The Bottom Line
Introduction, Specifications, and Pricing
Ever since the introduction of the Colossus, which was one of the first designs BitFenix came up with, we knew early on that this was a company to keep our eyes on. In the nearly seven years from that time, we have seen many iconic designs come from BitFenix. Cases like the Survivor, Ronin, Prodigy cases, Pandora, and the Aurora all have one thing in common with the Colossus, which is innovation.
While there are many manufacturers happy with delivering mediocre cases, BitFenix has always been able to pride themselves on pushing the boundaries. Whether it be external aesthetics, reinventing Mini-ITX chassis design, adding hidden features, redesigning interior layouts, or the use of finer materials, tempered glass, or LED lighting inside of the case, they have had great success in this enormous chassis market we have today.
Thinking outside of the box has been what has kept BitFenix at the top of the list when it comes to cases which will take the world by storm. We would rather a company have a miss or two in design by trying, rather than to fall back on their heels and constantly deliver the same thing everyone else already is. BitFenix also prides themselves on the fact that on their forums, they are always driving the members for input with simple questions or even using renderings to offer options to choose from before a design even makes it to the manufacturing process. Spending more time in the early stages allows a company to save loads of cash, yet at the same time, extending that part of the process allows BitFenix to deliver things which have not been seen or done before. This is what we love to see when it comes to cases, as with as many as we see, it takes a lot to keep us interested.
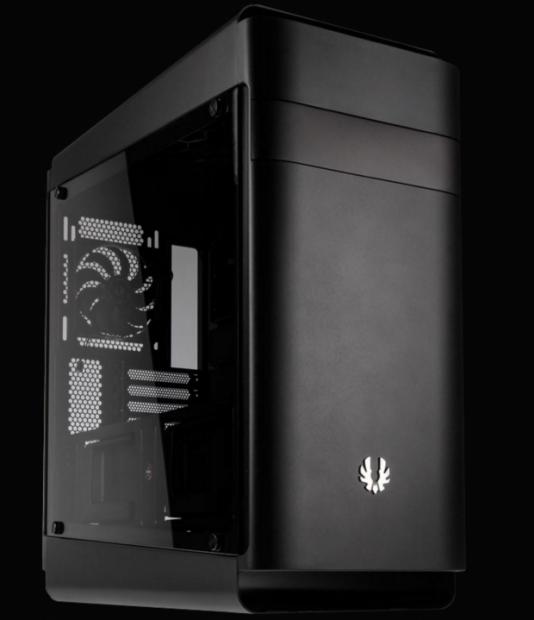
This is what has happened with one of their later designs, the BitFenix Shogun. The name alone delivers a sense of leadership or ruler of cases. However, there has to be more than a name to get customers to flock to your product, and we feel BitFenix has done things we may have already seen in various cases, but to our recollection, it has not been offered all-in-one chassis. There are mid-tower cases which fit EATX motherboards, and there are cases with tempered glass sides, some of them are rounded in appearance. Some have LED lighting, many have a PSU cover, and some even sport GPU support systems, but we have yet to see this at one time, and BitFenix is trying to change that.
It is easy to see that the amount of time and effort that went into this design was tedious and lengthy, but at the end of all that hard work, the BitFenix Shogun EATX Super Mid-Tower Chassis was worth every drop of sweat and every hour spent working rather than resting.
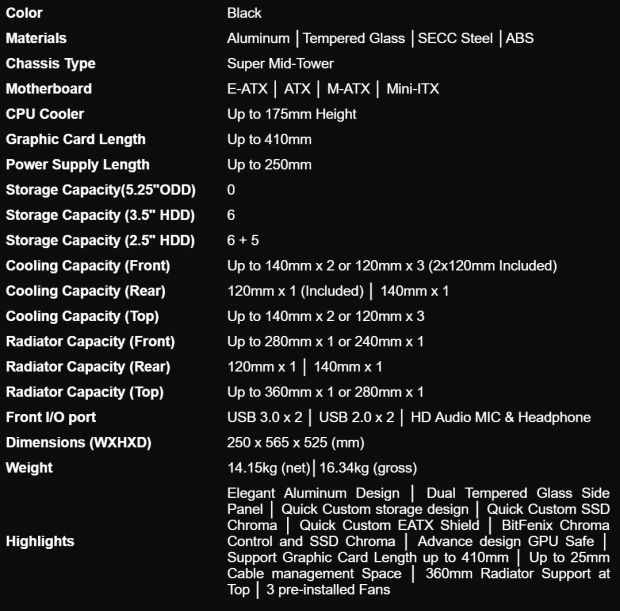
The BitFenix Shogun only comes in one color option of black, but it is made of aluminum, tempered glass, SECC steel, and ABS plastic, making up this Super Mid-tower chassis. It is designed to allow Mini-ITX, Micro-ATX, and ATX motherboards, but they were also certain to make EATX motherboards compatible as well. Next on the chart are the clearances, where we see that CPU coolers can be 175mm in height, graphics cards can be 410mm long, and on the floor, there is room for 250mm worth of power supply. Jumping down the chart a bit, we see that the front I/O contains a pair of USB 3.0 and USB 2.0 ports and HD Audio jacks, but there is more to be found there. As far as dimensions go, this chassis is 250mm thick, it stands 565mm tall, and is 525mm from front to back. Empty, this super mid-tower chassis, weighs in at 14.15kg.
Inside of the chassis, we will not find any 5.25" bays offered, but you can install up to six 3.5" drives, and an astounding 11 locations for 2.5" drives. The front of the chassis can have a pair of 140mm fans installed, but comes shipped with a pair of 120mm fans installed there out of the three possible locations. The top mimics the layout of the front, as it also allows for a pair of 140mm fans or three 120mm fans, although none come installed there. The rear of the chassis is designed to allow either a 140mm or 120mm fan, and BitFenix filled it with a 120mm fan. There is also quite a bit of room for water cooling options. The front of the chassis can take a 280mm or 240mm radiator. The top of the chassis offers room for the same 280mm radiator, but here a 360mm radiator can fit as well. You could also use the back for liquid cooling, as it will allow for a 140mm or 120mm radiator to hang from it.
The last section of the chart covers the feature set, and it is simple to see that the Shogun has a lot packed into it. Not only do they use aluminum and give the Shogun a rounded and elegant look with tempered glass side panels, but there is also much storage and even a spot where two 2.5" drives are illuminated by SSD Chroma. There is an adapter that can be installed to fit EATX motherboards, but to do so, they also had to make the drive bays removable as well. Much of the rest of what is discussed we have already covered, but we will be sure to point out anything we may have missed throughout the remainder of this review.
While visiting the BitFenix Shogun product page, there is a section where you can find locations which will sell you this chassis. Outside of buying it directly from BitFenix, they list another ten places where it can be found inside of the US. With availability quite high and spread across many venues, we see that currently, all of the listings are roughly the same price. What we have found between the two e-tail giants is that both offer the Shogun at $159.99. However, at Amazon, Prime members do get free shipping, while Newegg makes no mention of Premier members getting a deal, but they do state shipping is another $24.65. When a mid-tower chassis breaks that $100 mark, we tend to expect much more from such cases, but even just this far into the review, we can assure you that BitFenix did everything possible to earn their right to charge such a price.
Chad's Chassis Test System Specifications
- Motherboard: GIGABYTE GA-Z68X-UD4-B3
- CPU: Intel Core i7 2600K (buy from Amazon)
- Cooler: Corsair H80i GT (buy from Amazon)
- Memory: G.Skill Ripjaws F3-12800CL6D-4GBXH
- Video Card: ZOTAC GeForce GTX 970 AMP. Extreme Edition (buy from Amazon)
- Storage: SuperSpeed 128GB SSD
- Power Supply: SilverStone SST-ST85F-G (buy from Amazon)
- OS: Microsoft Windows 7 Ultimate 64-bit (buy from Amazon)
Packaging
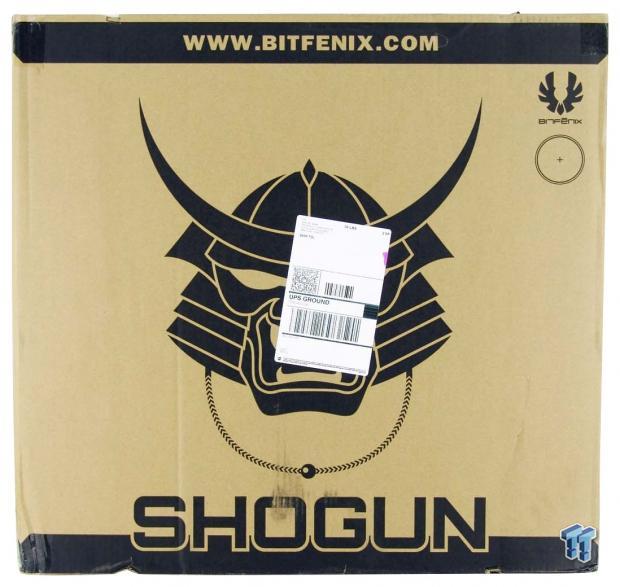
BitFenix chose to use a plain brown cardboard box to protect the case, and have printed all of the information on it in black ink. Across the top of the box, we see the BitFenix web address and the logo off to the right. The bulk of the panel is used to show a shogun's helmet, and Shogun is boldly written across the bottom.
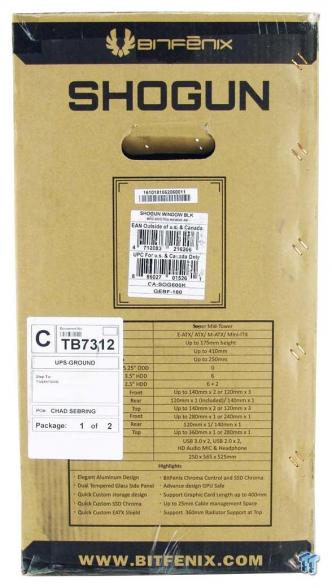
On this side of the box, the company and product names are found above the cutout handle. Below it there are stickers for the serial number as well as for the EAN and UPC codes. The lower section of this panel is used to display the specifications, although, the view is blocked by the shipping label.
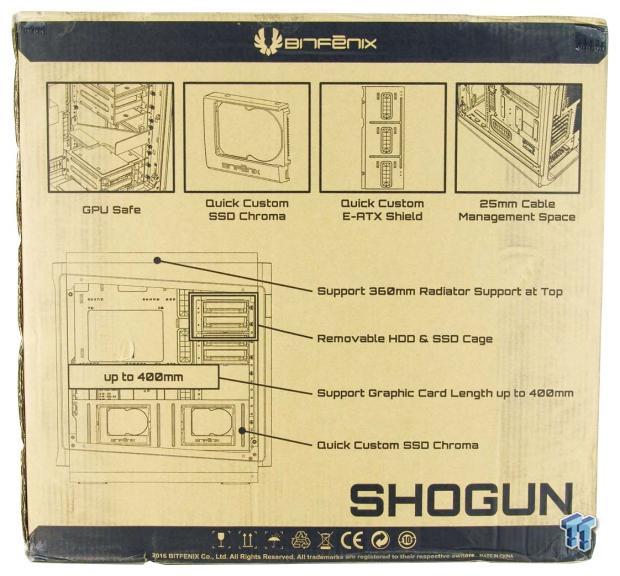
The back panel gets right to the point. Across the top, we see the GPU supports, the SSD Chroma, the EATX shield, and the 25mm of space behind the motherboard tray. Moving down the panel, there are larger images, and here BitFenix makes a point of the 360mm radiator support at the top, the removable storage drive racks, it shows here that GPU support is only 400mm not 410mm, and points out where to find the SSD Chroma.
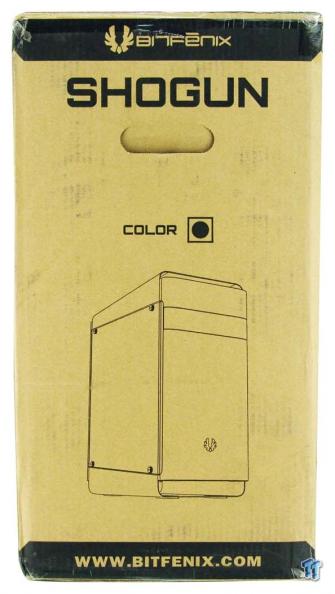
The last of the panels does not offer much in text, but you do find two important things on this panel. First, there is a box for color, and a black sticker is located in this one. Our thought, though, is that there are plans to offer more choices or there would not be a reason to add the color box. This is also where you get the first idea of what the chassis inside looks like. The rendering does point an excellent job delivering the basic idea, but you have to see the case to appreciate it fully.
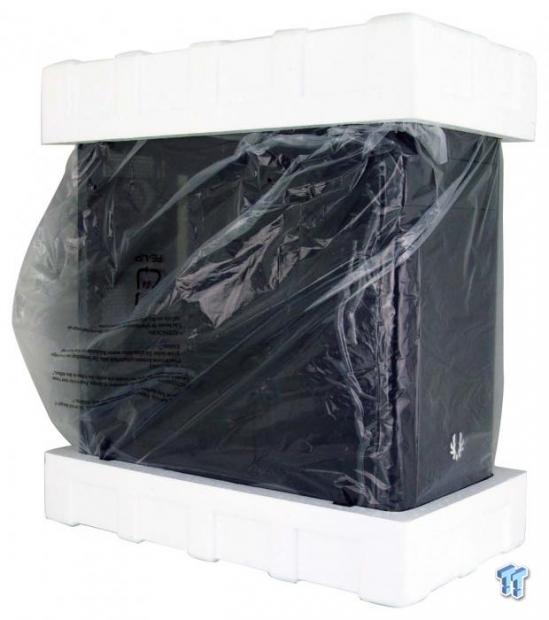
Keeping our chassis damage free, inside of the box, we find that the Shogun uses the typical gear to do it. There are layers of plastic on the outside of the tempered glass panels to keep them from being scratched, and it is then in which the entire chassis is wrapped in plastic. The top and the bottom of the chase are supported with thick Styrofoam, and this all culminates in allowing the chassis to arrive intact, without blemish, to your door.
BitFenix Shogun Super Mid-Tower Chassis
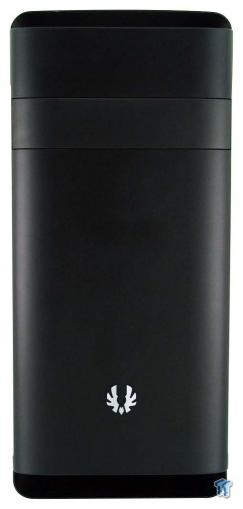
The front bezel of the Shogun is made of aluminum and is curved at both sides. There is a band near the top used as a design element, and the logo at the bottom are clean additions to the design. The top and bottom sections are also curved as they meet the sides of the case, but neither comes into contact with the front bezel.
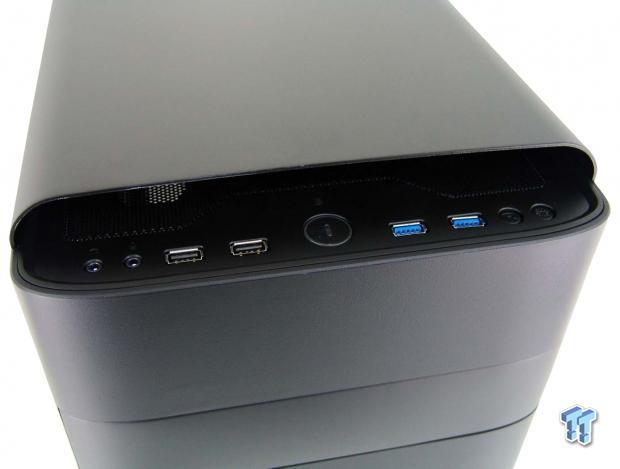
In the gap left where the top and front panels do not touch, this is where BitFenix put the front I/O panel. Starting at the left, we run into 3.5mm HD Audio jacks, a pair of USB 2.0 ports, a backlit power button, a pair of USB 3.0 ports, and the reset button. The additional button on the right is to control which color the Chroma is illuminated in, if not connected to a compatible ASUS motherboard.
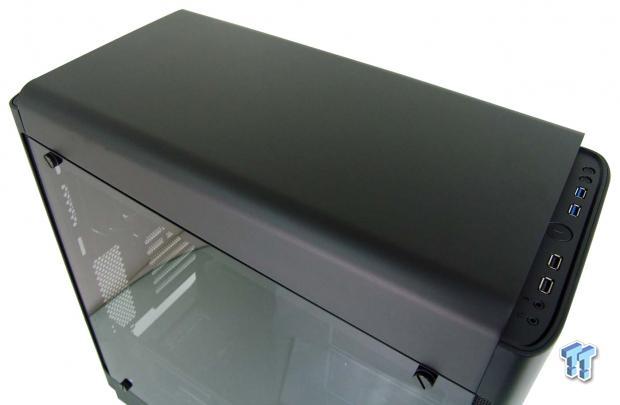
Since the top panel of the chassis stands quite a bit higher than the top of the case, the aluminum is left solid, allowing cooling to happen underneath of it, exiting at the front and back of it.
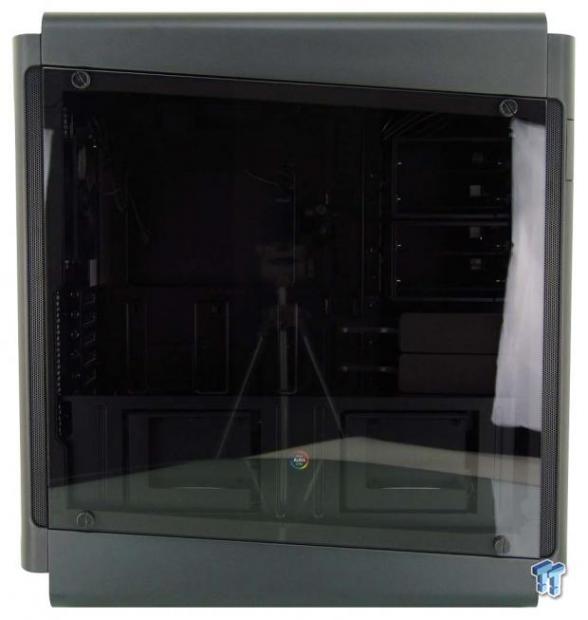
The left side of the Shogun shows off a shape in this chassis that looks almost like a knot. Along the front edge, we see a thin strip of mesh allowing it to take in air, and that shape continues into the angled tempered glass window. While not typical, we do like the angle and overall design the Shogun shows from the side.
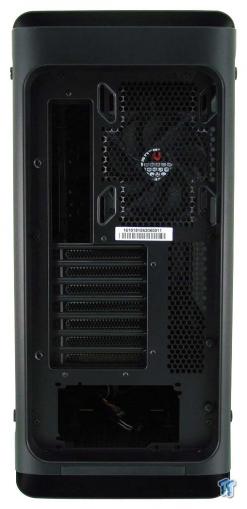
To keep the shape going on all sides, BitFenix surrounds the back of the chassis with a removable aluminum panel. Under it, we see that there are an exhaust fan location and the rear I/O at the top. There are seven expansion slots flanked to the right with passive ventilation, the PSU fits at the bottom, and we can also see the dust filter which slides into the lower frame of the case.
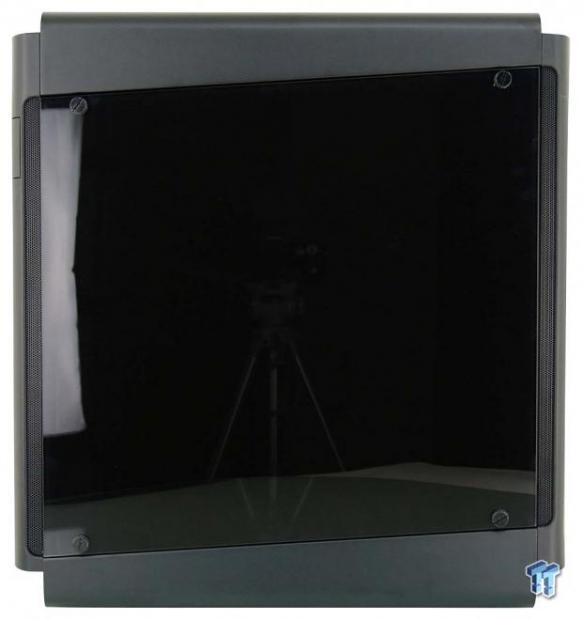
The right side of the Shogun is nearly identical to the left side, except that on this tempered glass panel, the inside is painted black, so you will never see behind the tray or have to look at the wiring. Ventilation can be found at the front and the back of the panel, and again we find four thumbscrews holding the glass onto the chassis.
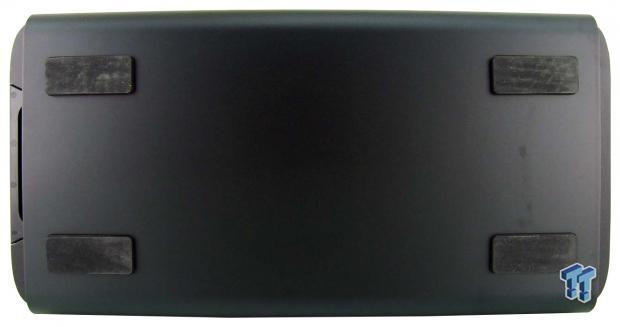
Even the bottom of the chassis is made with a removable aluminum panel. At each of the corners, there are rubber feet, but the ventilation for the PSU and the dust filter are contained under this panel.
Inside the Shogun
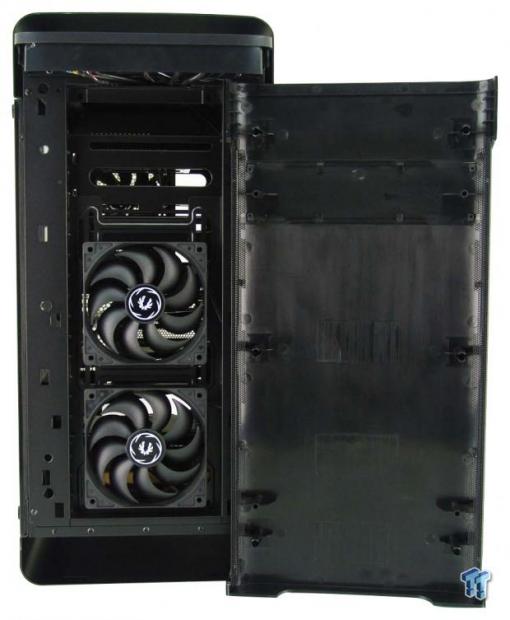
The first thing we did was remove the front bezel from the Shogun. The inside of the bezel is made of plastic to support the aluminum, and utilize round clips to pop it off and clip it into the frame. The frame of the chassis has the fans inset, so they do not starve for air, and while a third 120mm fan can be installed here, there is not framing at the top to secure all four holes.
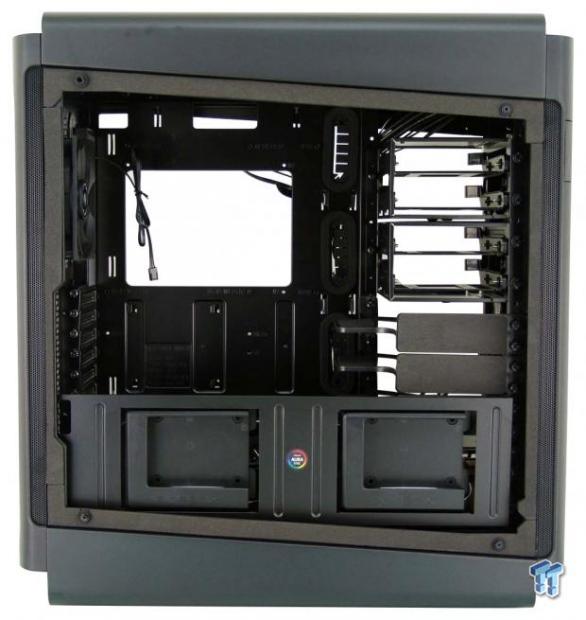
Removing the slightly tinted tempered glass panel, we can see everything the inside of the Shogun has to offer. The angled opening is padded with foam, and we see rubber grommets where the glass rides in the corners, and as of this moment, the interior appears a bit crowded.
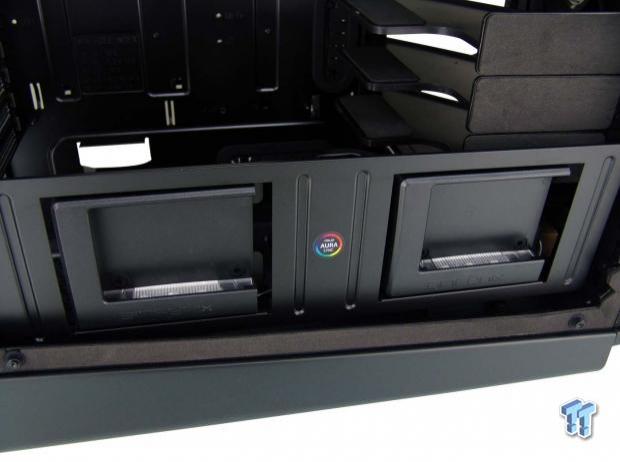
Stopping off at the pair of drive bays near the floor of the chassis first, as we need to remove this plate to see the rest of the guts. These two drive locations are illuminated from below with the SSD Chroma, which is shown to be compatible with ASUS Aura Sync, which means the motherboard LEDs will match this pair of bays.
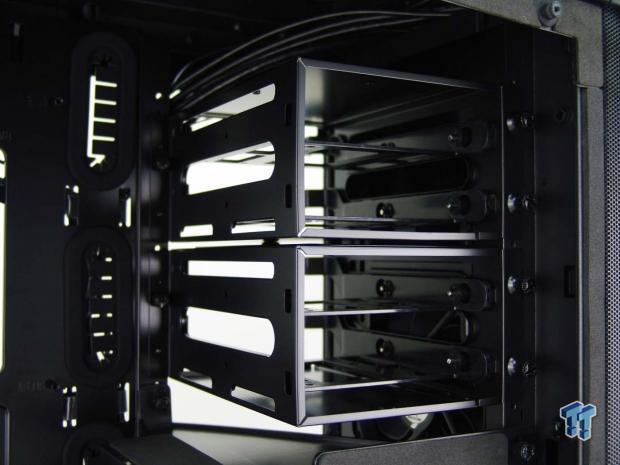
Rather than to offer a 5.25" bay, BitFenix fits the top with this pair of HDD cages. Each of the cages is removable, can house two drives each, and are also capable of 2.5" drive installation too.
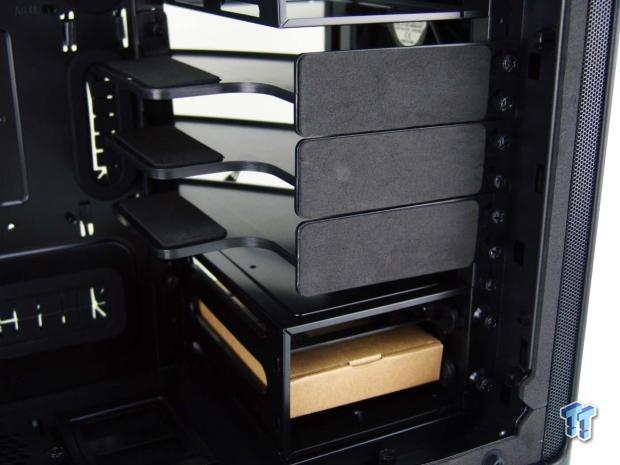
This leaves the middle of the chassis open for video cards, and to help keep your cards from sagging, three GPU support brackets are included. At the bottom of the supports, we find the third HDD cage, it is also removable, it is where the hardware is found, and under it is a pump and reservoir mounting plate.
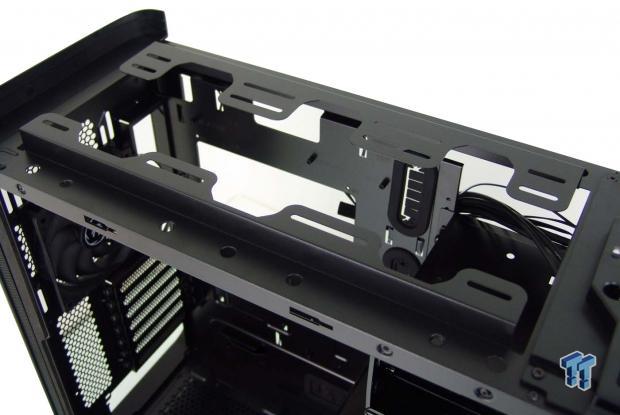
Removing the top aluminum panel, we find room to install fans and water cooling gear. A pair of 140mm fans or a trio of 120mm fans can go into the raised steel section, which keeps radiators from conflicting with the motherboard. We also found that the front I/O panel is stuck to the case, and is not attached to the front or the top panels.
Inside the Shogun Continued
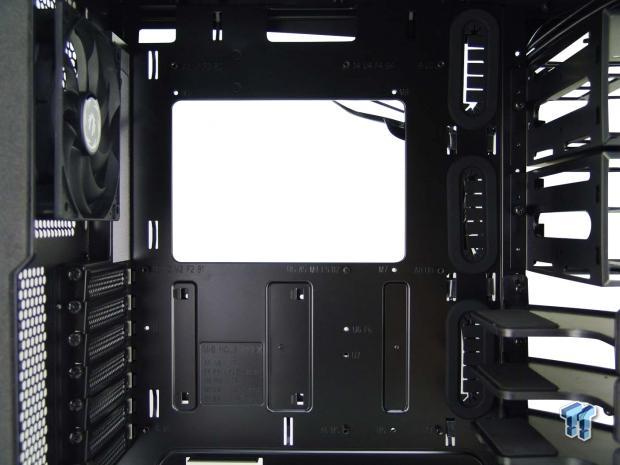
The standard motherboard tray offered in the Shogun is capable of housing a Mini-ITX, Micro-ATX, or ATX motherboard, but for EATX, there is another addition we have to install. Three of the wire management holes have grommets, while those at the top do not, the CPU cooler access is large, the motherboard tray is clearly marked and there are twelve tie points for attaching wires.
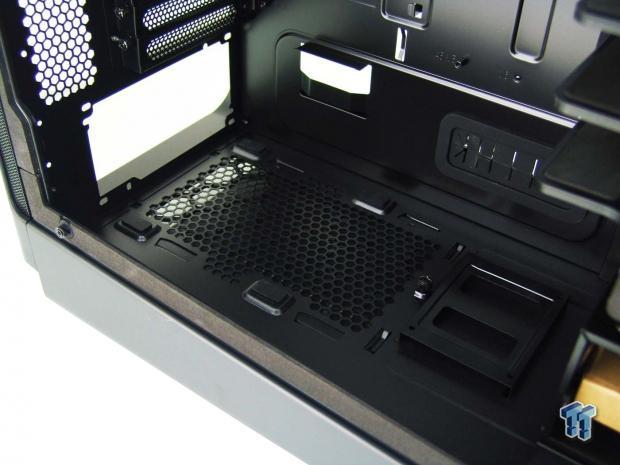
The floor of the Shogun has rubber pads on both sides of the ventilation for the PSU, and the length of the mesh will accommodate longer power supplies well. Just in front of that mesh, we see the first of the trays which allow for 2.5" drive installation. There is also a grommet on the motherboard try where all of the PSU wires exit the inside of the chassis.
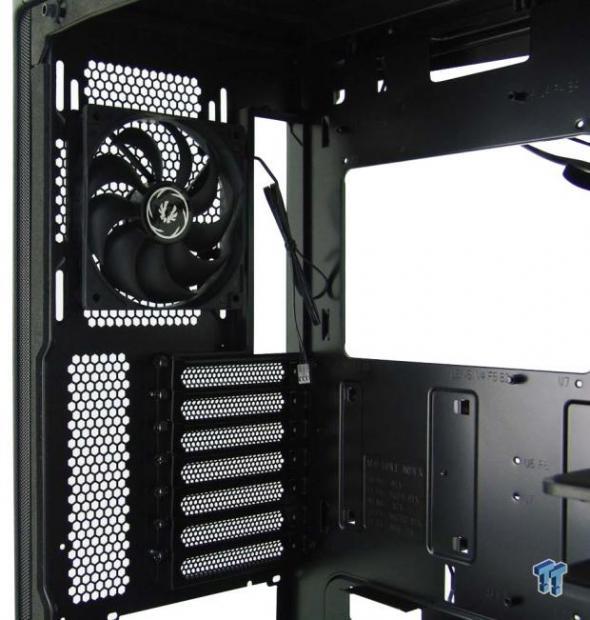
At the rear of this case, we find the third 120mm fan which is pre-installed, and all three fans are 3-pin powered with black leads. There are thumbscrews to support expansion cards, they are accessed from inside of the case, and the frame is shaped to allow a straight shot at the screw heads.
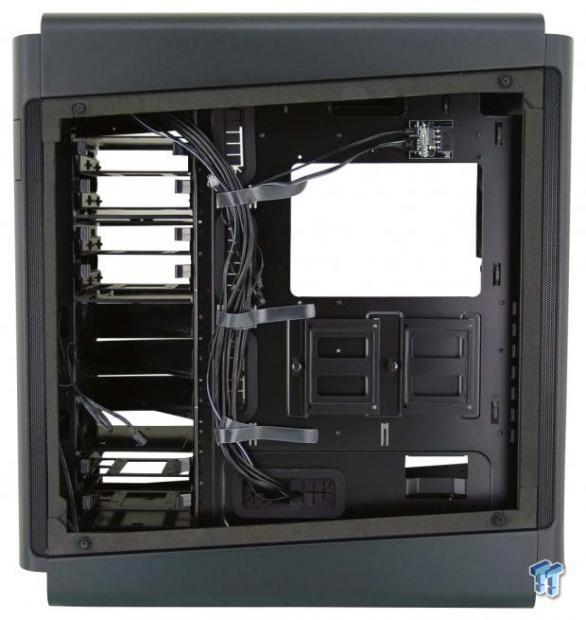
Behind the motherboard tray, we see things like the Chroma PCB above the access hole, which is powered via 4-pin Molex connectivity. We see an additional pair of 2.5" drive trays in the middle, and while there is 25mm of space here, BitFenix offers straps to help keep wiring tight to the tray and tidy. On the left, that is where you will remove the drive trays and fill the bays.
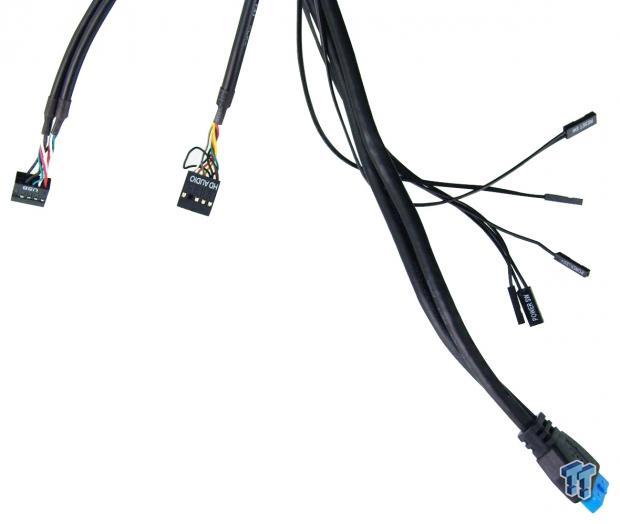
Most of the wiring is sufficient in length, but we do notice that the HD Audio cable near the USB 2.0 cable is short. The USB 3.0 lead has plenty of length, and the black LED, and switch leads blend in and will reach their intended location.
Hardware & Documentation
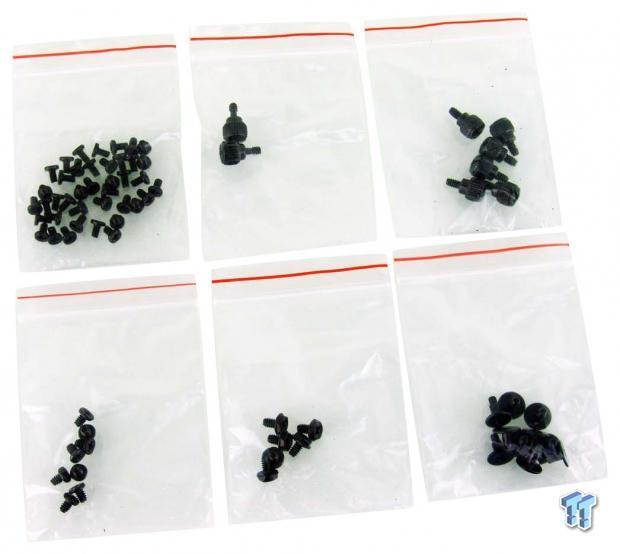
In the box of hardware, we found these six bags of screws. Across the top, we find a bag full of M3 screws for 2.5" drive mounting, there are two thumbscrews to use with the EATX plate, and other thumb screws to lock on the HDD trays. The bottom row of bags delivers 6-32 motherboard screws, PSU screws, and some flat head HDD style screws we found no use for.
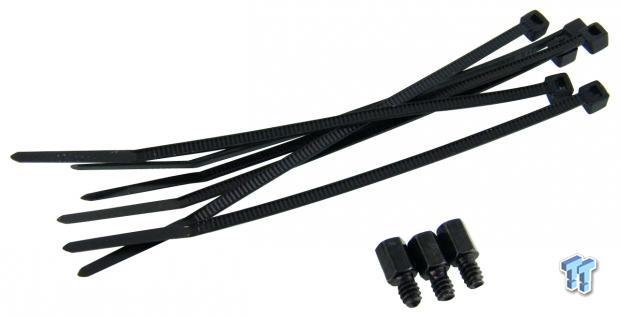
BitFenix is also sure to include six zip-ties to help with the wires, even though the trio of straps do a good job with the majority of the wires behind the motherboard tray. They also include another three standoffs, which are in case you lose some, as there are nine found in the motherboard tray already.
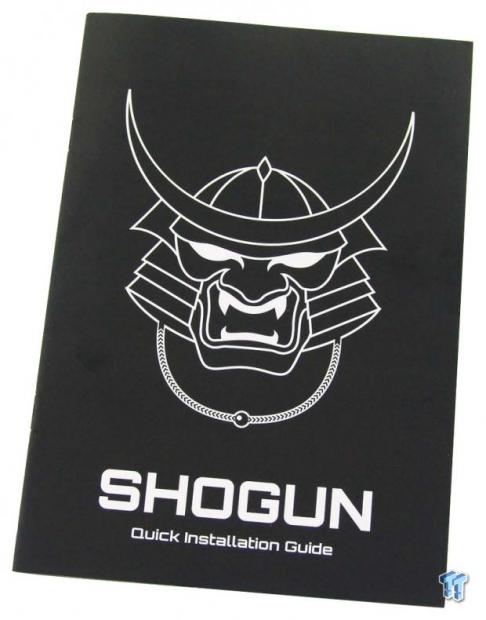
The quick installation guide for the Shogun explains sizes and quantity of the hardware you should have with your case. After that concludes, there are many pages with renderings and text, guiding you through a basic installation. There are mentions there as to cooling and water cooling support, allowing this manual to cover the novice and experienced builders needs.
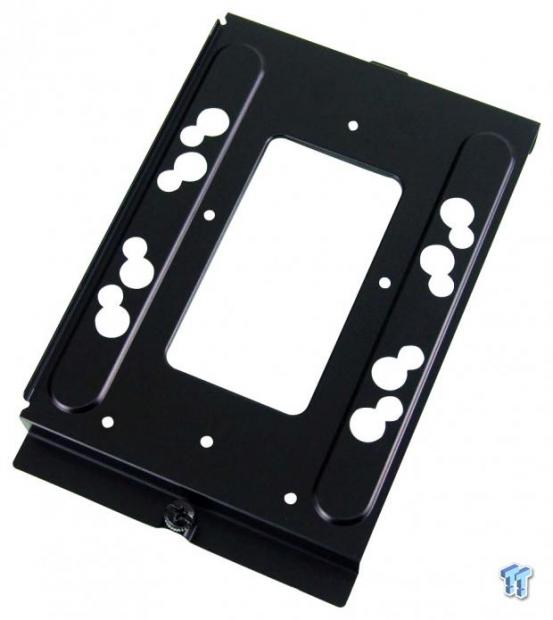
Since this is nearly impossible to get a clear view of when it is still inside of the case, after pulling all of the drive bays and GPU supports, we also removed this plate from the floor of the Shogun. This has holes in it for drive support, but it can also be used to attach pumps and reservoirs to it as well.
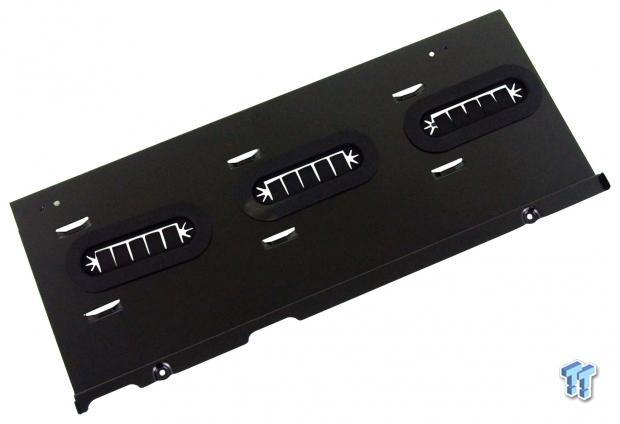
Found outside of the case, stuffed into the top Styrofoam cap, BitFenix sends this EATX extension panel. This will fill the gap found behind the HDD bays and GPU supports. It not only gives new locations to run wiring through, but it also adds another six tie points for wires.
Case Build & Finished Product
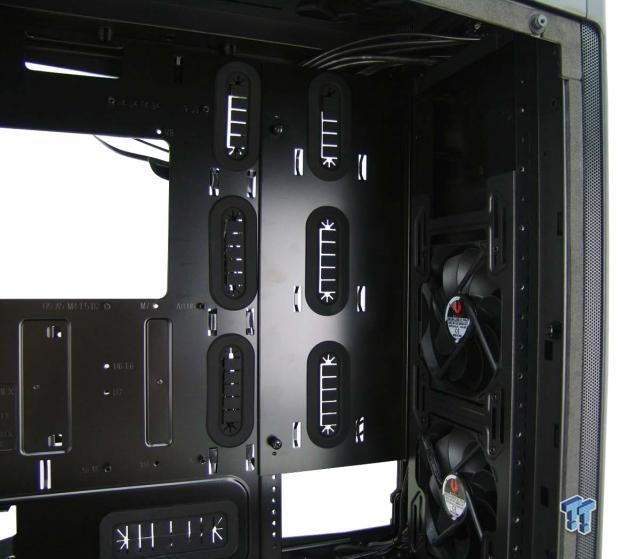
For our build needs, we had no interest in keeping the HDD bays inside of the case. By removing three screws in each cage, they all come right out of the Shogun, This makes room for the EATX plate to be installed, and the bottom of it is left open so that a pair of HDD bays can still be used and accesses when this plate is in use.
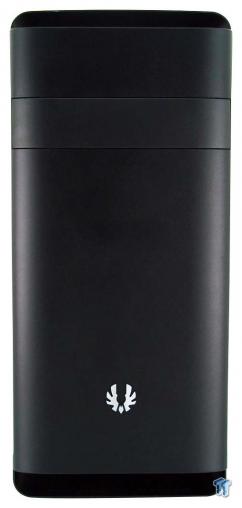
The front of the Shogun does not change in any way shape or form when the build process is complete. You are left with the same sleek looking aluminum fascia we saw fresh out of the box.
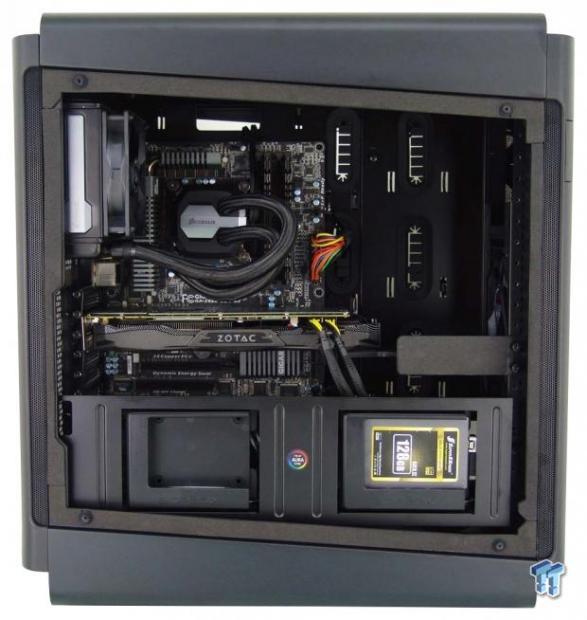
With the bays out of the top, the Shogun accepts parts with open arms. The motherboard sits low, and there is a lot of room to go with an EATX motherboard. The video card is level, thanks to the support bracket connected to the front of the case, and the SSD Chroma and cover plate block the view of all of the motherboard connection and PSU.
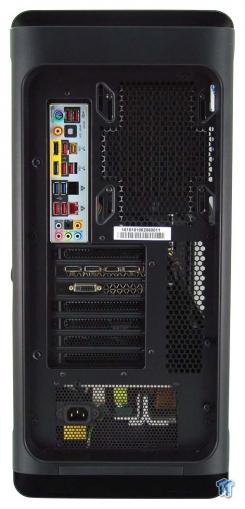
The dust shield fits well in the cutout, and when it came to installing the AIO, we could shift it up or down a bit too. No issues were found getting the video card installed into the back of the case, and the same can be said for the PSU at the bottom.
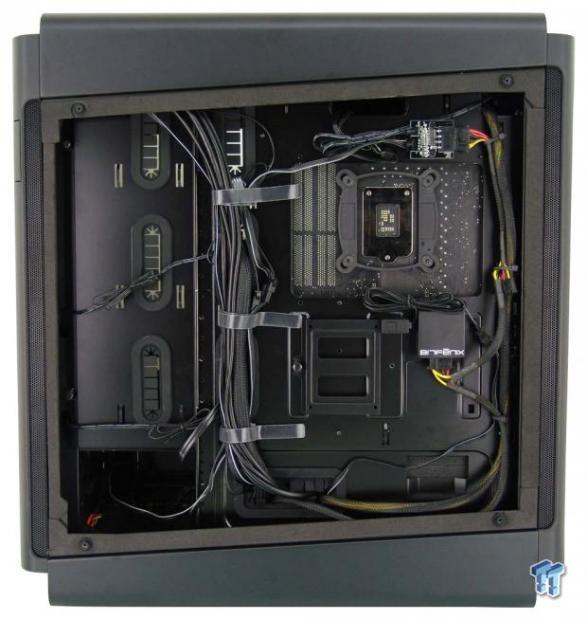
Wiring the chassis is not that complicated, as most of the work is done for you. The majority of the wires are contained with the straps on the left, and we found well-positioned tie points for everything else. You may also notice that we removed an SSD tray to place the controller for the Alchemy 2.0 LED kit. BitFenix sent us some lighting, which does not come with the case, but we installed it for looks anyways.
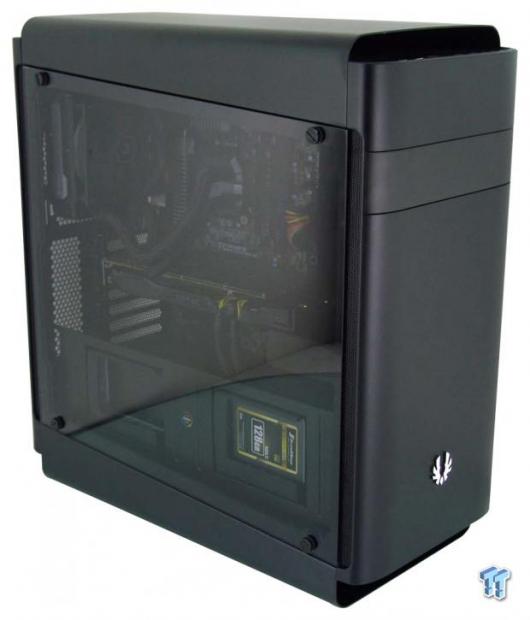
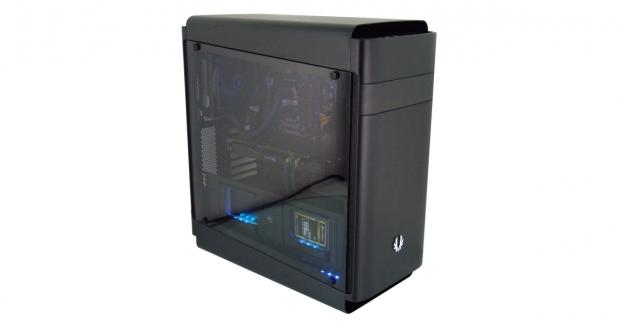
Denying the sleek and subtle design of the Shogun is hard. Even without any power going to the system at this point, it is attractive, rounded, and with all exterior components made of tempered glass or aluminum, there is a certain elegance to it as well.
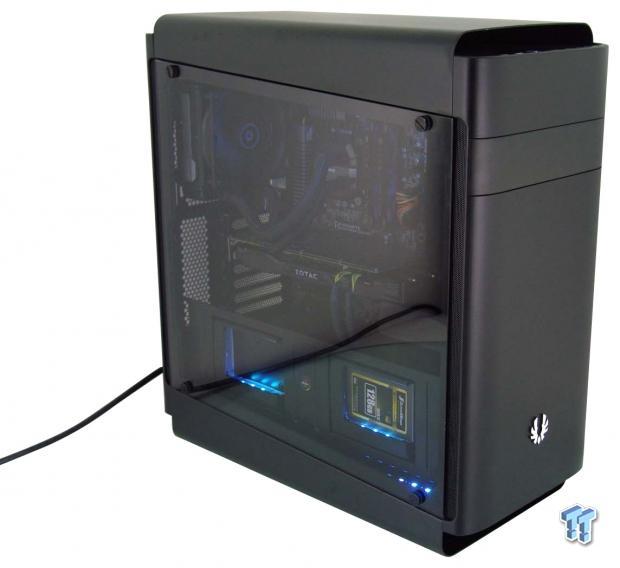
Once we powered up out test system, we found it to be cooled well, and the noise level at this time was at 33dB with the chassis fans running at full speed. The SSD Chroma is bright, much brighter than the LEDs on the AIO or video card. Keep in mind this is only one color. The button on the front allows for seven color options as well as a rainbow mode. You can also connect the Chroma to ASUS Aura motherboards, and all of the LEDs in your system can be matched.
Final Thoughts
With everything we have seen, we get the impression that the Shogun will be a big hit for BitFenix. As we mentioned at the beginning, we have seen just about every feature this case delivers in some form or fashion, but not done all at once, and never with such creativity. The modularity of this chassis allows those who need a plethora of storage drives to fit, 11 drives in total, but it also caters to the minimalist who wants to remove everything not needed and possibly fill it full of water cooling gear too.
The aluminum exterior, simple styling, rounded corners, angled tempered glass windows, it all just works well together, culminating in a chassis that is elegant on the outside, while the inside has everything you could need, including a plate for EATX motherboard which gives this chassis a whole new layout. Noise levels are subdued, and airflow is good, but we did pretty much gut the interior for our test of it too.
As far as build quality and component fitment is concerned, we feel the Shogun is solid and beefy, yet every part we installed showed no signs of awkward angles or oddly shaped panels; the build process was smooth sailing.
We also liked the SSD Chroma which features your SSDs right against the tempered glass. The fact that you can change it through seven colors, it can be run to cycle through those colors, or that it can also be hooked up to ASUS motherboards with Aura support, it makes life easy when trying to match a theme. Dust filtration is good for the PSU with its removable filter, but as for the front, this task is left to fine metal mesh. The nice thing about the lack of removable filters there, though, is that you can pull the entire panel and run it to the sink to clean it.
Usually, here, we tend to try and pick a design apart, and we only ran into one issue with everything that we found in the Shogun. Someone at BitFenix thinks a short HD Audio cable is fine, but with our older system being used, we could not make the connection to the bottom left corner of the motherboard, cleanly. We could have run the wire through the inside of the case and made the connection, but this is not 1999, and why offer wire management if the wires cannot be used in it. Outside of this small oversight by BitFenix, they are offering a stellar option to mid-tower case buyers with this Shogun.
BitFenix shows that when you listen to the customers, appreciate their input, and take your time in the development of a chassis, it will pay off in the end. The Shogun Super Mid-Tower Chassis delivers everything experienced builders want, it is modular to the extent of making anyone happy with the internal layout, and while pricey, it is a chassis you will not get sick of as you use it for a few builds over the coming years. At first, $159.99 may have seemed like quite a bit to pay for a mid-tower chassis. The pickings are slim when it comes to something which uses high-end materials, delivers lighting in a tasteful manner, and can not only take on an EATX motherboard but also checks all the boxes when it comes to selecting a chassis too.
The Shogun may not take the world by storm like the Prodigy did, but thinking outside of the box when it comes to chassis design will pay off big for BitFenix, the Shogun is just that good.
Chad's Chassis Test System Specifications
- Motherboard: GIGABYTE GA-Z68X-UD4-B3
- CPU: Intel Core i7 2600K (buy from Amazon)
- Cooler: Corsair H80i GT (buy from Amazon)
- Memory: G.Skill Ripjaws F3-12800CL6D-4GBXH
- Video Card: ZOTAC GeForce GTX 970 AMP. Extreme Edition (buy from Amazon)
- Storage: SuperSpeed 128GB SSD
- Power Supply: SilverStone SST-ST85F-G (buy from Amazon)
- OS: Microsoft Windows 7 Ultimate 64-bit (buy from Amazon)

