
The Bottom Line
Introduction, Specifications, and Pricing
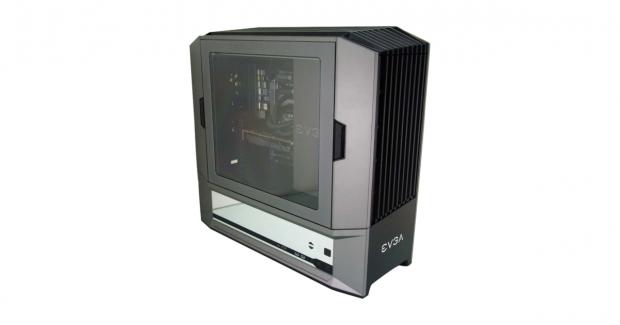
When it comes to graphics cards, PSUs, and even when thinking about motherboards, EVGA is a name that readily comes to mind. However, when it comes to cases and cooling products, they are likely one of the last companies that get brought up. While the product line from EVGA is slim as far as cases and coolers are concerned, they have come up with some interesting products in the past. Now as far as cooling is concerned, it seems that they no longer support this product type, as it does not show on their site any longer. As far as cases go, who could forget the Hadron variants? These slick looking mini-ITX chassis designs were ahead of their time and allowed customers to build a themed build. With the release of the Hardon Air and Hydro cases, you could keep the EVGA name on every bit of the build, well everything but the RAM.
While it has been quite some time since we had our look at the Hadron chassis, it seems that EVGA wasn't going to leave things with just one chassis in their repertoire. What makes it even more interesting, is rather than going with a minimalistic approach that the Hadron cases delivered, this time, their designs are taking cases to a whole new level of what can and should be expected in full-tower chassis design. Every aspect of the traditional chassis design was looked at in depth, tweaked, redesigned, and put together into a chassis that not only is attractive but supplies the end-user with every possible thing you could ever want.
EVGA not only sent along the chassis which we are about to show you, but it is one of four versions of their latest chassis. In the new lineup, there is the DG-84, the entry-level version, but there are also the DG-85, DG-86, and DG-87, all with various levels of options and accouterment. It is the DG-87 that we have been offered from EVGA, and with just a few minutes spent on their product page, it filled us with all sorts of want. Then, of course, this beast of a chassis arrived, and the want gets replaced with excitement, and all we can say at this point, is that the more you see and feel with this DG-87 full-tower chassis, excitement has now been replaced with being completely impressed with the direction EVGA has taken.
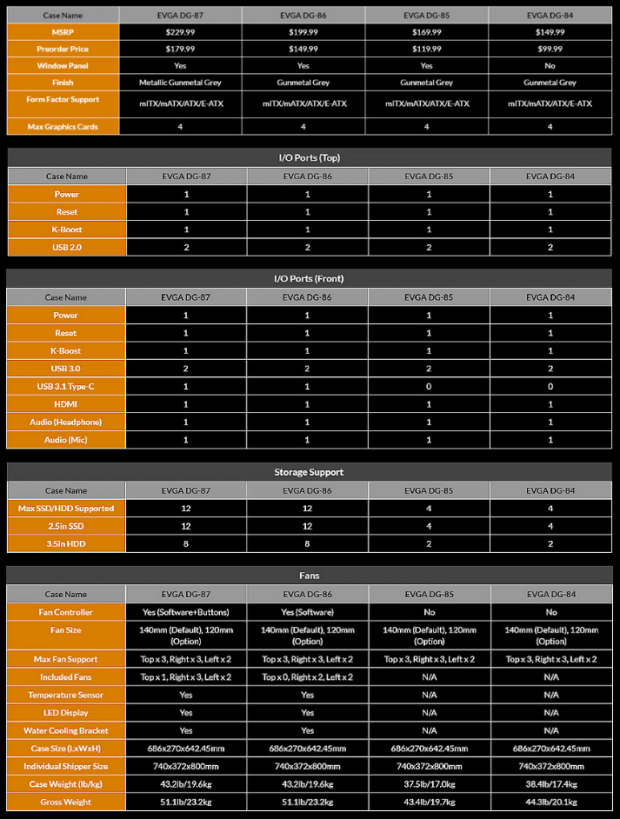
The chart provided from EVGA allows us to discuss the DG-87 in full detail, but at the same time, it provides all of the differences found in all four models of this lineup. As for the DG-87, we were sent a steel and ABS plastic chassis which is downright huge. This chassis is painted in metallic gunmetal gray paint on the outside and uses black on the interior as well as the color of most of the additional plastic bits. The DG-87 has the potential to house beastly builds on a Mini-ITX, Micro-ATX, ATX, or an Extended-ATX motherboard, and depending on the choice of the motherboard, you can also install up to four dual slot video cards.
In this design, EVGA offers two I/O panels. One of them can be found at the top of the chassis, and it provides the basics. There is a power button, a reset button, a pair of USB 2.0 ports, and a K-Boost button. A little about the K-Boost system is that essentially, with just a press of one button, you can change all of your connected fans from whatever speed you want to use them normally and ramp them instantly to one hundred percent of their operational speed. The second I/O panel offers quite a bit more and is found in the lower right-hand corner of the left side of the chassis. Here you will find a power button, a reset button, and K-Boost button as well, but that is all that remains the same. In this panel, we are also given a pair of USB 3.0 ports, a USB3.1 Type-C port, and HDMI port, audio jacks, and even an LCD display.
Other things found in and around the DG-87 includes room for an astounding 12 storage drives. In all, this is broken down into all of the locations supporting 2.5-inch drives, but only eight of them are in traditional cages which also support 3.5-inch drives. Along with the K-Boost feature, there is also manual fan control via a pair of buttons on the side of the chassis, which is controlling six 140mm fans right out of the box. As far as fan support is concerned, there is room for a trio of 120mm or 140mm fans in the front, the same is found at the top, and a pair of fans can be placed in the rear of the chassis. Of these locations, three fans are pre-installed in the front, one at the top, and there is a pair found in the rear, all wired for you and ready to go. There is a thermal sensor which works with the LCD display, and there is an included water cooling bracket as well. The last bits of information delivers the enormous dimensions of the DG-87, its 43.2-pound empty weight, but no mention of the three-year warranty covering this chassis.
While EVGA did offer a preorder discount for the DG-87, we are pretty certain that time has now ended, as retail samples are out in the wild now. EVGA made mention of the MSRP as well, at the top of the chart, and listed the DG-87 for $229.99. Currently, you can buy this chassis directly from EVGA just like with anything they make, but it is also available through Newegg. There we see that Newegg is sticking to the MSRP, listing this chassis for $229.99, but they are also requesting an additional $11.99 to ship this beast to your door. We realize many of you likely just choked on your beverage a bit when reading that pricing, but mastery of chassis design does not come cheap, and we cannot recall any chassis in our past experiences that even comes close to what EVGA has put forth.
So even though seeing a $230 price point may have you wanting to move on to something else to read, stick it out with us, as we are certain once you gain perspective, looking at the full picture, EVGA has priced this chassis well in our opinion. EVGA is almost not asking enough for this overly thought out design, which delivers not only an attractive chassis but one that will just impress you to no end.
Chad's Chassis Test System Specifications
- Motherboard: GIGABYTE GA-Z68X-UD4-B3
- CPU: Intel Core i7 2600K (buy from Amazon)
- Cooler: Corsair H80i GT (buy from Amazon)
- Memory: G.Skill Ripjaws F3-12800CL6D-4GBXH
- Video Card: ZOTAC GeForce GTX 970 AMP. Extreme Edition (buy from Amazon)
- Storage: SuperSpeed 128GB SSD
- Power Supply: SilverStone SST-ST85F-G (buy from Amazon)
- OS: Microsoft Windows 7 Ultimate 64-bit (buy from Amazon)
Packaging
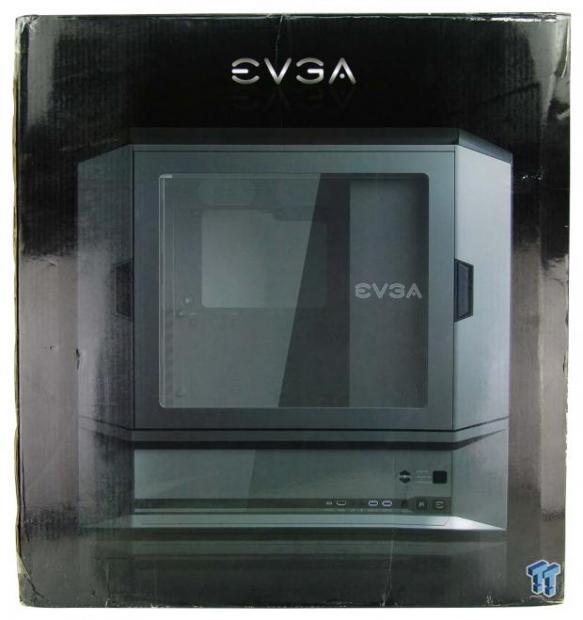
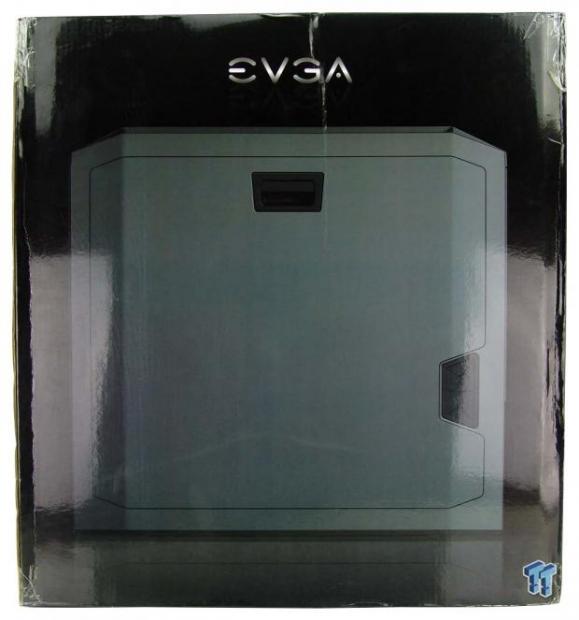
The exterior packaging is attractive, shiny, but at the same time very simple. On this side of the box, we find the EVGA name at the top, while the rest of the panel is taken up with a life-sized image of the left side of the DG-87 found inside of it.
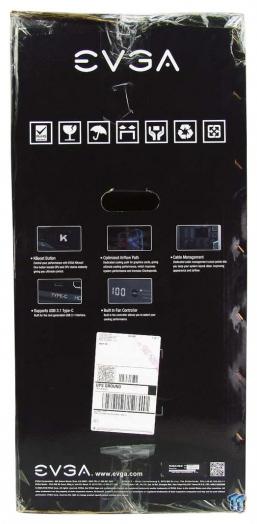
Again, the EVGA name tops this panel as well and is followed by iconography. In the middle, we find five features listed, covering the K-Boost, optimal airflow path, cable management, the inclusion of USB3.1 Type-C, and the built-in fan controller.
On the back of the box, we see yet another life-sized image of the chassis. Rather than repeating the left side of the DG-87, this time, we see the right side of it on this panel.
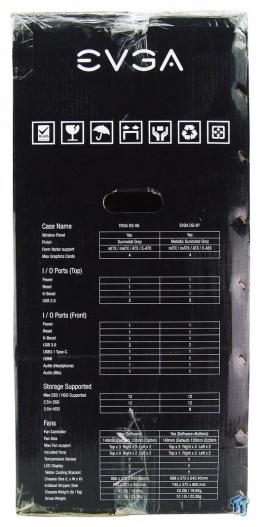
The last of the exterior panels mimics its opposing side of the box at the top. However, when we move down the panel, things have been changed from its features to this specifications chart which covers only the DG-86 and the DG-87 which is inside of this box.
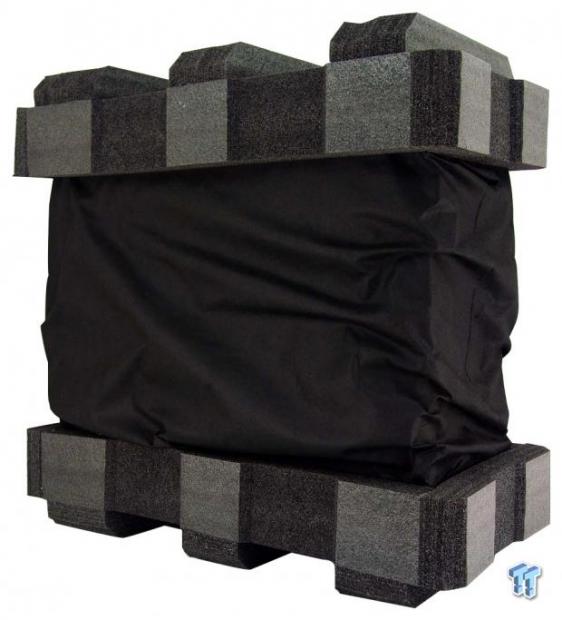
With such a large chassis and the weight associated with this case, the standard inner packaging would not have worked well at all. Since this chassis is heavy enough to destroy Styrofoam in transit, the chassis is protected with large, thick, high-density foam end caps. Under that, we find a cloth bag to protect the paint finishes, and it could also be used as a cover for dust prevention or traveling. Under the liner, there are layers of plastic found on the window and the mirrored side panel section, and even bits of tape to hold doors closed. This allows this enormous chassis to arrive at your door in perfect condition, as ours did.
EVGA DG-87 Full-Tower Chassis
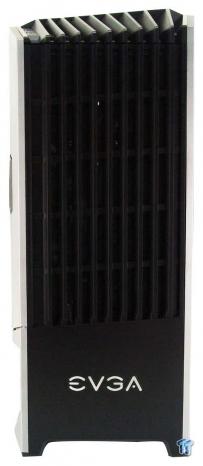
A view of the front of the DG-87 brings a lot to mention. Of course, there is the front bezel, which offers vertical stripes of plastic with mesh backing it, to give style and breathability to the chassis. The lower section is solid and sports the EVGA name boldly. As for the top, and the left side of the bezel, they both offer angled surfaces, as they make the transition to the top and left side panels.
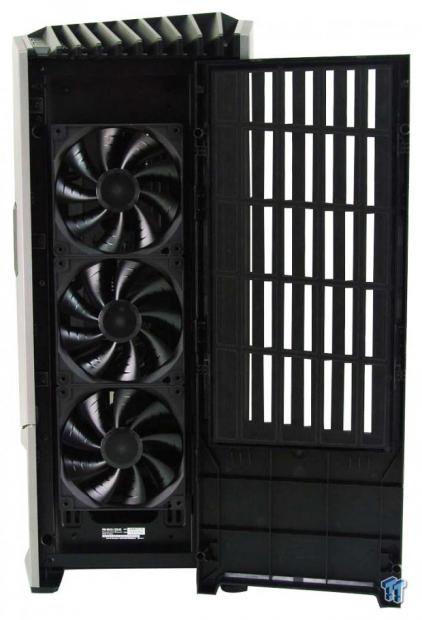
The front bezel is removable for cleaning of the fine mesh used as a dust filter. This is also the way in which you can adjust the locations of the three 140mm fans installed here, or if you need to swap them out for 120mm fans for various water cooling needs.
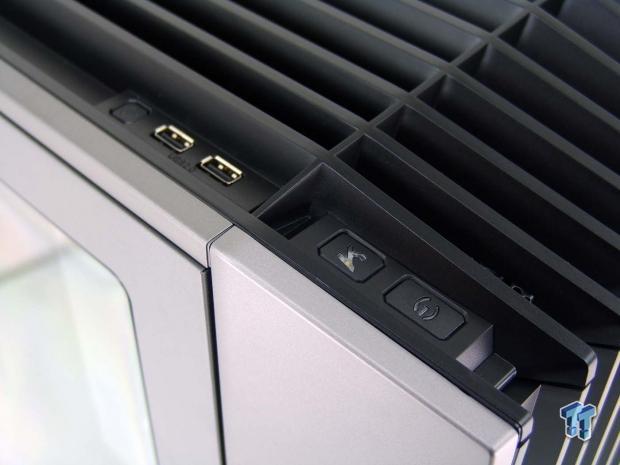
Partially above the front bezel, and partly found in the top panel is where the first of two front I/O panels are located. In this panel, we are offered the power button which sports the EVGA logo, and the K-Boost button just behind it. Further, back still, we find the pair of USB 2.0 ports and the tiny reset button.
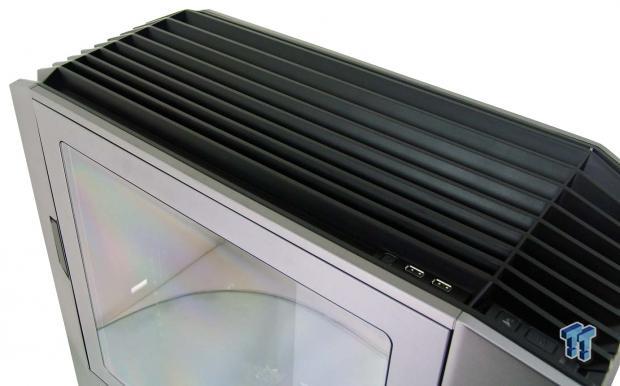
The top of the chassis is designed to mimic the front of the chassis, where we find thick lines of plastic running from front to back. This panel is also easily removed and allows access to the fan mounting locations below it.
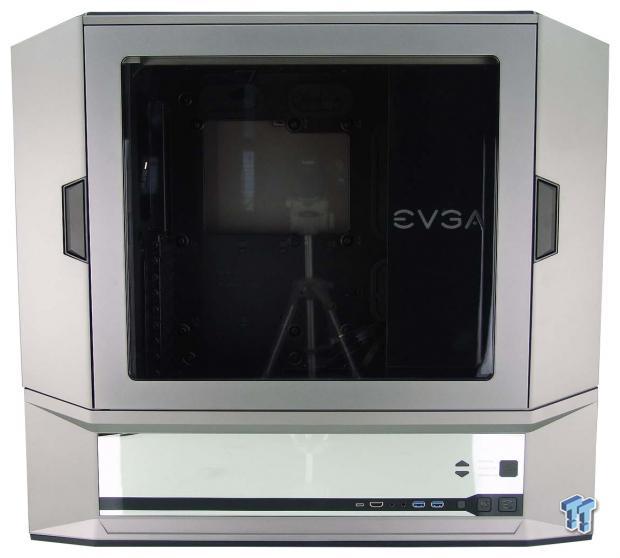
The left side of the DG-87 is furthest out where the windowed side panel is. There is a handle at the front of the chassis to release the side panel and allow it to swing open, and one at the back that opens the rear of the chassis. Along the bottom of the DG-87, we find a mirrored insert that not only adds style but near the front of the chassis, offers the second I/O panel.
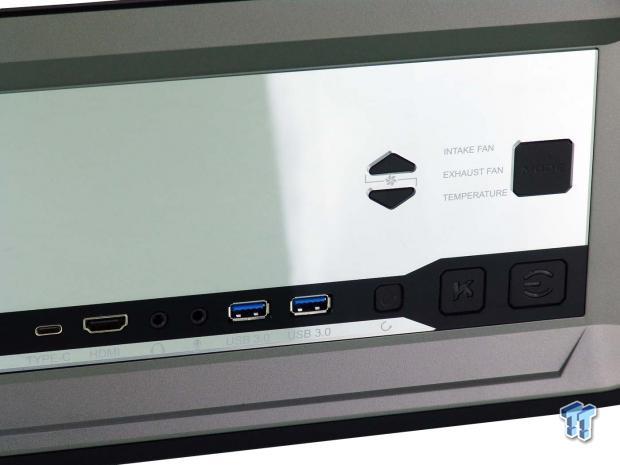
This I/O panel offers up buttons to set the fan speeds for the intake fans and the exhaust fans, but the mode switch to the right also allows you a third option, to see the internal temperature of the DG-87. Then, along the bottom, we see USB3.1 Type-C, HDMI, HD Audio, USB 3.0 connection, and there are also a reset button, K-Boost button, and a power button here as well.
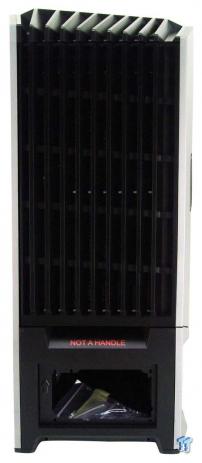
Even when it comes to the back of the DG-87, EVGA keeps that center styling. More of the ribbed design is found on the back of the chassis, and at the bottom is a removable section to access the PSU installation.
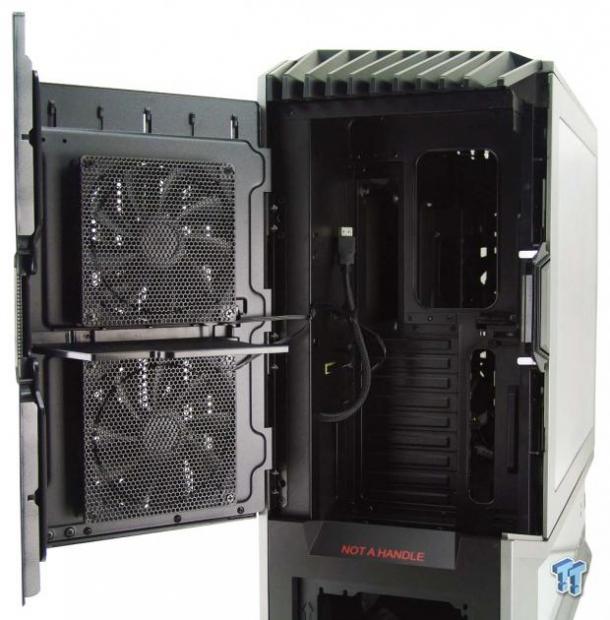
By pressing the button to the left side of the window, we can now open the back of the chassis. Just inside of the door are a pair of 140mm fans with dust filtering grills on them. Inside of the chassis, we can see the rear I/O area and expansion slots, but there is also an HDMI cable located here to feed the side of the chassis for those who are big into VR.
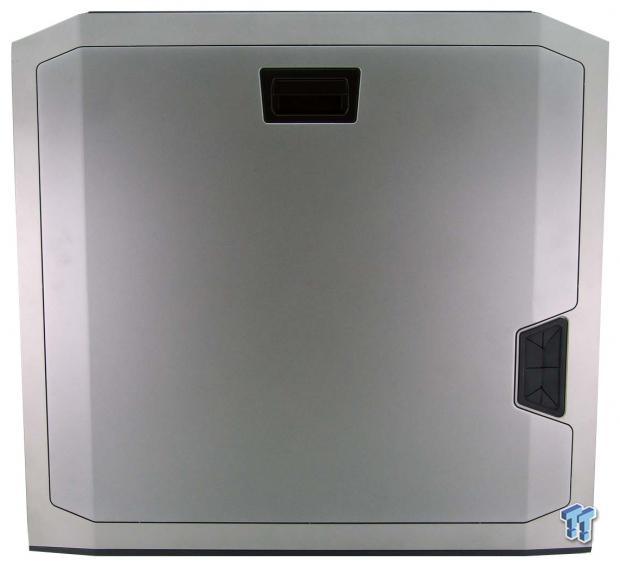
The right side of the chassis does not extend quite as far as the left side did, but still offers plenty of room behind this easily removable panel. The handle at the top releases the panel, and the section to the right is a grommet which allows wiring to pass from the rear I/O inside of the door, to the outside for connectivity.
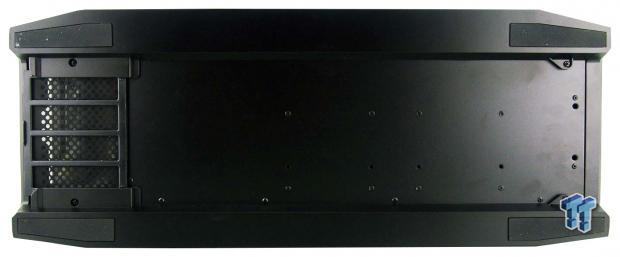
Under the chassis, we see a small PSU dust filter at the back of the DG-87, and all of the bits attached to the bottom are riveted into place. As for footing, the DG-87 uses rails that run the entire length of the chassis on either side and also come with rubber feet for added grip.
Inside the DG-87
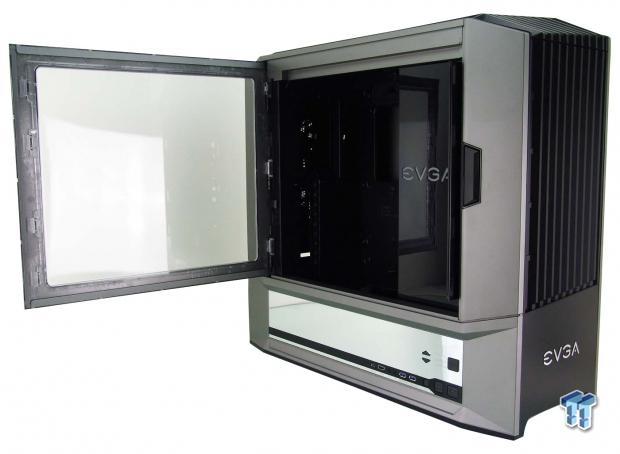
To obtain entry to the interior, we first pushed the button at the front edge of the window and found the side panel opens slightly more than ninety degrees. Since this can get in the way during a build, EVGA also adds a latch found near the hinges, which when slid down, pulls the pins from the hinges, and allows the windowed panel to be fully removable.
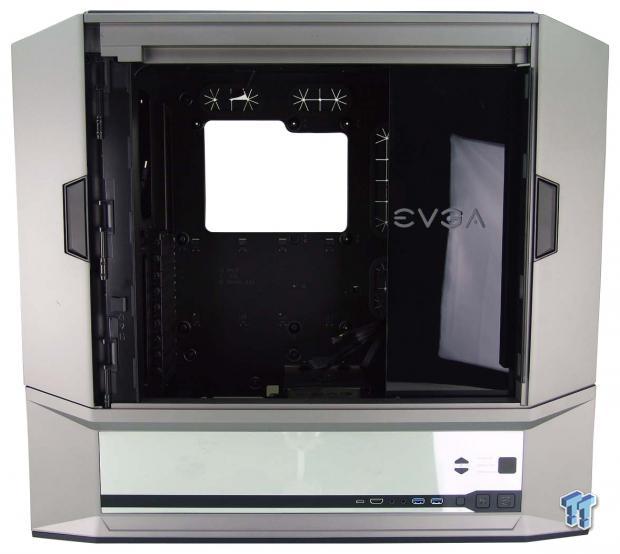
Now we have a less impeded view of the interior of the chassis. While we can obviously see the motherboard tray on the left, at the right is something a bit more important at this time. There is a removable Lexan panel which sports the EVGA logo and is placed here to block the view of water cooling that may inhabit the front of the chassis, as well as hiding most of the wiring that may need to be done inside of this chassis.
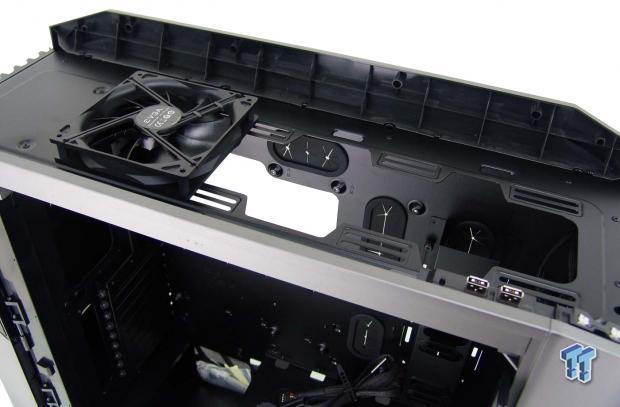
At the top of the chassis, you have a couple of options. You can install more fans if desired, but the room here will also allow for the addition of thin radiators. Of course, you can also hang them inside of the chassis, but the top cover offers a lot of room below it as well.
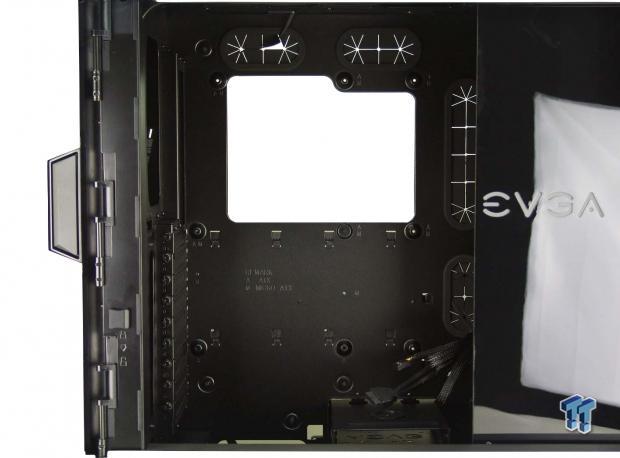
We still have yet to remove the Lexan panel, but the motherboard tray is still in full view. Four large holes with grommets are found above and to the right, while smaller holes can also be found at the bottom. There is a decent-sized CPU cooler access hole, and the tray is clearly marked for various standoff locations. As shipped, the DG-87 is ready to have an ATX motherboard installed.
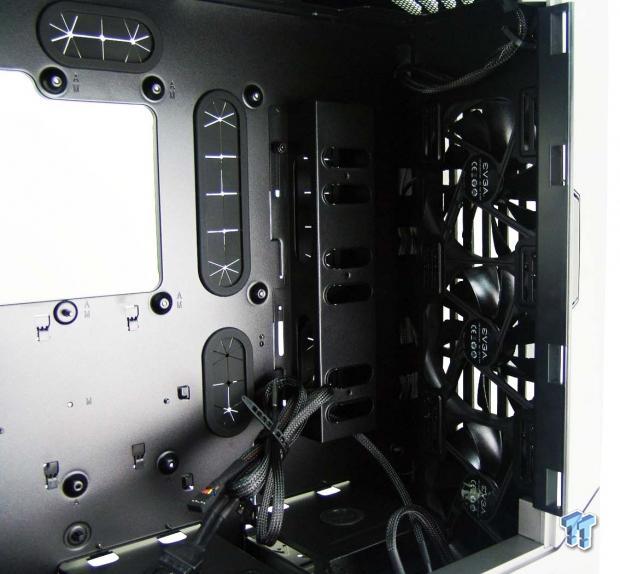
Removing the Lexan panel, we can see the inside of the front of the DG-87. The fans are running down the front of the chassis, and we can see sleeved wires running from both I/O panels. We also see a metal rail over a pair of holes, which will accommodate PSU leads for larger motherboards or any wiring associated with water cooling installations.
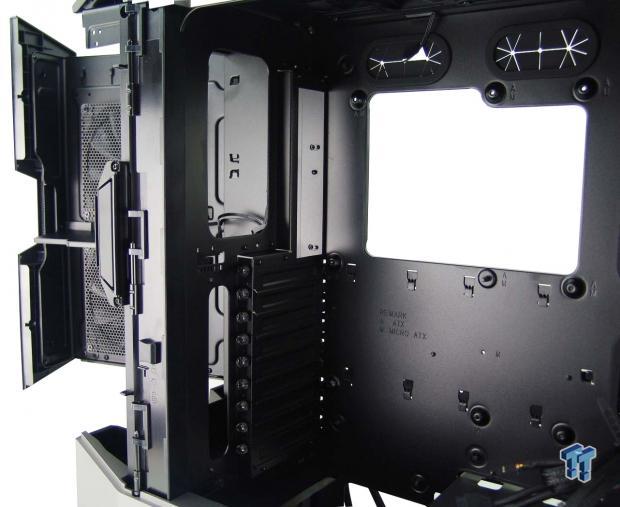
At the back of the chassis, we find large holes which allow air to flow right through it since the back door is what seals off this chassis. We can also see there are thumbscrews used to secure video cards in any of the nine expansion slots.
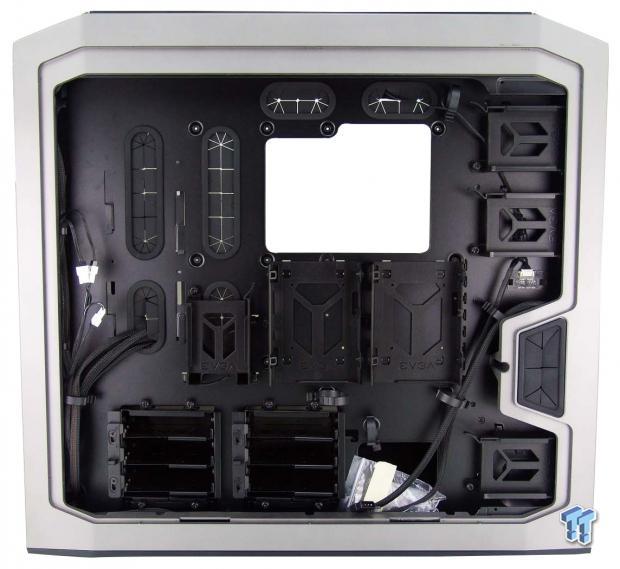
Looking behind the motherboard tray, we find a ton of depth behind the right side panel. This allows for the three removable drive trays below the access hole, and the three trays found near the back. We also see that the fans are pre-wired and routed at the front of the chassis, and even make connections at the back to power the fans in the rear door. Lastly, we found the hardware resting near the bottom.
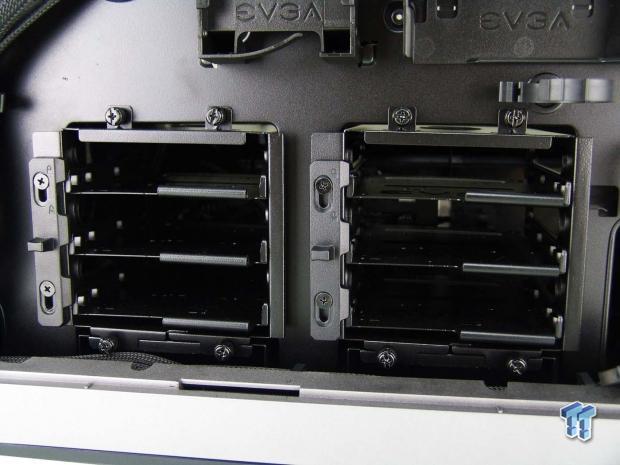
Two of the removable trays above are designed to house 3.5-inch drives, and so are these two cages. In total, between all of them, there is room for eight 3.5 inch drives, and all of the 3.5-inch locations are set up to use with 2.5-inch drives as well. What is also nice, is that both of these cages can be removed, allowing room inside for things like extremely long power supplies, and water cooling components.
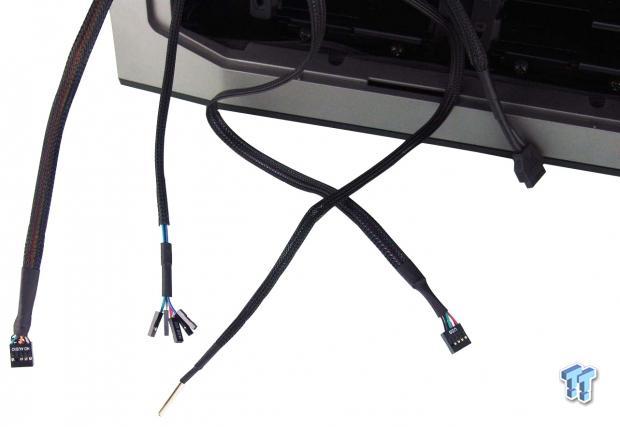
The chassis wiring is mostly routed and ready to go, but we did find the usual suspects laying inside too. There is an HD Audio lead at the left, the LED and button wiring, a standard USB 2.0 connection, and a native USB 3.0 connection. All of these are short, and you may want to reroute them, so they are not pulling on the motherboard. There is also a very long lead with a thermal probe at the end, which can be placed anywhere you wish inside of the DG-87.

While we usually dedicate a page to hardware, being this is a pre-release sample of the DG-87, this is all we found with the chassis. One bag contains a pair of standoffs, and a bag filled to the top comes with 6/32 screws for the motherboard and 3.5-inch drive mounting. There is another bag with M3 screws to use for 2.5" drive mounting in the HDD cages, while the last bag of M3 countersunk screws is to be used with the removable plastic trays attached to the motherboard tray.
Case Build & Finished Product
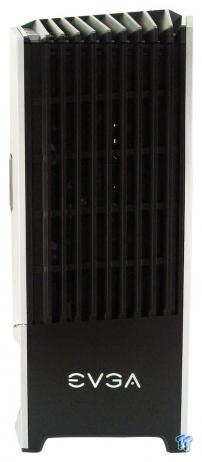
EVGA hits us right where we like things when it comes to the front chassis design. No matter what it is you want to install in the front of the chassis, the view never changes. With slits of mesh between each of the plastic ribs, if you were to install LED fans into the DG-87, they will be visible through the door, but that is all that may change.

For now, we left the side panel off the chassis to make obtaining this view a bit easier. It is easy to see how low the motherboard is from the top of the chassis, allowing plenty of room for additional cooling options, but at the same time, it stops short of being hidden in any way below the bottom section of the DG-87. Everything we installed in here went right into place as we would have expected, with not a single issue to report.
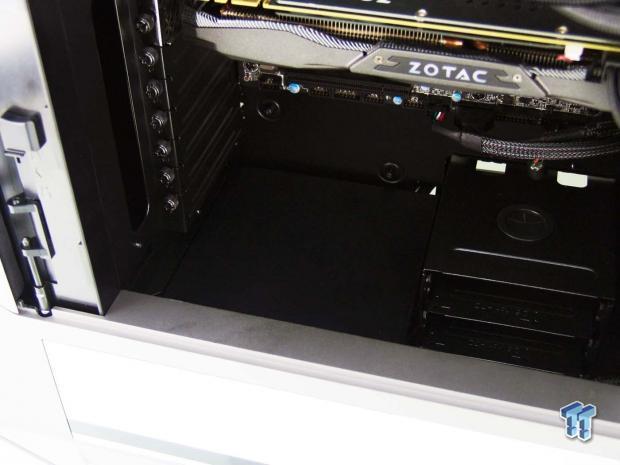
It is hard to see what we are trying to show in this image, but there is a PSU cover which blocks the view below the motherboard. What is special about this is that it is retractable to allow access to the wiring if needed, and then it can be slid to the right to keep everything clean and tidy.
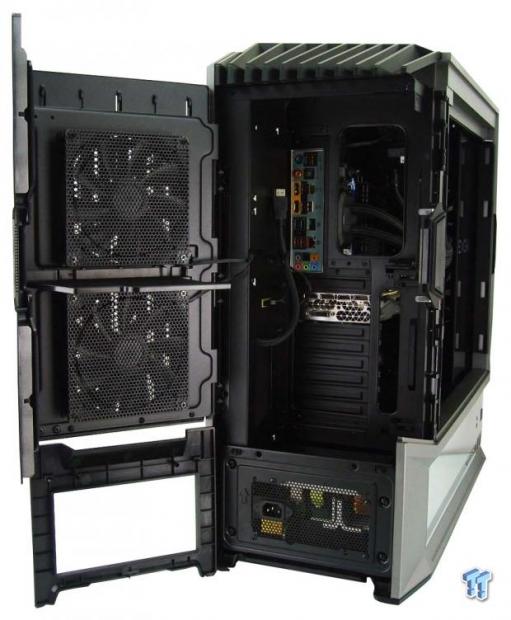
The dust shield snapped right into place, and we did not have to flex the chassis or adjust things in any way to fit the video card. You will need to remove the lower plastic section, as this exposes the PSU mounting plate, and is how you slide the PSU into the bottom of the DG-87.
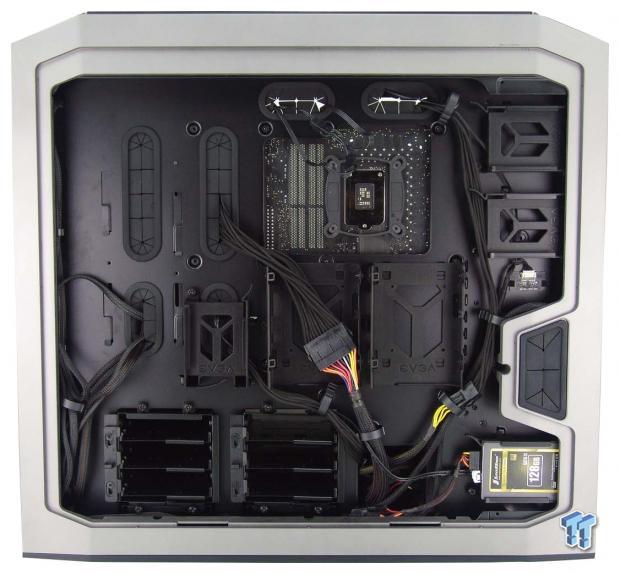
Using a few of the rings supplied from EVGA, we found routing the wiring to be easy and direct. Even using extensions on the PSU leads, there is sufficient room for anything you may need to run back here. As for our build needs, we leave a lot to the imagination, as things are looking empty still with all of our needs met.
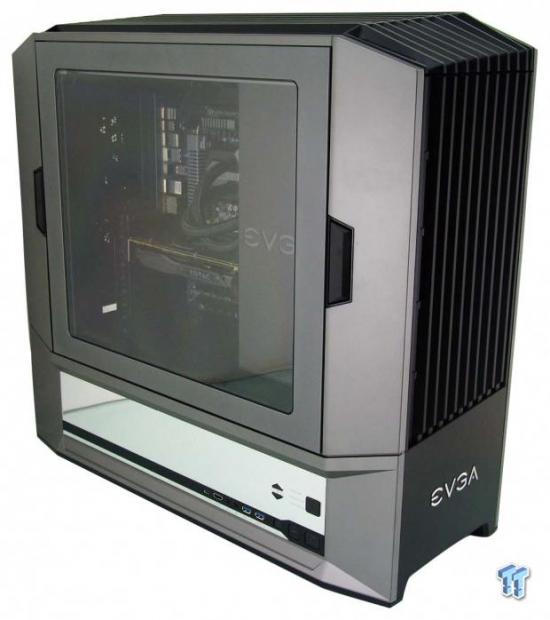
With the side panel back in place and the DG-87 all closed and ready for testing, we are enjoying what we have in the end. The DG-87 is sleek, aggressive, and with the mix of black, metallic gunmetal gray, and the section of mirrored plastic, there is nothing not to like with this EVGA chassis.
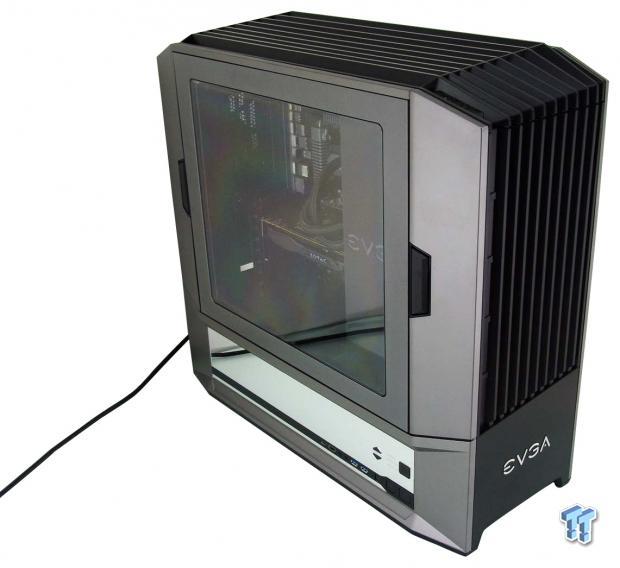
It is tough to see from many angles with the amount of light we have for images, but when powered, not only are the Zotac and Corsair names lit up, but the EVGA name in the Lexan panel is also lit by white LEDs. With the power buttons and the K-Boost buttons, there is a mix of blue and white LEDs used for those.
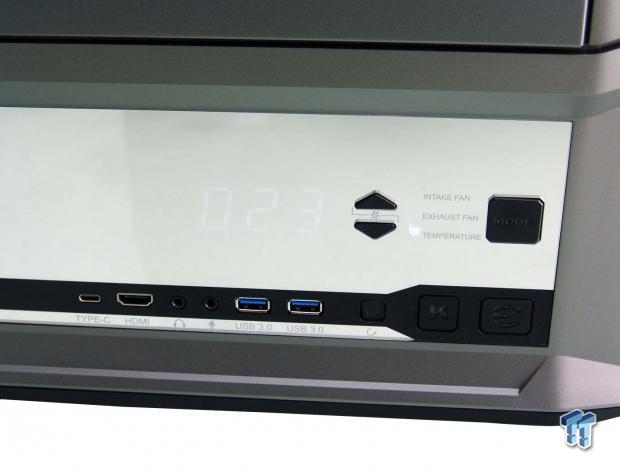
Again, due to the lighting, this may be hard to see for some, but in normal conditions, it is easily seen. Pressing the Mode button allows you to see the percentage of fan speed in the front and exhaust fans, and using the up and down arrows, you can make adjustments to their regular settings. Of course, pressing the K-Boost button will instantly change it to one hundred percent, but only while the K-boost is active. The "23" you see at this time is representative of the internal chassis temperature, as indicated by the white LED to the right of the arrow buttons.
Final Thoughts
The EVGA DG-87, as well as its other three brothers, all have an aesthetic that cannot be confused with any other chassis design. While we have seen many of the features offered in the DG-87 in other products from the past, not once has it been done in this manner, nor has the feature set been as inclusive as what EVGA has brought forth here.
The looks of the design are stunning, and they even made sure to address the back of the chassis, where many makers just give up before ever getting that far. Removable panels to make access a breeze, the mix of colors, and the inclusion of the mirrored section which includes an easy to access I/O panel and LCD display takes the DG-87 to a whole other level, and we haven't even got to the inside yet. On the inside, there is room for just about anything you could think of housing in it, including small pets and children. When it comes to components, everything lines up on a solid foundation that is this DG-87, and there are so many options built into this design it will take two or three passes around this chassis before you realized everything they are offering in this case.
Airflow is superb in the DG-87 and kept all of our components nice and chilly, and the thermal readout on the side panel can address any one area you wish to keep tabs on. You could rest it on a video card, you can lay it behind an air cooler for the CPU, or you can do as we did and use it to measure the intake temperature to see the difference between it and what software shows components running at. As far as noise is concerned, there is very little heard outside of the DG-87, and even using the K-Boost button to maximize the fans leaves little noise emanating from the inside. In our testing, our components were cooler than in many other cases we have tested in the past, and we hadn't even touched on water cooling, where the DG-87 shines.
There's plenty of room for even the thickest of radiators, room for tubing to run behind the motherboard tray, and the ability to remove the HDD cages to make room for pumps and reservoirs. In every compartment, from every angle, EVGA designed the DG-87 to not only look and function to a standard higher than many other chassis solutions, but this is also a chassis that will find a place in your heart for years to come. If it were a left-hand chassis like our TJ11, we would have gladly moved to this chassis for the next five to ten years of our computing life, but sadly the DG-87 did not fit the bill for our day to day usage. For us to say we would have moved away from the TJ11 says volumes about this design. It takes a chassis that raises the bar and is stylish and superbly functional even to make us contemplate the change. This EVGA DG-87 had us pondering rearranging the entire layout of our office to try and make it work, something we would not do for many of the cases we see day in and day out.
We did find one initial fault with the design, but after some emails and the realization that we could reroute the front panel wiring, the shortness of the cables we initially found was laid to rest. Once we took most of the length used to cleanly route the wiring from the factory and moved it into the lower section of the DG-87, all of the tension we saw initially was alleviated. Considering everything we have seen from beginning to end, and the ease in which our build went together, we have no issue with the pricing at all. While $229.99 may be a bit rich for some, those who need this sort of room for a chassis build know just what sort of a deal you are getting for the money. Comparing it to other tower cases that we have loved and admired in the past, this EVGA case stands tall and has us forgetting most of them. On the flip side of this, when a lot of those cases were released, they cost just as much if not more than this DG-87, and to be honest, they do not compare anymore.
Technologies have advanced, and the use of VR has become huge, and this is the first case to take that usage into full effect, making it as easy on the user as possible, while offering a stellar chassis design packed with features at the heart of it all. If a large chassis is in your future, consider the EVGA DG-87. For those of you who already have a huge chassis and are looking for a change, from what we have presented, we know we don't have to explain too much more. You are likely leaving this conclusion and clicking the button on Newegg or at EVGA to get one on the way to your door already. All in all, EVGA has stepped back into the chassis game and delivered one of the best cases we have ever seen.
Chad's Chassis Test System Specifications
- Motherboard: GIGABYTE GA-Z68X-UD4-B3
- CPU: Intel Core i7 2600K (buy from Amazon)
- Cooler: Corsair H80i GT (buy from Amazon)
- Memory: G.Skill Ripjaws F3-12800CL6D-4GBXH
- Video Card: ZOTAC GeForce GTX 970 AMP. Extreme Edition (buy from Amazon)
- Storage: SuperSpeed 128GB SSD
- Power Supply: SilverStone SST-ST85F-G (buy from Amazon)
- OS: Microsoft Windows 7 Ultimate 64-bit (buy from Amazon)

