The Bottom Line
Introduction, Specifications, and Pricing
EKWB is a company that immediately comes to mind if someone brings up high-end water cooling products, and they have to be one of the largest donors to the mod community. It seems like every time we turn around they are up to something new, and today is one of those days. They have been developing blocks, as well as many other components, but at the same time as they are releasing their lineup of MonoBlocks, they have also decided to enter the AIO game.
This isn't a typical design that we see across the board from Asetek; this is more along the lines of what Swiftech has been offering since the onset of water cooling becoming mainstream. This loop from EKWB is not a sealed loop system; it is expandable easily since it offers compression fittings, and due to patent limitations, the pump is mounted to the radiator in this design. This means that buyers inside of the USA can have access to this cooler with no fear of it being pulled from shelves due to potential legal battles.
EKWB sent over the Predator 240, the smaller of the Predator coolers, as they also offer a 360mm radiator based version of this kit as well. With the bar set so high from Corsair with their H110i GTX, EKWB has quite the hill to climb in performance, and with a few custom kits in our charts, both pre-assembled, and DIY kit style offerings, it will be easy to see just where EKWB sits in the masses of liquid cooling options. So late to the game, though, this kit has to be impressive, or it would make little sense for EK to release this cooler. Let's dive right into it and see just what EKWB and their Predator series of pre-assembled custom loops are all about.
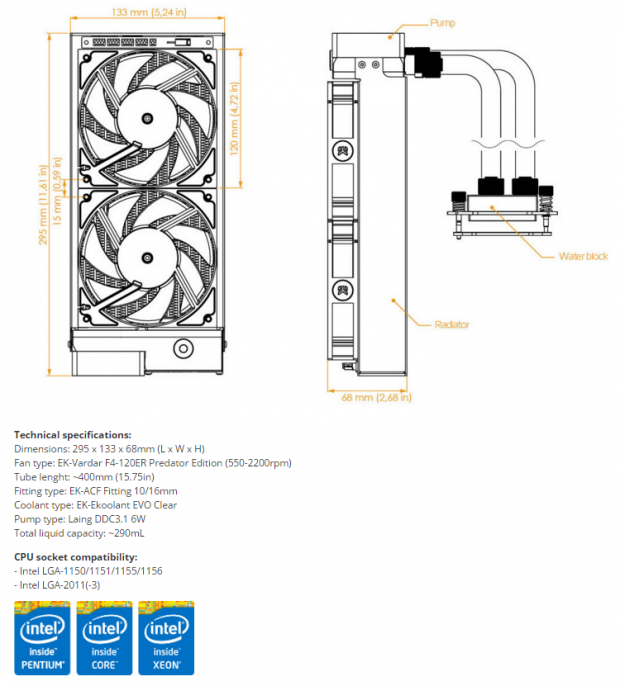
EKWB provided a chart that covers a lot of what the Predator 240 has to offer. At the top, we are shown dimensional renderings. The left one offers us the 133mm width of this design, it shows us it is 295mm from end to end, and it denotes the use of 120mm fans. The rendering to the right then offers notations to find the pump, radiator, and the water block, but also shows the thickness of the Predator 240 at 68mm including the fans.
The technical section offers the dimensions we covered in the renderings, and also reminds us that this kit is supplied with two of the new EK-Vadar F4-120ER Predator Edition fans. There is 400mm of tubing, some of the longest in the industry, and to connect the tube to other components, we are given EK-ACF fittings sized at 1mm ID and 16mm OD. The coolant that runs through the kit is EK-Ekoolant EVO clear, and the Predator has a Laing DDC3.1 pump to move the coolant that is powered with only six watts. All told, with coolant inside of the radiator, tubing, and the block, there is 290mL capacity as the kit is shipped from EKWB.
We do realize that with custom gear, there is a premium price to be paid for such goodness. The EK Predator is no exception to this rule. We have located it at some major e-tailers as well as finding that you can also buy these kits directly from EK. If you opt for the direct from the manufacturer route of access, be prepared to pay almost $250 to get this kit to your door. Venturing over to PerformancePCs as well as at Amazon, they are competing a bit harder for your money with listings of $199.95, but only Amazon is offering free shipping as well. That is a lot for a 240mm based AIO, and some $75 more than the Corsair H110i GTX that currently leads our charts. Although this is not a sealed loop, and after investing a bit more into it, you are all ready to cooler everything in the loop with this as the base to get that ball rolling. As of this moment, we will reserve our feelings on price until after we see what all can be done with this EK Predator 240 pre-assembled custom water cooling kit.
Packaging
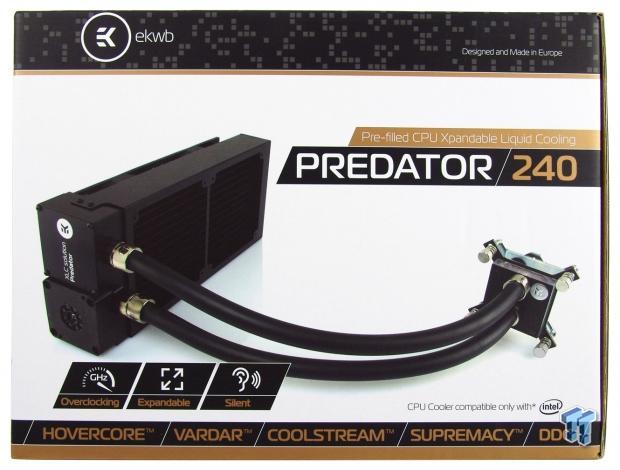
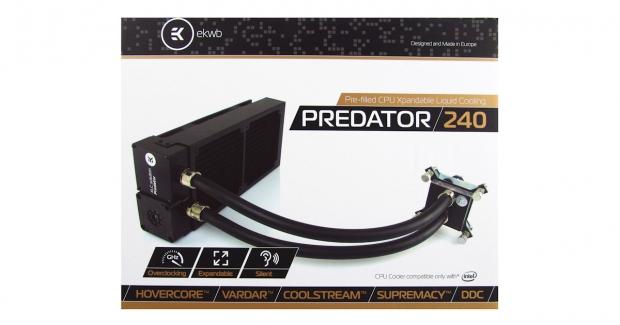
The packaging is attractive with the white, black and gold trim. On it we find the EKWB name and where it is made at the top. In the middle is a large image of the Predator 240, while the bottom addresses features and technologies developed to make the Predator efficient, yet silent.
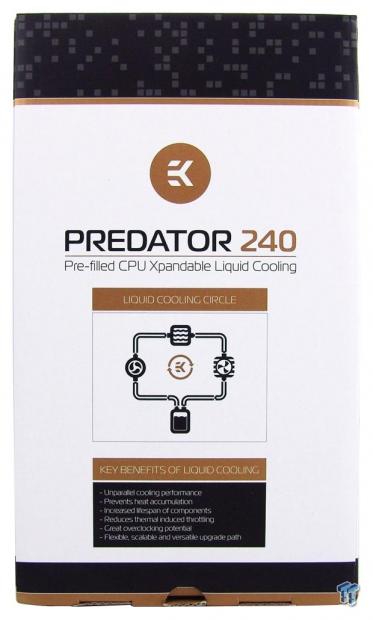
Moving to the side of the packaging, we are offered the naming at the top, just above a diagram of the liquid cooling cycle. At the bottom are benefits for this sort of product covering performance, better removal of heat from the chassis, lifespan, overclocking potential, and its versatile design.
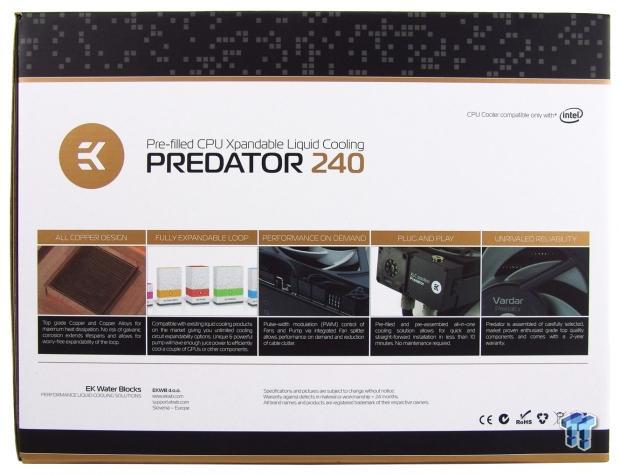
Under the naming we find at the back, there are five images. These images along with text cover the use of copper in the block and radiator, its expansion to other EK products, the PWM control, that it comes ready to go, and that they include the Vadar fans in this solution.
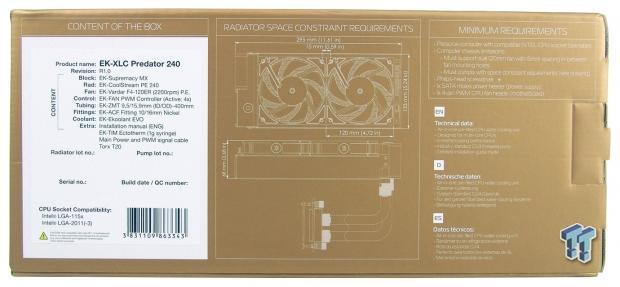
The bottom of the box is completely gold in color, and to the left it starts with a sticker covering what you will find inside of this box. In the middle are the dimensional renderings so customers can see if their chassis will house the Predator, and to the right are requirements and technical data.
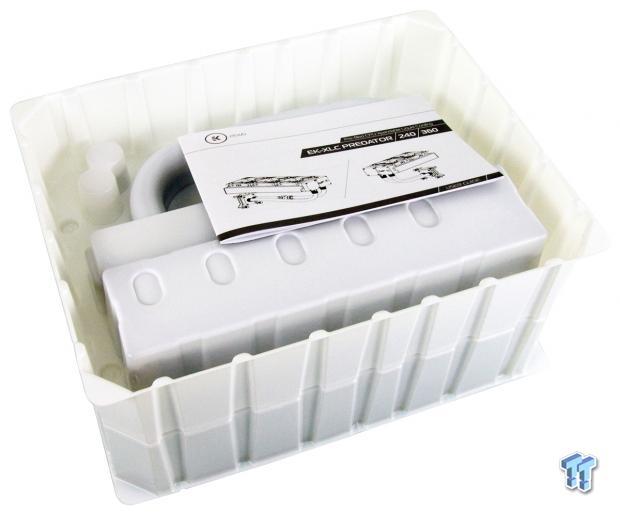
EK stepped up on the inner packaging with the Predator kits. Rather than recycled cardboard, EK surrounds this kit in a two piece, snap together plastic container. This allows everything to stay where it belongs, and is not as flimsy as the cardboard has proven to be.
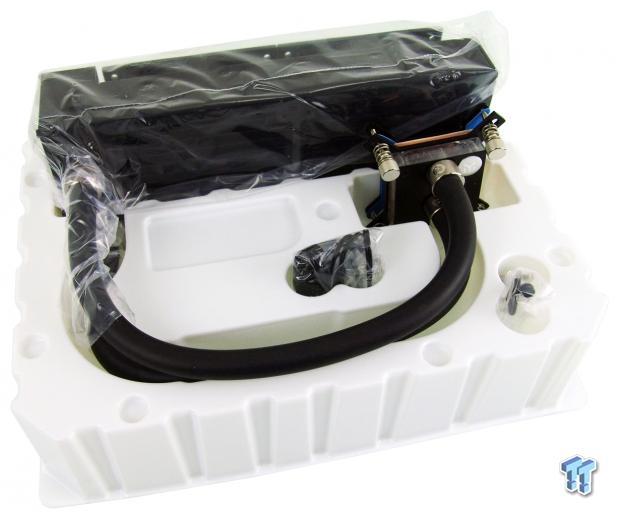
Popping off the top of the inner plastic packaging we see that everything sits comfortably in its compartment, and like with our sample, the Predator stands a solid chance of making it to your door without incident.
EKWB Predator 240 CPU Liquid Cooler
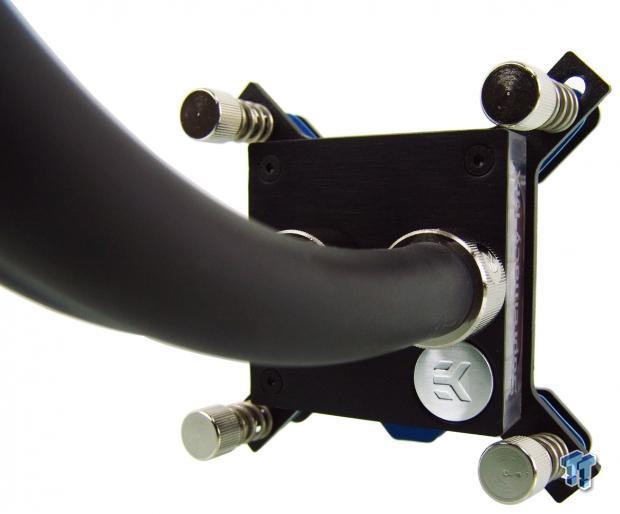
In this instance, we do not find a head unit, but rather the EK Supremacy MX CPU water block. This block offers a black metal top over a clear top, and sports a brushed metal EK logo in the corner. Attaching the tubing to it is one of the pairs of compression fittings.
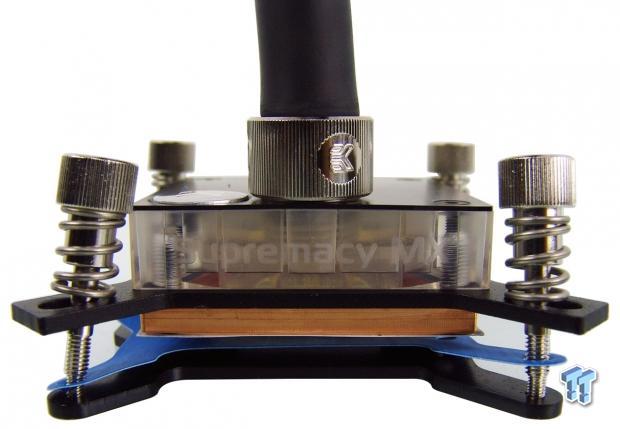
The side of the block offers the Supremacy MX naming, and we see right away that things are set up for Intel sockets. You may also notice that the ends of the screws are bent; we were able to straighten them, but we feel if the back plate were screwed on further this would not have occurred.
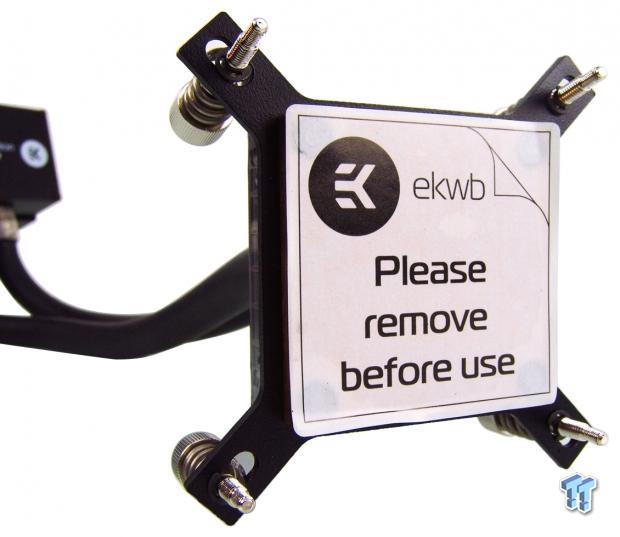
In the same way we have received all other EKWB products, this CPU water block also offers the paper sticker that protects the base from any oxidation. The way the packaging is, nothing should ever touch this, and so extreme measures of protection are not needed.
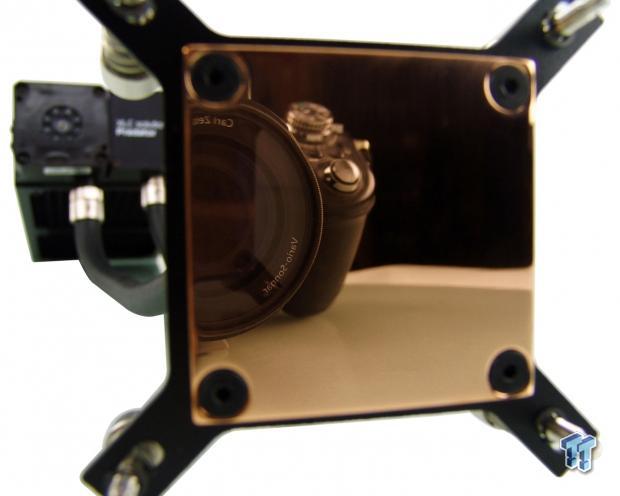
The base of the Supremacy MX is smooth as glass and polished to a mirror-like shine. The contact area is slightly convex, and the further out to the edges you go, the more angle you will find with this block.
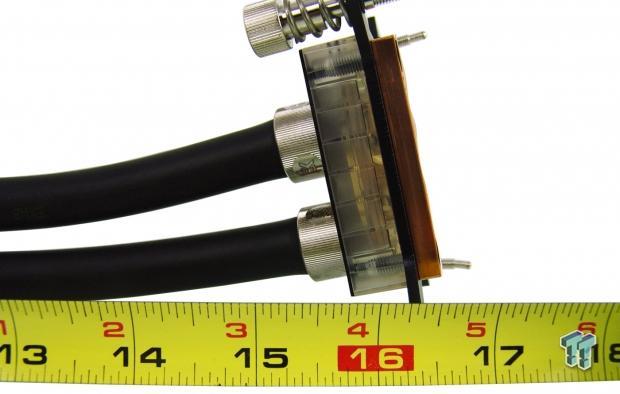
The box explains that we should have 400mm of tubing between the pump and the water block. Extending the tape measure, we indeed found near 15.75" of tubing running between them.
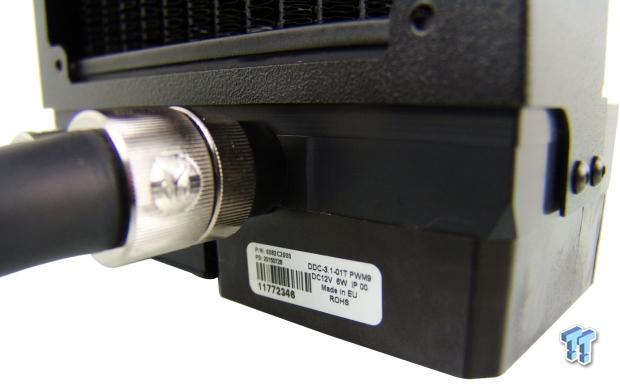
One of the tubes, the one behind this one, connects to the radiator for the coolant to get back to the block. On this side, the connection is made to the DDC3.1 pump, both using the second pair of compression fittings.
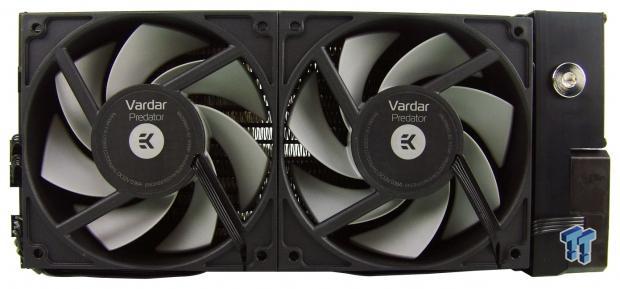
The radiator in the Predator 240 is a 240mm radiator cooled by two Vadar fans, installed to pull air through this high FPI radiator design. We also find a fill port in the extended bit of radiator to the right to help ease refilling the loop if you plan to add components in.
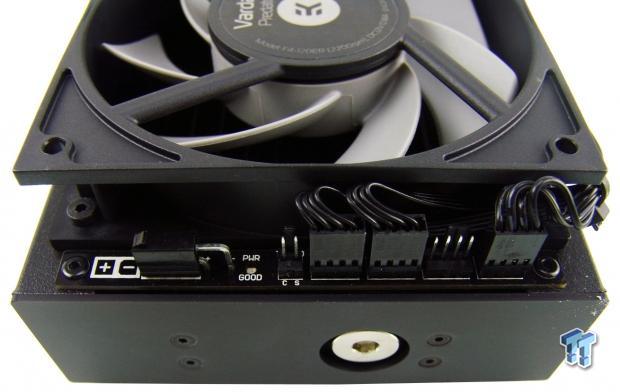
The other end of the radiator offers a second fill port option at the end of the radiator. Right next to the fan is a power board that powers this kit. As of now, we see a pair of fans connected to it, an empty fan header, and the lead supplying the pump power to the right.
Accessories and Documentation
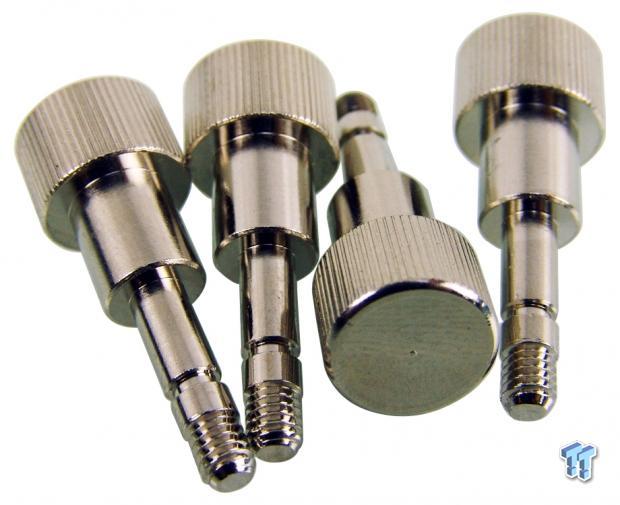
Inside of the box, there is hardware, but it is all based on Intel sockets at this time. In this image, we are offered a set of LGA2011 screws. You will need the e-clips and springs from the universal set already on the water block, but that is not that hard to accomplish.
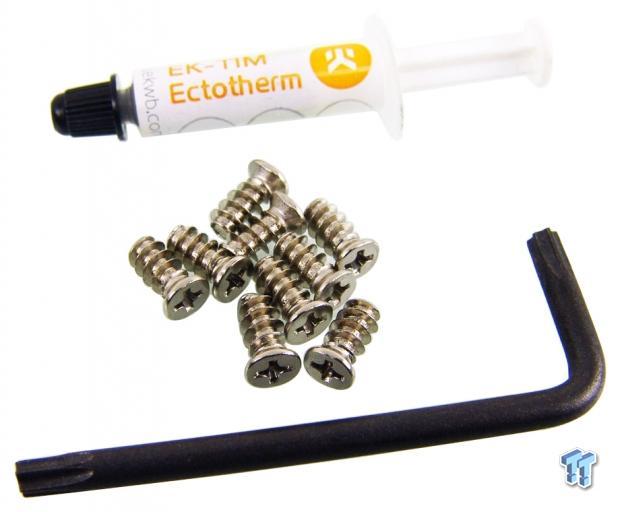
We were also sent a small tube of EK Ectotherm TIM, a set of eight standard fan screws to mount the Predator into a chassis, and are also delivered an Allen wrench to remove the fill port caps.
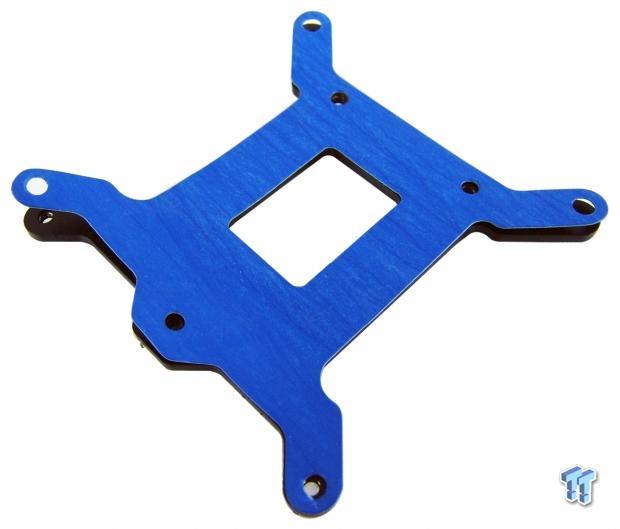
The backplate we were sent fits only LGA115X sockets, and it sort of specific as to the way it is meant to be oriented, as holes are drilled only one way. Between the steel backplate and the motherboard, EK sends a rubberized membrane that sits between them to isolate it from the motherboard.
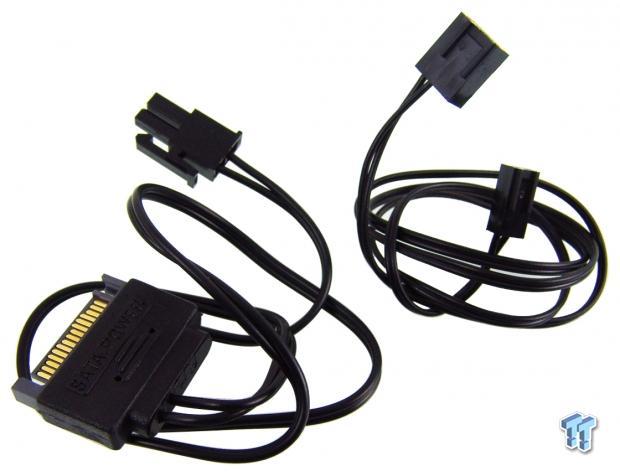
Also sent in the kit is this pair of leads. Both are roughly eleven inches in length, and the one at the left is a SATA power lead that powers the entire system. The lead to the right is to allow the system to use the CPU header on the motherboard for PWM control of the fans.
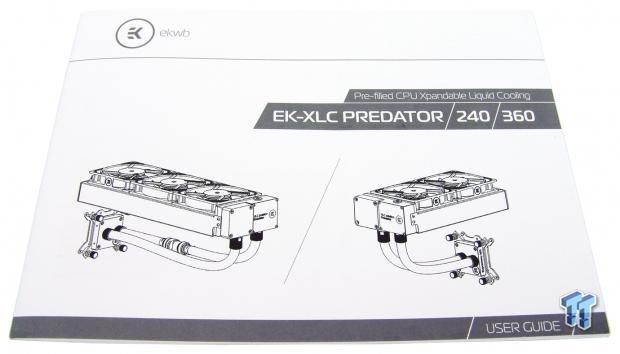
The user guide provided shows us everything we need to know. With well-drawn renderings and great explanations, this booklet explains it all like you are five years old, and leaves no stone unturned. It even shows what sort of options you have for quick disconnects, additional blocks, and where to add in the reservoir for best efficiency.
Installation and Finished Product
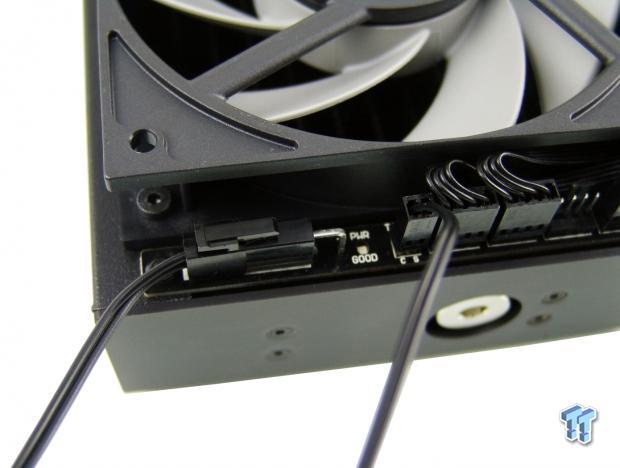
Aside from mounting the radiator and the water block, this is all you need to do otherwise. Grab the two leads, plug in the SATA power on the left side, and be sure to add in the PWM signaling wire if you want these fans not to run at full speed all the time.
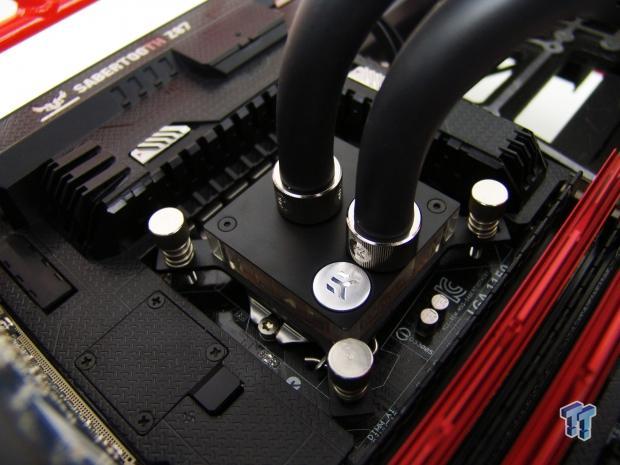
Getting here is truly painful. With one hand holding the back plate, balancing the motherboard, we are asked to press down hard to compress the springs enough to start the thumbscrews into the plate. While this took us much longer to accomplish than mounting any other water block, as you can see we did eventually win the battle.
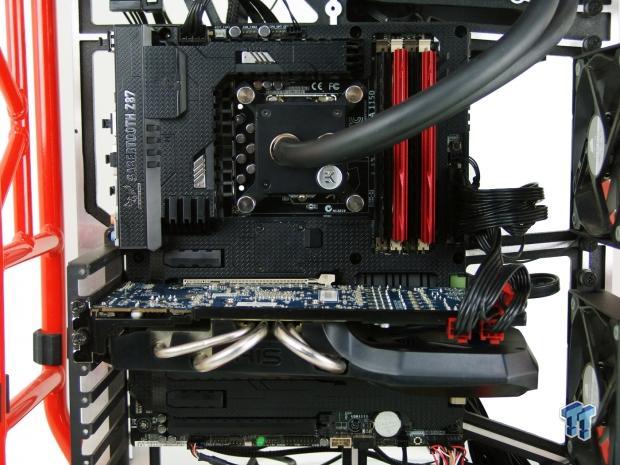
Stepping back to take it all in, as with any custom cooling block or sealed loop head units, they sit low and are clear from contact with anything around them.
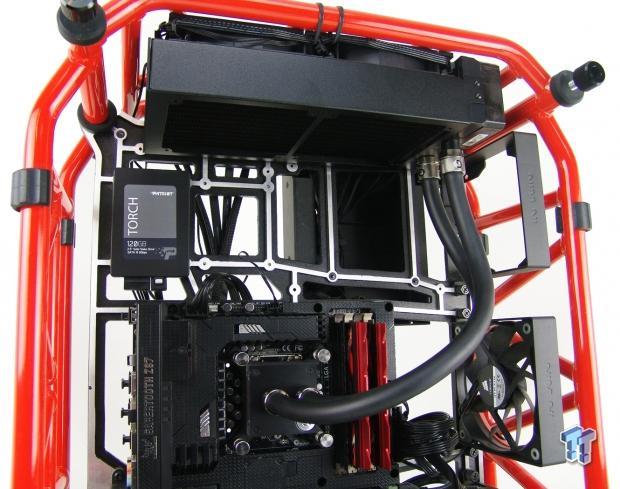
The D-Frame does not offer traditional fan mounting, but we did strap it on the top to show just how far away you can get the radiator, and still have gentle bends in the tubing. With over 15" of tubing in this design, mounting in the front of the chassis is no problem either, but EK does not recommend this installs on the floor due to the pump placement in that situation, as it would draw air, not coolant.
Test System Setup, Thermal Tests, and Noise Results
Chad's CPU Cooler Test System Specifications
- Motherboard: ASUS Sabertooth Z87 - Buy from Amazon
- CPU: Intel Core i7 4770K - Buy from Amazon / Read our review
- Memory: G.Skill F3-2666C11D-8GTXD - Buy from Amazon
- Video Card: HIS Radeon HD 7950 IceQ - Buy from Amazon / Read our review
- Storage: Patriot Torch 120GB - Buy from Amazon / Read our review
- Case: IN WIN D-Frame - Buy from Amazon / Read our review
- Power Supply: SilverStone ST85F-G - Buy from Amazon / Read our review
- OS: Microsoft Windows 8 Professional 64-bit - Buy from Amazon
- Software: RealTemp 3.70, AIDA64 Engineer 5.20.3400 and CPU-z 1.72.1 x64
I would like to thank ASUS, InWin, Patriot, and Fractal Design for supplying products for me to test with.
To see our testing methodology and to find out what goes into making our charts, please refer to our CPU Cooler Testing and Methodology article for more information.
Thermal Results
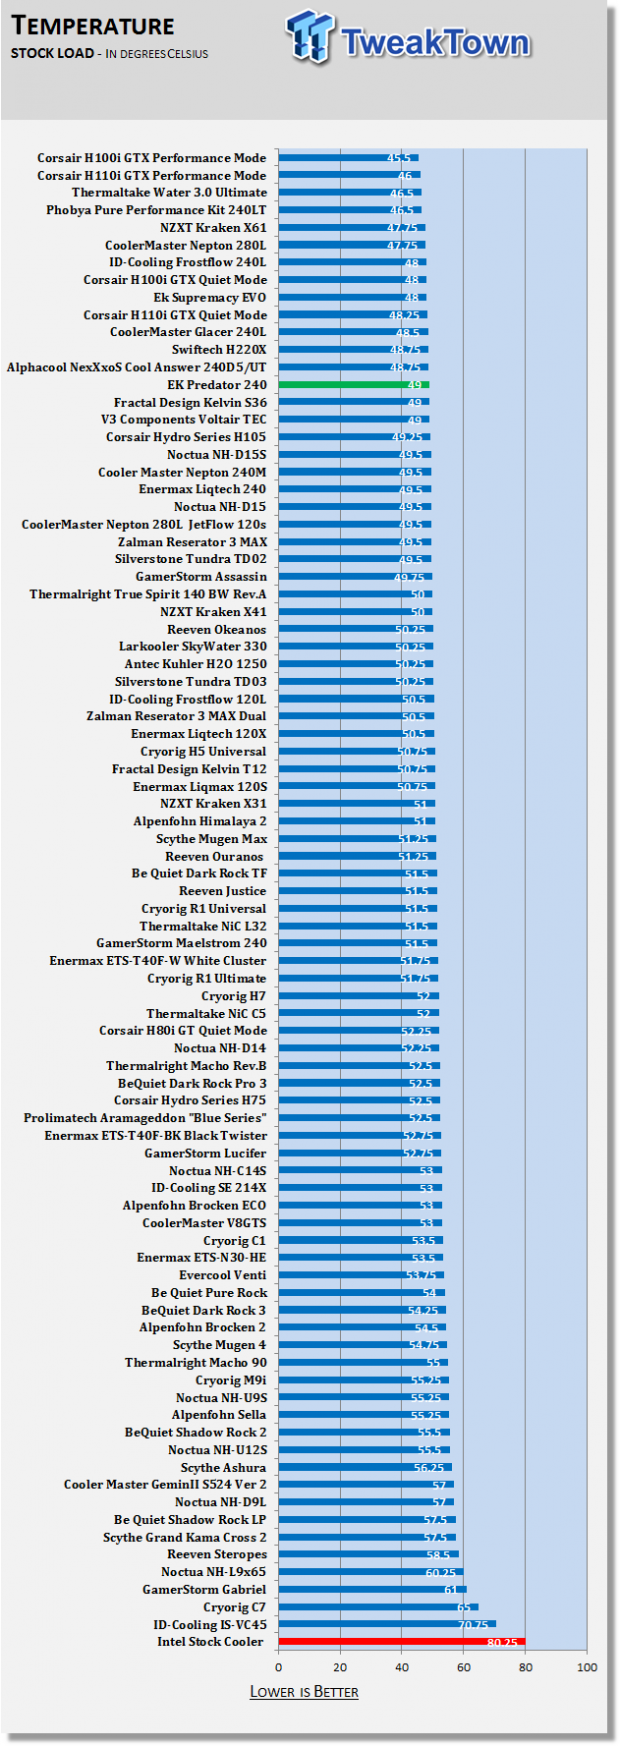
While this unit is designed to run with PWM in control of the fans, we had to even out the results supplying the same voltage to every cooler. The 49-degree result is not chart topping, and does get passed up by lesser models, but it is dead silent in this round of testing.

With the system overclocked, and the fans allowed to do all they can, we find the Predator takes second place overall with a 66-degree result. It slightly surpasses all of the custom cooling options, but as you can see, there are some sealed loop systems just as capable.
Noise Level Results
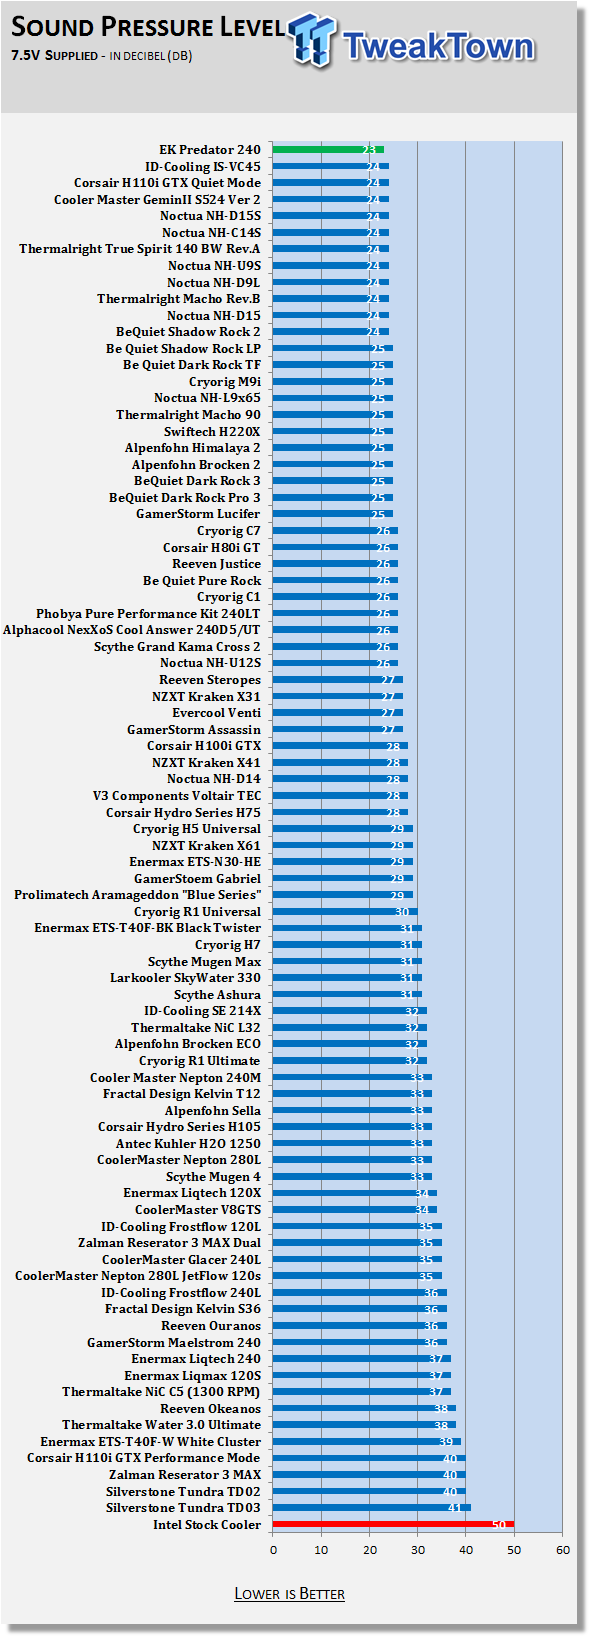
The most silent fan we have ever tested at 7.5V. The EK Vadar fan and its 23dB lack of noise level are quite impressive. Yes, it made our stock testing a little higher than it could be, but to get decent results with no noise at just 900 RPM is great.
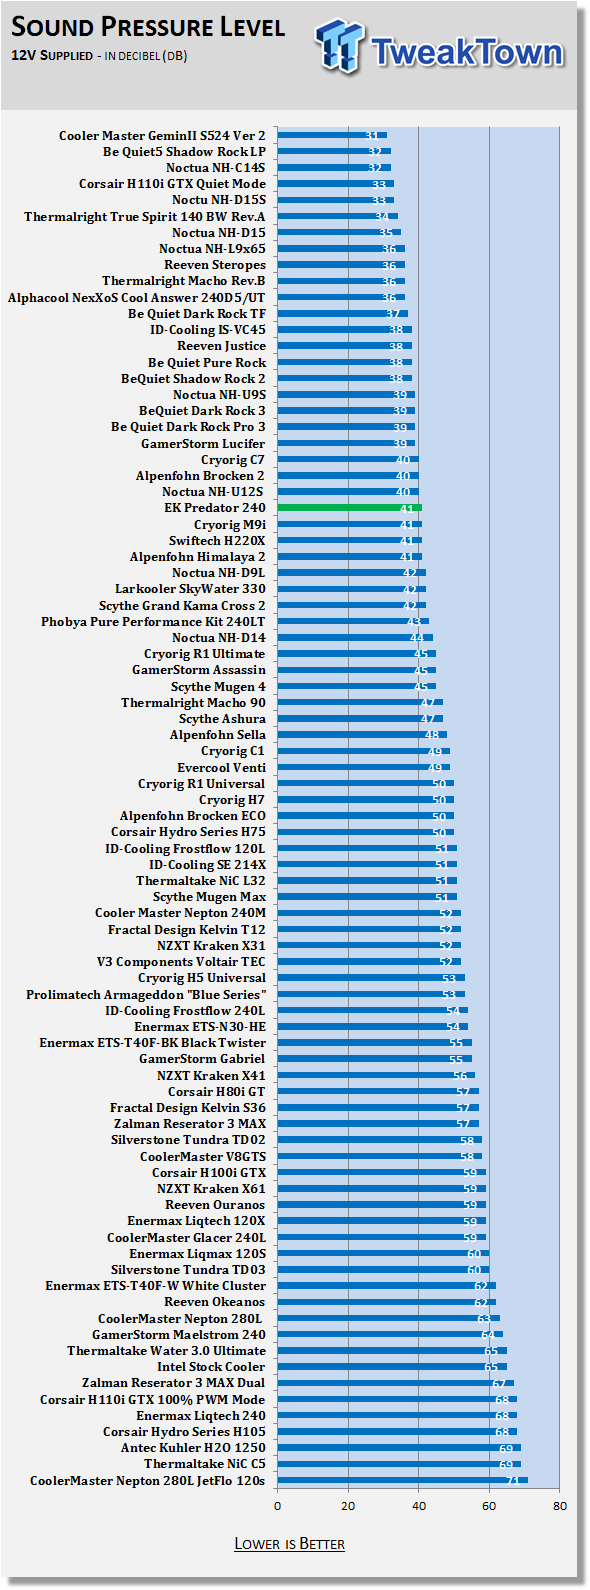
Under PWM control, we never hit this level of noise, but we did supply the fans with 12V from a fan controller. At this time, we recorded them spinning at 2100 RPM delivering 41 dB of noise. Compared to sealed loop systems, this EK does much less damage to your ear holes to get the results we have here.
Final Thoughts
While there may have been other companies to bring forth the concept of the AIO system that is customizable and adaptable, but to date, they are offering the most high-end and best performance of any custom water cooling loop we have tested. Even though the Corsair H110i GTX slightly bests the Predator 240 for less money, even as dolled up as the new Corsair units are, there still is no comparison to the aesthetic appeal that a custom loop offers. As long as we are carrying on with the direct comparisons, there is also no other water cooling that can get these thermal results while still being a complete pleasure to use. At the low-end, these fans are inaudible inside of a chassis, and even when we manually spooled them to full speed, 41 dB is the most the Vadar fans will intrude in the office. Comparatively, and AIO usually needs fans that are 65 dB to do this, and are near double the noise to the human ear.
The Predator 240 is intended for Intel sockets only at this time, but we see no reason there should not be an AMD version shortly. In this respect, we did have some issues. First of all, we feel the back plate should be screwed all the way into the studs, and the bending at the ends we experienced would not have happened.
Secondly, we completely understand that higher pressure when mounting leads to better performance. There is a balance, however, and with the amount of struggle that this mounting hardware delivered, we feel it could use just a bit of love to make it easier to use and install. As far as the rest of the kit is concerned, with over 15 inches of tubing to use, there should be no reason this unit will not fit in the front of or the top of just about any chassis on the market. We also like that the fans are pre-assembled to the radiator, as anyone installing a sealed AIO knows the struggle of holding the radiator and the fan while trying to pass a screw through it all at one time. With a set of eight basic fan screws, installation is a breeze.
There are other factors to consider too with a purchase such as this. Consider you can easily add quick disconnects in-line of the tubing, and stop any flow, allowing additions of other components at any time. The other way to look at this is for those on a budget that have the desire to build a custom loop but have to get their feet wet somehow. This sort of kit offers worry free installation much like a sealed loop system, but where those stop, the Predator is more than willing to take on a reservoir, other water blocks, and even more radiators as well. With a kit such as this, the options of where to go next are endless.
You are going to have to pay up for the EK Predator 240, though, in the range of $200. This is nearly double the cost of a comparable sealed loop system, but we feel there are plenty of advantages and step-ups in this kit that the price is justified. The Predator 240 may have taken us a bit to get the CPU water block in place, but the fight was well worth the effort, as we have not seen many coolers, liquid or air coolers, that can put up low numbers in both thermal testing as well as audio testing.
EKWB was late to the game with this Predator 240 and Predator 360 but have not failed to impress even after seeing as many options in liquid cooling as we have.

