The Bottom Line
Introduction and Packaging
We have only had a handful of barebones kits in the lab, in fact only two. The first one was a server kit and now we have a workstation to take a look at.
One of the advantages of barebones kits is they pretty much come with everything you need for the base build and often times they are pre-assembled so you do not have to get down and dirty installing every little thing into the case. In fact, that is what we like about barebones kits.
Barebones kits can come with or without CPU coolers or even rack mounts in the case of servers. Kits that come with everything you need will naturally same time and money doing the final assembly. Let us get started unpacking and setting up the ASUS TS700-E8-RS8 Workstation Barebones kit.
Packaging
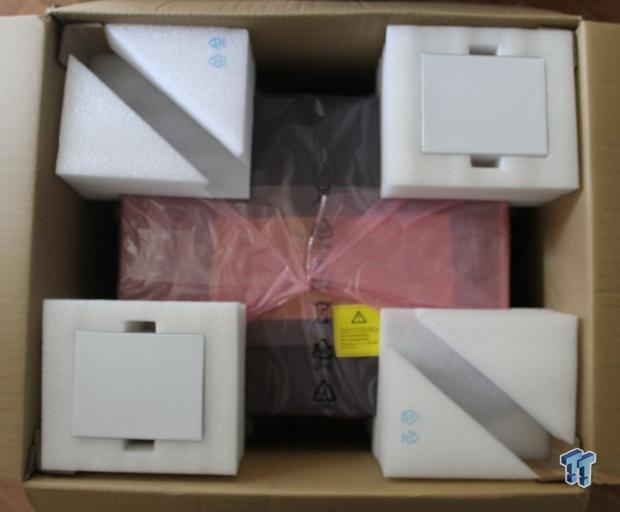
The shipping box is made of heavy gauge cardboard; it is thick and provides good protection for the components inside. Inside there are four foam inserts with ample air space to provide protection against punctures. Two of the foam inserts have white boxes that contain the supplied heat sinks for the workstation.
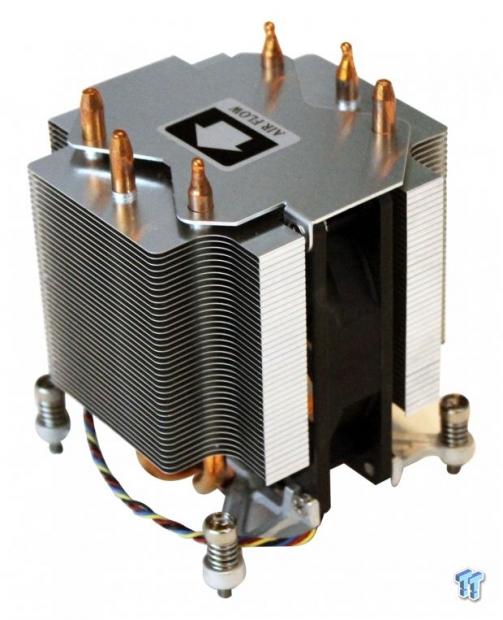
The workstation kit comes with two CPU heat sinks, which we see here. These are rather generic looking and lightweight. Down the middle of the heat sinks is a single cooling fan to supply airflow through the cooler. It seems rather simple; we will use these heat sinks in our tests to see how well they perform.
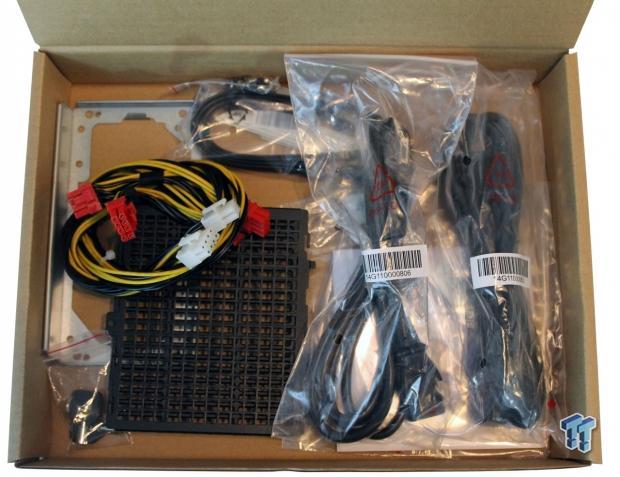
Here we get a look at the accessory box that comes with the TS700-E8-RS8 Workstation. It has everything you will need to get the workstation up and running.
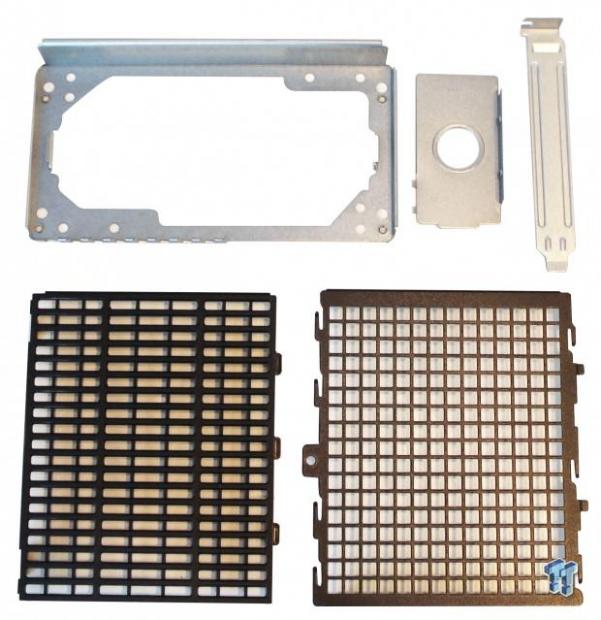
Several inserts are provided to give you options on how you want to outfit the workstation.
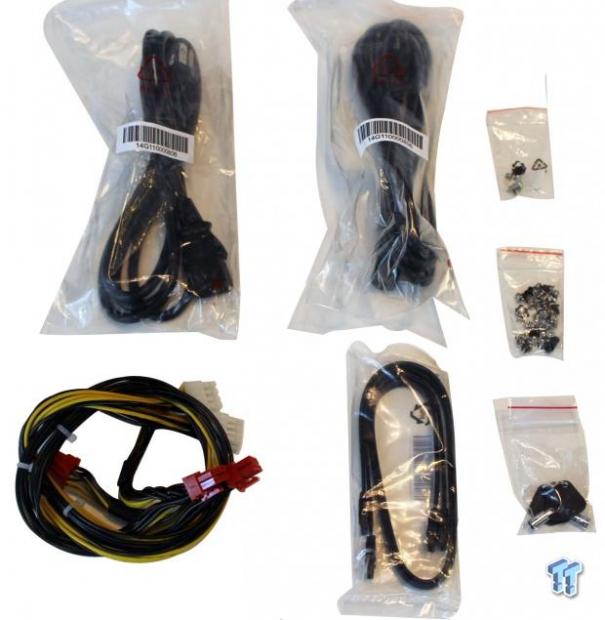
Here we see the rest of the included accessories. As we will see, later on most of SATA ports are connected inside the case so we only get a few spares here. We only received two sets of GPU power cables, while the system can support three full size video cards, this would leave us short power connectors if we wanted to use a full load out of video cards.
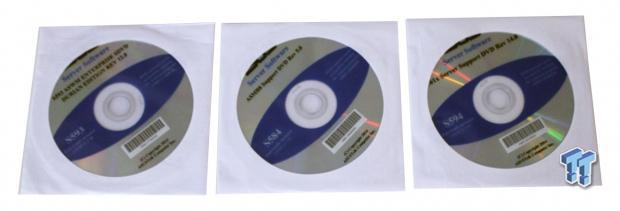
The supplied DVD's provide drivers and manuals for the workstation:
- S584 - ASMB8 Support DVD Rev 5.0
- S593 - ASWM Enterprise SDVD Durian Edition Rev 12.0
- S594 - C61x Server Support DVD Rev 14.0
Specifications and Layout
Specifications
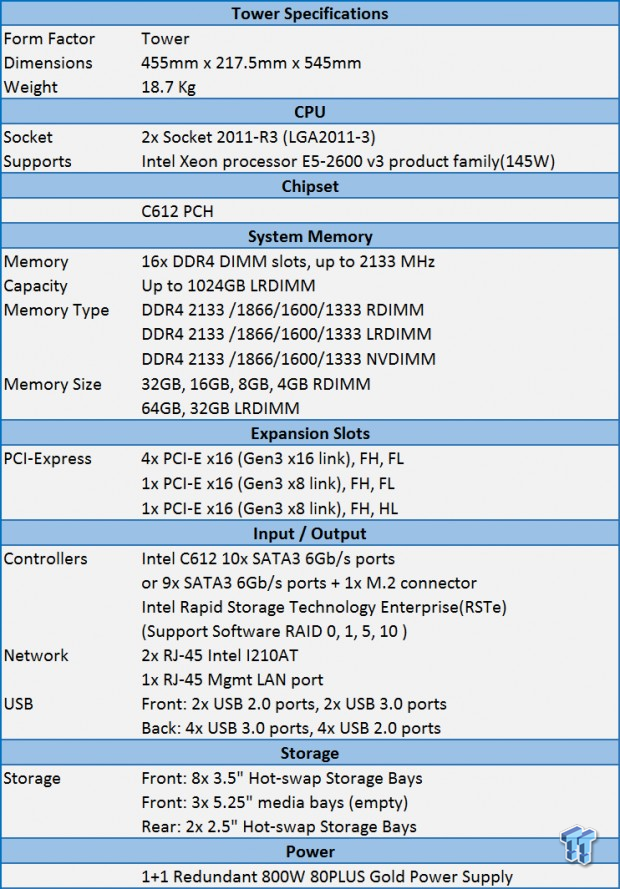
The size of the tower case is not overly large so it will fit nicely on desks and have space behind for cables and power cords. The Z10PE-D16 WS motherboard used in the workstation offers expanded memory capacity with a max of 1024GB of RAM. For dual use as a workstation or server, IPMI 2.0 is provided onboard without the need of an expansion card.
Layout
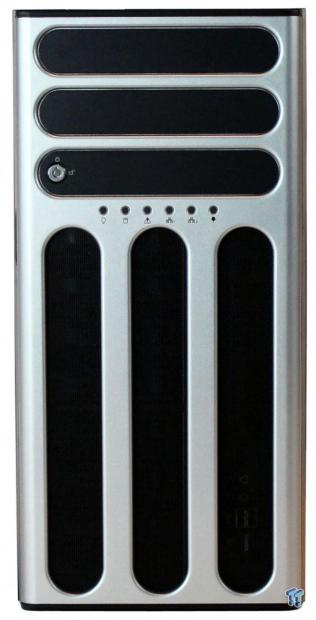
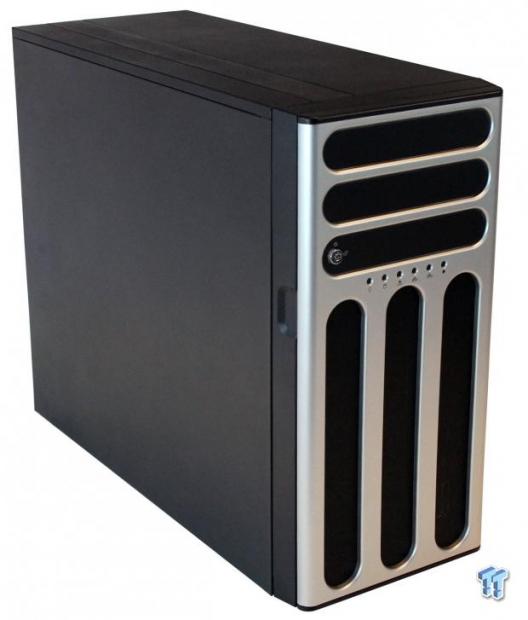
The front of the ASUS TS700-E8-RS8 Workstation has clean lines with a silver finish, it looks good and does not collect many fingerprints when handling. Three large ports provide ventilation for the workstation, which also act as dust collectors; these clean off easily and work well for this.
The middle area shows LED status lights to show system activity. At the top, we see three media bay covers and a key lock for security. These covers are solid and do not allow for airflow through the case. Security is important on workstations and locking this unit up will prevent anyone from unauthorized access. In order to access the power button or USB ports the front door must be unlocked.
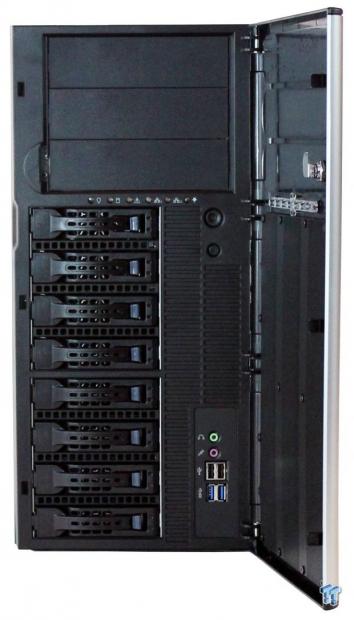
Here we have opened the front door of the workstation and we can see the eight hot swappable drive bays and the three media bays at the top. The power and reset buttons are at the middle right of this area. Security has its place in the workspace, but we are not crazy about having to open the front door to access the headphone and microphone jacks that are above the USB ports.
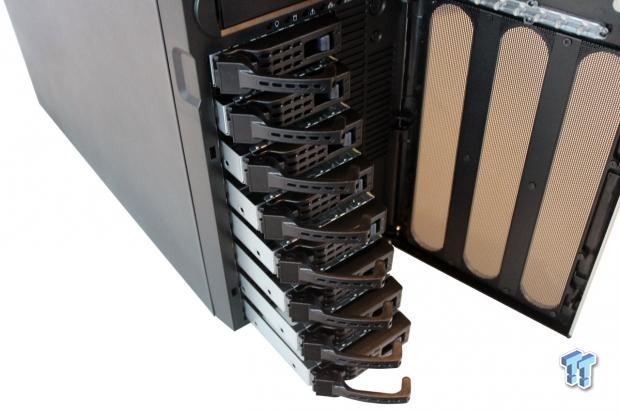
Eight hot swappable SATA3 drive bays provide plenty of storage capacity for this workstation.
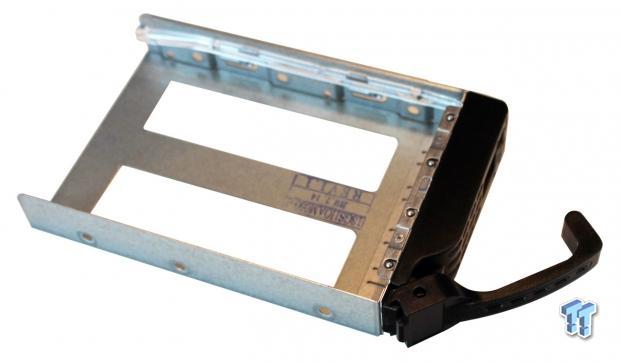
The drive trays are typical for ASUS products with options to mount hard drives and SSDs.
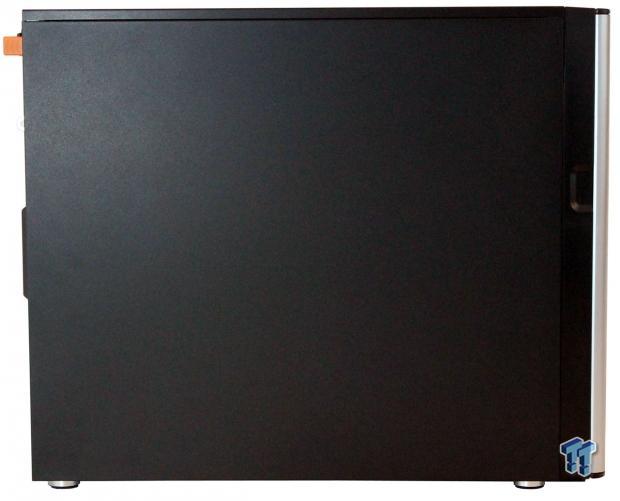
Nothing fancy on the sides of the TS700-E8-RS8. A window mod might look nice to show off the insides components.
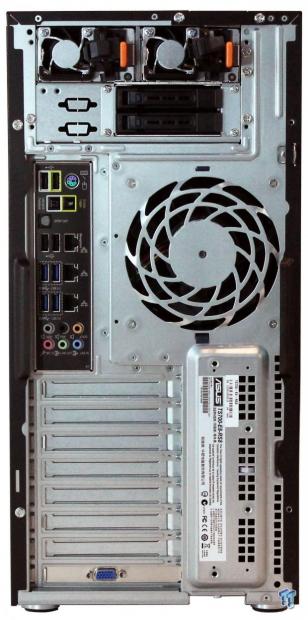
Here we get a look at the back of the TS700-E8-RS8. At the top, there are dual 800-watt redundant power supplies, which are, hot swappable. One large cooling fan provides exhaust for the inside compartment. We also see two 2.5" hot swappable drive bays just below the power supplies.

The I/O ports for the Z10PE-D16 WS motherboard used in the TS700-E8-RS8 Workstation include:
- PS/2 mouse and keyboard port and 2x USB 2.0 ports below.
- Q-Code Logger button and USB BIOS Flashback button below.
- Next is an Optical S/PDIF output port.
- The next stack includes a Management LAN port with 2x USB 2.0 ports below.
- The next two stacks have an LAN port with 2x USB 3.0 ports below them.
- The last stack is for Audio ports.
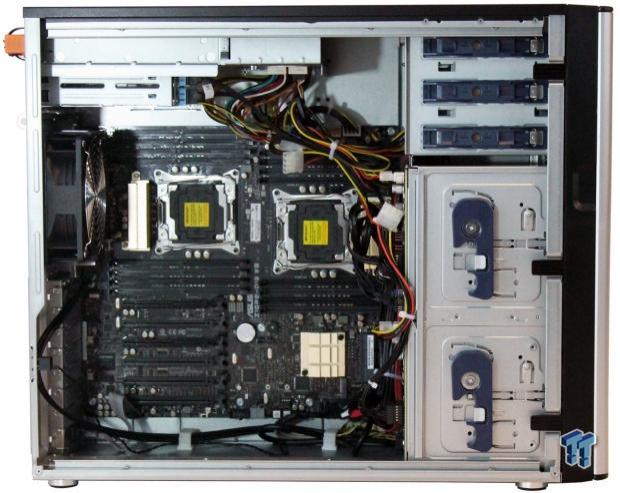
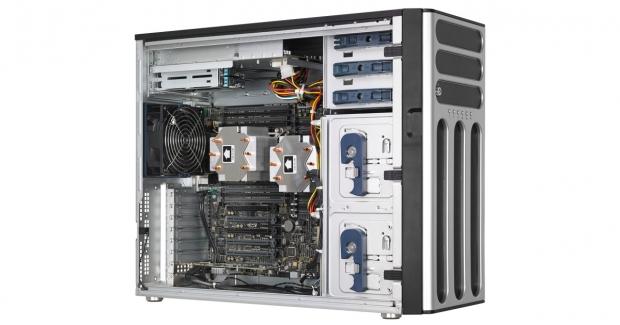
Taking off the side panel, we get our first look at the insides of the TS700-E8-RS8 Workstation. The Z10PE-D16 WS motherboard fills the entire bottom of the case with a few inches to spare. The TS700-E8-RS8 Workstation is a bare bones kit so cable management is up to the system builder, however on a positive note: all hard drive and power connectors have been connected for you so that difficult task is completed when you purchase this kit. Most of the cables have been tied off in good locations so all that is left to do is cable up accessories that you want to add such as a DVD drive and GPUs.
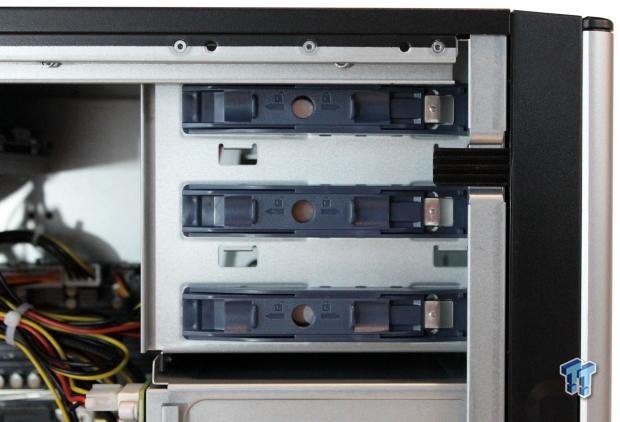
The media bays have simple lock in place connections, just insert the drive and they lock in place.
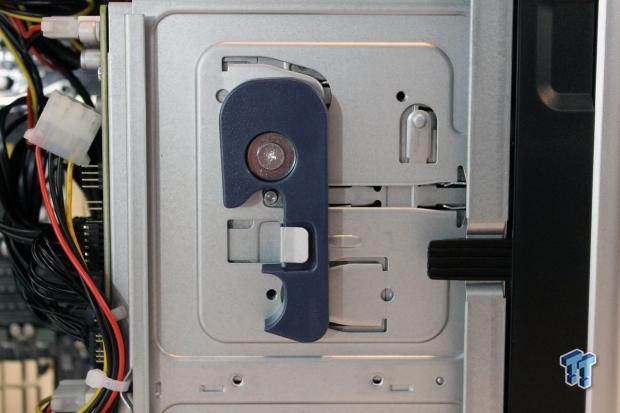
The drive bays located in the front of the case come in two compartments with 4 drives in each. Each of these compartments can be unlocked and removed if needed.
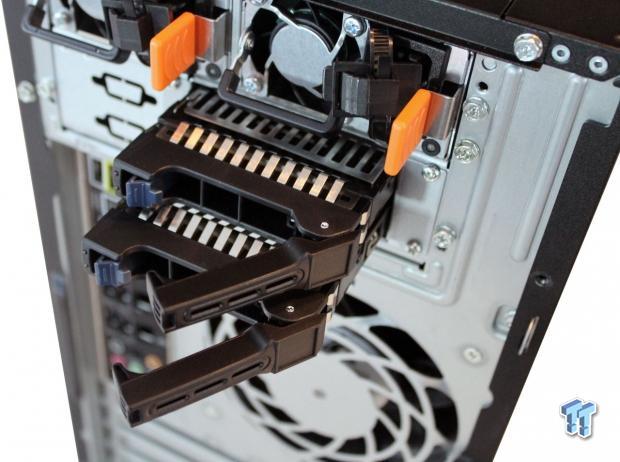
At the back of the case, there are two 2.5" hot swappable drive bays. We really like this addition because you can install two SSDs and RAID them together for an OS install, leaving the front bays available for pure storage uses.
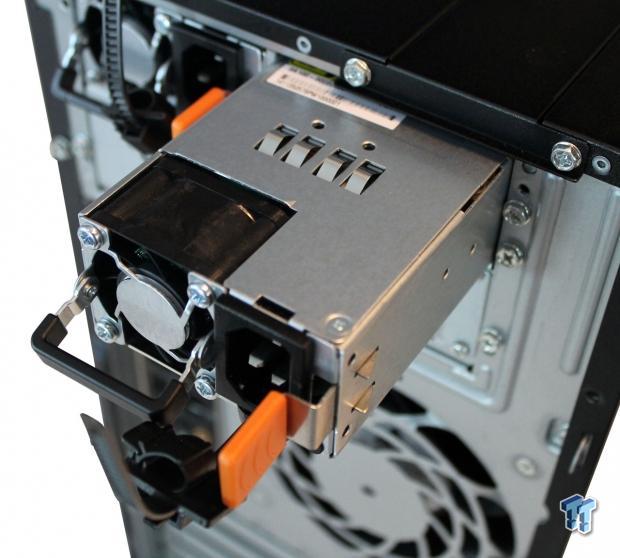
Each of the two 800-watt power supplies are hot swappable for easy replacement if needed.
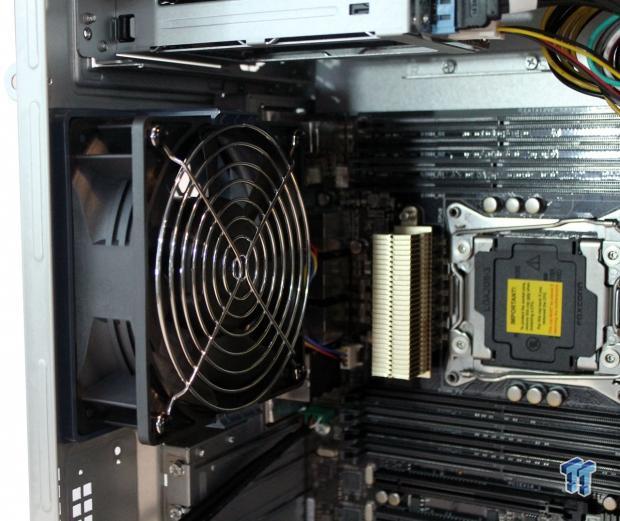
This single large fan located at the back of the case provides cooling for the case. Installing the CPU heat sinks require you to connect the PWM fan header which is located right behind the gold heat sink. This is a difficult location to access. We ended up using a needle nose pliers and a flashlight to install this fan header, it was not easy to do.
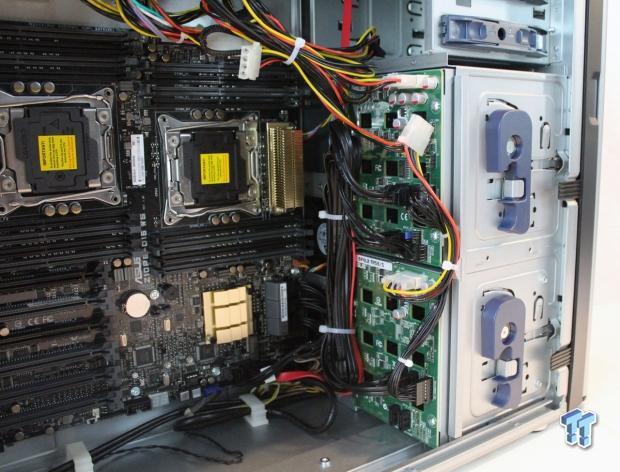
Now we are looking at the front of the case towards the drive bay back plane, we get a better look at the how the cables are installed; yes, it looks like a mess. Most of these cables are tied off and do not require any further cable management. Considering this is a bare bones kit, it would not make much sense to have everything all nice and clean only to have a systems builder have to cut things loose.
Installing the second CPU heat sink, we ran into the same problem as we did on the first one. The fan header is located just behind the gold heat sink under the bundle of cables. Just like the first one, this was not easy to reach and required us to use a needle nose plier and flash light to be able to install this one.
Before we did install the CPU heat sinks we installed the CPUs which was no problem. Then came installing the RAM sticks, again space is very tight and this was not a simple task. We just took it slow and careful and managed to get everything installed without to many issues.
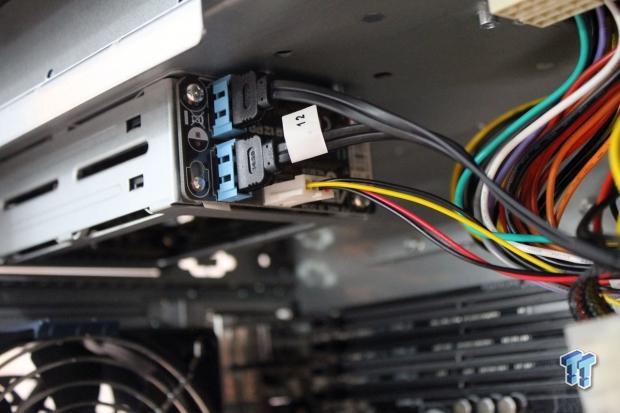
Just under the power supplies, we can see the back two drive bays, which come pre-wired.
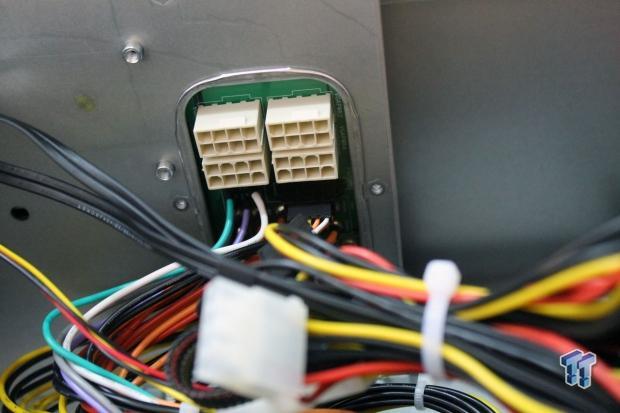
Just under the power supplies, we also find four power connectors for GPUs or other expansion devices. These are in a good location and easy to reach. The only problem was our kit only came with two power cords.
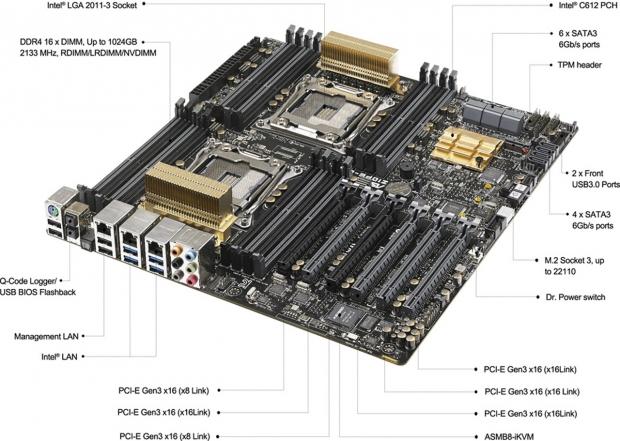
The motherboard that is used in the TS700-E8-RS8 Workstation is the ASUS Z10PE-D16 WS. Not long ago we reviewed the ASUS Z10PE-D8 WS motherboard, which is very similar to this board. The D16 has expanded memory capacity and server/workstation features such as IPMI. It does not come with iKVM which would be just the trick to complete this board.
BIOS, Remote Management and Software
BIOS
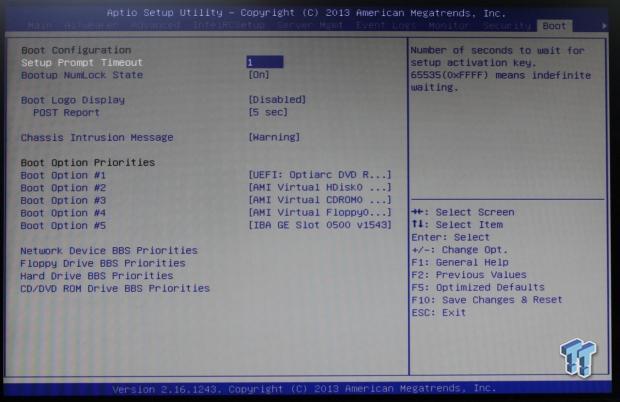
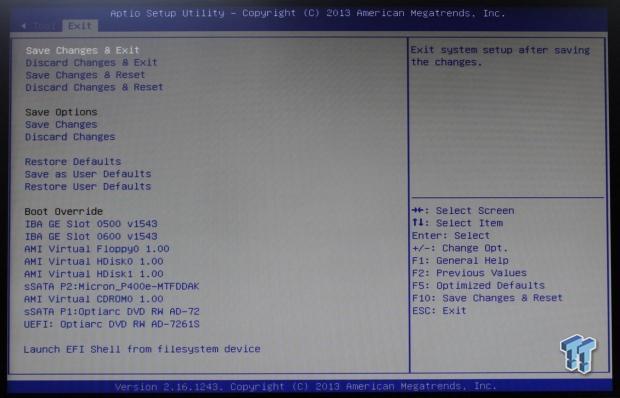
The BIOS for this workstation is typical so we will only show key BIOS screens.
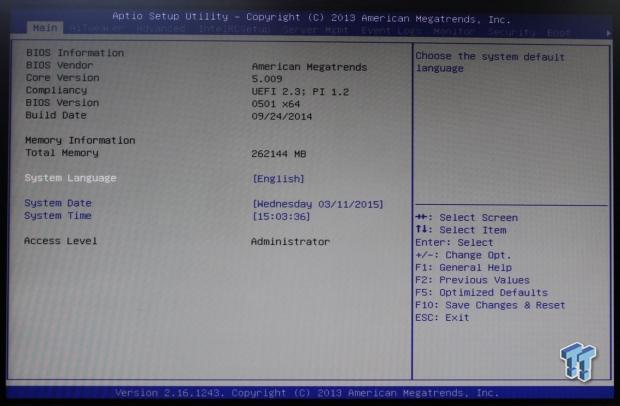
This is the main BIOS screen you see when you first enter the BIOS.
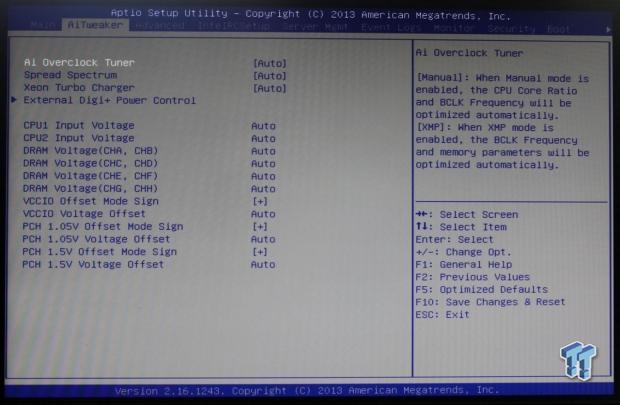
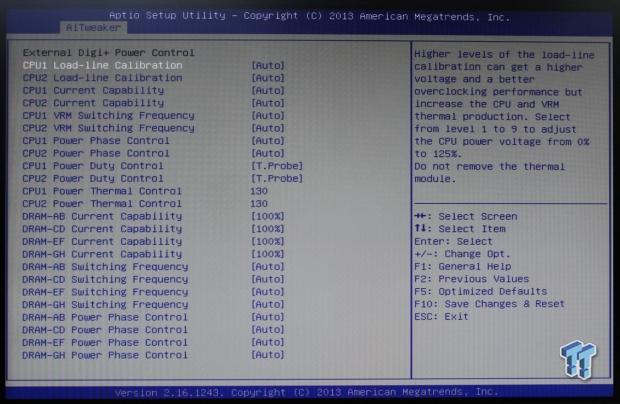
The Z10PE-D16 does allow for overclocking which is simple to do. Simply set the AI Overclock Tuner to "manual" and adjust the BCLK to 104, which is about max for Xeon CPUs used on this board.
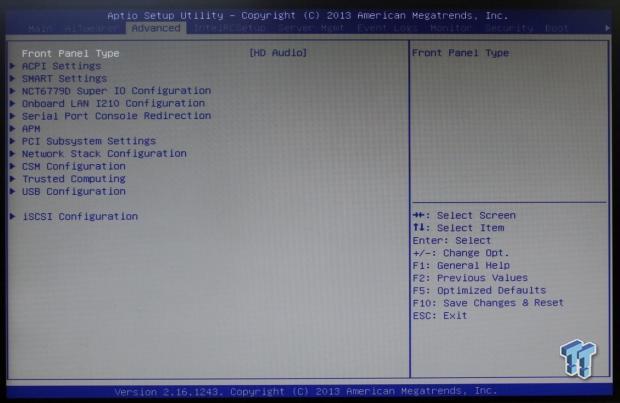
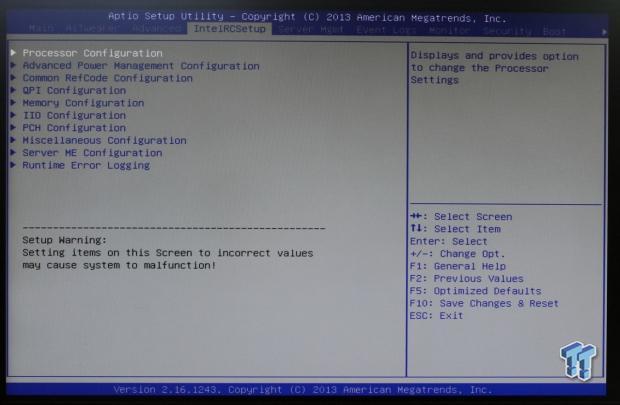
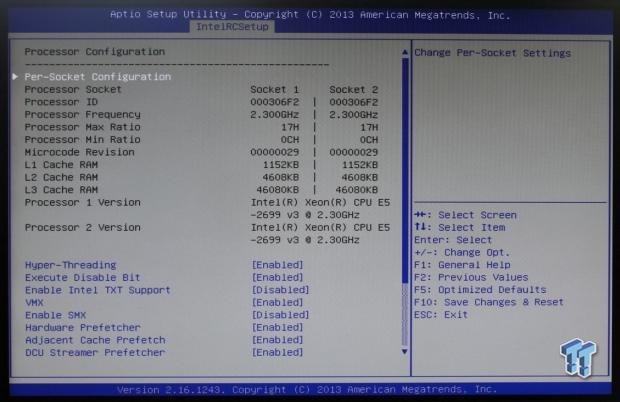
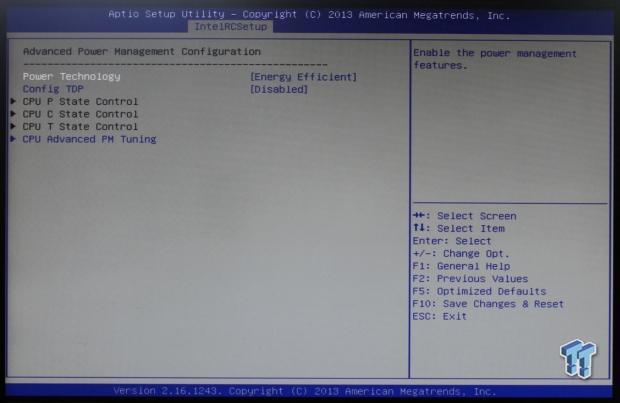
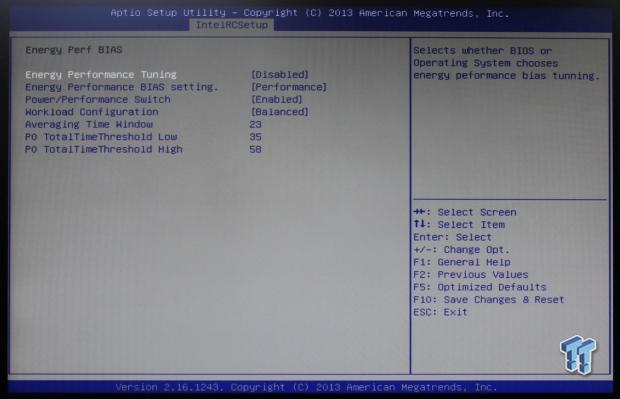
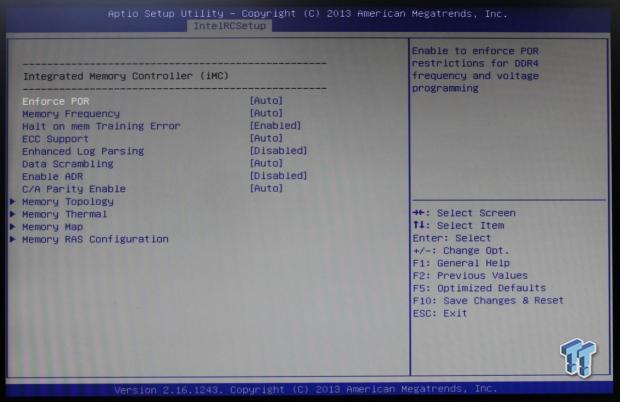
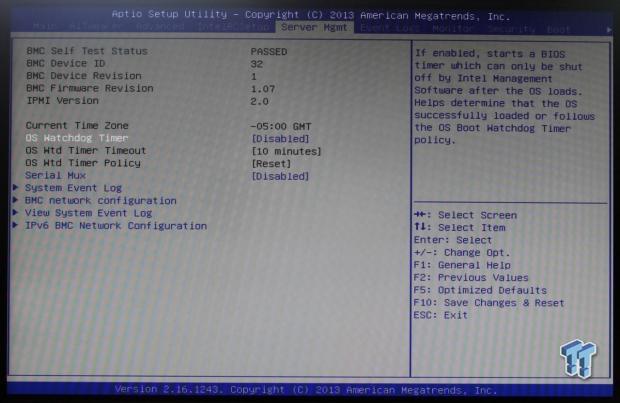
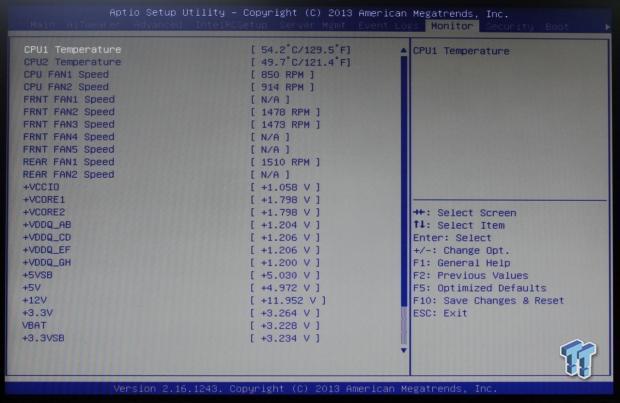
Remote Management
To get remote access up and running, enter the BIOS and head over to the server management tab. Move on down to the BMC LAN configuration tab. This will show the IP address used for remote access.
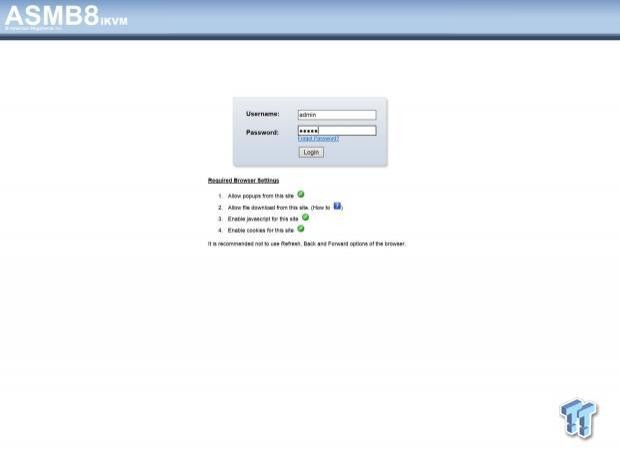
Enter this IP address into your browser and you will see the login page. Log in using:
Username: admin
Password: admin
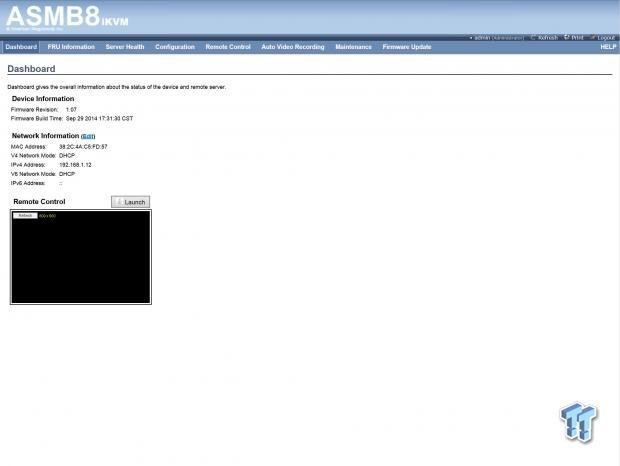
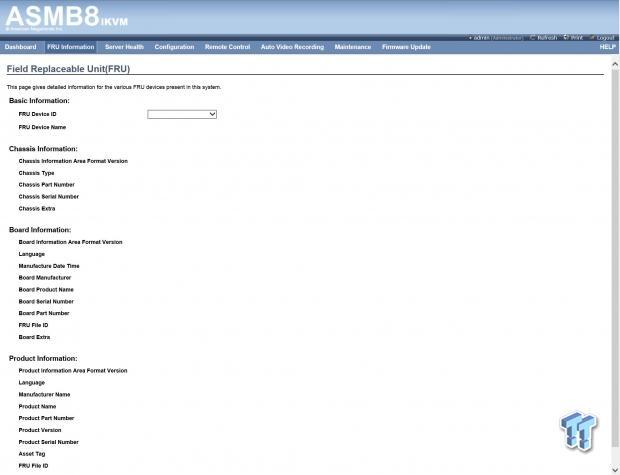
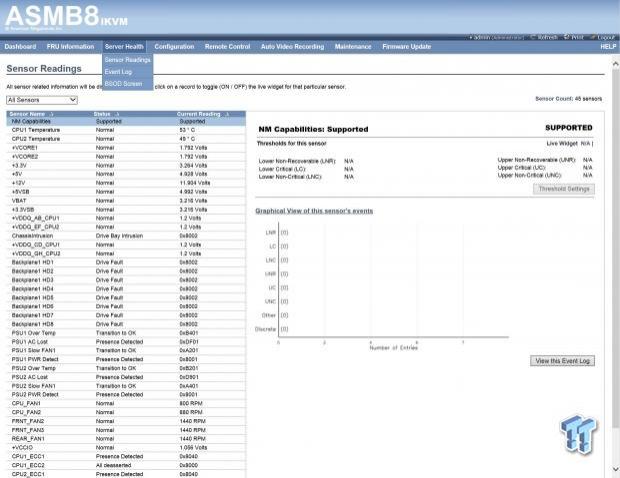
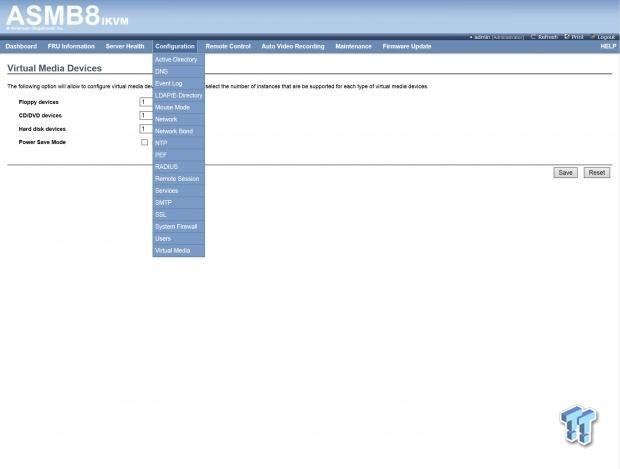
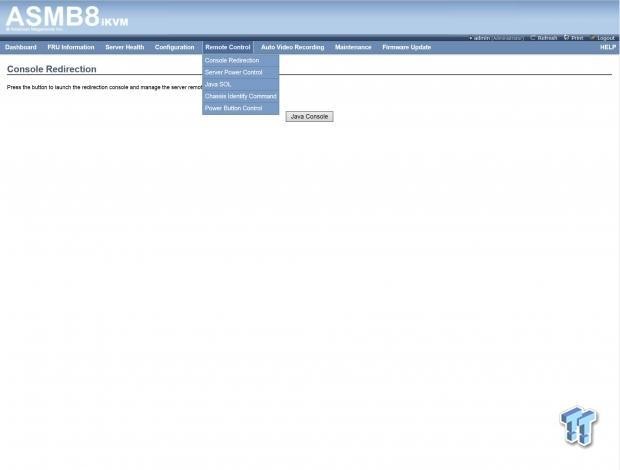
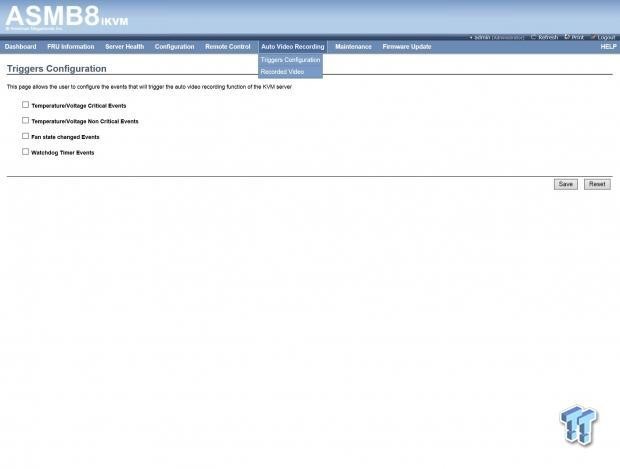
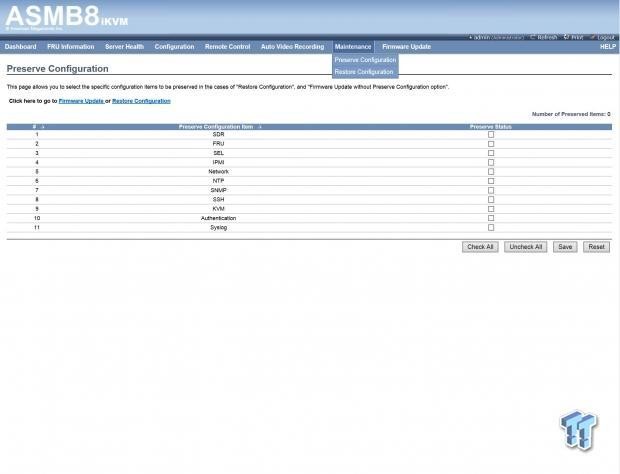
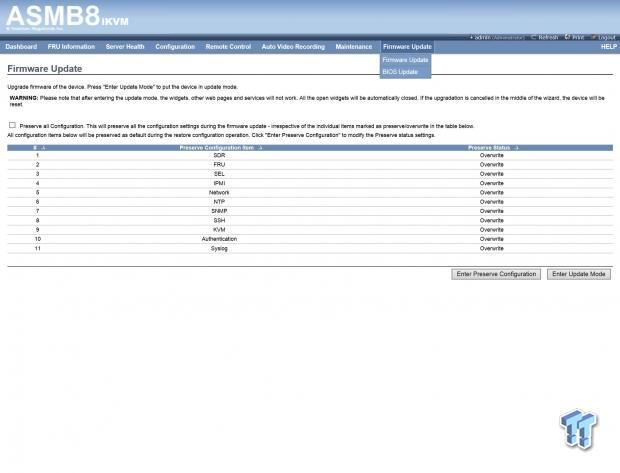
As a best practice, Administrative users should change factory default Username/Password logins before connecting any new server to their network. The rest of the screens are typical for ASUS remote access so we will just show the screens here.
Software
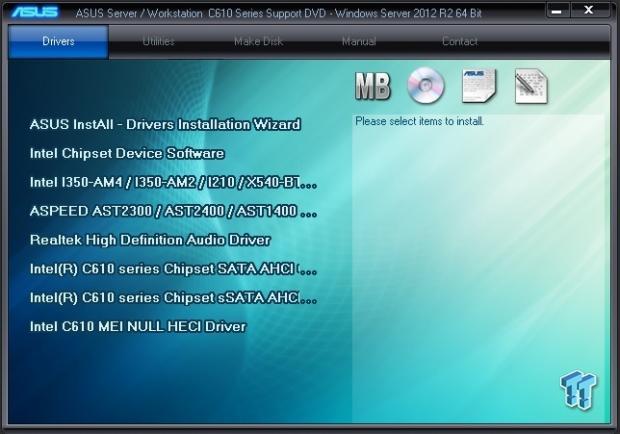
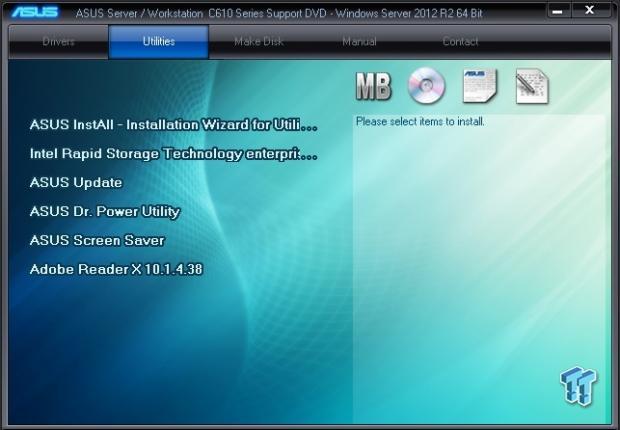
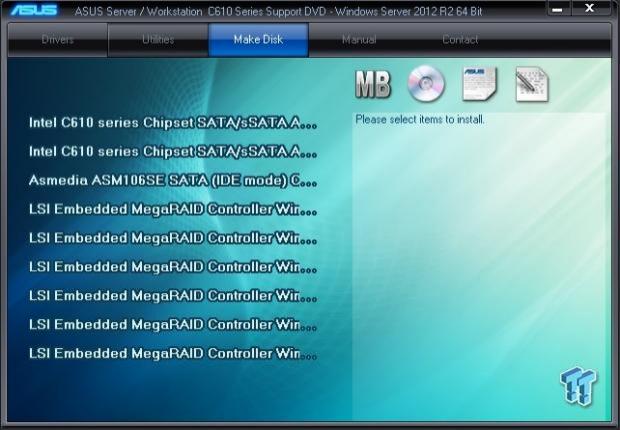
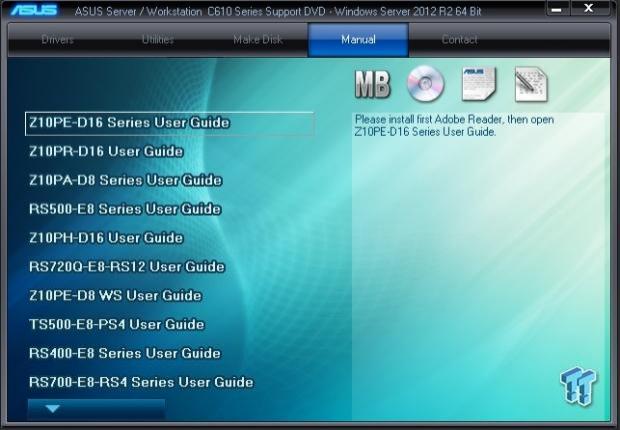
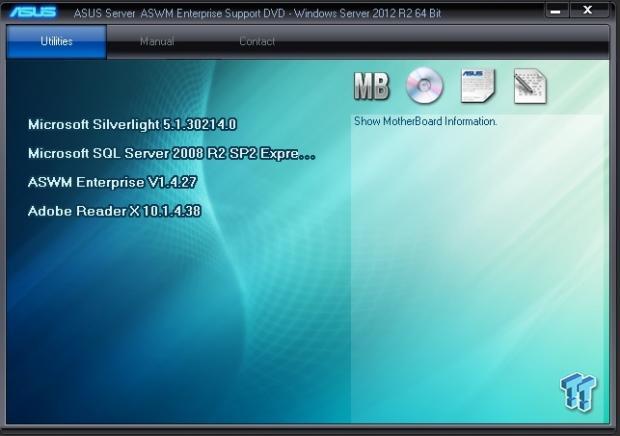
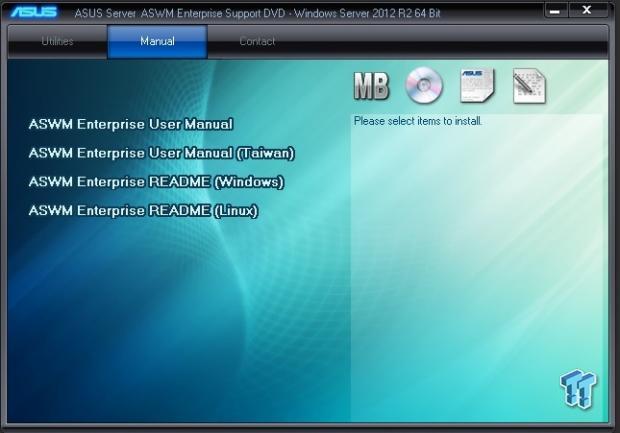
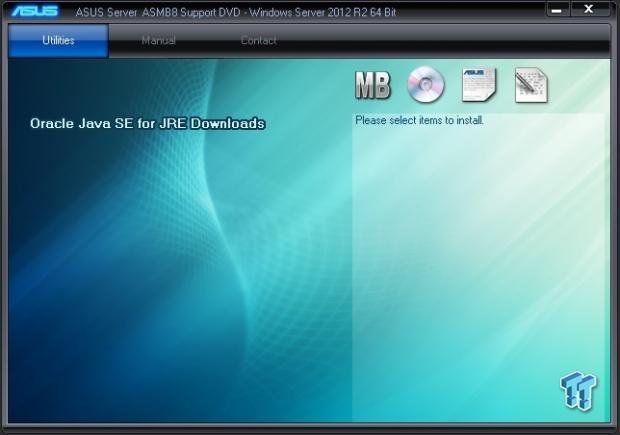
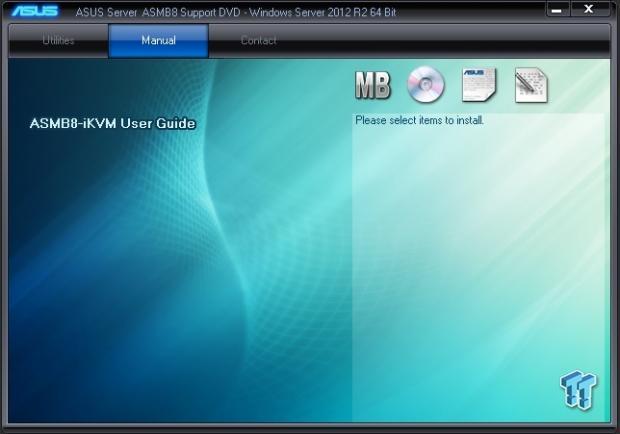
The supplied DVDs provide drivers and manuals for the workstation. These are:
- S584 - ASMB8 Support DVD Rev 5.0
- S593 - ASWM Enterprise SDVD Durian Edition Rev 12.0
- S594 - C61x Server Support DVD Rev 14.0
- S594 - C61x Server Support DVD Rev 14.0 driver disks provides the driver to get you board up and running
Disk #2
S593 - ASWM Enterprise SDVD Durian Edition Rev 12.0
Disk #3
S584 - ASMB8 Support DVD Rev 5.0
Test System Setup and Overclocking
Test System Setup
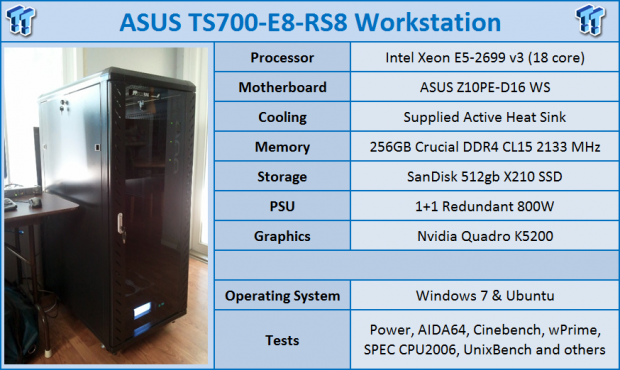
We would like to thank ASUS, INTEL, Crucial, SanDisk, NVIDIA, SPEC, Yokogawa and AIDA64 for their support in providing parts for our test system.
For tests that we ran, we used default BIOS settings.
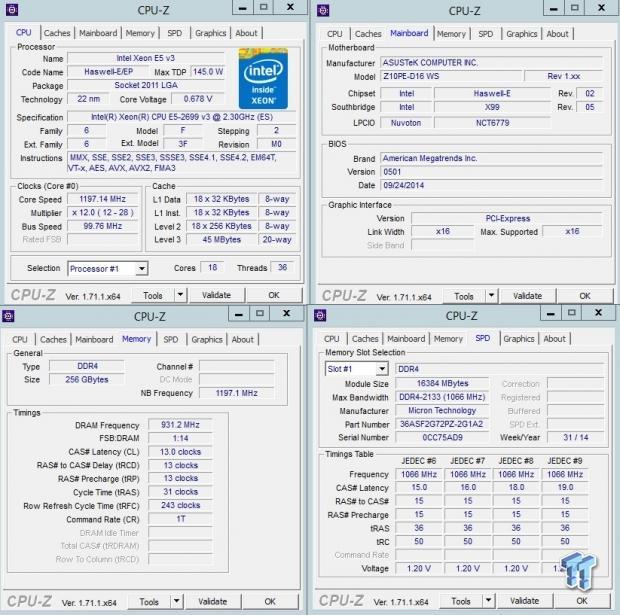
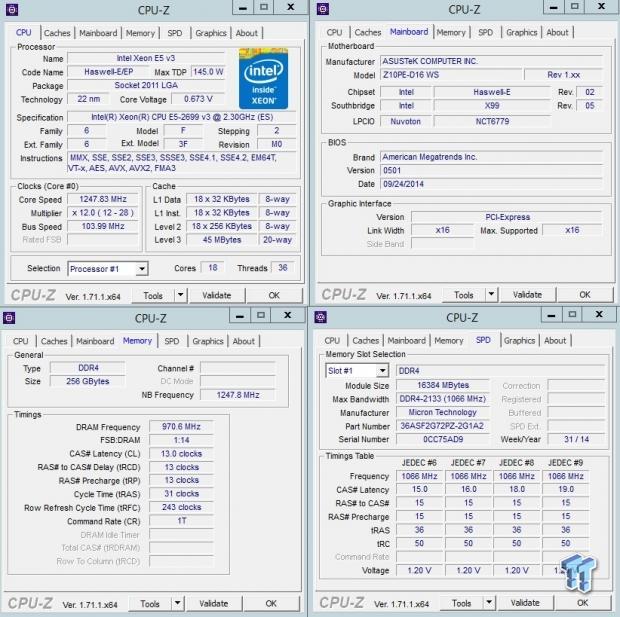
This is the CPUz screen showing the various stats of the Xeon E5-2699 v3 CPU's. These CPU's have a max of 145 watts TDP. These are 18 core CPUs with Hyper threading giving us 36 cores/72 threads to work with. The CPU's have a stock speed of 2.3GHz and turbo's up to 3.5GHz. Features of the E5-2699 v3 processors are:
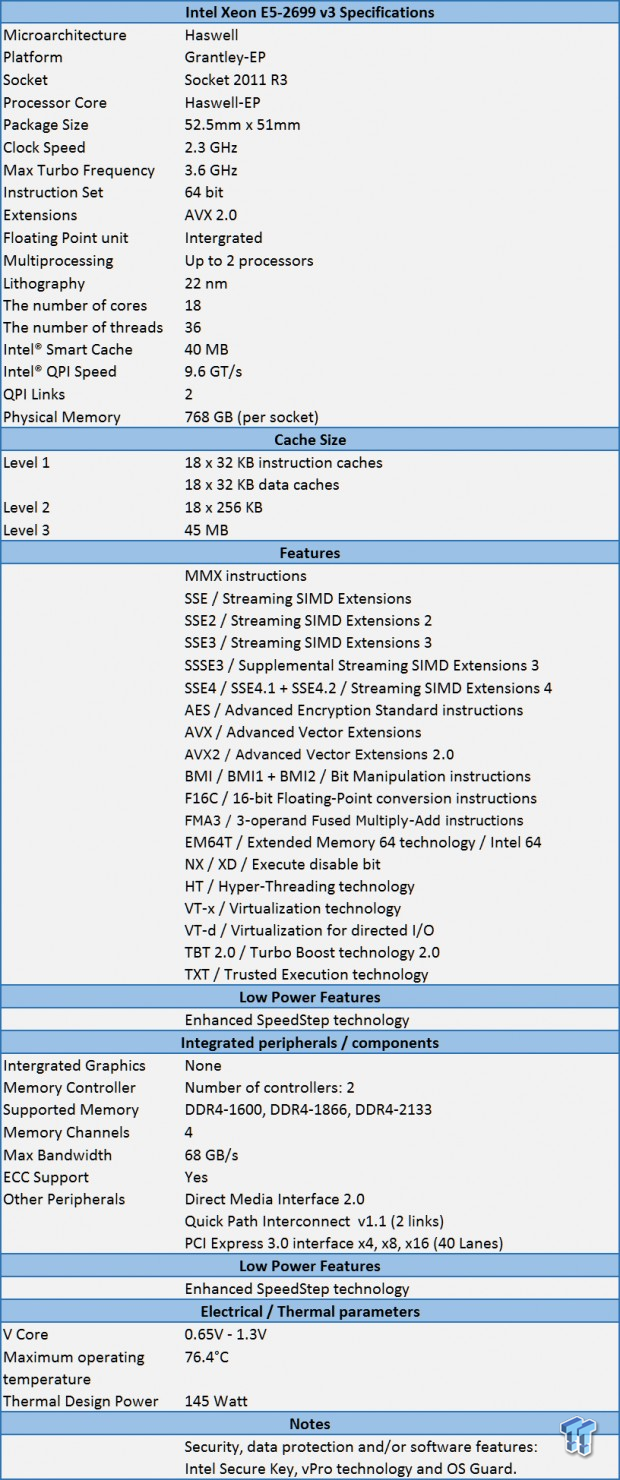
The Intel Xeon E5-2699 v3 processors are very powerful CPU's that are perfect for a workstation like the ASUS TS700-E8-RS8. They have good stock speeds and can turbo up to an impressive 3.5GHz.
Depending on your needs, we would also recommend Intel Xeon E5-2687w v3's which are more workstation oriented processors. They do have a higher base speed and would provide faster single threaded performance. For workloads that are more multithreaded oriented, the E5-2699 v3's are hard to beat.
Many features like VT-x and VT-d can come in handy if you plan to use VM's on the system. Virtualization (VT-x) Features lower entry/exit latency, which reduces VMM overhead and increases overall virtualization performance. VM control structure (VMCS) shadowing enables efficient nested VMM usages such as manageability and VM protection. Advanced Vector Extensions (AVX) 2.0 has also been updated to AVX2 which now uses 256-bits floating point SIMD instructions. This will allow you to use up to twice the amount of packed data with a single instruction. Turbo and AVX Improvements will automatically allow processor cores to run faster than the rated speed and AVX frequencies if they are operating below power, current and temperature specification limits.
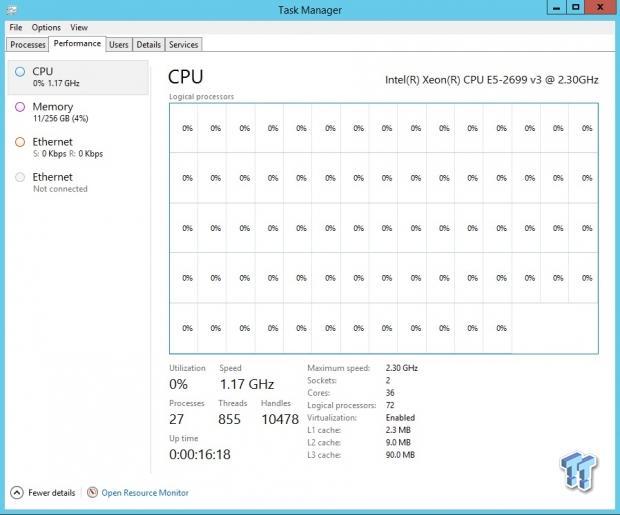
Here we see the task manager showing all 72 threads provided by the E5-2699 v3's. This is a massive amount of processing power packed into these CPUs.

In our tests, we will be using the new Crucial DDR4 memory, which has a speed of 2133 MHz, and rated at CL15. We will use 8x 16GB sticks of these kits that will bring us to 128GB of RAM. We have already taken a look at these memory kits which you can find here: Crucial DDR4-2133 DRx4 RDIMM Memory Review - Testing up to 256GB
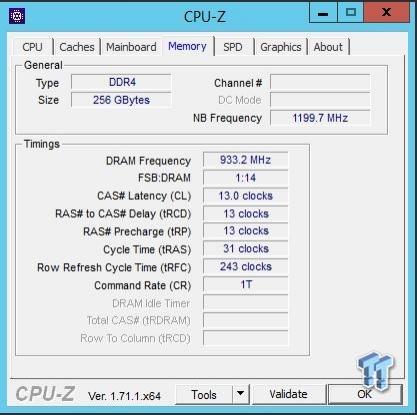
Here we can see the timings of the Crucial DDR4 memory that we will be using in our tests.
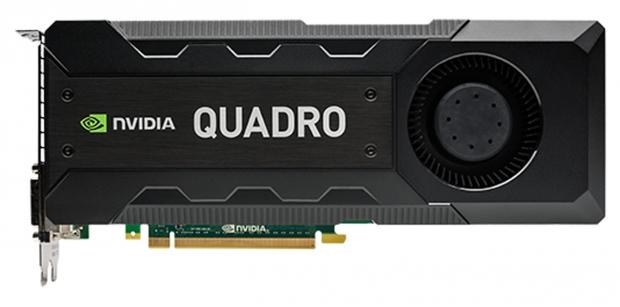
We just received an NVIDIA Quadro K5200 for our workstation reviews. The K5200 and other NVIDIA video cards allow it to be certified to run many key professional independent software vendor (ISV) applications, including Adobe, Autodesk, Dassault, PTC, SolidWorks, Avid, and Siemens.
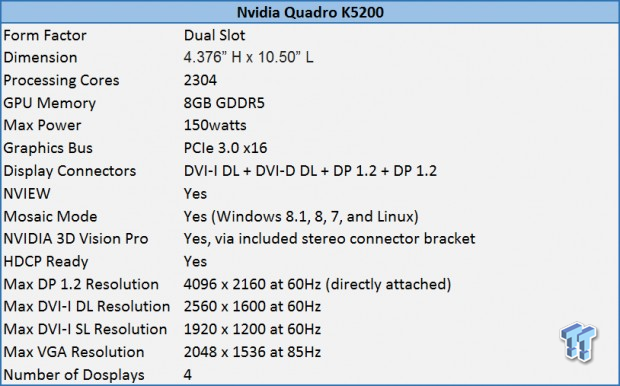
The main specification list for the NVIDIA Quadro K5200, are shown here. The K5200 is a powerful workstation video card and is able to run demanding applications and the ability to use OpenCL and Cuda applications on the P900.
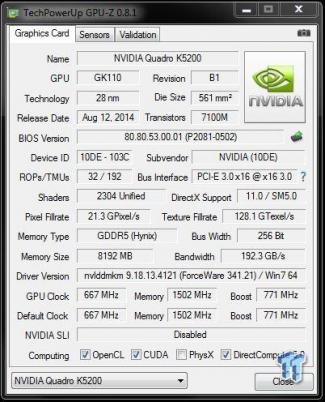
Looking at the GPUz screenshot for the K5200 gives us a full detailed breakdown of the specifications.
Overclocking
The ASUS Z10PE-D16 WS motherboard also allows for overclocking. Overclocking the D16 is simple, enter the BIOS and move over to the Ai Tweaker menu. Select Ai Overclock Tuner and set it to manual. This will unlock a menu that allows you to enter the BCLK you would like to change. We used a BCLK of 104 here; most CPUs cannot go higher from what we hear.
We will run all of our tests at default BIOS settings and then again with the OC set to 104 BCLK. Let us move forward now with testing the ASUS TS700-E8-RS8 Workstation. We will show test results from actual workstations we have tested and not just motherboards. Workstation load outs can affect scores vs motherboards that have far less options installed. We will also keep this on same socket setups so to not mix up processor classes.
System and CPU Benchmarks
CINEBENCH R15
CINEBENCH R15 is a real-world cross platform test suite that evaluates your computer's performance capabilities. CINEBENCH is based on MAXON's award-winning animation software CINEMA 4D, which is used extensively by studios and production houses worldwide for 3D content creation.
The test scenario uses all of your system's processing power to render a photorealistic 3D scene (from the viral "No Keyframes" animation by AixSponza). This scene makes use of various algorithms to stress all available processor cores.
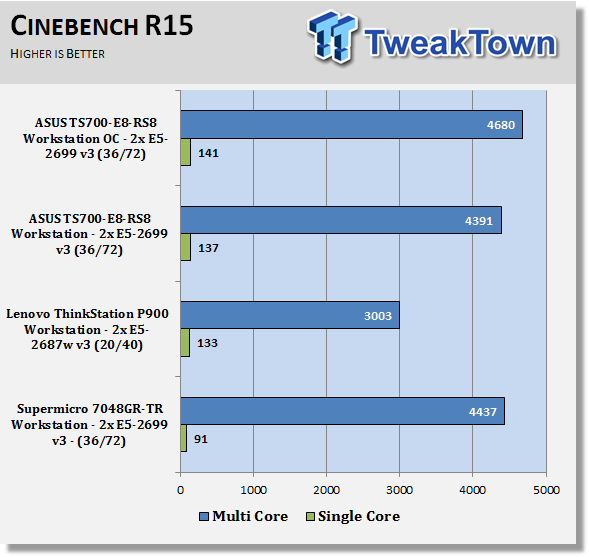
Number of cores/threads and base speed of the CPUs affect the scores for Cinebench R15. Without any overclock adjustments, the Z10PE-D16 performs very good, apply the overclock and it takes the lead.
wPrime
wPrime is a leading multithreaded benchmark for x86 processors that tests your processor performance. This is a great test to use to rate the system speed; it also works as a stress test to see how well the system cooling is performing.
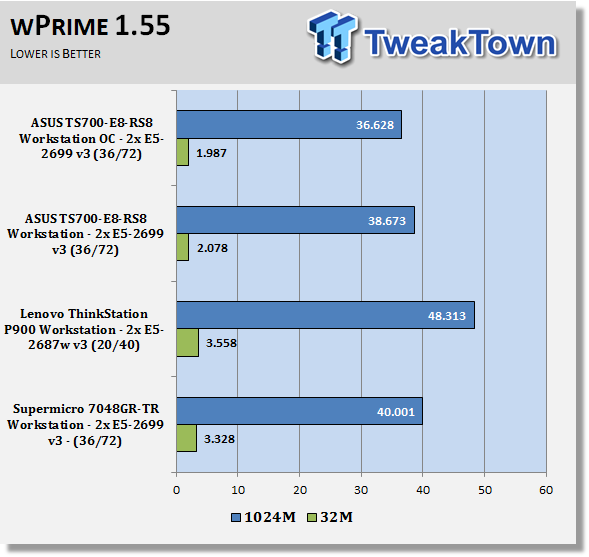
Just like in the CINEBENCH R15 scores, wPrime shows similar results, in this, the Z10PE-D16 take the lead again. Stock settings or overclocking this motherboard is showing to be very powerful.
Memory Benchmarks
AIDA64
AIDA64 memory bandwidth benchmarks (Memory Read, Memory Write, and Memory Copy) measure the maximum achievable memory data transfer bandwidth.
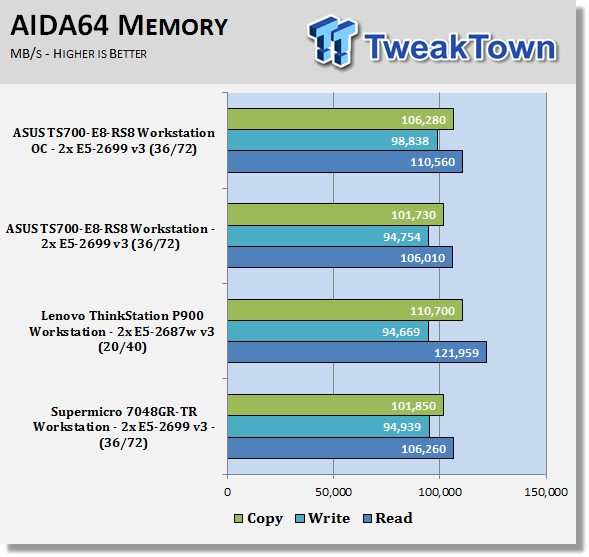
AIDA64 memory tests show the Z10PE-D16 using Quad-Channel memory has good memory bandwidth. It is showing to be very strong, but has a hard time against the E5-2687w v3's, which have a higher clock speed.
Linpack
Intel Optimized LINPACK Benchmark is a generalization of the LINPACK 1000 benchmark. It solves a dense (real*8) system of linear equations (Ax=b), measures the amount of time it takes to factor and solve the system, converts that time into a performance rate, and tests the results for accuracy.
Linpack is a measure of a computer's floating-point rate of execution ability and measured in GFlops (Floating-point Operations per Second), 10 billion FLOPS = 10 GFLOPS. Linpack is a very heavy compute application that can take advantage on the new AVX2 instruction. As it puts a very high load on the system, it is also a good stress test program.
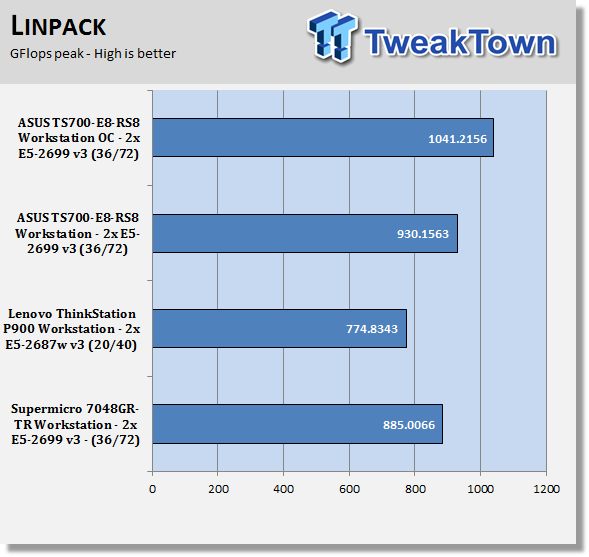
We think this is one test where the Z10PE-D16 really shines. Overclock or not, this board is showing the highest bandwidth numbers we have seen in the lab going over 1,000 GFlops.
System Benchmarks
Geekbench
Geekbench 3 is a processor benchmark that uses single-core and multi performance simulating real-world scenarios.
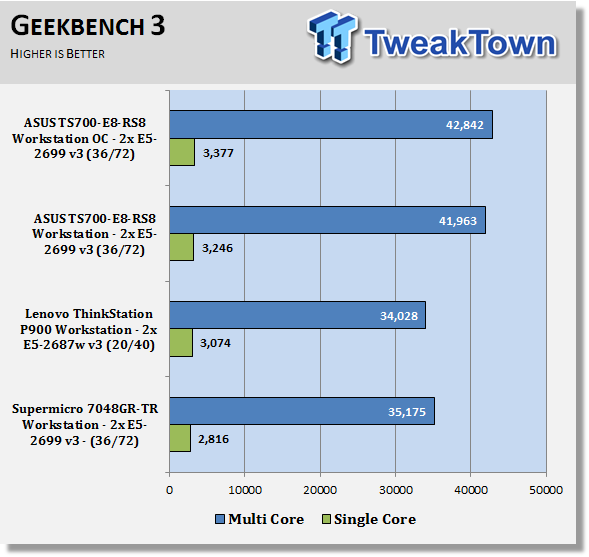
In Geekbench, we see strong scores in both single and multi-threaded scores. Just like in the past benchmarks, we are again seeing very strong numbers for the Z10PE-D16.
PCMark8
PCMark 8 is the latest version in the series of PC benchmarking tools by Futuremark. It is fully compatible with Windows 8, and can be run under Windows 7.
SPECwpc
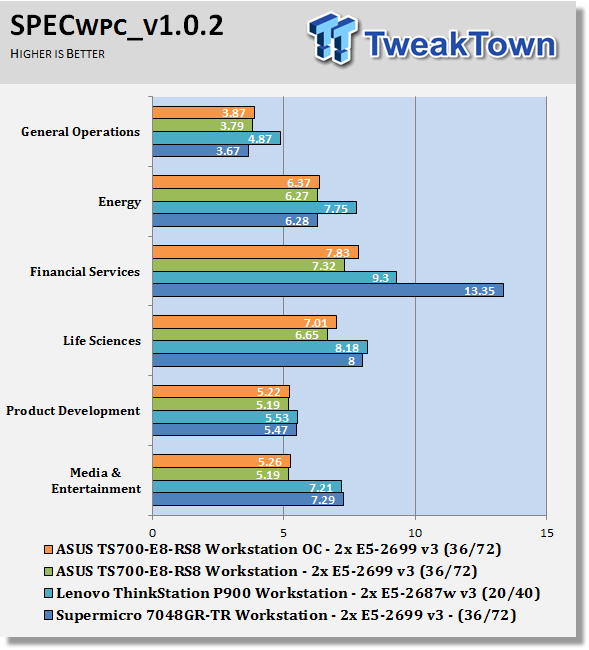
Again, we see impressive results with SPECwpc. Some of these tests rely on storage devices to load files. The results from this test are rather strange compared to the past tests, the Z10PE-D16 holds its own very well, but it is not as strong as other systems we tested.
UnixBench 5.1.3 and SPEC CPU2006v1.2
UnixBench
UnixBench has been around for a long time now, and is a good general-purpose bench to test on Linux based systems. This is a system benchmark, and it shows the performance of single threaded and multi-threaded tasks.
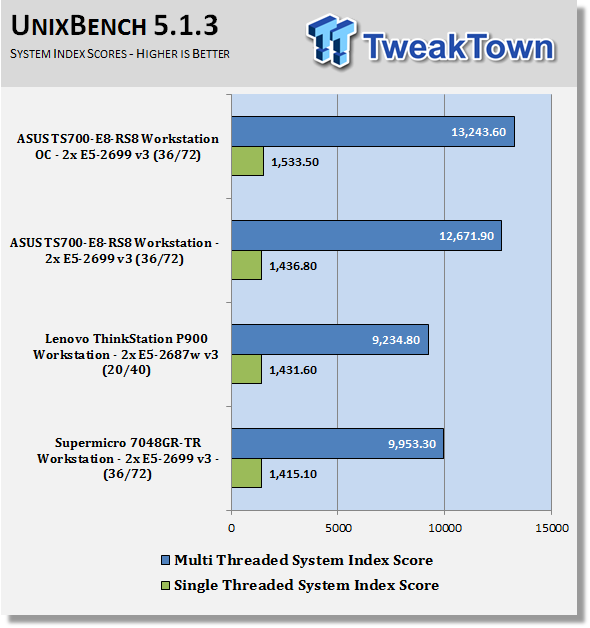
This shows the system indexes after a complete UnixBench run. Here, we get an idea of how much performance gains we get using multi-threaded applications. However, many applications use single threaded, so this number is really the base, and a higher clock speed will increase both indexes.
SPEC CPU2006v1.2
SPEC CPU2006v1.2 measures compute intensive performance across the system using realistic benchmarks to rate real performance.
In our testing with SPEC CPU2006 we use the basic commands to run these tests.
Runspec --tune=base --config=tweaktown.cfg then int or fp
To do multi-threaded we add in --rate=72 on the TS700-E8-RS8.
When SPEC CPU first came out these tests could take up to a week to run, but as computers become faster, our tests can take up to four days for a full run.
The user can do many thing to effect the results of CPU2006 runs, such as compiler optimizations, addons like Smartheap and different commands used in to start the tests.
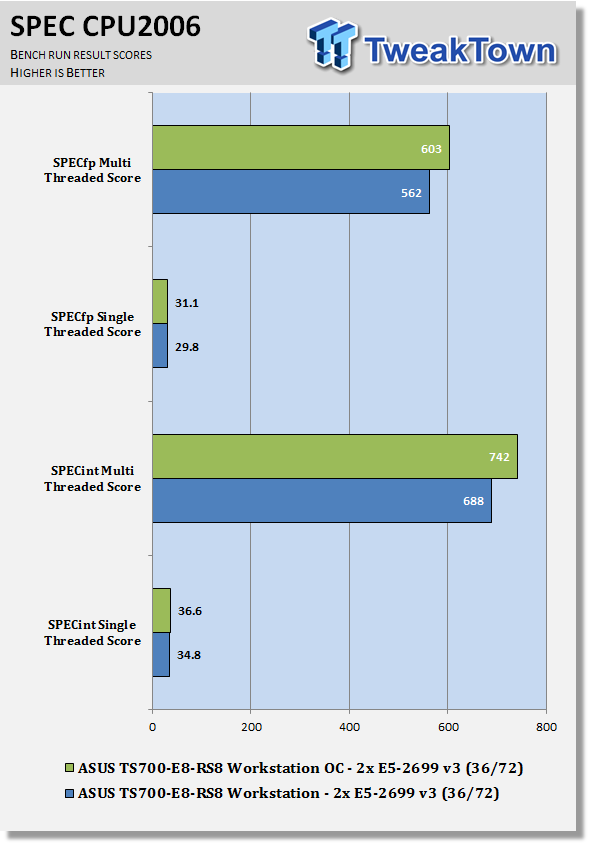
Here, you can see the SPEC scores after full runs for Integer (int) and Floating Point (fp) tests. Single core runs show how fast (speed) a CPU can perform a given task. In the multi-core runs, we set SPEC CPU2006v1.2 to use all threads, and this is a measure of the throughput of the system.
The additional core/threads of this system has a huge impact on performance in these tests and really shows the amount of horse power that a dual socket system has over a single socket board
Single threaded results are still very important, but when you need lots of those to run moving to a dual socket setup is the way to go.
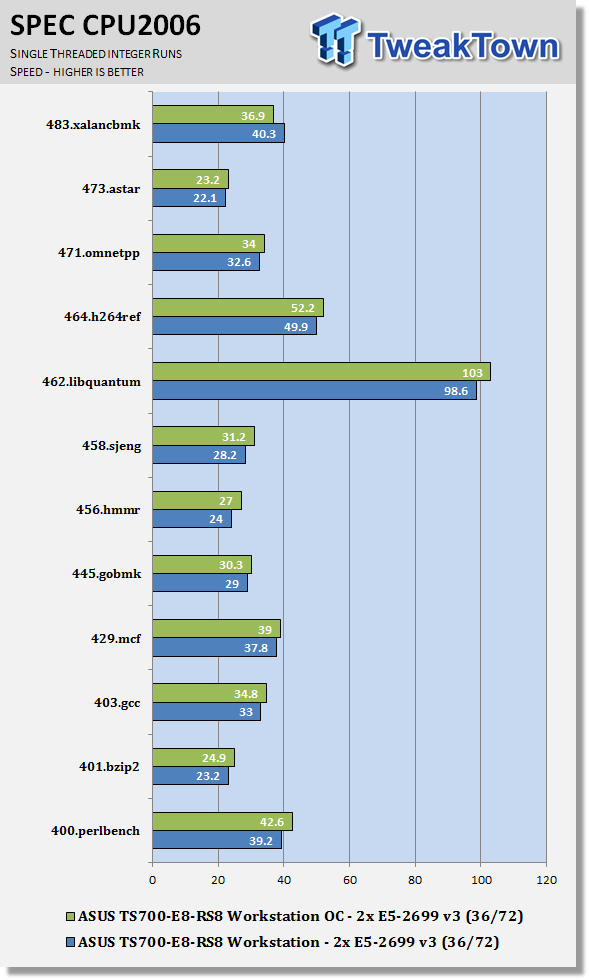
Looking at the results of single threaded integer runs, we can get an idea of speed at which the Intel Xeon E5-2699 v3's can crunch through the different integer tests. Not all CPU's are equal here, and ones that have a higher speed will perform these tests faster. In this case, this is the stock speed of the Intel Xeon E5-2699 v3. Naturally, using an overclocked system or CPU's with a higher stock speed will generate higher results.
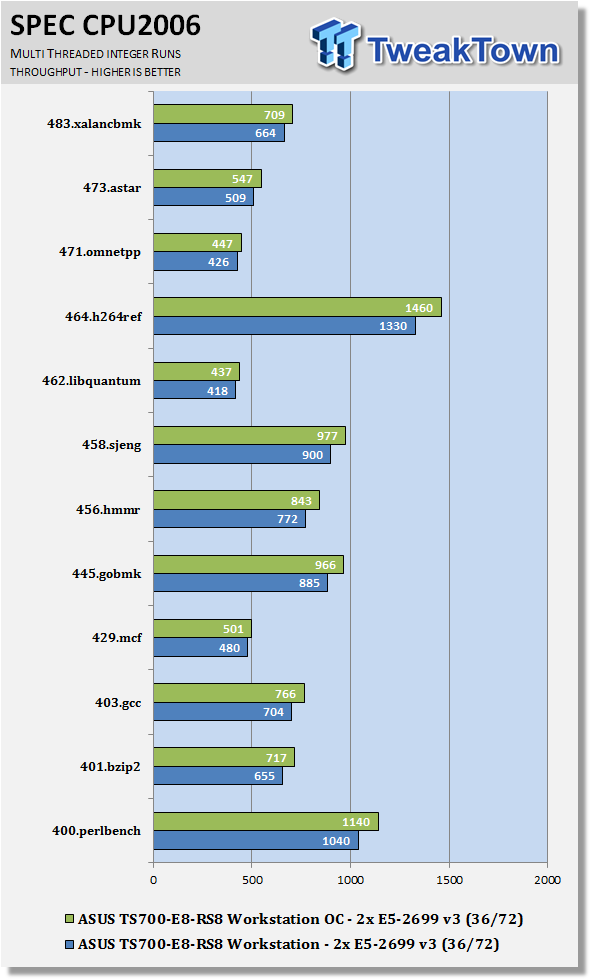
Now we run the test using all 72 threads of the Intel Xeon E5-2699 v3's, to measure the throughput of the system. In this test, more cores/threads will have a greater effect on the outcome.
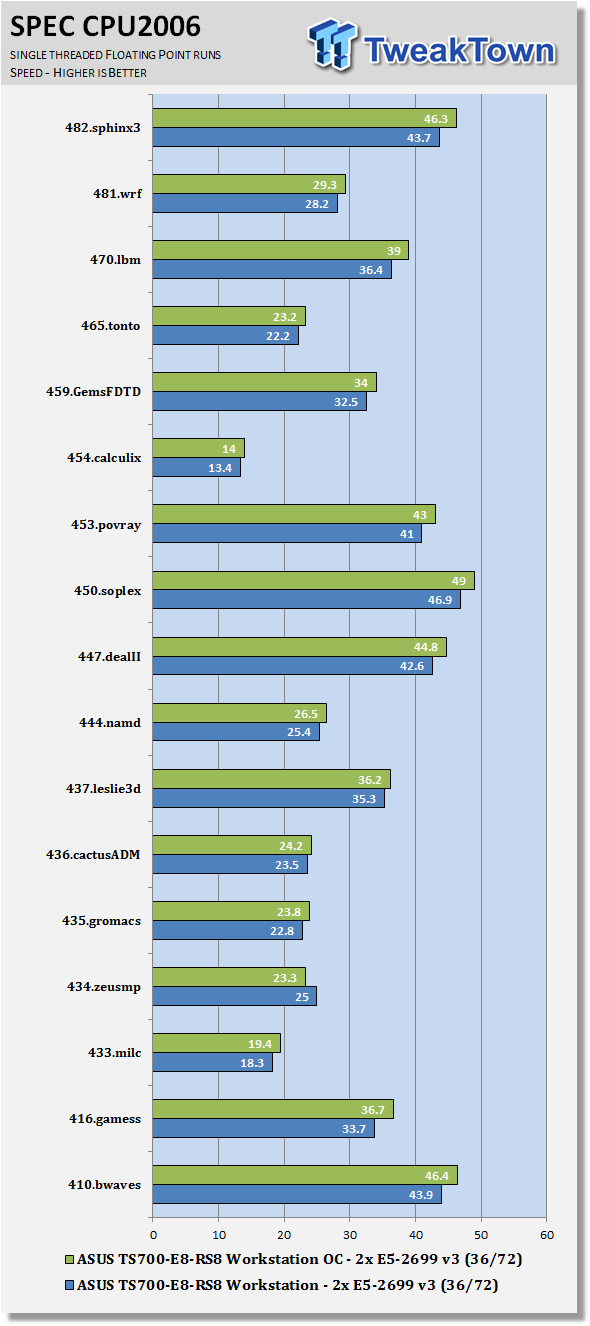
Just like the integer tests, we now run the floating-point tests in single (speed) mode. We do see strong results with the Intel Xeon E5-2699 v3's in this test.
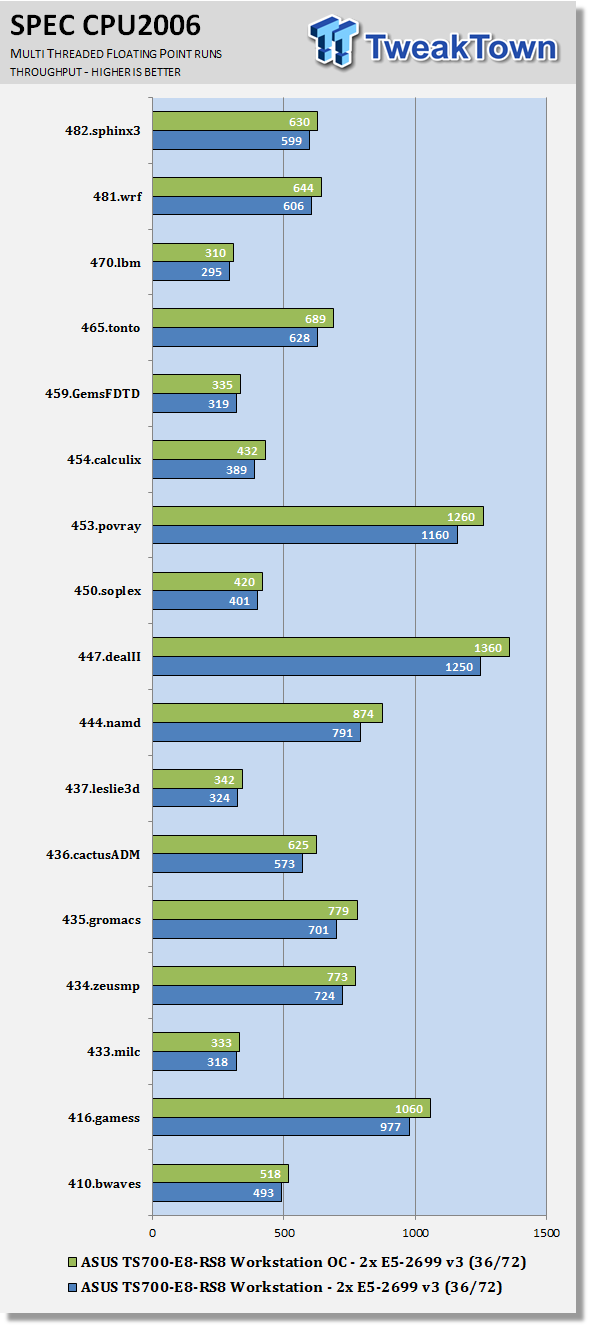
Here, we see the results of the multi-threaded floating-point run that uses all 72 threads of the Intel Xeon E5-2699 v3's. Like the multi-threaded integer test, more cores/threads will have a greater impact on the test. Just the single threaded FP runs, we see a strong advantage with using Intel Xeon E5-2699 v3's in this test.
Power Consumption and Final Thoughts
Power Consumption
We have upgraded our power testing equipment and now use a Yokogawa WT310 power meter for testing. The Yokogawa WT310 feeds its data through a USB cable to another machine where we can capture the test results.
To test total system power use, we used AIDA64 Stability test to load the CPU, and then recorded the results. We also now add in the power use for a server from off state to hitting the power button to turn it on and take it all the way to the desktop. This gives us data on power consumption during the boot up process.
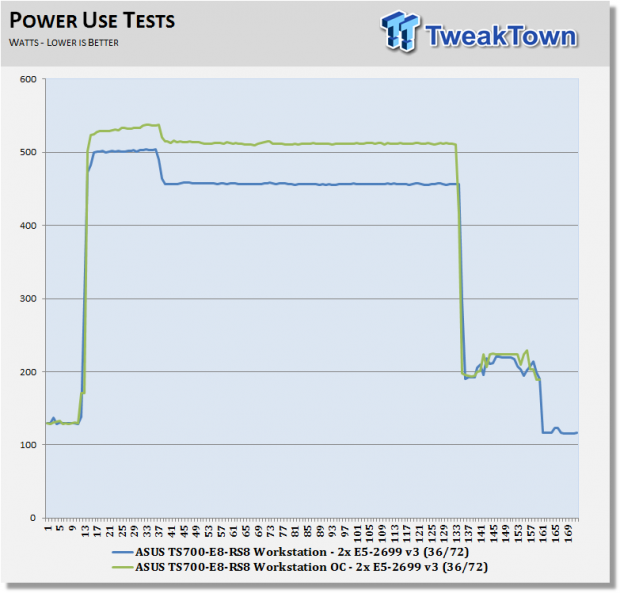
The ASUS TS700-E8-RS8 Workstation peaks out at close to 540 watts when put under full load, which is about average for systems like this. Idle power use is in the range of ~120 watts which is a bit high. Overclocking the system adds ~50 watts of power used during our tests and on idle the system settles down to about the same vs a stock setup.
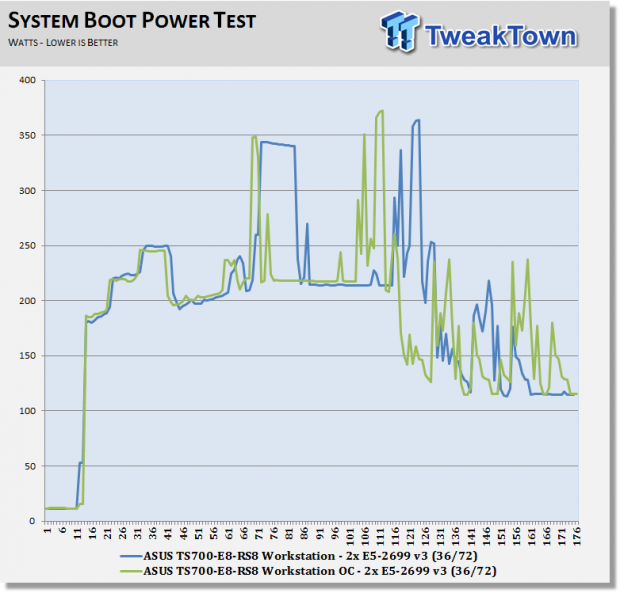
Booting up the ASUS TS700-E8-RS8 Workstation peaks out at ~370 watts then quickly settles down to ~120 watts sitting on the desktop. There is not much difference here between a stock and overclocked system. Dual CPU systems do take a little longer to boot up vs a single socket system, the ASUS TS700-E8-RS8 Workstation takes ~146 seconds to complete the boot up with what we have equipped.
Final Thoughts
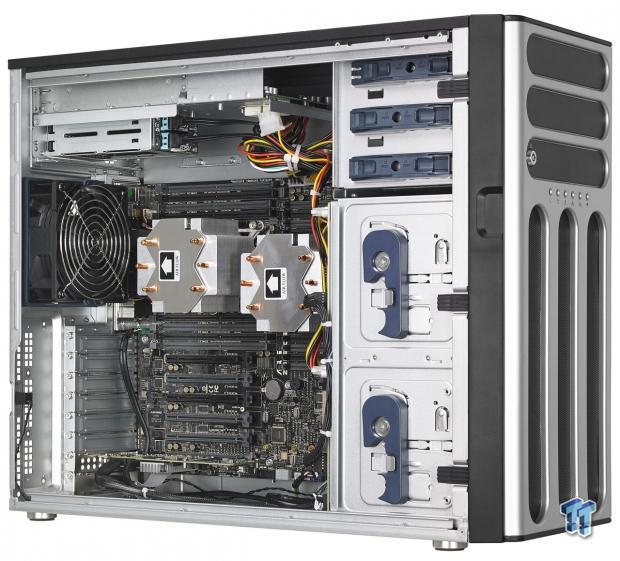
Over time, we have built a large number of workstations here in the lab and one thing we like is barebones kits. These kits save us a lot of time figuring out what motherboards fit what cases and all the other extra components that you might want to add to outfit your workstation.
One of the first things that we take into consideration is what the case looks like. Does it provide the storage bay options that we are looking for, and does it include power supplies. Looks are a matter of personal taste, but the TS700-E8-RS8 certainly looks stylish with the silver trim. Eight drive bays in the front of the case are rather typical these days, but the additional 2.5" bays in the back we really like. You can install two SSDs here and RAID 0 them together for fast OS installs and not use any of the front bays for this. The dual redundant power supplies are server rated so they should last a good long time. The length of the case is right in that sweet spot at 21.75", not too long to have it hang over the edge of your desk and short enough to provide enough space in the back for cables. It could actually be a little longer to provide a little more space inside the case for installing components.
The Z10PE-D16 WS motherboard is an excellent choice for this workstation, performance is high, and it has plenty of storage options. This board is very much like the ASUS Z10PE-D8 WS motherboard that we reviewed earlier. To be able to install a full 16 DIMM's, a PCIe slot had to be left out on the D16. Additional server features were added also such as IPMI, but there is no iKVM on this board. That would have been a nice feature to give you the ability to remotely run workstation farms. You can do this with several different expansion cards though.
Our first thought when we saw the included heat sinks was these are not going to work good enough and would need to be replaced. We were very happy to see that they did perform very well with our CPUs running heavy loads for extended periods. We saw no throttling and temperatures were reasonable, so there is no need to toss these out and spend more dollars on additional heat sinks.
We found cable management with the supplied kit to be sort of a mess, but on the plus side, all drives were connected, which saves a lot of work. Cables that used to connect the media bays are conveniently placed; no extra fuss was needed for these. Most of the cables were nicely secured around the drive bay backplane, but this brings us to the main problem with this kit. The location of the CPU fan headers are in rather hard to reach locations. In order to reach the header at the front of the case, we had to cut the cable ties on the backplane to be able to get our fingers in this tight area. We finally ended up using needle nose pliers and a flashlight to secure it. We also had similar issues with installing the CPU fan header at the back of the case.
Once we had everything installed, we found the ASUS TS700-E8-RS8 Workstation to be a very powerful machine with benchmarks taking the number one spot in many cases. Cooling fans inside the case do not make a lot of noise and do a very good job of keeping everything nice and cool inside. The ASUS TS700-E8-RS8 Workstation Barebones kit is hard to beat; you get everything you need to get this workstation up and running quickly.

