The Bottom Line
Introduction, Specifications, and Pricing
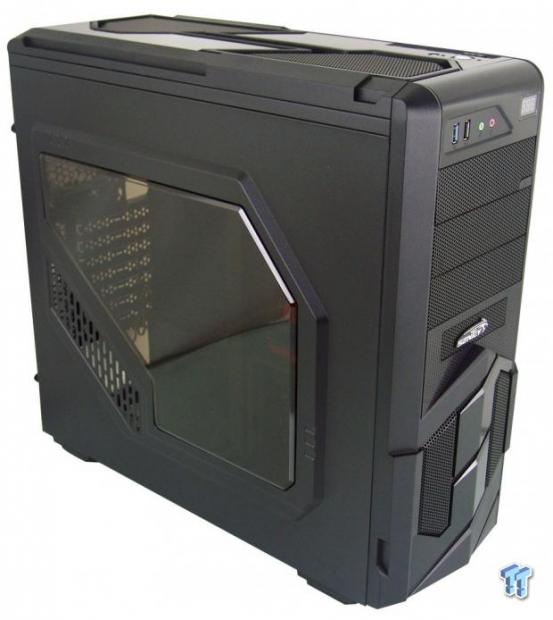
Despite the large amount of cases Sentey has developed over the years, in all of our time here, we have only seen two of their designs to date. It's possible that they may not have liked our review style, or maybe the U.S. market just isn't their targeted area. In all honesty, we can only guess why we haven't seen more Sentey cases. Fortunately, Sentey sent us a third chassis to review not too long ago, and since the packaging shows this is an "Enthusiast Gaming Chassis," we do have some high hopes for this latest submission.
From what we have seen, Sentey is not afraid to go outside of the box when it comes to styling, lighting, and overall aesthetics. Sentey has done everything from curving the chassis for an aerodynamic look to going completely boxed and aggressive with their designs. Today we will have an opportunity to see if Sentey is keeping up with, or even setting the curve in chassis trends. By the time we are done, we will have a defined image of what Sentey is doing in late 2014 and into 2015.
The chassis we are reviewing today is the Sentey Shield GS-6090, which is a mid-tower chassis with a couple of tricks up its sleeve. There is also a cousin to this chassis that offers a completely different aesthetic, but is built on the same main chassis components that can be found in the Seeker GS-6080; however, we will not be discussing that chassis today. Back to the chassis at hand, we may as well get right to it, and see what this aggressively styled mid-tower offers users, and just how well it stacks up to the mainstream competition.
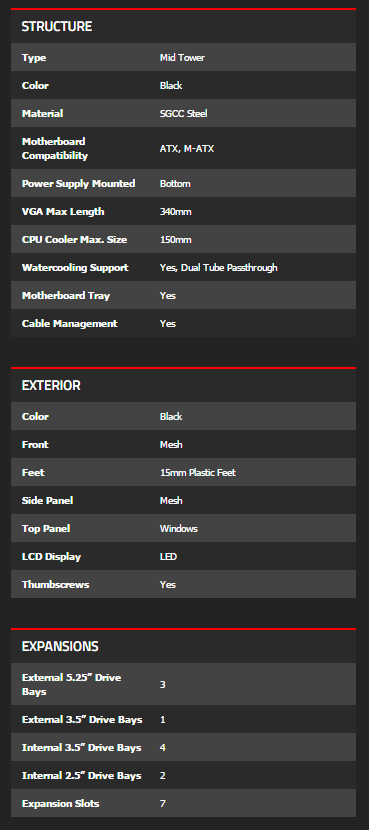
You will find everything there is to know about the Shield GS-6090 in the charts Sentey has provided. The Shield GS-6090 is a black mid-tower chassis made from SECC steel. This chassis is made to take both ATX and Micro-ATX motherboards, and has a bottom mounted PSU. There is only room for 340mm of video card, and only 150mm of CPU height clearance, but the PSU can be as long as it needs to be without causing issues. There is a pair of holes in the back of the chassis to allow water cooling tubes to pass through. It seems there is also a motherboard tray, which is always good, and there is included wire management.
Outside of the chassis, you will find a few surfaces and textures, but all of them are black. First is the mesh present down the front and across parts of the top. The chart also shows mesh on the side, but we have a tinted amber window in our chassis, and not a mesh panel. It appears they have the top and side swapped. Along with textured plastic and the mesh inserts, there is also a fair amount of shiny plastic used to highlight bits and accent the overall design. Along with the 15mm tall plastic feet under the chassis, there is also a LED LCD display on the front as well, which is used to display temperature.
Inside, there is room for a trio of 3.5" drives, and a pair of 2.5" drives, all built into a single removable lower HDD cage. On top of that, there are three external 5.25" bays, one of which offers a stealth bay cover. There is also a lower slot for an external 3.5" device. In the bottom of the ODD cage, there is an adapter that comes out to go to 3.5", but there are also four tabs in that floor section to allow a 2.5" drive to go in there. At the back of the chassis, there are seven break-away style expansion slots, but they do offer a single expansion slot cover to replace one you may have removed on accident.
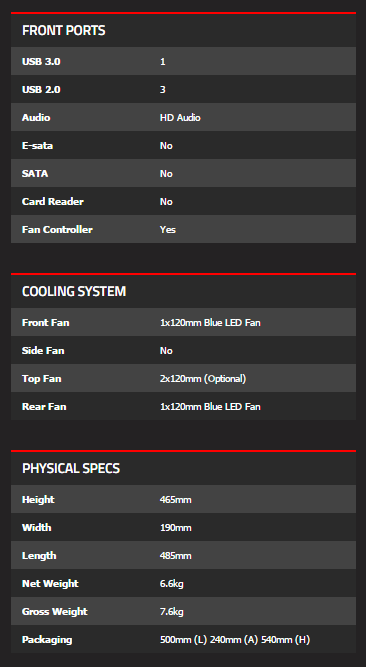
The front I/O offers a single USB 3.0 port, three USB 2.0 ports, and 3.5mm jacks for HD Audio connectivity. There are two sections to this unit; there is one on the front for easy access, and another on the top right. The power and reset switches are located at the top. The power has an LED ring denoting chassis power, while the rest is ringed to denote HDD activity. There is also a two-position fan controller here that is made with two leads on it to connect the pair of fans that ship in this chassis. Both fans included with the chassis are clear 120mm fans, and both are backed with blue LED lighting when powered. As for the physical specifications, feel free to read through those above.
We have had this chassis for three months now, and while we do apologize for the delay in getting to this chassis, we did find something strange. You can easily stop off at Sentey.com and see that this chassis has an MSRP of $69.99, but what is strange is that we can't find this chassis for sale anywhere. We even went through the list of retailers supplied on the Sentey site, and every single location either shows no information on this specific chassis, or in the instance of Amazon, states there is no availability. So, even if you do happen to like what you are about to see in the rest of this review, you probably won't find one to purchase.
Packaging
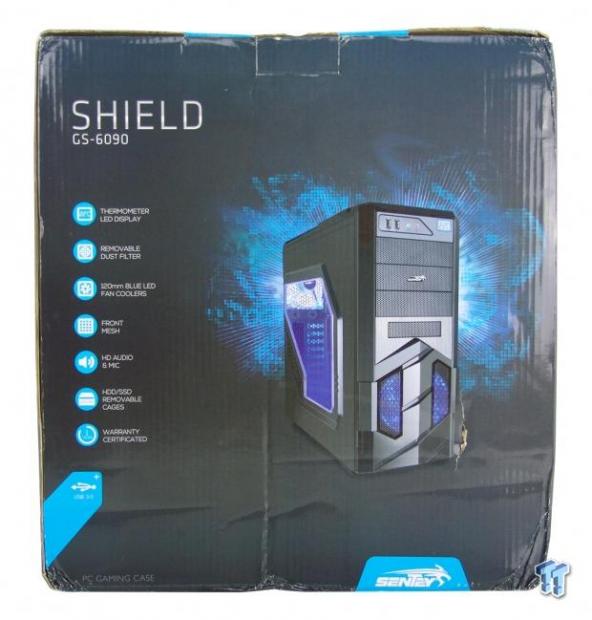
Sentey ships the Shield GS-6090 in this high-end shiny packaging that features a lot of blue. Down the left side is a list of eight things that may inspire you to purchase this chassis, while at the right there is an image of the chassis inside of the box.
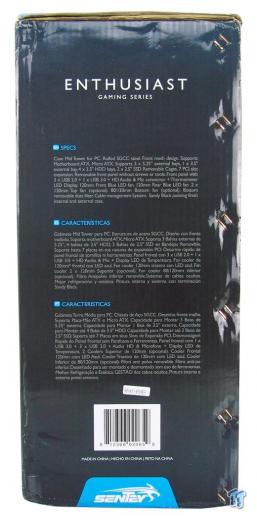
Rather than using specifications charts on the side of the packaging, Sentey has chosen to write the specifications out in paragraph form, so you really need to hunt if you are looking for something specific.
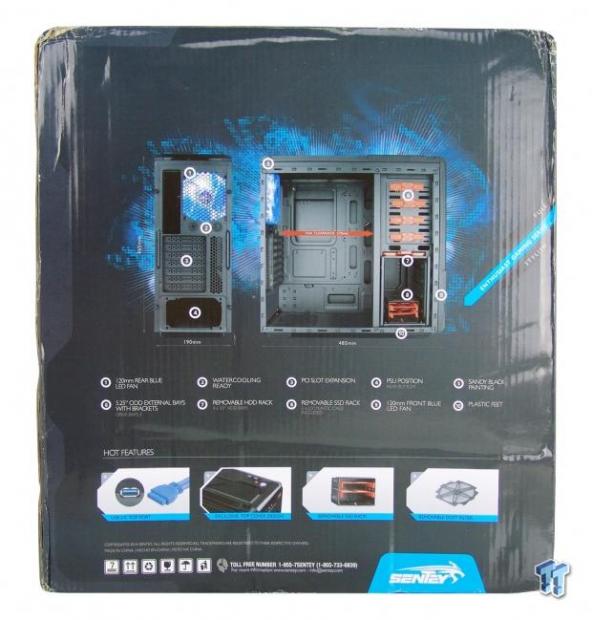
On the back of the box, we find two more images of the chassis with features highlighted on them. Near the bottom, we also see images of four "hot features" in this design.
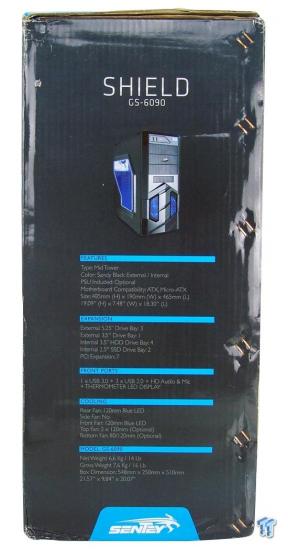
Under the naming and the image of the chassis, this panel repeats some of the features. Here we see the chassis is a mid-tower, it is black, and there is an option for a PSU inside. We also see information on motherboard compatibility, and the size of this chassis.
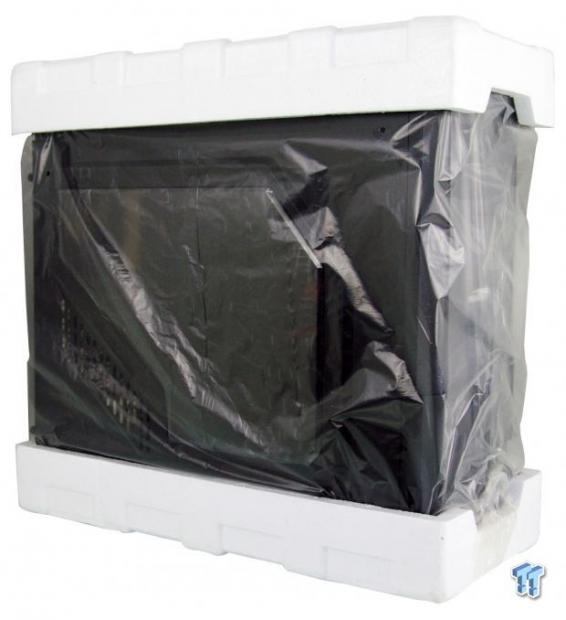
Inside of the box, we find the chassis has an external layer of plastic on the side window, and the entire chassis is also wrapped in a plastic liner; both plastic liners reduce the potential for scratches. To absorb hard knocks like the one evident on the box, Sentey used thin Styrofoam caps to secure the chassis. These caps are effective, and in our instance, the chassis arrived in much better shape than the box leads us to believe it would be.
Sentey Shield GS-6090 Mid-Tower Chassis
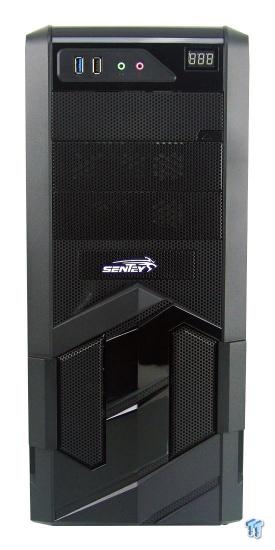
The front of the chassis has a lot of mesh running down the bay covers and into the knot-like design of shapes, angles, and different textures in the plastic. This is not exactly our style, but there are people out there that can appreciate this.
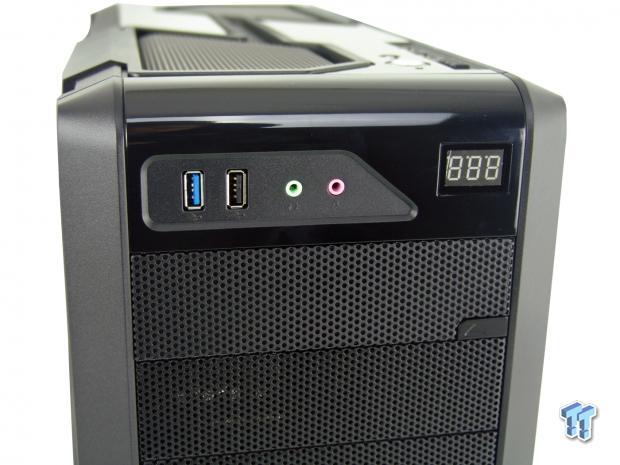
The front of the chassis offers a single USB 3.0 port, and a single USB 2.0 port next to the 3.5mm HD audio jacks. The placement of these ports makes connectivity easily accessible. Off to the right is a display connected to a thermal probe that allows you to keep tabs on whatever you install the probe on.
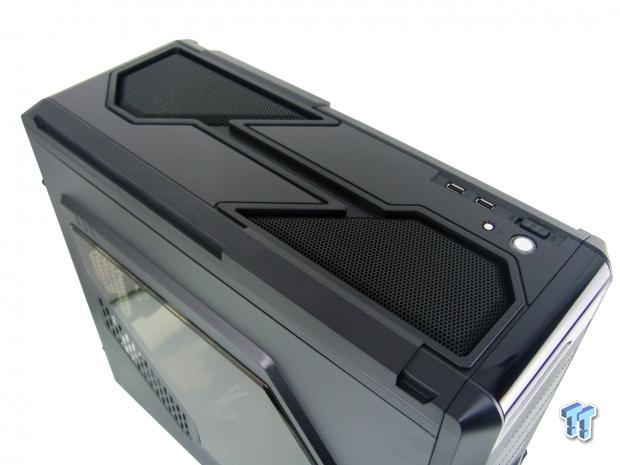
The top of the chassis is a mix of solid plastic sections and mesh inserts shaped to mimic what we saw on the front. We also see the second control panel at the front, off to the right aside.
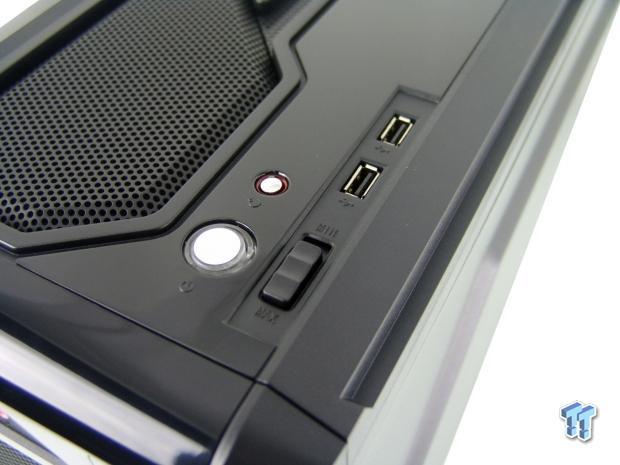
This I/O panel is where the power and reset buttons are found; both buttons are surrounded with a LED ring. At the far right, we see the two-position fan control switch, and a pair of USB 2.0 ports behind it.
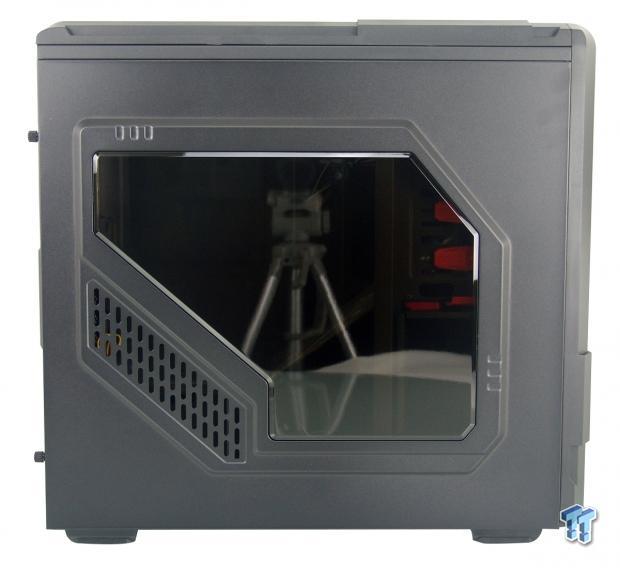
The left side of the Shield offers a bulging side panel that has a square shape and styling additions around that edge. At the right and top there is venting and triple dents. This version of the Shield offers a large amber window to provide a view of the inside.
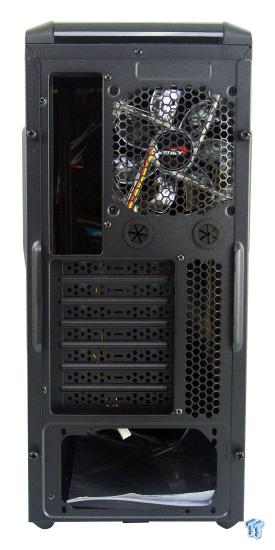
In the back, we find the rear I/O area with a 120mm fan at the top. We also find a pair of grommets above the seven expansion slots and venting, leaving the PSU to be installed at the bottom.
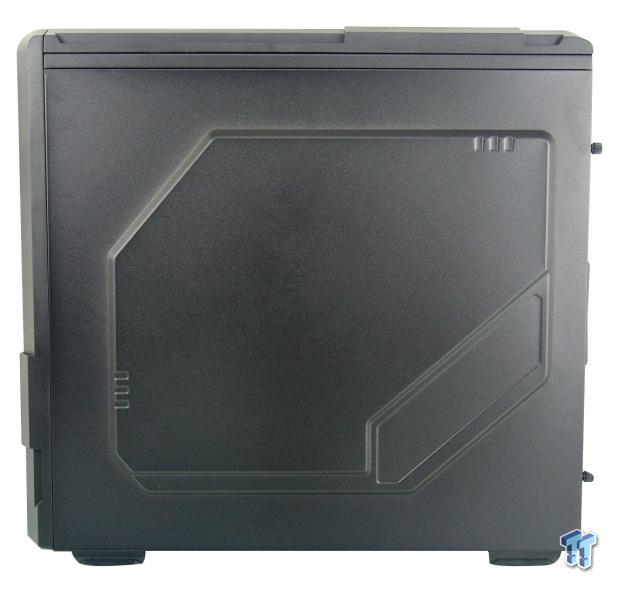
The right side of the Shield offers a design that is a mirror image of the inner left side, except it does not have a window. Since there is not much room behind the motherboard tray, this does add enough space to allow for some wire management.
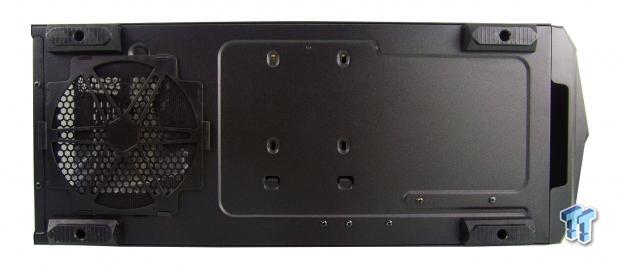
Under the chassis, we find chunky plastic feet at the corners, a dust filter under the PSU, and what appear to be holes to mount a 3.5" drive to the floor inside of the chassis.
Inside the Shield GS-6090
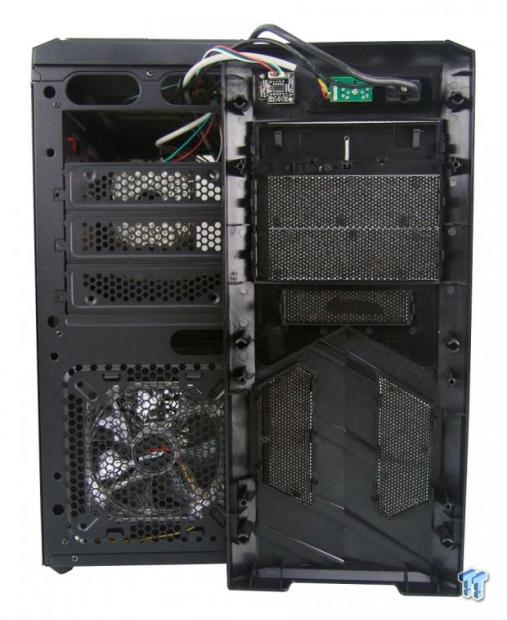
Removing the front bezel takes a lot of pull, as the clips are tough to release. While the mesh is backed with a foam dust filter, since this area is wired, and likely cable tied after the build, it is sort of a pain to clean.
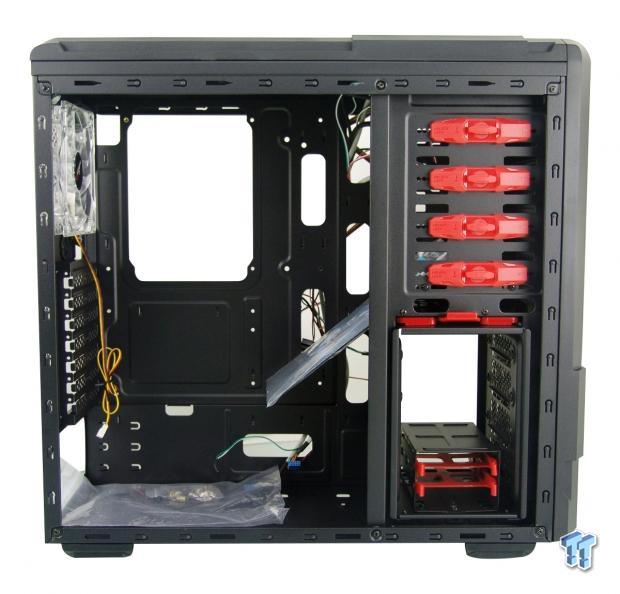
Looking inside of the Shield for the first time, we see a mess of wires tucked behind the motherboard tray, the hardware bag on the floor, and the paperwork spilling out of the ODD bays.
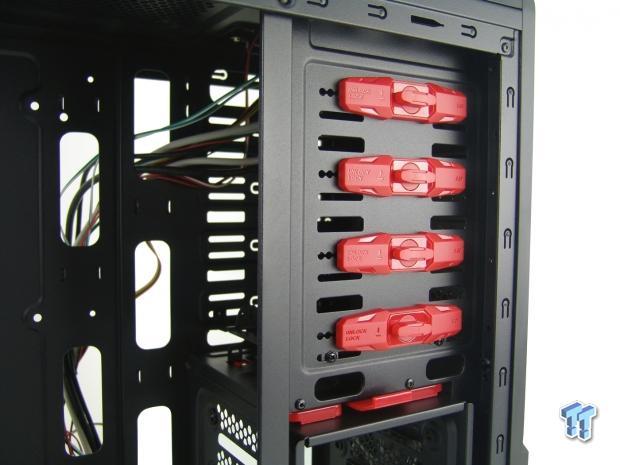
Since the wiring runs through the top bay, only the lower four are usable, and they use these twist locks to hold the drives in place, but only on this side. There are elongated holes at the bottom that allow access to the bay adapters that can be used in the lowest section of the ODD cage.
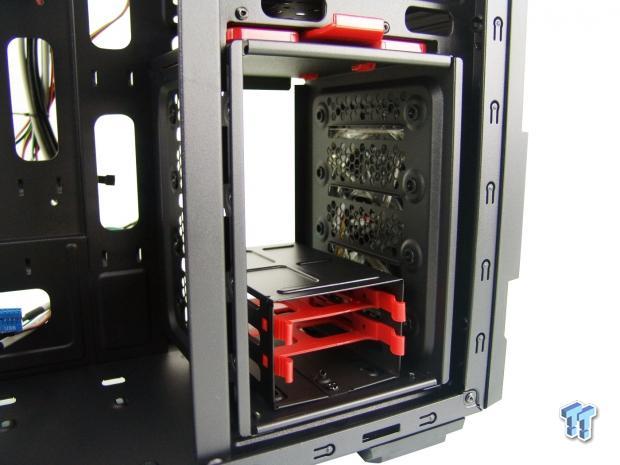
The lower section is set up to take on three 3.5" drives, and a pair of 2.5" drives in the smaller removable cage at the bottom. Removing this cage will allow for a fourth 3.5" drive.
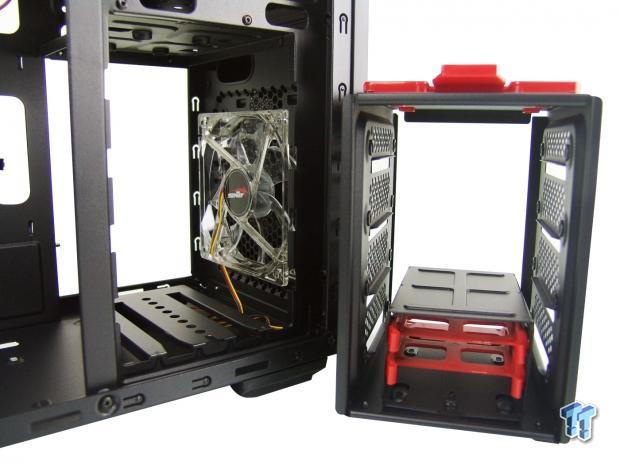
Pushing down on the big red tab at the top, and sliding the cage out of the chassis opens the front of the chassis right up. While the support bar will always be there, removing the cage does allow for much better air flow into the chassis, and even room for optional water cooling gear.
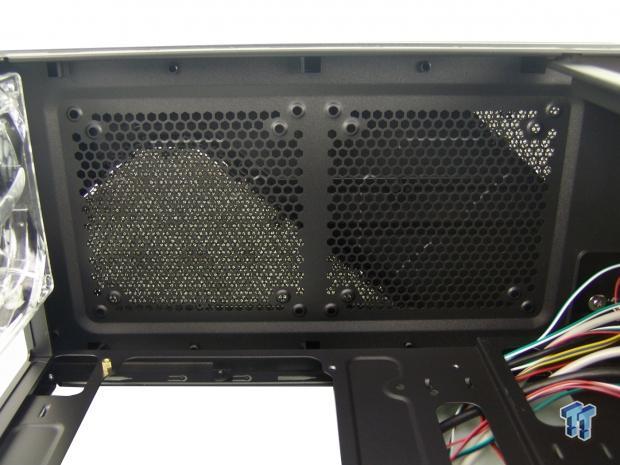
The top of the chassis is designed to house a pair of 120mm fans, and also give the option to use 140mm fans. However, with the odd shaped venting on top, a lot of the right side is generally blocked of airflow.
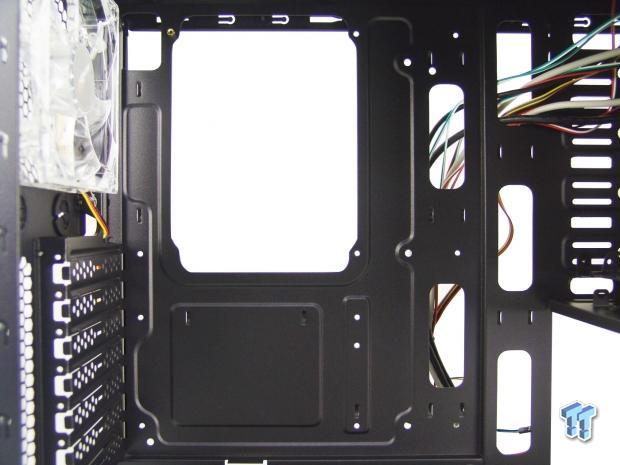
The motherboard tray offers a large CPU cooler backplate access hole, and six wire management holes without grommets. It also offers roughly fifteen tie points to help keep the wiring behind it as flat as possible. Of course, the motherboard tray is drilled to accept standoffs in arrangements for both ATX and Micro-ATX boards.
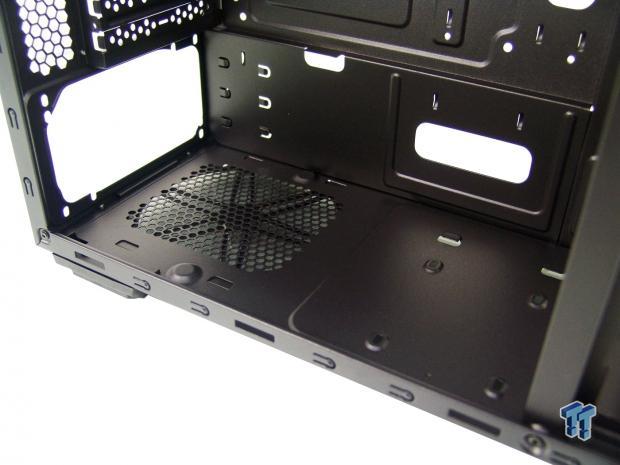
The floor of the chassis has room for a drive to the right, next to the drive cage. As you move to the back, we find only two supports for the PSU; the screws at the back serve as supports for the PSU there.
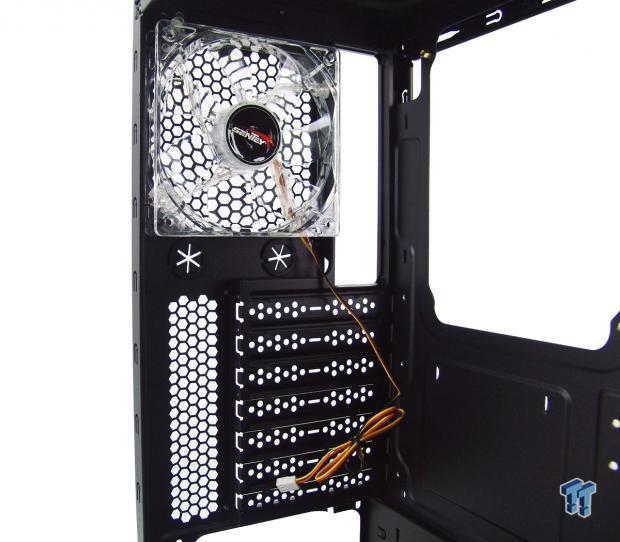
The back of the chassis offers the second supplied 120mm fan, and both use a three-pin connection for power. We also see that the expansion slot covers have no screws in play now, as we still need to break them out before we install the motherboard.
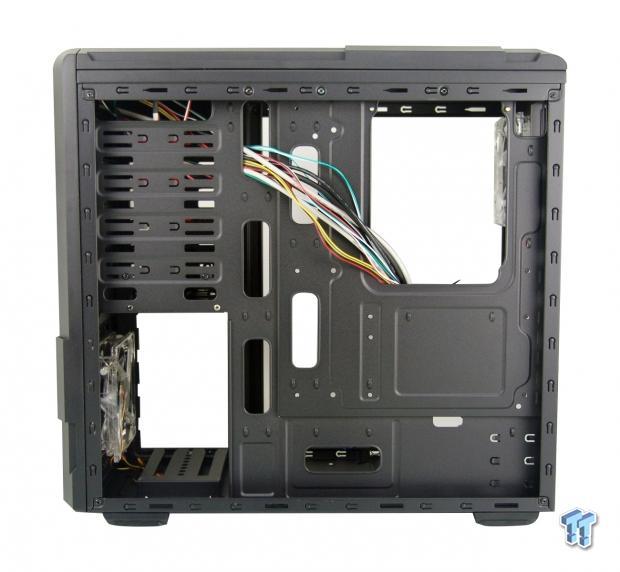
Behind the motherboard, there is roughly 10mm of space to tuck wiring into, but with the bump in the panel, we get closer to 15mm in total. We can also see that you do have the option to screw devices into the ODD cage from this side.
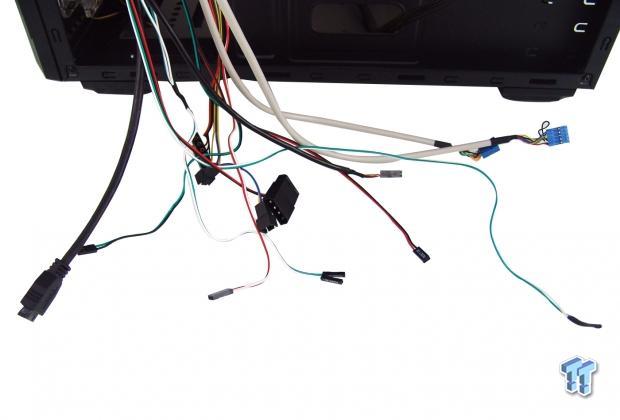
Where mainstream cases go with black cables, Sentey keeps it old school with the beige and rainbow assortment of wires and connections to be sure every bit of this sticks out like a sore thumb when the build is finished.
Accessories and Documentation
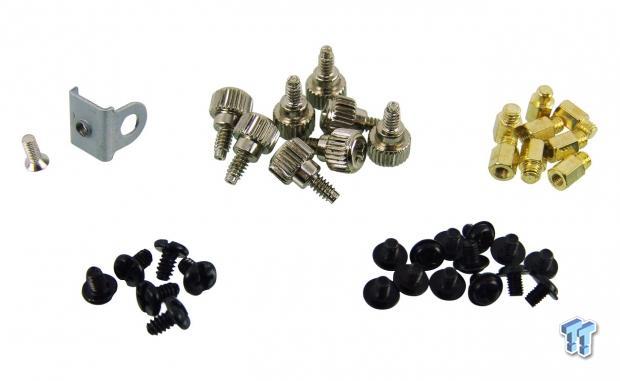
At first, it seems the assortment of hardware is plentiful. We see the panel lock loop and screw, we find eight thumbscrews, eight more standoffs (one of which has no threads), five HDD screws, and motherboard and SSD screws to the right. However, when do the math, it becomes apparent that you cannot fill the spaces in this chassis with the provided kit; there is only enough to get you started.
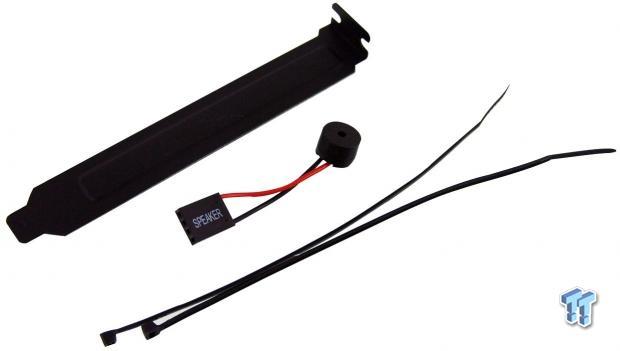
Sentey includes a single replaceable expansion slot cover, just in case you have removed the wrong one, or removed a single slot add-on card. They also offer a motherboard speaker, and were kind enough to send exactly two tie straps. There are fifteen places to tie to, and only two straps to tie wiring with.
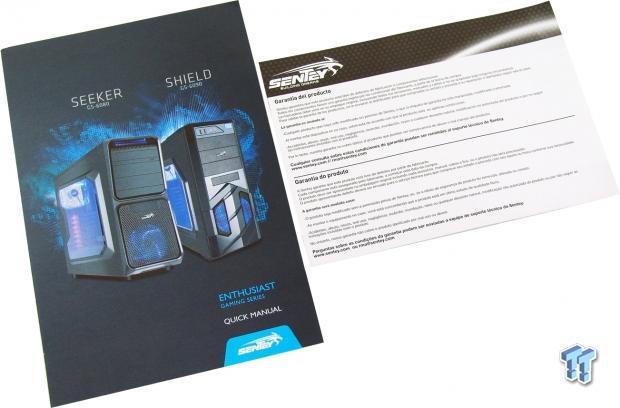
At the left is what they call a "quick manual," but we can say this: it is quick, and it is nothing resembling a manual. Enthusiasts should know what to do, but the manual only shows images of the chassis with highlighted features. Needless to say, this manual provides no real help with the installation, and half of it covers the Seeker. Off to the right is the warranty insert that details what can and cannot be claimed for warranty service.
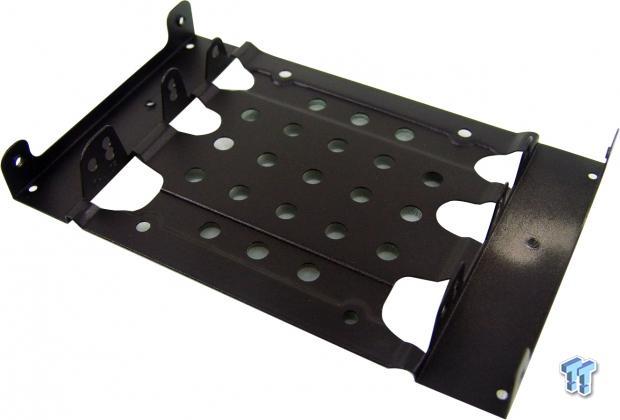
Here we have the removable 5.25" to 3.5" bay adapter. Simply screw the device into the bracket, then slide it in and use the elongated holes to secure it to the chassis. As we said previously though, there are tabs in the bottom that will allow us to hide the 2.5" drive there.
Case Build and Finished Product
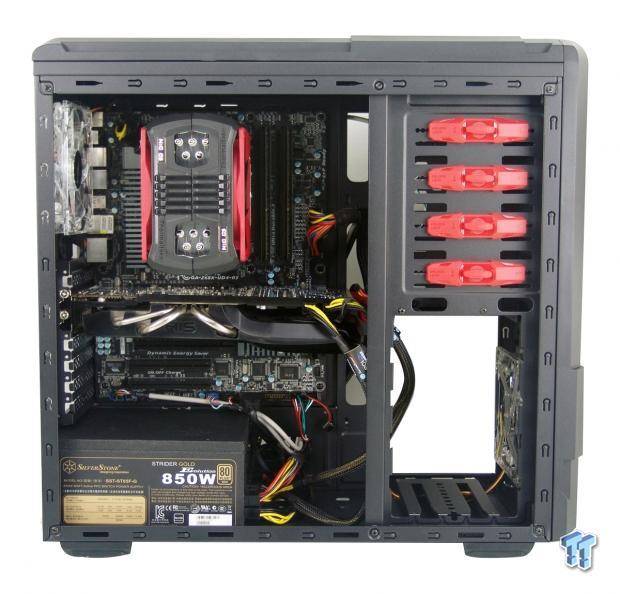
Things are tight inside, so trying to get the ATX motherboard in is a bit of a challenge. Also, because we are down a standoff, we have to choose which one affects things the least. We removed the HDD cage to give this chassis any chance at all at keeping cool with an exhaust and an intake that is blocked off almost entirely. The case wiring sticks out just as we thought it would.
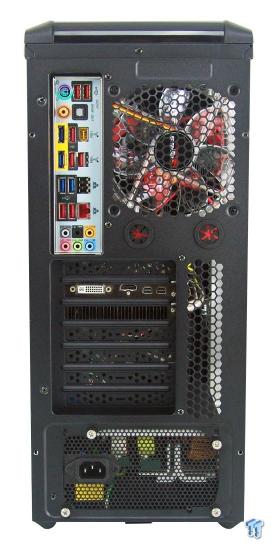
The dust shield slides in without issue, and so does the video card, but here is something to ponder: Since PSU screws are not supplied, we needed to use thumbscrews for the PSU, leaving us without enough to fill the expansion slots. We could have used the HDD screws, but then what would we use to install the HDD?
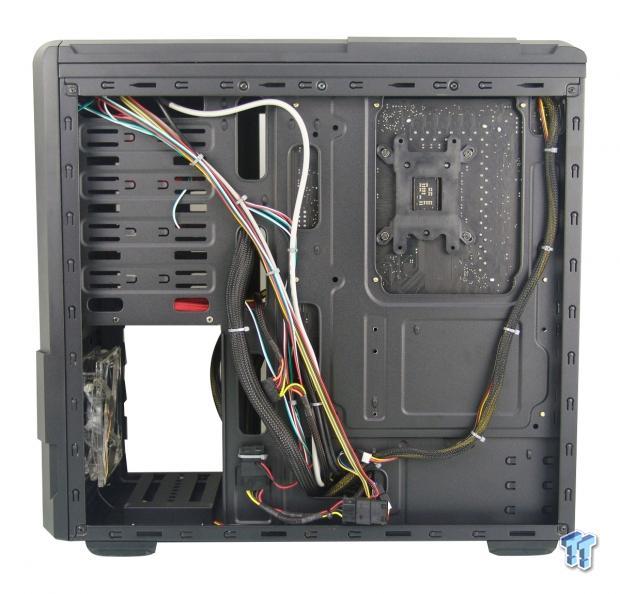
Not only is the wiring outdated in color, but also there isn't enough excess length to allow for clean wire management. The wires tend to run right across the openings, and will even impede running PSU wiring if you don't do things just right.
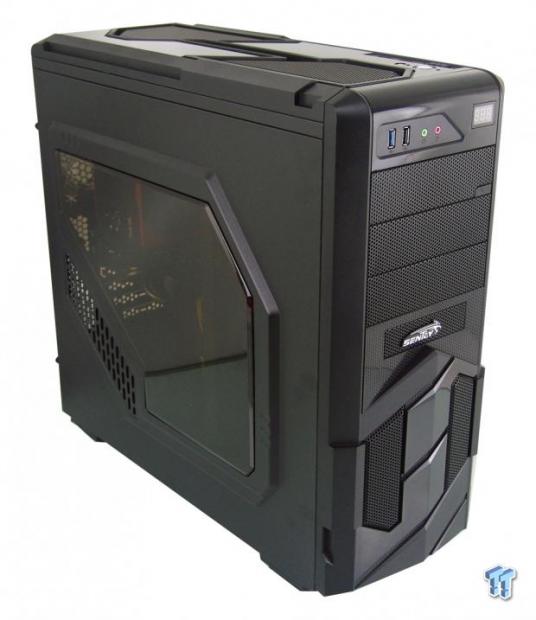
Once everything is back together, we see not much has changed externally, but we can slightly see the bits of the system behind the amber tinted window. The view isn't the greatest, but it is a view.
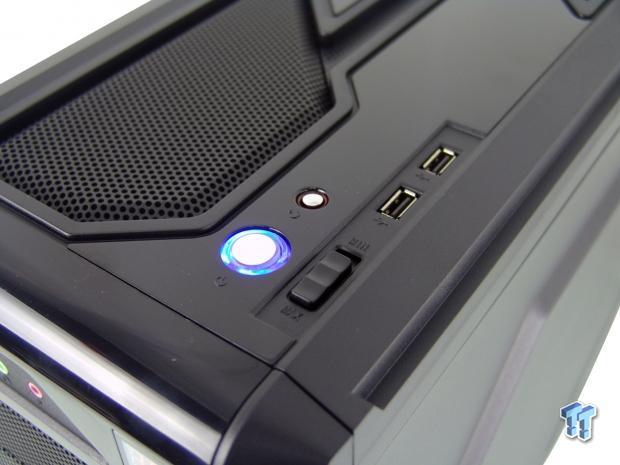
As soon as we ran the power cord and pressed the power button, we found the ring glowing blue to indicate the system has power. We kept missing it in images, but the reset has a red ring that will flash when the drive is accessed.
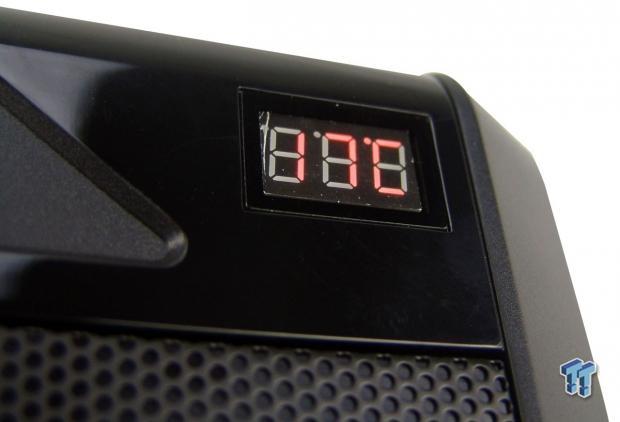
We also found that the temperature in the ODD bays where we laid the temperature probe is showing that the temperature of the ODD bays is seventeen degrees Celsius. It also appears that our cover is either scratched, or has a piece of something under it; either way, it's not so attractive.
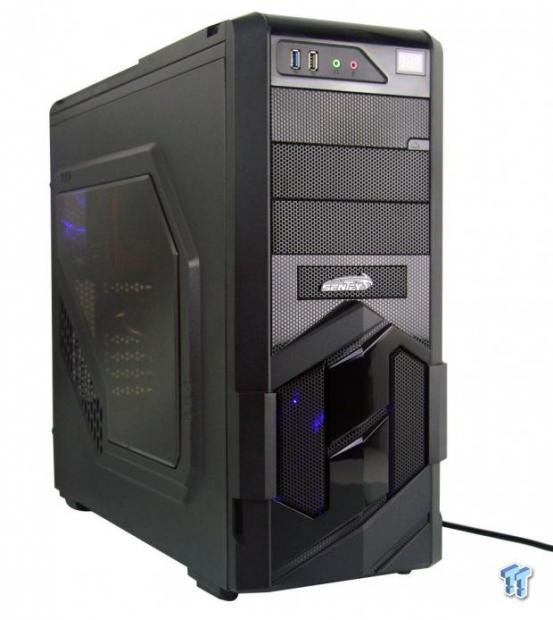
After stepping back a bit to take it all in and listen to the fans, we can see the blue LED fans in the front and back are both powered and lit. While on the low setting of the fan controller, we could barely hear the fans at a foot away, and when we threw the switch to high, all we got was the dimming of the LEDs, and no speed increase at all. We are guessing someone wired the controller wrong.
Final Thoughts
While there are some things the Shield GS-6090 has improved upon over the years, not everything was hunky-dory. On paper, the feature set seems impressive with the fan controller, compact size, and aggressive aesthetics all in play. However, in reality, it's difficult to provide a reason for you to opt for this chassis. For every good feature, there was a flaw.
We don't speak for every enthusiast or gamer out there, but we have a very good idea of what the market wants. Enthusiasts do not need instructions, but many gamers will since not all of them are experienced builders, and the provided instructions are poor. Additionally, the design may be attractive to some, but we think Sentey may have taken it too far - even far enough to block most of the convective cooling this case offers at the top. Things like twist locks for the ODD bays, and the rainbow assortment of wires were also disappointing. Almost everywhere you look, it feels almost as if Sentey threw in the towel and just pieced together some random parts from the bin.
It is very uncommon for us to be so harsh to a company and their product, but maybe this should be directed at their marketing team, as they are likely the ones who thought it was cool to label this as an "Enthusiast Gaming Chassis" right there on the box. The promise of an enthusiast level chassis really raised our expectations, and overall, we feel let down.
It is really too bad that Sentey couldn't pull it together, because the chassis is solidly constructed, but the looks and failures we have covered here are too difficult to overlook. At this point in time, we really can't recommend that anyone purchase this chassis without some sort of a revision, or at least stepping up the quality control. For now, we feel you can spend your money much more wisely.

