Introduction, Specifications and Pricing
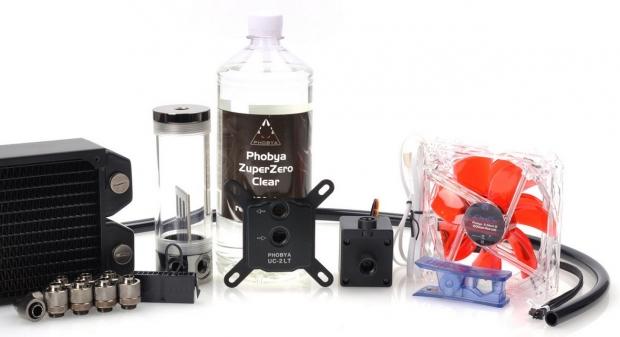
We were first introduced to Aquatuning when we brought our last custom loop review to our readers with the Alphacool. Today, we are once again working with Aquatuning to bring forward another of their assembled kits. When we looked at the Aquacool, we clearly noticed everything had moved over to metric tools, but we also noticed that Aquatuning kits have everything someone will need to get started with a kit style purchase; Aquatuning has done all of the work of selecting products. This also eliminates possible tubing issues, fitting issues, and even covers the small things you may have never thought of in the first place. This gets your purchase and assembly done much faster since virtually everything you need is all-in-one box; no muss, no fuss.
While this is our second time working with Aquatuning, this is the first we are getting our hands-on anything that Phobya has made. If you frequent the forums, and are in the water cooling scene, the Phobya name is nothing new; we just tended to go back to companies like Danger Den, Swiftech, and EK, as the doors there were already open. Expanding horizons is always a good thing though, and we do like that we have an open door to sample pretty much anything Aquatuning, whether it's from their overseas base, or their newer US and Canada site.
It is much easier for people on this side of the pond to gain access to what we used to only see from the EU system builders. The tide has changed now though, and thankfully, we can bring you a much wider perspective on what is currently out there in water cooling, outside of the companies we typically review products from.
The reason we have you here today is because we have been sent the Phobya Pure Performance Kit 240LT for assembly and testing. In this review, we plan cover every aspect of the included components and accessories. To put it simply, this kit from Phobya has to be the best deal in kit style setups that we have seen in quite some time. Our more frequent readers know it is out of the ordinary for us to make such a statement so early in the review, but what we have today will at least raise an eyebrow, and it will definitely leave this Pure Performance Kit 240 LT from Phobya high on your must-have list.
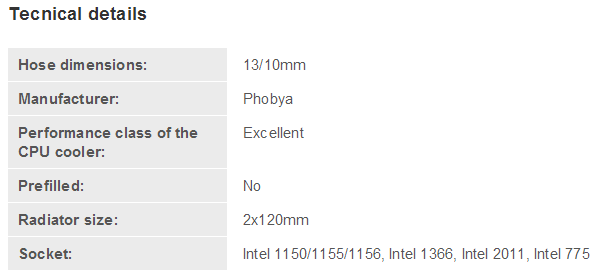
Since Aquatuning put this kit together, they make short work of the technical details they provide for this Pure Performance Kit 240LT. In the specifications provided, we are given information on the 13mm OD and the 10mm ID of the supplied tubing. We are also informed that Phobya makes all of the parts, and that this kit offers excellent performance for its class. Furthermore, we are told it does not come pre-filled, it uses a dual 120mm radiator, and it is capable of fitting any relative Intel socket. Well, as far as this chart is concerned, we are done with the specs.
Let us take this to another level though; shall we? Now, you do get 13mm OD by 10mm ID, Masterkleer black PVC tubing, and there is nearly three meters of it included. Part of the reason that this kit received an excellent rating is due to the Phobya CPU-Cooler UC-2 LT block that has been tested at other sites with great success. The loop is not pre-filled, but it does include a 1000ml bottle of Phobya ZuperZero Clear coolant. There is also the G-Changer240 V2, which is a 240mm radiator that is 60mm thick.
That isn't all that is included by any means though. There is still the DC12-220 pump that offers 2.2 meters of head pressure, and 400 liters per hour of flow. There is also the clear Balancer 150 reservoir, which has the top and bottom caps, and its diverter plate, all done in black nickel plating. We also get two G-Silent 120mm fans, a splitter cable to power them, black nickel compression fittings, a tubing cutter, an ATX power adapter, and a few Phobya stickers. That should just about cover everything.
What we are really digging about the Pure Performance Kit 240LT, is that it can be easily found on the Aquatuning site, with no signs of stock limitations. On top of that, this kit, which you will soon see abusing our charts, can be had for less than $200. As we looked on the Aquatuning website, we saw that they offer this kit for $182.76, and that is including shipping and tax. For those of you over the pond who may want to search out this kit as well, expect to pay 149.99 EUR, including VAT plus returns.
If what we have discussed about the kit already doesn't drawn your attention, and the pricing does not seem like a very good deal yet, we strongly urge that you continue reading. Once you see what the Phobya Pure Performance Kit 240LT is capable of, we are pretty sure your AIOs will soon find the bin in order to make room for this top-tier kit.
Packaging
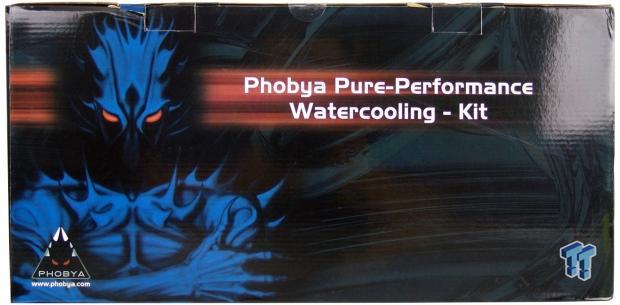
The front of the packaging features a black background, and offers streaks of paint, and a red swipe across the middle. The words "Phobya Pure Performance Watercooling - Kit" are displayed in white text. We also see the blue Phobya creature posing off to the left.

We again have the blue guy to the left, but this time we are given Phobya's web address in the red accent stripe, just in case you need some more information on the individual parts enclosed in this packaging.
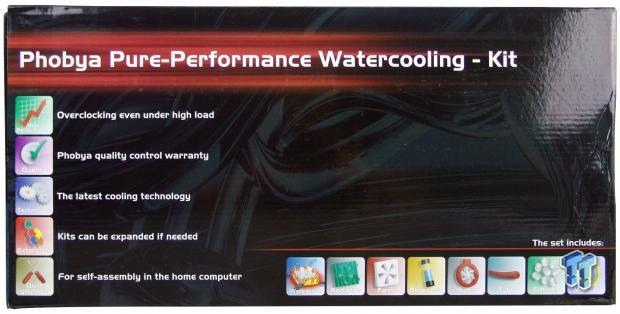
The back offers the naming we saw on the front, and below that we find a list of features. The list covers advantages for overclocking, a quality control warranty, a statement that the kit is the latest in cooling technology, the expandability of this kit, as well as the fact that assembly is required. There are also eight icons along the bottom denoting the entire list of product types included in the kit.
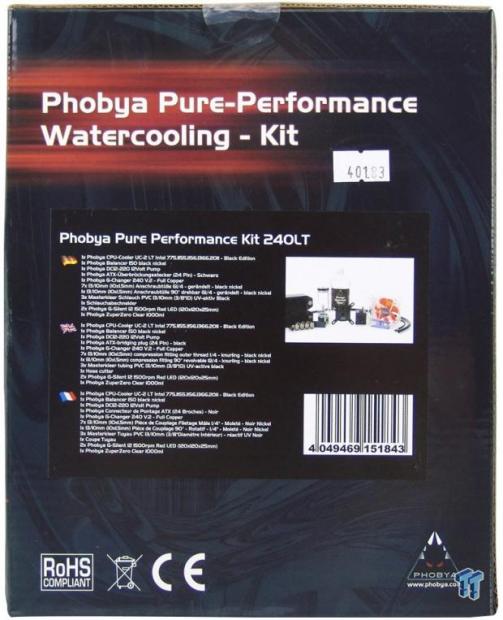
The other smaller end of the box is less generic, as we see the sticker specific to our Pure Performance Kit 240LT that is inside. Also, in three languages to the left of the image, we get a complete and detailed listing of what the included parts are.
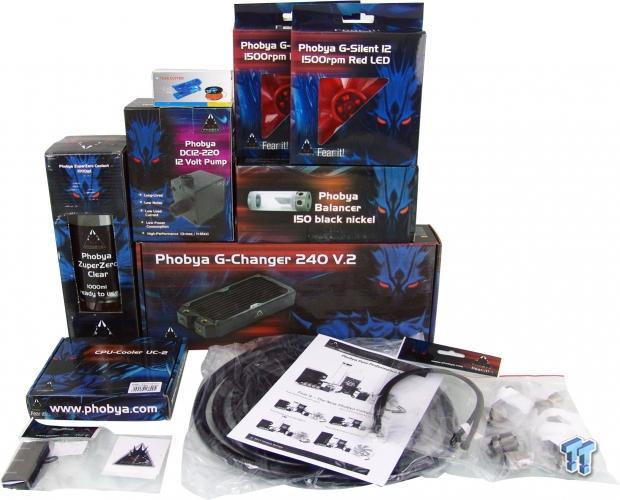
Along with a few bits of packing paper to fill the gaps, inside of the larger box we find all of the components and goodies that come in this kit. At this point, it looks like we are in good hands with what we have been given, as it seems we have everything we could possibly need to get things assembled and running.
CPU-Cooler UC-2 Water Block

The first part of the kit we want to cover is the CPU-Cooler UC-2 water block. This will, of course, cool any Intel processor since, and including, LGA775. Looking closely at the sticker, we see we have the Black Edition block.
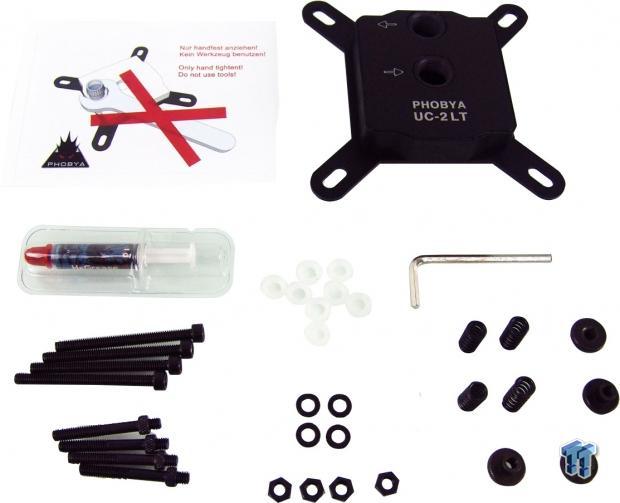
The block is packed well, with dense foam surrounding it on all sides. We find an insert warning that you do not use a wrench to tighten the fittings sitting next to the UC-2LT with Intel mounting hardware already in place. We also see some TIM, two sets of motherboard studs, two sets of washers in nylon and metal, four nuts, a wrench, springs, and thumbscrews to lock it all down.

Everything about the Phobya UC-2LT Black Edition is black with the exception of the naming, denotations of flow for the fittings, and the copper of the base. The bracket is very solid, and offers oval holes at the ends to fit various Intel sockets without the need to mess around with the block.
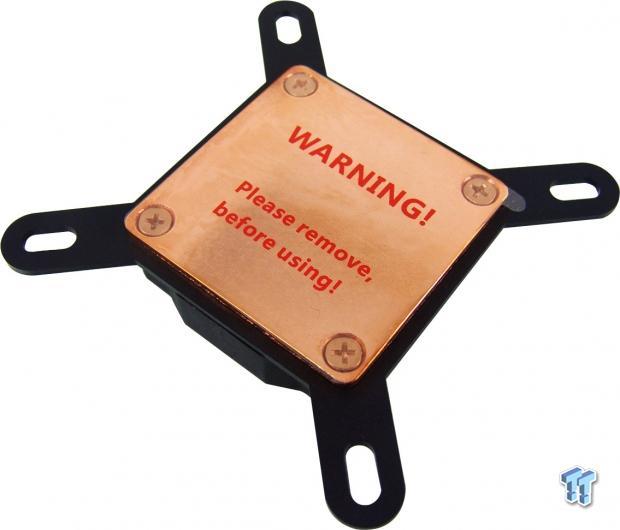
On top of the dense foam used all around this CPU block, we find that the copper plate also ships with a plastic protective film that needs to be removed prior to installation. This not only helps fight small scratches, but it also keeps the surface in the same cleaned state that it was in prior to being sent from Phobya.
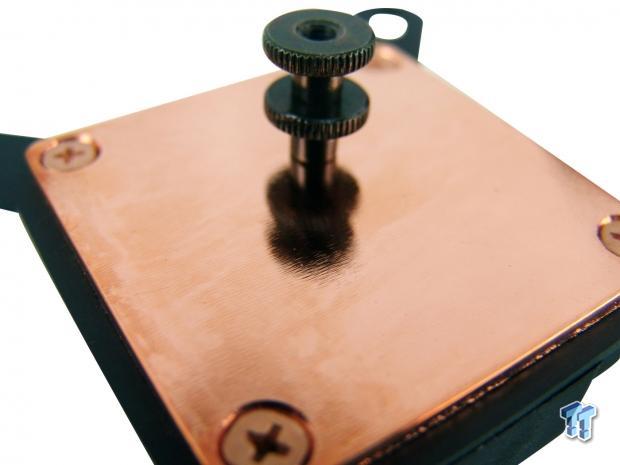
The block is higher in the middle, but only slightly, and this will help with getting great socket pressure against the IHS as well. The surface has been milled, but there is little polishing done.
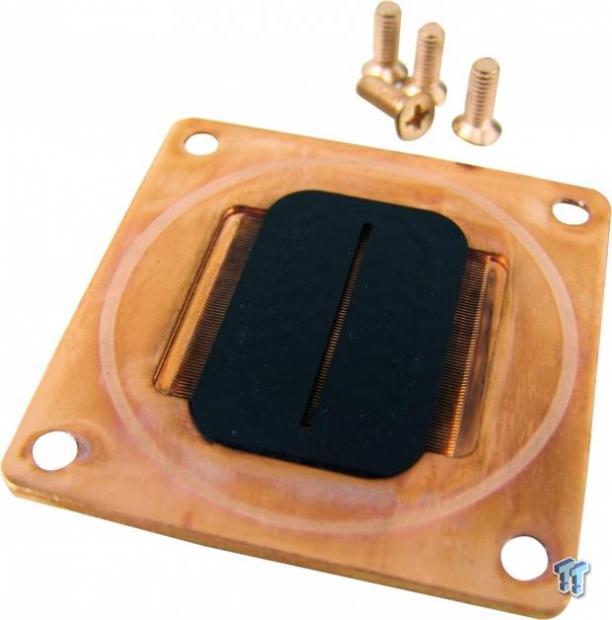
We then pulled out the copper plated screws (a handy way of doing away with mixed metals). We find the copper plate has tiny micro-fins cut into the plate from one side to the other. On top of that is a plastic diverter insert that forces the flow through the center, and out of both sides to return to the loop.
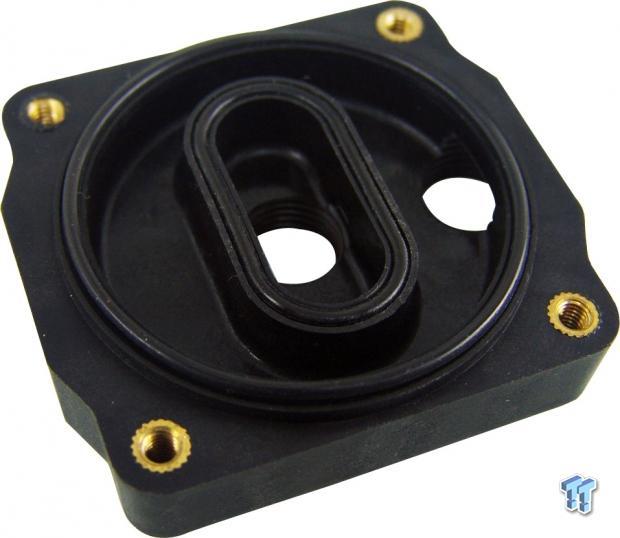
To maintain a good seal between the two halves, a large, round o-ring is seated in the top half, around the outside edge. To force the water through the diverter, there is an inner washer to seal the flow off to that direction only. All sides of the fins are cut away here to provide the heated coolant with an easy way out, and back into the loop.
DC12-220 12 Volt Pump
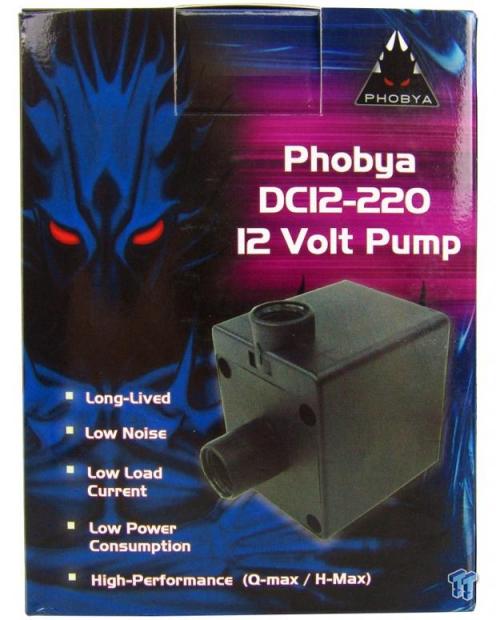
The front of the packaging for the DC12-220 12 Volt pump offers an image of the all black pump off to the right. To the left, over the blue guy, there is a list of five features that this pump offers.
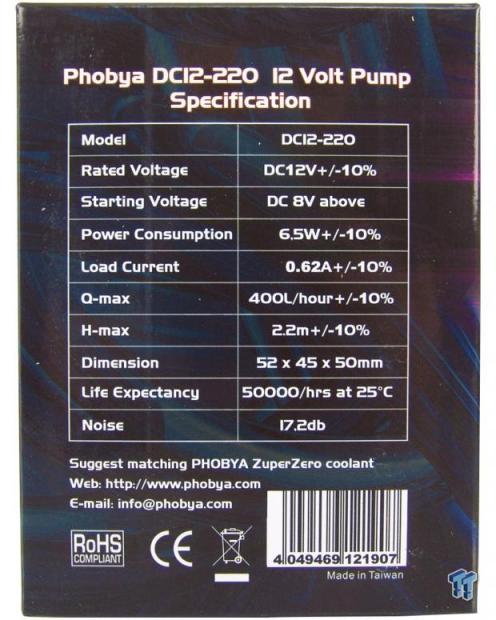
The back panel will interest more users though, as it breaks down what the DC12-220 can do. We see it can operate on voltage ranging from eight to twelve volts, consuming a maximum of 6.5W. It is capable of up to 400 liters per hour with 2.2 meters of head pressure, boasts 50,000 running hours, and only 17.2dB of noise.
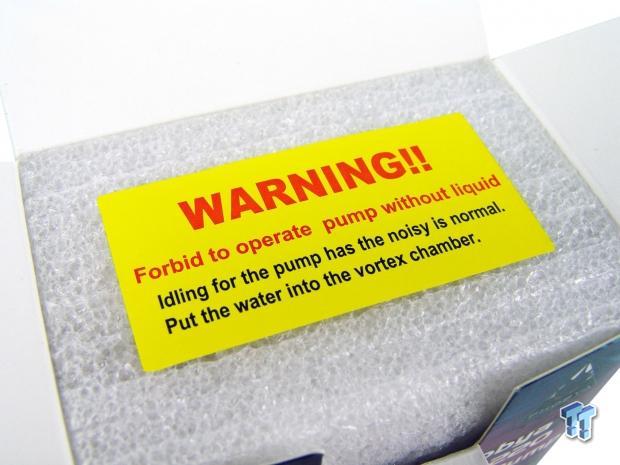
Since this is pretty common knowledge when using a pump, this is the first time we have seen a kit with the warning sticker. It simply states that at no time should the pump be run without coolant in it, and in the reservoir.
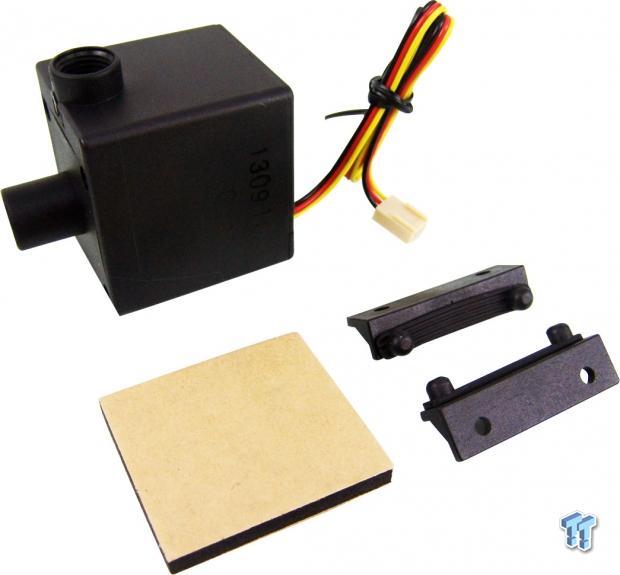
Inside of the open celled foam, we find the pump, a foam double-sided mounting tape pad, and we also get two rubberized pump mounts. These will stick into the pump and allow it to be mounted with screws, without vibrating whatever they are attached to.
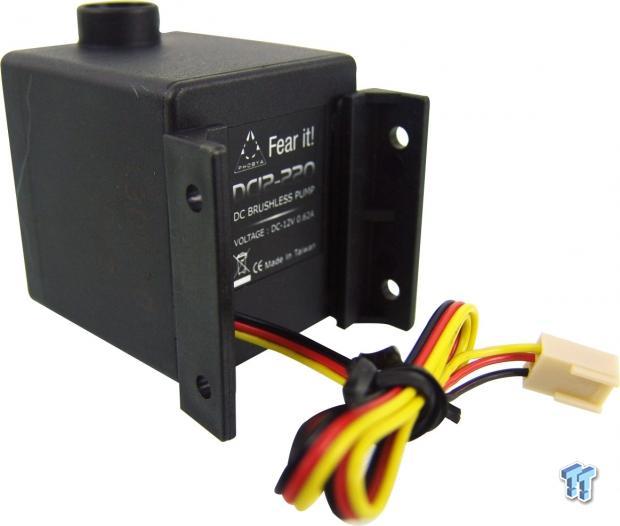
With little instruction from Phobya or Aquatuning, this orientation of the mounting system seems to make the most sense. We can also see that the eight inches of pump power lead uses a three-pin fan connection.
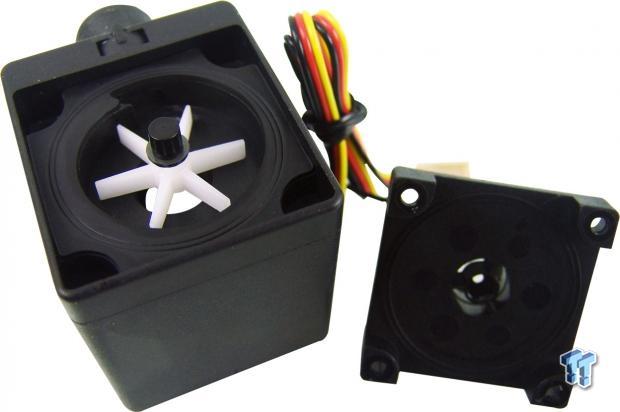
Just in case you wanted to see the impeller, we popped the top on the pump. There is also an arrow on the outgoing side of the pump, so you do not have to remove the cover to see that the impeller pulls in through the cover, and spins coolant out of the top.
G-Changer 240 V2 and G-Silent 12 Fans
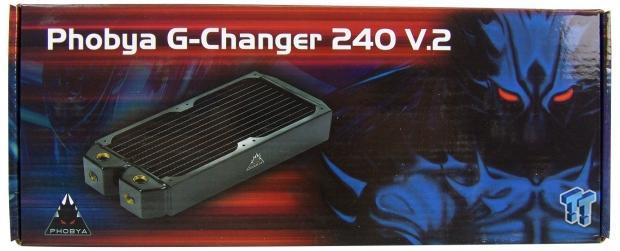
To cool the coolant, and keep the system happy, we are give this 277mm by 124mm, which is 60mm in thickness. Because this kit is from over the pond, keep in mind that the screw holes are M3.
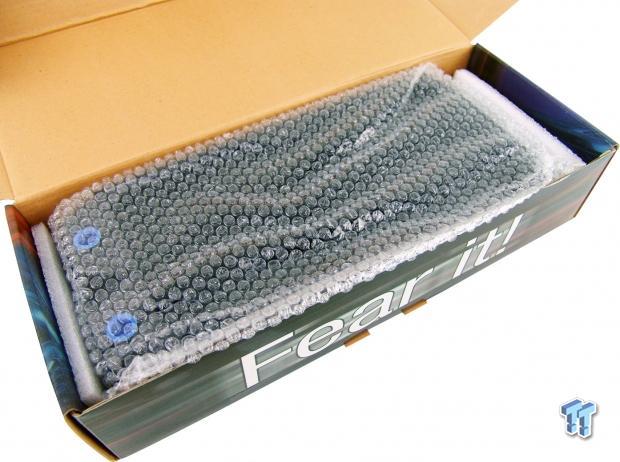
Inside of the box, we find the radiator has plugs in all of its holes. The radiator is wrapped in bubble wrap to help keep the paint job looking fresh, and this will also help to keep those fins straight.
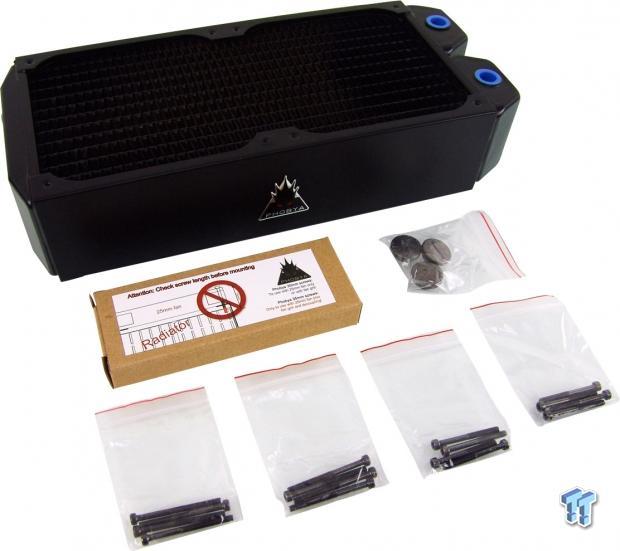
At the far end in the last image, there was this little box of hardware. Inside of it there are three black nickel caps to fit unused ports in the radiator, which is sitting in the background. There are also four bags with four screws each. Eight are for use with 38mm thick fans, while the other set is for 25mm thick versions.
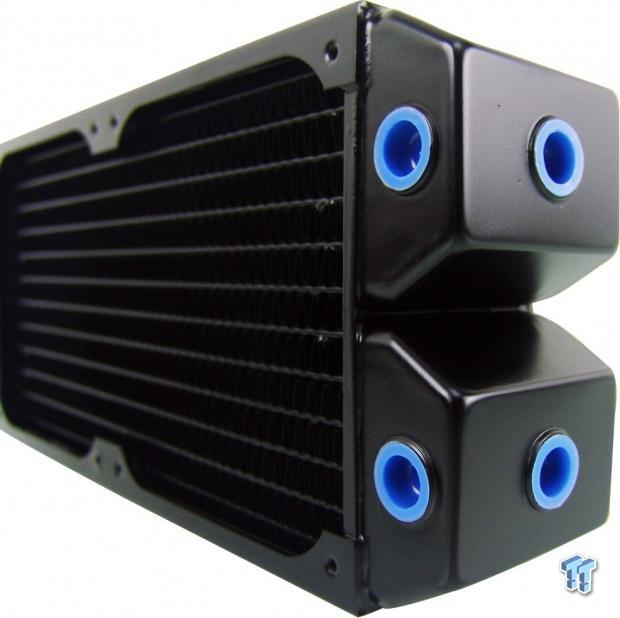
To connect fittings for the tubing to run into and out of the G-Changer, we find the ends of the headers are ported, as are the typical pair of ports on the face that most radiators offer as the only option.
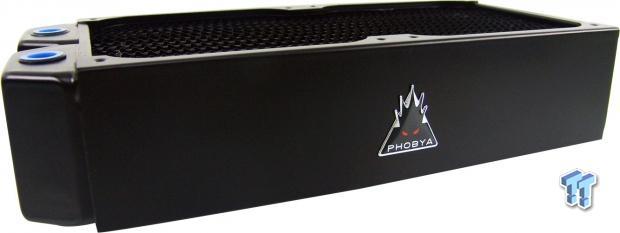
Both sides of the radiator have a steel plate to cover up the internals, and we can see Phobya has applied their name and logo to the sides with a thick metal sticker.
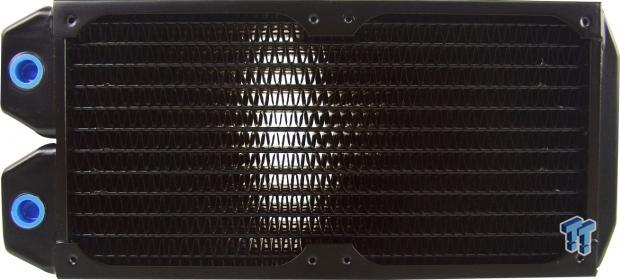
While everything gets treated to a complimentary black paint job, this all copper radiator offers twelve larger tubes running from end to end, to help maximize the flow. We also see they went with a 7FPI fin design between them, allowing for more silent fans to be used with good success.
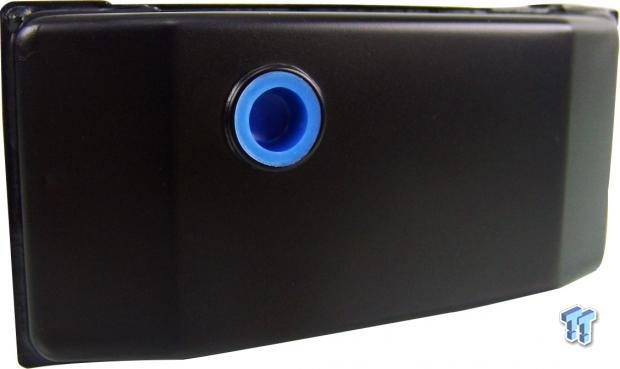
We also find a fill port at the opposite end of the G-Changer 240 V2. For some installations, this may not be needed, but if the radiator is installed vertically, or at the top, this fill port can come in very handy.
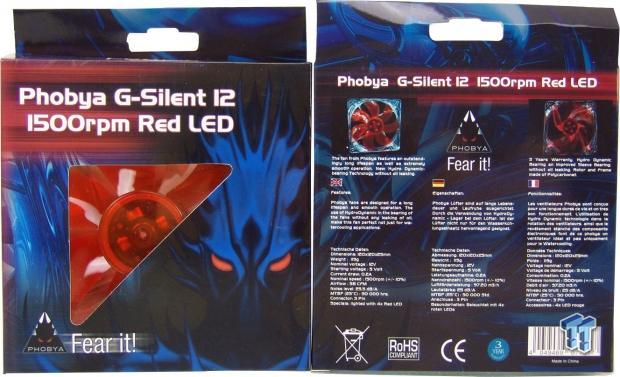
To cool that radiator, we were give a pair of G-Silence 12 fans. These are 120mm by 25mm fans that will spin at a maximum of 1500 RPM; they obviously have transparent red blades, and looking at the back of the box, we find these fans offer 57.20 cubic meters per hour, delivering only 25 dB of noise.
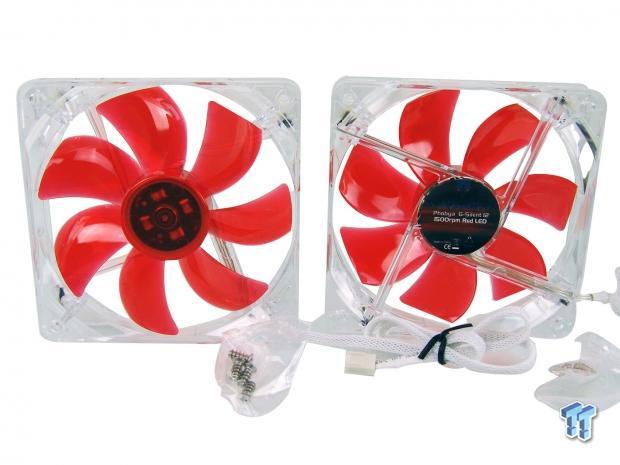
Inside of those boxes we find this pair of clear framed fans, with seven red blades on the hub of each. We can also see that the fan leads are sleeved in a white braid, and they terminate in a three-pin connection. Each fan also comes with case fan screws, but they are of no use in this kit really.
Balancer 150 Black Nickel
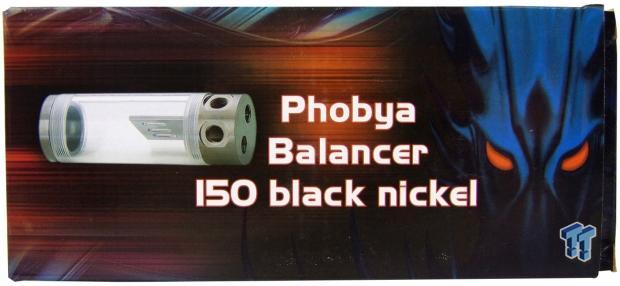
Then, to hold some extra fluid, this kit includes the Balancer 150 Black Nickel, which is one of the fastest bleeding reservoirs we have ever tested. Inside of a layer of plastic, then a layer of thin foam, then inside of dense foam cut out to support the tube, we found the reservoir inside to be very well packed.
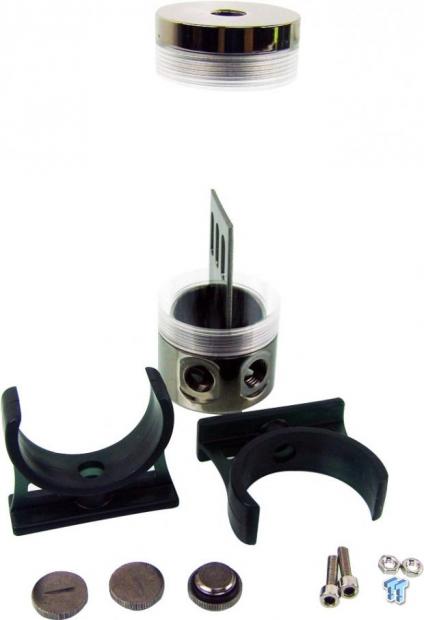
Along with the tube style Balancer 150, we also found three caps to close off unused ports, a pair of green C-clips to lock the reservoir into, and its mounting hardware.
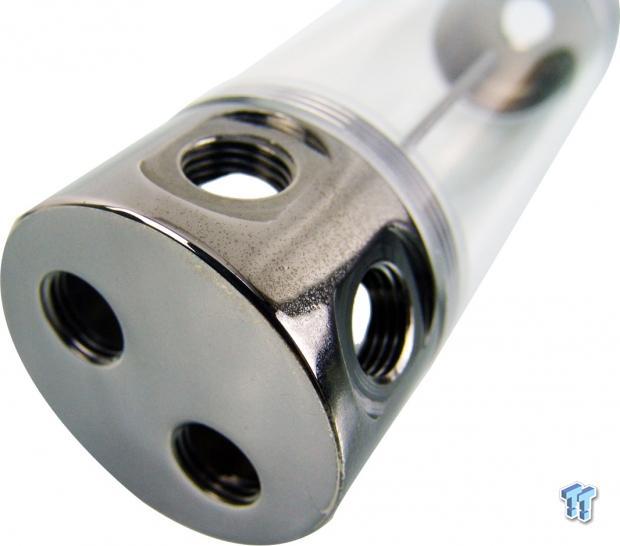
On the southern end of the Balancer 150, much like we saw with the radiator, we are again given four ports to choose from. This will do two things: First, it will allow you to use shorter runs of tubing, and secondly, it removes the need for angled fittings here.
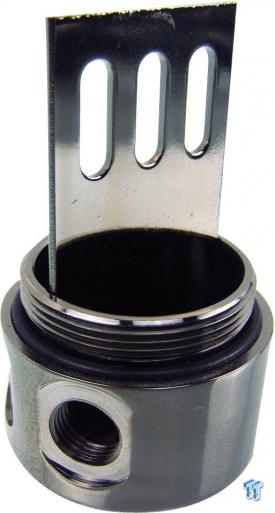
After unscrewing a much thicker clear section than we are used seeing, we can get a much better look at the diverter plate inside of the reservoir. This is to keep the inflow of liquid from the one side of the reservoir from dumping air directly into the outgoing side. On top of that, it is designed to virtually eliminate any vortices that plagued other tube style reservoir designs in the past.
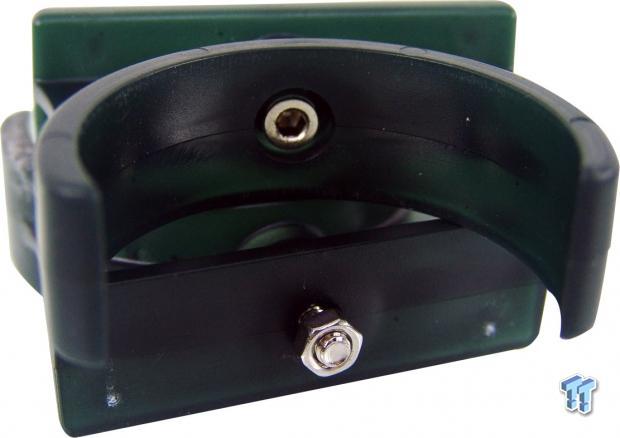
Getting back to the mounting clips: they have a couple of holes in the support that allow them to be ghetto-modded with zip ties, but it is intended to be used with the supplied hardware. All you need is a hole or two to send the screw through, and once the screw is in, simply tighten the nut to lock it all to the chassis.
Accessories and Documentation
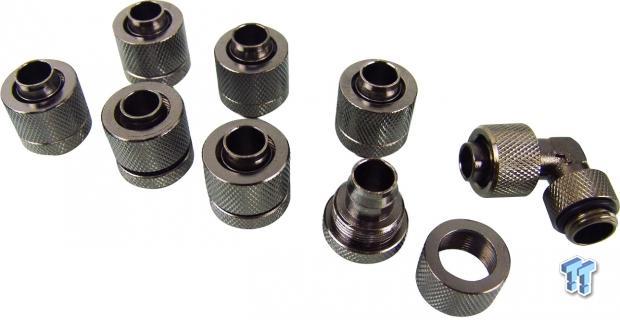
A major bonus to this kit is the fact that we are given seven straight compression fittings to connect the block, radiator, and reservoir. The pump could very well need an angled fitting, but they even have us covered here, as you can see by the eighth fitting in this image.
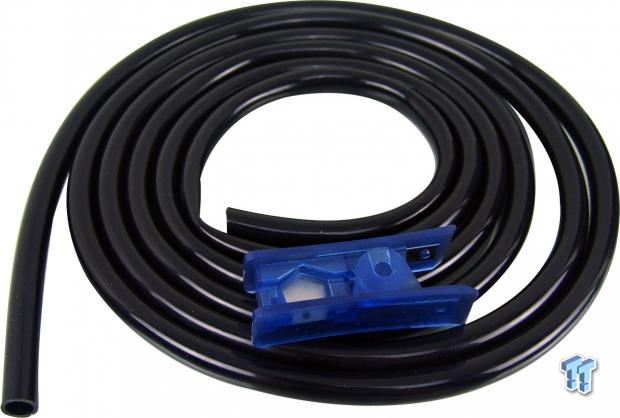
There is also enough Masterkleer black 13/10mm tubing to do a loop two, maybe three, times over. What we found very handy, and a first to any kit we have seen, is the simple guillotine style tubing cutter for making fast, accurate, clean, and straight cuts anywhere in the build -not just on the table.

We are also given coolant in the form of this bottle of Phobya ZuperZero Clear, which is 1000ml in capacity. This is a no-mix coolant that is ready to go out of the bottle, and it contains enough chemicals to have that familiar automotive coolant tinge to it.
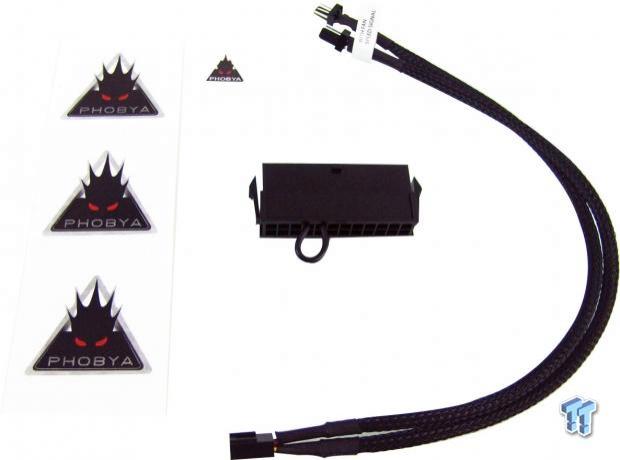
There is a set of three large stickers to apply anywhere you desire, along with a much smaller one with the same intentions. There is also a 24-pin bridging plug that allows the loop to run and bleed out air, without firing up the entire system. We also found a splitter cable to power both fans from a single motherboard header.
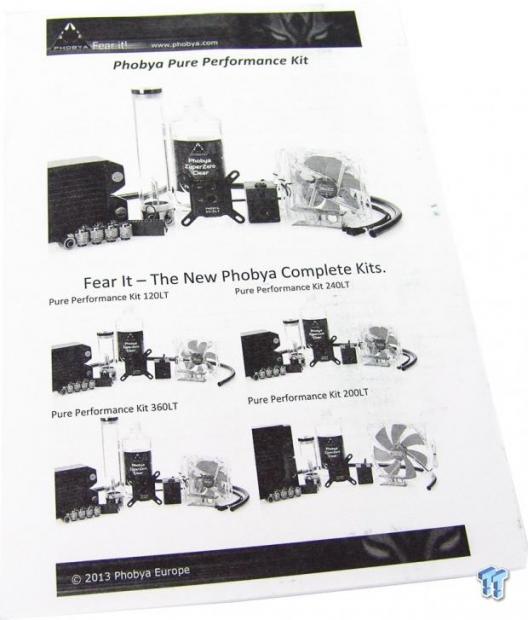
The paperwork that comes with this kit is very basic. There is a list inside of all the parts you should have, but very little instructions for assembly, flow direction, or anything along those lines. We assume that Phobya assumes that if you are buying a kit like this, you must have some mechanical aptitude to be trying it, thus it will be easier for you to figure out as you go along.
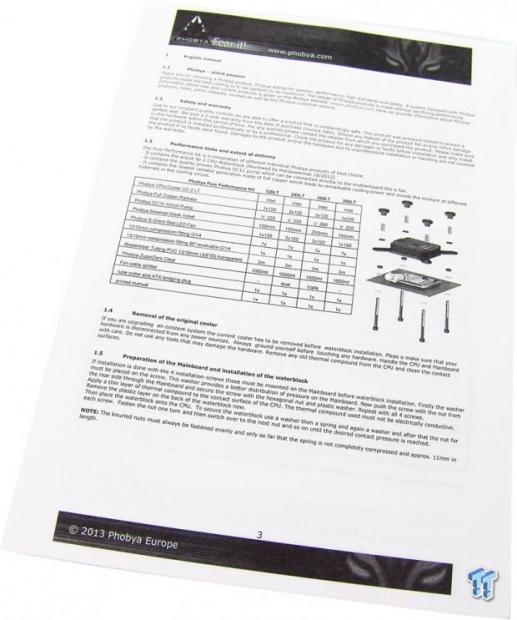
The only thing they really do cover on the inside is how the CPU water block gets mounted. There is an exploded diagram, as well as a written paragraph describing the orientation of the parts, and just how far to tighten the block down to the motherboard.
Installation and Finished Product
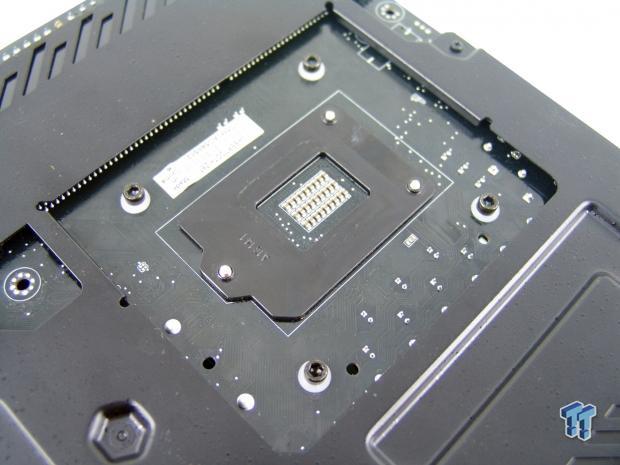
There is not an included back plate; instead, you send four long screws through the motherboard, after adding in a nylon washer. This is it as far as it goes here, but you will be using the supplied wrench to tighten things down on the top.
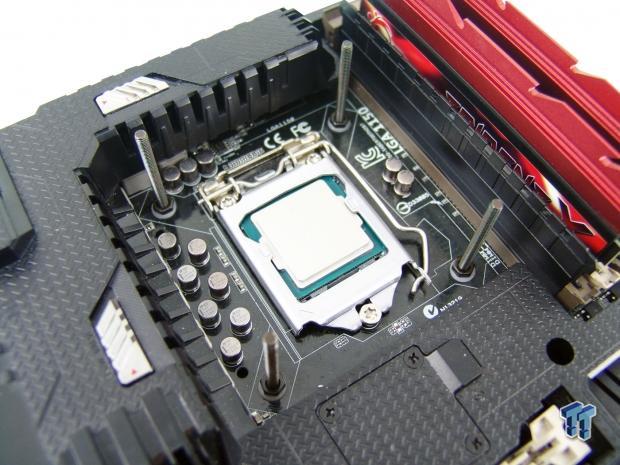
To make the rest of the installation much simpler, after adding the rest of the nylon washers, you need to tighten nuts all the way down to make the long studs a solid part of the motherboard without damaging it.
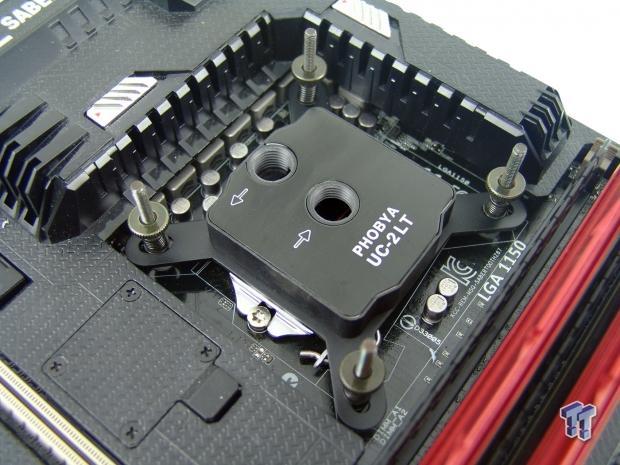
From there, you simply apply the TIM, set the UC-2LT on top, drop on the springs and washers, and then tighten things down with the thumbscrews. The only note here is you should not completely compress the springs, as per the manual. So, when we got to this point, we backed the screws off a full turn, just to be safe.
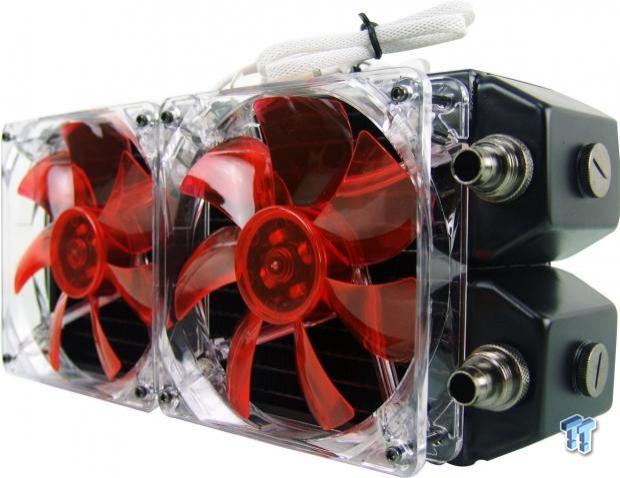
We also mounted the fans to the radiator, and you will have to come up with the wrench for that, because the one supplied with the water block is too large for this. We also went ahead and added the fittings and the caps, so we were ready to go when it came to adding the tubing.
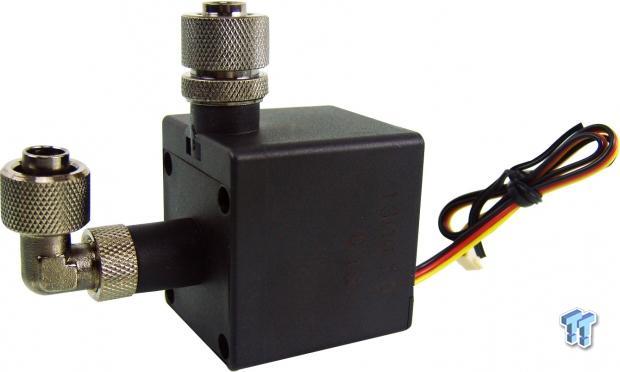
We also went ahead and prepped the pump for the chassis, and our layout. We added the foam pad to the other side for our mounting needs, and we also found that we wanted a straight fitting going out of the pump, but to simplify tubing, the angled fitting is perfect on its inlet.
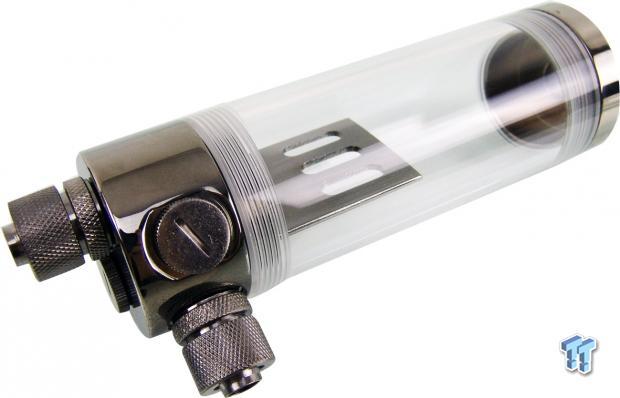
While we were at it, we also went ahead and set up the Balancer 150 for installation. With one run of tubing going to the CPU, we came out the side for that. As for the other tube, that will go to the pump below the reservoir, so we added the fitting there, and were sure to fill all other ports with the caps.
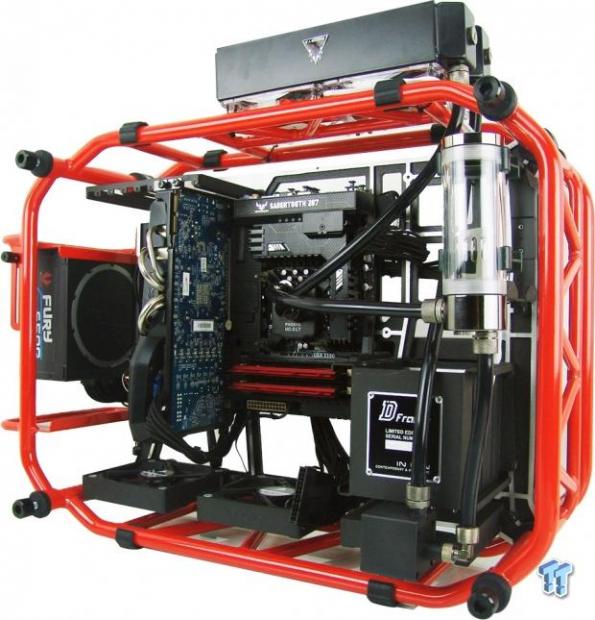
After getting the radiator where we wanted it, putting the motherboard back in, hanging the reservoir, and sticking the pump to a fan support at the bottom, we added in the tubing, and were ready to get started with filling and bleeding the loop.
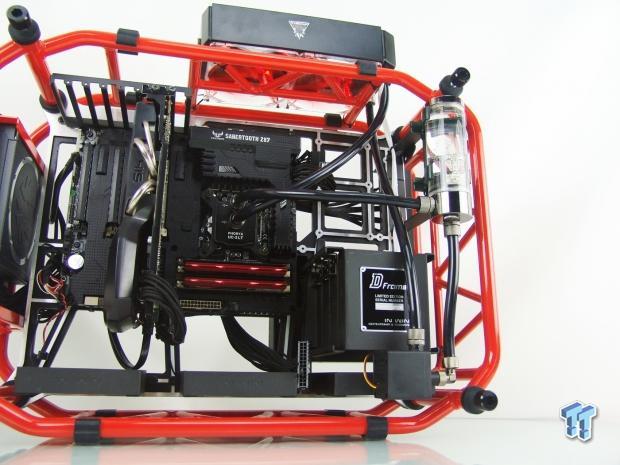
Without the glow of red LEDs in the fans, and the few bubbles still left in the reservoir from tipping things around to remove any air from the loop, it is difficult for even us to know much of anything has changed, and we built it. Being a fans of colored tubing rather than colored coolant, we like the finished results. With the clear reservoir, we can easily detect flow, visibly see if anything is in the liquid, or if it has changed color or consistency.
Test System Setup, Thermal Tests and Noise Results
Test System Setup
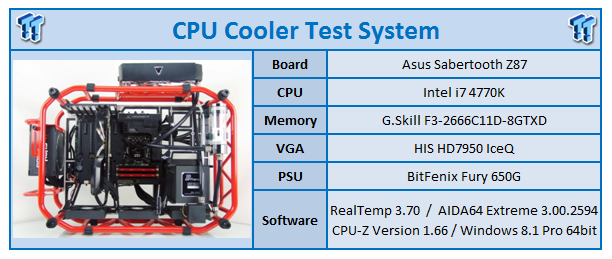
I would first like to thank ASUS, IN WIN, Corsair, and Fractal Design for supplying products for me to test with.
To see our testing methodology, and to find out what goes into making our charts, please refer to our CPU Cooler Testing and Methodology article for that information.
Thermal Results
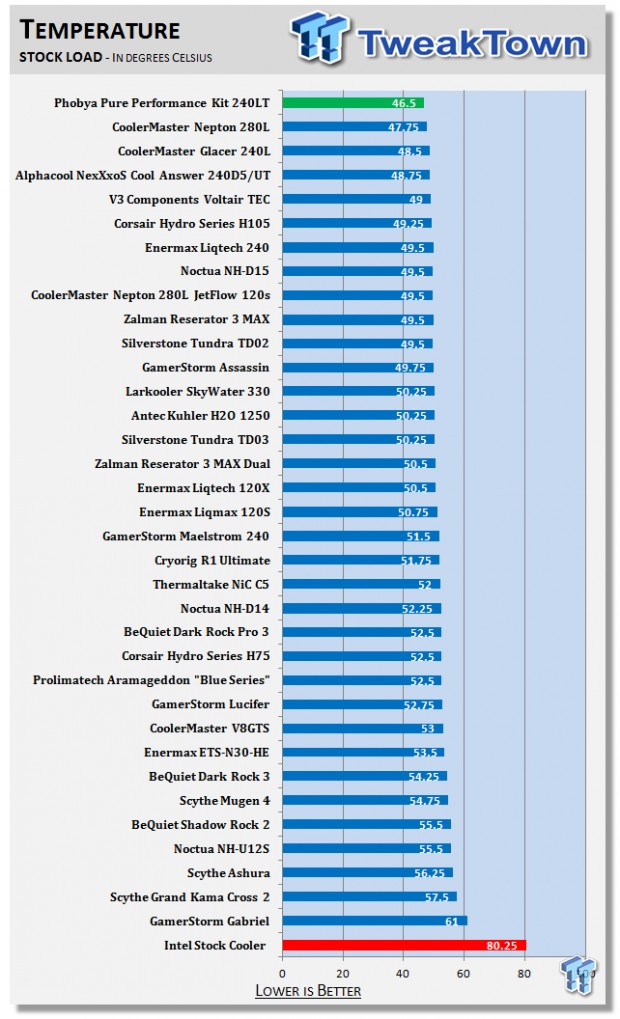
As we started things off in the stock set of tests, we found the loop was idling right around 26 degrees with the fans limited. With the pump reporting 2080RPM, once we turned on the test and waited it out, we were left grinning at the 46.5 degree result that takes top honors in our charts.
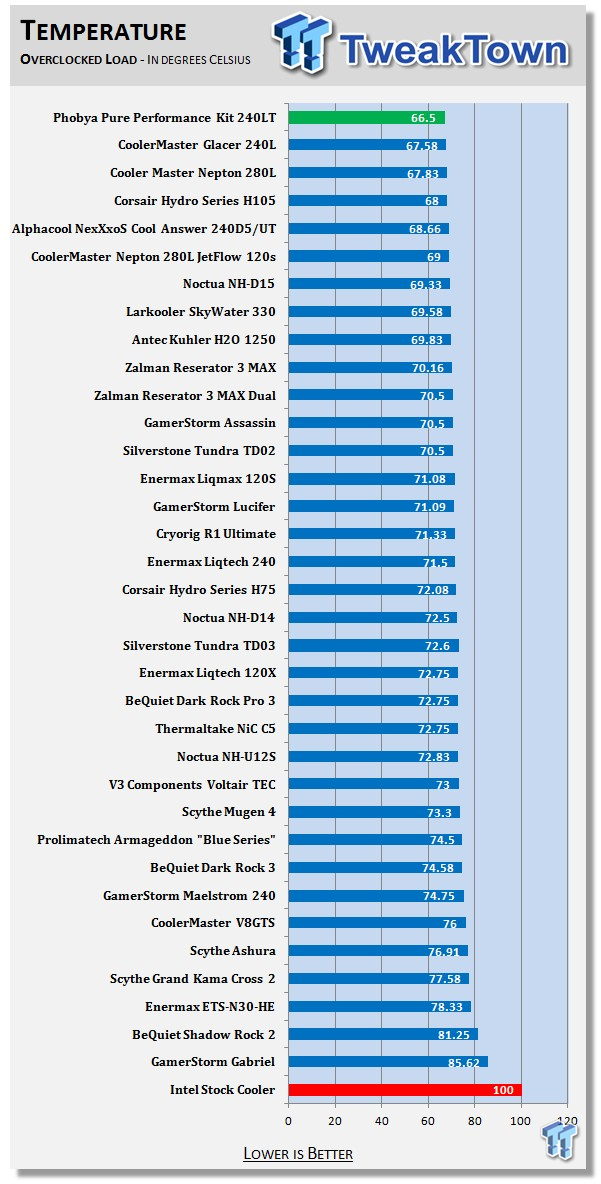
We left the pump spinning at full speed, but this time we turned up the power to the fans as we applied the overclock. Of course, with Speed Step active, the 27.25 degree idle temperature is of little surprise, but once we set the testing loose on this cooler, we found our surprise.
Not only did the Pure Performance Kit 240LT top the stock charts, but when it came to overclocking, this kit beat the next competitor by a full degree with its 66.5 degree result average. Now you can see what we were alluding too way earlier in their review, as Phobya has a good handle on what it takes to come up with a winning product.
Noise Level Results

With the fans spinning at only 1055RPM with the 7.5 Volts of power we apply for the stock testing, we were pleased to find the fans almost inaudible, as the meter displayed 26dB from one foot away from the back of the radiator.
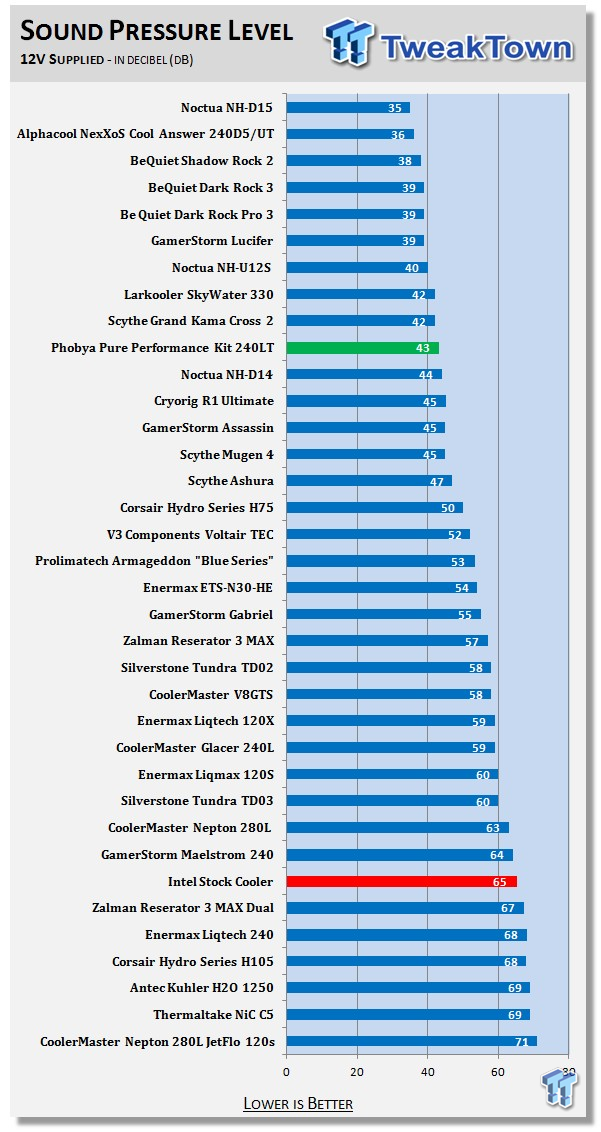
We actually got these fans to spin at 1544RPM when supplied with 12 Volts of power, but even with them going slightly better than the rated full speed, we found the 43 dB of noise coming from the test system to be very tolerable. This is especially true considering what most AIOs sound like, and as we just saw, they cannot compete with this kits performance in thermals either.
Final Thoughts
As we look back at everything we have just seen, before we got to the amazing results in the charts, we will lay out what we found. Everything is well packaged, from the outer packaging, all the way through to the various hardware kits and extras; everything arrived in perfect condition, and ready to go into a chassis. Without having to stop for images throughout the un-boxing process, and the setup and installation processes, we would guess that in roughly two hours or so, you can have everything unboxed, laid out, set up, bled, and running.
That's pretty damn quick. The reason this is possible is that even with all separate components, the parts all match and are picked to work well with each other. Also, with the tubing cutter, you can cut tubing as you install it; none of that back and forth to the table with a utility knife, or a pair of scissors.
We found that this system is well cooled by the UC-2LT CPU water block, as that is the point of contact to remove the heat from the CPU. We also found that the loop offers sufficient flow of the coolant with the smaller pump. With the pump's lower power requirements, there is much less heat dumped into the loop than from, say, a 655 style pump. We also like the thicker radiators with lower fin density, as they have proven time and time again that you don't need a leaf blower and super tight fins to win the cooling race; in fact, Phobya has accomplished the exact opposite. This kit proves that silence, performance, and affordability can be had in one kit; it just took us a while to find it.
On finer details, we loved the fittings. There are thick o-rings that will seat completely with just finger tightening, and that is in all of the components; not once did we ever feel the need to grab pliers. The lack of any real instructions is a bit of a downer for the new guys to water cooling, as we feel they are as entitled to this level of performance as well. Although, after looking up the individual components online, it is a bit easier to figure out how everything works.
If we were to pick out one thing that we really found any issue with at all, it would be the lack of a funnel, or at least a squirt cap on the bottle of coolant. While we have plenty of spare parts, filling the loop without any "extras" lying around may have you running to find a clean way to get coolant into this loop. Otherwise, the kit just wins in all aspects.
We realize that the pricing of this kit is a bit on the steep side when looking at a lot of the other cooling choices on our charts. When it comes down to the best of the best we have tested to date, we find that the Phobya Pure Performance Kit 240LT is worth every penny of its $182.76, all-inclusive pricing. To get the best of the best, this is a mere drop in the bucket compared to what it would cost to source all of these components individually. Even when we think back to dual AIO pricing at $120-$130 upon release, for another $50 or so dollars, why not treat yourself to what you truly wanted in the first place?


