Introduction, Specifications and Pricing
Over the last four years, we have seen IN WIN work their way up to the upper echelon of chassis manufacturers. When we first started reviewing IN WIN cases, they seemed to deliver functional cases with most of the feature set that was hip at that time. The real issue for us then was the child-like external aesthetics. There were a few chassis, that upon glance, we knew were intended to suit some very young people. This was probably due to the appearance of these early chassis, some of which ranged in aesthetic from looking like a football helmet or a transformer, to just some bright pieces of strangely placed accent plastic.
Although, it wasn't too long until we saw the limited edition X-Frame. This $500 chassis was the first of its kind, and took the conventional wisdom of what composed a great test bench, but it was also designed to run lying flat, or it could stand up in ATX or reverse ATX configurations as well.
After a year or so of using the X-Frame exclusively to test our CPU coolers on, we were given yet another IN WIN chassis in a line of exclusive chassis designs. We are pretty sure there were only five hundred of the X-Frame cases, and we were told the same about the D-Frame that now graces our CPU cooler test setup. Of course, with the D-Frame, there were orange and red versions of the chassis, so in total, they may have produced a thousand of these cases, and they retailed those hand built creations for an almost unobtainable $700.
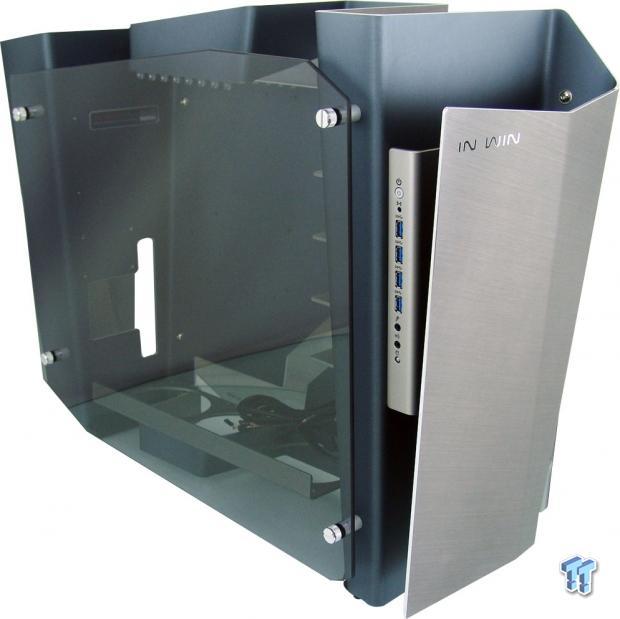
The reason we have you here today is because IN WIN has stayed the course, and has now released something intended to top all other cases they have made in the past. This new case is open-air like the previous two; it has glass sides like the D-Frame had, but in all ways, things are much different in their latest release. Today we will be looking at the new S-Frame from IN WIN, which gets its name from the one piece, 4mm thick, extruded aluminum frame that meanders from front to back much like a snake would. We feel that IN WIN has definitely come up with something very unique, and it will undoubtedly be sought after. However, the question is: Did IN WIN cross the line where art takes precedence over function, or have they mastered the two for a harmonious blend of aluminum, glass, and technology? Stick with us and find out.
As we have already mentioned, the S-Frame is constructed almost entirely of 4mm thick extruded aluminum components, but they are held together with steel bolts and screws; not one part of the chassis is riveted into place. On either side, much in the same way the D-Frame offered side glass panels, the S-Frame also offers tempered glass side panels that are tinted, and screw to the chassis for quick removal. The S-Frame also comes in two color options. We received one of the light blue and grey models that were sent out as review samples. While we can only locate the black model with red trim for sale in the retail market, there may be more blue ones in the wild as well.
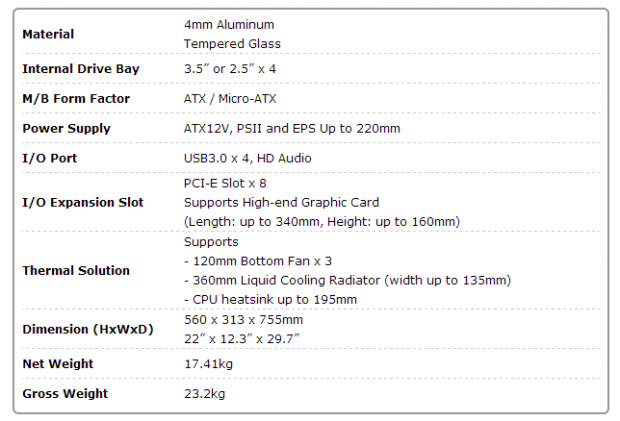
In, on, or around the chassis somewhere, since this is in no way a conventional design or layout, you will also find the following. The S-Frame will house either a Micro-ATX or ATX motherboard in the middle. In front of that, there are trays for four storage drives, whether 3.5" or 2.5" (they are drilled for both), but there are no optical bays. The PSU hangs hidden to the right side of the chassis, and like the D-Frame, this chassis also uses plastic clips to tie wiring together as a form of wire management. Along with eight PCI slots, support for a 360mm radiator, room for 195mm CPU cooler, 340mm of video card, and its massive size and weight, the motherboard is also turned ninety degrees, and allows this chassis to take advantage of stack effect cooling.
As we have seen with other exclusive IN WIN chassis designs, if you want one you, are going to have to dig real deep. Both the MSRP, and the pre-orders we were able to locate for this chassis, boast a $799.99 price tag is that same across the board. With this sort of a price point, we have to take into consideration cases like Mountain Mods, CaseLabs, and the like, as you can get some mighty fine cases there for this sort of price point. There is something that none of these cases can offer, and that is this very unique design, which is easily recognizable, even from across a crowded hall. One look at the S-Frame, and you know what it is for sure. The real issue at this point is to find out whether we are paying for a Michelangelo, or for the ultimate evolution in case design.
Packaging
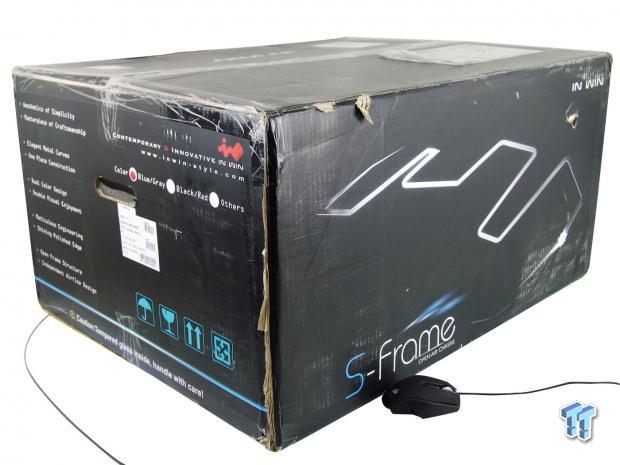
The packaging is so huge, it took up our entire photo booth and then some. Notice that we did add the mouse for a bit of perspective. The left side panel shows us some features of the chassis, along with a sticker denoting its color option. On the larger front panel, we find the S-Frame naming, and just a view of the top edge of the chassis that lends to the name of this design.
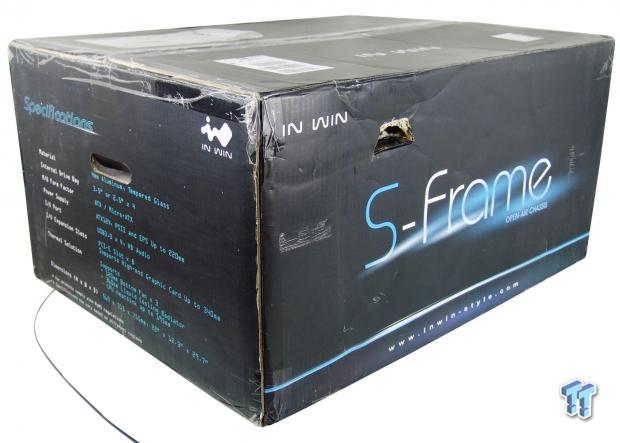
Spinning things around, we can see on the side panel that there is a specifications chart offered below the handle. The back, or maybe this is the front, features a large S-Frame across the middle, and the IN WIN website address in much smaller text at the bottom.
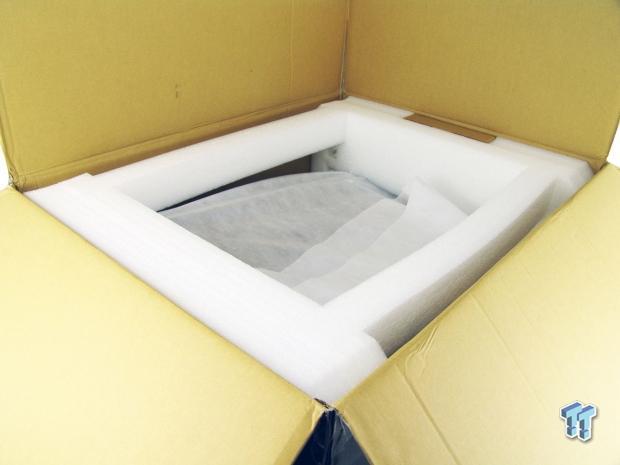
We noticed a couple of pokes through the cardboard, and one hole is even large enough to fit your hand through. However, as you can see, the use of dense foam and a lot of empty space allows for this nearly forty pound chassis arrive safely, even with the box damage.
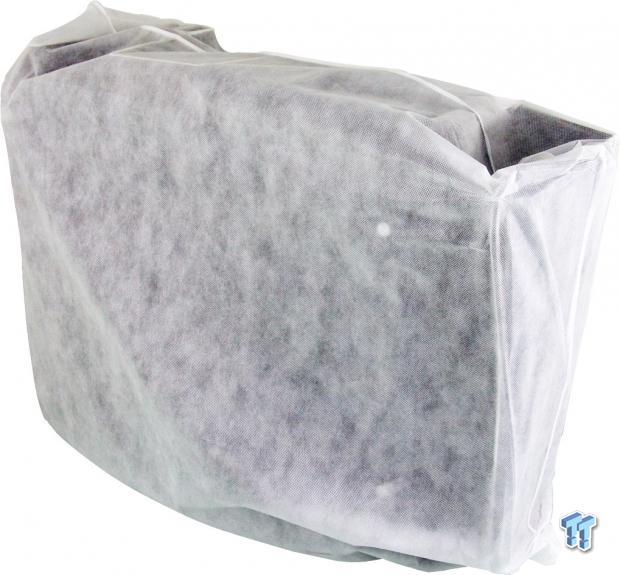
We do realize the chassis is currently sitting backwards, but the point here was to show that IN WIN also wraps this chassis in a cloth bag, which usually graces high cost cases. The added bonus is that it functions as a travel cover as well.
IN WIN S-Frame Open-Air Chassis
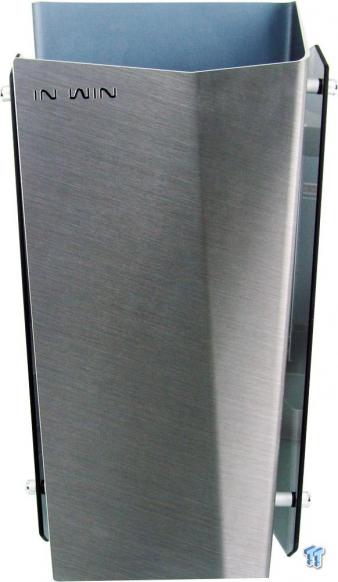
The front of the S-Frame is made from the same 4mm thick aluminum that makes up the rest of the chassis. However, unlike the rest of the chassis, here it is shaped to be thinner at the bottom, and wider at the top where the IN WIN name is placed. You can even see the reverse side and its blue color peeking over the top.
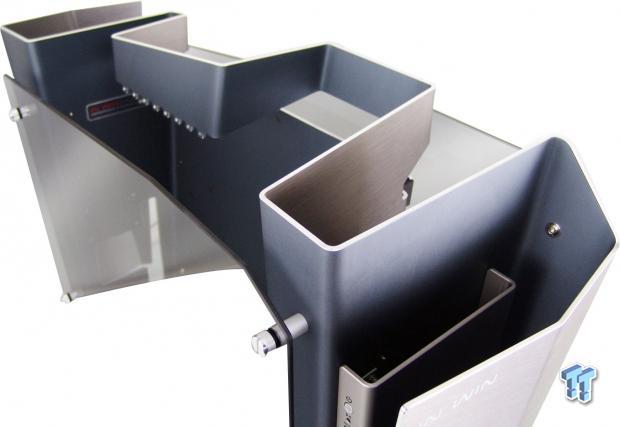
Just like the box would suggest, we find the backbone of the chassis to be the structure at the top of the chassis. There are no places for fans, as this is the rear I/O, but these shapes and bends all have a strategy to them.
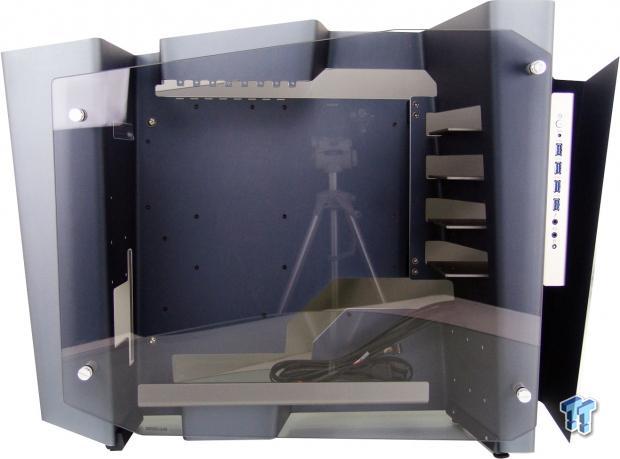
As we spin this monster around for our next view, we are looking through a sheet of tined and tempered glass. This affords a full view of the interior, but we do not see a lot of what makes a conventional chassis here; instead, we just see a vast expanse of angular, blue aluminum, with grey bits here and there.
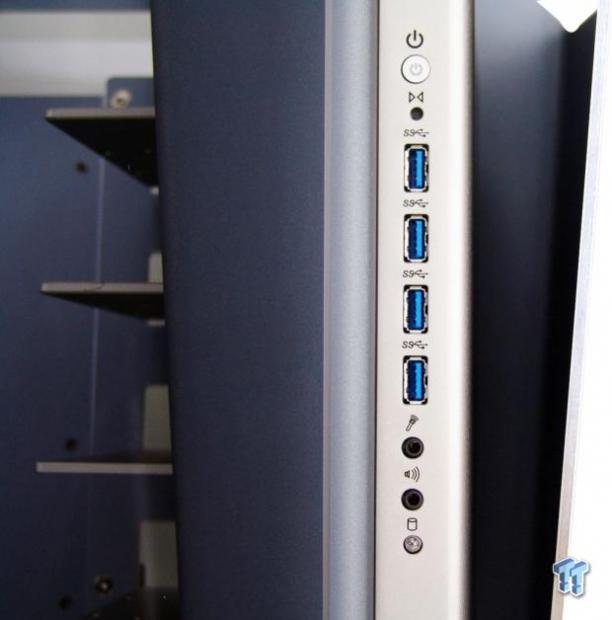
Toward the front of the chassis, just to the right of the glass side panel, there is the front I/O panel. It is well appointed, and offers buttons, lights, four USB 3.0 ports, and HD audio connectivity.
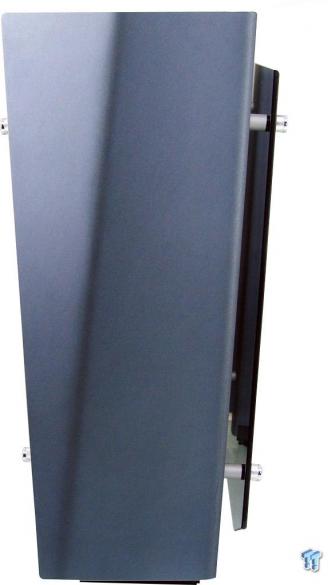
As we look at the back of the chassis, we see it is like a reverse of the front bezel. We don't have anything peeking out of the top this time, but the shape and angle added through the panel are very similar. However, instead of brushed aluminum, we see this side carries on with the blue color.
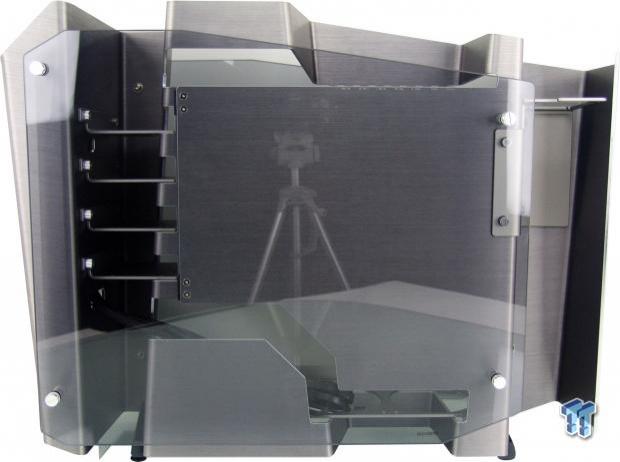
The right side of the chassis offers an identically shaped, side glass panel, so they are interchangeable. As you can see behind it, there is room for wiring to pass, but nothing to help maintain the wiring.
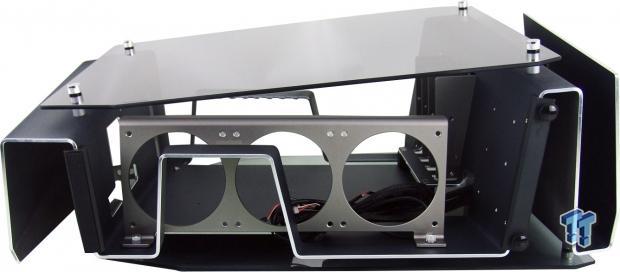
Looking at the bottom of the S-Frame, we see the extruded shape of the backbone runs all the way through. The back of the chassis is supported with a wide rubber pad, but at the front there are two adjustable feet to make sure this chassis will not wobble, even if the desk is a bit out of whack.
Inside the S-Frame
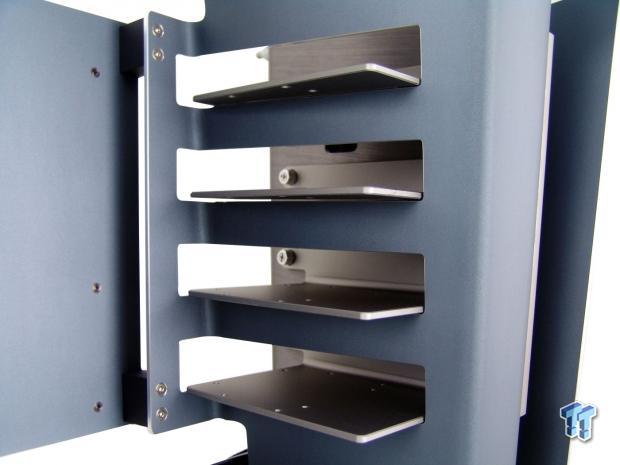
With the glass panels now removed for a better view, we are back at the front end of the chassis, looking where optical bays would typically be. However, these are pre-drilled trays for up to four storage devices.
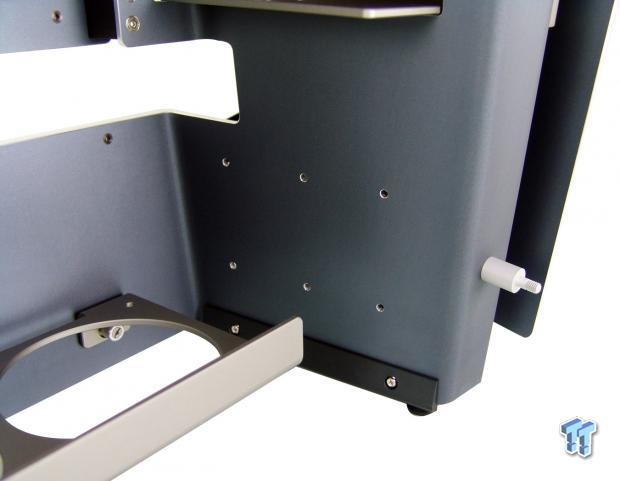
With no manual, and the online guide not offering much at all, we can only assume these six holes drilled into the chassis are to be used for pump or reservoir mounting. It could be used for just about anything really, but that is our guess as to its intentions.
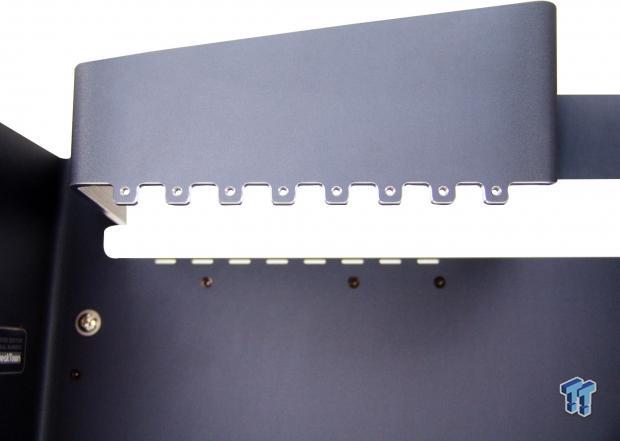
Looking back up at the top isn't much different than looking down upon it, with the exception of the notches and drilled holes used to support expansion cards, in conjunction with the slots milled into the motherboard tray.
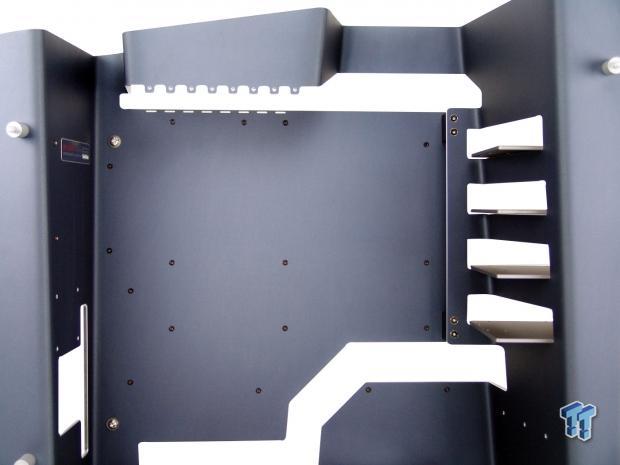
The actual motherboard tray is completely flat, and offers no CPU cooler access hole, but comes with brass inset nuts secured in the aluminum to mount the standoffs, or some of the clips for wiring. The bottom is cut away to act as a pathway to pass cables all the way from the left, to the right of the motherboard.
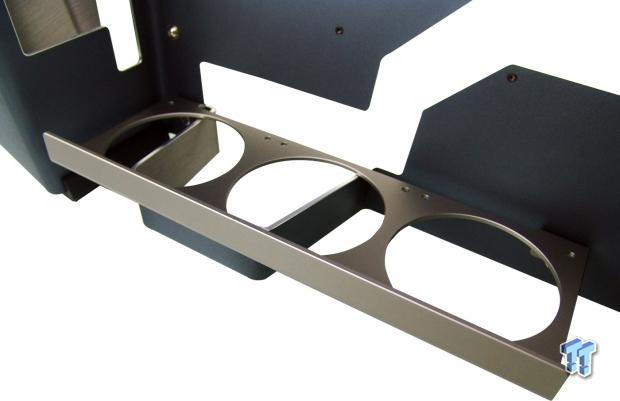
Where the floor would be in a conventional chassis design, in the S-Frame, things are completely open to allow the intake of cooler air, helping convection do its magic inside. There is a fan or radiator support plate in this design that is drilled correctly for custom water cooling, but it may play up with AIO alignment.
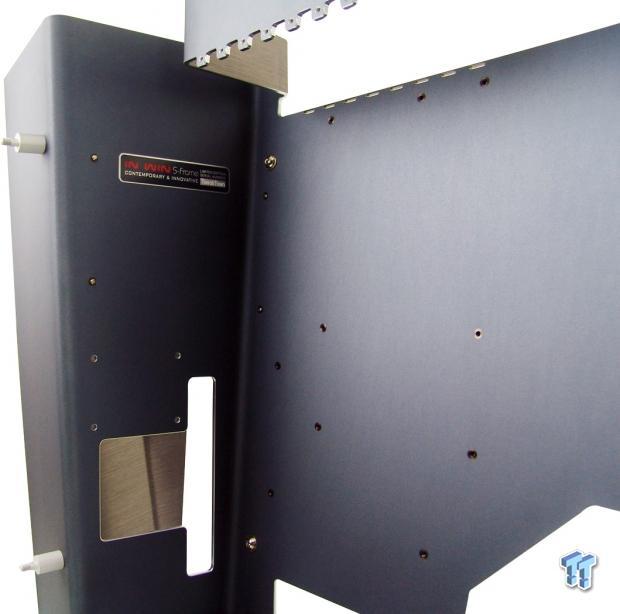
Where we would normally see expansion slots and a fan, the S-Frame offers an expanse of that blue aluminum. On the panel there is a plaque, holes for either storage or more water cooling mounting, and a large cutout for wires to pass into the chassis from the PSU.
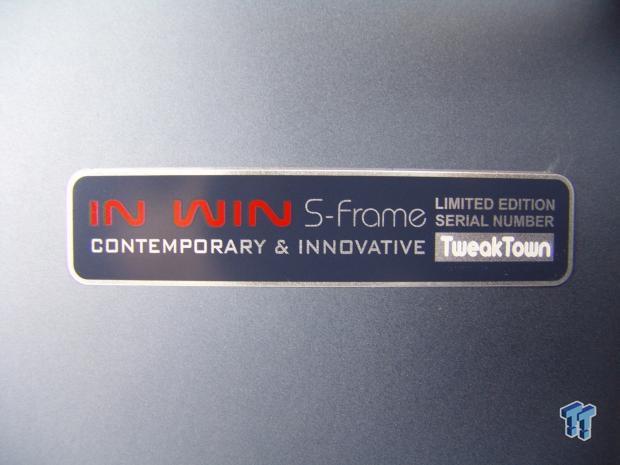
When you get the S-Frame retail, this plaque will be exactly the same, but where ours has "TweakTown" carved into the plate, you will have an actual serial number like "005/500."
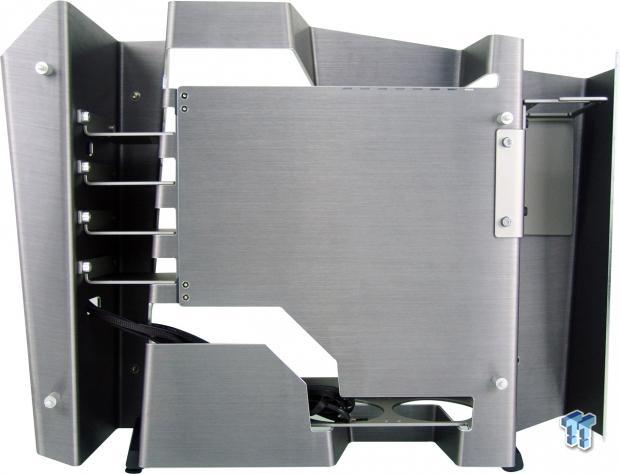
Looking at the back of the motherboard tray, we can see the drive stack off to the left, and the chassis wiring is even laid into the channel cut along the bottom. So, that leaves the right side area for the PSU mounting.
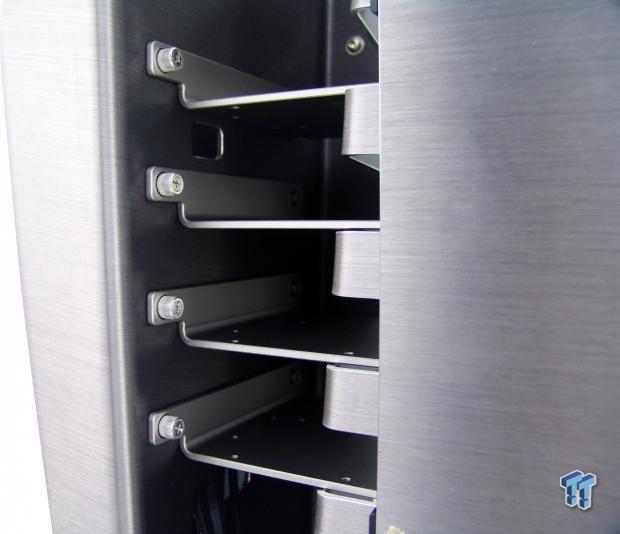
The four aluminum drive trays are kept in place with the spring load screws on the left. It also uses a pin system at the far end of the tray for support, but they do rest on the aluminum frame for additional support on the right side, and each tray is drilled for 2.5" or 3.5" drives.
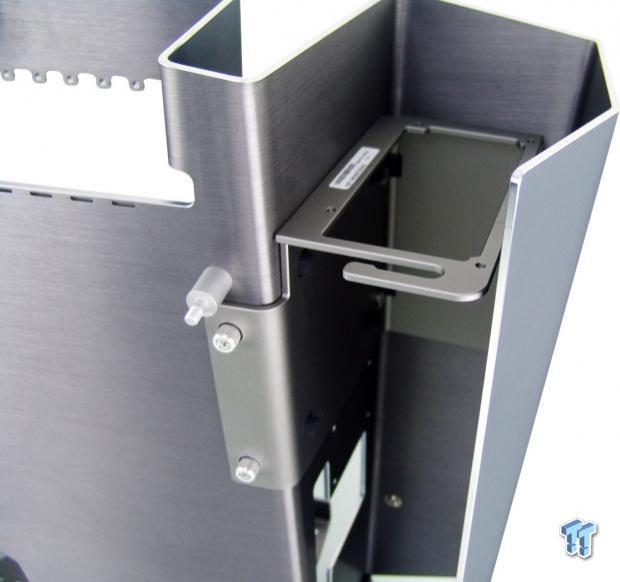
There is a PSU support bracket that should be removed to easily install the PSU to it. Like the drive trays, the bracket has two spring loaded screws at the back to take the full weight of the PSU you want to install.
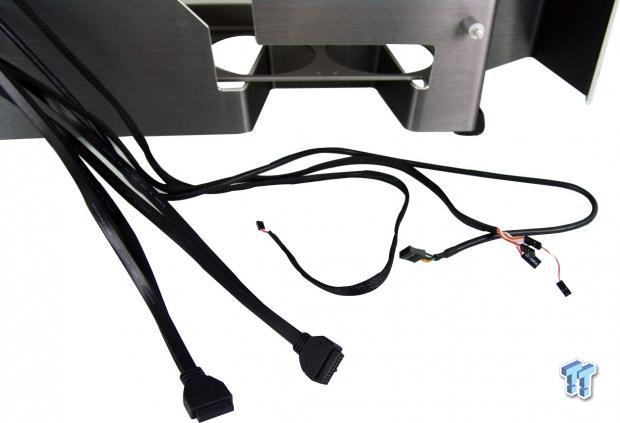
It is easy to see that there is plenty of cable for the front panel lights and buttons, and even the HD audio cable has plenty of length. However, the USB 3.0 leads are much shorter, and if the header is not on the side of the motherboard, this may cause issues.
Accessories and Documentation
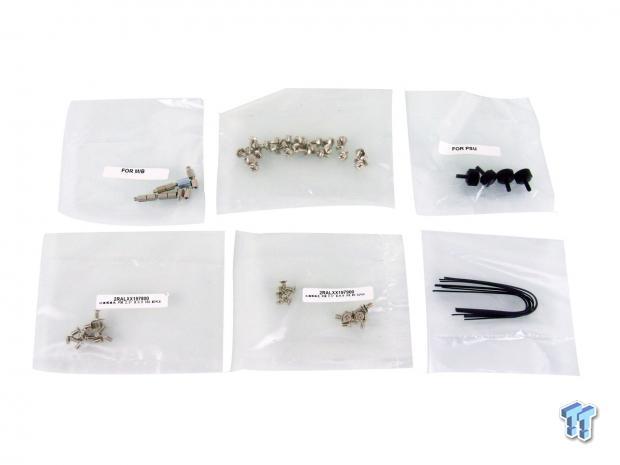
Stashed within the dense foam that secured the chassis in the box, you will locate a plain brown hardware box. In that box we found six bags of hardware to be used. There are standoffs, and a socket for them; hex head screws for the motherboard, the wire management, and expansion cards; along with four large thumbscrews to mount the PSU. At the bottom, we have a pack of SSD screws, a pack of HDD screws, and believe it or not, we got ten twist ties for wire management.
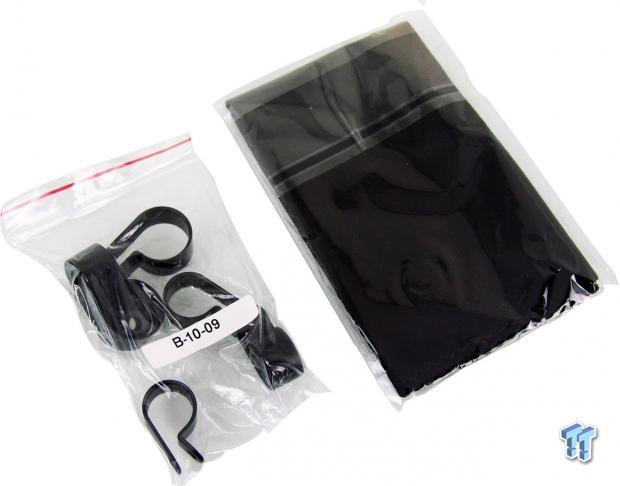
We are also given a bag containing six clips that surround the wiring and get screwed into the chassis to help tend wiring. There is also a micro-fiber cloth to keep the glass clean.
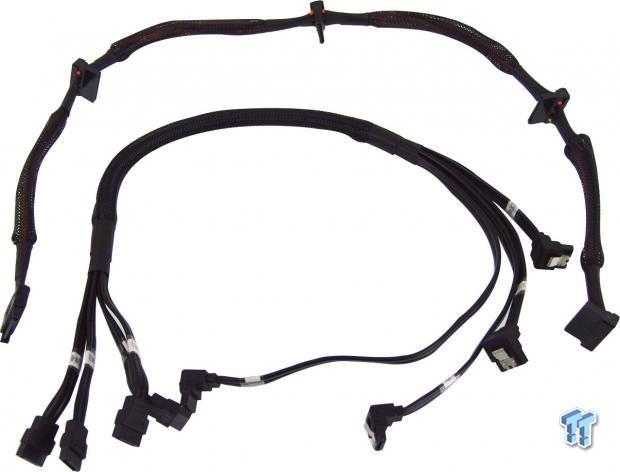
IN WIN takes things a bit further than most, and has provided a four-connection setup for the storage bays. They offer an adapter for the SATA power line that clips into the PSU lead, and extends the line to make a much cleaner setup. They also provide SATA data cables that are bundled and marked "COM1" through "COM4."
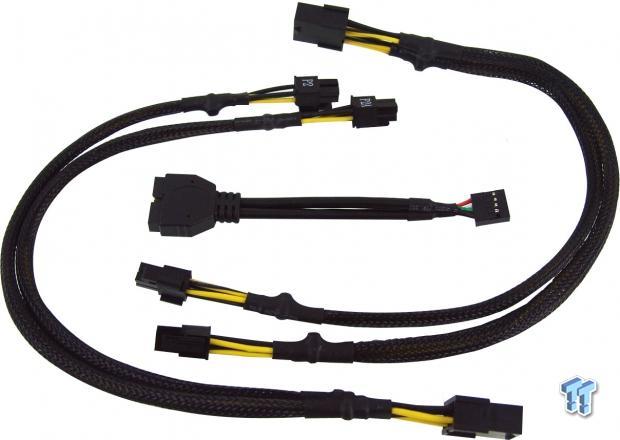
Since, the eight-pin connection, or connections, on more recent motherboards are typically so far from the PSU, IN WIN also includes two extension cables to be sure you can get everything connected. We also found a native USB 3.0 to USB 2.0 adapter included, in case the motherboard does not have dual USB 3.0 ports.
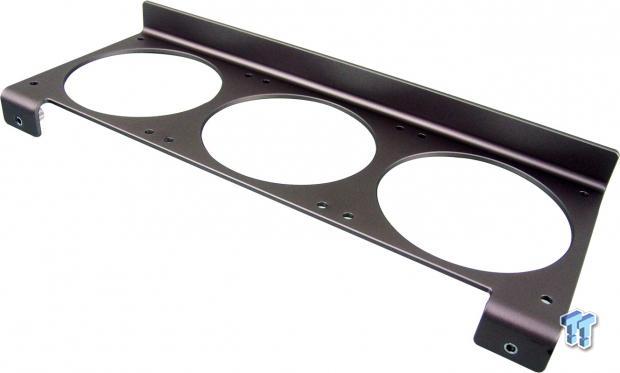
The radiator, slash fan mount for the chassis is grey in color, and is removable from the chassis with the same screws that hold in the PSU bracket and drive trays. On the flip side, the holes are countersunk for 2mm of the 4mm thickness, but they are small in diameter, and are not fit for larger mounting screws.
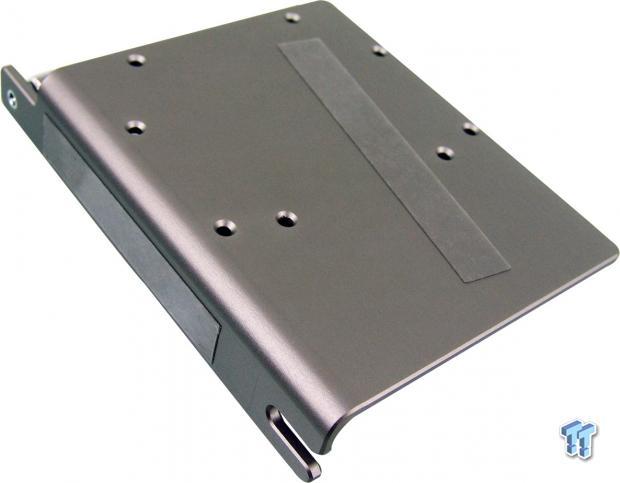
We removed a drive tray and took time for this image for two reasons. One reason is to show the mounting holes that are drilled and countersunk for both drive sizes, but we also wanted to show that they added plastic strips to all the removable components where it will be supported by the main section of the chassis.
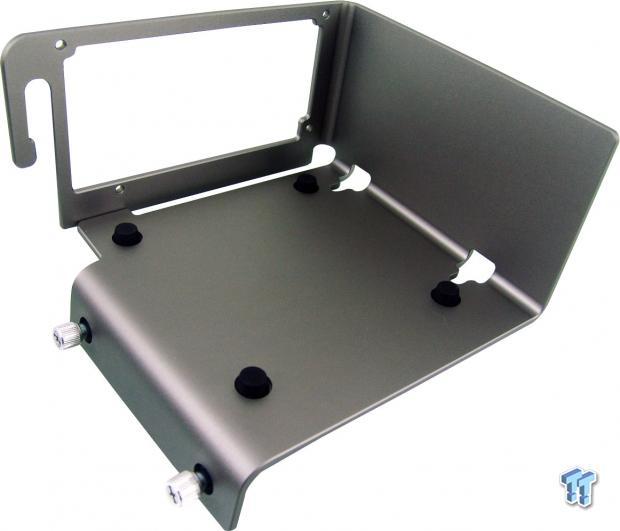
The PSU is to be installed with the fan facing upward, as this bracket is oriented. We also see that there are rubber pads to isolate the PSU vibrations, as well as to line up the mounting holes at the back with the ones on the power supply.
Case Build and Finished Product
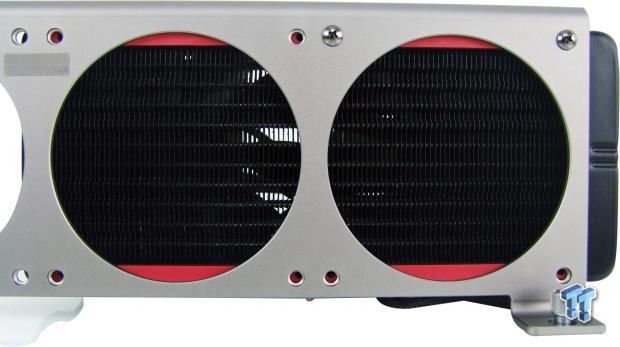
While we were safe with our choice of AIO to cool our CPU, since it has rubber strips already in place, the lack of mounting screws that we could use won't add any extra vibrations. However, we did test this with an EK and Swiftech radiator, and found no issues there; just a heads up for AIO users.
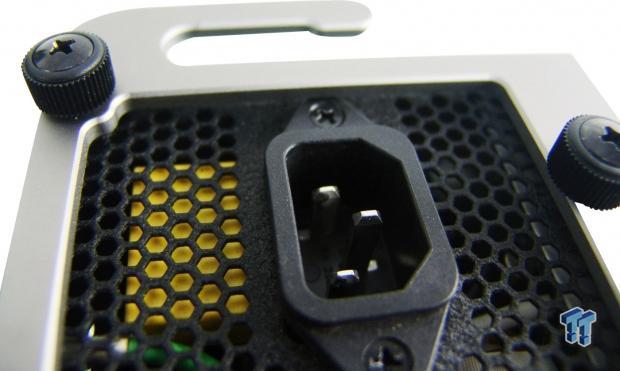
Another issue we found was with the PSU bracket. At least the screws are long enough to compensate for the fact that the bracket does not clear the socket to power the PSU. We are held in with a couple threads here, but the other side is, of course, screwed all the way down.
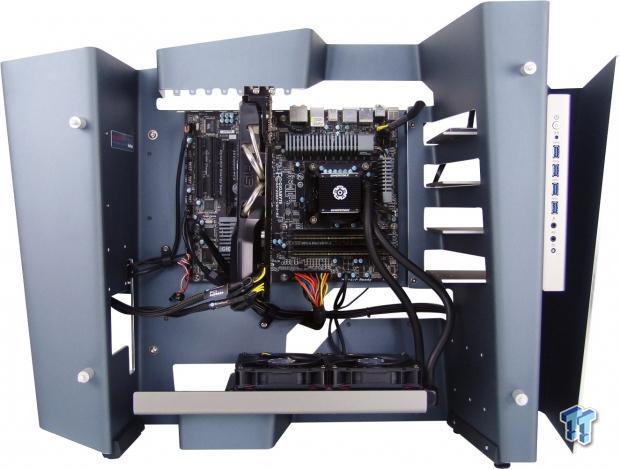
As much as we tried, with our components, we just were not happy with the finished results. The motherboard, AIO, GPU, and SSD look clean, and even where the wiring begins at the right, we are still okay with things. The fact that the USB cables have to pass over the motherboard to be connected is just too much to handle in a chassis of this cost. It is in no way a pleasure to try to wire cleanly, and we barely have any gear in this case.
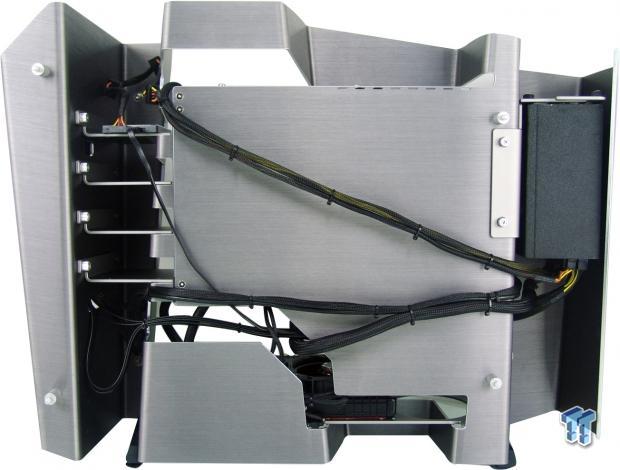
As we spin around to the back, we find some really tacky wire management where we had to invent tie points at either end, and strap multiple wires together to even be presentable. A cover would have been nice, or how about some of those brass inserts for wire management like we saw on the front? Tacky.
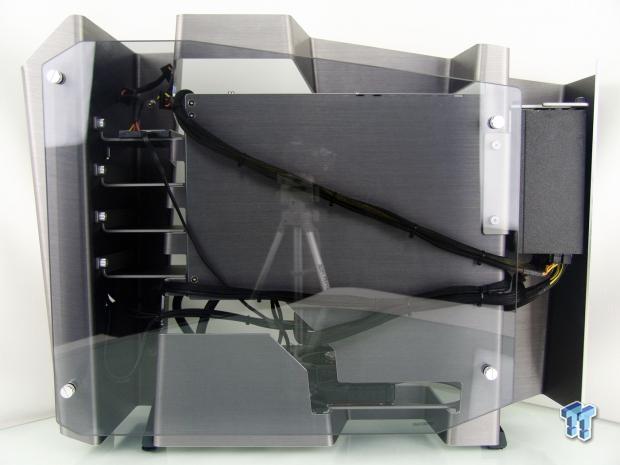
Even once we reinstalled the tinted side glass, we can still plainly see the wire management. If this chassis is obviously designed to be seen from every angle, we feel this is a drastic oversight in this design, as is the lack of a CPU access hole.
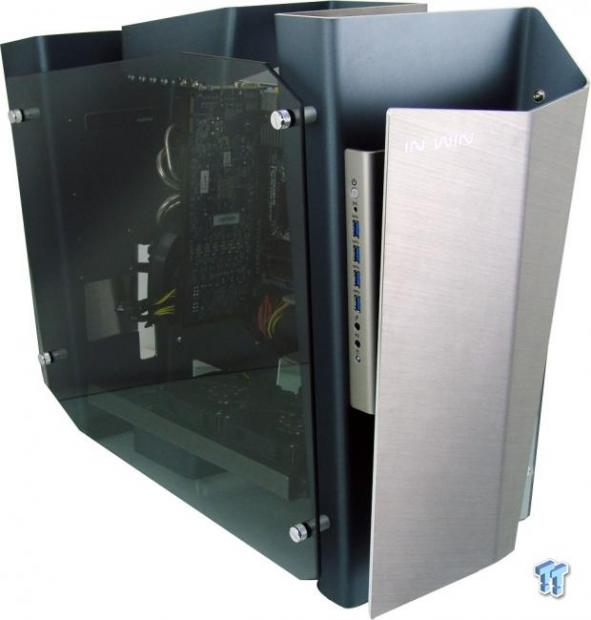
Now that everything is back together, we take a few minutes to admire all of the time and energy it takes to continuously spin this forty pound monster to wire it and mount the components. It was a lot of work, and we just aren't that happy with what we had to do with our choice of components.
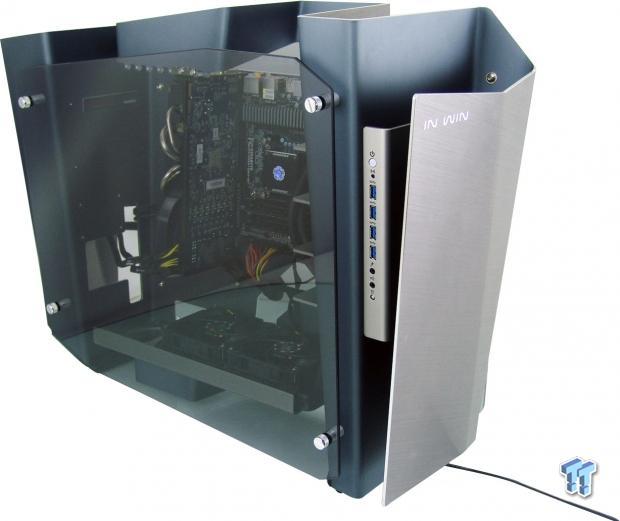
Once the chassis is powered on, there is the occasional flicker of the HDD LED at the bottom of the I/O, but the power button at the top stays illuminated as long as the chassis is powered. Another thing to keep in mind is that this chassis is completely silent; although, noise level is up to you, as the choice of fans and cooler is what will set the tone here.
Final Thoughts
There is a ton, almost literally, to like about the S-Frame. While it's not very tall in stature, this chassis is thirty inches from front to back, and that is a definite concern when looking to house a chassis this massive. At the same time, the one piece, extruded, 4mm thick aluminum structure is so unique, you will never see another manufacturer match its design.
We in no way mind the lack of optical bay, as this is more of a display chassis that will sit proudly and display all of the expensive hardware inside, in plain sight. We also like that IN WIN has come up with a design that is fully water cooling ready and capable, without having to mod it or drill holes in very expensive investment. There is also the exclusivity factor. These chassis come in limited supply, and no two cases will match since they have individual serial numbers right on the plaque. Also, don't forget, the retail version of this chassis is likely to be the all black version with red trim, just in case you do like the design, but aren't so in love with the blue and grey we have shown you today.
The sad thing about this is that while the S-Frame is an eye catching work of art, and a design that takes what we know about chassis to a whole new level, we do have a problem. The problem is, we did find it was almost more art than a functional chassis. We fully understand the costs involved in making limited production runs, and at this price, or any other price, you will not find another chassis like this anywhere else. However, with such a high price, the bar is raised exponentially when it comes to features, and how well the completed package does overall.
This is where the S-Frame stumbles in our opinion. The PSU bracket makes it so you have to be leery of it if you get a correct mount, or use some ghetto rigged setup like ours. Then you have to be sure of what motherboard you choose, because the cabling from the front I/O is not made to fit well with every layout possible. On top of that, with only one way to mount any fans to the system, or any sort of water cooling, due to the fact that the holes are not slotted in the mounting plate, only custom water cooling is truly viable. That or just filling it with fans and using an air cooler. For this kind of money, if I can afford to buy it, I should be able to put whatever system that floats my boat inside of it as well.
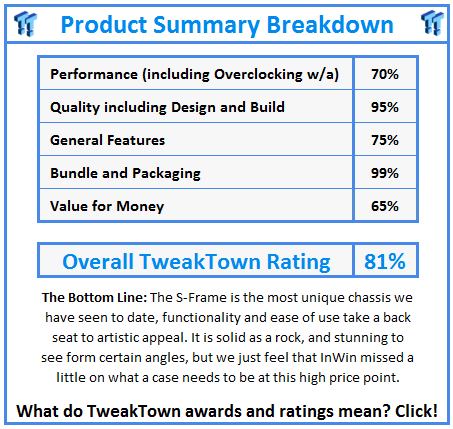
At this point we are really torn. IN WIN has proven over the last few years that they are not afraid to step out of bounds and deliver something completely new, and unheard of. On the flip side of that artistic coin, we can appreciate the costs involved all the way around, but when it comes to shelling out $800 of our hard earned money, we should not have restrictions or ugly parts to the build. Simply offering longer cabling on the Native USB 3.0 leads would fix one nasty looking issue.
Also, how hard would it have been to add some sort of removable cover to the back of the motherboard tray, so when someone looks at it from the back, they would be as astonished to look there as they would be to look at it from the front? In the end, we feel that while IN WIN made one hell of a chassis, they just sort of lost focus, and definitely put form ahead of function with this design.


