Introduction, Specifications and Pricing

While Zalman is a company that is much better known for their CPU coolers than anything else, they have been adding cases to their lineup for quite some time now. From what we saw at CES on our last trip, they were full of ideas and designs that were all aggressive in their aesthetics, and it was easy to see Zalman was watching the market and offering things inside of the chassis designs that should help them keep up with today's needs in cases. While it has been a long time since we have last seen a chassis from Zalman, this is exactly why we have you here now.
The latest chassis we are looking at is one of a group of cases. There is a vanilla version as well as a Plus addition to the same essential design. Also with the Plus chassis, there is the option for a black or a white version to choose from, of which we received the latter. The reality of the differences is pretty simple, though. The vanilla offers everything the Plus has minus two things. One of which is a VGA support bracket, and the second feature is that the Plus version also offers a window in the side panel. Outside of those two things, this one review will pretty much cover all three versions of this chassis.
Today, Zalman has us looking at the Z3 Plus White, the latest offering in their mid-tower cases. As you will soon see, while very light and aesthetically appealing, they also offer things like wire management, room for longer expansion cards, bays for both 2.5-inch and 3.5-inch drives, and an opening in the motherboard tray for access. The Z3 Plus does bring a lot to the table. What we are here to distinguish is if this chassis is worth the time and effort to consider it for your next chassis. By the time we are done, you will have the full picture, and all of your questions will be answered.
The chart offered from Zalman offers a comparison chart between the Z3 Plus, the Z3 Plus White, and the Z3 to the right, but we snipped out the Z3 as the only difference is the two features we described above. Just under the names, we find they are all mid-tower designs in a chassis that weighs just thirteen pounds empty. These are made of steel and ABS plastic, and while the Z3 Plus is all black, the Z3 Plus White is all white but has black steel mesh used down the front bezel. Also, all three of them can house Micro-ATX and ATX motherboards and allow for 360mm of video card length.
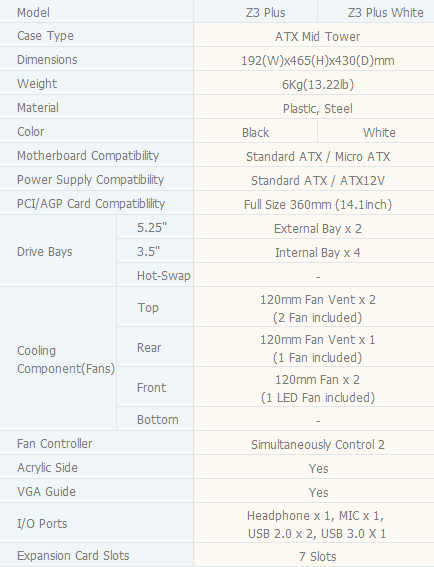
Inside of the chassis, it offers two 5.25-inch bays with a single 3.5-inch bay under those, all of which are exposed through the bezel. At the bottom of the chassis, just behind a 120mm blue LED fan, there is a rack to house three 3.5-inch drives or a single 2.5-inch drive on the top of said rack. In the back of the chassis, along with the bottom mounted PSU and seven breakout expansion slot covers, there is another 120mm fan added for exhaust. As for the rest of the offerings, you can read about the front I/O offerings and the two-fan fan controller. There is more to this design, which will be seen soon enough as we make our way through the images. As it sits now, it seems the Z3 Plus cases have what everyone needs.
Looking around to see if Zalman has made this chassis widely available, we are finding it everywhere we look, and we have to assume they are doing the same in their other markets. This is also where we get into the pricing, and while a few places are offering free shipping with this chassis, its pricing is below that $100 magic line that we feel well equipped mid-towers should not cross unless it is something revolutionary or the material choice prohibits such a low cost. This is good for Zalman and this Z3 Plus White chassis. To be honest, we were expecting the price to be higher, as it seems many of the cases we just looked at this month we're asking a bit too much for what was offered. Zalman seems to have hit an acceptable price point for what we know of this design so far.
PRICING: You can find the Zalman Z3 Plus White for sale below. The prices listed are valid at the time of writing but can change at any time. Click the link to see the very latest pricing for the best deal.
United States: The Zalman Z3 Plus White retails for $60.99 at Amazon.
Canada: The Zalman Z3 Plus White retails for CDN$87.51 at Amazon Canada.
Packaging
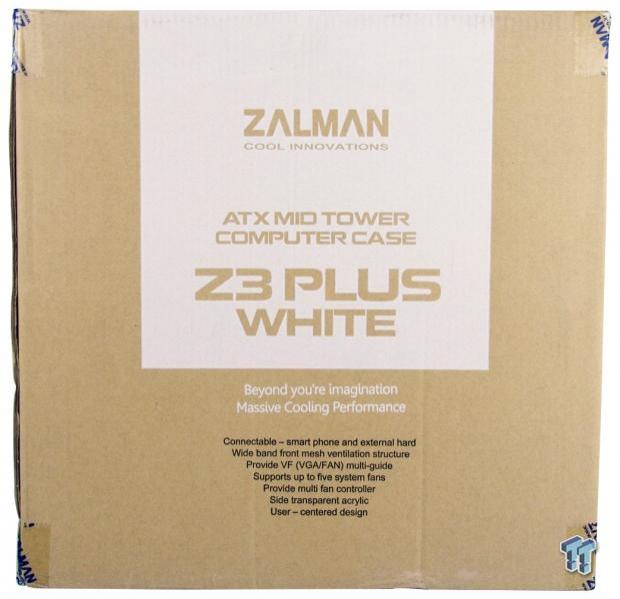
The packaging is kept very basic by using plain cardboard to print the large white section with the naming on it. They also offer some black printing as well, but here it is used to list seven features found in the Z3 Plus White chassis.
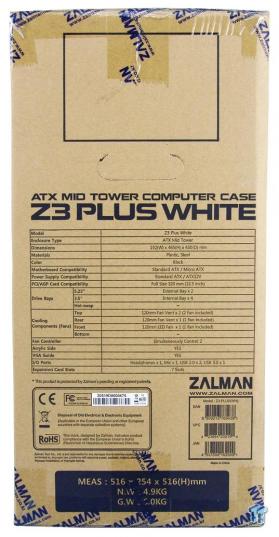
As we spin the box to look at the next panel, we find this time a fully detailed specifications chart. As an added touch, it is cool to see the box sealed with Zalman tape to be sure the box has not been tampered with and just resealed.
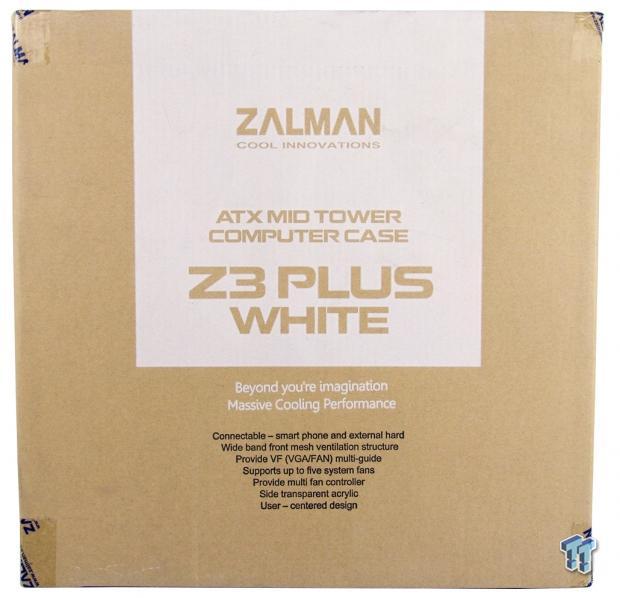
Along with using simple printing and plain cardboard, to save a bit more money to invest into the chassis, the larger panels are duplicates of each other.
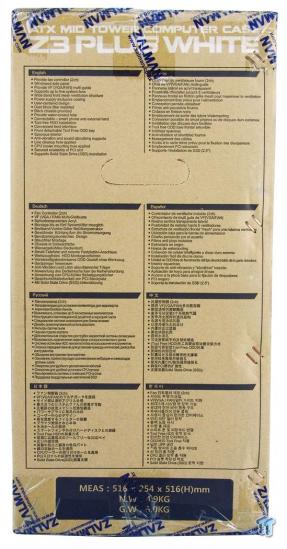
In eight total languages, we get lists of no fewer than twenty features found in and around the Z3 Plus. Do not let the measurements and weights at the bottom confuse you; those are gross numbers that include the packaging.
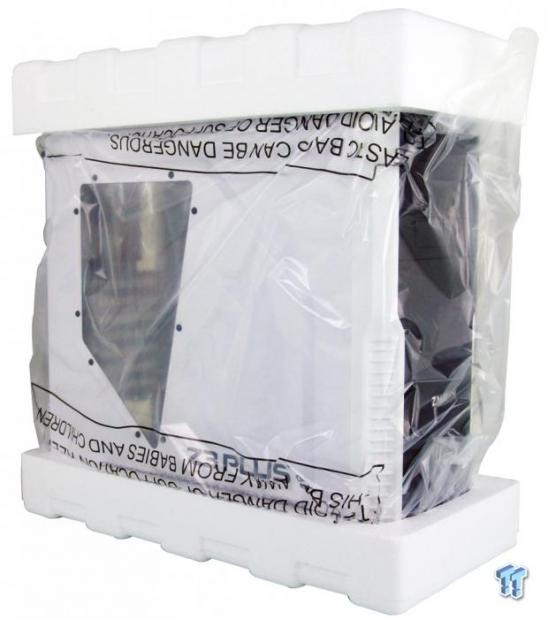
As most cases do, the Z3 Plus White arrived wrapped in a clear plastic liner, and since it offers a window, both sides of the window also have plastic protecting it. To take on the big drops and tumbles, Zalman used Styrofoam to cap the ends. With a light chassis such as this, these materials are a suitable choice and allowed our Z3 Plus to arrive in top-notch shape.
Zalman Z3 Plus White Mid-Tower Chassis
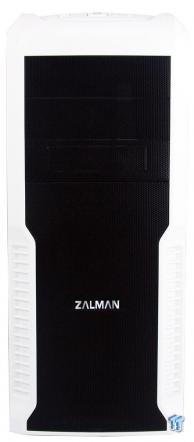
The front of the Z3 Plus is rounded at the top, straight down both of the sides as you pass the ribs added for styling, and down to the blunt bottom of the white plastic trim. Centered in that frame are two 5.25-inch mesh bay covers and a 3.5-inch one just below. The rest of the panel is more of that same mesh with an aluminium Zalman name near the bottom.
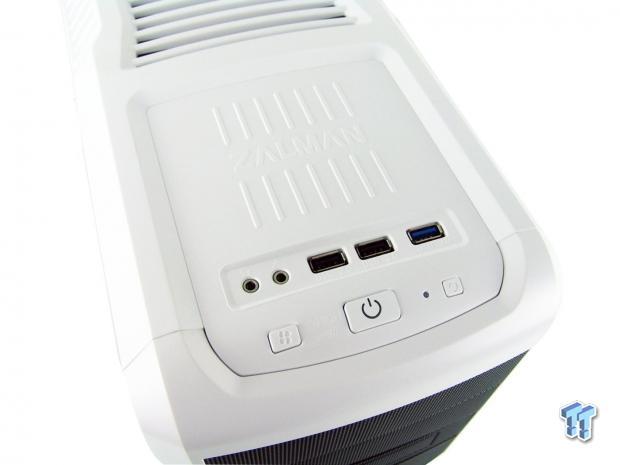
As the front rounds over to the top of the chassis, we run right into the front I/O panel. Here there is the fan controller, power button, and reset button nearer to the front. Right behind them are HD Audio jacks, two USB 2.0 ports, and a single USB 3.0 port followed up with a rest area for maybe a mobile phone.
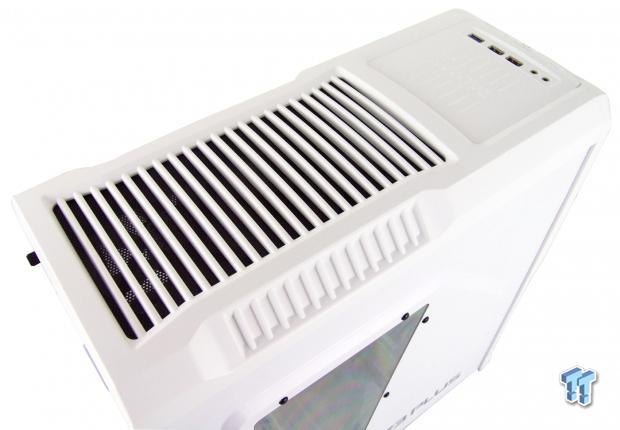
We spun the chassis around to allow for a better look at the louvered top panel with the black mesh under it. Also, to keep with the front bezel styling, both sides of the top panel have the same ribs built into the molded plastic.
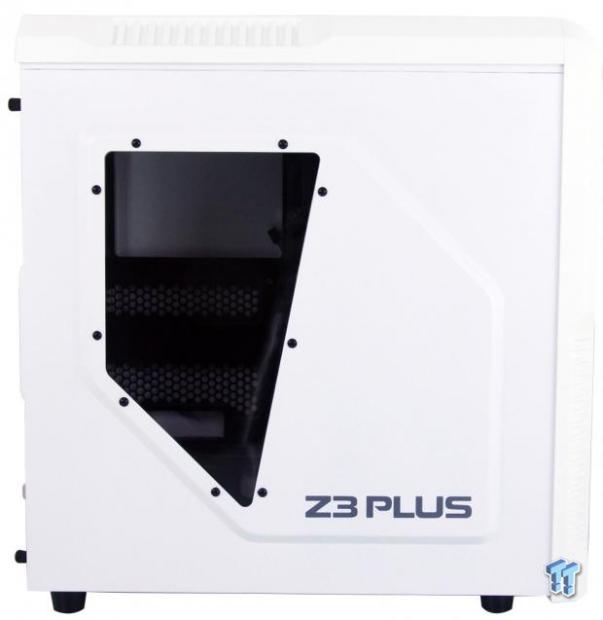
The left side of the chassis offers an odd shaped bump in the steel panel to add a bit of room inside. Cut from part of that irregular shape is the tinted widow to the left, leaving room for the Z3 PLUS painted onto the panel.
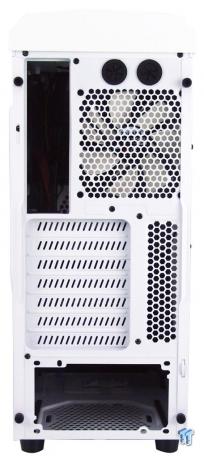
Around the back of the Z3 Plus, we find external water cooling holes above the exhaust fan, seven non-replaceable expansion slots, and that the PSU is mounted in the bottom of this case.
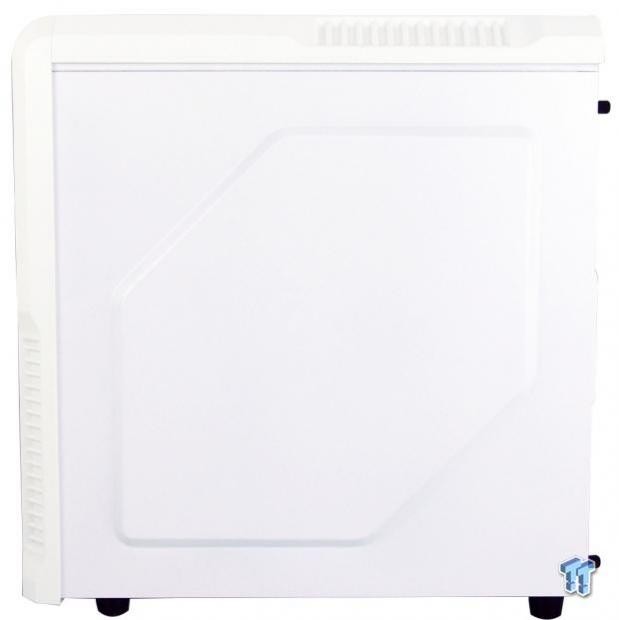
The right side of the chassis duplicates the bump we found on the left side, but this time we are given only white paint and steel. The bump is there for wiring room behind the motherboard tray and is shaped to allow routing where it needs to be.
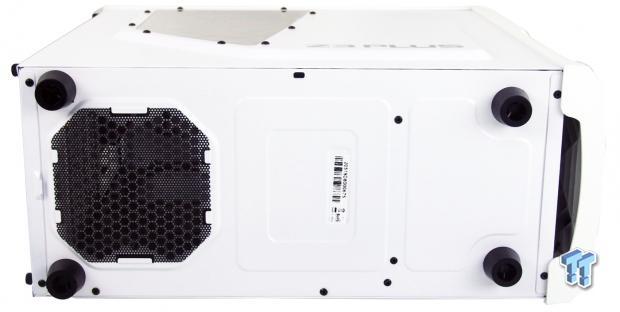
Under the chassis, we find round plastic feet, or maybe they are a very hard rubber, but they slide on glass very easy and will move around a bit on most surfaces. We also see one opening for the PSU to vent through, and it offers a plastic removable dust filter.
Inside the Z3 Plus White
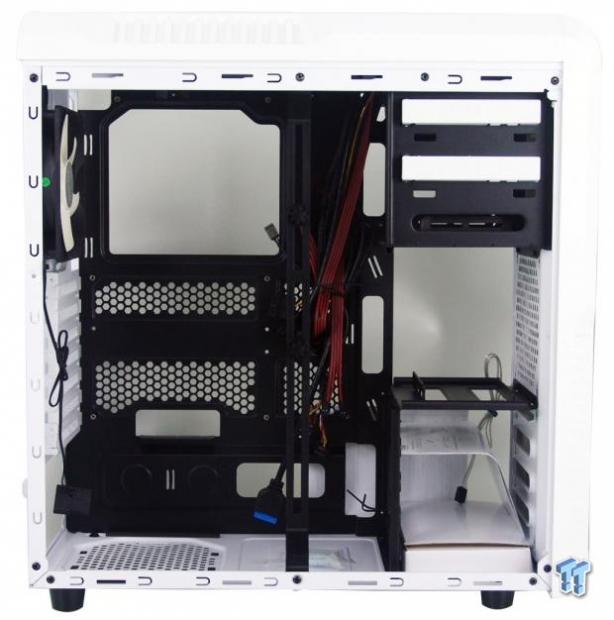
The first look inside of the Z3 Plus shows the wiring tied to the motherboard tray and the VGA support system just to the left, screwed into the edge closest to us. We also find the hardware and manual in the HDD rack, and there is a QC checklist sitting in the back.
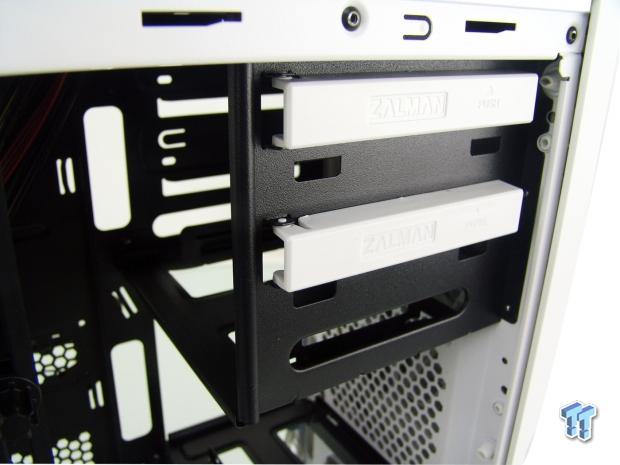
There are three 5.25-inch bays, the top two of which offer tool-free latches and will house 5.25-inch drives. As for the third bay, it has a 3.5-inch adapter built-in that closes that bay to specifically 3.5-inch exposed devices.
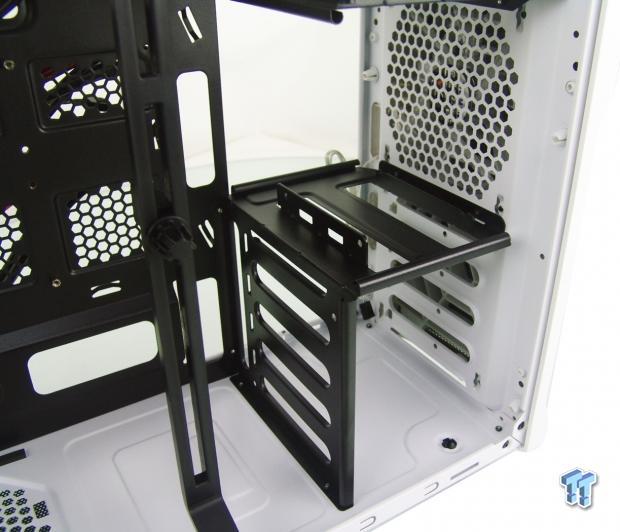
Lower down in the front of the chassis, there is an open area that allows the 120mm fan a solid chance of getting into the main compartment. Below that, there is an HDD rack that looks to hold four drives in it as well as a 2.5-inch drive on the top. There are also holes in the left side of this rack to mount a 120mm fan there.
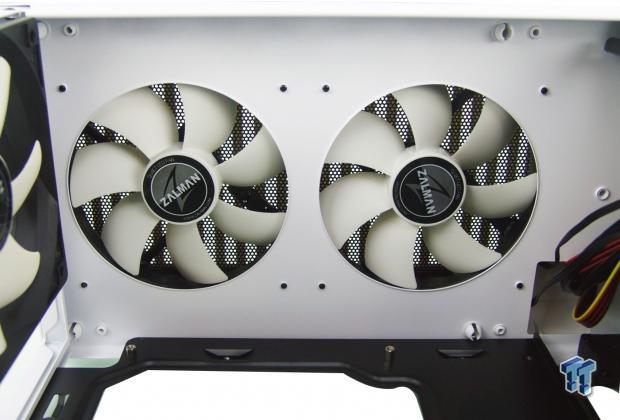
The top of the chassis has round holes cut into the steel, and there is a pair of 120mm fans installed here. While a single radiator AIO is feasible, the offset of these fans is too wide for standard dual radiators.
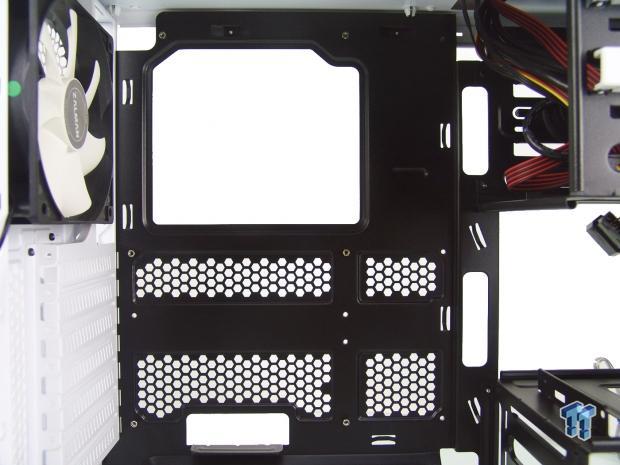
The motherboard tray has the standoffs already in place for six of the nine ATX holes, offers a large access hole, and has five wiring holes and a lot of ventilation added to keep things cool.
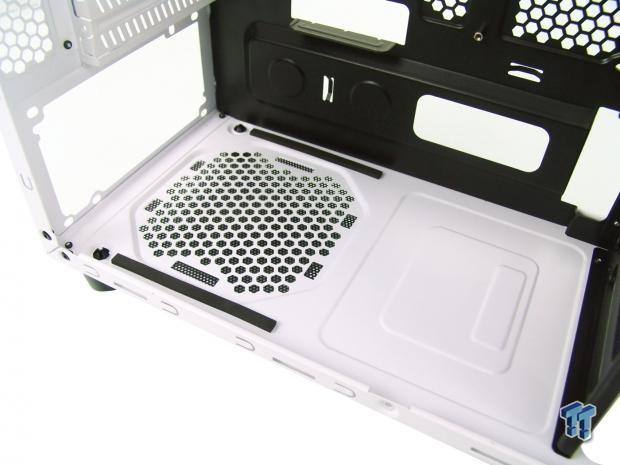
The floor of the chassis does not offer an optional fan placement, but there are rubber strips to allow the PSU to sit on top of, and we can also see that the back of the chassis, where the PSU mounts to, does not offer a gasket.
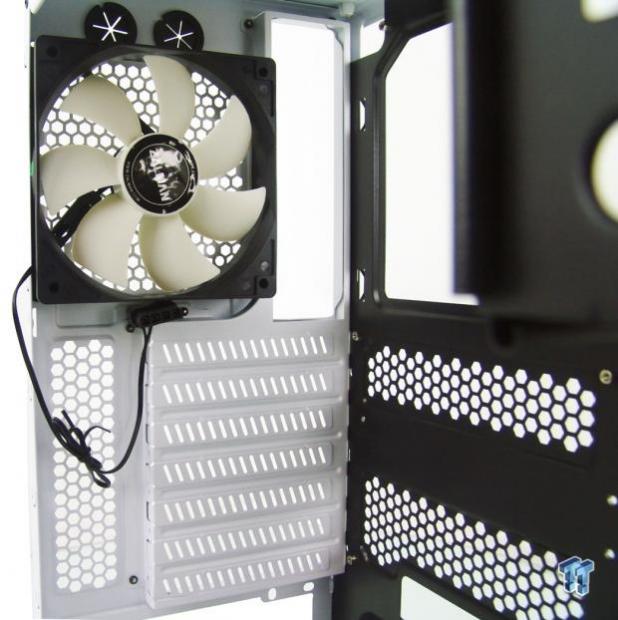
Inside of the back of the chassis, there is the last of four 120mm fans installed as the exhaust. This is powered via a 4-pin Molex connection, but it offers a fair length of wiring to get it connected cleanly. We also see the expansion slot covers are breakout style, and there are PSU style screws offered for securing cards.
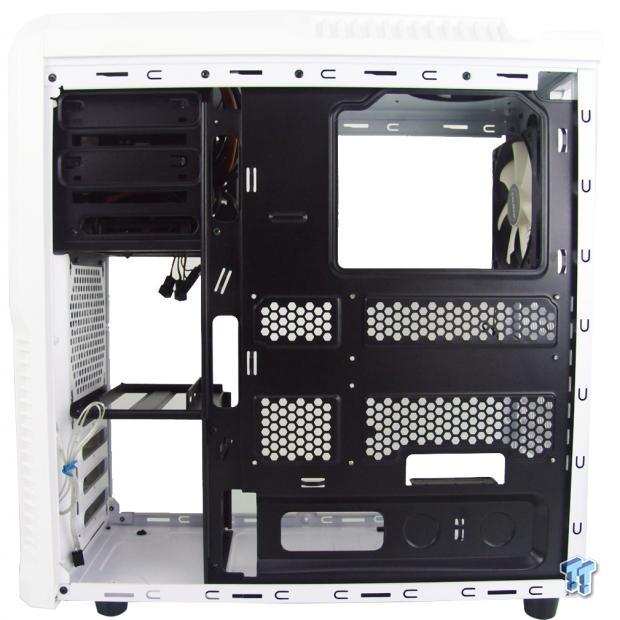
Looking behind the motherboard, we find only 10mm of room for wiring, but there is a deeper section at the bottom that is 15mm deep and allows for a bit of wire nesting. There is room behind the HDD rack as well, but there will be enough wiring already if those slots are all filled.
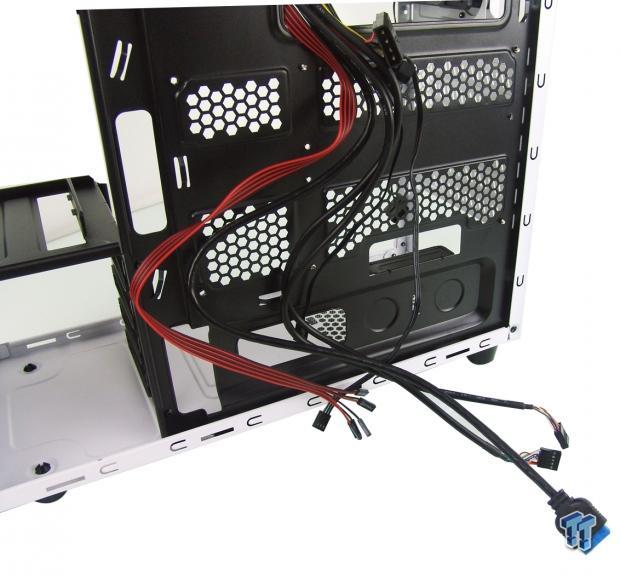
The wiring is long enough to get to any size motherboard that this chassis allows for, and it all is mostly black. The exception is the front panel wiring for the switches and LEDs; that came striped red and black.
Accessories and Documentation
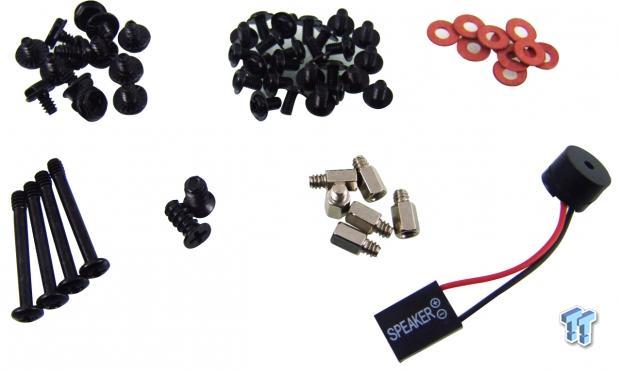
In the box offering up the included hardware, this is half of what we found. There are hex head screws for the PSU and expansion slots, M3 screws for the motherboard and storage drives, and for some reason, we are seeing companies offer paper washers again. We also were given four long fan screws, two normal fan screws, six standoffs, and a motherboard speaker.
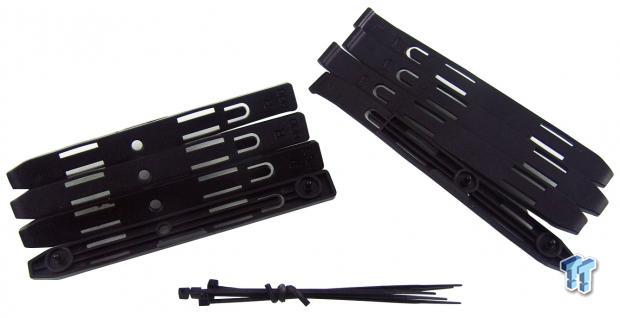
For 3.5-inch storage drives, they offer four rails for the right side of the drives and another four for the left side of the drives. Each of the sets is clearly marked as well. We also get a small bundle of five wire ties to help with the cable management.
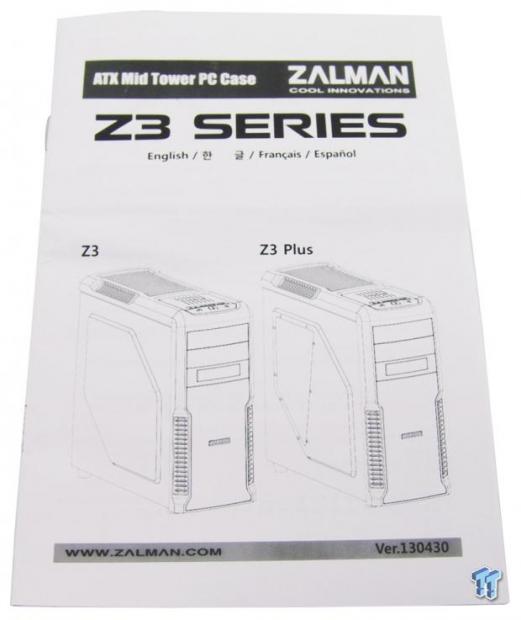
The manual is multilingual and is simply printed in black on white paper. It starts with the parts list, takes you through the entire build process, and is very well done. So well done that even if somewhat confused by something, a quick glance at the manual will get you back on track and allow even the most novice builder with enough information to complete it.
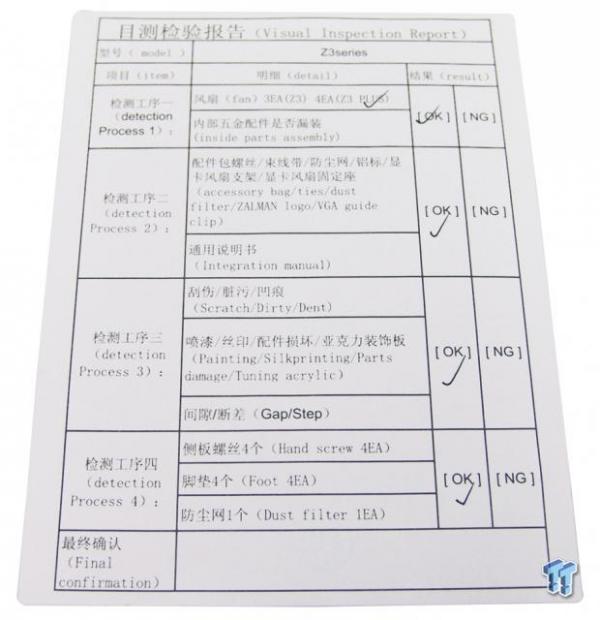
While not spectacular to most readers, we do like the quality control check list left inside of the chassis. At least we know that someone is actively looking at the chassis as it goes together, and we don't have misaligned panels and components like other chassis we have just looked at.
Case Build and Finished Product
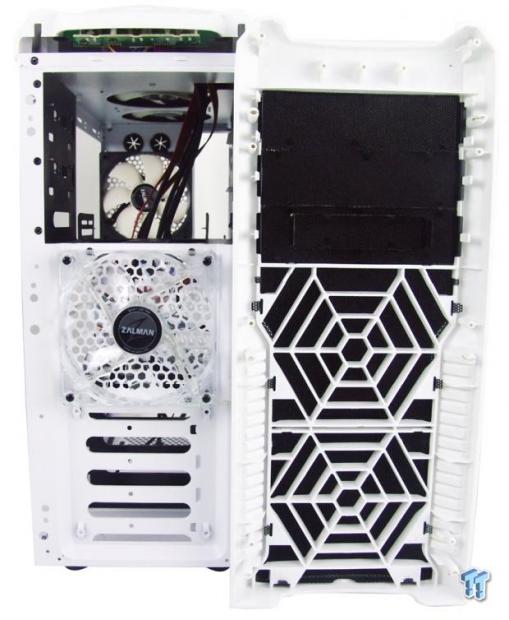
We had to really fight to remove the front bezel. It required us to have to bang against the clips to get it to come off. We see the clear blue LED fan on the front of the chassis, and we see that to clean the foam dust filter, the mesh tabs need to be unbent to allow it to come out.
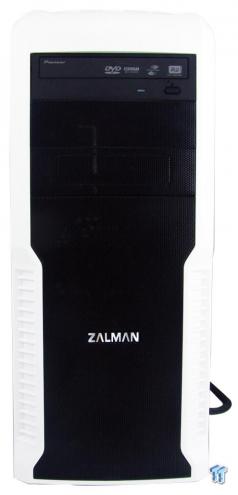
With the build completed, and even when we added the DVD drive, we find the look to be much the same as when we started.
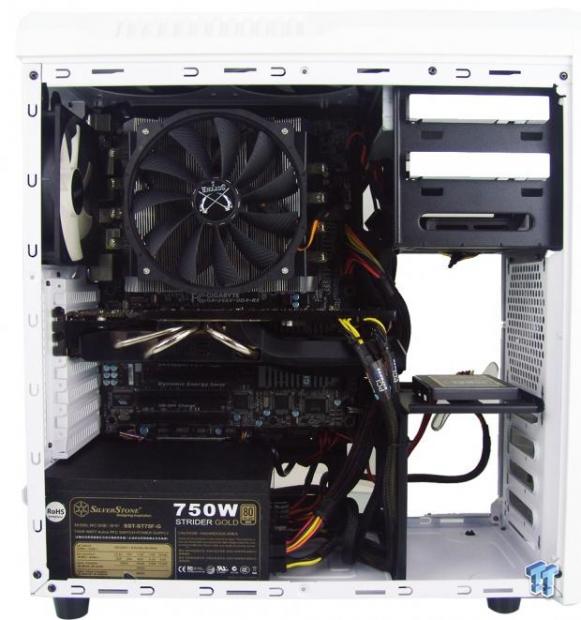
We knew CPU clearance was limited, so we went with a 150mm cooler, but were able to use the HD 7950 without issue since the top section of HDD rack is not in the way. There may be issues with some cards in multi-GPU setups, but reference cards and coolers should not cause issues.
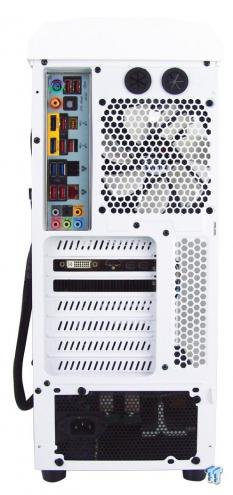
In the back, the dust shield snapped in easy enough, and breaking out the expansion slots was easy as well. When we added the card, we did have to force the back of the chassis inward to screw it in, but the PSU went in without incident.
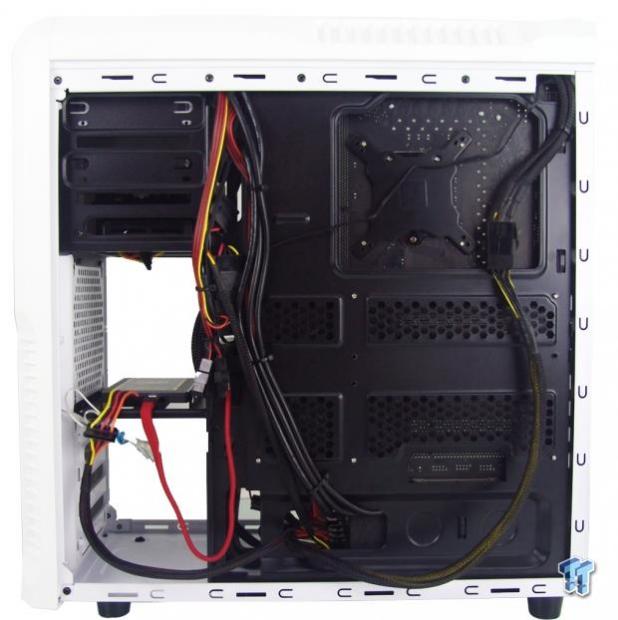
We limited what we ran behind the tray due to the limited room offered, but we were still able to get most of it hidden. The panel did require a bit of pushing to get it back onto the chassis, but we managed it without damaging anything in the process.
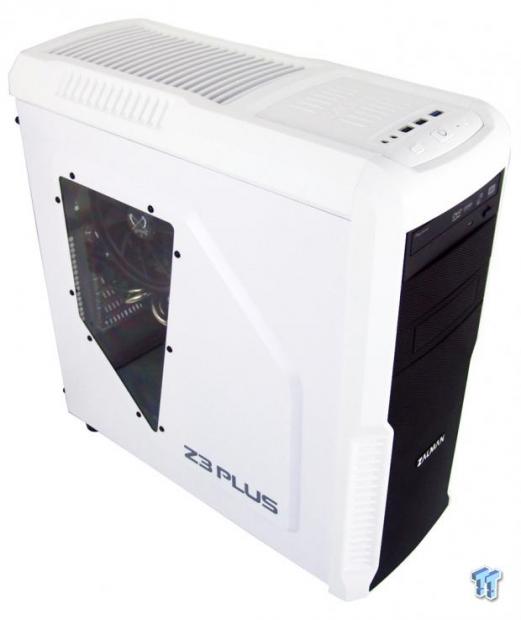
Stepping back to take it all in, we do like the smaller, even if oddly shaped, window that offers a view of the CPU cooler and video cards, but keeps all the mess of a chassis out of view. Now, let's add some power and see what happens.
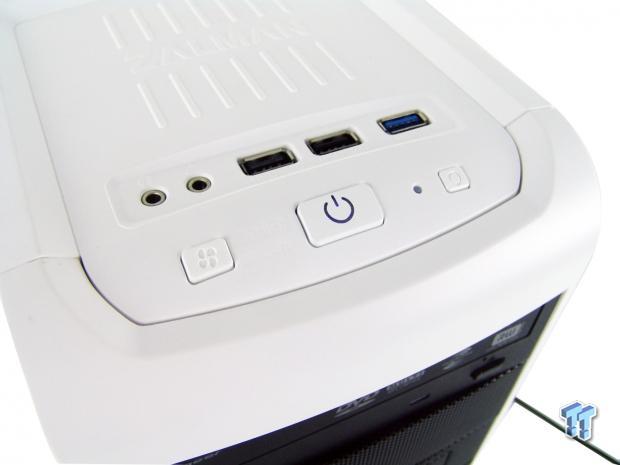
Along with a slight view of blue LEDs through the front mesh that we used for the introduction image, the top of the chassis offers the power button backlit by a blue LED when powered. While we did miss the HDD activity light, it is also blue.
Final Thoughts
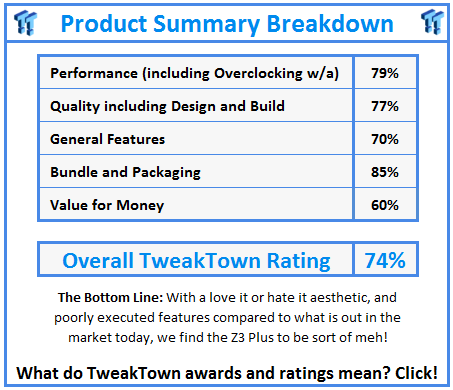
We find ourselves torn at this point. Being honest has always served us well thus far, so why change now? The thing is that even with the features they have listed all checking out and working well, we find ourselves with an overwhelming feeling that something is missing, almost like we stepped back in time a bit. It is really strange, too, because with the drive compatibility being reduced to allow for longer cards, you are still stuck to reference designs for multi-GPU setups. And forget most of the top-tier aftermarket coolers! It's like for everything positive we can come up with about this design, there always seems to be a flipside to that point.
This may come off as a bit harsh, and maybe even a little "elitist," but reality is what it is in today's market. Being able to sample cases from around the globe gives me access to all sorts of design ideas and what can be had in a mid-tower chassis these days. While Zalman and the Z3 Plus do cover all the basics and most of the features that users need in a chassis, it seems the attempts were a bit weak in design and implementation.
Things like wire management come to mind where room is so limited that you need to force the door panel back on with even just a bit of the mass of wires run there. Things like offering dual 120mm fans in the top but not using normal spacing to allow for any chance of internal water cooling. This is more of a chassis for a beginner who really isn't wise to the market or isn't looking forward enough to see the limitations that one runs into in this chassis.
For what the Z3 Plus White mid-tower chassis brings to the table, it does offer unique styling, and we feel most people will really like the looks. We also find that the pricing is not all that bad considering the features that they do offer, even if not done the way we would like it to be.
I guess the bottom line is that you really need to love the exterior and not need that much from your chassis to full appreciate what Zalman has delivered. It is cramped to the point that the DVD drive rubs the motherboard with ATX and Micro-ATX. We can't run dual card systems and we have seven slots? We are just left with so many questions that we find, even at a reasonable price, your hard earned dollars could be better spent.
PRICING: You can find the Zalman Z3 Plus White for sale below. The prices listed are valid at the time of writing but can change at any time. Click the link to see the very latest pricing for the best deal.
United States: The Zalman Z3 Plus White retails for $60.99 at Amazon.
Canada: The Zalman Z3 Plus White retails for CDN$87.51 at Amazon Canada.


