Introduction
It's not every day that we run across a company like BitFenix! Most all of them have broken ties with other manufacturers in the quest to deliver what they think is what the customer actually wants versus what is the best for their bottom end. BitFenix is going on the assumption that if you build it they will come. With just about everything in the world, if you develop something the masses desire, the money end will take care of itself. I have huge respect for those who go against the grain and strive to produce one thing that is awesome over a bunch of products that are OK, but really not worth mentioning or recommending to people.
For those of you who haven't heard of BitFenix since Cameron introduced them to us in his video in May along with his early postings since Computex, climb out from under your rocks for a minute or two and prepare for what you are about to see. Cameron has had early access to all the build stages and the early previews, which do shed some light on the chassis we are about to look at. But I can tell you from experience, the videos I have seen just don't do this product justice. You really need to see it in person to get the entire "feel" for the design and implementation of this case.
Today we are looking at the long awaited Colossus. I was privileged enough to receive one of two samples to reach the USA. Keep in mind, to do so means I actually received a pre-production sample of the Colossus so that we could be one of the first to showcase the awesomeness of this chassis. There are a few changes that were made to the retail version of the Colossus and I will point out the changes and/or additions as we go along. The changes made are not drastic, but they do improve the overall product which you will receive. I say we just jump right in and see what kind of right cross the Colossus from BitFenix delivers to the competition.
Specifications, Availability and Pricing
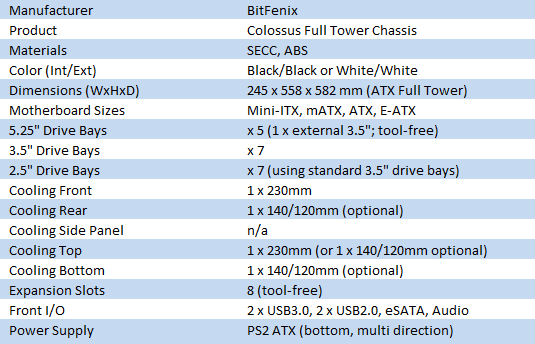
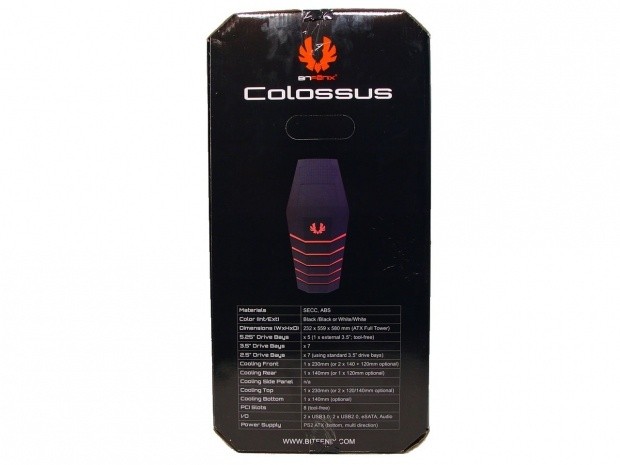
The Colossus comes with a choice. You can either purchase a white or the black version which we are about to see up close. Aside from the obvious color difference, the chassis will be identical in structure and design. With the Colossus your color choice does cover both the exterior as well as the interior. The exterior is a mix of ABS plastic, used in the top and front, while SECC steel makes up the structure and door panels. This BitFenix chassis will allow for the full range of motherboards from m-ITX to E-ATX, and being able to house the E-ATX makes this a large chassis, almost the same size as the Obsidian. Internally the chassis can also accommodate up to five 5.25" drives, seven 3.5" drives that will hold 2.5" drives as well, and in the rear there are eight tool-less expansion slots.
Wired inside the Colossus, the front I/O has all the amenities we are used to in a full featured case. Things like e-SATA connections, front audio and USB 2.0 are all covered. Along with a few other chassis builders, BitFenix has chosen to offer two additional USB 3.0 connections to either use now, or later when you have equipment capable of using it. All of these connections are hidden in a lockable tray and offer a unique way of routing the cables to give the Colossus a very professional and clean look, even when in use. Inside of this tray you will also find a fan control knob along with a couple of lighting switches. The fan controller will operate up to five fans, including the two included 230mm fans. The switches will allow control of red, blue or no lighting, and also allow for a "pulse" feature for the lighting.
With the Colossus there are just too many features to talk about. I would rather show you what they are. Things like the Softouch exterior coating and the wire management are better explained with visual cues. As I mentioned, I received my sample extremely early, and on the 20th of August it was publically released "on paper". I personally know production is in full swing and they do expect the Colossus to be ready on store shelves around the middle of September month. Both sides of the pond will be blessed with access to this chassis and at very reasonable pricing. BitFenix has set the MSRP of 159€ or $169 US dollars. Effectively, that puts the Colossus in direct competition to the Phantom we just saw recently and even the DF-85. The ring girl is carrying the card for round one. Get ready to welcome the newcomer into the ring!
Packaging
The Packaging
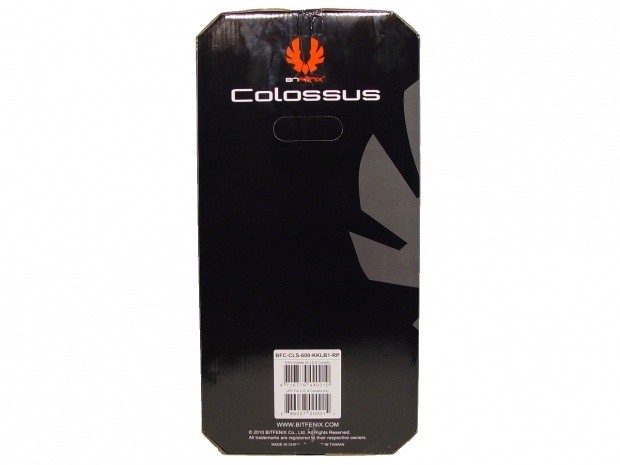
The front of the packaging is all black and lets you know two important things. This is the BitFenix case you are looking for, as displayed by the large logo. If you were still slightly confused, the large word Colossus is all you need to look for.
BitFenix even goes that extra little bit in the packaging. I know it isn't a big deal to put angles on the corner of the package, but as far as I know this is the only one; making for an obvious stand out when you see all the boxes stacked next to each other at Fry's. This panel shows an attractive view of the Colossus above the specifications list.
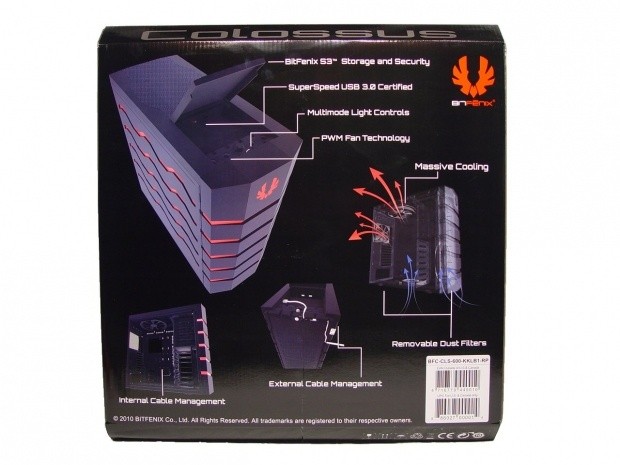
The back is where BitFenix showcases the finer features of the chassis. The lockable storage and controls included, the cable management, external cable management and the air flow of the chassis.
The last side is relatively plain, but even if they get stacked like this on the shelf, the large, red BitFenix logo will show you the way to the right choice in cases.
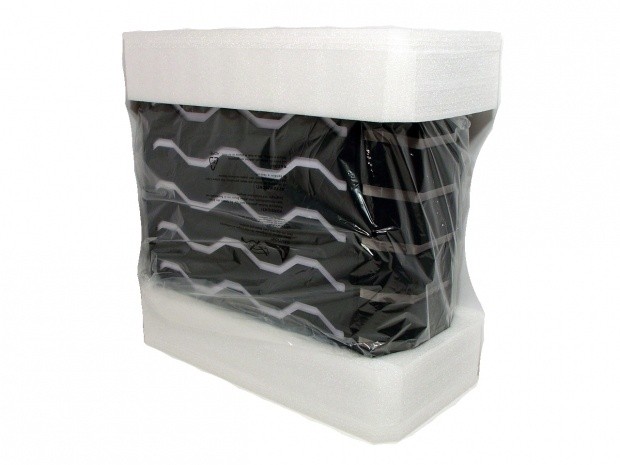
High density foam on the top and bottom of the Colossus secure it during transit. There is the typical plastic liner underneath to keep minor abrasions off the side panels and lighting tracks.
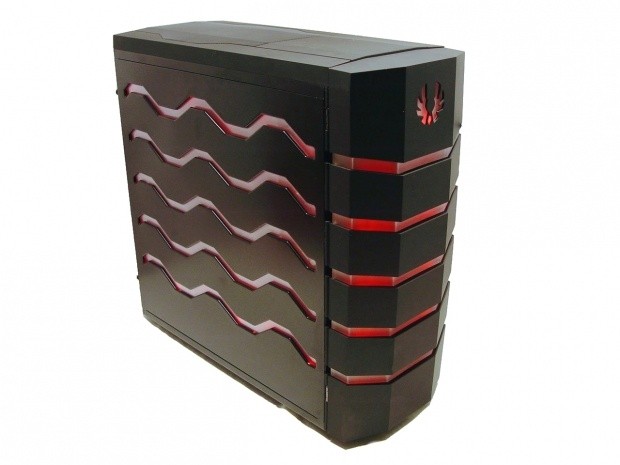
The BitFenix Colossus Full Tower Case
The BitFenix Colossus Full Tower Case"
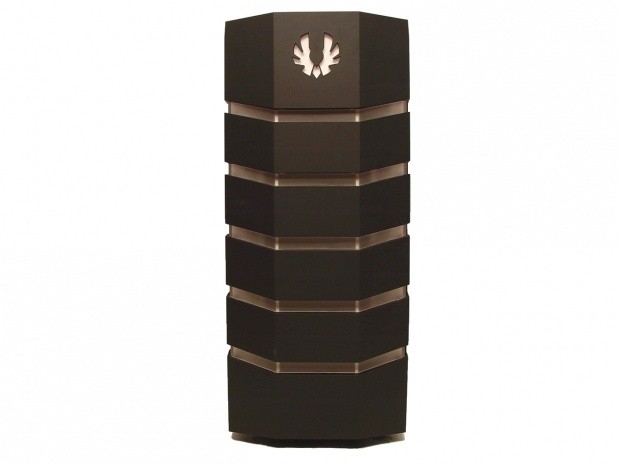
The Front of the Colossus is covered with SofTouch; BitFenix's own creation. This not only gives the case a flat finish, but allows for easier cleaning and the lack of finger prints. At the top marks the logo and in the five bands there is an opaque plastic that allows for the LED lighting to take effect later.
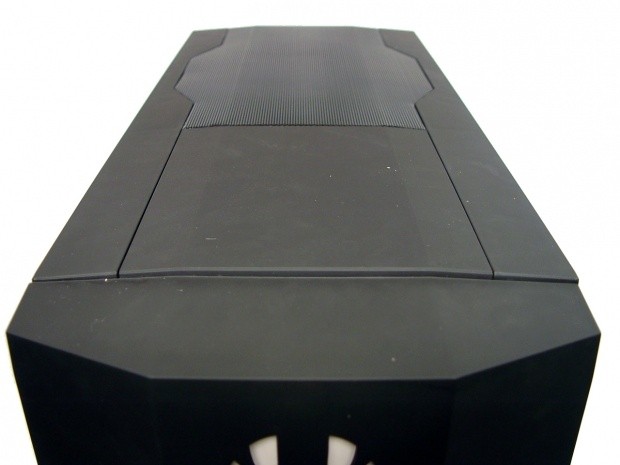
The top of the Colossus looks unassuming. For the most part all you see is the mesh covering the 230mm fan underneath.
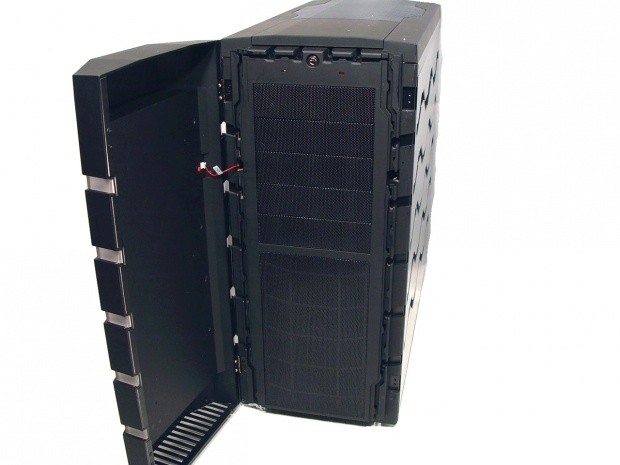
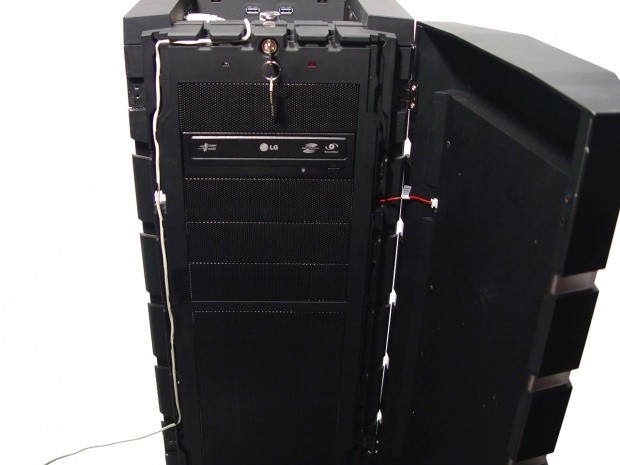
Swing the door panel open and along with the five vented drive covers and the large vented area to the bottom for the other 230mm fan, you can see a lock in the center of the chassis front bezel. This allows you to lock the storage tray or unlock it while you are at your computer. My Colossus was shipped with it in the unlocked position. For those saying that the door doesn't swing in the right direction, it can be reversed.
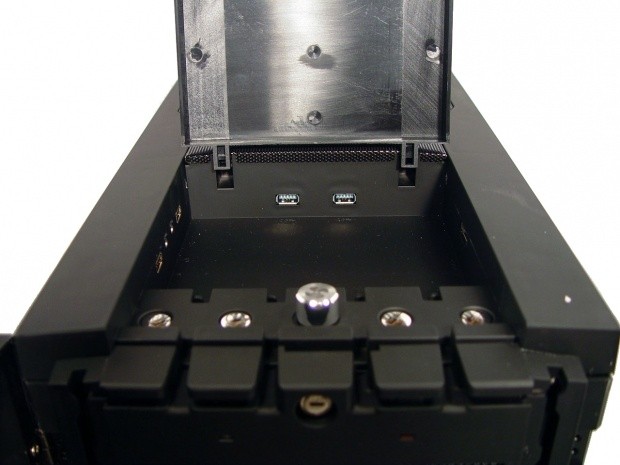
Just lift the cover from the front of the chassis and it exposes the front I/O and storage area. Under the lids hinges you will find the two USB 3.0 connections. In my sample the cover is plastic. I was told that the retail version will have a metal lid for added security.
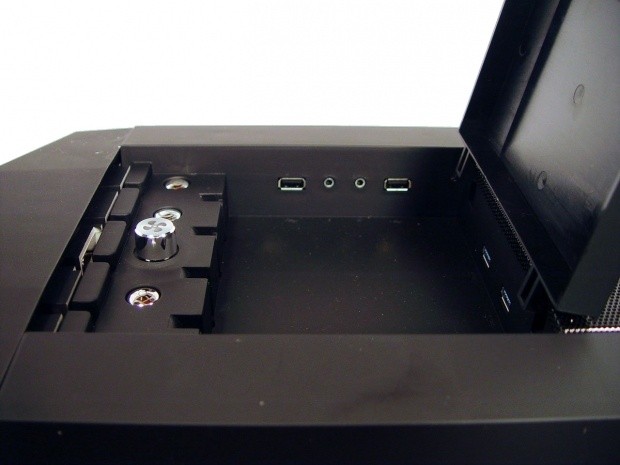
Looking from a different angle I can cover the rest of the included components. On the left there are actually four buttons and one fan knob, but the angle cut off the last button. From top to bottom there's the reset, power, fan speed, red (or off) coloring, and the button you can't see activates the pulse feature. In the tray are the audio and USB 2.0 connections, and in the wall nearest there is an e-SATA port as well.
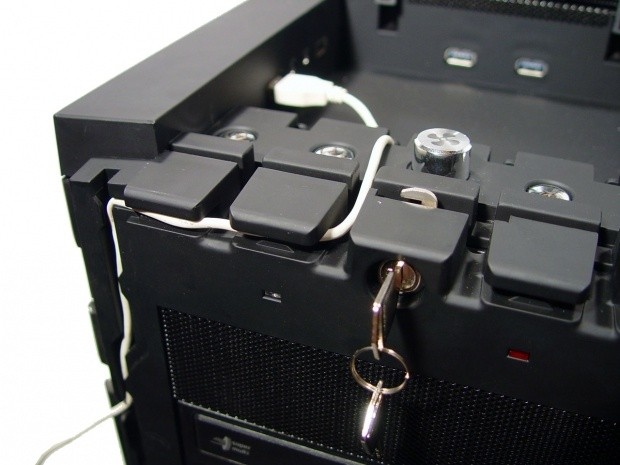
Skipping ahead to continue with the features of this area, I grabbed a white USB cable for a camera I own. This shows how the inner locks will hold the wiring in place, and you can route it cleanly under the door so it will close. This in conjunction with locking the storage area will keep all your devices safe at a LAN. For day to day use it simplifies and cleanly holds your devices like headphones in place in case you accidentally try going farther than the cord allows. We've all done that at least once, and this way the jack stays out of harm, too. I also turned the lock to show how it latches to the cover.
Stepping back a bit, you can see that the external wire management goes all the way to the table top. Even for cables for charging your phone, or in my case, one to download images, it keeps them close to the PC on the table without all the extra wire to get in the way. As I mentioned before, the door is reversible. In this process I realized that the door is held shut with a magnetic closure. So the door should have a solid "clunk" when it closes and not want to swing open if the case sits unlevel.
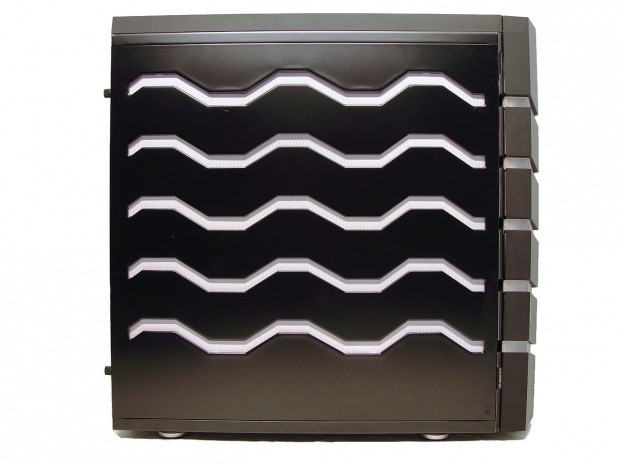
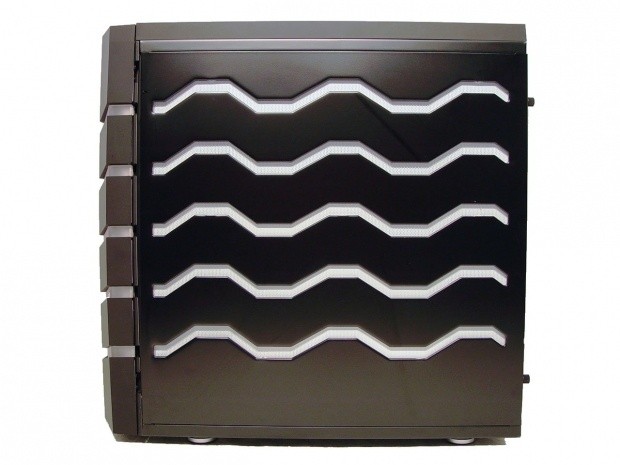
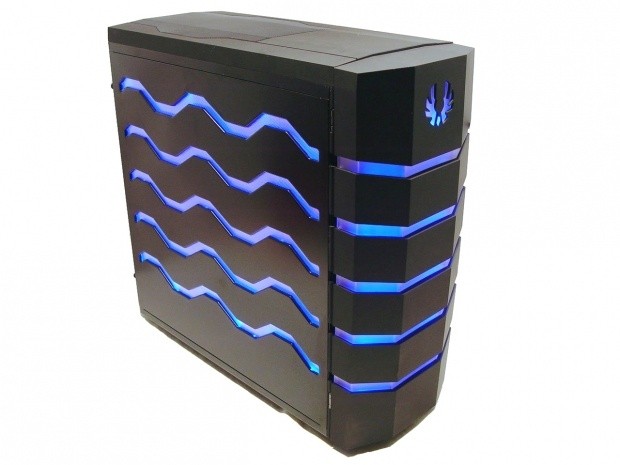
The side panels have a bit more sheen to them than does the front or top, but the textured finish will hide a lot of prints and smudges for you. The five, zigzag stripes of white in the panel are backlit with blue and red lights.
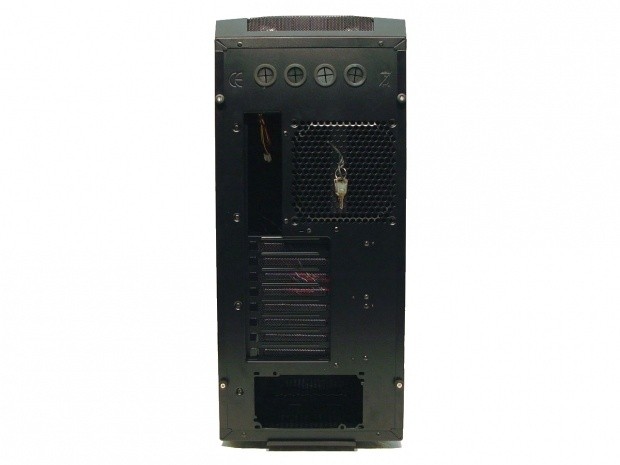
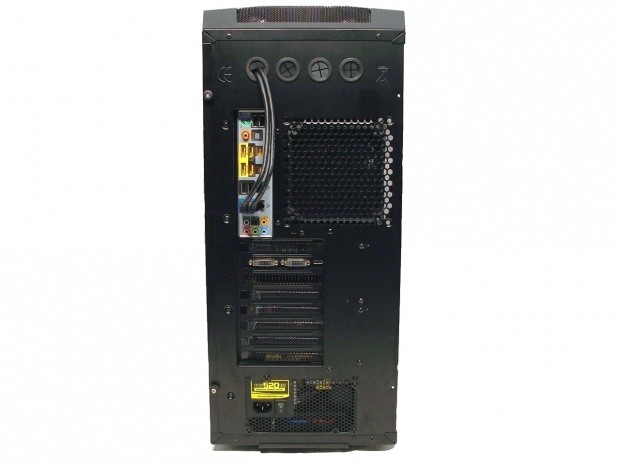
The back of the Colossus starts with four holes for water cooling and to be able to get the USB 3.0 wiring to the rear I/O of the motherboard. Then there is the area for the rear I/O plate next to a hole designed for 140mm fans. You can mount a 120mm fan as well, but in my sample there are no actual provided holes for the 120mm fan. Moving down we run into the eight, ventilated expansion slots and the bottom mounted power supply hole. The bit you see at the bottom; that is a removable filter that easily slides out the back for cleaning.
I was already sold on lighting on the front and the side I would see all the time, but BitFenix wasn't happy and went all out. They made sure that on the right or the left, or even in the center of a wall on a desk, the Colossus will surely be visually pleasant to look at with all the creative lighting.
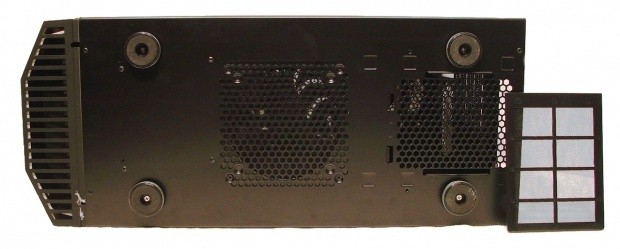
The Colossus sits on four, large, plastic feet with rubber pads to keep surfaces safe and the PC from sliding. There is an area in the floor that will allow for an optional 120 or 140mm fan to be installed in front of the PSU. Speaking of which, furthest right, there is the vent for the PSU and the dust filter leaning on the chassis.
Inside The BitFenix Colossus Full Tower Case
Inside The BitFenix Colossus Full Tower Case"
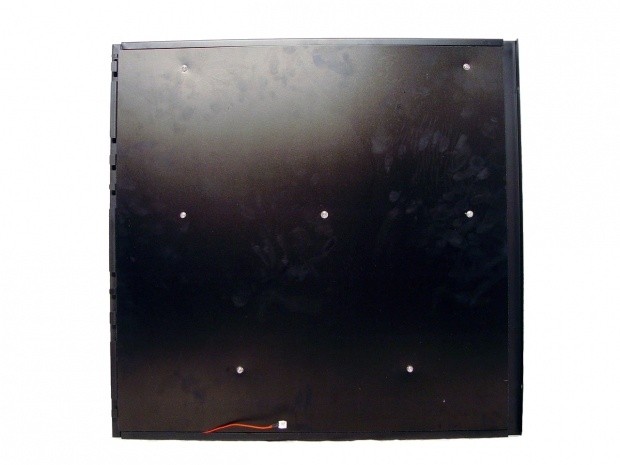
I wanted to show the inside of the door panels. BitFenix even took steps to make the back of the panel clean. With use of a thick plastic liner and some well placed screws, all you see is the two pin connector that powers the lights.
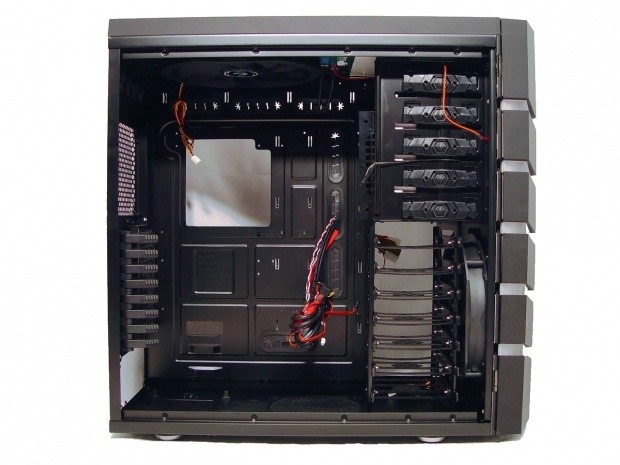
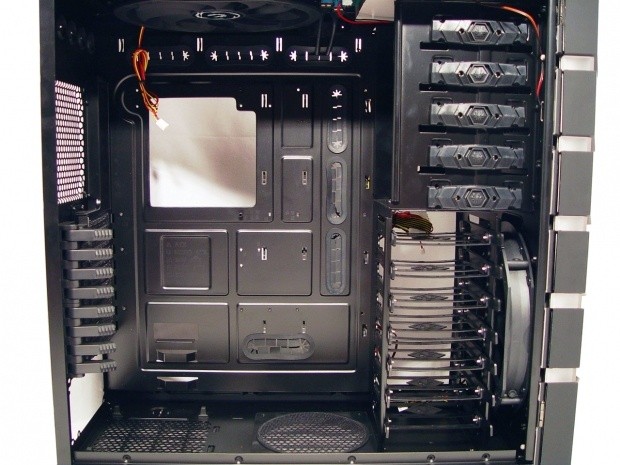
There is a lot to cover inside the case as well. Let me just stay simple here and cover that the case is very roomy inside and as I said, the interior matches the exterior in color, whether you buy the white one or the black one.
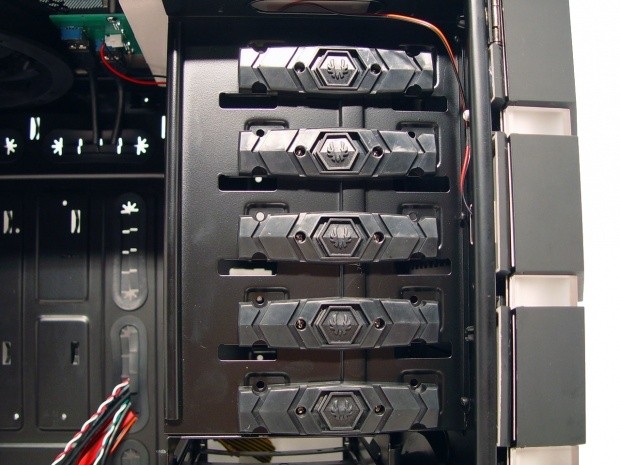
The five 5.25" drives use these tool-less clips on both sides of the bays. With the BitFenix logo in the middle they are unlocked. If you are to push the logo in and slide them forward, they will lock the drive into place. Using them on both sides of the bays makes for a very secure final install of the drives. I couldn't move mine at all once locked in with these.
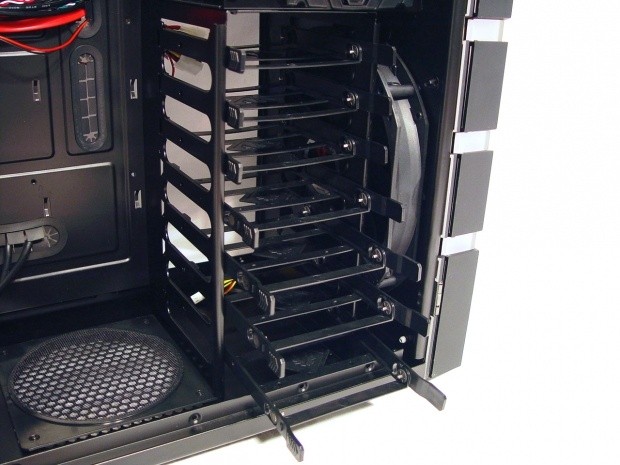
The seven 3.5" bays use a plastic tray that will lock the drive in place. To use these, you simply flex the tray around a 3.5" drive, or with the use of a few included screws, screw in a 2.5" drive to the base of the trays. The rack here is built in a very open design to allow that 230mm fan in front of it to get good flow into the chassis.
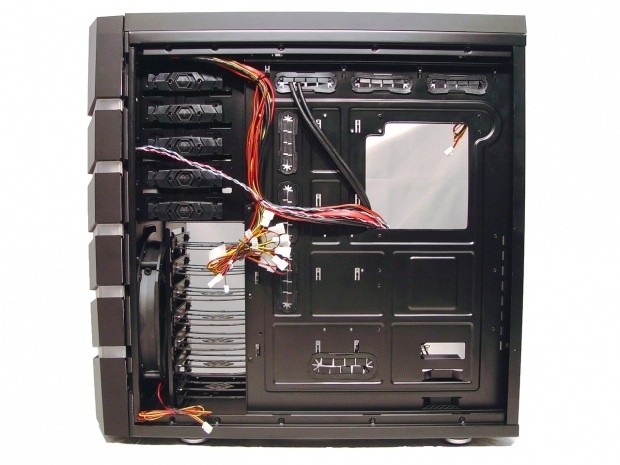
The motherboard tray has everything you will need to get a clean finished product, both in front of the tray and behind. Not only are there seven separate grommets for wire management, there are sixteen "loops" punched into the tray to allow wire tie points either here or on the reverse side. Of you look at the floor of the Colossus, you see rubber supports to keep the PSU off the floor of the case, and there is an internal dust filter covering the optional fan hole to the right of it.
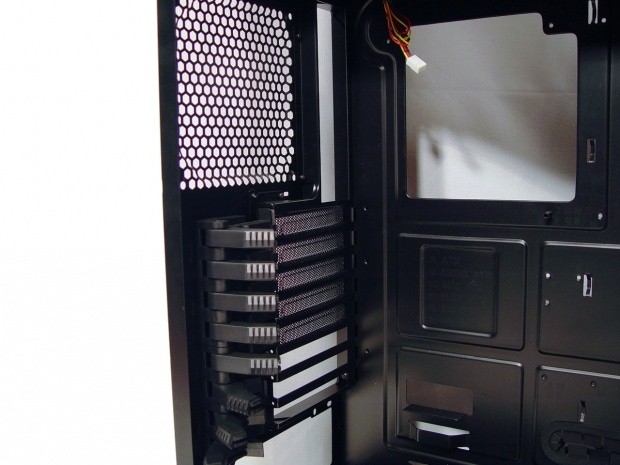
The expansion slots have vented covers for the slots you won't be using. What I did like is the beefy, plastic, tool-lees locks in the Colossus. I have seen everything from cheap plastic tabs, to steel latches in a Lian Li, and to be honest, these hold a card just as secure as the steel version.
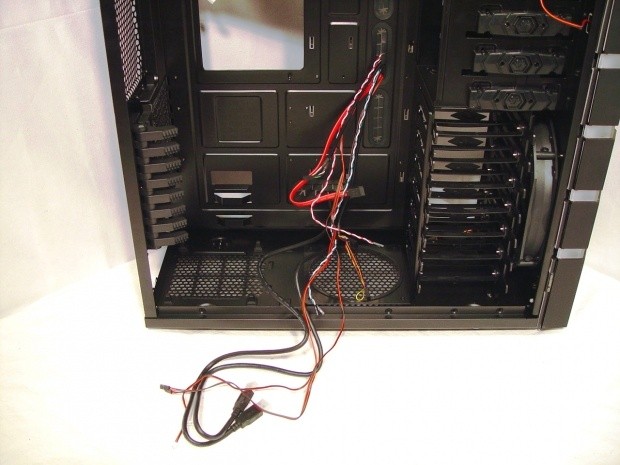
All of the chassis wiring stems from the front I/O and is sent directly behind the motherboard tray first. This wiring includes the HDD activity, power LED, power, and reset in shorter lengths, stopping along with the e-SATA length. The audio cable is a little longer to get to the far side of the motherboard, and the USB 3.0 and the three lighting connections spill onto the table.
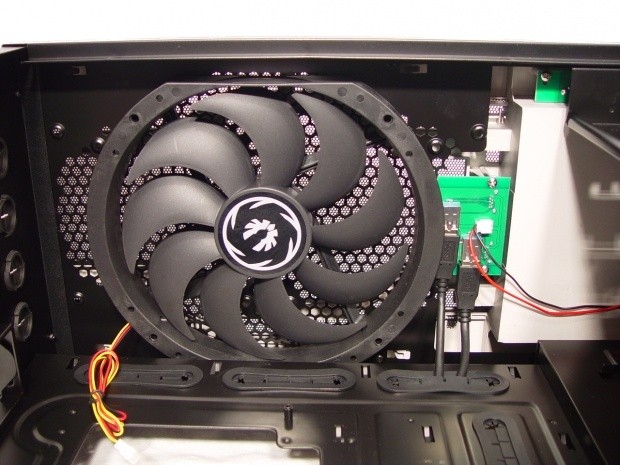
Looking under the roof we see the 230mm fan used to exhaust the chassis. It is well clear of any cooler you decide to use, so don't worry about clearance issues here. Just to the right is the PCB for the USB 3.0 connectivity. If your motherboard doesn't have that tech on it yet, you can simply unplug them here and stash them away for a later date. You may notice that the bottom of the storage tray is white. I have to assume that is due to this being a work in progress, and you should receive a black one if you buy the black chassis.
You can obviously see the wiring and the CPU access hole in the back of the tray, but what you can't tell from this angle it's that there is plenty of room to hide all the wiring you need to back here. I don't care if your PSU isn't modular. With a few zip ties and some creativity, you have a lot of room to play with here.
Accessories and Documentation
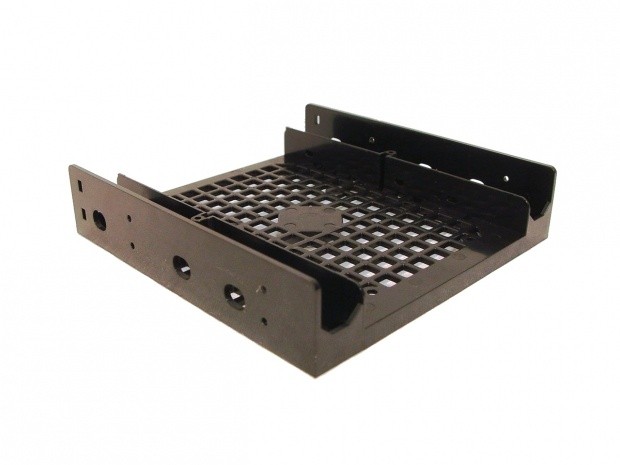
Inside the chassis, tied to the optical bays, there is this 3.5" to 5.25" floppy drive adapter. The holes are provided on the side, as you would find on a typical optical drive, which will allow the tool-less latches to function with this perfectly.
Shipped inside of a little box that is cradled during shipping by the adapter we just saw. Inside you will find ten zip ties, the floppy drive face plate, five stick on wire management clips, and a motherboard speaker. The baggie in the middle contains all the screws and risers you will need for installation of your components.
The Build and Finished Product
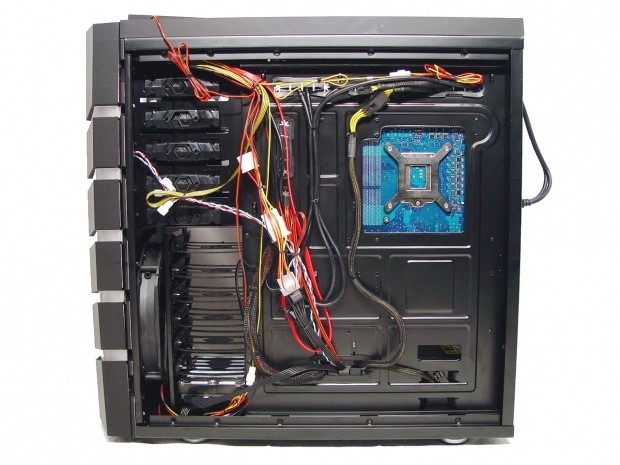
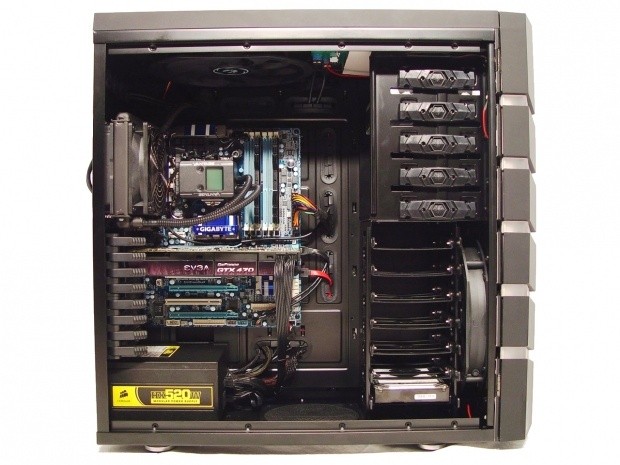
Behind the tray I made as big of a mess of the wiring as I could. I tried to bulk it all up in the middle to cause the door an issue with closure. The result is, I failed. Even with this mass of wiring the door shuts completely over them with ease. As I said, there is plenty of room left here, and plenty of the tabs to tie the wiring to. No excuses here, the Colossus offers space and opportunity just like the Obsidians do. Don't forget to leave the door panel connection accessible. Mine is draped over the top so that I could easily make the connection when I installed the panel. I ran the opposing panels wire under the hard drive so it was ready for that one as well.
The rear of the Colossus fills out well, especially with all black components. I used one of the holes to pass the USB 3.0 connections through and hooked them to the appropriate USB connections in the rear I/O.
Internally the finished product is just as clean of a presentation as I have seen in any case. You can see not only is it tidy, it's roomy, allowing for both easy access to components, but allows for AIO water coolers and huge air coolers to be installed with no issues as well. At this point in the fight, the Colossus is even with some judges, but it is ahead on my score card.
You have already seen the Colossus without lights; here is what it looks like in blue. This lighting is bright both day and night, and will add a considerable glow to the room.
With the push of a button it goes to red. In the daytime hours the red isn't so brilliant, as natural and fluorescent light will cancel out a bit of the red. I can assure you, once it starts to get dim in the room; the red lighting takes on its full effect. I have mine set to red and it turns my room a nice red as it reflects off the white walls.
Final Thoughts
Now I have seen just about everything as far as what it takes to win this bout with the competition. This whole time I have been doing a head to head with the Colossus battling it out with cases like my Obsidian 800D, the Phantom, the DK-85, and even the HAF-X, and I got to tell you, my money is going here. BitFenix has raised the bar in not only exterior presentation, but in the lighting concept and functionality. The SofTouch finish is very nice to look at and solves a lot of the finger print issues found in Aluminum cases, or ones with shiny plastic. I'm usually not a "bling" kind of guy, as you know from reading my previous reviews, but BitFenix has changed my mind. The Colossus has replaced the Lian Li PC-X1000 chassis I was using on my backup rig.
The Colossus does offer room for water cooling, but I saw no brackets or screw placement for a radiator in the top of the chassis. As you can see, an AIO cooler that is all the rage currently will install with no real issues. As far as coolers go, it doesn't matter if you have the D-14 from Noctua, this case can hold any air cooler. There is plenty of room inside once everything is installed, unlike the DF-85, which delivers the K.O. punch to that in my mind. It doesn't have the shrouds to cover things like hot swap bays or power supplies, but there isn't a window, so there is no need for them here. Usually I like to see what's going on inside of my cases, but the silence I get with the double walled doors, and the use of the 230mm fans, I just couldn't pass it up. So that's a T.K.O. on them! As far as a head to head against the Lian Li, well, the PC-X1000 is a super tower, and a sexy one, but it got replaced by the Colossus anyways, so how can it not be a win for the Colossus?
I have had the pleasure of using the chassis for about a week now, and I am pleased with my daily results. With the two 230mm fans, the Colossus can rid the interior of a ton of heat. I have that PC well overclocked, and the card runs Folding@Home all day every day. Moving from the Lian Li, the temperatures went down on both the GPU and CPU temperatures under load. With the fans being dead silent under full speed operation, it was a huge plus, as I prefer a silent work environment. The Lian Li made much more noise and didn't perform as well with three more fans!
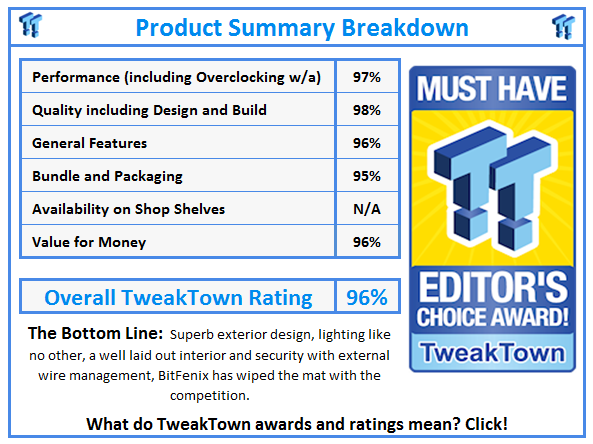
What it all comes down to is this. Are you looking for the most uniquely lit chassis on the market? Are you looking for great "bang for the buck" in our crappy economy? Are you looking for a completely functional and easy to use case? Are you looking to impress your friend with the latest in awesome cases? If I got you to answer three out of the four with a yes, I'm telling you, keep an eye on your favorite retailer or e-tailer, as the Colossus from BitFenix is the case I would opt to by myself if I wasn't so blessed as to be able to switch to new cases on a regular basis. In the end I replaced a $400 case with a case that has a MSRP of $169. It's only a couple more weeks, but I suggest you sit on your hands and don't buy anything just yet. It's well worth the wait to get this chassis into your home and see it for yourself.


