Introduction
In August of 2008 a new take on a chassis was brought to the world via Microcool; with the main objective of their inception being that they specialize in "designing and developing component heat control products for computers". Over the years Microcool has released thermal solutions from coolers for chipsets, CPU's and even offers Thermattach (thermally conductive tape).That in mind, it only makes sense that if Microcool would develop a chassis, they would design the coolest version of all chassis designs, the tech-bench.
For those of you who aren't aware of such a chassis, they are an open air solution that offers ease of access to your components like no other solution. And on top of that, you get some of the best temperatures attainable due to the lack of anything to hold heat near the components. I have seen many concepts of tech-benches; some homemade, some like the Antec Skeleton version, but most are a setup of shelves spaced above each other with the motherboard laying on the top-most layer and all the components getting neatly tucked underneath. Basically, the designing and material choices are only limited by what people can afford, as they can truly be made from just about anything.
Microcool offered me the opportunity to have a look at their Banchetto 101 and I gladly accepted. I have seen this chassis, both in reviews and I personally know an owner and have seen his many images. Having a bit of a head start on the basic idea, I was excited to get one for myself and have a real close up look at how it all goes together and if it's going to look horrible with the parts I have to use. Taking action to a comment directed at my last "water cooled" chassis review, I hope not to disappoint this time around, as I will be mocking this up for water. Looks like I better get to work; let's have a look, shall we?
Specifications, Availability and Pricing
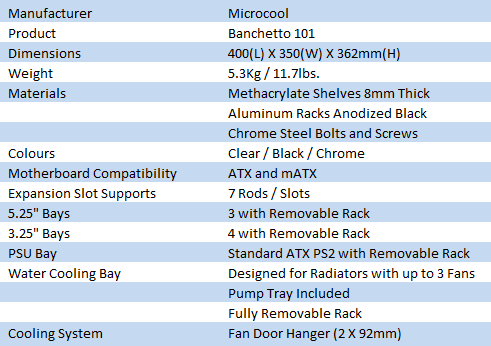
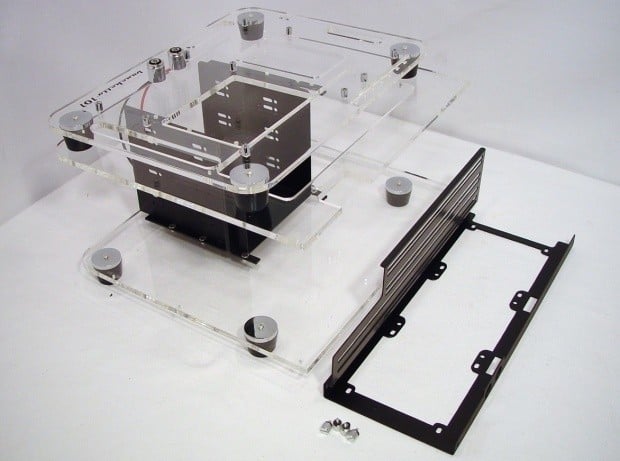
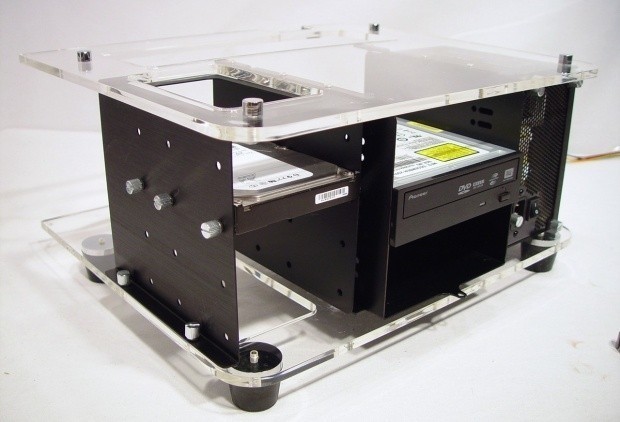
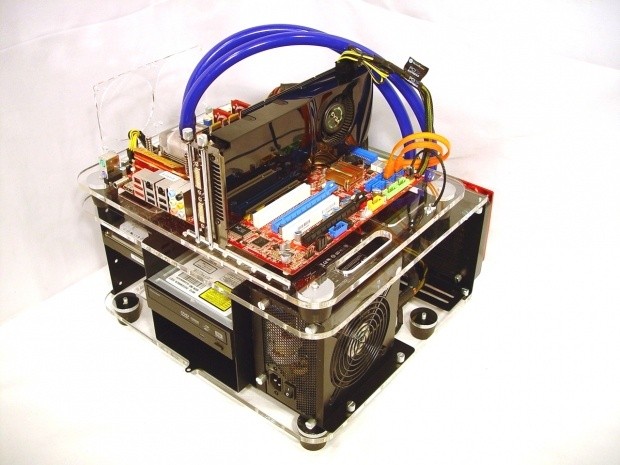
Microcools Banchetto 101 will arrive about 95% assembled. The shelves or layers of the Banchetto 101 are made from 8mm thick Methacrylate pieces and are clear as glass. The middle section, frame and removable tray sections are all made from aluminum and then anodized black. Standing out against all the black, the chromed steel thumbscrews are easy to locate for removal. Overall size of the entire unit is slightly larger than a full ATX motherboard in all directions and composed of 3 layers; the floor, the top support shelf and then the motherboard tray. All components included, the Banchetto 101 weighs in at just under twelve pounds.
Being a tech-bench, things are laid out differently and most times there is less room for optical and hard drives. This is not the case here, Microcool left room for three 5.25" devices, or a reservoir if you choose. To one side of the 5.25" bays the 101 offers room for four 3.5" drives and on the other side there is a rack to hold the power supply in place. That pretty much sums up the majority of the font and major components of the chassis, but there is still one thing to cover.
Cooling! While the chassis can work with any air cooler, as there is no roof or door to cause issues with height or air flow, Microcool offers a better idea built right in to the back. How about water cooling? As I mentioned, you might choose to set a reservoir in the 5.25" bays. That is because the Banchetto 101 offers a rack in the back that can house a 3 X 120mm radiator. This plate is pre-drilled for mounting to one side of the radiator, has water tubing holes to keep the tubing clean and also offers holes to pass the fan wires through. On top of this, Microcool knows that there is usually no direct air flow on the components, as there are no fans with this chassis. They do, however, offer a plate for dual 92mm fans and is mounted near the CPU and RAM on the motherboard tray to offer a bit of "spot" cooling.
Checking locations and pricing as I usually do, via Google Shopping I have found that the Banchetto 101 is a bit limited as to where you may get one. Sidewinders, Heatsink Factory and FrozenCPU all offer it and relatively all at the same price. Low end is $255 USD with the cheapest shipping to me being at another $21.29, so actually around $276 and some change. On the high end, the pricing is about $260 with another $20.25 for shipping. So if you do want one, you know now where to get one and the size of the dent it is going to put in your wallet. Hopefully along the way I can answer weather this is your solution, or if you should pay a similar price for something like the 700D.
Packaging
The Packaging
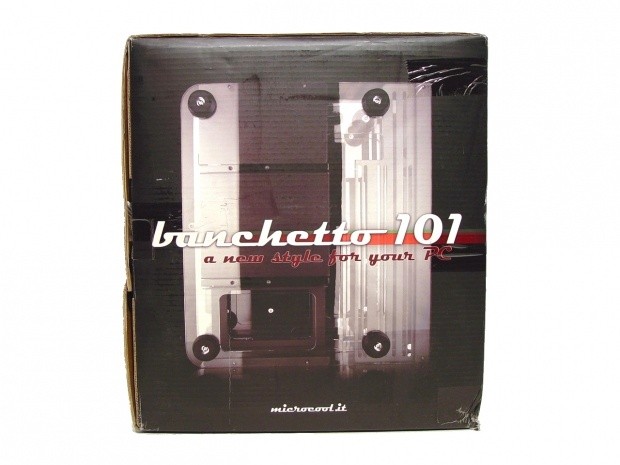
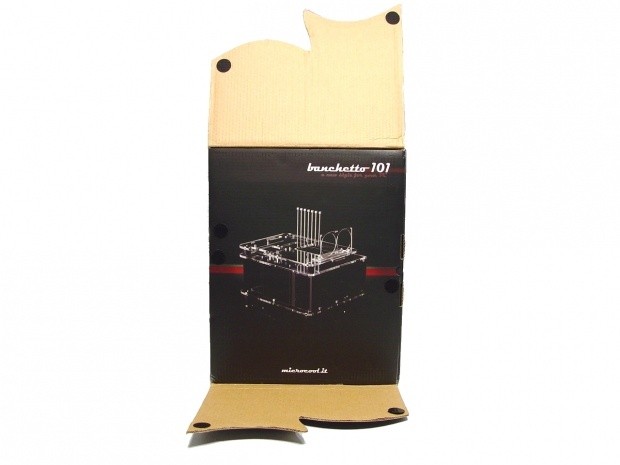
There is no question what is inside! It's a Banchetto 101 from Microcool. Packing it in all black box, with an image looking down from the top of the Banchetto, really makes the lettering pop.
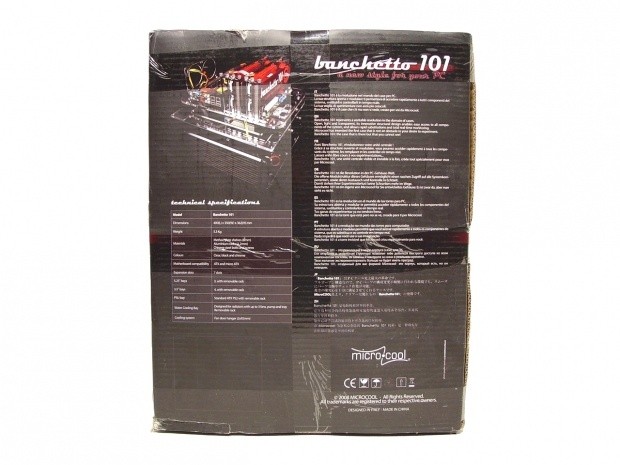
Spinning the box, we run into this. A fully loaded image of the Banchetto 101 flanks the top left. Under it you will find the specifications list. The right half is a mission statement about the Banchetto 101 in varying languages.
With another spin we run into a mirror copy of the first side.
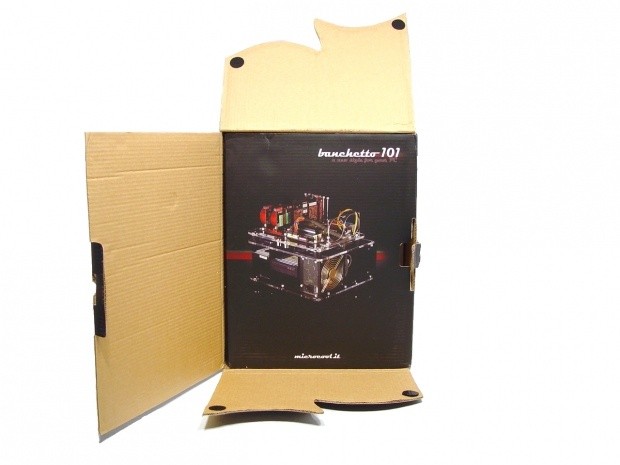
This is the important side, at least at this point, as this is how you get in. Cut the tape along the wave of grey and gently pull on the flaps.
Velcro is used to keep the flaps in position once the tape is cut, so there may be a touch of resistance. Inside Microcool hides a very nice image of what you are about to unveil.
At the right of the panel there is another tab that is taped; releasing this panel gets us one step closer and again greets us with another terrific image.
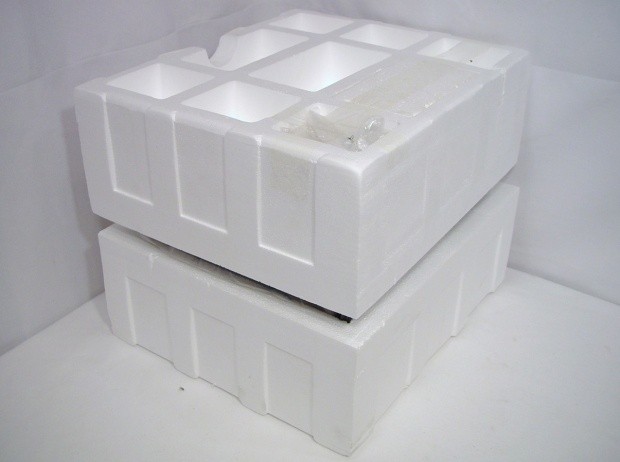
Packed very snugly into an almost all encompassing cocoon of Styrofoam, the Banchetto 101 ought to arrive in very good shape. At the top you get a glimpse at a bag with goodies taped to the top. The panel just to its right can be removed to reveal more hardware. Don't forget to have a look.
The Microcool Banchetto 101 Chassis
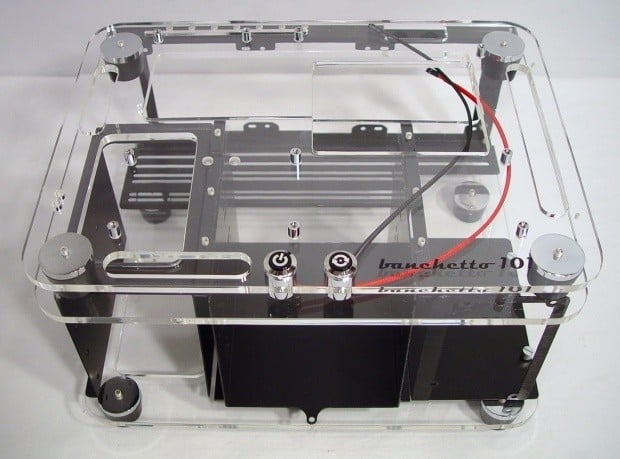
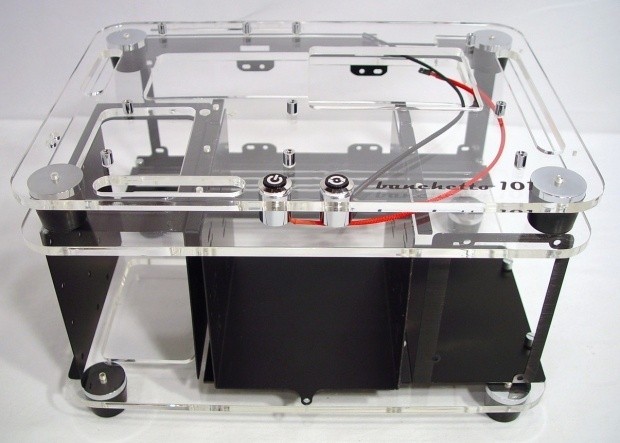
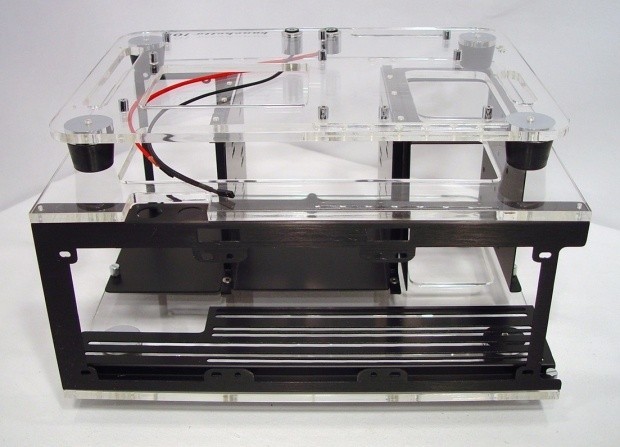
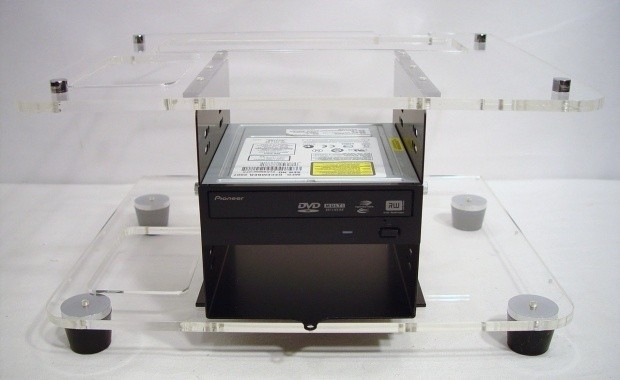
Getting it out of the packaging was tough, but it was worth all the wait and struggle. Out in the open the Banchetto 101 looks clean and sophisticated, even if it isn't the typical chassis design. Three layers of clear, Methacrylate make up the lower sections floor and top, as well as the removable motherboard tray pressed onto the top.
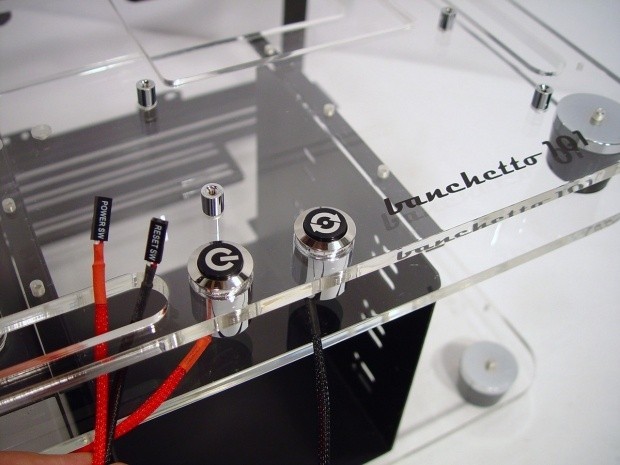
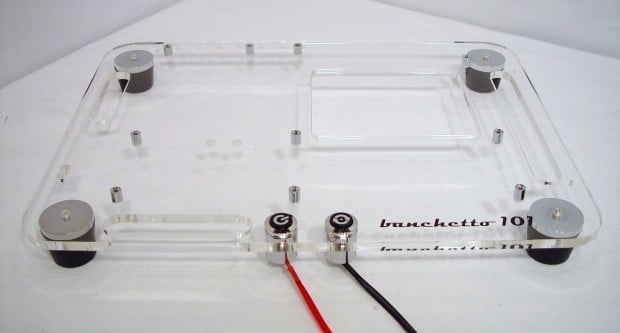
Included wiring is simple with the Banchetto 101. All you have included is a power switch with 2-pin header for the motherboard and the same for the reset.
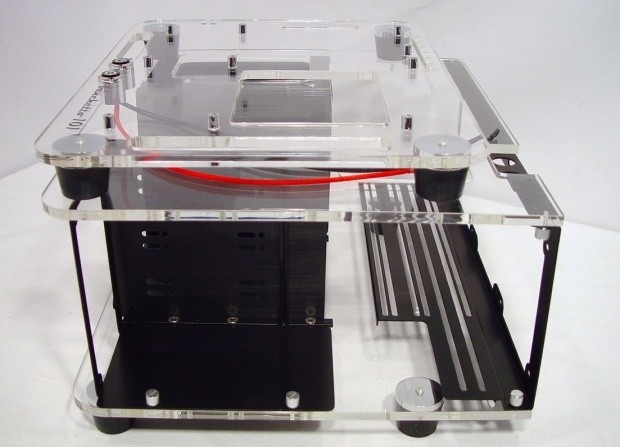
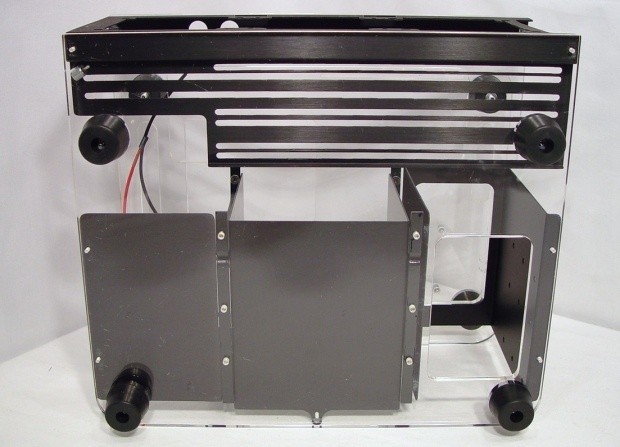
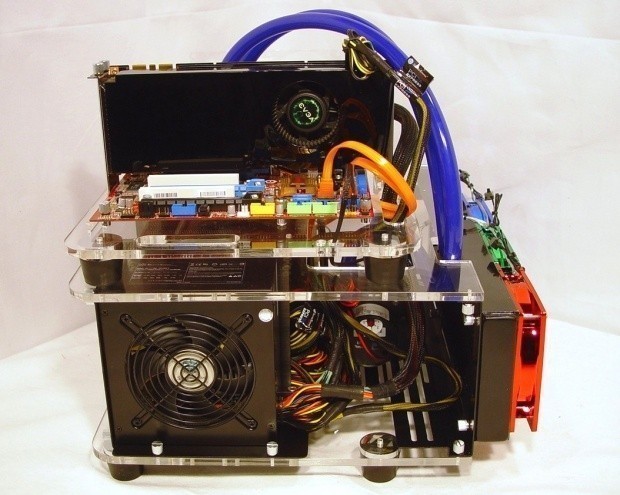
From the side you can see the motherboard tray is supported with thick rubber feet. The feet rest just above, on this side at least, the area designed to accept your power supply of choice.
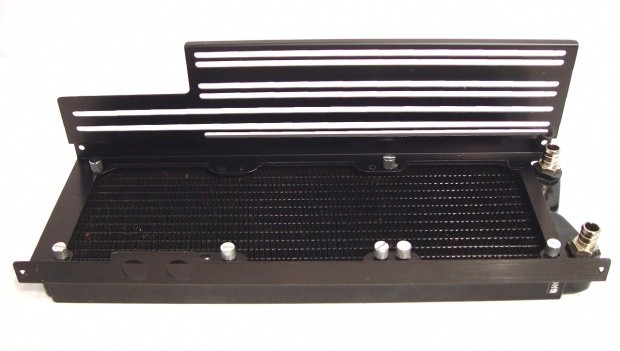
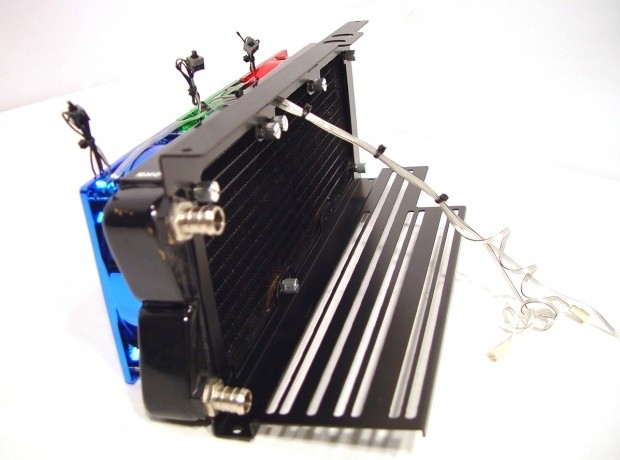
Most notable on the rear of the Banchetto would have to be the removable rack that can support up to a triple 120mm radiator. This tray is predrilled to mount directly to a radiator, has a large notch at one end for the fittings to face inward, as well as tubing and wire management holes.
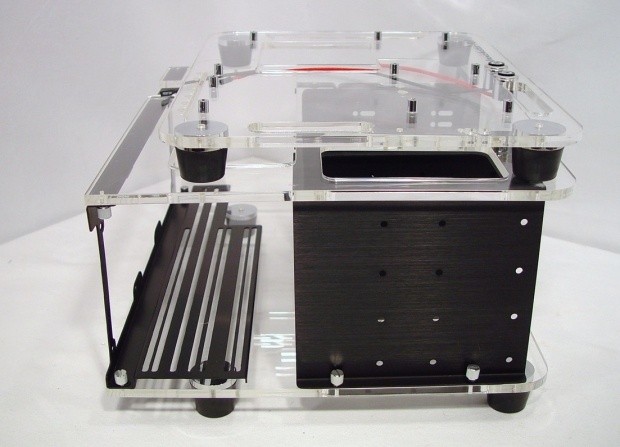
Toward the front on this side, the 3.5" removable drive rack blocks most of the view in the middle.
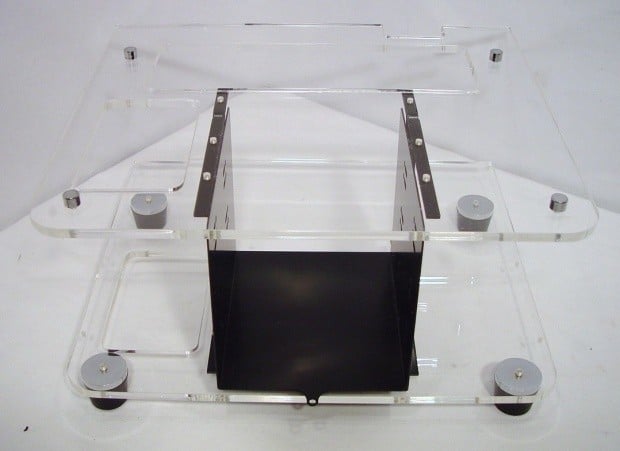
Viewing the Banchetto 101 from underneath, I got a close look at the support members that hold the clear panels together. Six screws top and bottom hold the layers together quite solidly I might add, for such a small footprint for stability. The same large rubber feet that support the motherboards tray are also used to elevate the chassis off the table while leaving no marks.
You may have noticed this in the last picture and I'm really not sure how it got here considering how tightly the Banchetto 101 is packed. One of the bags of hardware did lose its bottom and I found them in the area with the hardware, maybe just this one weaseled its way in.
Disassembly of the Microcool Banchetto 101 Chassis
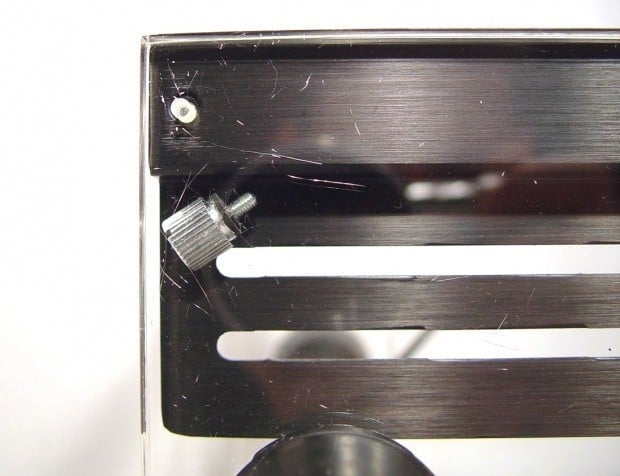
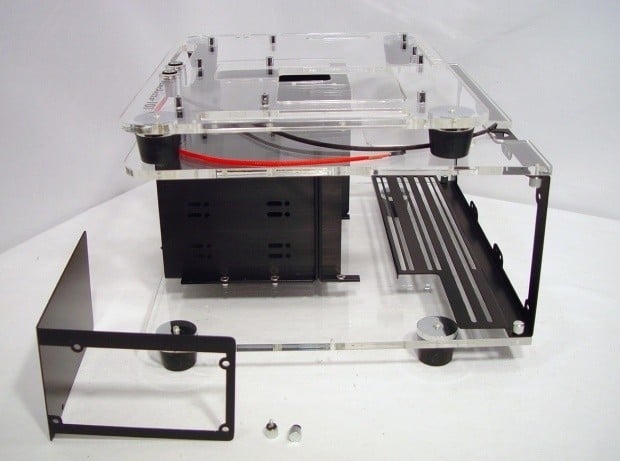
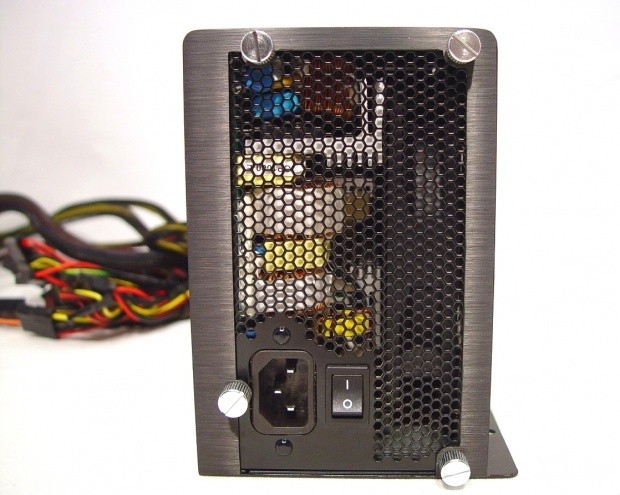
Removing two thumbscrews from the outer edge allows for the black, anodized aluminum, ATX PS2 power supply tray. This will make it a snap to install it to a PSU with some of the included hardware.
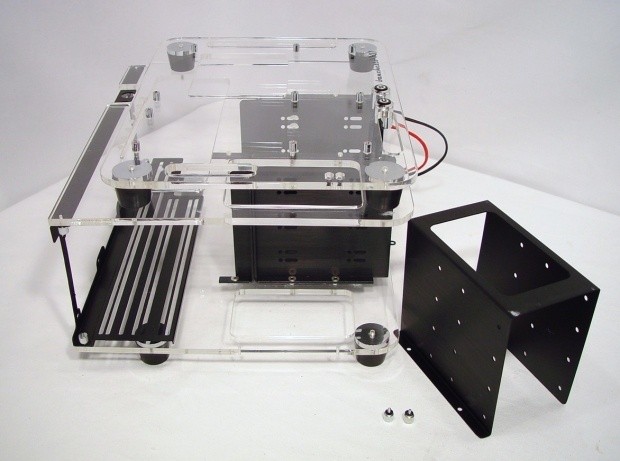
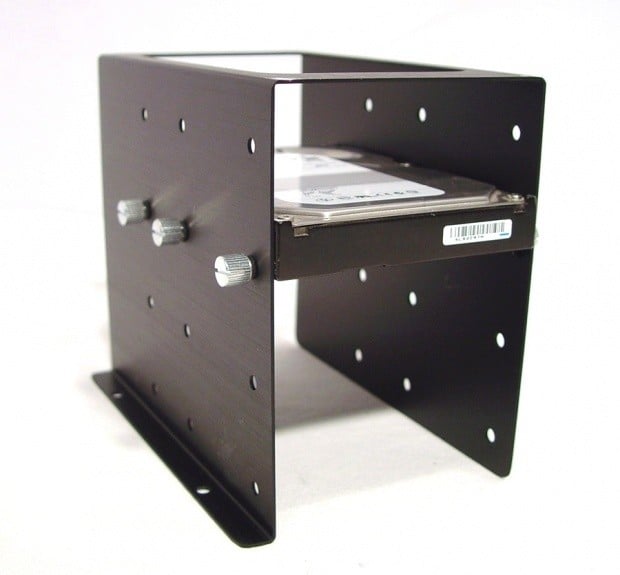
The opposite side you will find the same thing, two thumbscrews. These once released will allow you to gently slide out the 3.5" drive rack to make mounting a drive in it a breeze.
Pretty much the whole rear of the Banchetto 101 is taken up by this removable rack for water cooling. This time it takes four screws; two in the top and two at the bottom, then the tray easily flops out of position. Not only does this tray hold the radiator and fans, but the grooved section pointing up will allow for a pump to be mounted there. But more on this later!
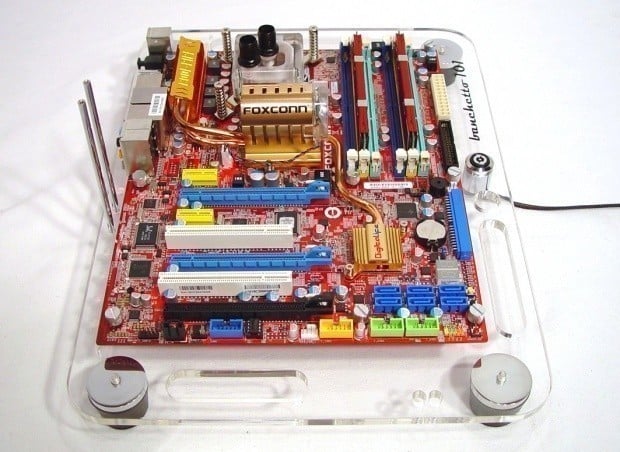
With a lot of resistance the rubber feet eventually released from the "pins" they set over. The motherboard tray only supports ATX and mATX motherboards, so some of you dual socket guys, I'm sorry, but no EATX with this one. However, there are holes here for back plate access and wire management around the outside.
Looking at what is left? You can actually grab a hold of the tab at the bottom of the 5.25" bays to remove them as well. I gave it a tug and it is fit in there pretty tightly, plus with full access to both sides for my build, it doesn't need to be removed. Also leaving this in, I believe, adds strength to the chassis in this state. While it isn't wobbly, you can flex it a bit easier now.
Included Hardware
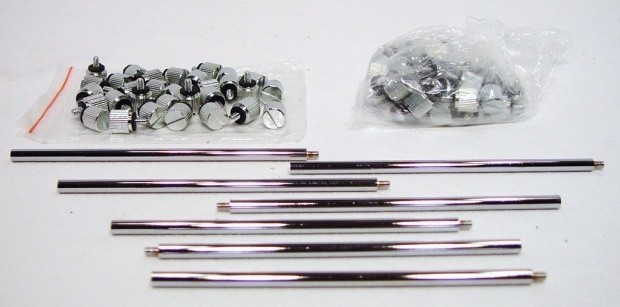
I am pleased to see both coarse thread and fine thread bags of thumbscrews. Honestly, there's thirty of each, so use them as needed; there are enough to go around. In front of both bags there are seven threaded rods. These act as expansion card supports. One end screws into the motherboard tray while the opposing end accepts the fine threaded thumbscrews for securing the card in place.
Here is what Microcool calls the "fan door hanger". It is a thin piece of the same material as the rest of the Banchetto. Facing you is a wire management hole that matches one in the tray. Simply use two thumbscrews and mount it in place. While I didn't mount any 92mm fans myself, asking a friend who owns one, he said his piece snapped in half when mounting fans. Honestly, I would rather this piece be anodized aluminum anyways, that would solve that issue.
Assembly of The Microcool Banchetto 101 Chassis
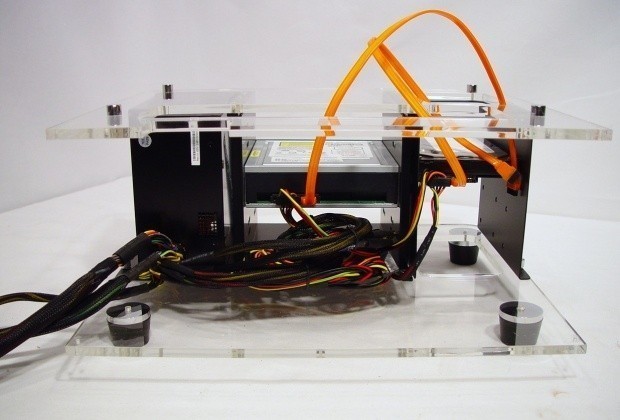
As I mentioned, with both sides open to the air, simply slide in your drive of choice, possibly a reservoir, and mount with the provided thumbscrews. Pretty easy so far!
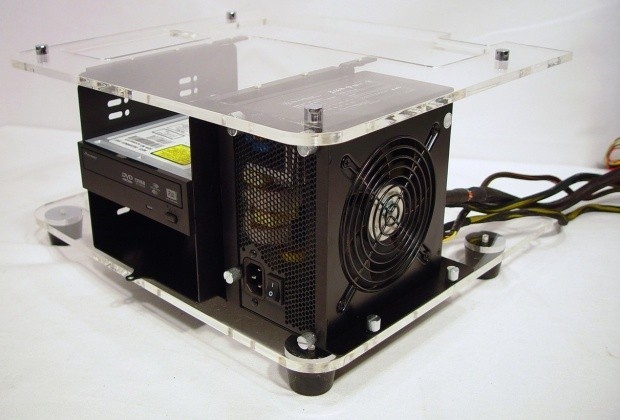
Mounting the power supply can only be done one way, as the holes aren't universal to flip it by accident. This mounting position will leave the PSU with the fan pulling air from the open side rather than from against the 5.25" bays.
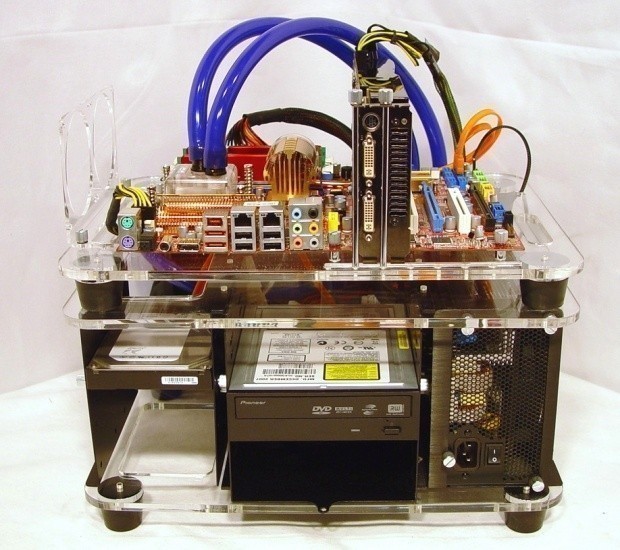
At this stage, just replace the two thumbscrews that hold the anodized tray into place and keep adding components. I do like that this position offers the plug and switch to be accessible from the front, however the wires on the PSU do need to be longer with this chassis.
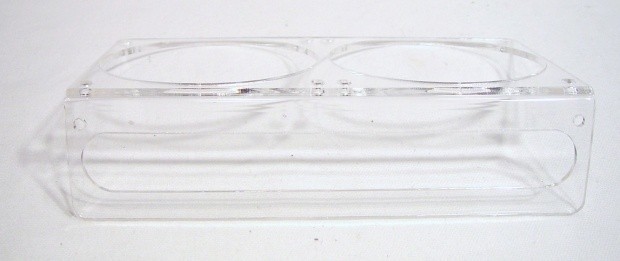
The 3.5" drive tray is more of the same. Just line up the drive and grab some more thumbscrews, and mount up to four drives here. Also in the chassis, there is a cutaway above and below this assembly to allow for convection to keep the drives from getting toasty with no fan in place.
Both components are back in place and ready to be cabled. Now I get to turn my attention to the water cooling aspect.
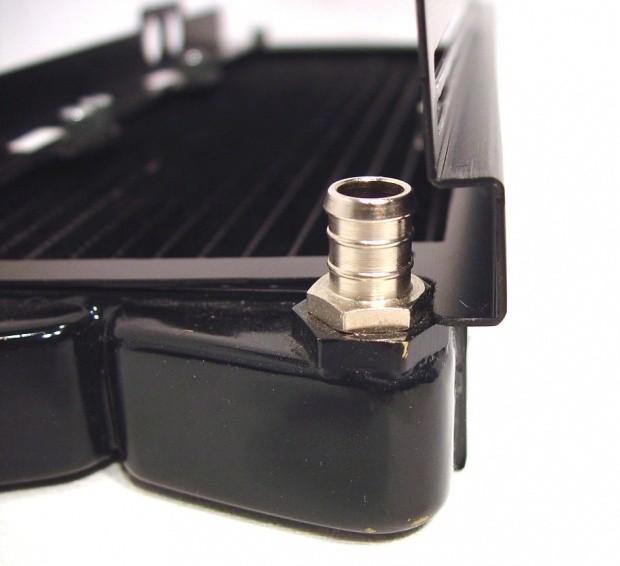
Right away I noticed that even as hard as they may try, this "universal" assembly may not fit every configuration. As you can see, the holes to mount the radiator to the plate are a bit off, enough to where I couldn't use 5 of the screws. It is, however, mounted really solid with the screws I did manage to get in.
Part of the reason for the misalignment is that the cut out made to allow the barbs to face inward hits on the radiator. A little trimming would solve this issue in most instances.
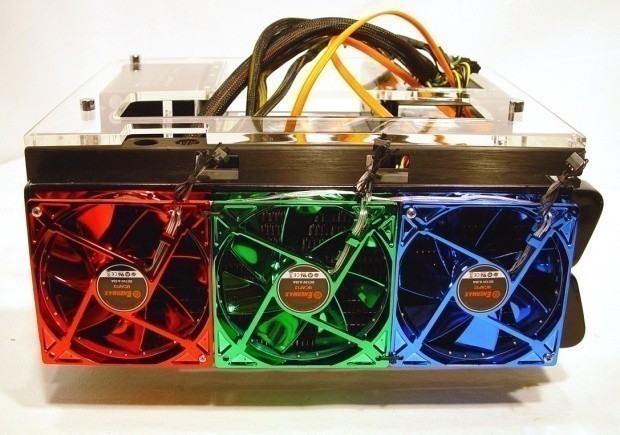
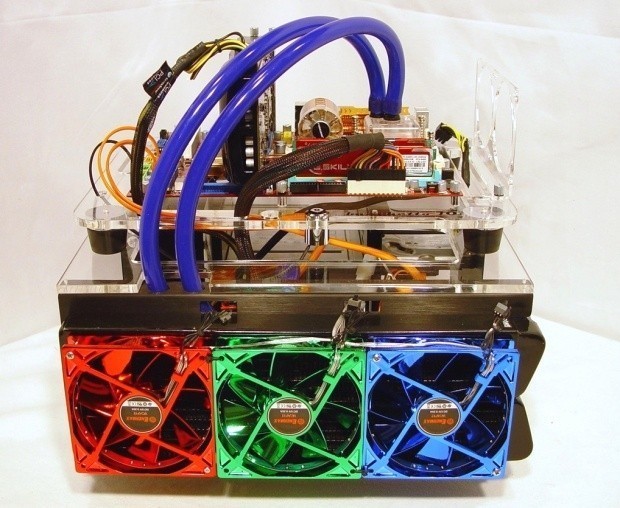
Since the Foxconn motherboard looks like Rainbow Bright had a hand in painting it, I chose to keep with the multi-colored theme and strap on some Apolish fans to go along with it. So far things are still going easy despite the previous setback. Now I just need to get the tubing and pump in place.
Before you mount this tray back into place, be sure to stage the wiring. Get all the components wired and lead the power wires up and out the top. Once the water cooling is mounted, it may not be so easy to get to these again.
Mounting things up to make sure I have everything ready, I took this picture. I still need to finalize the tubing and wire up the motherboard tray.
Fit and Finish
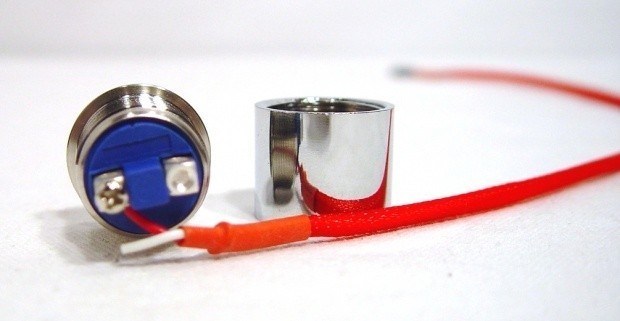
Finalizing the wiring, I noticed something fishy about the power switches wire and how it was laying. I removed the switch from the motherboard tray to find that it was missing a screw and at this point is dysfunctional, as I don't have any this tiny to replace it. Oh well, I can use the reset button to power it up. If something like this was to happen to you, I am sure Microcool will be more than happy to rectify this.
A full ATX motherboard fits the tray nicely. The issue I had was setting the support rods in place. I did find putting the thumbscrew in the end of it really helps to get them into place. From here I just have to press the rubber feet on top of the pins I pulled them from earlier. Be mindful of your wires as you may need to feed them through the holes as you set the tray in place.
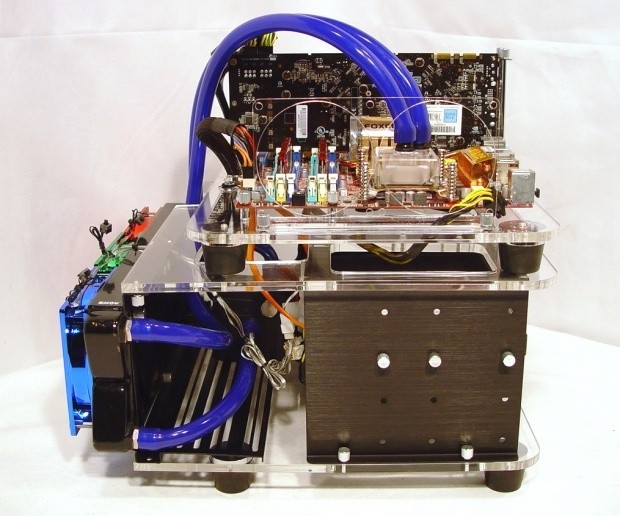
I liked the fact that even though the name should go forward on the motherboard tray, due to no I/O ports I mounted my motherboard in reverse so I can have access to them. With everything wired and plumbed, the Banchetto 101 keeps it tidy when it is completely exposed to the world.
There isn't a whole lot of room to hide wires, mainly due to the rear mounted radiator. A modular PSU would be a real problem solver and keep wiring down so more air can flow through the Banchetto and into the radiator.
You can see how nice the two holes in the radiator tray come into play. I used 3/8" tubing for this build and there is a bit of room left for bigger tubing. I do love how simple it keeps it and leaves it clean and unfettered.
As you can see, the 3/8" tubing bent pretty well, but to the pump I had to worry about a kink that kept trying to appear. If you were to choose ½" tube, or if you use a different pump assembly than my 655 with the Acetal top from EK, you may want to ponder some angled fittings to keep tight corners from kinking your tubing.
Whichever way you set the motherboard tray, you are going to end up with a similar look sitting atop your table. Overall I am pleased with the cleanliness of this clear chassis. There is just enough anodized aluminum to keep things hidden and out of view and still allows for a flow inside the chassis under the motherboard. At the top I have placed on the additional fan bracket. With it in place you can see how it would add well placed cooling to the area surrounding the CPU, including the memory.
Final Thoughts
I have to say, for how involved this build is, with water cooling and getting all the racks out, parts in them and remounted, I never really got stuck or upset. There is a slight issue with the radiator mounting, but nothing I would say is detrimental. Even though mine didn't "fit", I was still able to successfully complete the build. To sum up my time with the Banchetto 101, I would say two words; attractive and easy. Attractive, well ; that's obvious. I mean even if this chassis isn't your flavor of choice, you still want one holding your hardware. Easy, what more can be said? I mean from beginning to end, there wasn't anything that I would say could or would cause issues in any of the steps up to booting.
Temperatures were great; it's water, what do you expect?! As the Banchetto 101 sits in the last image, the only fans I had running were the ones on the radiator. Testing things in my basement, I didn't need fans to keep the rest cooled, as ambient hovers at close to 20 degrees Celsius. The power supply can breathe well, so does the graphics card. Running Everest I found the drive to be right around 30 degrees while operating, so a fan really isn't needed if ambient is low. If it gets hot where you plan to place your Banchetto 101, I would suggest at least the two 92mm fans. A set of twelve fan screws to use with a radiator would have been nice, but nothing a run to the hardware store doesn't solve.
Long term, I can see an issue or two. One, and hopefully it never happens, but I could see a little brother or sister trying to sit on this chassis if left on the floor. When the chassis is fully disassembled, I won't lie, the Banchetto 101 is in a much weaker state than with all the removable trays screwed in place. Be careful what you do with it as you are building. The thing that annoys me the most is one or two of the screw holes are already sloppy. I can see very easily over time that these can get stripped and at minimum will need tapped to fit the coarse threaded thumbscrews. Aside from this I still like it very much.
Is it worth the $265 USD asking price? I have to say yes, yes it is. Starting with arriving assembled, removable parts that are super simple to remove, fill, and replace, and it offers a super clean water cooling experience. All the thumbscrew mounting makes swapping parts and the initial build process a snap, proving this, even with a lack of any paperwork; I breezed right on through the assembly. When I was done, even with it being components that aren't that attractive, the chassis still looks elegant and tidy. What isn't to like?
If cats or little kids don't come into play and you love to tinker, I say get yourself one; just be sure to get some compressed air as things will tend to get a little dusty. Don't let the score you are about to see fool you; if it wasn't for the lack of stores stocking the Banchetto 101, Microcool would have gotten higher. Look beyond that if you can and realize this is a very nice system with low availability.


