


Earlier in the year, I transitioned from the Late 13 MacBook Pro to the 2017 iMac Retina 4K. This new system is intended to test all Thunderbolt 3 products that come through the lab, and it quickly went to work testing enclosures, portable SSDs, and docks.
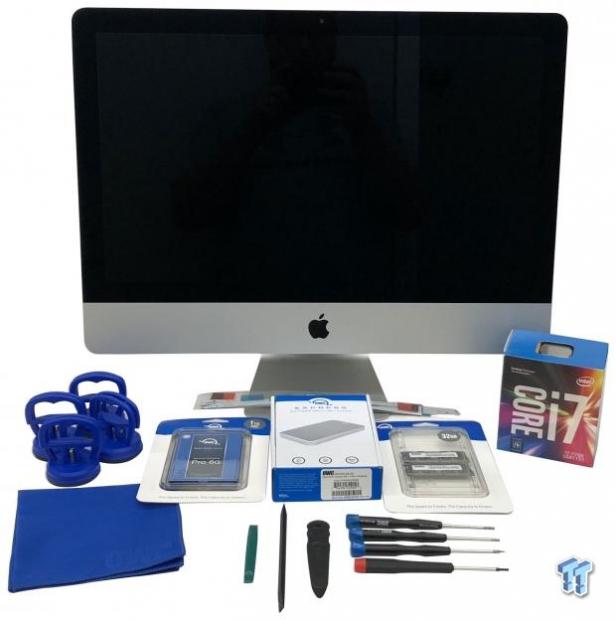
For those of you that don't know, the 2017 iMac is one of only a few models from Apple that are upgradable, systems like the MacBook Pro and Mac Mini have, since 2012, had their bits soldered to the mainboard. That said any and all upgrades to the iMac must go through the screen, so the process isn't for the faint of heart.
With that said, for those that have nothing to lose, OWC offers two kits made for upgrading your iMac.
The first of those kits is the SSD Upgrade kit that comes with the OWC Express Enclosure. This can be used in two ways, one being installing the SSD into the enclosure connecting to your Mac and running something like Carbon Copy to Clone the OS to the SSD and then swapping the SSD into the machine. The second use would be as an enclosure for the original iMac HDD, to get any data off the drive after a fresh install of macOS to the SSD.
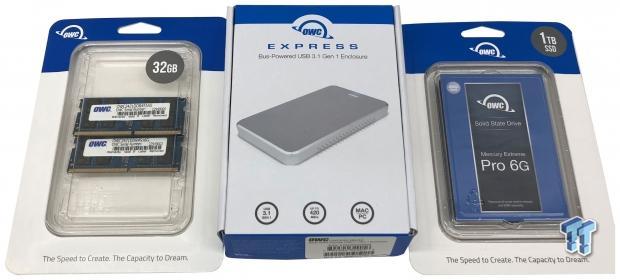
The memory upgrade kit is a standalone kit of memory made for the 2017 iMac, OWC sent over the 32GB option for this article.
The MSRP of the 1TB OWC SSD Upgrade kit comes in at $329.99 backed by a five-year warranty: Here
The Memory upgrade kit in the 32GB capacity comes in at $328.99 with a lifetime warranty: Here
Our Latest Editorials Article Coverage
- MSI's Project Zero Delivers a Stunning Cable-Free Look to More Gamers
- EK Fluid Gaming: Water-Cooled Gaming PC Build Guide
- My new gaming/workstation PC: Ryzen 7 1800X, GTX 1080 Ti
- AMD's Answer for a Sub-$1K Battlefield 1 Gaming PC
- TweakTown Blue Prodigy PC breaks PCMark Storage World Record at Computex 2013
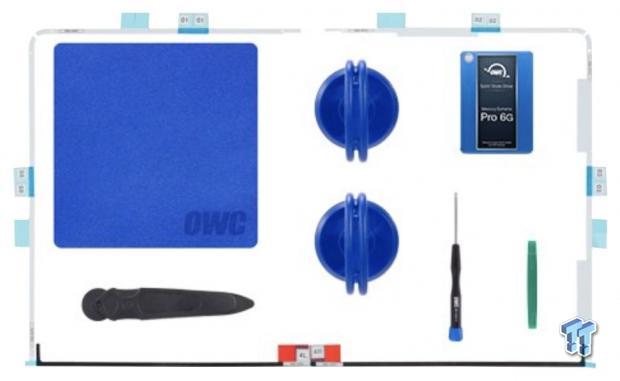
The SSD upgrade kit comes with additional accessories; these include adhesive for the Retina display, suction cups for handling the display and a plastic pizza cutter for removal of the display among others.
The Teardown
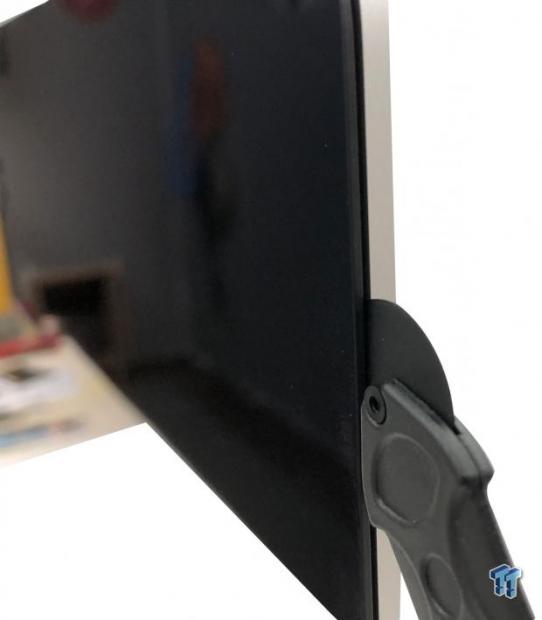
The teardown starts by using the plastic pizza cutter, moving it around the edge of the screen back and forth multiple times. After four or five trips around the screen, we can begin to pry, gently the screen from the chassis.
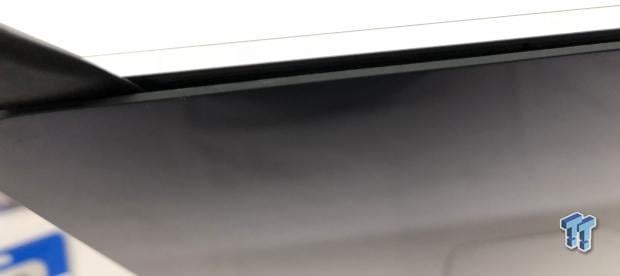
Start prying on the screen at the top left to create a gap, use the plastic spudger that's included to hold that gap while you check for any adhesive still holding the screen to the body.
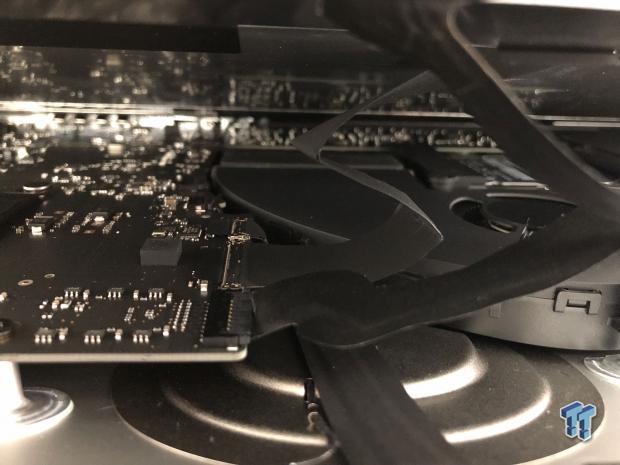
Once you have created a large enough gap, you will see the ribbon cables connecting the two halves together. The two rearmost cables have locking mechanisms you pry up from the left side, and the front cable just slides straight out.

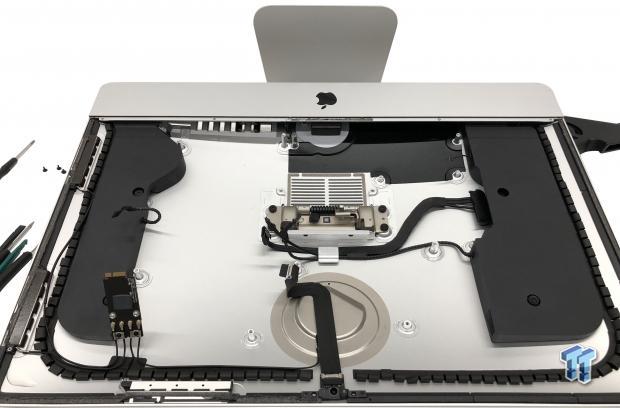
After the screen is removed, we have full access to the iMac.
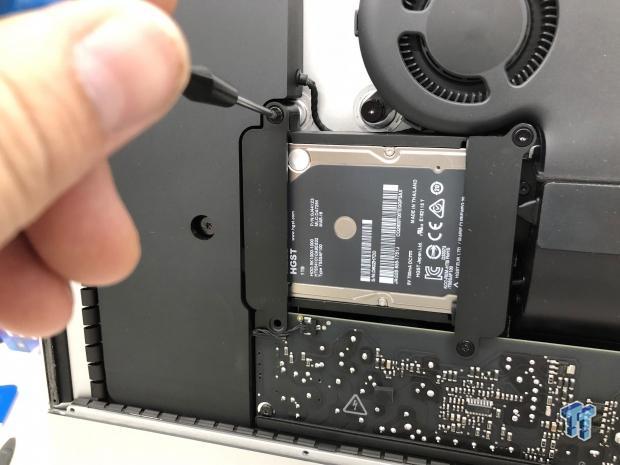
We move next to the removal of the HDD; this is four screws easily removed and then disconnecting the SATA connection.
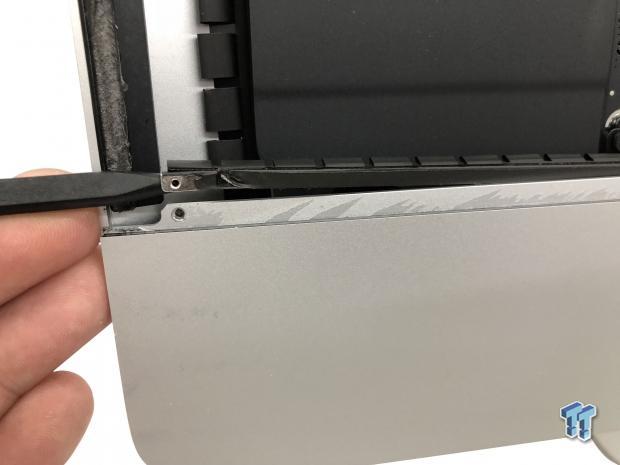
Starting the teardown of the rest of the machine, we remove the thin strip at the bottom for clearance to the mainboard and PSU.
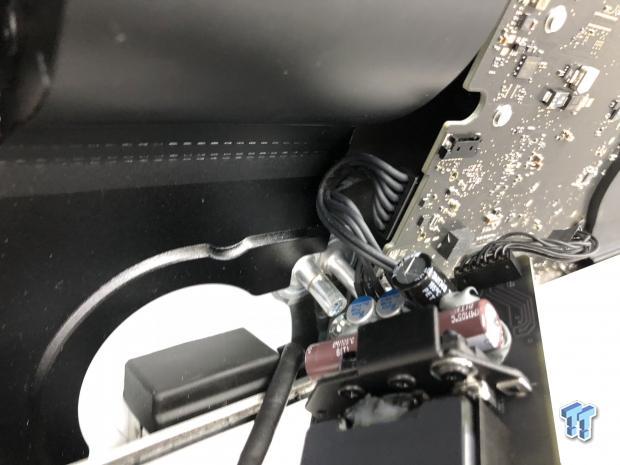
Once the strip is removed, there are four screws the will release the power supply. After the power supply is loose you will have to carefully maneuver it to disconnect the power to the mainboard and the secondary connection.
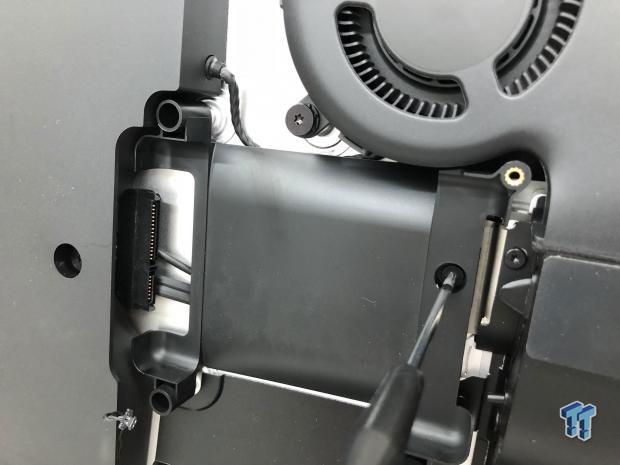
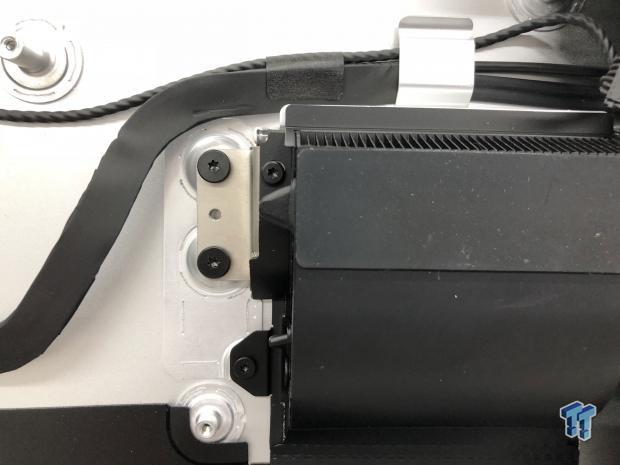
We then start disassembling components to get access to the cooling fan; the first is the 2.5" drive caddy.
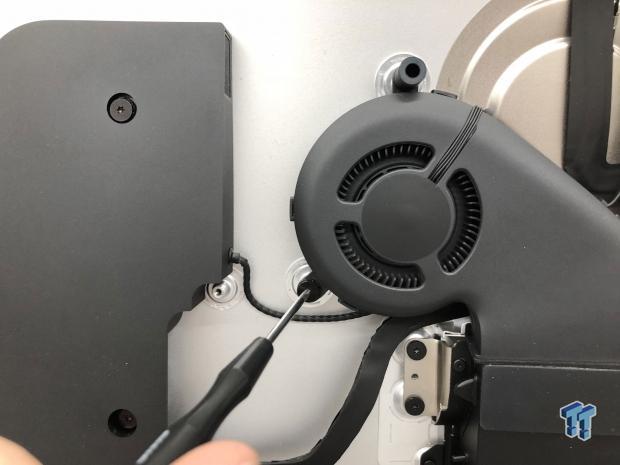
Gaining access to the cooling fan screws we can get it out of the way and move on to the mainboard.
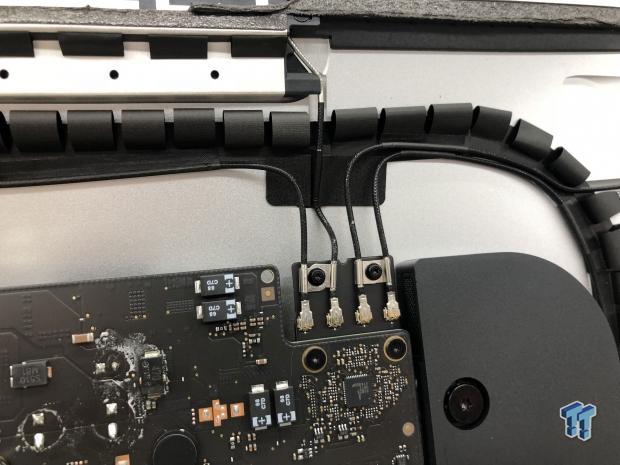
Start with the mainboard by removing the clamps that hold the antennas in place.
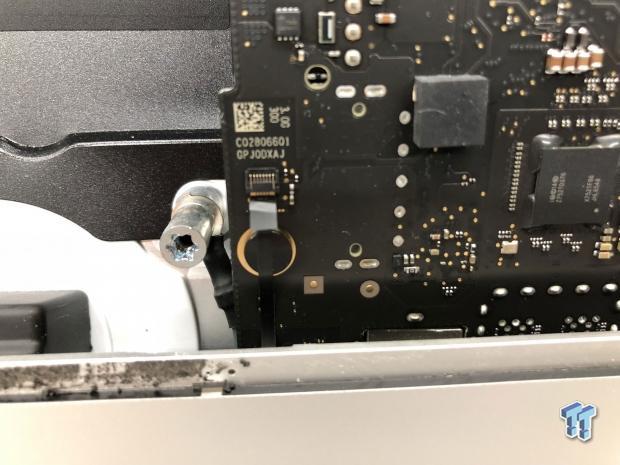
You can then move through the face of the motherboard removing all screws that hold it in place.
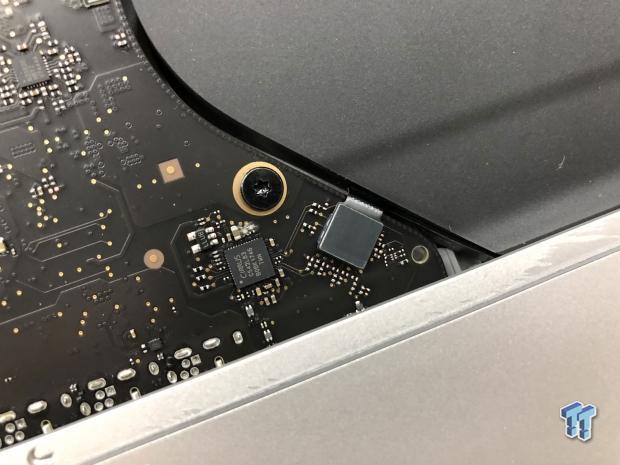
When moving through removing screws look for electrical connections as well, like the ones seen above.
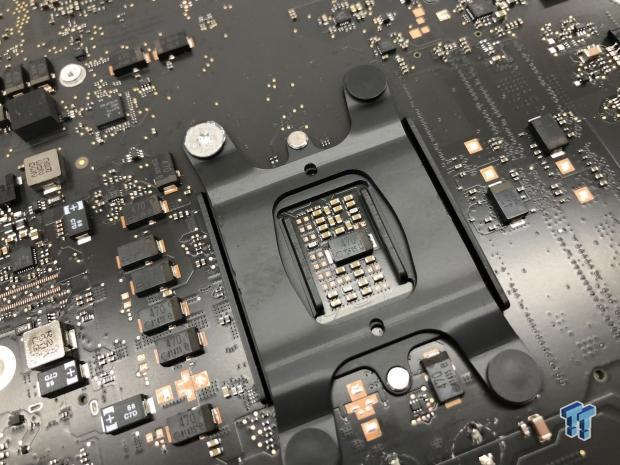
Last we hit the heat sink. Here you want to remove the small black screws and leave the larger screws intact as they hold the stand to the chassis.
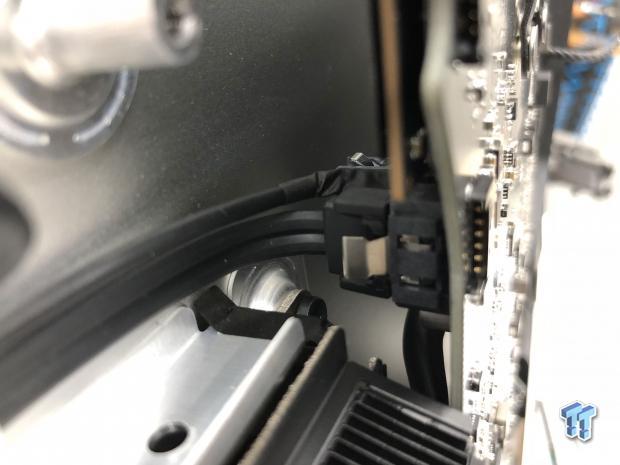
As we begin to remove the motherboard, take your time and disconnect cables as you go. The first set of cables is the SATA connection and left speaker seen above.
Maneuvering around the right speaker will test your patience, but it is easily done if you stay calm and rock the board back and forth. A second option is to take the speaker screws out and remove the speaker and motherboard together as a single unit.
The Upgrade

Once we have the mainboard out of the enclosure, we can begin the upgrade process.
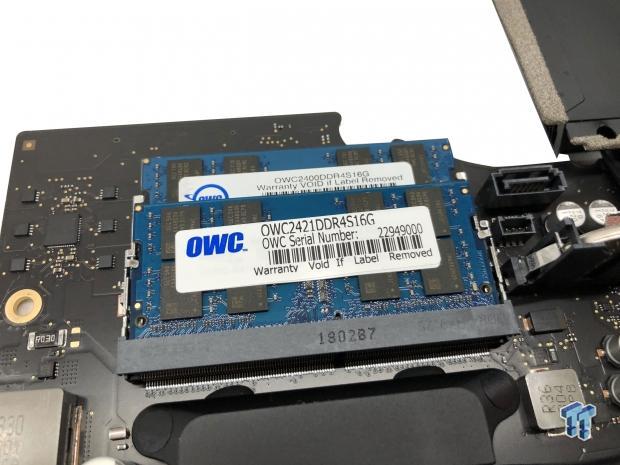
The first of which is the memory upgrade, this unit came stock with 8GB of DDR4 2400 in two sticks. The upgrade is the two stick 32GB kit from OWC, the same DDR4 2400.
I opted to take the upgrade process further than the two OWC upgrade kits. In this case, im removing the stock Core i5 7400 and replacing it with the Core i7 7700. For this we must remove the tape blocking the screws on the backplate, followed by the screws.
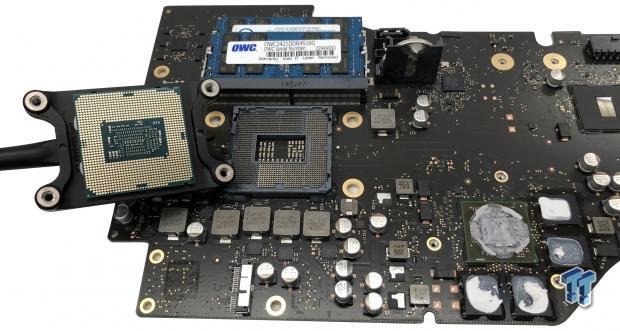
We then flip the unit over to remove the heat pipe and CPU that are stuck together with thermal material.
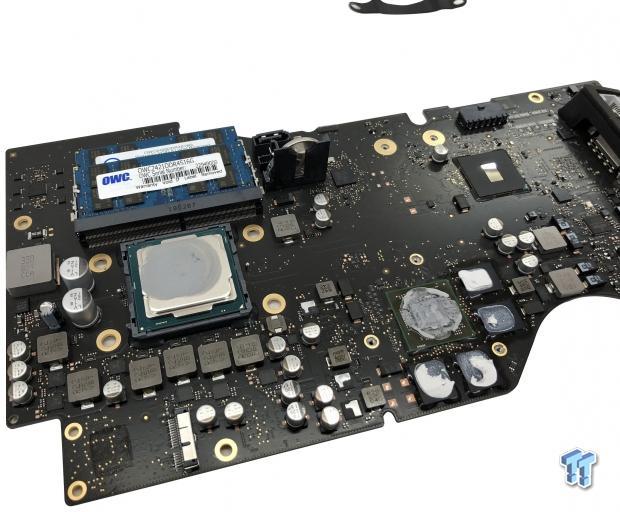
After replacing the CPU with the 7700, we applied new thermal paste, after thoroughly cleaning the base.

Once you have completed the upgrade process, carefully begin to reinstall the components. I would start first with the right speaker and mainboard, making sure you reconnect all cables as you go. Then move into securing the heat sink, installing the power supply and finally the SSD.
The Performance
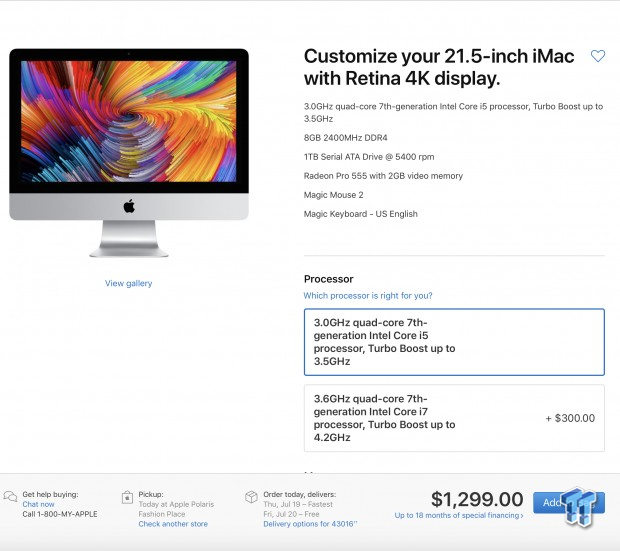
When I purchased the 2017 iMac, I went with the base configuration for the 4K Retina model. This gave us a total of $1299.

Storage performance of this base model is quite terrible, the HGST hard drive is 5400 RPM and gets around 97 MB/s read and write.
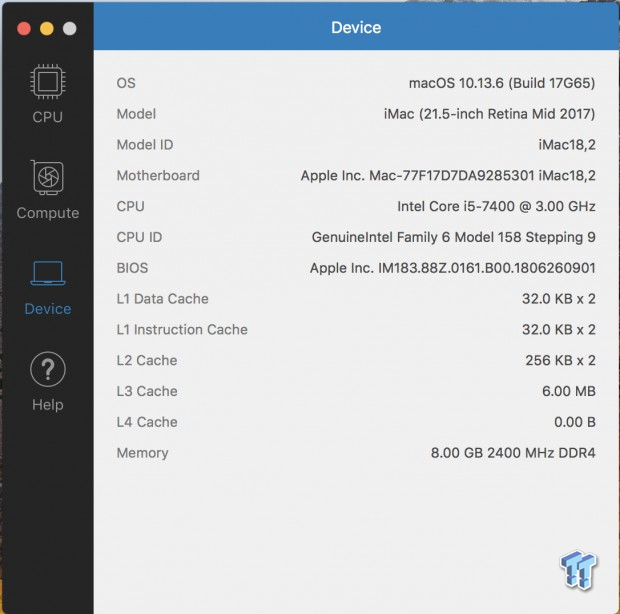
Geekbench 4 gave me the opportunity to test system performance in the base configuration above.
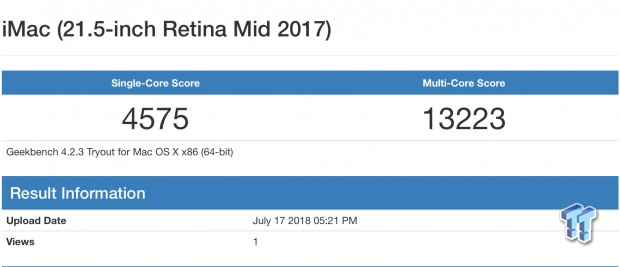
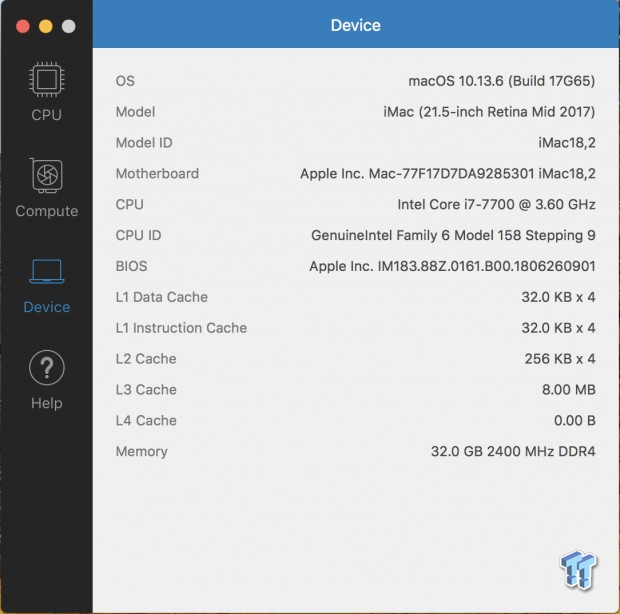
CPU results gave us 4575 single-core and a 13223 multi-core score.
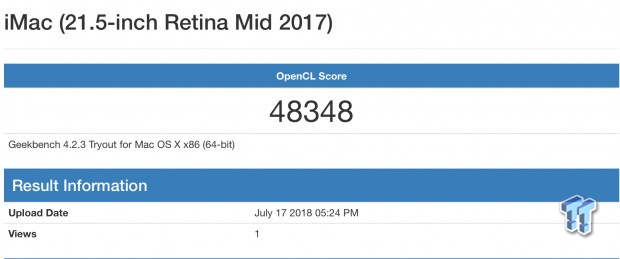
OpenCL gave the base model a 48348 score.
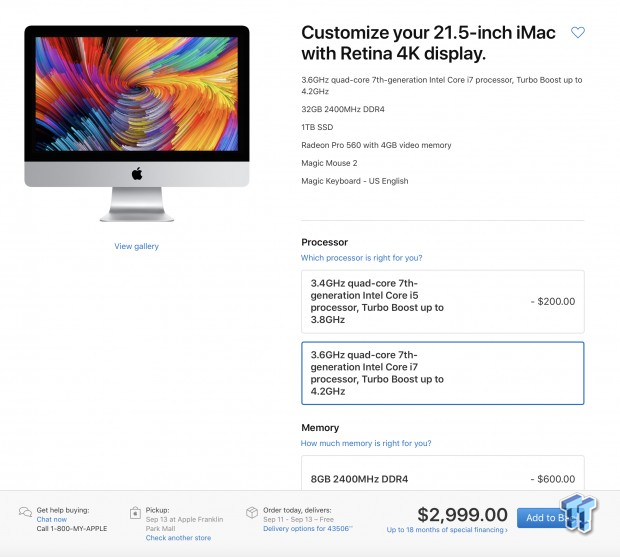
After the upgrades, the 2017 iMac is configured similarly to the highest end model that's retailing for $3K. That said, you should have roughly $2200 into the machine depending on the capacity of your SSD and memory upgrade, remember you don't have to go all out as I did, anything is better than the stock configuration.
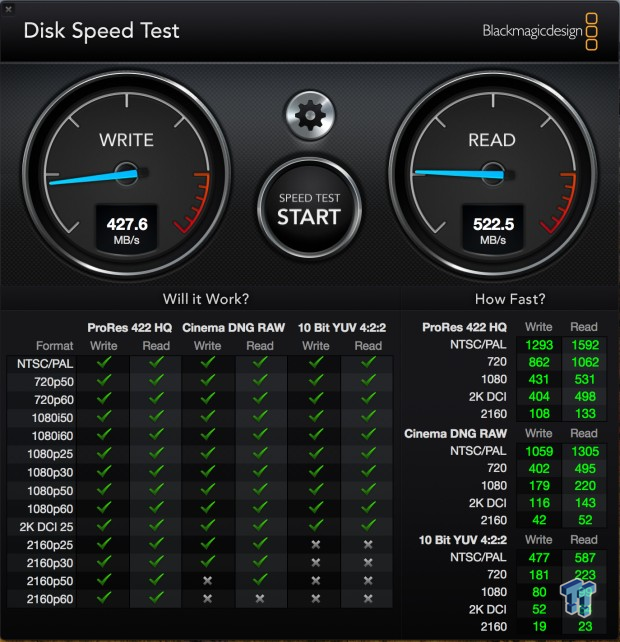
That said, the 1TB SSD provided a nice bump in storage performance roughly, 4x faster than the HDD.
I then moved over to GeekBench 4 to take this new configuration for a spin.
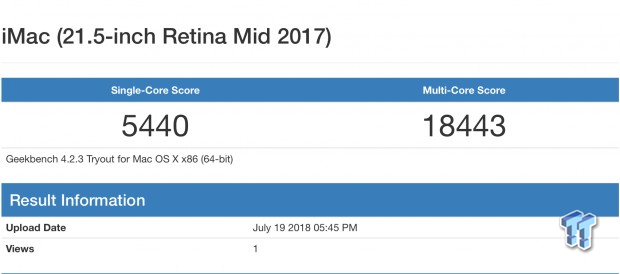
The single core score came in at 5440 a near one-thousand-point increase and multi-core topped 18443, an increase of 5K.
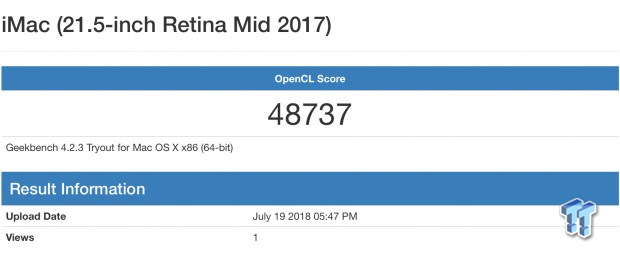
OpenCL didn't see much of an increase, we went from 48348 to 48737 with the 7700.
I'm closing in on two months since I went through the steps of upgrading this iMac. The biggest performance gain has definitely come from the SSD, and if you are going to dive into tearing your iMac apart it's the easiest component to swap out. In fact, you can remove the screen and swap the drive without touching the power supply, mainboard or speakers. Is it worth it? Apple charges a nice $700 USD to go from the base HDD to a 1TB SSD, OWC charges $329 for the upgrade kit, you save roughly $350.
As for the memory upgrade, the base model 8GB unit works just fine. However, it's the lowest amount of memory you will want and moving into a new macOS in a few short weeks it may be worth future proofing your iMac. That said, Apple charges $600 USD to move from the 8GB to the 32GB while you can add it to your OWC upgrade kit for another $329.99. For those that don't need 32GB, Apple does offer a 16GB upgrade for $200 while OWC charges $169.99, this makes a 16GB feasible to have done from the factory.
Last was the processor upgrade, the base i5 7400 is an ample quad-core CPU, but for those that want the very best or are doing editing with multiple windows, the 7700 is a great upgrade. You can find the i7 7700 on sale for around $303 at the time of writing and Apple will include it for $300, but it will delay the build time for your iMac by a few weeks.
 MSI's Project Zero Delivers a Stunning Cable-Free Look to More Gamers
 GEEKOM IT15 AI (Intel Core Ultra 9 285H) Mini PC Review
 Acer Predator Orion 7000 (Core Ultra 9 285K + RTX 5090) Desktop Gaming PC Review
 Beelink EQi12 Mini PC Review
 GEEKOM A6 Mini PC Review - AMD Ryzen 7 power in a small package
 NVIDIA RTX 5000 GPUs get hotspot temperature readings in new version of HWMonitor to help diagnose cooling-related flaws
 Ryzen 7 5800X3D 10th Anniversary Edition hits fourth place on Amazon best sellers list, less than a month after release
 Microsoft confirms ads are being removed from Windows 11 Search in new major upgrade
 Switch 2 OLED could arrive years ahead of Nintendo's original OLED timeline
 Chinese DDR5 memory just hit 8000+ speeds on MSI Intel motherboards
 Anthropic says Claude changes its personality across languages and models
 These fantastic Mini PC deals from KAMRUI deliver performance and value
 Dying Light the Beast cancelled on PS4, Xbox One, refunds will be offered
 Assassin's Creed Hexe to be revealed 'relatively soon' according to insider
 LG claims that you can improve your aim by up to 38% by playing on a 480Hz OLED monitor
 ASUS ROG Raikiri II Xbox Wireless Controller Review - Ready to Take Control
 MOZA FMP18 Panel Bundle Review: authentic F/A-18 Hornet cockpit controls for flight sims
 Micron 6600 ION 245.76TB Enterprise SSD Review - Best in Class Programming Speeds
 MOZA MA3F EFCM Flight Control Module Review: authentic Airbus A320 autopilot panel for simulators
 Turtle Beach Stealth Pro II Wireless Gaming Headset Review - Premium Sound, Fantastic Features
 MOZA MGX1000 Instrument Panel Review: a realistic Garmin G1000 replica for immersive flight sims
 Simagic Zeus Formula Steering Wheel Review: premium build and advanced inputs for F1 racing
 GIGABYTE X870E Aero X3D Dark Wood Review - A woody goody
 The Super Mario Galaxy Movie (2026) 4K Ultra HD Blu-ray Review
 KTC H49S66 5K2K (5120x1440) 49-inch 180Hz Gaming Monitor Review
 I stopped digging through Windows menus after I set up this one folder
 Don't sell your Windows laptop until you do these things
 6 PC cleaning mistakes to avoid for safer hardware maintenance
 Phison and Intel Take Aim at Local AI's Memory Wall with aiDAPTIV
 How to Remap Keyboard Keys in Windows using Microsoft PowerToys
 7 tips to organize your Windows files for faster, easier access
 Intel Arc G3 Extreme first impressions with MSI's Claw 8 EX AI+ - Incredible power for an extreme price
 How to fix Wi-Fi Adapter Not Working on Windows laptops: troubleshooting tips
 Hisense U7SG 4K TV: Modern Entertainment for the New Age
 6 underrated Microsoft Word features worth using to boost your productivity