


Introduction
It seems ever since I got together with Swiftech to review the first of the Drive kits, other manufacturers have been sending emails looking to showcase their products as well. Since that original loop, we have seen its redesign in the HD series, and we also took a look at what EKWB has to offer. Today it is XSPC's turn to get its name in lights as we take a look at the latest series of custom water loops that come as a kit, all in one box to take all the decisions out of it, so users can easily get into liquid cooling without much fuss.
I have used some XSPC products before. Just recently I removed the 655 and XSPC top from the loop when going to my new build, I even picked up a triple radiator version of their older RASA series of loops and got a chance to play around with that, even adding it to a Danger Den chassis I reviewed here.
As far as the reservoir I bought a few years back, it has been solid and shows no signs of wear or anything that makes me think I shouldn't continue using it. The RASA kit on the other hand had some issues that made me stop using the kit all together and traded it away some time ago. Issues like barbs that would loosen under the pressure of the slightest twist of the tubing are never good, the fans then were quite loud, and it could be that it was used, but the pump/reservoir combo unit was loud and is where I had the most issues keeping the barbs tight. So I already have a fifty-fifty experience going into this review, and I do have a few things I am going to keep my eye out for as I complete my build.
This is going to be a long review, so grab a beverage and get really comfy as I bring you what I found in the XSPC Raystorm 750 RX360 kit. I have seen some of the best loops money can offer already, so the bar is set pretty high for XSPC to jump into this and compete head to head. Stick with me as I plan to cover every little aspect, pros and cons of this kit, and see just how the Raystorm stacks up against previous submissions as well as against its own pricing.
Specifications, Availability and Pricing
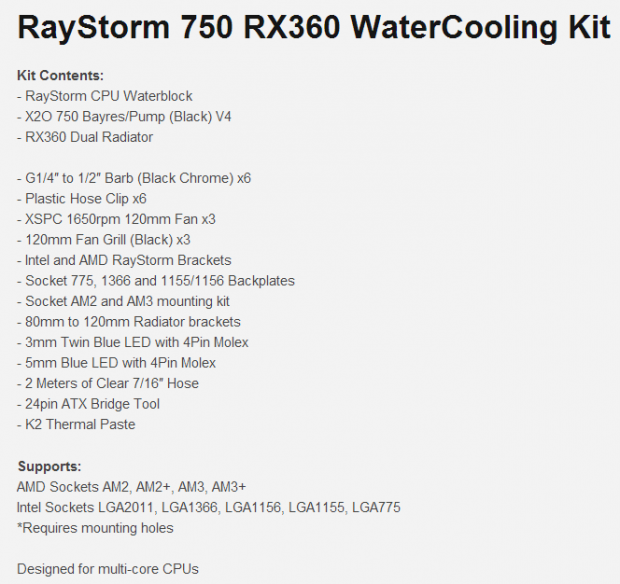
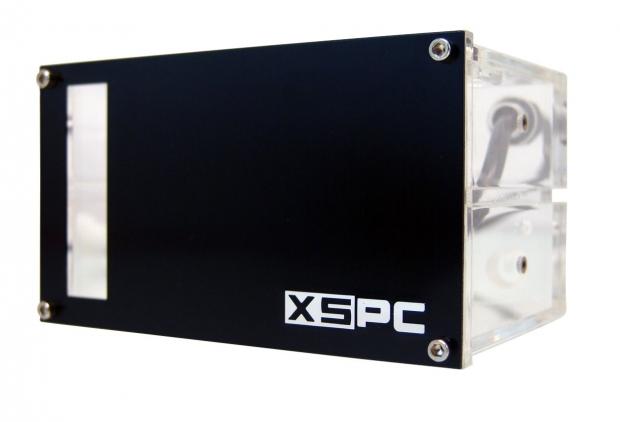
The list at the top is what XSPC displays as the specifications for the Raystorm 750 RX360 kit, but this is more of a parts inclusion list than anything else. Of course you are getting the LED backlit Raystorm CPU block the kit takes its name from. You also get the dual bay X20 750 reservoir/pump in its fourth version now. With this specific kit, you also get the RX360 dual radiator. To get the components connected, XSPC supplies all you need. Barbs, clamps, fans, hardware, LED lights, tubing, PSU jumper and thermal paste - it's all in there. What is also cool about these kits is that all of the hardware for both Intel and AMD mounting needs are included in the box.
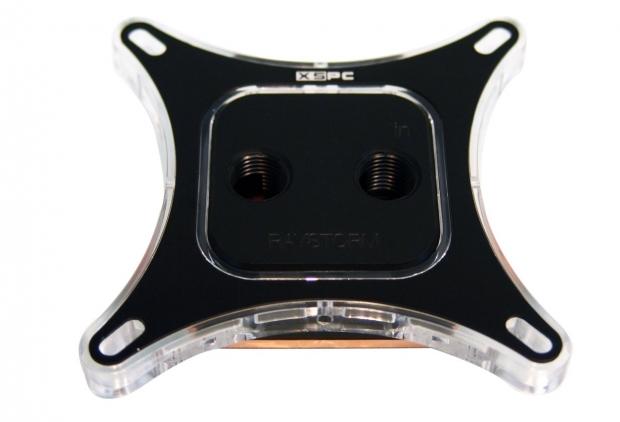
The Raystorm CPU block is made of a copper base with micro channels cut into the top side to allow the water through to remove the heat. Above that there is a dispersal plate that takes the round entry of water and makes it a wide steam to blast across all of those channels in the base. The top of this version is machined of Acetal plastic and offers G1/4" threads on the top with the inlet clearly marked for this unidirectional block. For the mounting hardware to secure the block in place, it is built just slightly larger than the Acetal top and snugly wraps around it and used thumbscrews and springs to supply all the pressure.
The X2O 750 bay res/pump, reservoir and pump combination unit, will take up two bays, and comes with the option of a natural or black anodized face plate. The reservoir is made of high quality acrylic and houses the 750 LPH pond style pump internally. This pump can deliver 11.8 meters of head pressure while using 12V via a Molex connector. As the block does, the reservoir also comes with the option to be LED lit with 3mm blue LEDs.
Our Latest CPU Liquid Coolers Review Coverage
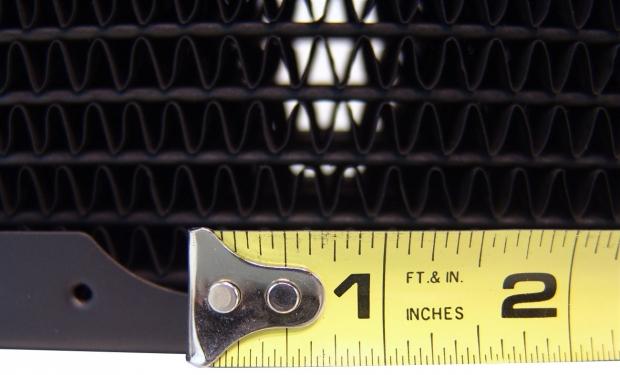
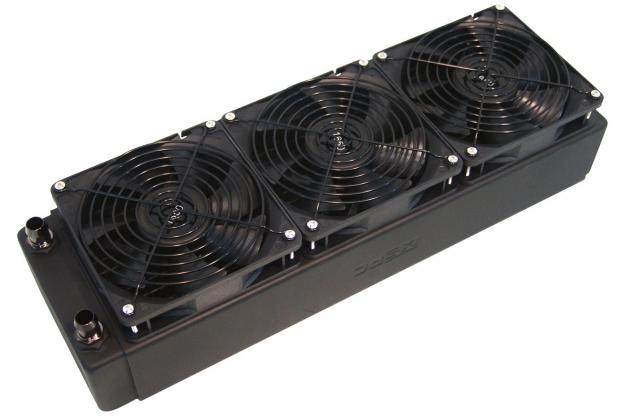
The radiator in my kit is the RX360 triple fan radiator in its second version. This as well offers two ports with G1/4" threads. Dimensionally you need room for 400mm of length, 124mm of width, and the best part, 63mm of depth or thickness. This radiator uses an all copper construction with 13mm by 2mm tubes passing the heat to the fins. XSPC also rates the fins FPI at less than 8.
As I look around to purchase this kit I am fining only two price points online. On the lower end they are charging $199.99, while the other option is to pay $209.99 for the same kit. Neither of those prices include the shipping either, and depending on the distance from the point of purchase, or if you live out in the boonies, shipping may play a big part in the overall pricing for each individual.
What this price does do, is that it comes $50 cheaper than the Swiftech unit and has a thicker radiator. As compared to the more equally equipped EK kit, the XSPC kit is much cheaper and more of an apples to apples comparison.
Packaging
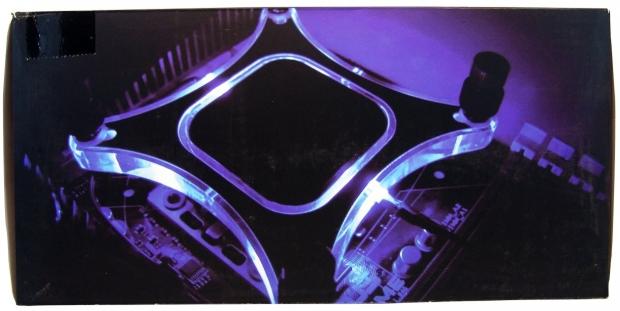
I'm going to go ahead and call this the front of the packaging since it brightly displays the LEDs lit inside of the acrylic mounting bracket. Since the lighting is down in this image, you can also see that there is a large flood of area the LEDs illuminate around the block.

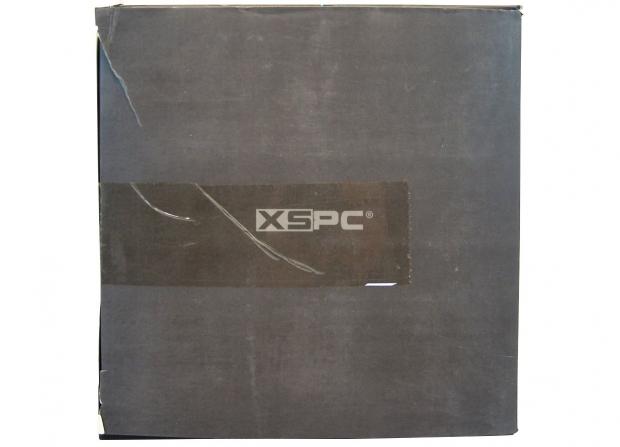
On this panel the background is black and just shows the light blue line with the XSPC name in the middle.
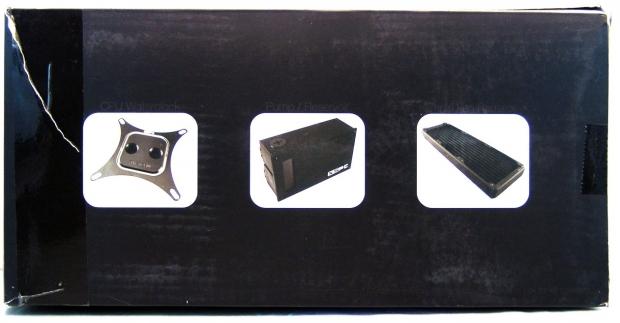
This panel offers a look at the block inside, a different reservoir than what is found in the box, and a thin version of the radiator actually included.
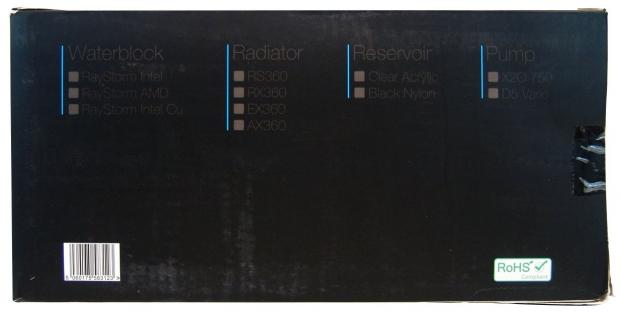
On the last of the larger panels you get lists of possible components that would be included in the box. As far as this version, nothing is checked off, so we will have to open things up to see exactly what is inside.
Both of the end flaps are exactly alike and are just black with the XSPC name in grey, centered in the panel.
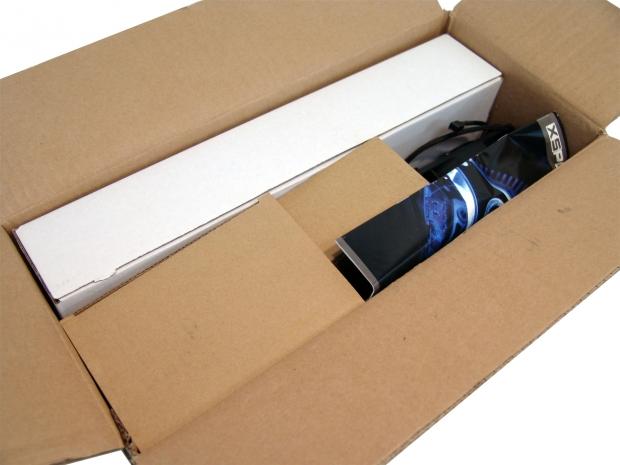
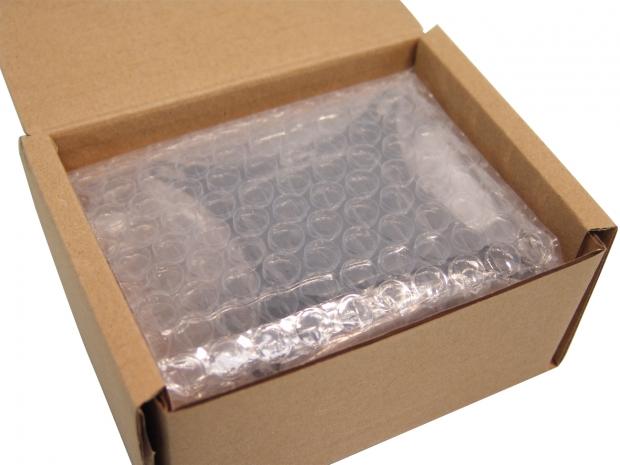
After removing the decorative outer shell, I ran into a pain cardboard box. Once I opened that box, I found this third box on the inside holding all of the included components. Even then the individual parts are in their own boxes to ensure there is no damage done from the factory to your door.
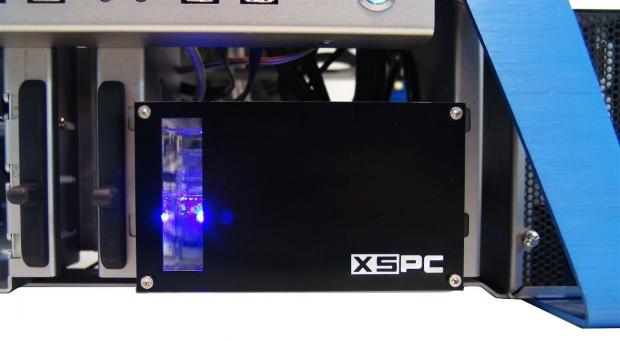
X2O 750 Dual Bayres/Pump (Acrylic) V4
This unit comes in its own cardboard box with the reservoir and pump wrapped in bubbles at the bottom, with the various pieces of hardware lying on top of it.
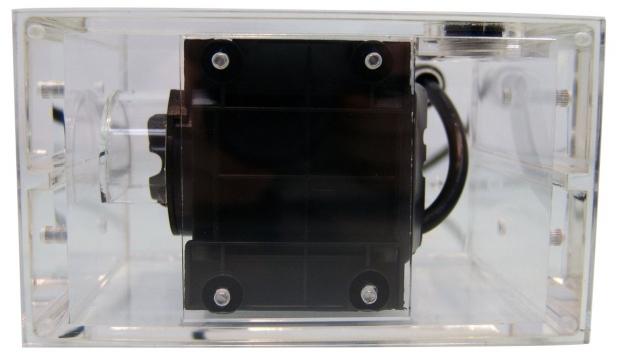
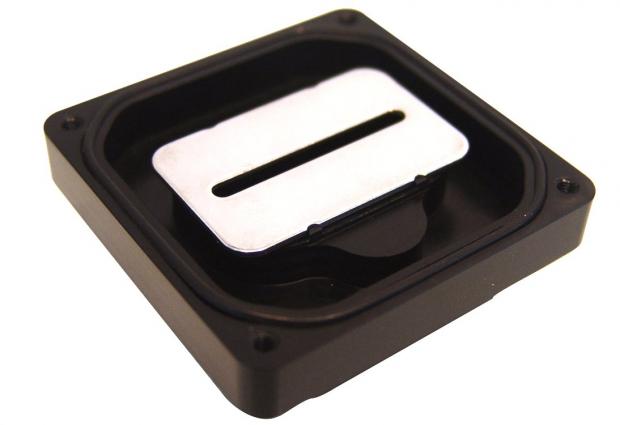
Looking in the front of the res you can see that the 750 LPH pumps is attached near the front of the unit. On the left it draws in the water, and on the right there is the power cord running to the back of the reservoir.
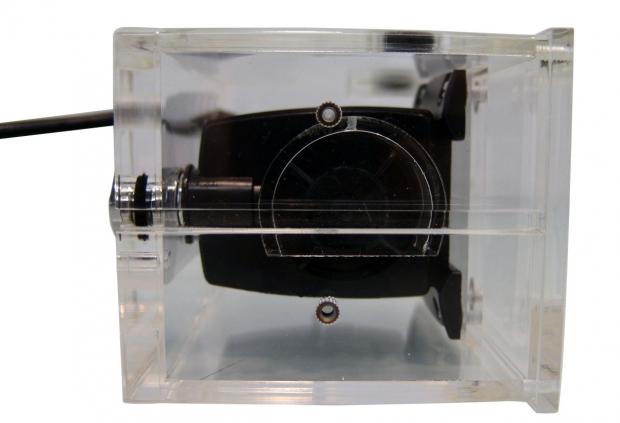
Not only do you have brass threaded inserts in the sides to securely mount this into a chassis, you can also see the cover over the intake that is made to help keep the air over the top of it while it draws water from the bottom only.
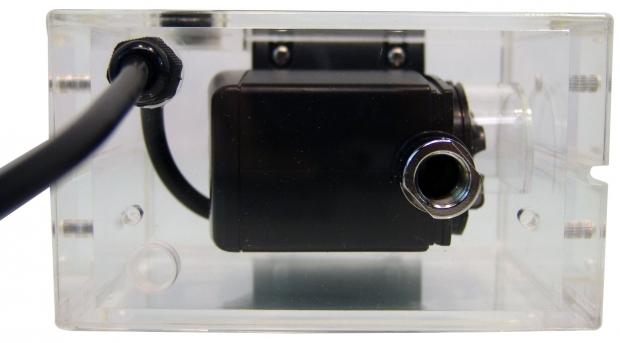
In the back you have the power cord exiting at the top with the bulk of the pump in the middle. Since the intake is at the left, the air goes over the pump while water is drawn under it. The chromed fitting is then the outlet, and there are also two 3mm holes drilled for the LED placement.
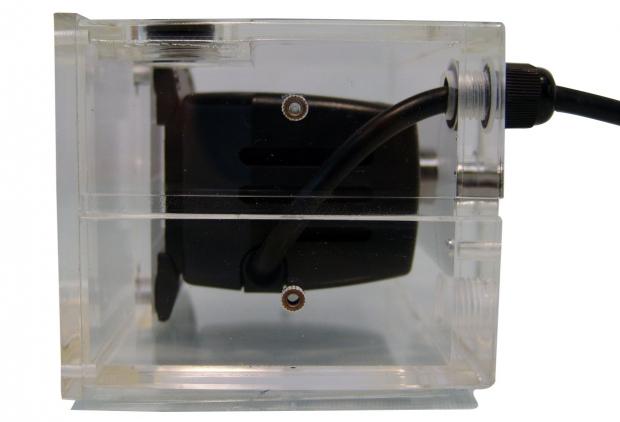
As the other side did, this side offers the same brass inserts for securing this side in the case.
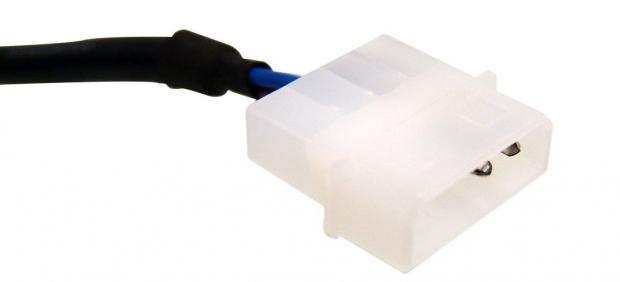
To power the pump inside of the reservoir all you need to do is make the Molex connection to the power supply.
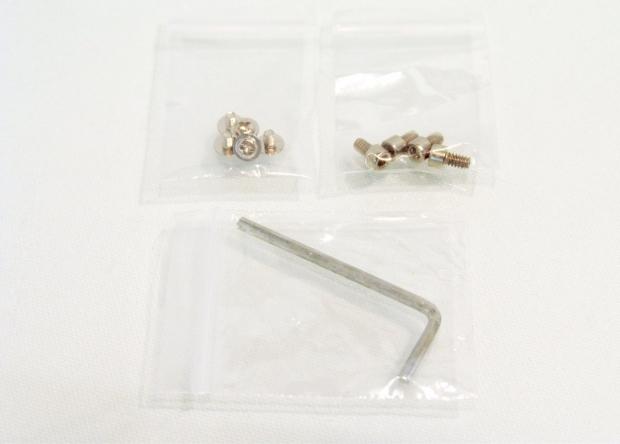
Part of the hardware that comes along is the tiny screws to secure the reservoir into the chassis. The hex head screws on the right and the Allen wrench are used to mount on an optional face plate.
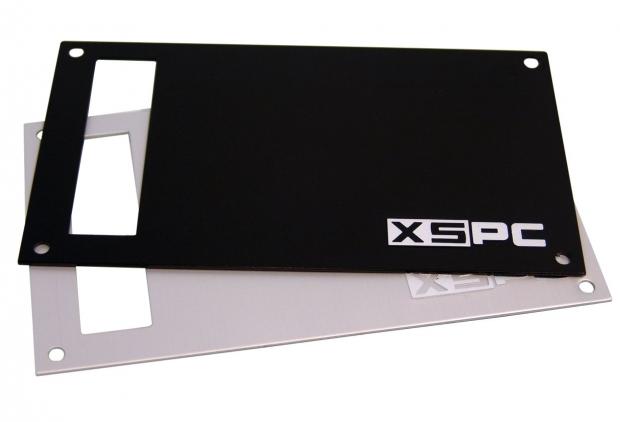
Here are those optional plates. They both are made of brushed aluminium, one natural and one anodized black. Both of which have a small viewing window for the coolant levels and XSPC etched into the face of each of them.
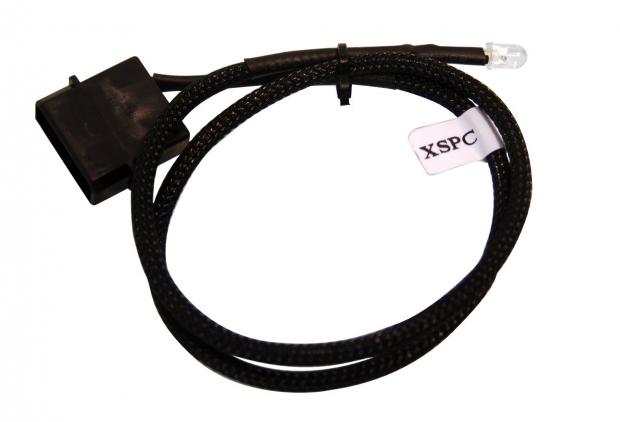
The LED and lead supplied with the reservoir is what you see here. It also uses a Molex connection for power and you have to choose which side of the reservoir you would like to use it on.
For me, I went with the black face plate, and it was easy to install.
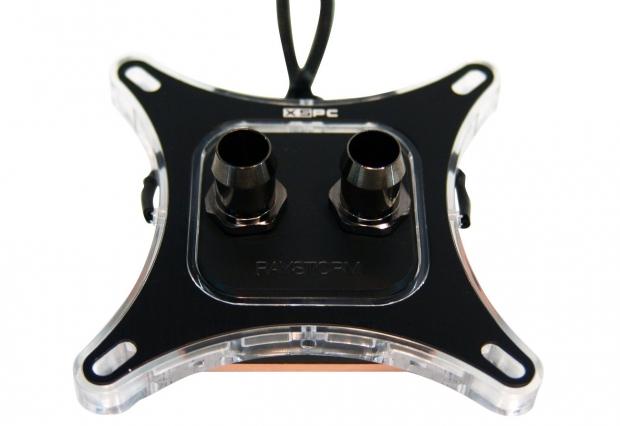
Raystorm CPU Water Block
The Raystorm CPU block comes in its own box as well. Along with some bubble wrap to protect the block, there is also a thin layer of plastic around it and another layer to covert the polished copper base. The rest of the hardware and goodies are packed underneath it.
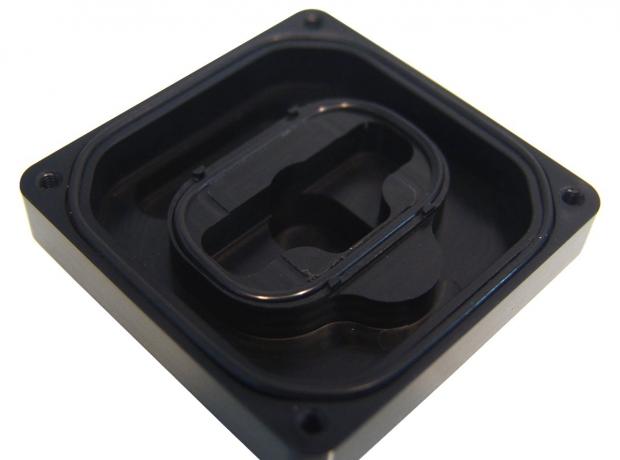
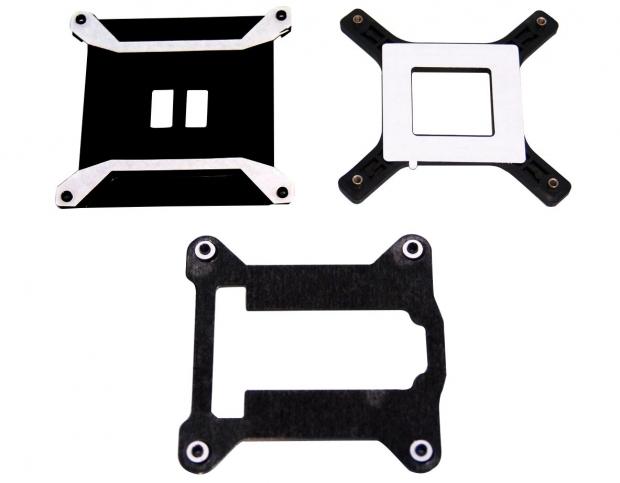
Unwrapped you can see the acrylic bracket it thick and should take some stress for mounting. It is also dressed up with an aluminum plate to match the Acetal top of the Raystorm block it surrounds.
On all four sides of this mounting bracket you will find 3mm holes drilled into it to give you all the options possible to insert the pair of LED lights that come with the block.
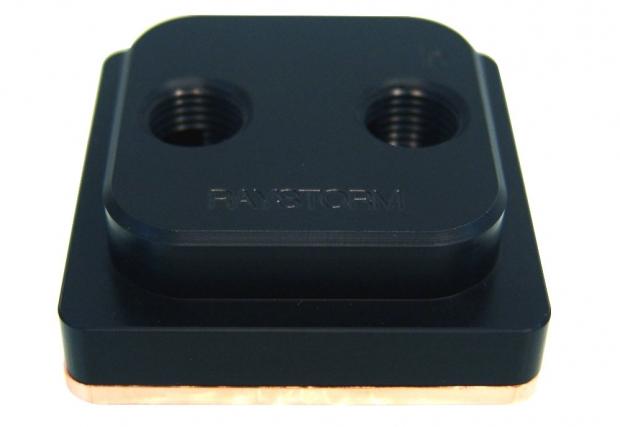
With the bracket now out of the way you can see how petite the Raystorm is. As the bracket surrounds the block, it has the wide shelf for support, and on the top you are given G1/4" threaded ports for the inlet and outlet.

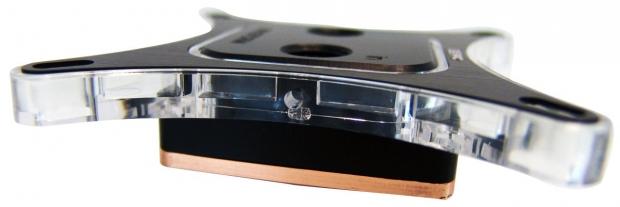
The copper base plate is held onto the Acetal top with four hex head screws with a washer to keep things leak free. The surface of the block is finely polished and is flat across the middle, but deflects a bit at the four corners.
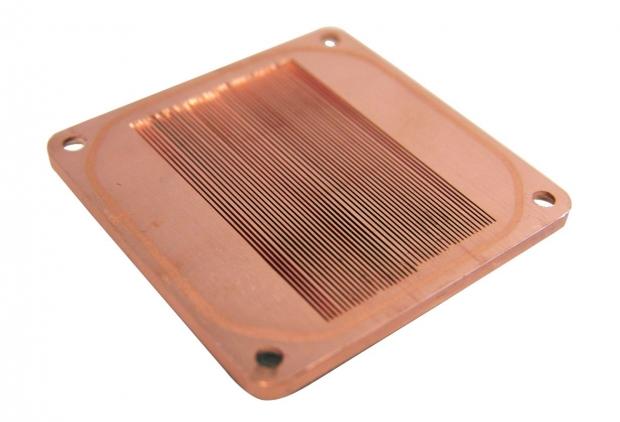
Removing the base you can now see the many micro channels that the water is forced through to remove the heat from the CPU. You can also see the line from where the O-ring seats.
Raystorm CPU Water Block Continued
Where the Acetal top meets the copper plate, there is a steel diverter plate used to widen the water stream from the round inlet into a stream that covers the width of all of the channels. As it comes out the ends of the channels the water is collected and sent out of the block around the outside.
Not only is there an O-ring on the outside, there is also an O-ring on the plate to keep any flow by from happening. The Acetal is also cut to start the process of allowing the water a place to build up as it makes for the high pressure blast into the channels.
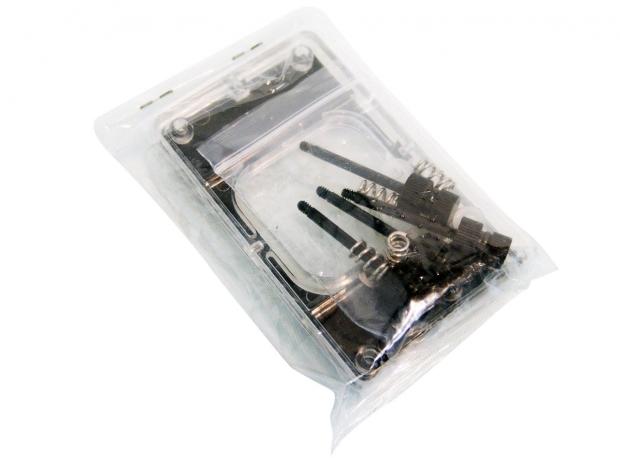
There are three back plates that come individually wrapped. There is the LGA1366 plate at the top left, with the LGA775 to the right. For LGA 1155/1156 users, you need the plate at the bottom.

Two bags of hardware also are in the box floating freely. On the left are the threaded bolts used for LGA2011 along with its washers. The bag on the right contains the thumbscrew topped nuts, washers, and springs needed to securely mount the block.

Unlike with the reservoir, with the CPU block you get a pair of blue 3mm LEDs to insert into the sides of the mounting bracket to make the bracket glow when the PC is running.
Since this is a universal block, XSPC also includes all of the AMD hardware needed to bolt this to any AMD system with the standard four bolt pattern that AMD have used for years.
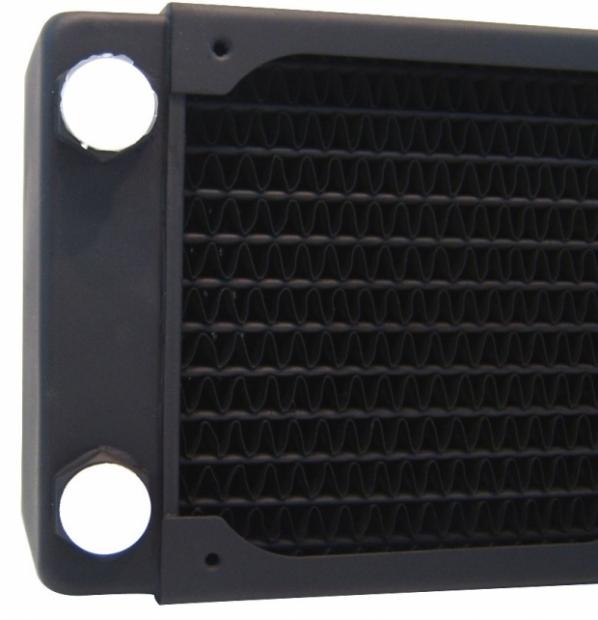
RX360 Triple Fan Radiator V2
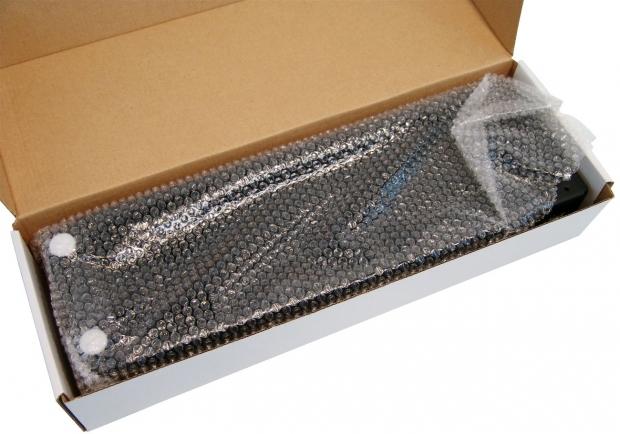
The RX360 radiator comes in a cardboard box and is also wrapped in bubbles like the rest of the kit has been this far. It all worked out rather well as even all of the fins on the radiator arrived in flawless condition.
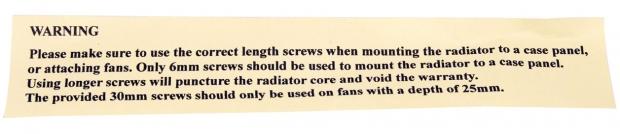
There is a warning placed into the radiator box, and basically it says to be careful mounting to be sure the threads don't poke into the radiator and cause leaks.
Keeping the G1/4" threads clean from when they are cut and the radiator is pressure tested, these nylon caps are inserted to ensure there are no cross threading issues when you go to insert the barbs.
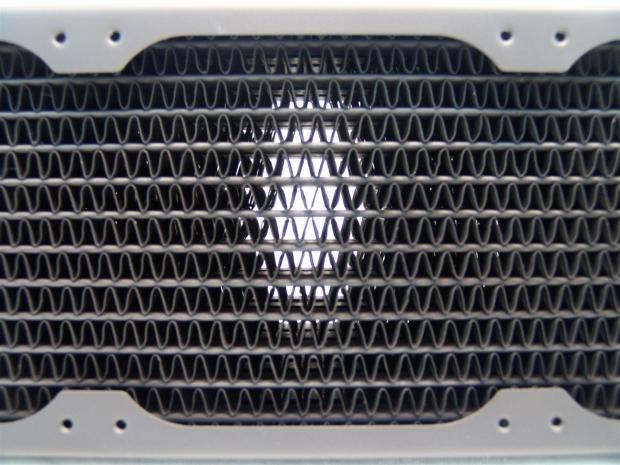
Just to give you an example of the 12 copper tubes as they pass under just one of the fans and all of the surface area associated with this 63mm thick radiator.
The specifications stated that the FPI is kept under 8 and I just randomly picked a spot to check. With four V shapes in each inch, we are exactly at 8FPI with this example. Low FPI means we can use lower speed fans with good static pressure and not need the noise of high speed ones.
On both long sides of the 63mm thick radiator, XSPC has their name pressed into the sides so it will show inside of your case as well.
In this bag you will find 12 6/32" threaded screws that are 30mm long and are intended to be used with the supplied fans and grills. The shorter set of four is to mount this radiator to a chassis or some sort of radiator bracket.
Universal Content and Instructions
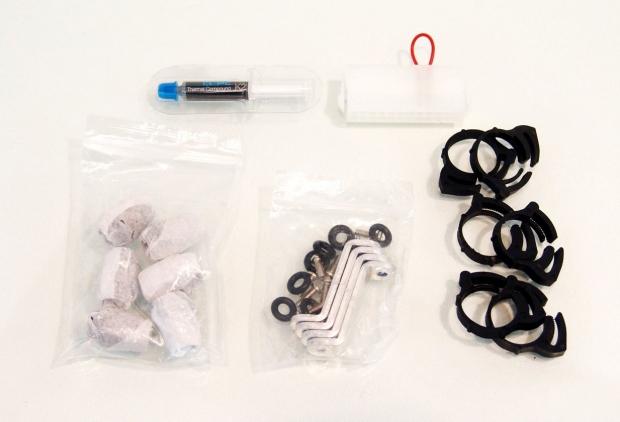
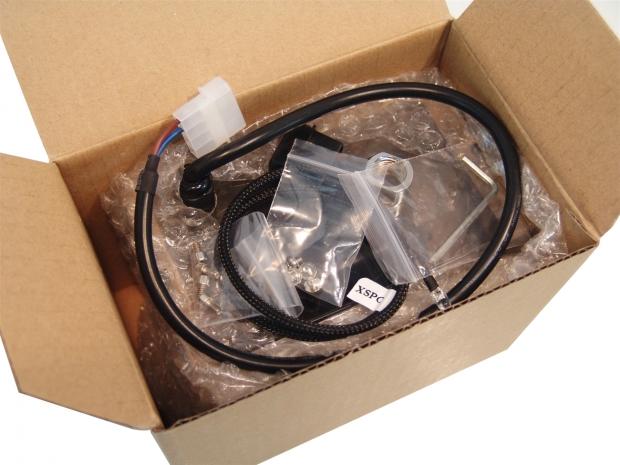
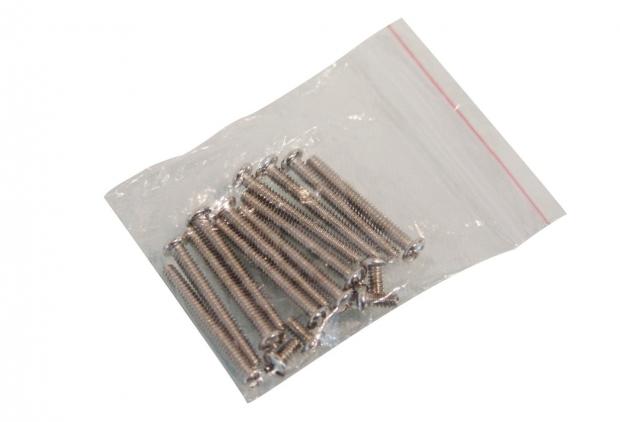
In a bag that floats free in the main large box, there is all of this hardware. There is K2 thermal paste, the PSU jumper for filling the loop, a bag with six black chrome 1/2" barbs, a mounting kit to support the radiator on a case, and six clips to hold the tubing on the barbs.
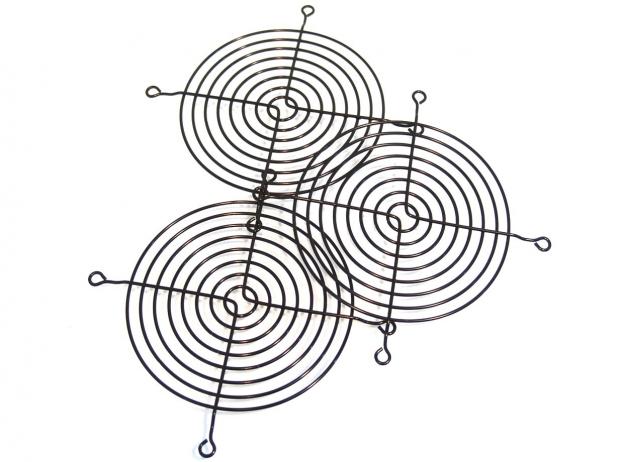
To help protect your fingers, the XSPC kit also provides bulls eye fan grills to use with the kit.
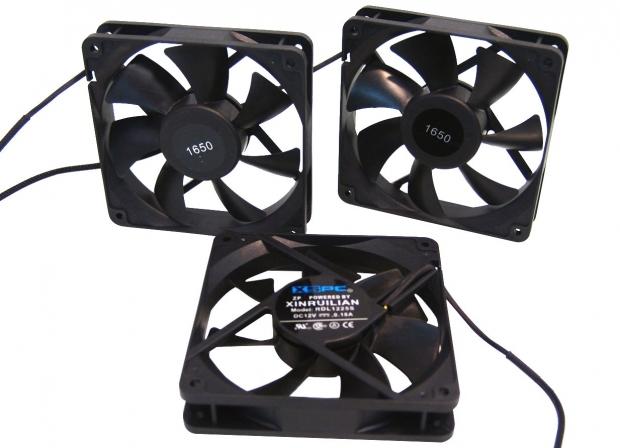
You also get three XSPC branded Xinruilian fans that are 120mm square and are 25mm thick. The sticker on the fan hubs would indicate that these fans will spin at 1650 RPM. All of the fans use 3-pin fan connectors to power them.
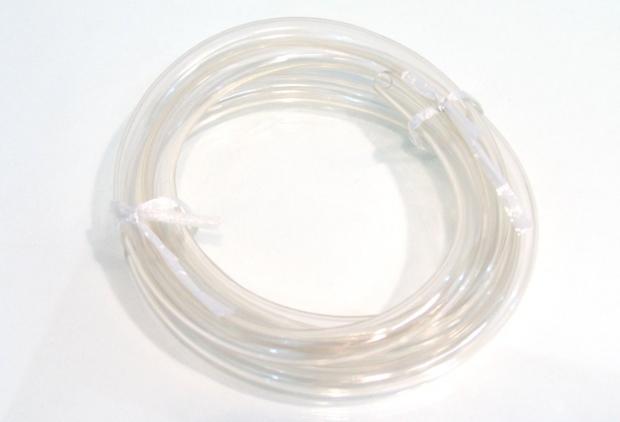
You will also get a two meter length of 7/16" ID tubing to use with the half inch barbs. This will make you have to force the tubing on, and the clips are just to keep it from backing off the barb.
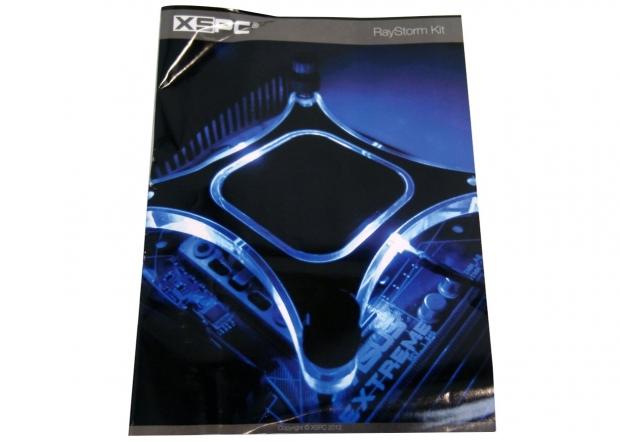
Then you get this full color install guide. Not only does the cover look good, but on the inside the images and explanations are top notch.
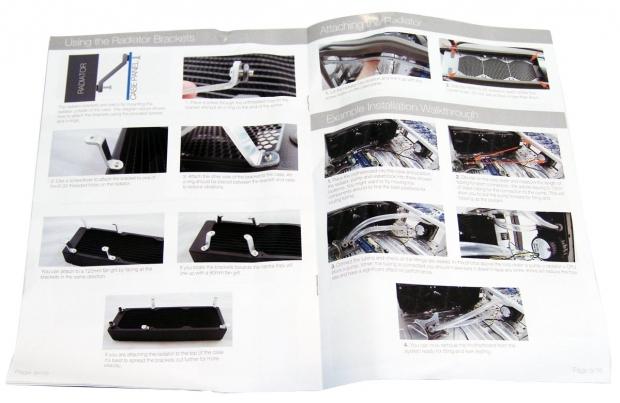
On the inside you get full color photos to go along with the text where it was applicable. When that wasn't possible, even the renderings are multi-colored to differentiate the components and make things much easier to understand.
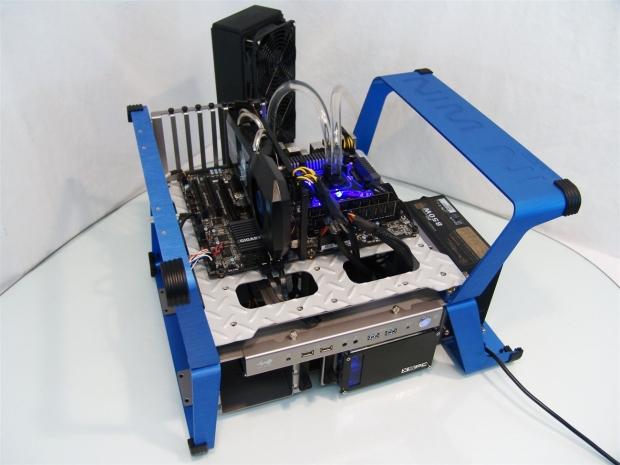
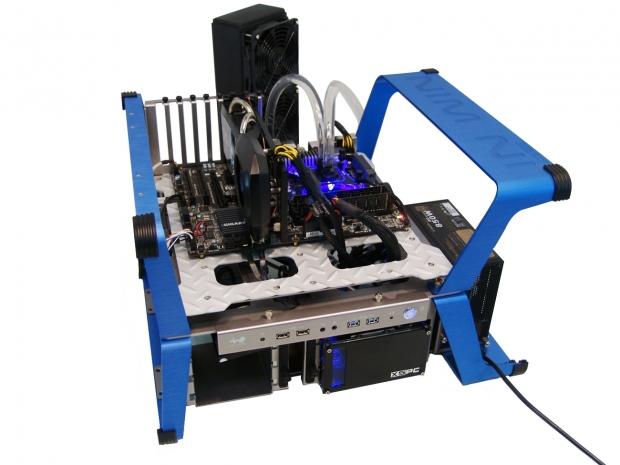
Build and Finished Product
Starting to assemble the components I went ahead and added the barbs to the radiator as well as attaching the fans and grills. I also went ahead and made the fan wires tidy on the other side so that I didn't have a mess when I needed to connect everything.
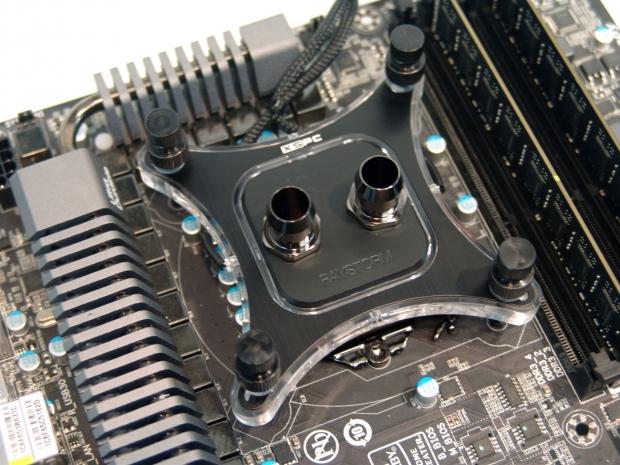
To prepare the CPU block before I mounted it, I went ahead and inserted the LEDs into the sides of the bracket and tucked the wiring underneath of it so that I could get a cleaner looking install than having the wires lying loose wherever they may fall.
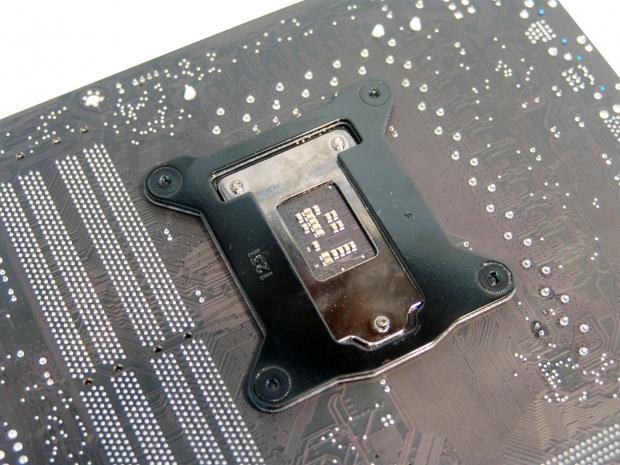
To install the CPU block on this Z68 motherboard, I grabbed the appropriate back plate and installed it to the board. There are isolation washers on the other side, and you can only install this one way due to the cut out in the middle of the plate.
Using the washers, springs, and threaded bolts I tightened them until they stopped. The lower section under the top nut will allow you to tighten them compressing the springs even more for excellent pressure against the CPU.
Right after I dumped in about a half a gallons worth of distilled water into the reservoir and cycled the pump a few times, the loop bled in about 20 minutes time leaving only the tiniest of bubbles stuck to the sides of the tubing.
With the LED installed you can more easily check the fluid levels as it makes the edge of the water glow. You can also move the LED to the other side if you don't want the glow of light to come out of the slit on the left. If you install it on the right the light is not nearly as bright, but still illuminates the fluid.
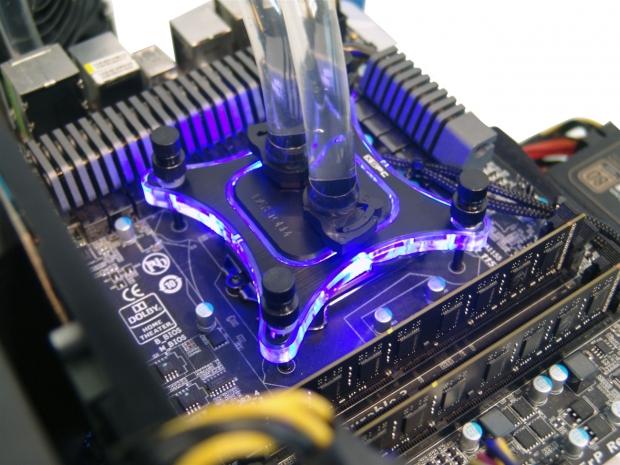
The heart of the unit and the components that lends its name to the kit, the Raystorm CPU block also comes to life as it floods the motherboard, and most of the room with the blue glow from inside the bracket. I do like the metal plate on the bracket not only for style, but that it also blocks the light from blasting you directly in the eyes.
Test System and Thermal Results

I would first like to thank HIS, GIGABYTE , InWin and AVADirect for supplying products for me to test with.
Testing for the CPU coolers is done with the use of RealTemp to ascertain temperatures, Intel Burn Test to deliver the load to the CPU and CPU-Z to verify the CPU speed and the voltage being used in Windows. All of the testing is done with an ambient temperature of 24.5-25°C and humidity is maintained to 35% sometimes less.
For the "stock" runs, it's more of a plug and play setup where the PWM of the motherboard is in control of the fans speeds for both the idle and load results. Speed Step is active and the processor idles at 1600MHz and loads at 3500MHz for the stock settings. I also set the memory to run at 1600MHz for stock. As for the overclocked runs, I load the CPU at 4.5GHz and idle results are obtained with 7.5V to the fans while the load run is set to deliver 12V to the fans. This allows me to gauge the lowest and highest fan ratings for my charts.
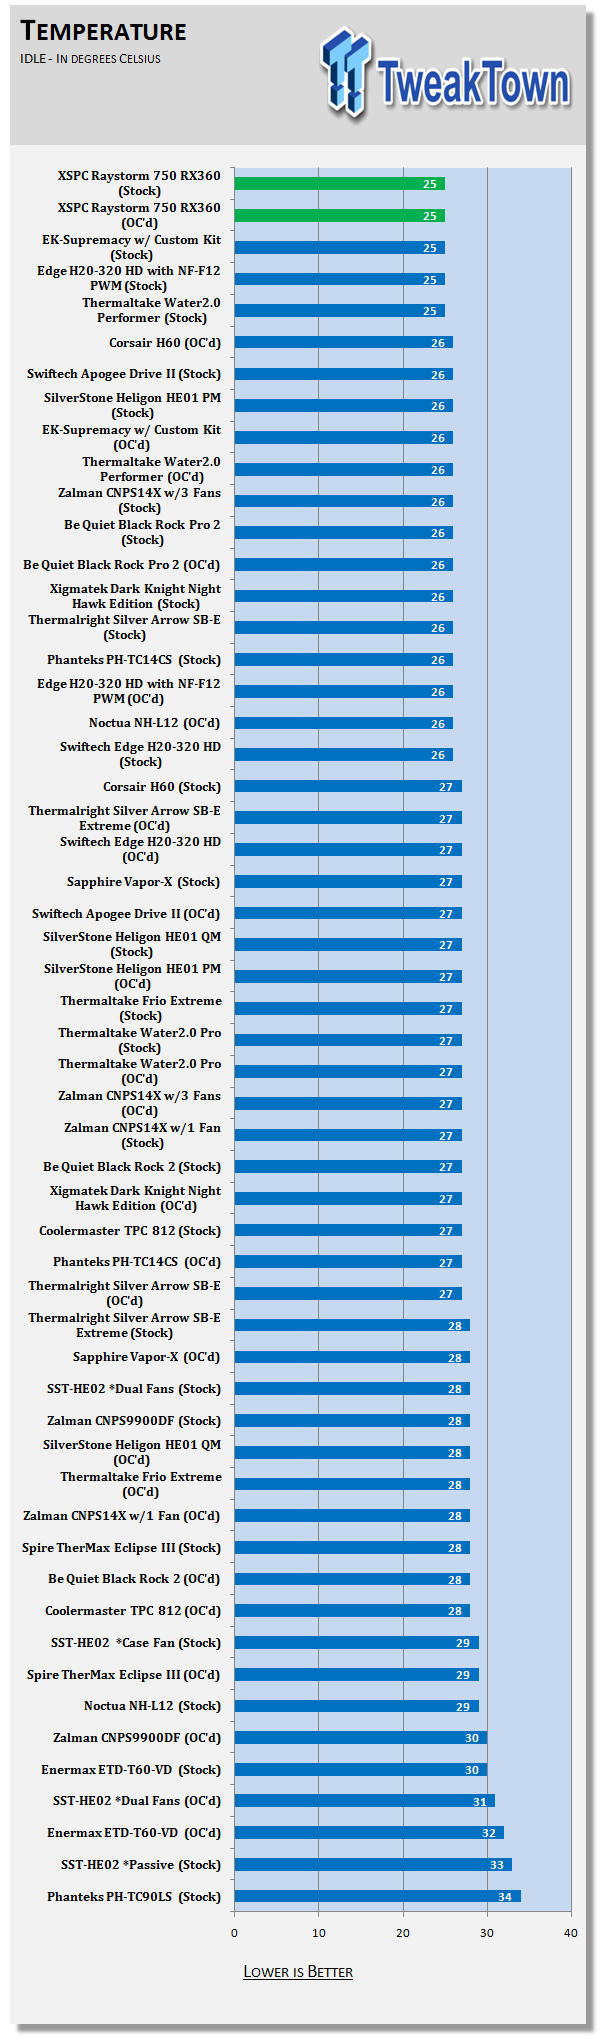
At idle the XSPC kit is the first to get the temperatures to read 25C degrees at both stock and overclocked speeds. Keeping a loop within a half of a degree to ambient is something neither Swiftech nor EK had accomplished.

When IBT was running, the XSPC kit has the same results to the degree as the Edge HD kit. Readings of 47C at stock, and 63C degrees with the overclock applied aren't numbers to just scoff at. These are impressive results for a kit that is the most affordable solution of the three.
Noise Level Results

Since I had three fans to connect, when running the stock tests I only allowed the fans to receive 9.5V to achieve these results. Even so the fans are audible, but just ever so slightly at this point. The 31 dB rating is what you would get with these fans running roughly 1100 RPM.

Sliding the sliders to maximum on the fan controller only supplies 11.83V, but at near 1650 RPM, the fans do increase in volume. I do like that they aren't out of control loud, more along the lines of average with a 52 dB rating with the overclock applied.
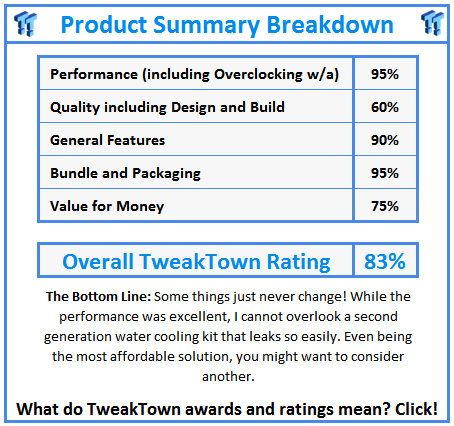
Final Thoughts
Things I like about the XSPC Raystorm 750 RX360 kit are quite numerous. The reservoir and pump combo is not only attractive with the LED lighting and the aluminum cover plate, but the design with the pump inside made the loop simple to bleed and allowed me to get up and running much faster than other kits I've tested in the past. I am not such a fan of micro channels in a block, but there are no complaints about its performance or the appeal of the dual LEDs and aluminum cover plate to dress it all up. The thick radiator just screams extreme, and offers you plenty of opportunity to handle the motherboard blocks and multiple GPUs into the loop later on. I also like the fact that there were no parts missing and I was able to go from box to completely assembled, in very little time as well.
I do have a few things to complain about though, some personal, and some potentially detrimental. First off, what is with needing three Molex connectors and three fan headers? Why not power the CPU LEDs with a fan connection and simplify the wiring. Also what would be a tremendous help is that if these Molex connectors were a pass-through style so I don't have to have power leads running to each component.
The tubing used is very stiff and very sticky on the 1/2" barbs, and most times I wouldn't complain about this, but what ends up happening is when you reset the reservoir after filling it, the slight twist of the tubing will back the barb right out. They do have washers on all of the barbs, but even a quarter of a turn out and these barbs start to leak. Not only did it leak as I got finished bleeding it and inserting the reservoir all the way in, but when I carried it upstairs, any movement of the radiator would cause me to drip across my carpet. Compared to the others I have tested there is just an air of "budget" that overwhelms you as you build, test, and use this loop.
The Raystorm 750 RX360 kit does perform well as the results in the charts showed, and this is the most affordable kit that offers a triple radiator at this current time. Since I told you what to look out for, you could go to an auto parts store or the local hardware store and get some thicker washers at a cost of maybe a couple of dollars, I think then you can get enough bit against the surfaces to keep the barbs in place. I also thing using tubing that isn't so rigid may also aid in not twisting them in the first place. If you really can't afford to step up to the Swiftech or the EK offerings, this Raystorm kit will get you by.
In my honest opinion, I would gladly pay the extra $50 to get a kit that is leak free out of the box, and also getting a more professionally designed kit in the process. XSPC is close, but overlooking the simplest things on something like a water cooling loop can be devastating, and I for one am going to pass on the kit. I would however buy the block and the radiator as standalone pieces.
 Lian Li B4-mATX Review: a compact mATX SFF case with excellent airflow and premium features
 Ocypus Sigma F36 BK ARGB Cooling Fan Review: high airflow and unified design in one frame
 PCCooler CPS RZ820 Display Review: a flagship-level CPU air cooler with an LCD screen
 MOAIPLAY ORA PRO G1 850W ATX 3.1 PSU Review: high efficiency and 10-year warranty for $119.99
 NZXT H6 RGB+ Compact Dual-Chamber Chassis Review
 Minecraft now recommends 16GB of RAM and a much newer CPU
 007 First Light ditches Denuvo DRM just as first patch arrives packing a ton of bug fixes and some new content
 Microsoft's still working on Windows 11 File Explorer improvements, and it's now making deleting large files speedier
 Hacking group Anonymous targets Sony over deciding to kill PlayStation discs
 Top 5 PS Store pre-orders in US are all $100+ games
 Anthropic responds after Claude conversations appeared in Google Search results
 Steam Workshop maps infected players with malware and took over a 100,000-member Discord
 MSI launches compact PRO MAX EDGE AI+ desktops, with up to Ryzen AI Max+ 395 and 128GB of memory
 ASRock launches new 27-inch QHD QD-OLED Phantom Gaming monitors
 Framework says current memory prices are 'far beyond anything we're able to absorb'
 Logitech G512 X 98 Analog Mechanical Gaming Keyboard Review - An Innovative Two-in-One
 Thrustmaster T.Flight HOTAS 5 MSFS Edition Review
 SteelSeries Arctis Nova Pro Omni Wireless Headset Review - One Headset to Rule Them All
 SteelSeries Arctis Nova 7 Wireless Gen 2 Headset Review - New and Improved, But Is It Enough?
 AMD Ryzen 7 7700X3D Review - Days of Future Past
 Samsung 990 2TB SSD Review - Ninth Gen QLC at PCIe Gen4 Speeds
 ASUS ExpertBook Ultra (Panther Lake) 14" Business Laptop Review
 ASUS ROG Raikiri II Xbox Wireless Controller Review - Ready to Take Control
 MOZA FMP18 Panel Bundle Review: authentic F/A-18 Hornet cockpit controls for flight sims
 Micron 6600 ION 245.76TB Enterprise SSD Review - Best in Class Programming Speeds
 Printer Not Working in Windows? How to fix detection, print queues and drivers
 The Ultimate Guide to Personalizing Your Windows 11 Taskbar
 How to Turn Your Windows Laptop Into a Second Monitor with Miracast and Wireless Display in Minutes
 6 Mistakes to Avoid When Buying a Windows Laptop
 I capped Windows Update's bandwidth with Delivery Optimization, and my downloads stopped choking
 I use this decade-old free tool that finds files faster than Windows Search does
 I install and update most of my apps with this Windows command now, and I stopped downloading sketchy installers
 Hisense U6SF 65-inch MiniLED TV: High Performance Meets Leisurely Convenience
 I stopped digging through Windows menus after I set up this one folder
 Don't sell your Windows laptop until you do these things