Introduction

Intel introduced the consumer market to DDR4 with the introduction of the X99 platform. These are the early days of DDR4, and top kits are in the 3300MHz range, which is quite modest considering DDR4 is projected to be at 4000MHz+ in the near future. Nevertheless, DDR4 kits are pricey, and as with anything that costs you a kidney, it is good practice to get to know your purchase inside and out.
At launch, there wasn't even standardized support for memory dividers above 26.66x, and many have taken to using BCLK dividers to achieve the rated speeds of their kits. DDR4 isn't overly complicated, and overclocking DDR4 is basically the same as overclocking DDR3. There are some interesting new changes that come with the new standard, and I will cover those today.
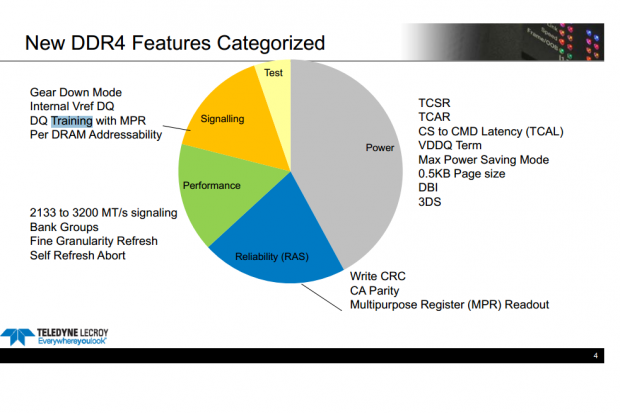
In the slide above, you will notice that most of DDR4's advantages over DDR3 come in the form of power savings. For starters, the main DDR voltage is now 1.2v stock versus 1.5v with DDR3. A new voltage called VPP was also introduced; VPP is the voltage for the electrical high for DRAM row access.
For DDR4, JEDEC decided to introduce an external VRM that provides a 2.5v electrical high voltage for the word line (row access). Since the word line voltage is no longer pumped up from the DDR voltage (like it was for DDR3), the inefficiencies of pumping up the DDR voltage are gone, and instead you get power savings.
Test Setup and The Kits
Test Setup
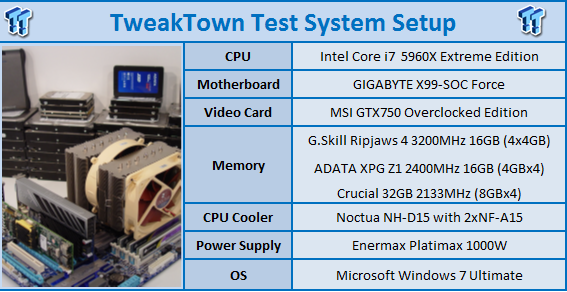
The setup here is pretty simple. If I had started testing two weeks prior to the date I started testing, then I would have had to use two motherboards, as the X99-SOC Force wasn't overclocking the 32GB Crucial kit over 2400MHz, and it wasn't able to get over 3250MHz on the memory. Over the last few weeks, the BIOS updates have made huge improvements to DDR4 overclocking on this motherboard. I used BIOS F6i for these tests because it provided the quickest DDR4 training, and as you will see soon enough, training is a key part to high-speed DDR4.
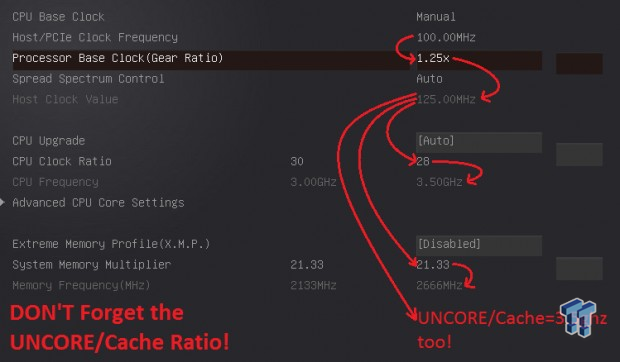
Sometimes you are stuck with using lower multipliers for the memory as stability, and ease of use is higher with the 1.25x divider on many boards. Don't be upset if your board doesn't boot above 26.66x, as this isn't your board makers' fault, it's just the slow progression of DDR4 code in the stock AMI UEFI code. This doesn't mean that you can't use higher speed kits, it just means you have to invoke the BCLK divider. As you can see in the image above, when you change the BCLK divider, it has an effect on almost all of the clock frequency domains (CPU, Uncore/Cache, and Memory). Don't forget to dial back the CPU and Uncore/Cache ratios; if you forget to lower the CPU and Uncore/Cache ratios, then you could face instability.
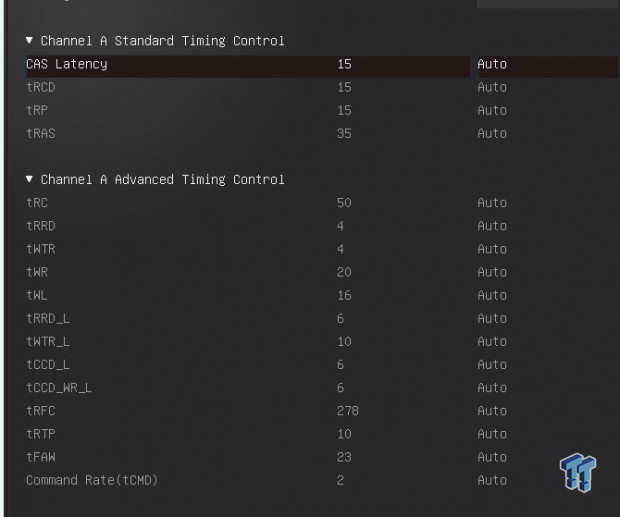
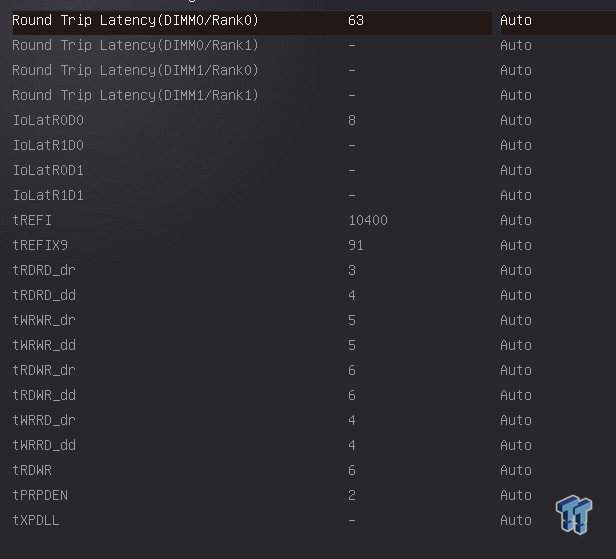
Timings, timings everywhere! DDR4 comes with a lot of timings, and if you just love to alter the timings to find the best one in the billions of possible combinations, then DDR4 will be fun for you. However, that isn't the point of this guide. In this guide, I will only deal with the primary timings CAS, tRCD, tRP, tRAS, and of course, CR (command rate). You might also be happy to know that Intel has brought back real-time timing changes in Windows! However, RTL (Round Trip Latency) and IOLs can't change after initial boot up and training, and consequently, some timings like CAS won't really make much difference to performance if they are changed in Windows.

DDR4 is pretty resilient; although default DDR4 voltage is 1.2v, I have run at 1.5v on-air many times without active memory cooling. All of my kits are still 100% alive and kicking; however, I am not recommending you do this. I would suggest staying under 1.4v for 24/7 usage. The memory controller in the CPU is based on the DDR3 controller, so higher voltage levels won't damage it either. The VPP voltage is okay to mess with at very high speeds; otherwise, it is pretty high at default. The only CPU voltage you need to change for memory overclocking is the VCCSA, or system agent voltage. I would say anywhere from +0.3v to +0.5v for very high overclocks is acceptable. Your board will probably auto increase VCCSA for you anyway, as most boards I have tested do increase VCCSA on "Auto".
The Kits
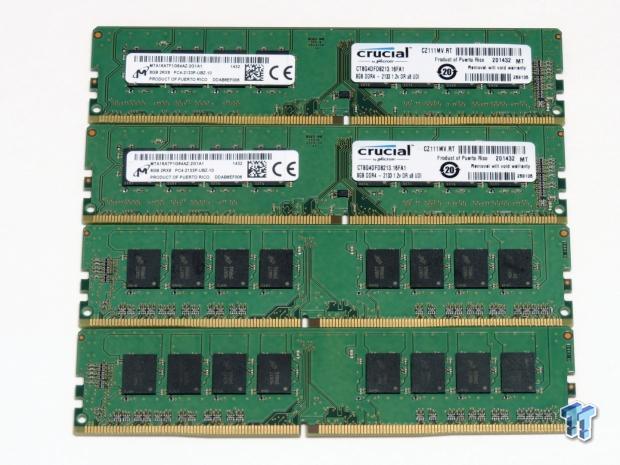
First up, we have the Crucial 32GB (8GBx4) 2133MHz Micron based kit. This is basically the go-to for anyone seeking a solid 32GB of DDR4 in only four sticks. We will find out later if the fact that it is double-sided has any impact on overall performance.
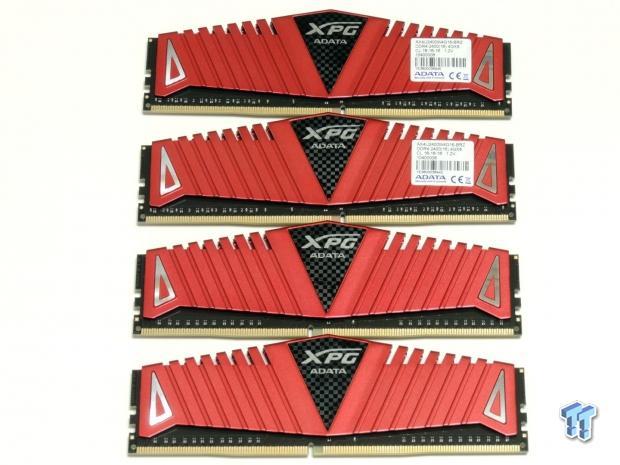
Next, we have this nice kit from ADATA, which is rated at 2400MHz, and offers a slight increase in speeds over the Crucial kit. However, this ADATA kit is only 16GB. This kit actually features the same type of Hynix memory as the G.Skill kit - just not as binned.
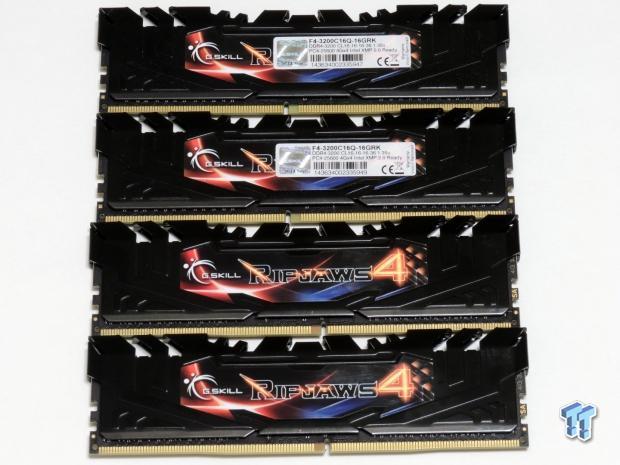
This is our high-speed G.Skill kit that we also use in our motherboard overclocking articles. G.Skill has this kit rated at 3200MHz, but it is also only 16GB. This kit produced our highest overclocks, and it's pretty easy to lower the timings, even at 3200MHz.
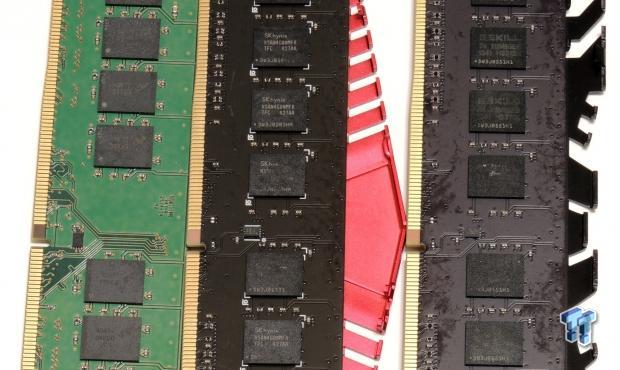
I took the heat sinks off, and not just to look at what's under the hood, but also for thermal tests later on in the article. Both the G.Skill and ADATA kits I have today are based on single sided SK Hynix.
Timing, Training, Multiplier, and Density Investigations
DDR Timing Investigation
First comes first: the easiest parameter to change for memory is the command rate. This is usually indicated in the UEFI as CR1 or CR2 (sometimes T1 or T2).
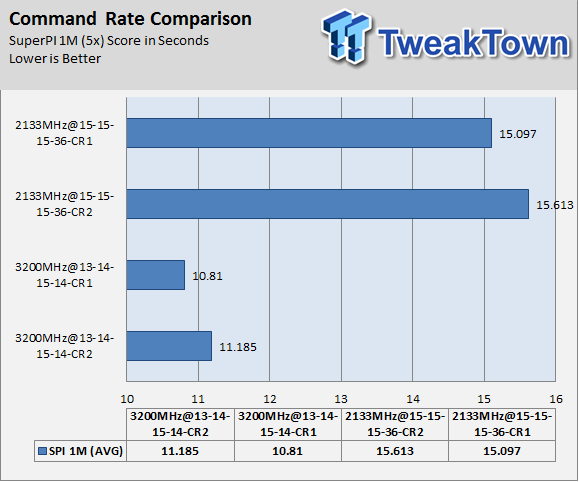
I tested both the Crucial and the G.Skill kit at high and low speeds. It is obvious that CR makes a big difference, just as it did on DDR3. It was actually quite easy to change this - you might not even need to increase the voltage.
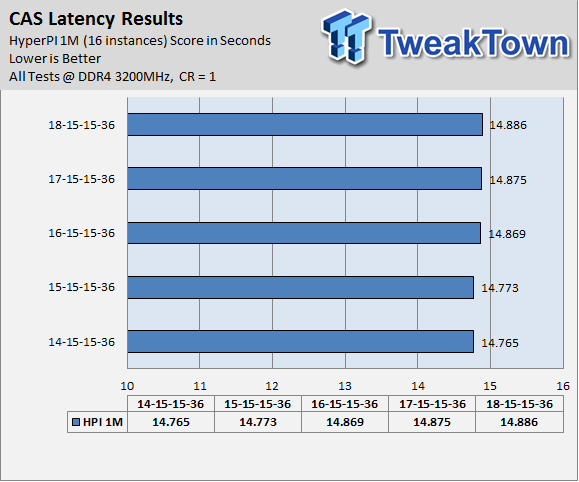
Note that I didn't touch any of the other timings, and they are super loose at 32x in comparison to lower dividers. This graph illustrates the need to change other timings as well for maximum performance, but also shows us that just changing the CAS latency can have a positive effect.
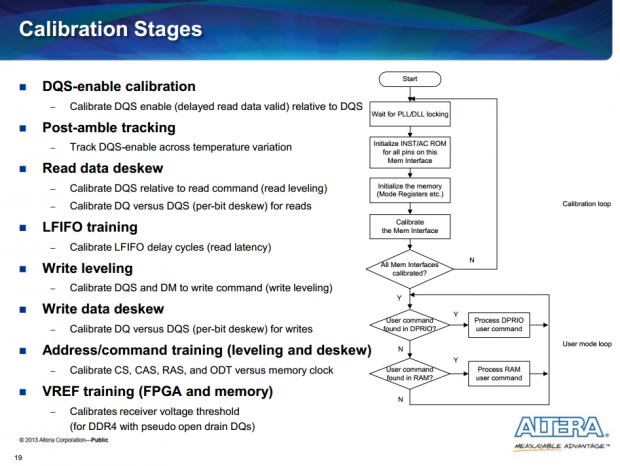
This is the typical DDR4 startup sequence for calibration. You will notice that the word "training" pops up a lot throughout the sequence. Signals don't always reach their destination at the same time, so small delays are introduced to ensure that all signals are synced the way they should be. Training allows for a testing and determination of the best possible range for the delay and signal. With DDR4 training, the DQ line can be customized to maximize margins, and the VRef is now internal and needs to be trained as well. It is also important to note here that RTLs and IOLs cannot be changed after boot up, and that will have an impact on the CAS latency if you change it in Windows.
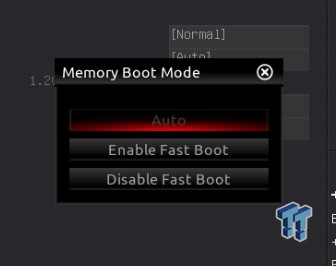
If you want the memory to train, then make sure to disable things like this option for fast booting, as it may skip parts of the DDR calibration procedure. You can also clear your CMOS, load your settings, and then save and exit, and that should ensure training (as opposed to changing something small and restarting).
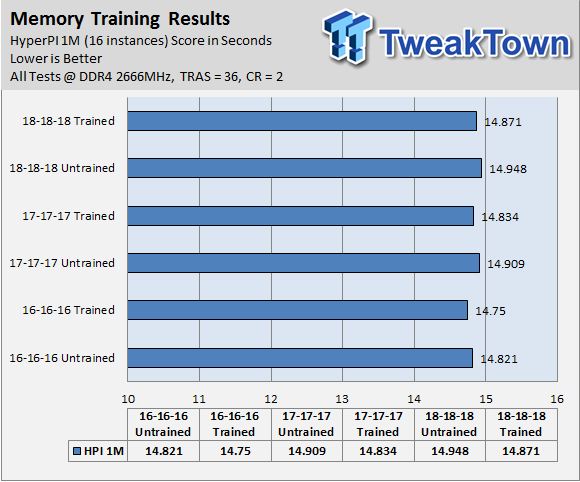
This is what happens if I boot up at auto timings (19-17-17-44), and then change them in Windows (marked as "Untrained"). The results are much better when I set the timings in the BIOS (marked as "Trained") from a clean CMOS reset.
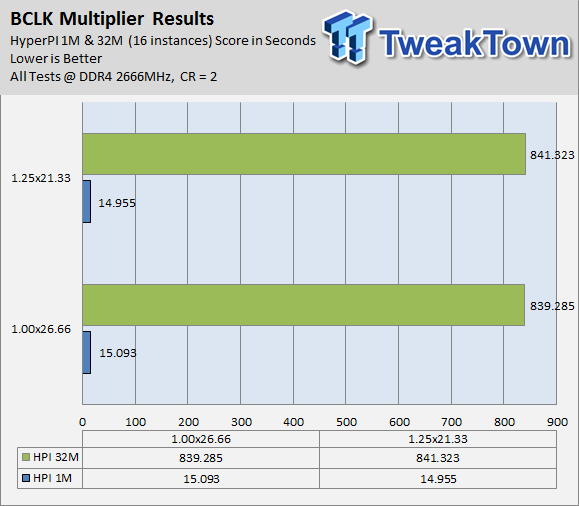
So, is it better to use the 1.00x divider, or the 1.25x? In general, when you use the 1.25x divider, you also use a lower memory multiplier to achieve the same speed like I did above. This means two things: first, your 3rd timings are tighter, and performance is improved; and second, your 3rd timings are tighter, and your maximum speed has decreased. There doesn't seem to be a huge difference between the two dividers; I would say they are pretty much equal. I would suggest that for very high-speed DIMMs, stability might be better with the 1.25x divider, as the tuning on higher multipliers might not be perfect when compared with lower multipliers.
Single vs. Double-sided
With DDR3, it is apparent that single-sided modules overclock higher, but don't perform as well at the same speeds as double-sided DIMMs. I decided to see if that was true for DDR4, so I took my two single-sided 16GB kits, and mixed them, filling up all eight DIMMs.
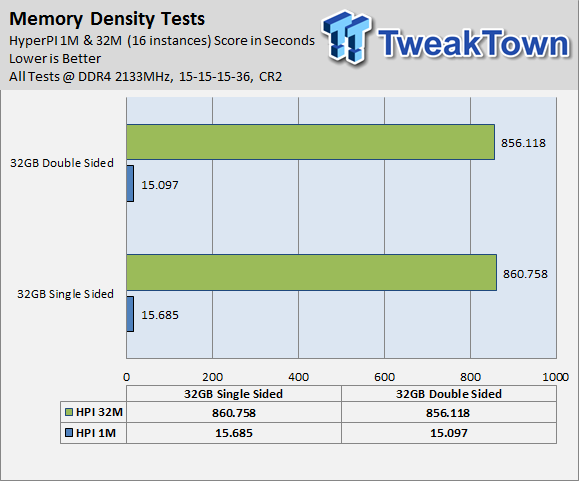
The results show that double-sided DIMMs do provide some improvement over single-sided. However, having all eight DIMMs filled up also puts a strain on the IMC, and certain internal timings that could also slow down the single-sided tests are changed. If you are in the market for 32GB, I would go with a kit of four sticks, instead of one with eight.
Maximum Overclocks and Temperature Testing
Crucial Maximum Overclocks
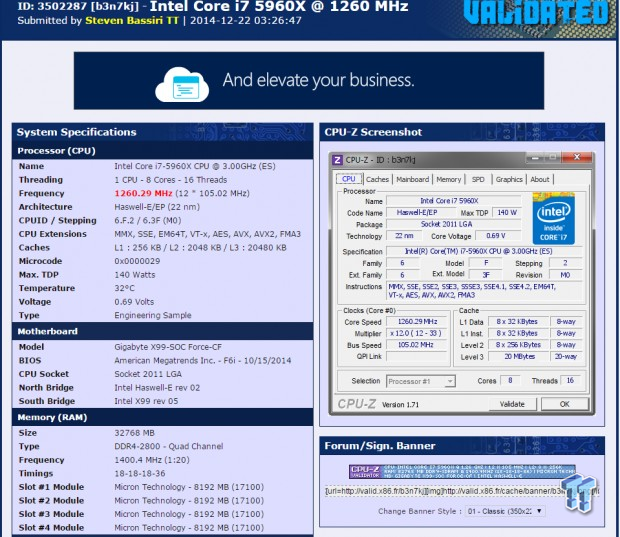
By increasing the timings to 18-18-18, I was able to get this kit to 2800MHz; however, I also tried lower timings below.
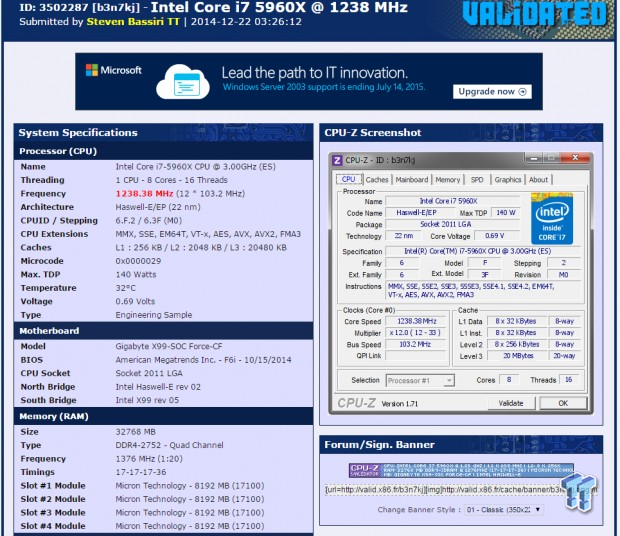
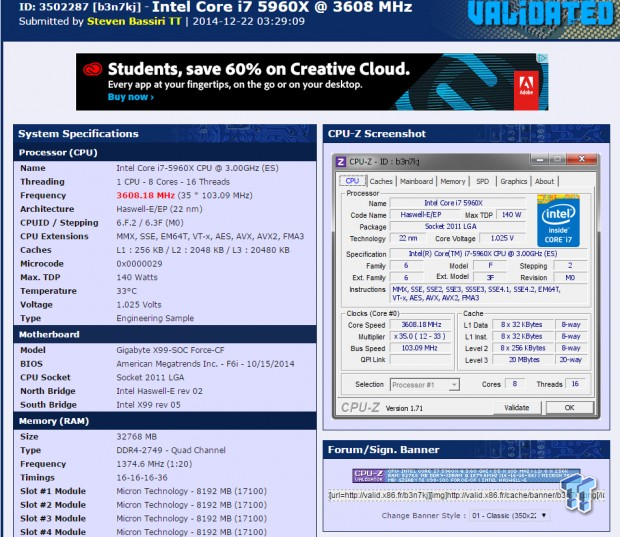
These are the respective maximum frequencies for 16-16-16 and 17-17-17 with the Crucial Kit. There isn't much difference between them. I used VCCSA of +0.35v for the Crucial kit, as well as a DDR voltage of 1.4v.
ADATA Maximum Overclock
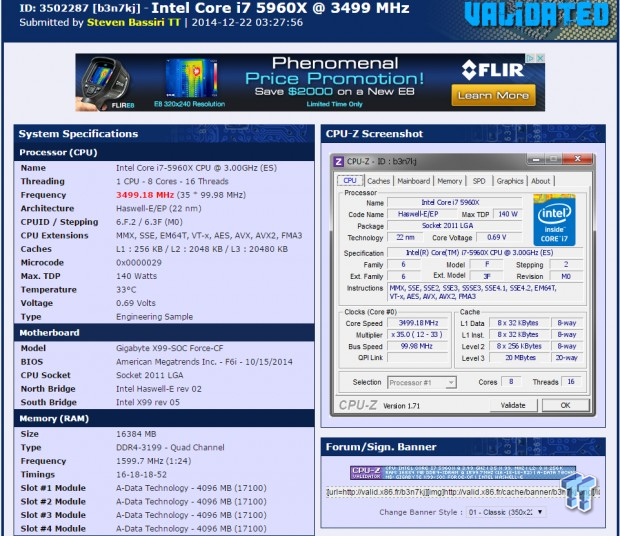
At 16-18-18, I was able to get the ADATA kit to the same 3200MHz the G.Skill kit is rated for. I used +0.5v VCCSA, and 1.4v on the DDR voltage.
G.Skill Maximum Overclock
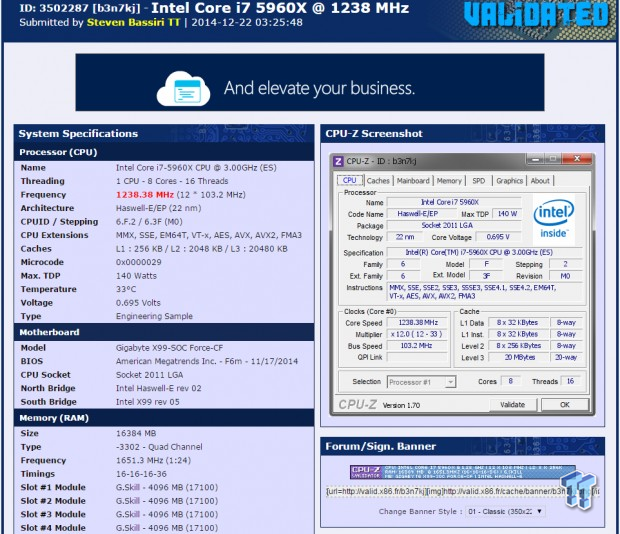
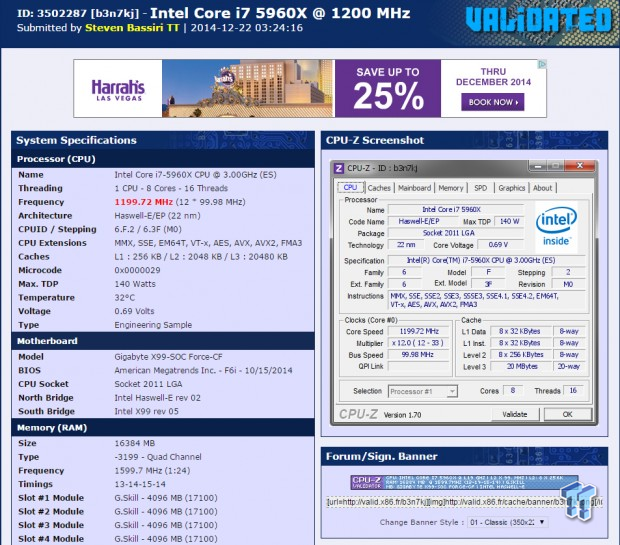
Using G.Skill's XMP timings of 16-16-16-39 CR2, I was able to pull off 3302MHz at 1.4v! I also decided to tighten the timings and see how high I could get, so I used 13-14-15 CR1. Tightening the timings required a voltage bump to 1.5v. VCCSA was at +0.5v for both runs.
Temperature Testing
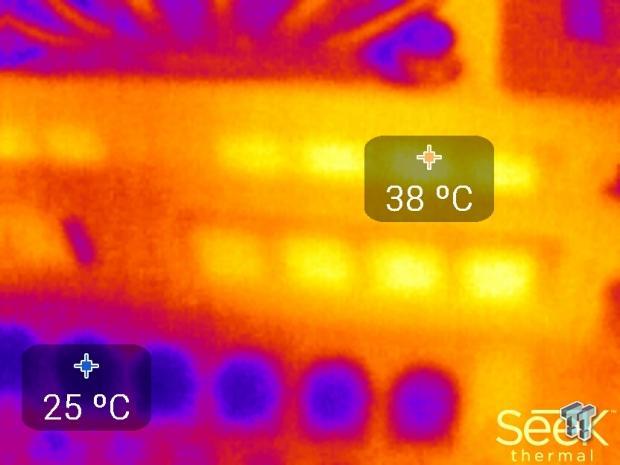
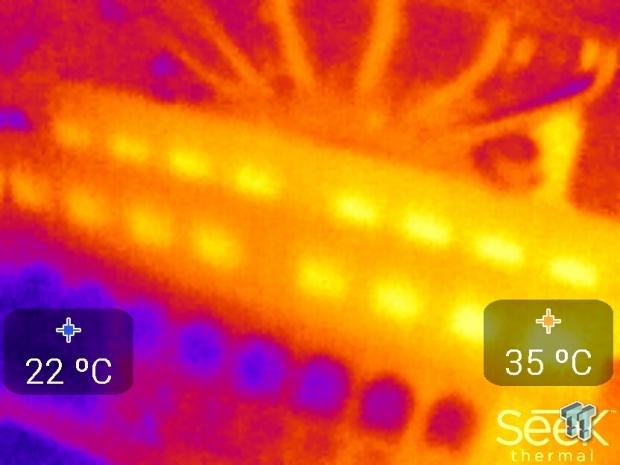
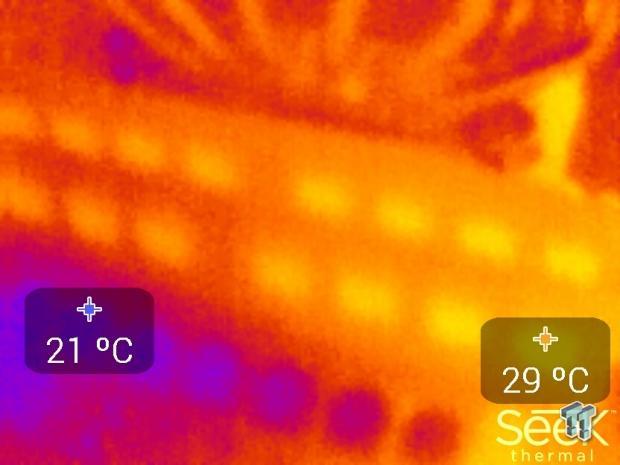
I decided to use my new thermal camera to find the maximum temperatures of modules during heavy load. Lowest and highest temperatures of the Crucial kit are depicted here:
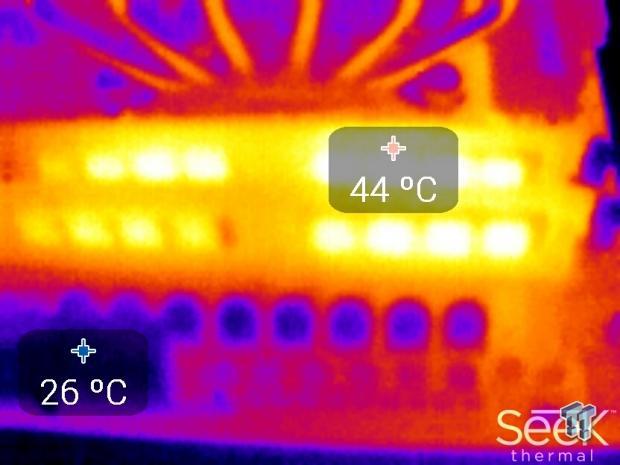
I have the camera set to find the lowest and highest temperature points in the frame. Here is the G.Skill kit:
The results are as follows:
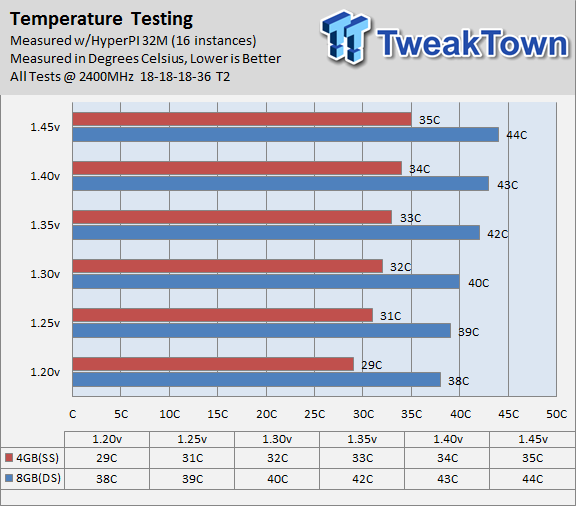
It is interesting to note that the Crucial was warmer; however, I expected this result, as the Crucial has memory on both sides of the DIMM. Overall, the temperatures are pretty low, so it looks like DDR4's power saving features are working. I never saw the VPP VRM (which is right near the top of the memory DIMMs) get hotter than the memory ICs.
Final Thoughts
Overclocking DDR4 isn't hard. Memory rated at the bottom, around 2133MHz, seems to have a lot of headroom, and memory at the top can be tuned by reducing timings. The memory and IMC are very voltage tolerant. While +0.5v VCCSA might seem scary, I have used it for a while with my 5960X without damage, but I would recommend around +0.3v for overclocking around 2800MHz.
While the stock voltage might be 1.2v for most kits, I would say you can safely go to 1.35v without much issue. The key to tightening some timings seemed to lie more with higher voltage than anything else. I would say that if you are looking for a solid DDR4 kit with a reasonable price tag, you shouldn't be afraid to go with a kit with a sub-2800MHz speed, as these kits seem to overclock pretty well.

The overclocking headroom might be due to the fact that DDR4 is set to go to much higher speeds than what we have today; a little clue can be found in some BIOSs where much higher dividers are listed (some go to 40X). With the improvement of BIOSs, memory manufacturing, and motherboards, I think we will see kits in the mid-3600MHz range within the next year.
While you might not be so keen on overclocking your expensive DDR4 kit, it is worth it to just make small enhancements like changing command rate to one instead of two, as things like that don't require much voltage increase. If you are benching a high-speed divider, and the system won't boot, just clear the CMOS and load the setting again; for some reason, this works once in a while.
The Crucial and ADATA kits both provide nice headroom, and make for great value purchases. The G.Skill kit is for those who want to compete in the overclocking realm, and I can say that they are very well binned. Overall, DDR4 proved to be a bit of a challenge, but the payoff is definitely worth the effort.
