Introduction
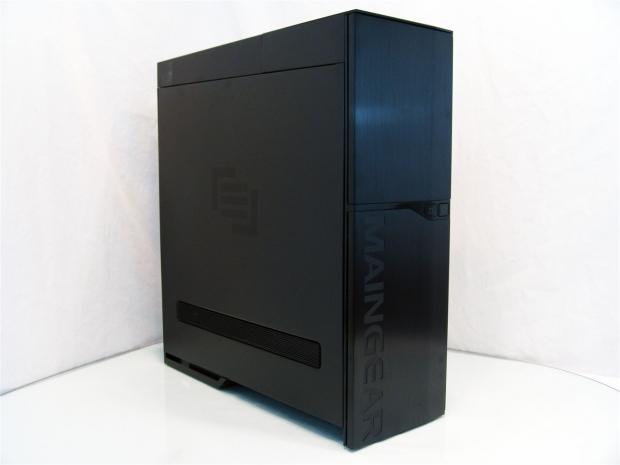
For those who are unaware of Maingear and what sort of services they offer to the public, they are a high-end system builder that also offers their own flavor with add-on technologies that are made, along with their chassis configurations, to dominate in all aspects of gaming. Maingear delivers some expensive, but none the less, seriously powerful builds in currently one of four enclosures, at least until now. Well almost, as I write this there are still three days prior to them being able to ship these units.
Essentially, at its core, the shift is a Silverstone RV01 that Maingear outfits with its own skin or outer sheet metal to their own desires and strips a couple of things from the interior that just aren't needed or otherwise clutter up the custom builds that they do inside of it. Being that these are custom order builds, there are seemingly a lot of the options still left in this design that the previous carbon fiber version and more plain aluminum renditions offered before.
You can add a window, get a custom interior color, various EPIC 180 cooling solutions, the Epic Audio Module along with other optional all at an additional cost.
It was also rumored a bit ago that just the case itself would be offered for the do-it-yourselfer in all of us. Since there are only 100 of this specific enclosure, if you want one, you have to act fast. The chassis we are looking at is of course the Maingear Shift Limited Edition chassis in its most basic form. While this chassis is developed around a pre-existing top selling chassis, Maingear makes enough changes to deliver a unique take on a really good design.
The fact that this chassis comes with cooling for the CPU and an audio module that works with both sound cards and onboard motherboard audio is just icing on the cake.
Specifications, Availability and Pricing
There isn't a true specifications chart for this chassis and I didn't want to just copy over the RV01 sheet as it isn't exactly the same. Instead I can tell you what you will find.
Outside of the chassis you get a long expanse of aluminum on the front that is split almost a third of the way down for the door that gives access to the ODD bays and Epic Audio module. The bottom two-thirds on the left side has MAINGEAR stamped into the front panel. The top and sides are also brushed aluminum, but the side panels also sport the Maingear logo etched into the center of each panel. The back of the chassis is an aluminum expanse of steel, but even here Maingear etches their name there as well. The color of the anodized coating is black and there is only mesh on the side panels to allow for chassis air flow into the case, so you are left with a sleek yet tall aluminum chassis.
On the inside the chassis can house motherboards from Micro-ATX on up to SSI-EEB on the large motherboard tray that is oriented ninety degrees to the right of normal cases. To the right of the tray you will find room for up to four optical drives, as one it taken up with the 3.5" adapter holding the EPIC Audio module. Under the ODD rack, there are six tray standing on their sides, four of which have quick connects mounted in the back for hot swap HDD trays. Under the motherboard tray and drive racks there is room for the PSU to be mounted in the bottom left of the chassis and a pair of 180mm fans across the middle floor. The 180mm nearest the front of the chassis is strapped to the bottom of the EPIC 180 Supercooler that hides away in the frame there.
Now anything Maingear touches isn't going to be cheap. I don't know if you have looked at any of the Shift solutions that are sort of pre-fabricated, but they can start just under $2000 and the sky is very literally the limit. As for those of you who either want Maingear to build a PC inside of this for you, or for those of us who wouldn't dream of letting someone build it for us, either way you can have this chassis as long as the supplies last.
It will however set you back $899 for this exact version and if you want a window, a dual cooler for dual socket boards, or an interior color other than black, those are going to cost you a bit extra every time you deviate from the Shift Limited Edition case as you are about to see it. Orders are able to ship as of April 30th, so act fast; there are only 100 to go around.
Packaging
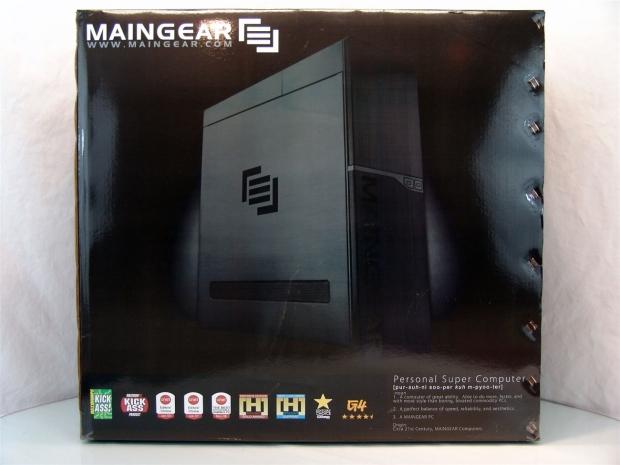
Even the packaging is high-end. A glossy black background, an almost life size image of the chassis on the front and a full list of awards along the bottom bring you to Maingear's definitions of what makes a Personal Super Computer.
On the side you find the phone number to order along with the support site information. Right in the middle is a plain white Maingear logo with their name pasted at the very bottom.
The back of the packaging, or is this the front? In either instance the panels are a match with no new information to be had.
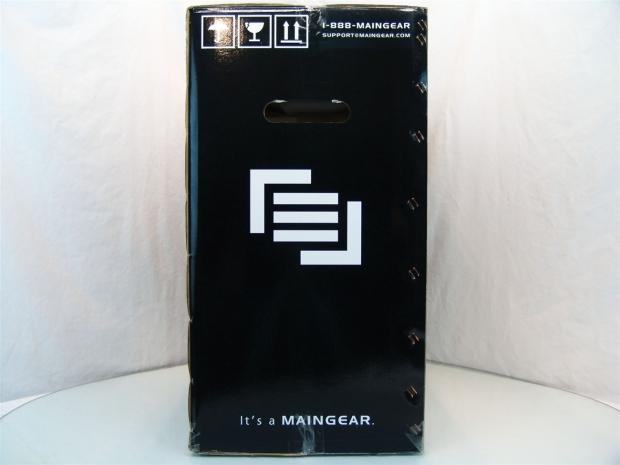
Same is said for the side panels. Again you get the number, site info, the logo and the company name.
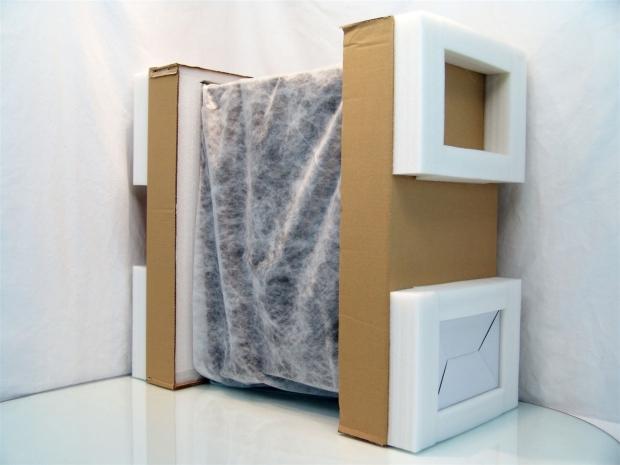
Inside the chassis is surrounded on the front and back with a combination of cardboard and high density foam end caps over a cloth liner to protect the case materials and brushed finish. Tucked in the front, inside of the square of foam at the bottom, the hardware box is snugly fit for travel.
Maingear Shift Limited Edition Chassis
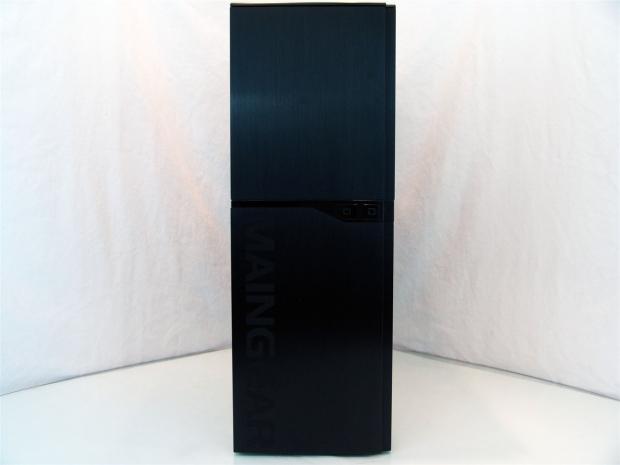
With a long length of aluminum running down the face of this cassis the black anodized and brushed surface is all you see aside from the shiny plastic breaking up the panel and housing the power and reset buttons. At the bottom left side, that Maingear name is pressed into the panel.
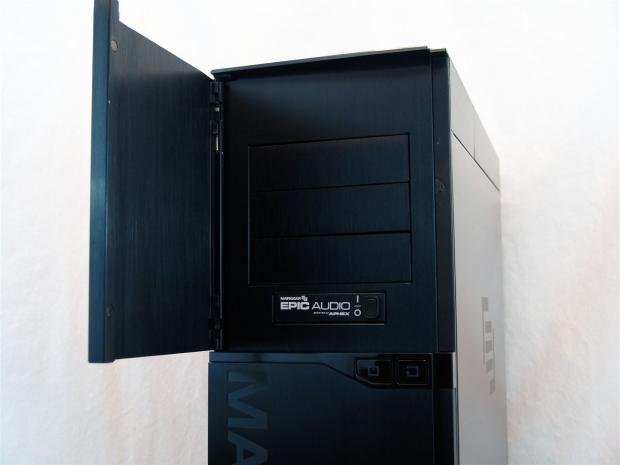
There are a total of five 5.25" bays, but two are in use with the pop-up I/O panel and the EPIC Audio device. The other three slots have removable covers to allow you to install things behind this left hand swing door.
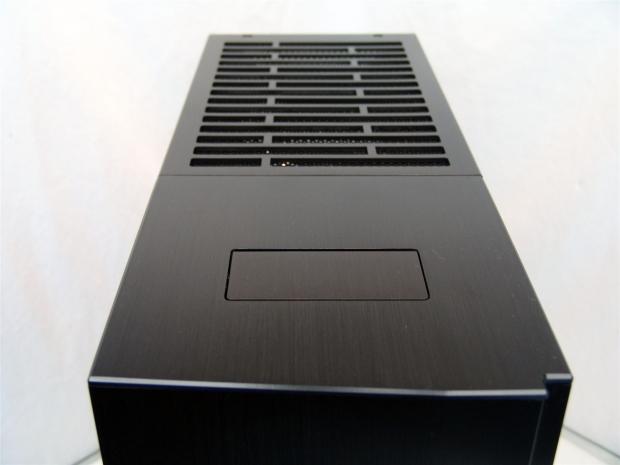
The top of the Shift chassis is also aluminum and due to the ninety degree rotation of the motherboard, there is the rear I/O access cover that is well ventilated, behind the pop-up I/O panel.
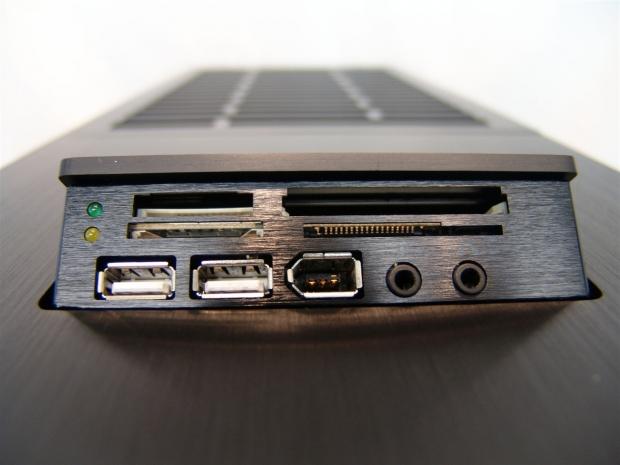
Once pressed down in the front, the front I/O panel pops up and allows access to the multi-card reader slots, USB 2.0, IEEE 1394 and the microphone and headphone 3.5mm jacks.
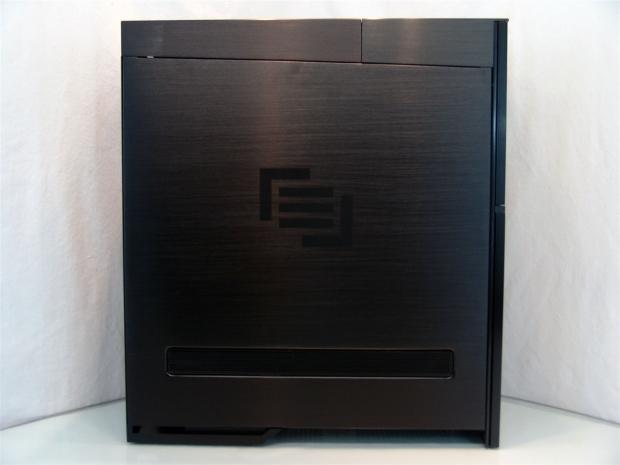
On the side of the chassis the top is angled to meet up with the frame from the old RV01. The rest of the expanse is a solid sheet of aluminum with ventilation at the bottom covered with mesh and the Maingear logo smack in the center of the door.
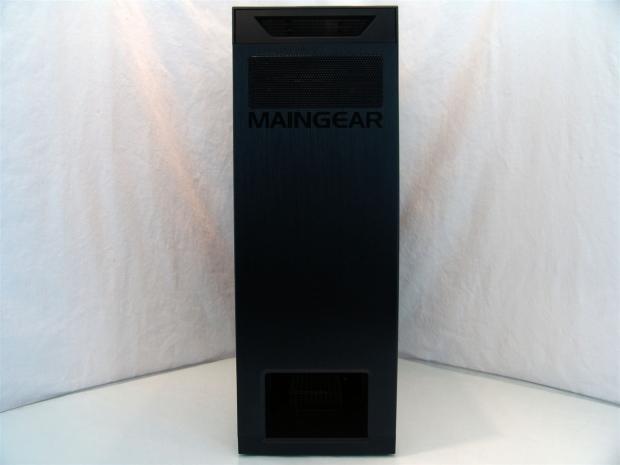
On the back of the chassis there is ventilation at the top under where all of your rear I/O wiring will soon go. There is even the Maingear name here and way down at the bottom is where the power supply goes, placed a few inches into the case.
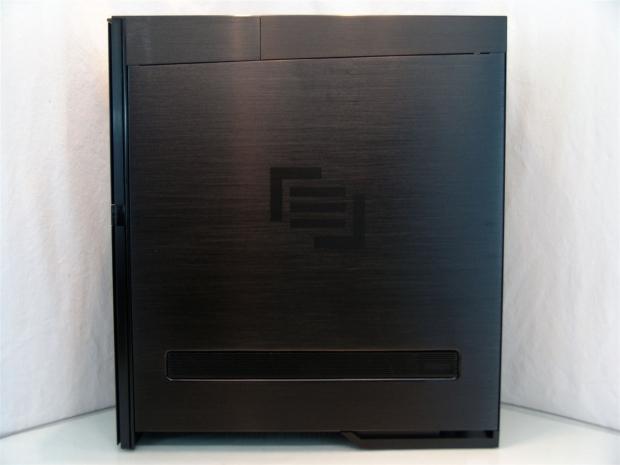
The right side of the chassis is even appointed just as the left side was. From every angle there is no doubt who manufactured the chassis they are looking at.
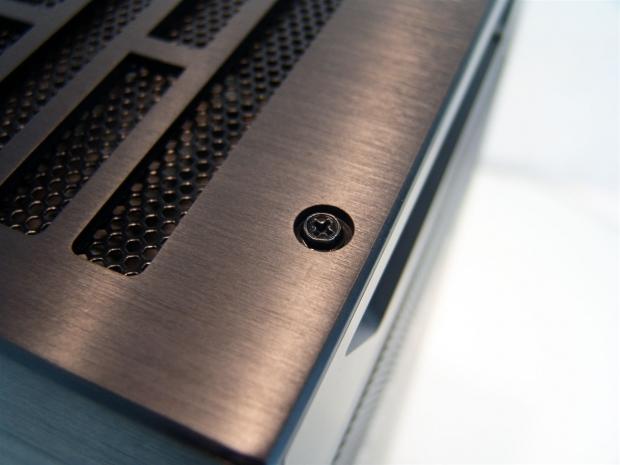
To gain access to the top of the chassis so that we can remove the doors soon, you need to remove a pair of these screws located along the back at the top of the chassis.
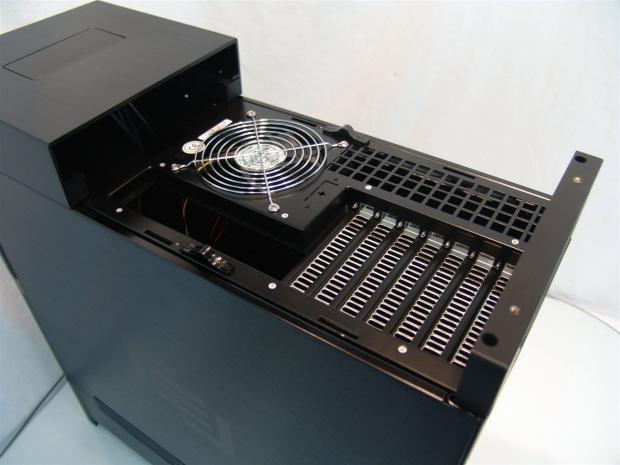
Once the top is removed you can see the "rear" of the chassis. There is a 120mm fan installed to exhaust the chassis, seven expansion slots and the pair of slide releases for the door panels.
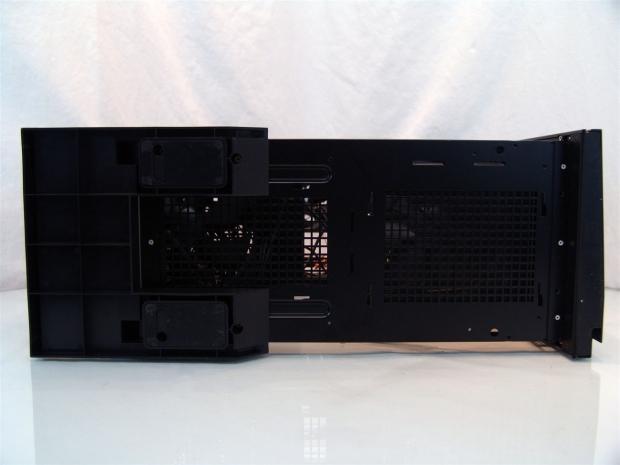
Under the chassis there is a huge rear foot assembly to allow Maingear to square off a case that little to no material in this area to start with. In the front, the bezel is lower than the chassis and has a rubber strip to keep it from sliding and protect your desk or wood floor.
Inside the Maingear Shift Limited Edition Chassis
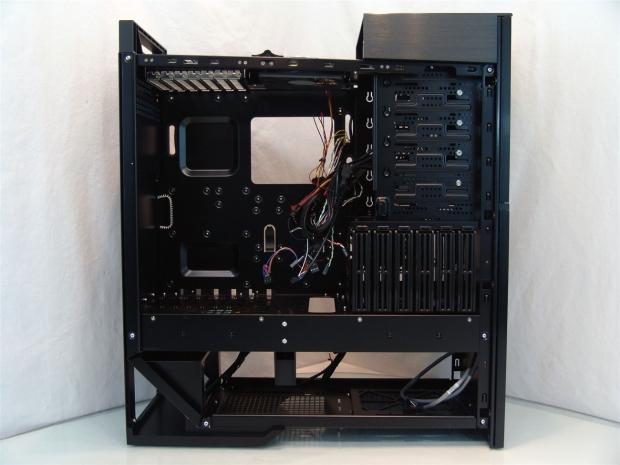
With the panels removed it is easy to see the RV01 innards, at least most of the factory equipped goods. There is all of the major chassis wiring tied together as not to flop around and I also have an audio pass-through cable sitting in the bottom near the front.
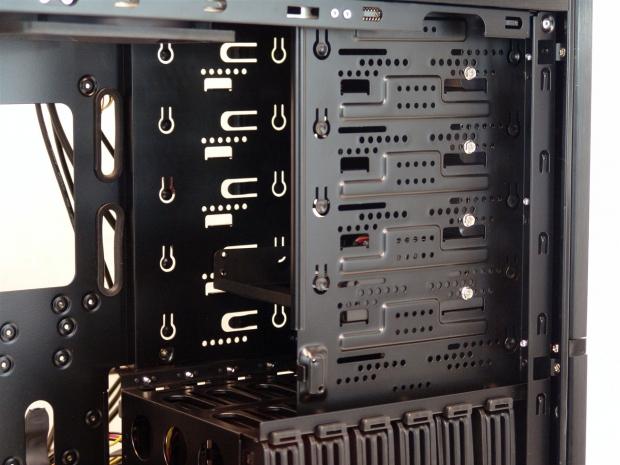
As the top slot and bottom slot are already in use, or using that space, you are left with the ability to use one of the three remaining slots with screws to secure the device into place.
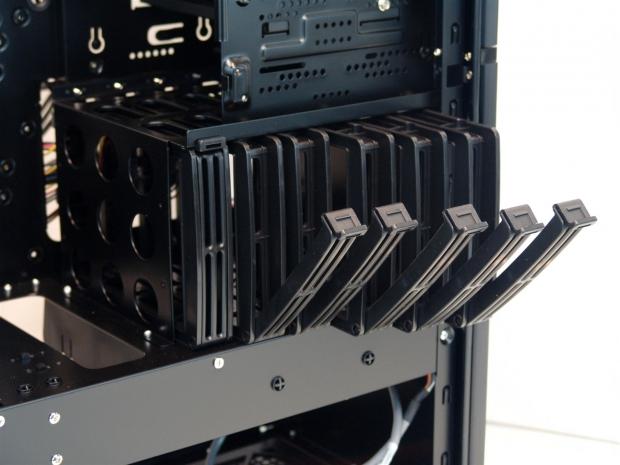
For storage drives, you can either insert a 2.5" by screwing it to the floor of these slide-out trays or 3.5" drive by screws that pass through the sides of these trays. There are a total of six spots, four of which have hot swap panels attached.
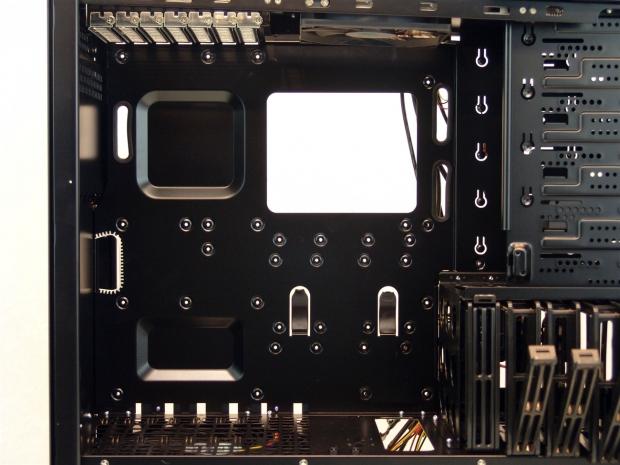
The motherboard tray has holes for everything from Micro-ATX up to dual socket motherboards for servers. Along with that compatibility there are eleven wire management holes around the tray and two large tabs to help support wiring behind the tray.
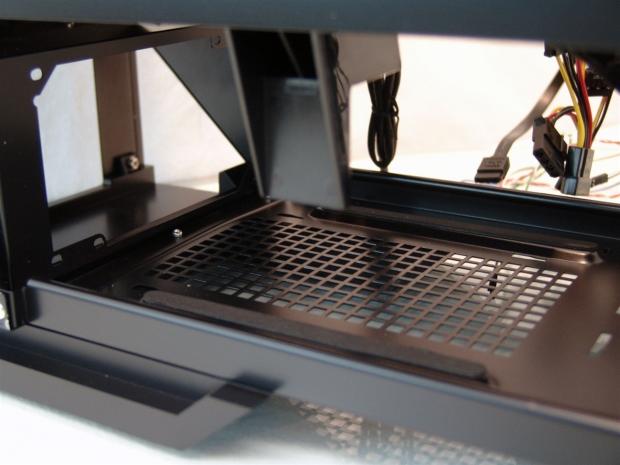
Under the first floor of this chassis is where the PSU installs on top of the raised rails with rubber pads on them. It is very well ventilated and even has a PSU bracket to make sure when you install the PSU from the back that you don't pass it right through the bottom of the case.
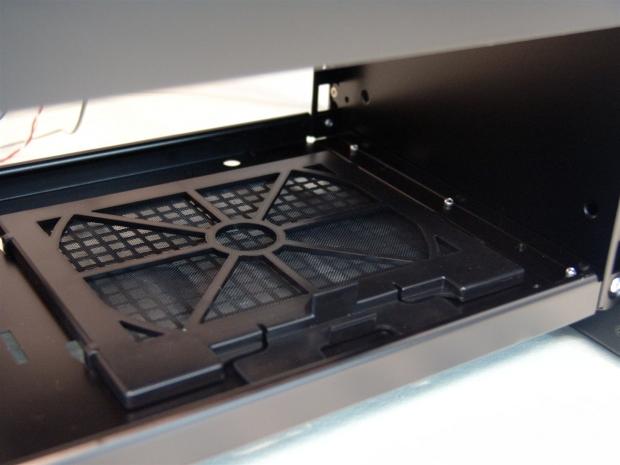
In the front there is a fan filter to protect the fan that is going to soon be strapped to the EPIC 180 Supercooler from filling with dust. Since it has the task of cooling the CPU it is much easier to clean a filter than a radiator.
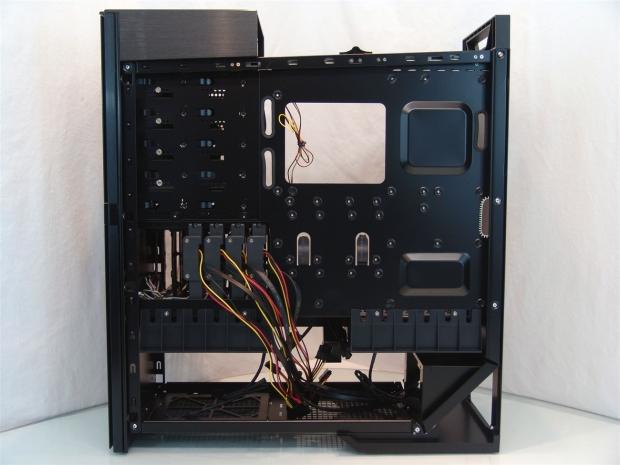
Behind the tray there isn't tons of room and that's why there is a large hole in the sub-floor to pass the bulky wiring through. At the left you can see the four pre-wired hot swap panels in the back of the HDD rack. These can be moved or removed as needed.
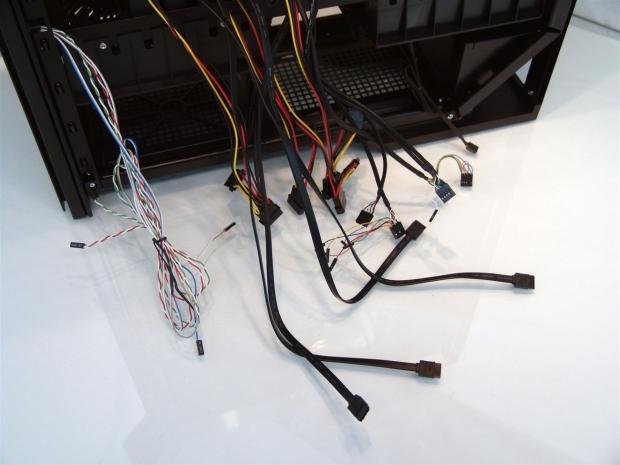
Besides the rainbow of wiring that connects the front panel lights and buttons to the motherboard, you get the pass-through SATA plugs and SATA cables to go with the hot swap bays. You also have USB 2.0, IEEE 1394 and an audio connector with spare tails to connect it to a soundcard or onboard.
Accessories and Documentation
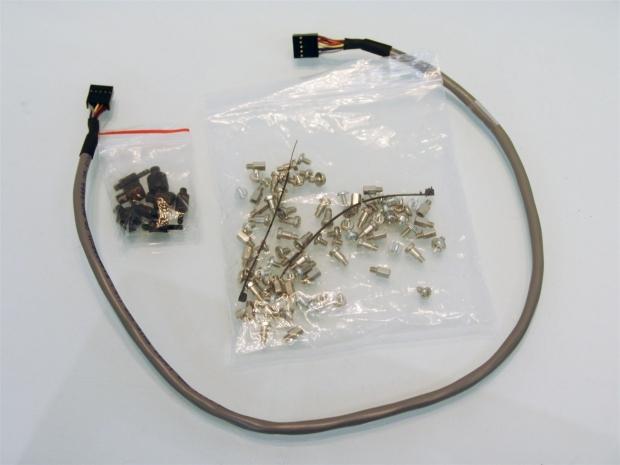
In the hardware box that was tucked into the foam inside of the inner packaging contains what you see here and I threw in the audio cable I found in the bottom. There is some mounting hardware for the EPIC180 along with another bag that contains all the screw, risers and a pair of wire ties to get a build in this chassis done.
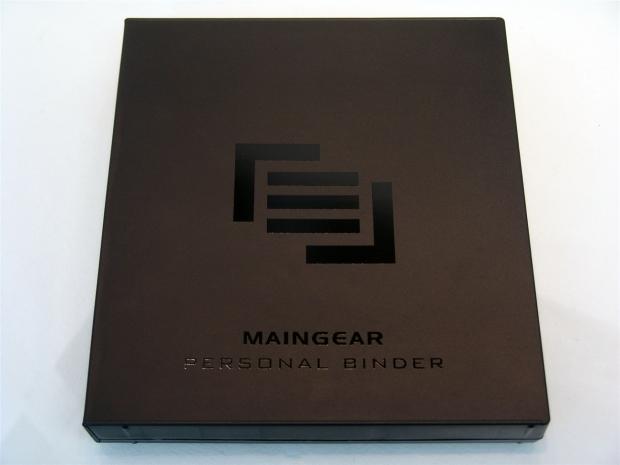
I also got a personal binder for the chassis and inside there are a few pointers to making the chassis not only beautiful when finished, but also properly connected and set up.
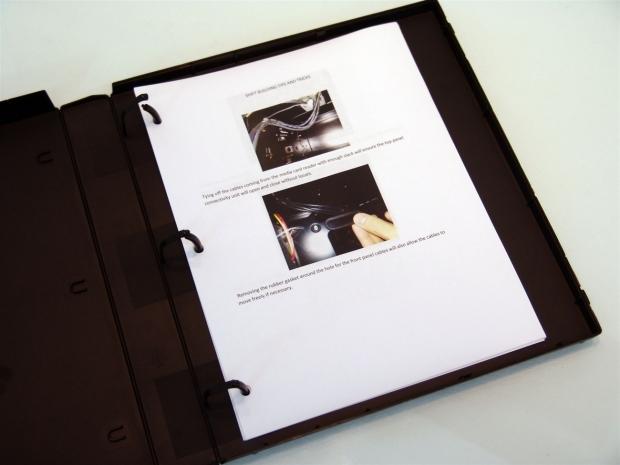
I'm not sure if all the instructions and guidance provided for those choosing to do-it-yourself with this chassis are all like this with color images and text, or if these were provided to me in a pre-release state. Either way the ones I got took me through the basics and made sure to explain how to hook up and run the EPIC Audio Engine.
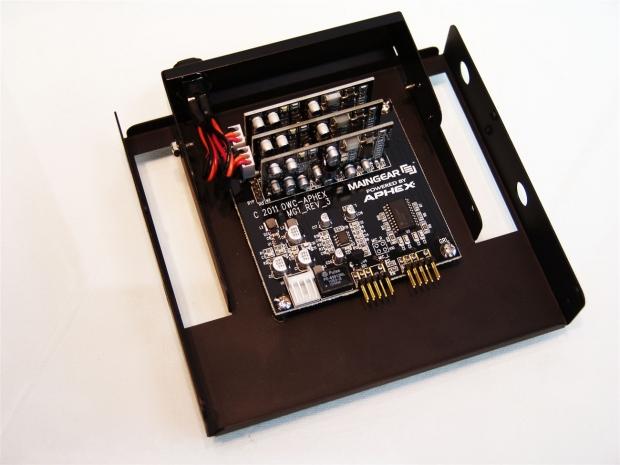
Screwed down to the 5.25 to 3.5" adapter is the Maingear EPIC Audio Engine. This device is meant to filter, enhance and improve on any sound device, whether a standalone audio card or onboard chips. The connections that need to be made to get this to work are the 4-pin floppy connection to power the unit and an IN and OUT for the audio before you attach it to the front I/O for improved sound quality through the headphones.
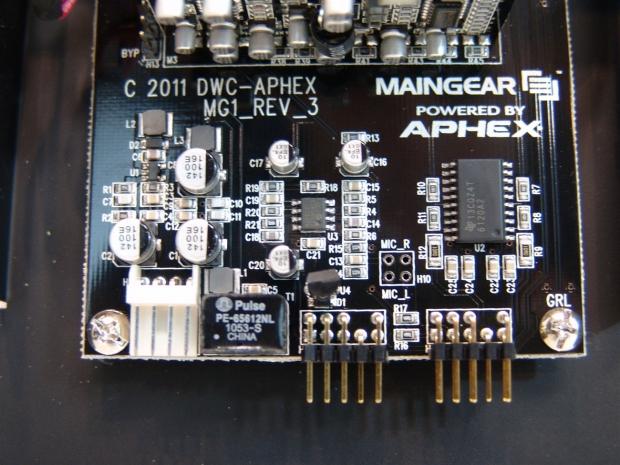
I don't claim to be any sort of audiophile and to me this card is a jumble of resistors and caps that are designed to handle the power and signaling at this end of the unit.
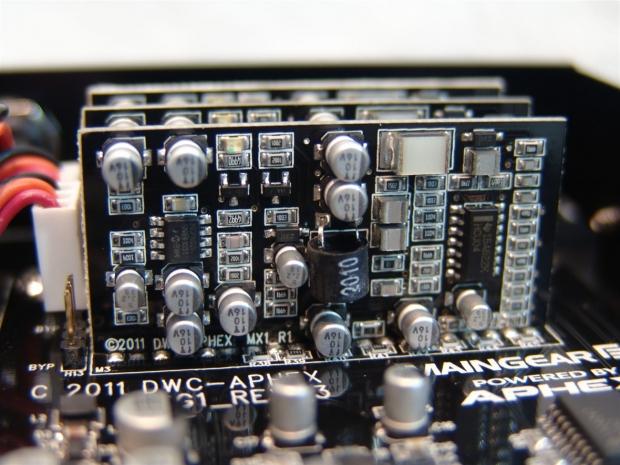
There are three of these, what I can only assume to be conditioning boards to clarify, accentuate and improve audio quality. I can also assume that the plugs just to the left of these cards are what deliver power to them and only two of the three are connected.
The Build and Final Product
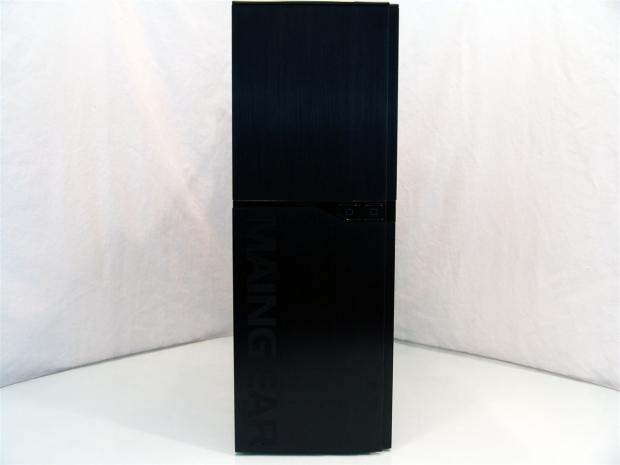
All finished with the build and the Maingear Shift Limited Edition case look just as sleek as it did when I first looked at it. No traces at all of really anything inside, nor anything that sticks out and breaks up the aesthetic appeal.
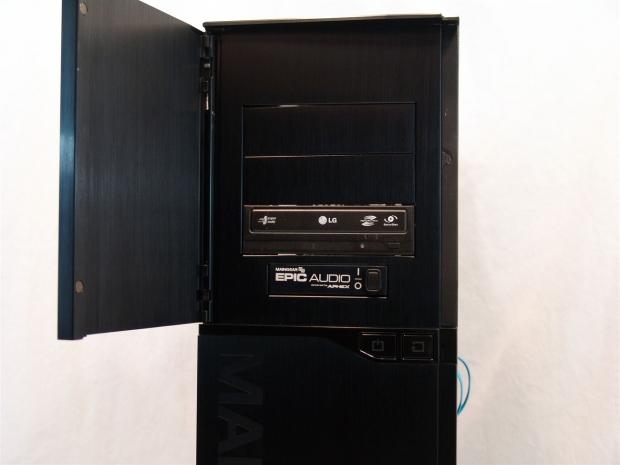
Opening the door shows the ODD installed. One thing to note here is that Maingear says due to the audio cable they don't recommend you use an ODD, but as you can see it can still be done if you plan for it.
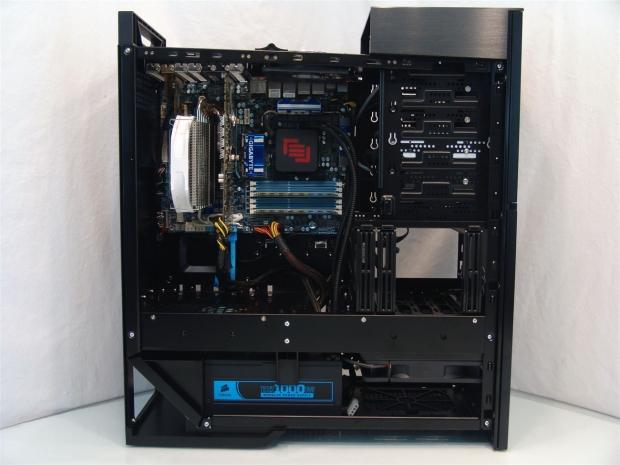
The EPIC 180 Supercooler is in and mounted, the EPIC Audio Engine is wired and ready and all the rest of the hardware went in pretty well without substantial issues that come to mind.
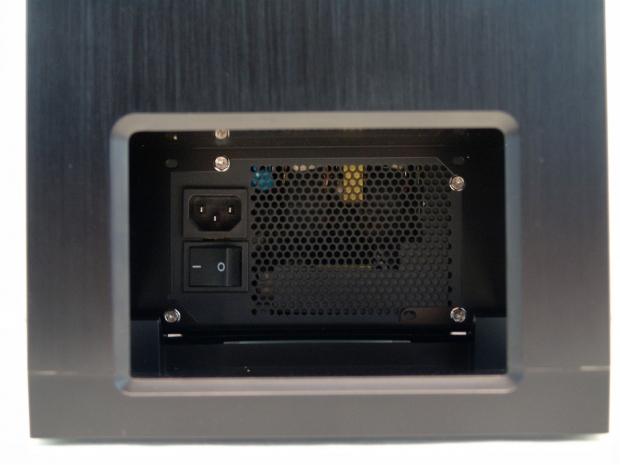
Like I said before, the PSU is inserted a few inches into the chassis and the back of the Shift is built square. The large diamond cut hole makes plugging in and hitting the switch on the PSU pretty easy.
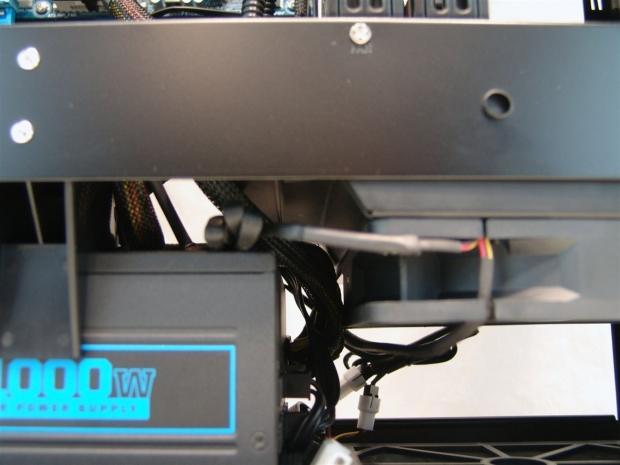
Those that read my EPIC 180 Supercooler review know that it offers an offset shroud and that was to allow long PSUs like this one to be installed and there be plenty of room left for wiring and air flow.
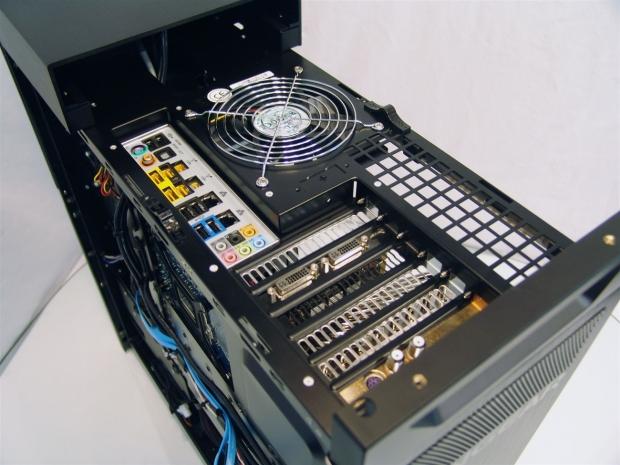
The top of the chassis filled out as one would expect, again no real issues with alignment or the rear I/O panel being tough to get in.
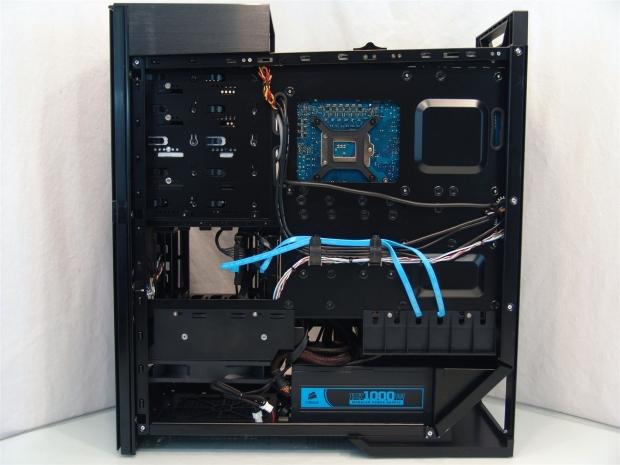
The back of the chassis has the large tabs that help to take the bulk of the wiring from right to left. As for the bit of wiring going up, there is room for those easily to run there. I did remove the drive adapters because I have bad luck with them in general and it also cleans up the build.
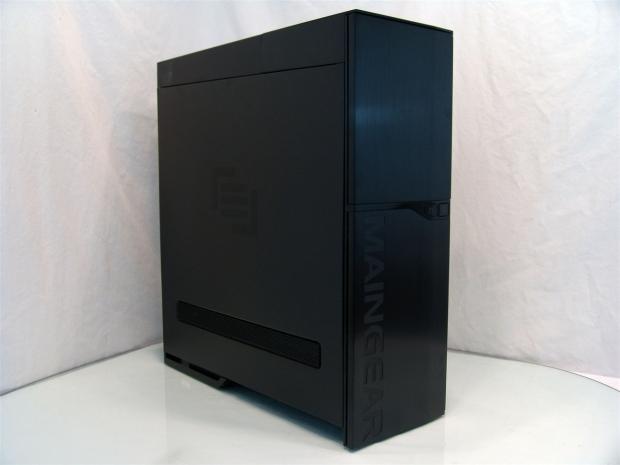
All ready now for the power cord and off we go into the testing phase of this chassis and incorporated goods. When powered things don't change and the system power and HDD activity lighting is almost completely hidden from view on the right side of the chassis about a third of the way up from the bottom.
Final Thoughts
Since I already tested the EPIC 180 Supercooler I knew already that I was installing the best performing AIO that I have tested, so I knew temperatures were already well under control. With a 140mm fan blowing on my video card and a 180mm blowing up from the floor, the components stay nice and chilly with the full panels back in place.
I was really taken back by the EPIC Audio Engine module. Granted I had to make an adapter to power the unit, but none the less, when I got it running, things sounded amazing. The lines you see on most sites are a bit exaggerated, but I could truly hear the footsteps in games and even for my basic music listening, it seemed brighter and more crisp, with a much fuller bottom end than what my onboard offered me previously. It may have been a bit of a placebo effect, but I swear it was actually louder as well.
Now I can't really say that this case has all the components to make you total up to the asking price, but in reality what is exclusivity worth? I mean with a limited run of only 100 of these to go around, it is highly unlikely that you are going to show up to an event or a buddy is going to show up with some lame claim to already seeing this case. Chances are slim to none that anyone you know is going to have one of these and unless you are reading this or already a Maingear follower, it's unlikely you even know this exists. That also solidifies my point of what drives the point of this case to the $899 price tag that this Limited Edition case is demanding.
There is so much I like about the build. There is the sleek exterior with its low intake to take advantage of cooler air into the Shift. While using a chassis we have all seen, the exterior is exquisite in fit and functional while delivering that sexy brushed aluminum that a lot of us drool over on any case. Put on top of that the feeling of being one of 100 others to actually own this bit of kit, the fact that it comes with top notch AIO water cooling and a kick ass sound tweaking system with the EPIC 180 Supercooler and the EPIC Audio Engine, it's really hard to go wrong with this as a choice when looking into cases of this magnitude.
I know this isn't a case for everyone; it is specifically geared to enthusiasts and elitists that can afford this sort of product. That doesn't mean the average guy can't get in line for one of these Limited Edition Shift chassis, it's just harder to justify.


