Introduction, Specifications, Availability and Pricing
Introduction
With temperatures on the rise, cooling your components is more essential this time of year. For those of us who overclock, the rise in temperatures from winter to mid-summer can be dramatic. The stock cooler has been long removed from its duties and the never ending quest to combat this rise begins. Beyond overclocking, think of the extremists; those that squeeze their components for every last stable drop of megahertz they can get. Cooling at that point for a processor is more of a harsh task than a job for just anything.
In the quest for a cooler to battle this rage, we look for innovative concepts and ideas that may help us in our quest. Things that immediately come to mind are the mounting, the choice of fans and the way the cooler is designed to aid the air flow. Mounting is most important. Coolers have long since moved away from the push-pins, as they are just not that tight, even when correctly locked into place. A substantial foundation is always a good starting point. Then there are the fans. If noise isn't an issue, high CFM and static pressure are the way to go. Considering this is a performance cooler we are discussing, noise levels are going to be high, so get used to it. Lastly, there are coolers with closed sides, shrouds, even crazy looking fans. If they help keep the temperatures down, I'm all for it.
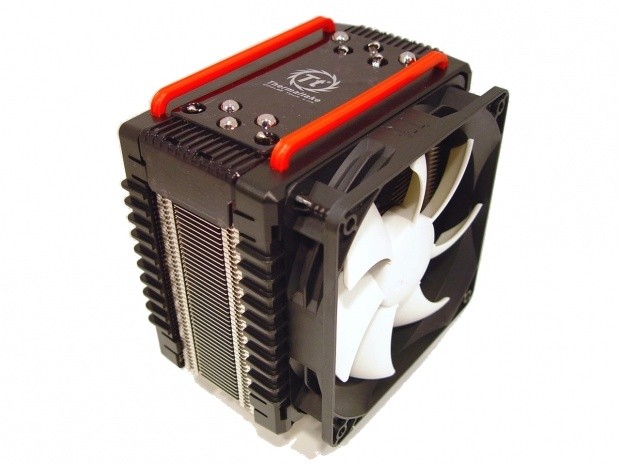
Today Thermaltake has given me the chance to look at a cooler that has brought attention everywhere it shows up. Not only does this cooler come in an attractive red and black color scheme, it seems to really produce great results. If you haven't figured it out by now, I am talking about Thermaltake's Frio CPU Cooler. This is a 220W monster with dual fans and over 100CFM of air flow. Join me as I disassemble and test The Frio. For those not so up to date on their Spanish, Frio means cold. With the naming alone, results should be good and other sites lead to this conclusion as well. It's time now for me to finally see the Frio face to face and what it has to offer.
Specifications, Availability and Pricing
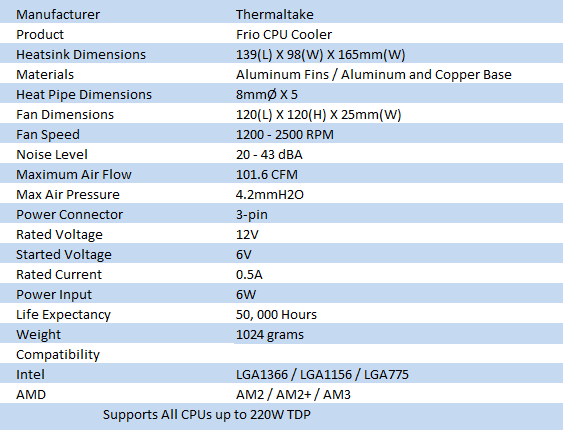
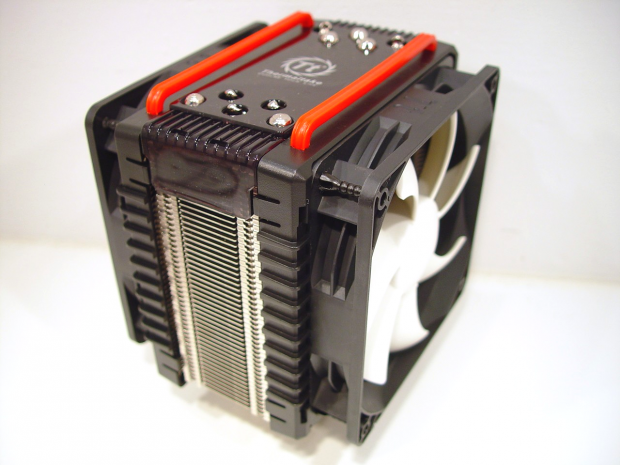
Like the Jing, the Frio is based on a tower style cooler under slick plastic covers and fans. In the center there are forty-eight aluminum fins surrounding five, 8mm, copper heat pipes. These pipes run in a staggered pattern through the fins and make a "U" shaped bend through the base. The base is comprised of two pieces. There is the top made from aluminum, which handles the mounting. Then there is the bottom, nickel plated, copper section that makes direct contact to the processor. Another trick used on this cooler is that about two-thirds of the sides are closed off to aid in air flow, while the middle section is open.
Covering the aluminum are two fans and an attractive looking top. The cooler ships with one 120mm fan attached. These fans boast over 100 CFM per fan and I bet a bit of noise to go along with that power. This way you get the option to run with one fan, or get the most out of the Frio and strap in the second fan. On top there is a black covering with two bold red bars running long ways across the Frio. This goes along with quite a few rigs I have seen as red and black is one of the most popular choices by far. No matter if you run AMD or Intel, there is hardware ready for any setup from either AM2 or LGA775 and up.
The Frio has been on shelves for quite some time, so if you are pleased with what you see, getting one will not be a problem. Pricing for the Frio is hit and miss. I see it cheaply listed and then they stack on the shipping charges and some pricing I couldn't really believe is legal to attempt. Right about average in the middle of pricing, I found the Frio at Newegg for $54.99, and only an additional $2.99 cents for shipping. While the cooler comes close to breaking that $50 mark, the Frio might just be worth that little bit extra. Let's get a good look at the Frio and see how the testing goes. Then I will be able to say for certain if the Frio is the cooler to buy!
Packaging
The Package
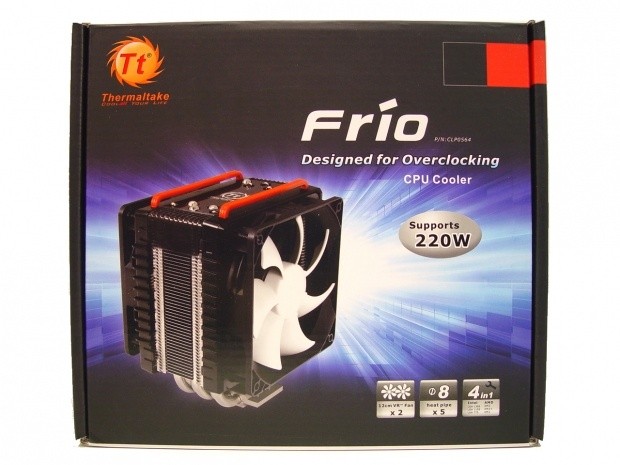
Placed over an explosion of whites, blues and purples, there is a great image of the Frio. Around the packaging we can see that this is capable of handling 220W of heat load, comes with two fans, has five large pipes and the compatibility of the coolers mounting.
On this end of the Frio, Thermaltake makes sure we know this is a CPU cooler inside the box.
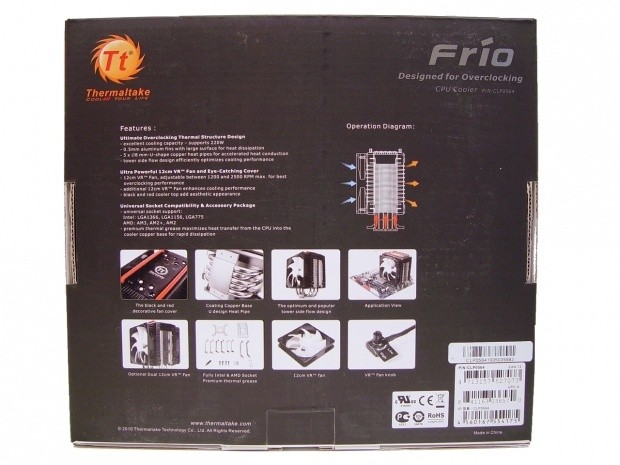
On the back you will find all the particulars of the Frio. From the listed features to the images explaining them, to the drawing of how the heat travels through the Frio, everything you need to know can be found here.
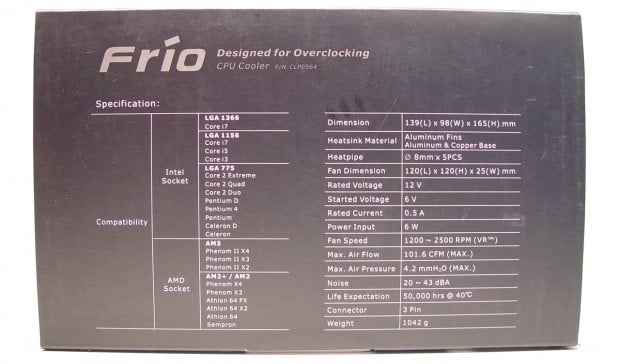
Spinning the box one more time we run into a specifications chart as well as the compatible sockets and processors you can use the Frio with.
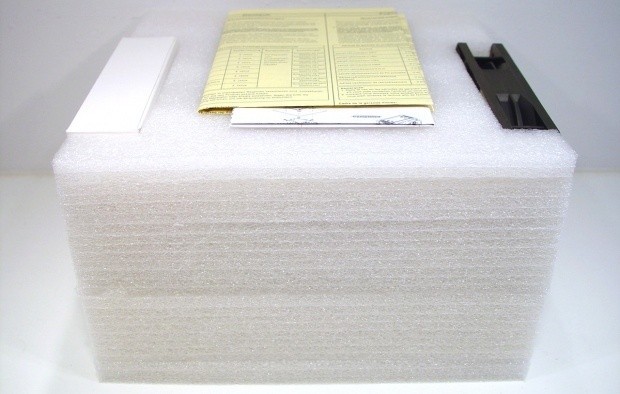
Once you open the cardboard box, you are greeted by the paperwork sitting atop a clamshell of high density foam. The main cooler is on the inside. On the outside in cutouts, the hardware box and second fan can be found.
The Thermaltake Frio CPU Cooler
At first glance the Frio seems to missing something; that's right, there are two fans. That's ok, because it gives me a chance to carefully disassemble the Frio so we can get a good look at it.
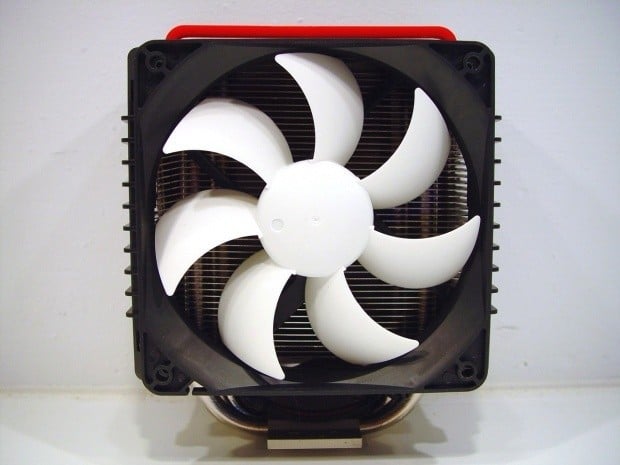
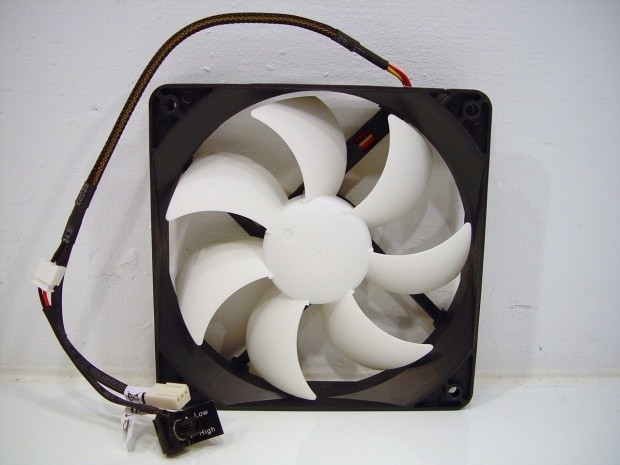
Starting with the 120mm fan that is mounted to the intake side of the Frio, the white blades make for a stark contrast of color against the red and black, but as far as I'm concerned, these could be purple if they are pushing over 100CFM. For me performance takes precedence over aesthetics for coolers and fans.
Looking at the side of the cooler, we can see how the shrouds are held onto the cooler. The fans mount with rubber tabs. In order to mount or remove the fans these shrouds need to be removed as well to ease the installation.
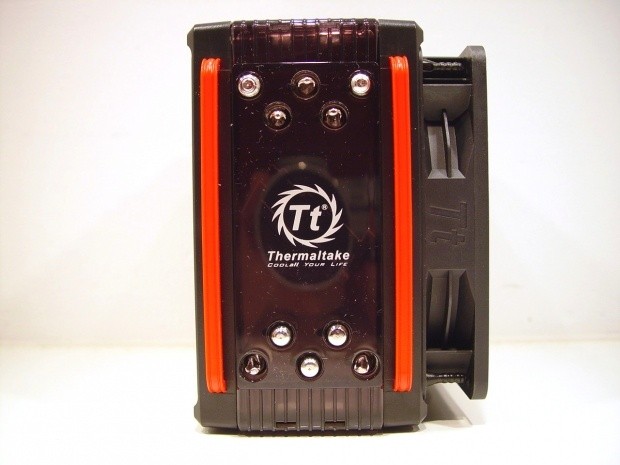
On top, most noticeable are the bright red bars. These flank the center cover made of a smoked plastic. This cover allows the pipes to pop through and also gave Thermaltake room for a logo.
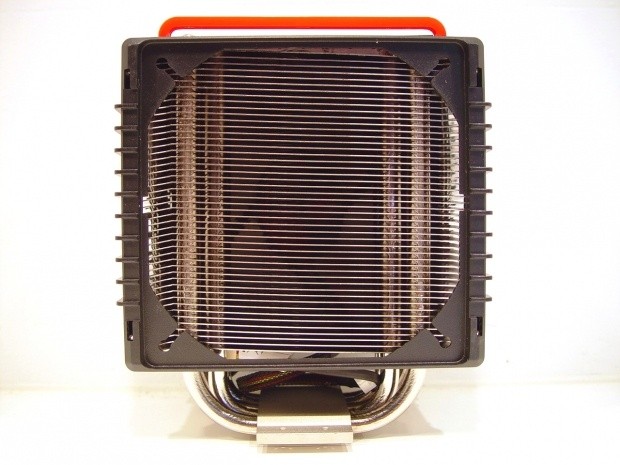
The back shroud comes already installed, but with it showing the level, you can see the fins are oddly positioned. The fins are set on an angle over the heat pipes and both ends are bent in the opposing direction. In the shroud itself there are grooves to accept the rubber mounting tabs. As you can see, it's rather difficult to get the fan mounted if it is on the cooler.
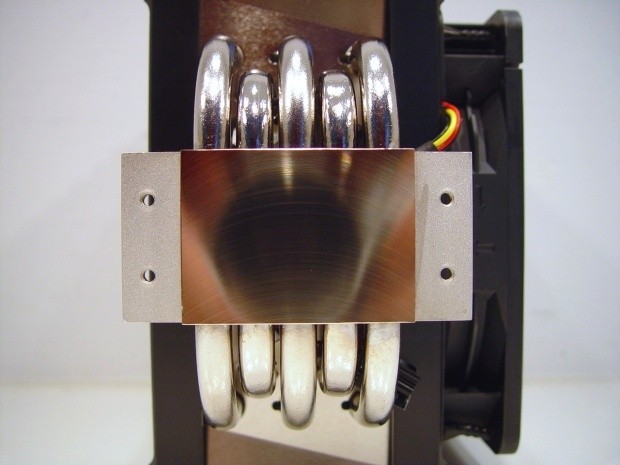
The base does have some obvious milling marks, but for the most part the center is flat and level. The outer edges do drop slightly, but the Frio's base is much larger than the IHS of any processor. Sandwiched between this base and the aluminum top, you can see the fat 8mm pipes that will immediately remove the heat from the copper base.
The Thermaltake Frio CPU Cooler - Continued
The second included fan does match the one already installed. Both fans have 3-pin connections and inline fan controllers. Keep this in mind, Thermaltake doesn't send a fan adapter, so you will need adapters or two free motherboard headers.
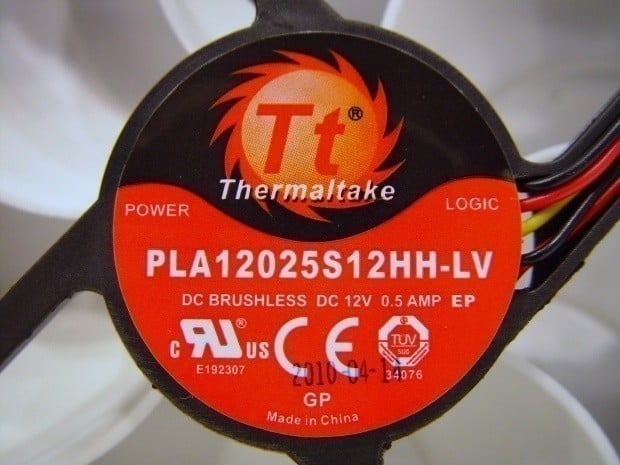
Just in case you wanted to Google the specifications for the fans, or if you are looking to see if the fans are available by themselves, here is the model number to look for.
Once you get the second fan mounted, you can see the cooler gains a bit of girth. If memory issues aren't the issue for mounting this cooler on your motherboard, take a look at the exhaust fan clearance. With both fans in place the Frio is a wide cooler to install.
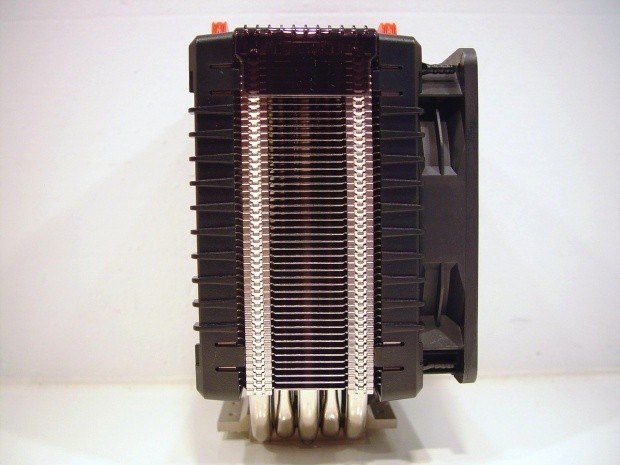
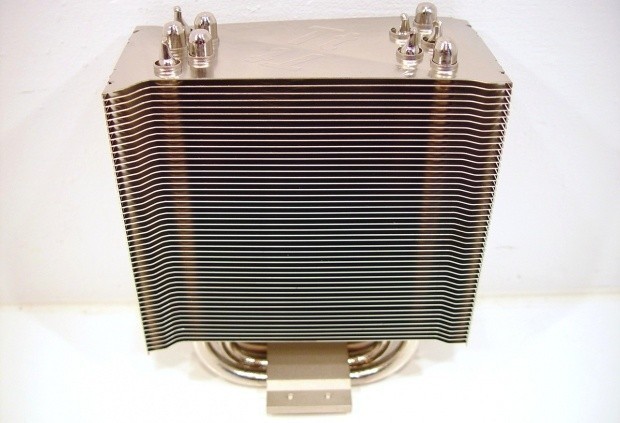
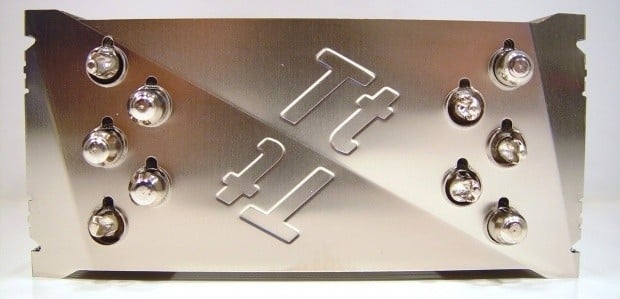
With all the plastic and fans out of the way, we can see the inner workings a lot better. I mentioned that the fins were set on an angle, but what becomes apparent here is that each individual fin is also bent slightly. That is a bend running between the Tt logos.
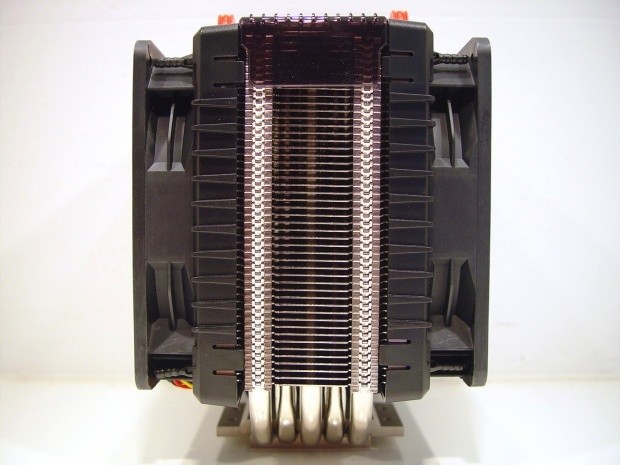
With the shrouds removed you can see how the fins are bent on the sides. This helps support the fin above it as well as closing it off to the fans flow.
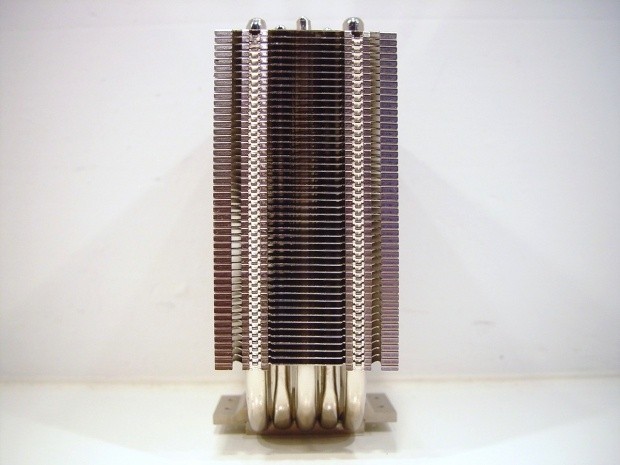
There are so many angles and bends going on to either increase air flow or offset the fans for the correct spacing, I just had to show this image as it accentuated all those angles well.
Accessories and Documentation
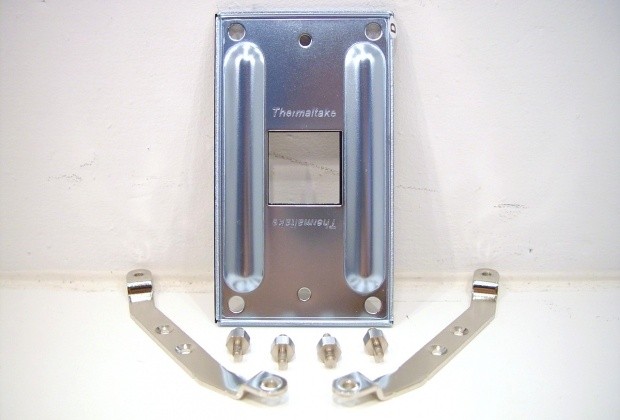
Let's take the hardware in stages, as there is quite a bit to cover. Here is the AMD back plate, risers and support legs included in that white box stuck in the side of the packaging.
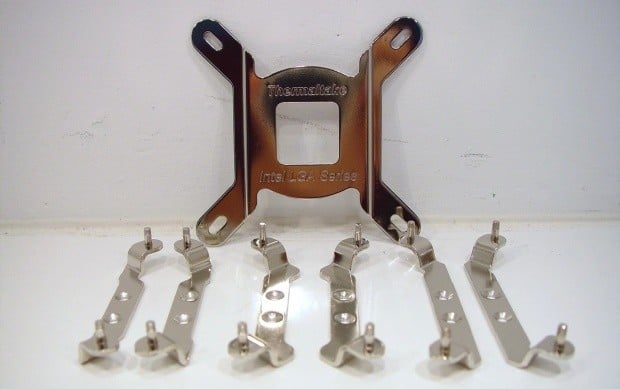
Here we have all of the Intel mounting goods; a universal back plate along with LGA775, 1156 and 1366 support legs.
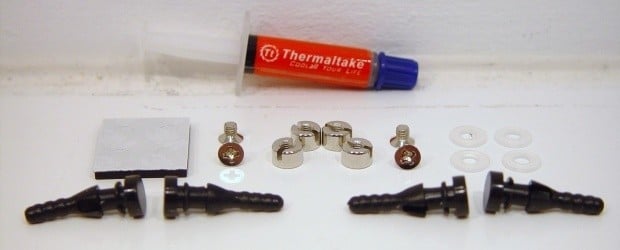
In another bag you will find the rest of the hardware. There are the four rubber fan mounting tabs, four nylon washers, four foam washers, four mounting screws and four nuts for securing both AMD and Intel support legs to the motherboard. Along with all of that, Thermaltake also provided a baby syringe of compound.
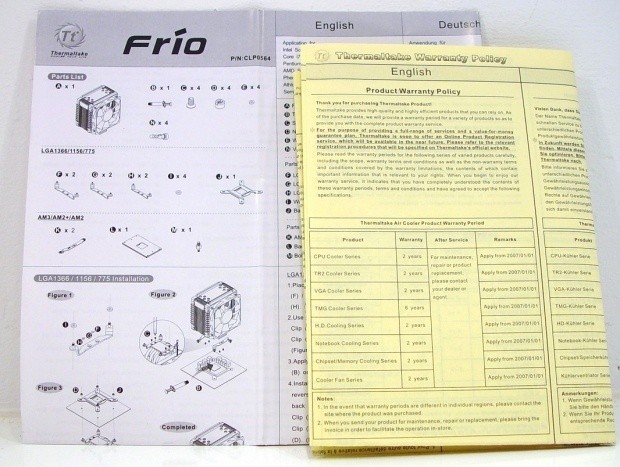
The instructional fold out is very informative and is accompanied with great renderings to aid in solving any confusion. Follow these simple directions and the Frio can be doing its duty worry free. As with all Thermaltake products, there is the yellow warranty paperwork shipped as well.
Test System &Testing Results
Test System & Test Results
TweakTown uses a different method for testing CPU heatsinks which allows for an even playing field across all product tests. We feel that by using the same ambient temperature and strict lab-like testing procedures we are able to accurately compare one product to another. More information on our testing procedure can be found in the T.E.C.C. article here.
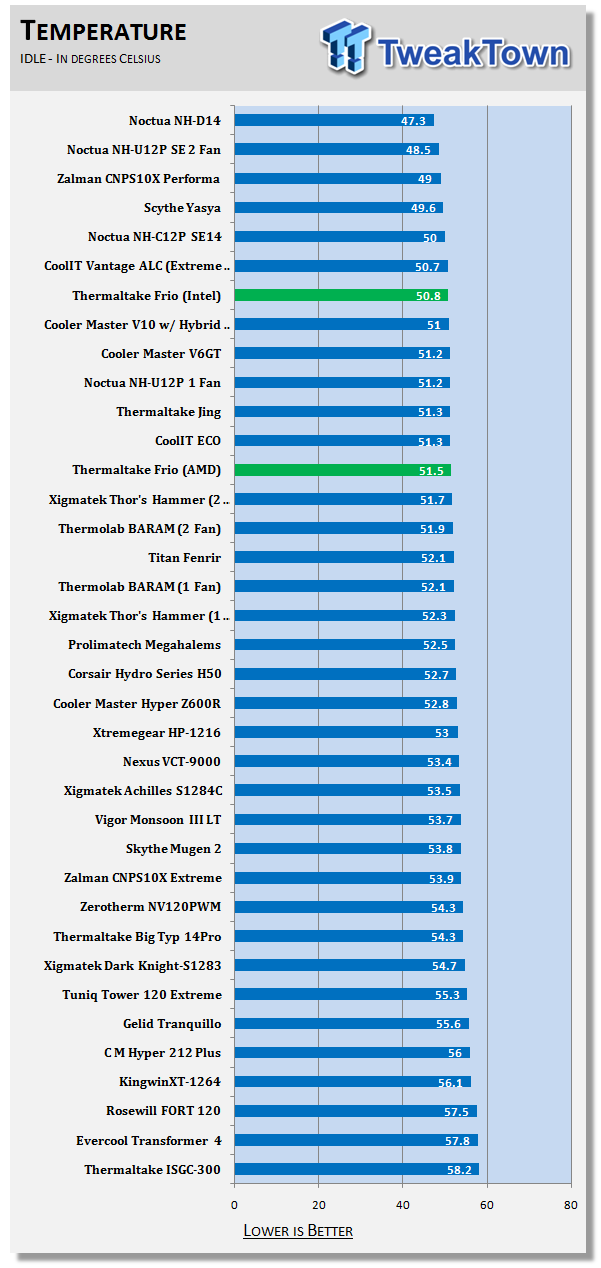
I did the first few runs on the AMD hardware and to be honest I wasn't all that pleased with the results. Come to find out, the AMD setup wasn't putting as much pressure on the TECC as did the Intel tests I did after it. So in fairness, I listed the idle temperatures for both Intel and AMD mounting systems.
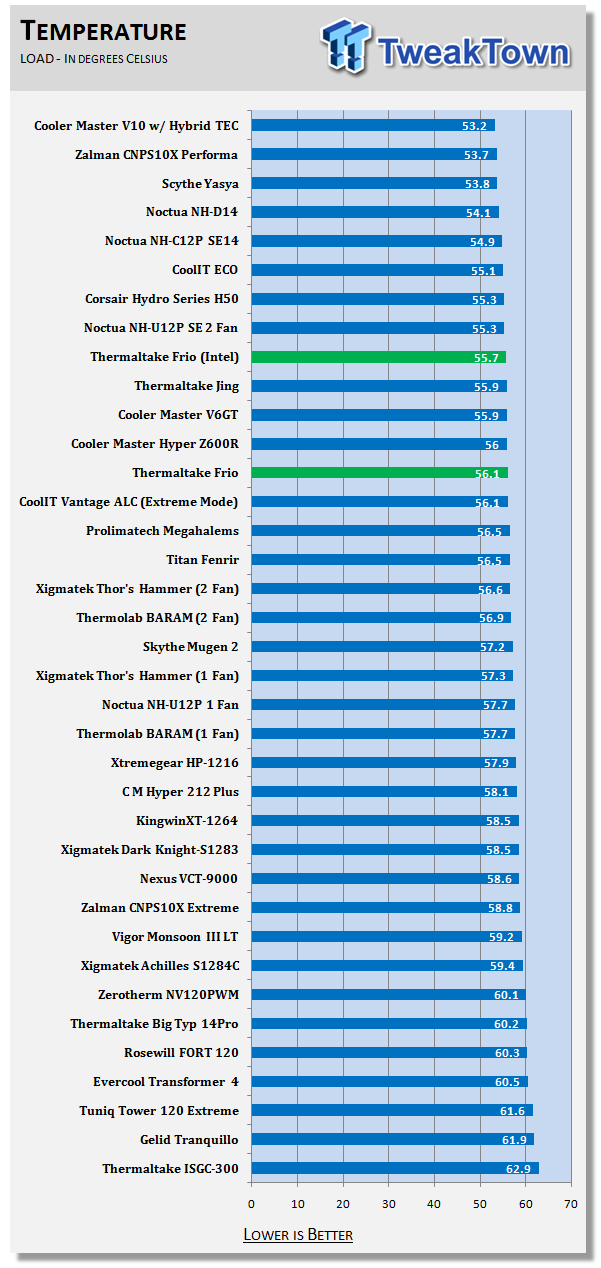
Again with the Intel configuration, I was able to get a top ten performance out of the Frio. The AMD setup left a little to be desired here just like on idle. Let's hope this new hardware found in the Jing ends up on all their coolers from here on out. The main reason I chose an AMD install was because of the great results I got with the Jing. I can see now why a hardware change was made.
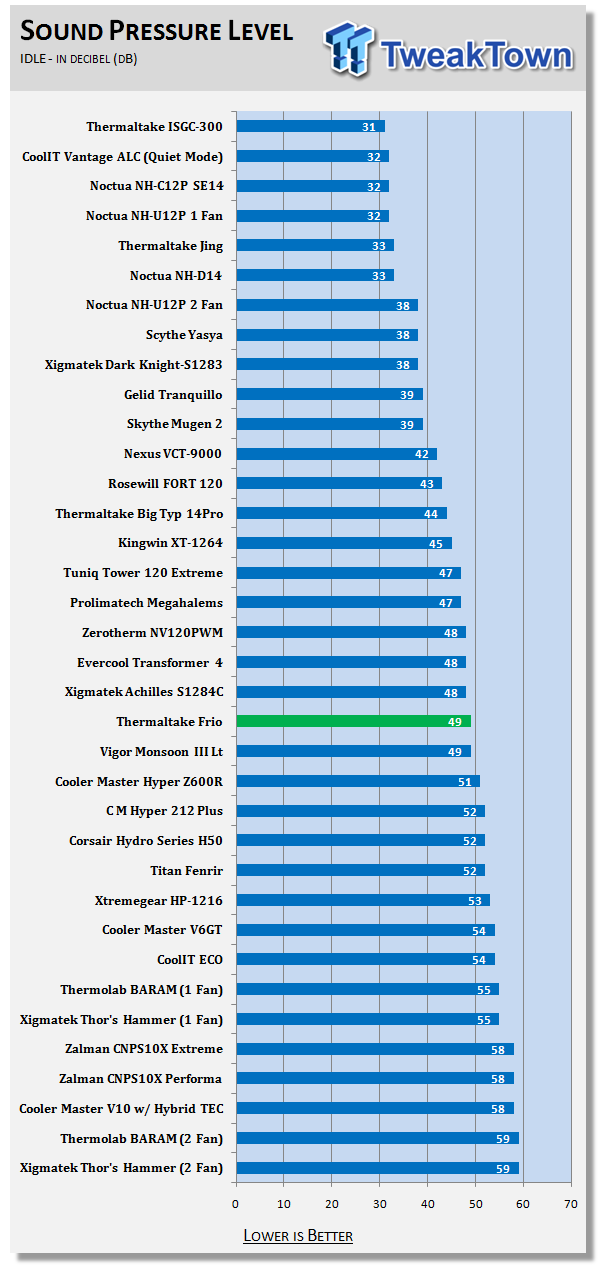
These numbers are for dual fan runs. I didn't do single fan temperature results, so I didn't do them here either. With two fans hovering at what I would guess to be at 60 or so CFM, I expected these fans to be a bit on the noisy side and here are the results that prove that.
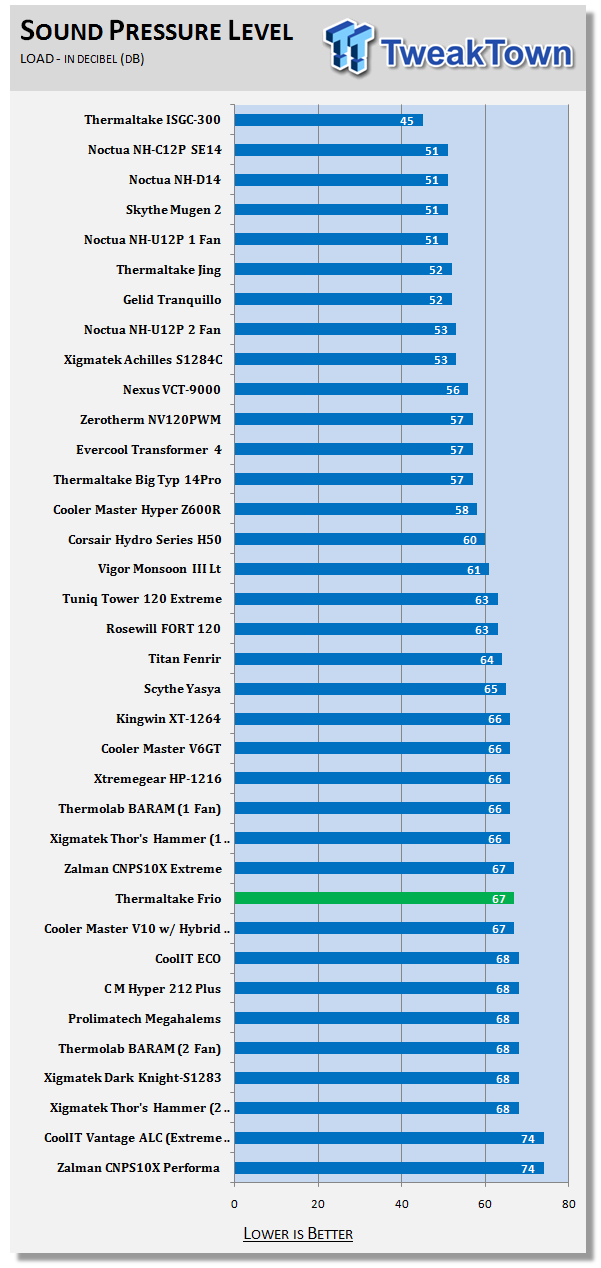
Not exactly the worst I have tested, but the Frio will bring on the noise. At full load and the fans spinning at 12V, a level of 67 dB is still going to be heard from 4 feet away, so be sure noise is not an issue for you.
Final Thoughts
I'm glad I didn't stop and just go with the testing as I saw it with the AMD mounting kit. Using the Intel kit showed a degree and a half difference at load and just over half a degree improvement at idle. Usually with Thermaltake coolers there is an AMD locking bar like what is found on a stock cooler. During my testing it always left the coolers a little loose. After testing the Jing and seeing there was a different AMD setup, I tried it out. The mount was way more secure than their previous setup, but I am glad they added newer AMD hardware with the Jing. It will be an improvement felt by AMD owners everywhere. Moving over to the Intel hardware was the ticket to getting better results from our setup. Even though it took me a bit of fiddling around, I was able to find that secure foundation I was looking for.
Having two fans pushing just over 100CFM covers my air flow and I can check that one off the list. As I said, with fans high CFM brings noise with it. For those looking for silence, this is definitely not the cooler for you. Innovations and tricks were my last pre requisite and Thermaltake has us covered here as well. Fans attached to shrouds, five fat heat pipes, unique bends and angles of the fin placements just to name a few. I really think Thermaltake left no stone unturned with the Frio and I can see where it led to the Jing. Lastly, as it does come into play for some, is the aesthetics of the cooler. White fan blades aside, the all black with bold red highlights will be a huge seller to mass amounts of custom builders.
Like I mentioned, this review is a little late in the game, but I wanted to see for myself what all the fuss was about and Thermaltake was happy to oblige me and sent the Frio along. I have to say it is quite the performer. Keeping up with $80 air cooling and even $90 to $130 all-in-one water cooling units isn't easy, but it looks as if Thermaltake has hit back to back homeruns. If clearance for the Frio isn't an issue, for the $54.99 asking price at Newegg, it is a good bang for the buck. The question really becomes, do I go for the red and black of the Frio, or do I take the green silent Jing? - Either way you go, you won't be disappointed.


