Introduction
Attending events like Flash Memory Summit as a member of the press has its advantages. You get to see the latest in flash technology before it hits retail channels, meet with persons who are the driving force behind new flash technology, and if you're lucky, even tour some major players' facilities. A side benefit that can really payoff, is your name is put on a list for manufacturers and developers who may want to contact you to pitch their latest and greatest.
LC Technology International, a Global Leader in Data Recovery, contacted me and asked if I would like to learn more about their services. Now, I'm not really interested in data recovery services, I'm more interested in maintaining data, enhancing solid state storage performance and permanently removing data by returning my solid state storage to its original RAW state (secure erasing). As an SSD user and reviewer, I'm always looking for an easy effective way to maintain and optimize my solid state storage. An easy to use, universal tool that will work with different manufacturers SSD's has remained elusive.
Who is LC Technology International? LC Technology is a global leader in data recovery, file system utilities and data security technology. Clients include original equipment manufacturers, local, state and federal law enforcement agencies, corporate security specialists and IT consultants, among others. Available worldwide and published in more than 24 different languages, LC Technology products are available direct or through several major manufacturers of flash memory products. Founded in 1997, LC Technology is based in Clearwater, Florida.
It turns out that LC Technology International specializes in more than just data recovery. LC Tech also creates SSD maintenance/optimization software suites. In fact, they write the software for vendor specific tool boxes offered by Corsair and SanDisk. Vendor specific tool boxes are nice, but what's really needed is a more universal application that will work with whatever SSD you own. LC Tech realizing there is a need and a market for a universal SSD utility suite, has just launched an updated SSD utility suite they call "Solid State Doctor" version 3.0. LC Technology reached out to us and asked if we would take their updated SSD utility suite for a spin. We like trying out new stuff so we took them up on their offer.
Apparently the "Solid State Doctor" has been around for a while but, we've never heard of it until a couple days ago.
Specifications, Pricing and Availability
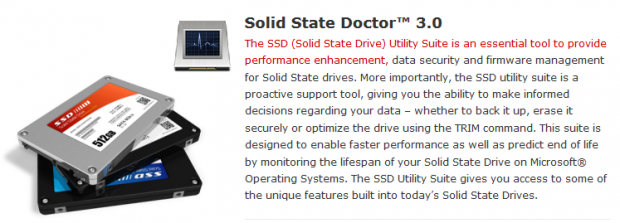
You can purchase the Solid State Doctor utility suite version 3.0 for $29.99 or you can demo it for free. $29.99 buys you a single license for Windows that can be activated up to five times, meaning it can only be used on one PC per license at a time but, can be moved to another PC up to five times.
Most SSD "Tool Box" software I've used have their short comings. Usually I have to change to a default SATA driver to get it fully functional. Or, I have to hot plug the drive to perform a secure erase or some other quirk will pop-up that makes me decide to uninstall it after beating it into performing the function it was supposed to easily perform.
The common thread with most SSD "Tool Box" software is that it's proprietary in nature and will only fully function with the brand of SSD it's designated for. LC Tech's Solid State Doctor is a universal solution and, if it functions as advertised then it will be a valuable asset to those of us that have SSD's from many different manufacturers.
Drive and S.M.A.R.T. Information
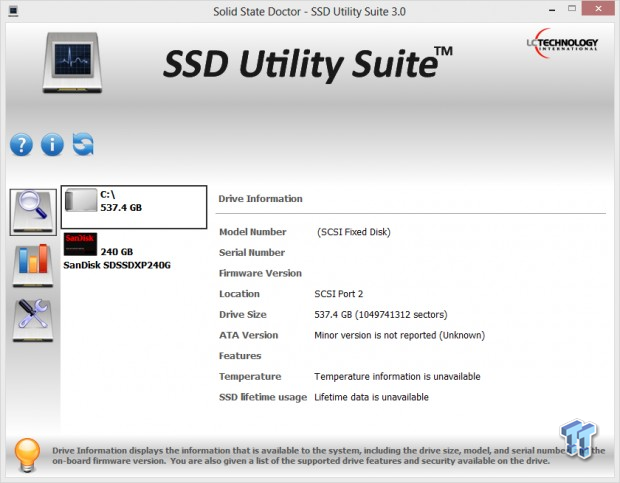
Launching the application, we are greeted with this screen. This is where some basic information about the selected drive is listed. Our drive "C" is a RAID 0 Volume and the Solid State Doctor is unable to provide very much drive information because it is a RAID Volume.
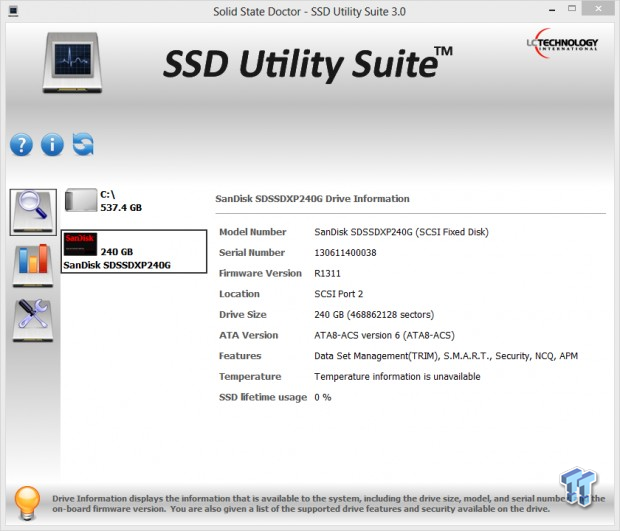
When we select our SanDisk Extreme II 240GB SSD, we get some basic drive information such as the drives serial number, current firmware revision, capacity before formatting, features and SSD lifetime usage. The drive internal temperature was not being read for some reason. We know internal temperature info is available because it shows up when we check the drive with CrystalDiskInfo. I spoke with LC Technologies about this and they are looking into it.
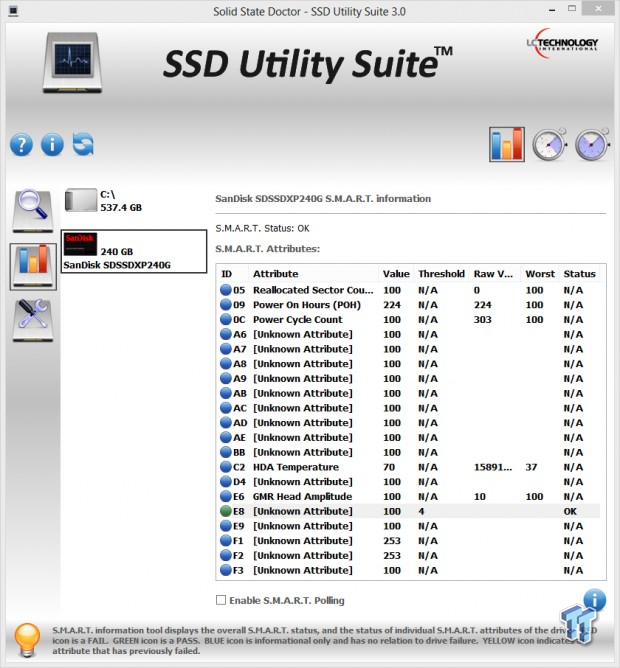
Selecting the S.M.A.R.T. information icon displays the selected drives S.M.A.R.T. attributes and status of each attribute.
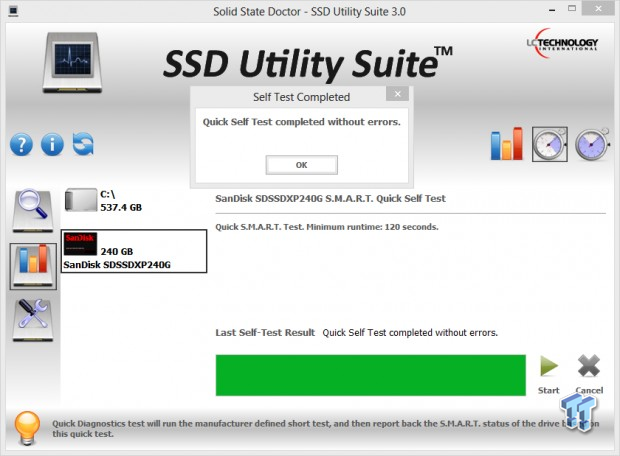
There are two S.M.A.R.T. self-diagnostic tests available to provide more in-depth drive health analysis. The first shown here is a Quick Self Test. The Quick Self Test runs for a minimum of two minutes and reports if any errors are found.
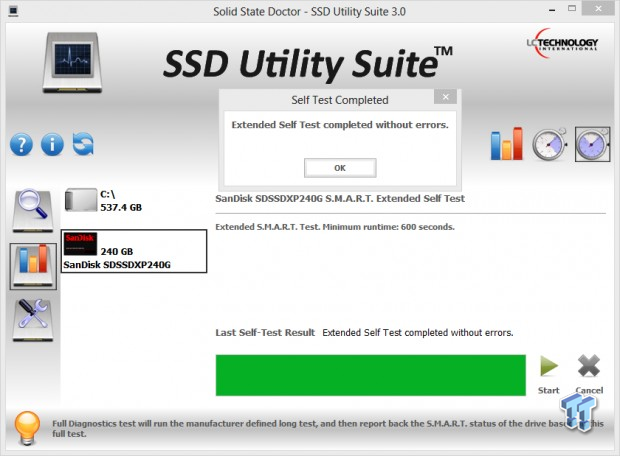
The second S.M.A.R.T. test is an Extended S.M.A.R.T. Self Test that runs for a minimum of 10 minutes and reports if any errors are found.
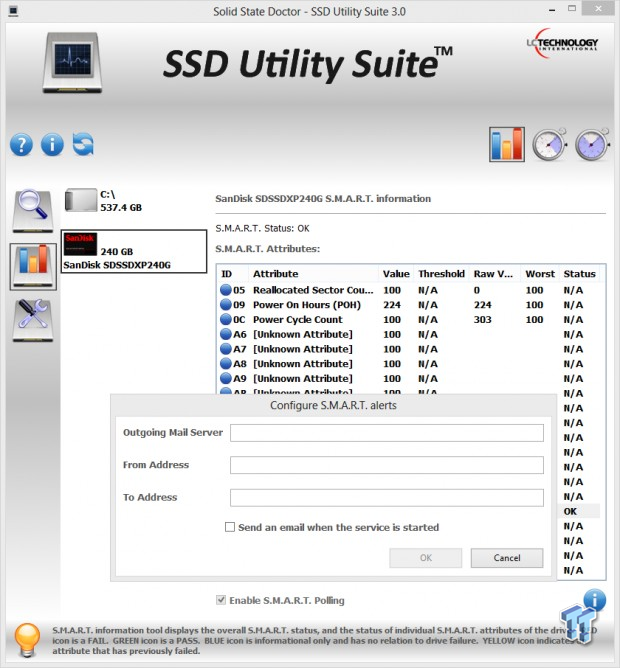
If you want real-time drive health monitoring, you can enable the built-in SMART Polling feature. The S.M.A.R.T. Polling feature allows the user to configure alerts via e?mail in the event one or more of the individual S.M.A.R.T. attributes have been exceeded indicating a failure occurring with the SSD drive.
Solid State Doctor will poll the drive(s) every 60 minutes for any change to the attributes and will send an alert if any attributes are out of normal range. SMART Polling is more of an enterprise centric feature geared toward predictive end of drive life monitoring.
TRIM, TRIM Scheduling and Overprovisioning
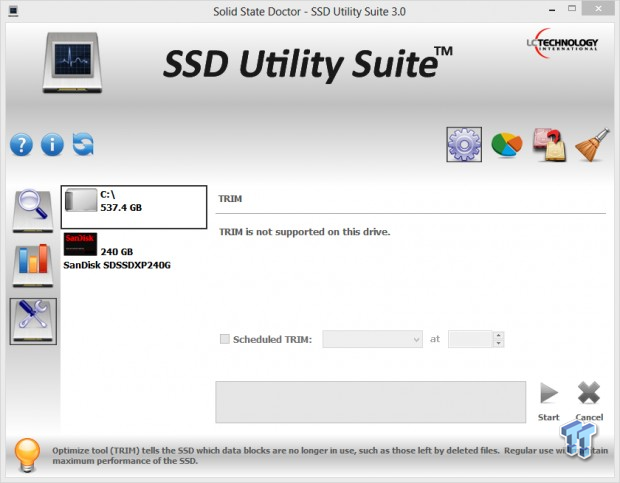
The Solid State Doctor's TRIM tool is called the Optimize (TRIM) Tool. The Optimize Tool issues a TRIM command to the SSD which tells the SSD which data blocks are no longer in use, such as those left by deleted files. Regular use of the TRIM command will help the SSD maintain maximum performance. TRIM can be run manually or auto?scheduled.
First we tried to TRIM our RAID Volume and found out that Solid State Doctor 3.0 does not support TRIM on a RAID volume. This is kind of odd IMO because we are running Windows 8 and I can TRIM my RAID Volume with Windows 8's built-in drive maintenance feature. I spoke with LC Technologies about this and they're looking into supporting TRIM on RAID Volumes with Windows 8.
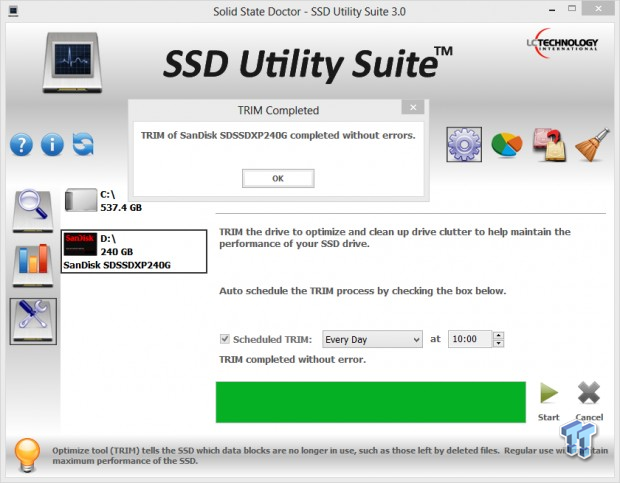
We selected our SanDisk Extreme II 240GB SSD and were able to TRIM the drive without issue. There is a check box to schedule automatic TRIMMING of the selected drive. We set our drive to be TRIMMED every day at 10am. The Solid State Doctor's Scheduled TRIM maintenance will occur even if the program is not running, which is nice, because I personally hate software auto launching and running in my system tray all the time, which is exactly what some "Tool Box" utilities want to do.
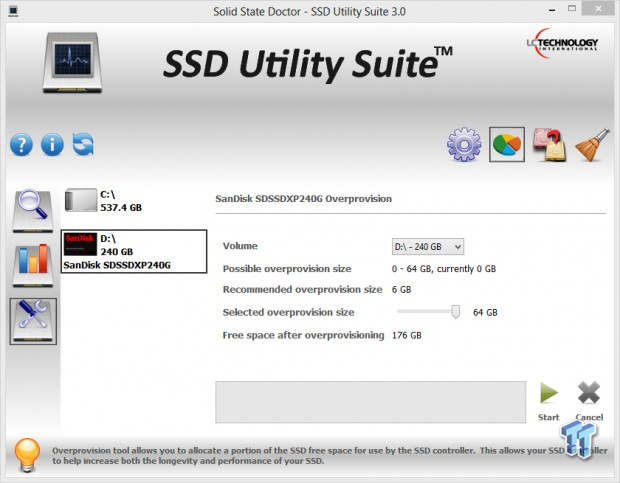
Selecting the second icon that looks like a pie graph allows us to over provision the selected drive. The software will overprovision a RAID volume as well as a single drive. Overprovisioned space created on the drive will allow the controller to better manage and maintain the performance and longevity of the SSD drive.
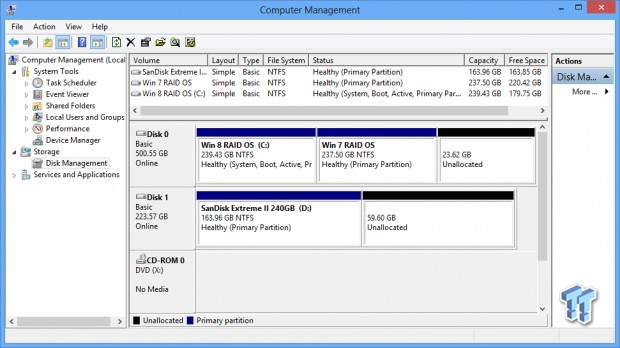
Overprovisioning (OP) simply means you leave some unallocated space on your drive. This unallocated space can be utilized by the SSD's controller to better perform internal flash maintenance as the drive fills up.
We chose to OP our SanDisk Extreme II 240GB by 64GB and as you can see the utility performed this task perfectly. The utility makes it easy for novice users to OP their SSD without going into Administrative Tools to do it.
Drive Cloning
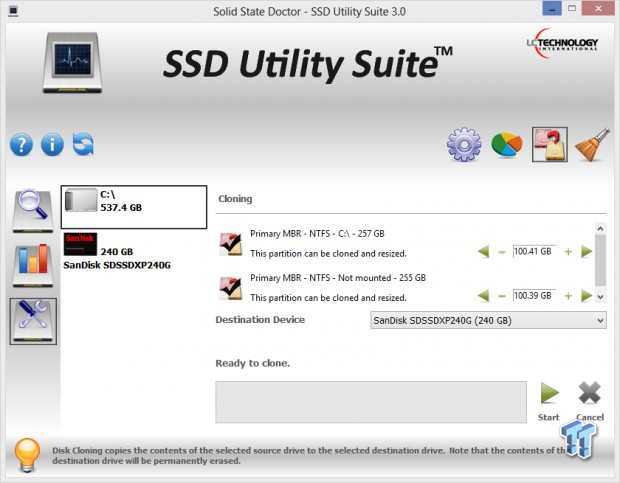
Drive cloning is a super cool feature for novice users and experts alike. Say you are a novice user and this is your first SSD and all you want to do is swap out your HDD for an SSD, Solid State Doctor makes it easy. More than likely your HDD will have more capacity than the SSD you are swapping with. No problem, as long as the actual amount of data on our drive does not exceed the formatted capacity of the SSD, you can just adjust the partition size to be cloned to fit your SSD and seamlessly clone your partition to the SSD.
We decided to clone our OS RAID volume, which is a 500GB dual boot two partition setup to our SanDisk Extreme II 240GB SSD. We adjusted each partition to fit and hit start. We should mention the destination drive needs to be empty and unallocated before cloning.
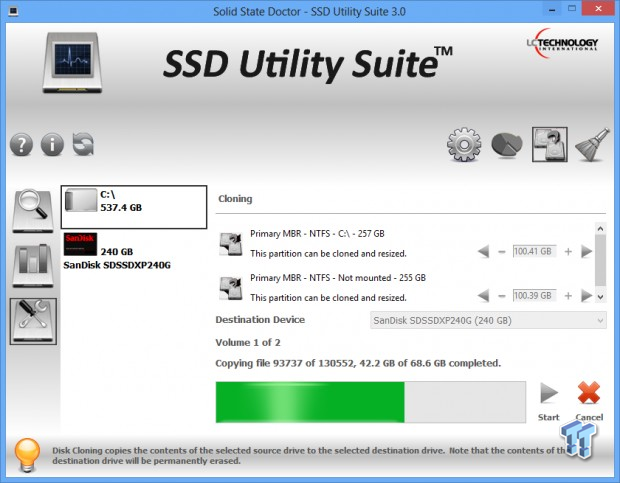
This is a screenshot taken at about midway through the cloning of the first partition of our OS RAID Volume to the SanDisk Extreme II. This is our Windows 8 partition which is mounted and active.
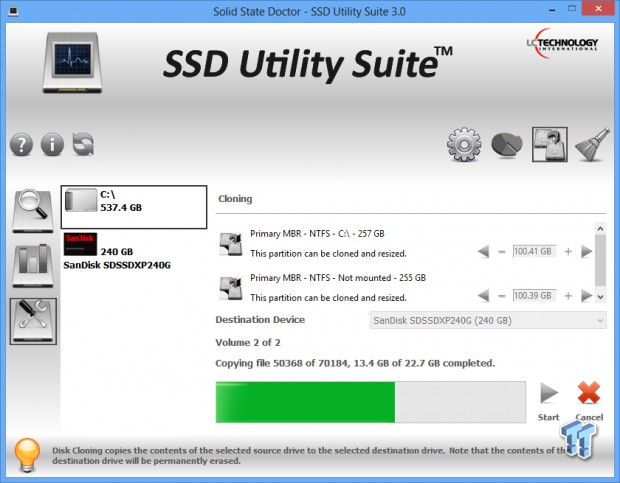
This is a screenshot taken at about midway through the cloning of the second partition of our OS RAID Volume to the SanDisk Extreme II. This is our Windows 7 partition which is not mounted or active.
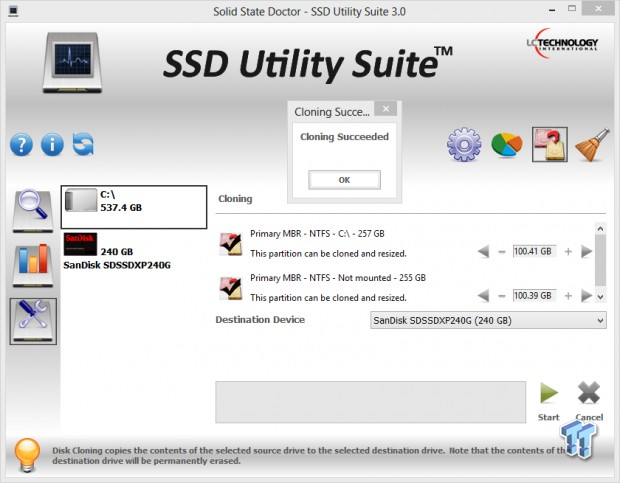
Both partitions were resized and cloned in a single operation quickly and easily.
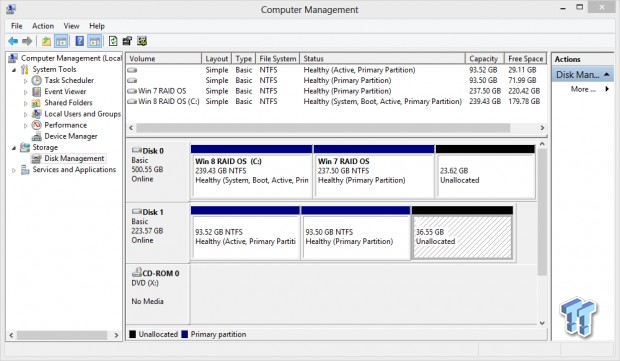
A quick look at disk manager verifies that the partitions were created exactly as we specified (100GB each before formatting) and that we have some unallocated space remaining on the drive exactly as intended.
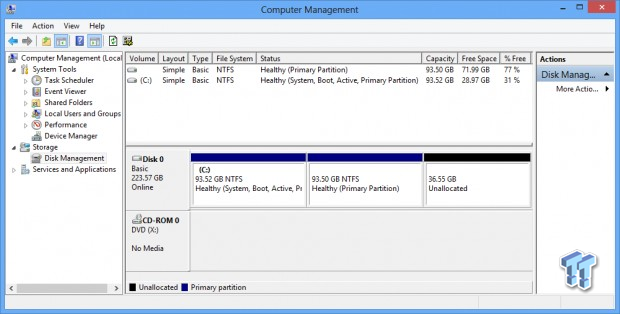
We disconnected our RAID OS volume and fired up the drive we cloned to. Everything went perfectly. Our boot selection menu popped right up (we dual boot Windows 7 and Windows 8) and we booted into Windows 8 first. So far, so good.
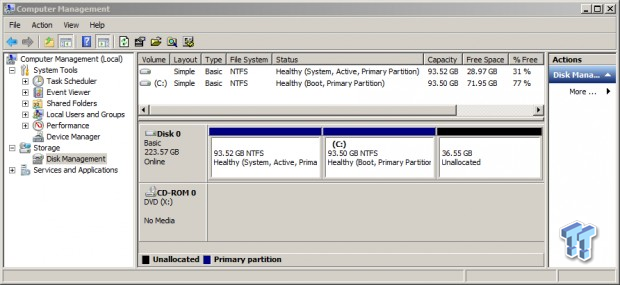
We restarted and booted into Windows 7 without issue. The cloning of our dual boot RAID OS to a single smaller drive was smooth and easy, all done in one step from within a Windows environment and no re-booting required. Very Nice!
Secure Wiping and Final Thoughts
Secure Wiping
The Solid State Doctor's "Secure Erase" feature is called "Secure Wipe Tool". The Secure Wipe Tool will allow the user to securely delete the entire contents of the drive. This feature will place the drive in its original unformatted RAW state without any file system. The data on your drive cannot be recovered after running a secure wipe. As a safety feature, the Secure Wipe Tool will NOT allow the user to erase the contents of their boot drive.
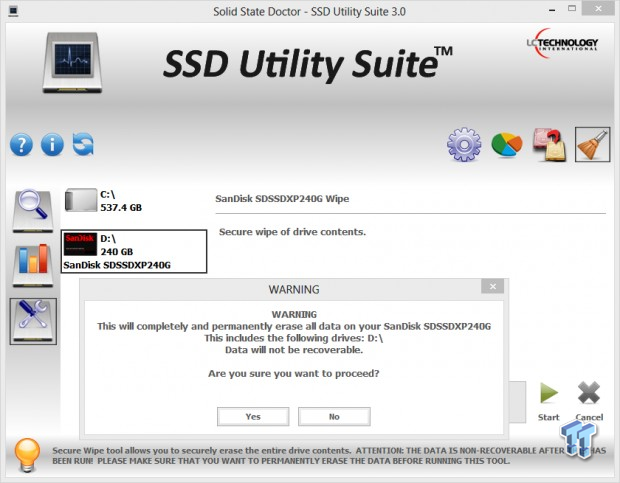
To test the secure wipe feature of the Solid State Doctor, we plugged our OS RAID volume back in and attached the SanDisk Extreme II we just cloned to, as a secondary drive, and launched the secure wipe tool. A warning message pops up and you confirm that you want to secure wipe the drive by selecting "Yes".
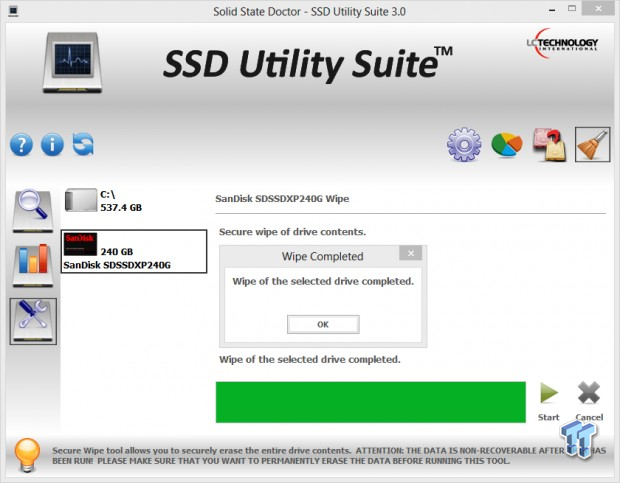
Secure wipe completes in a couple of seconds without the need to hot plug the drive or re-boot your system.
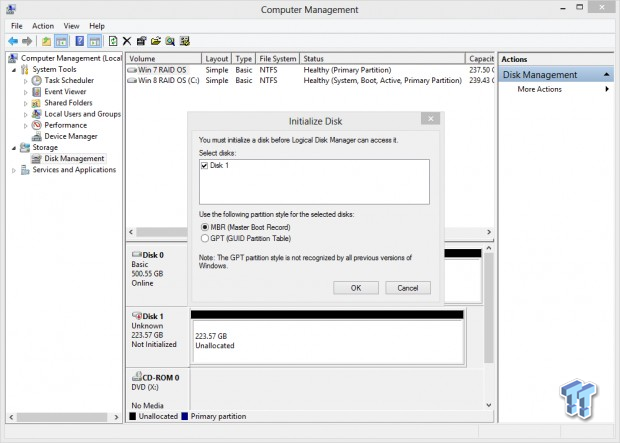
We took a quick look at Windows Disk Manager and secure wipe did in-fact return the drive to a RAW state. We know this because we had to initialize the drive before we could access it, which means the drive is in a RAW state, just like when its secure erased using hdparm or in a factory new state. Knowing that this could have not been an actual "Secure Erase" in a conventional sense, I got on the phone with David Zimmerman, president of LC Technology and asked him about LC Tech's "Secure Wipe" process.
David informed me that a secure wipe is not accomplished in the same way as a secure erase. A secure erase requires a reboot and or a hot plug to accomplish because the BIOS locks the drive. A secure erase command involves sending a charge of sufficient voltage to the NAND to instantly reset it to a new or RAW state (all 0's). LC Technology's proprietary "Secure Wipe" tool utilizes, you guessed it... proprietary technology to accomplish the same end result as a secure erase through different methodology that does not require a restart or hot plugging. All David would tell me is the drive is erased, TRIMMED, and returned to a RAW state all at once permanently erasing all partitions and data, restoring the drives performance to a new state.
Final Thoughts
Overall the Solid State Doctor SSD Utility Suite 3.0 performed very well. The key features of the software performed perfectly. I can overlook little flaws like the drives internal temperature not registering in the S.M.A.R.T. data and, the fact that you cannot TRIM RAID volumes with the Optimize Tool. The fact that this utility is universal in nature is a really big deal.
Tasks like drive cloning and secure erasing (wiping in this case) that were once a dark art are now as simple as a click of the mouse. Not having to restart or hot plug to securely erase data, clone partitions or regain like new performance are key feature that clients in the enterprise sector will especially appreciate.
I really like the Solid State Doctor SSD Utility Suite 3.0 and this will actually be the first time such a "Tool Box" will remain on my OS partition because it manages to do everything I want from an SSD Utility, nothing I don't want (like running in the system tray on startup) but, most of all I can use it with every single SSD that I own.

