The Bottom Line
Introduction, Specifications, and Pricing
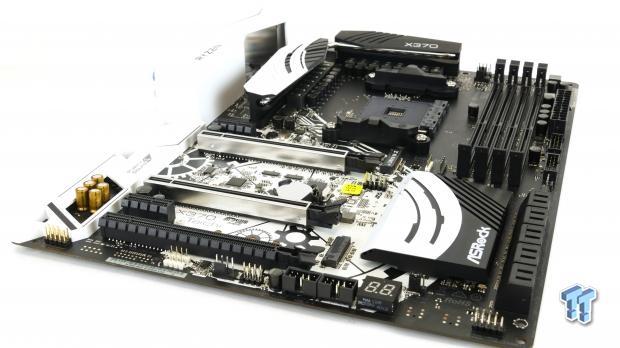
AMD's Ryzen launch must have been one of the most exciting of the past half-decade, as it brought AMD back into the high-end computer hardware market. Ryzen's strength is its workstation capabilities, where it does better than Intel in regards to multithreaded performance at a more reasonable price. To match Ryzen's exciting capabilities, motherboard vendors from across the globe have prepared and launched their first generation of high-end motherboards. One of ASRock's offerings is the X370 Taichi.
ASRock's X370 Taichi is their third Taichi branded motherboard to hit the market. The Taichi is one of ASRock's top-end motherboards, so it's loaded with the latest features. The ying-yang symbol provides a pleasant aesthetic to match your (Ry)zen processor. Excuse the wordplay, but the coincidence is a neat thing, and could provide for a great build theme.
The Taichi offers an interesting amount of features, above and beyond what the AMD CPU and chipset provides, and I will cover it all in depth.
Specifications

The X370 Taichi features an Intel NIC, Wireless AC, 10 SATA6Gb/s ports, an Ultra M.2 slot and a normal M.2 slot, USB 3.1 type-A and type-C, as well as SLI/CrossFireX support.
Pricing
The X370 Taichi costs $199.99.
Packaging and X370 Taichi Overview
Packaging and Overview
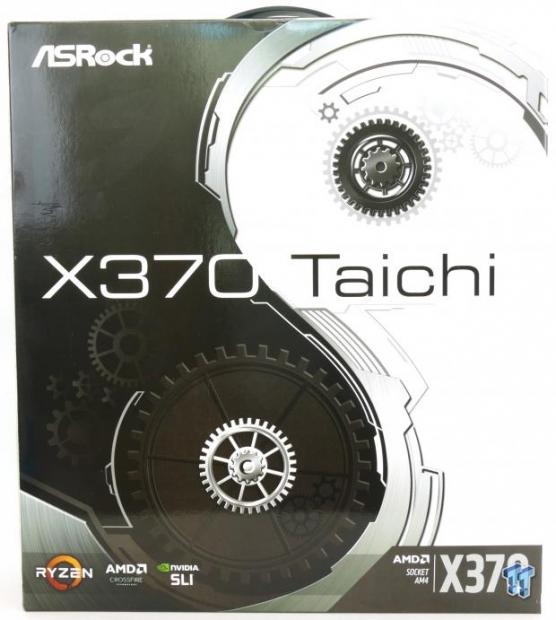
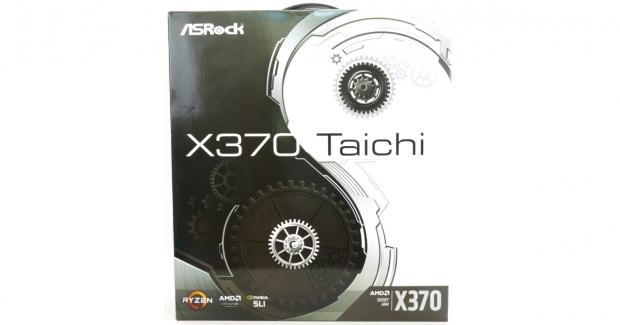
ASRock's box design is similar to that of the other Taichi motherboards I have reviewed. Packaging is quite good and should protect the motherboard during transport.
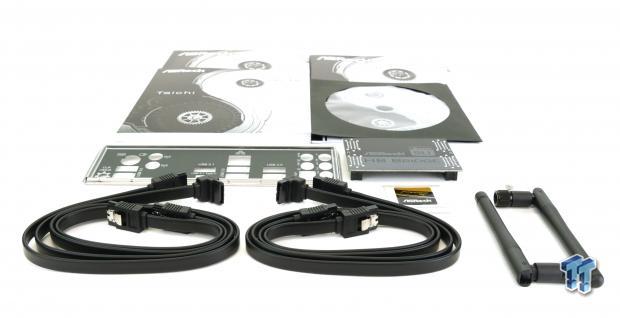
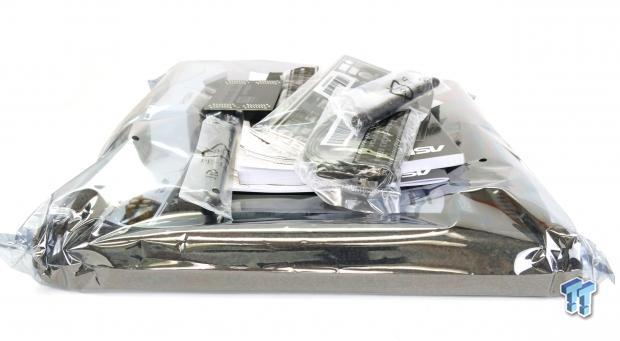
The accessory package includes four SATA 6Gb/s cables, IO shield, two WIFI antennas, SLI_HB bridge, case badge, driver DVD, and manuals.
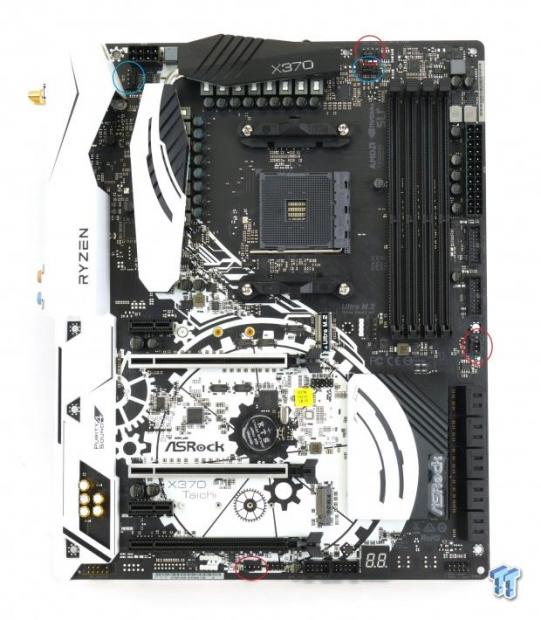
ASRock offers five fan headers on this motherboard. All the headers are rated 1A except the two circled in blue, which are rated 1.5A. The headers circled in red can auto-detect if a PWM or DC mode fan is connected, and will automatically change their control mode.
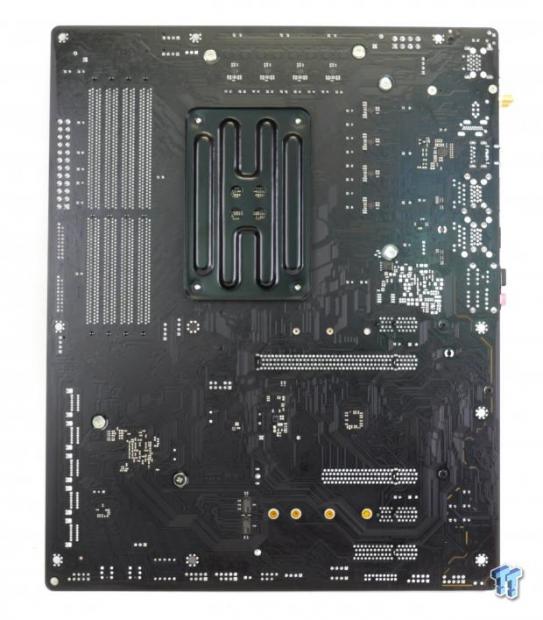
The motherboard's aesthetics are white and black, and the PCB's silkscreen plays a big role in bringing everything together. ASRock worked hard to make it so that the heat sinks and silkscreen match up, and it produces a neat effect that will be blocked by the installation of a GPU and CPU cooler. The back of the motherboard has very little components, which is a good thing.
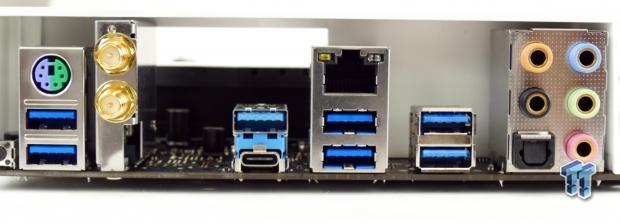
The rear IO panel features PS/2 Keyboard/Mouse, WIFI antenna, USB 3.1 type-A, USB 3.1 type-C, Clear CMOS button, four USB 3.0 ports, Gbit LAN, and 7.1 gold plated audio outputs with S/PDIF.
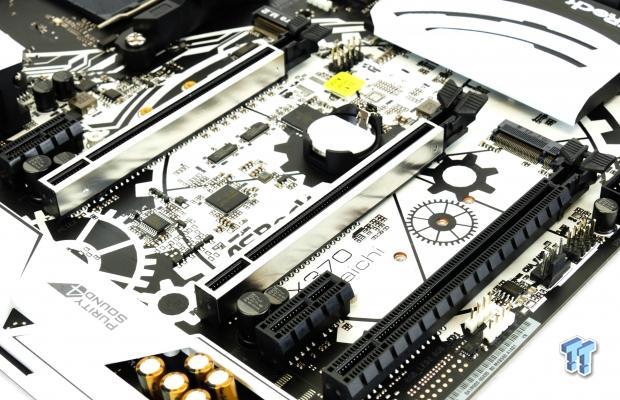
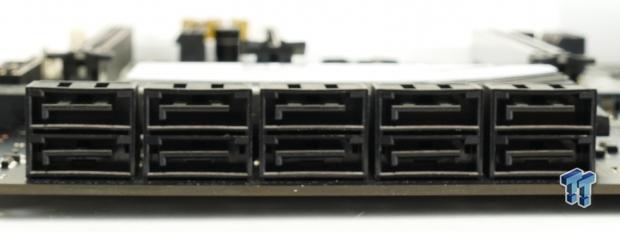
The PCI-E layout is quite simple; the first two x16 PCI-E 3.0 slots operate at x16/x0 or x8/x8. The last slot operates at x4 PCI-E 2.0; it shares x4 PCI-E 2.0 with the nearest M.2 slot. There are 10 SATA 6Gb/s ports.
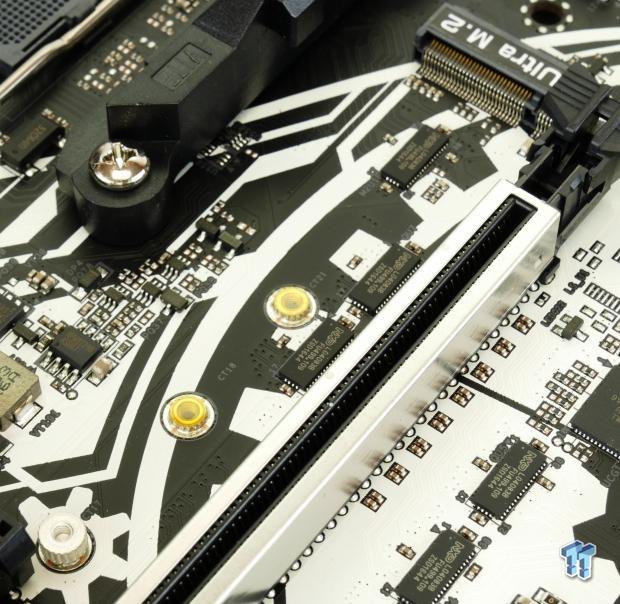
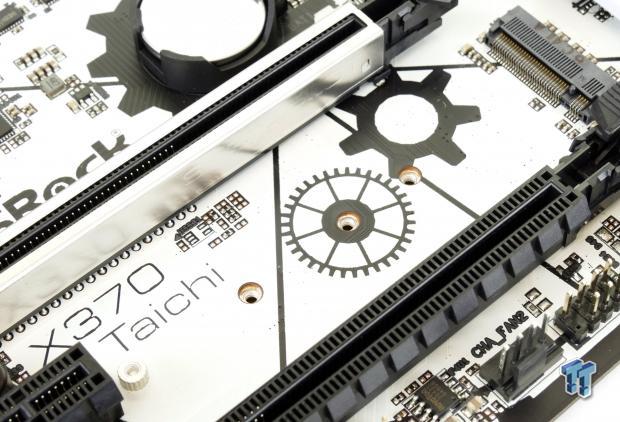
The topmost M.2 slot is wired x4 PCI-E 3.0 (32Gb/s), the bottom M.2 slot is wired x4 PCI-E 2.0 (20Gb/s). The bottom M.2 slot shares bandwidth with the last PCI-E x16 slot (electrically x4).
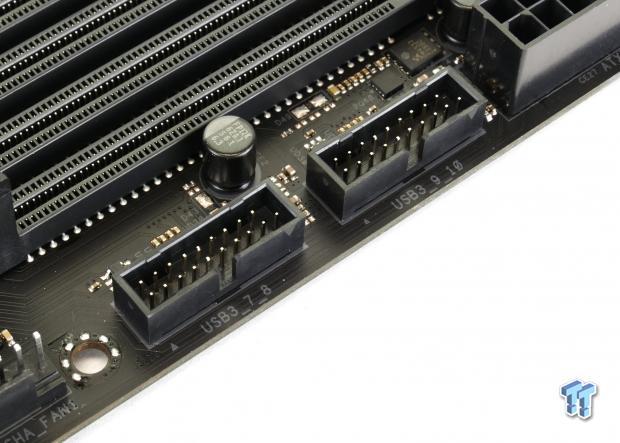
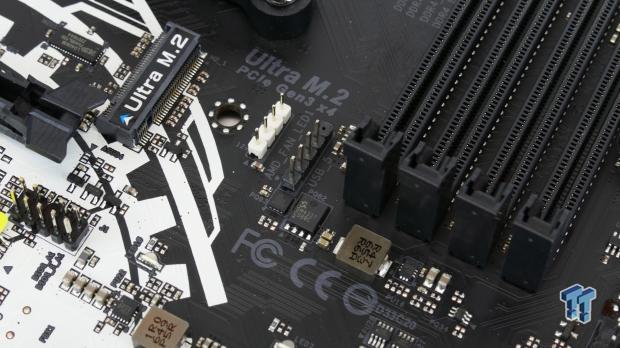
There are two USB 3.0 internal headers located right below the 24-pin power connector. ASRock strategically positioned one of its RGB headers near the CPU socket so that AMD's new cooler's RGB cable could easily reach. They also positioned a USB 2.0 single port header close by so that AIO's with USB connections could reach.
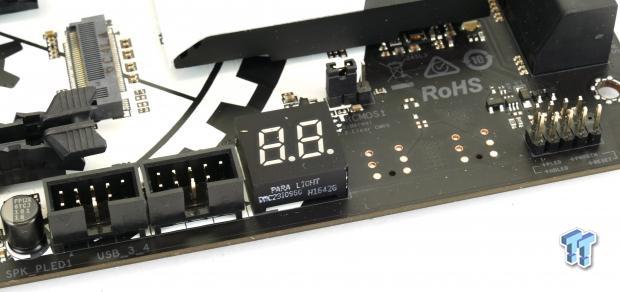
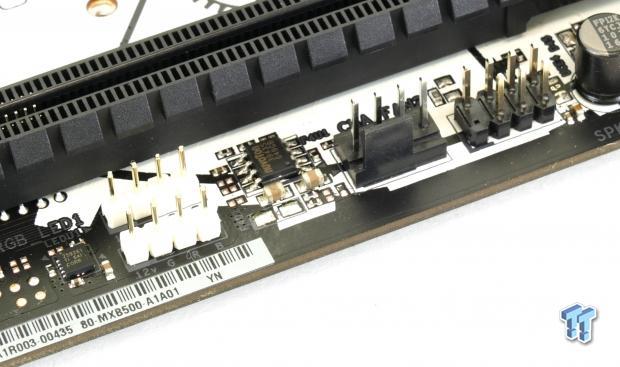
The motherboard comes with a POST code display located to the right of two USB 2.0 internal headers. Two RGB LED headers reside at the bottom of the motherboard.
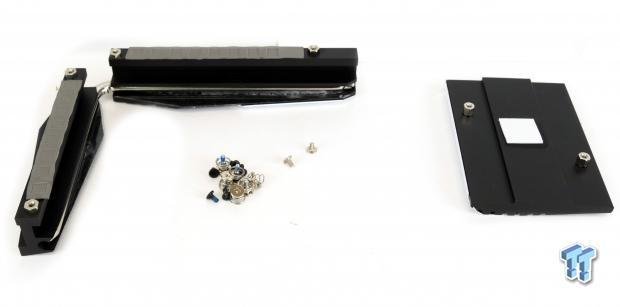
The heat sinks and shields are all screwed into the motherboard.
ASRock X370 Taichi Circuit Analysis
Circuit Analysis

The X370 Taichi's Taichi is lost when the heat sinks are removed because of how the heat sinks and silkscreen match up.
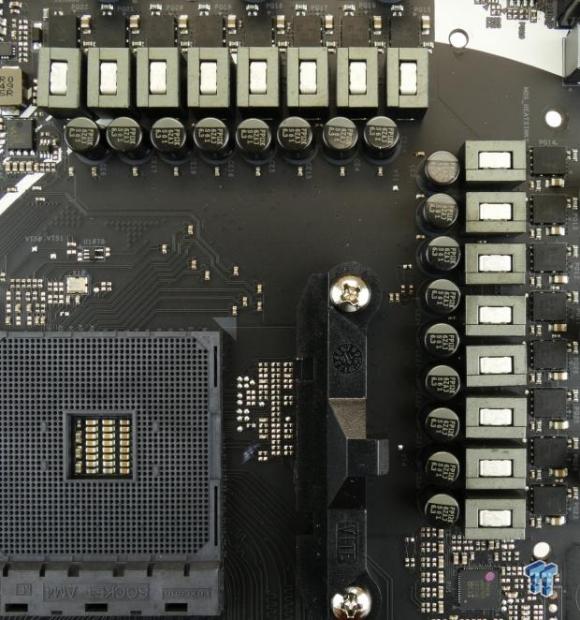
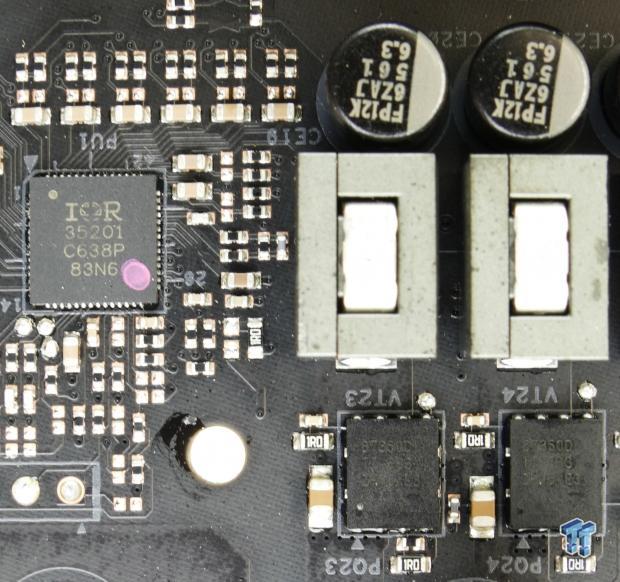
The VRM on the motherboard is very strong, after doubling we get 12+4 phases for the core voltage and SOC voltage. The International Rectifier (now Infineon) IR35201 fully digital PWM is being used in 6+2 phase mode instead of 7+1 or 8+0 phase mode. It is one of the best digital PWMs on the market.
Each of its PWM channels is sent to an IR3598, doubler and dual driver chip, which then outputs to two Texas Instruments CSD87350Q5D NexFETs. The NexFETs are rated 25A at 90% efficiency and 40A maximum. The inductors are high-quality 60A parts, and the capacitors are 12K FP Japanese capacitors.
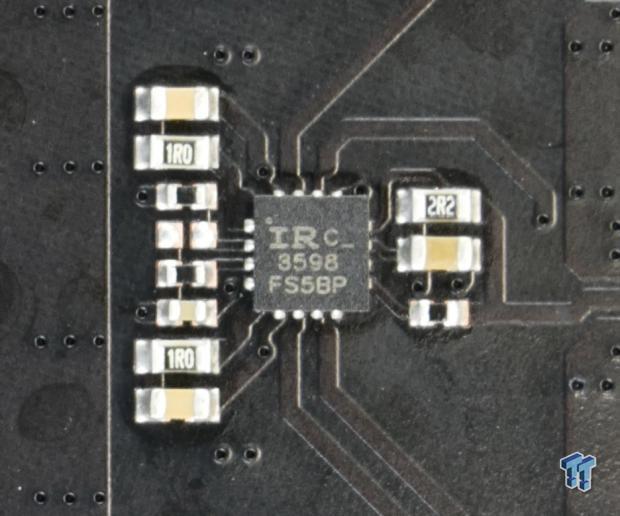
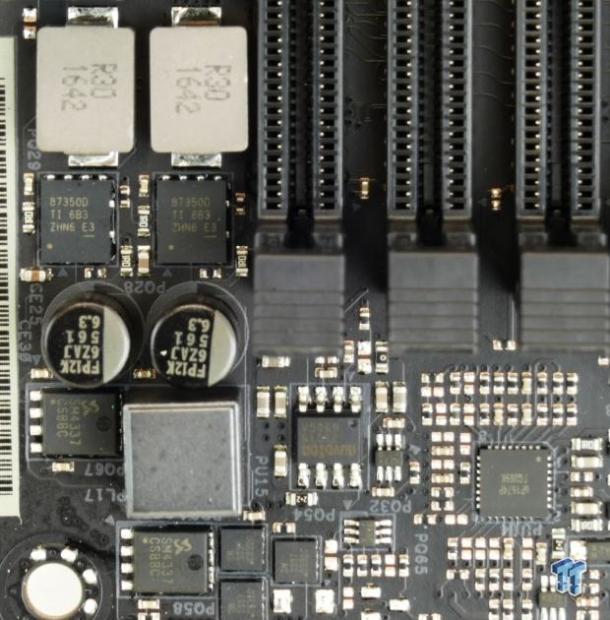
The IR3598 takes in a single PWM channel, doubles it to two, and then controls two phases through two integrated drivers. The memory VRM uses a UPI UP1674 two-phase PWM that controls two CSD87350Q5D NexFETs.
ASRock X370 Taichi Circuit Analysis Continued
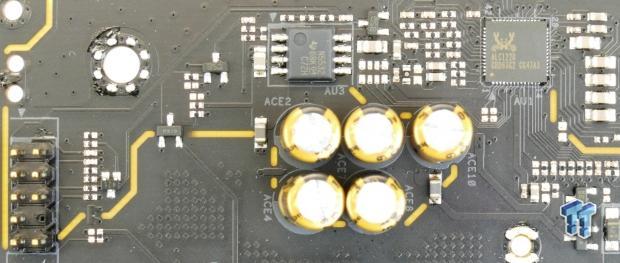
ASRock is using the ALC1220, which offers 120dB SNR with an integrated headphone amplifier, and a Texas Instruments NE5532 amplifier is used to amplify the front panel headphone jack. Nichicon Gold Series audio capacitors and PCB isolation help improve sound quality.
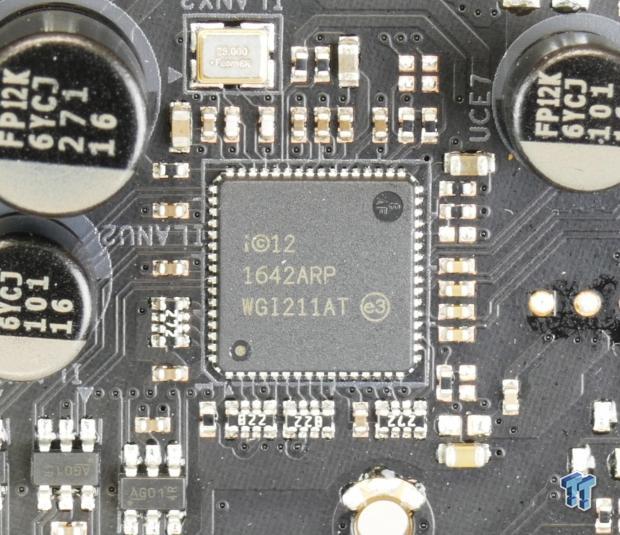
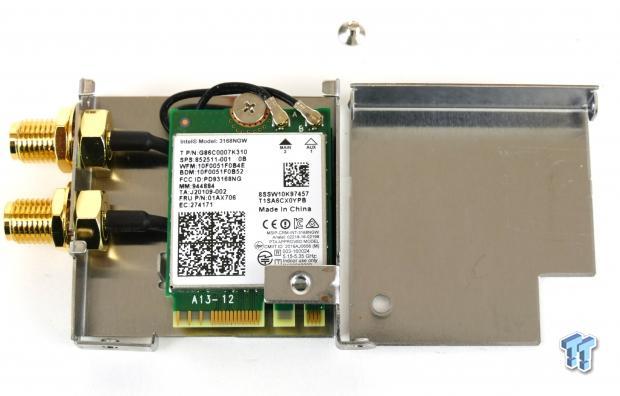
ASRock uses Intel's i211AT for the wired NIC, and Intel's Wireless-AC 3168NGW dual-band card is used for Wireless AC on the rear IO.
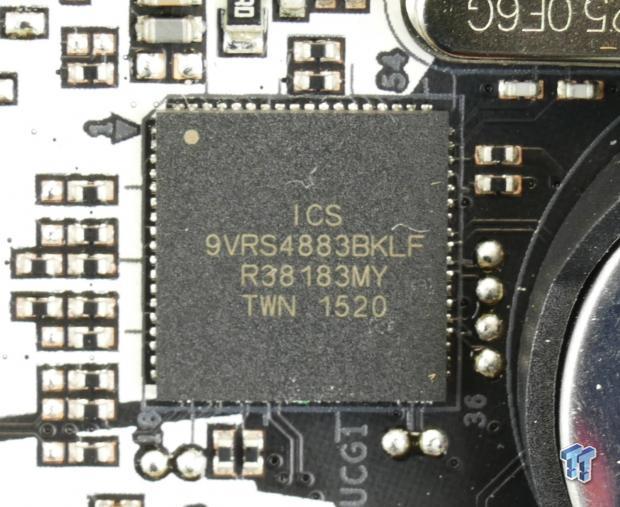
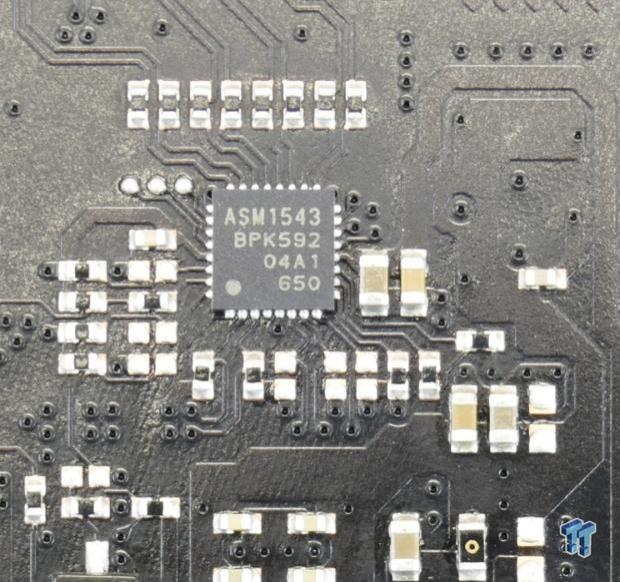
An ICS clock generator is used to help manipulate the bus speed of the system so that memory overclocks above 3200Mhz are possible. ASRock uses AMD's integrated USB 3.1 controller for the rear USB 3.1 ports, and the ASMedia ASM1543 is used as the type-C switch and control logic.
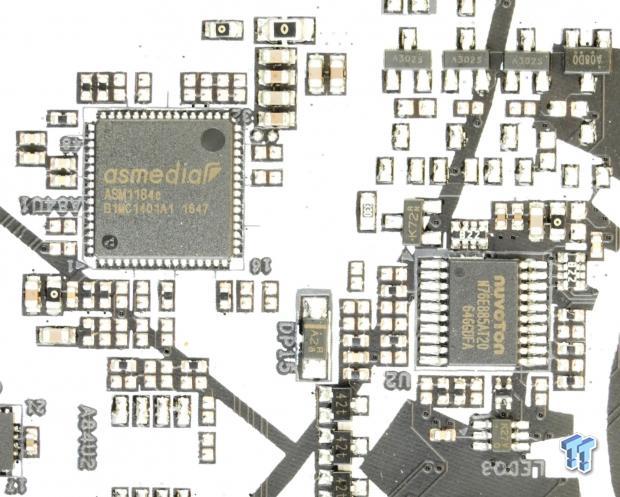
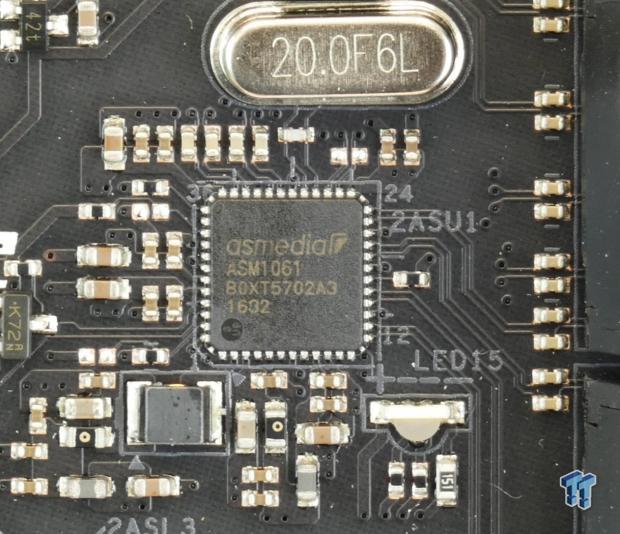
An ASMedia ASM1184e is used to expand PCI-E lanes from a single PCI-E lane from the chipset. The nuvoTon N76E885 is used to provide RGB control. An ASMedia ASM106 provides two SATA6Gb/s ports from a single PCI-E lane.
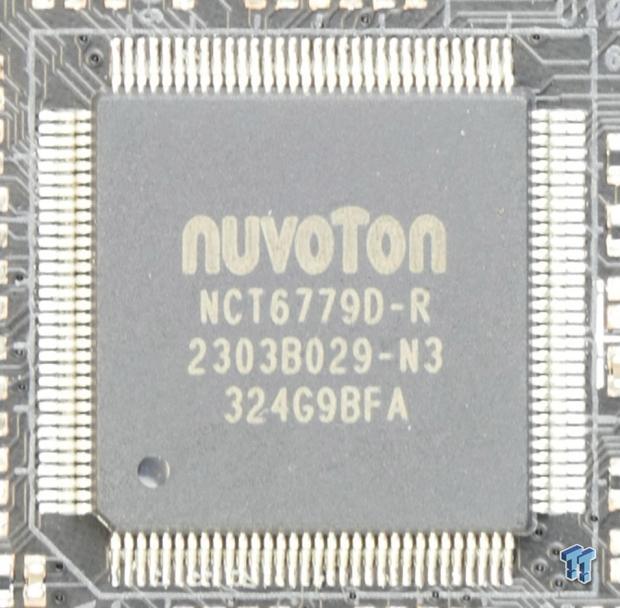
The SuperIO is the nuvoTon NCT6779D, and it controls the fans, provides monitoring, and provides the PS/2 port on the rear IO panel.
BIOS and Software
BIOS
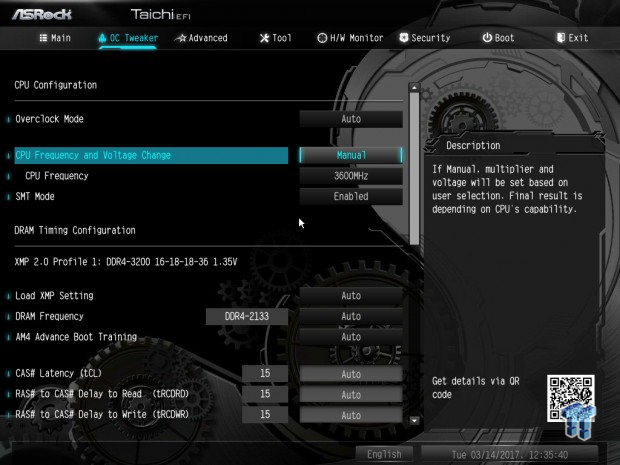
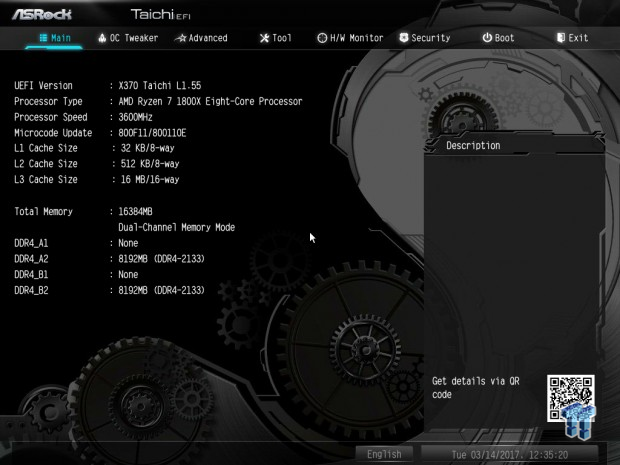
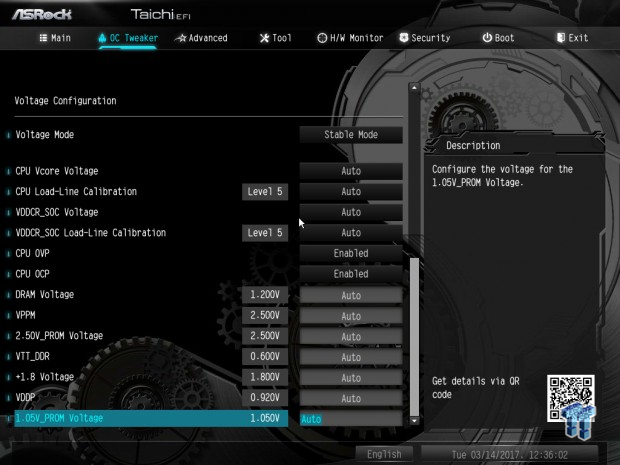
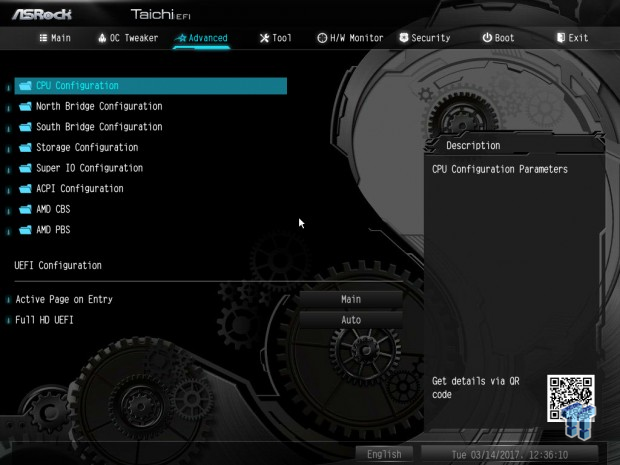
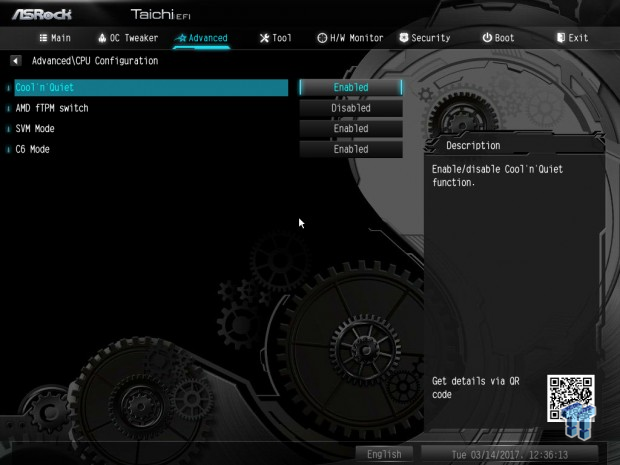
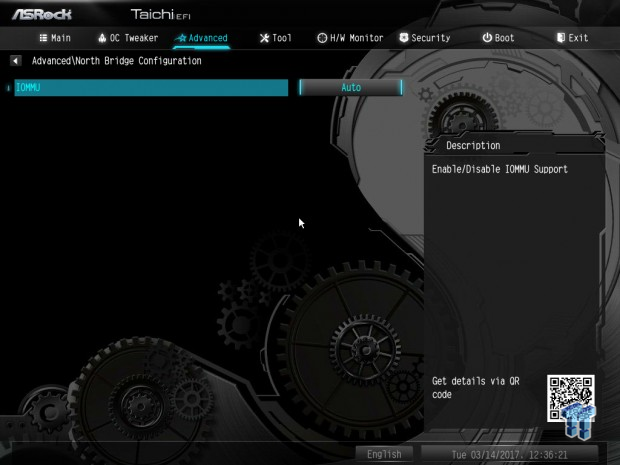
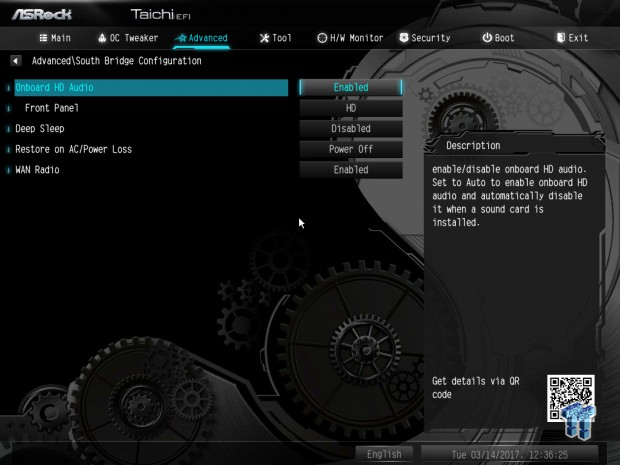
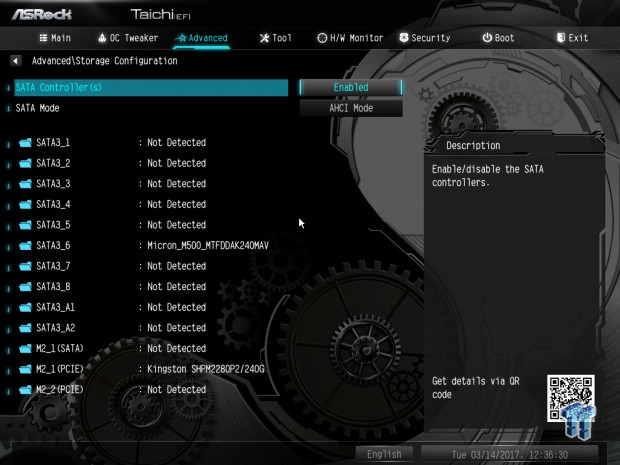
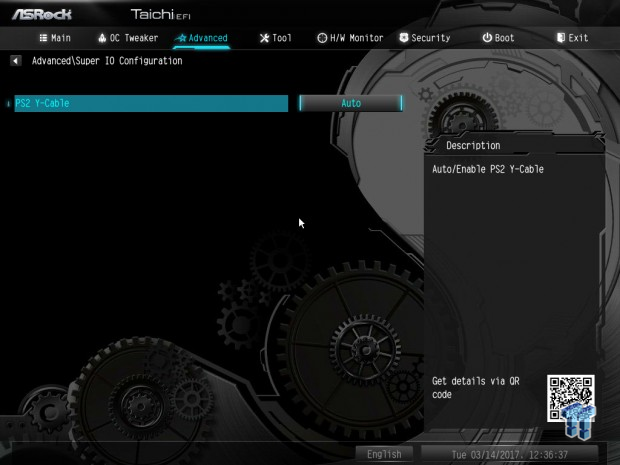
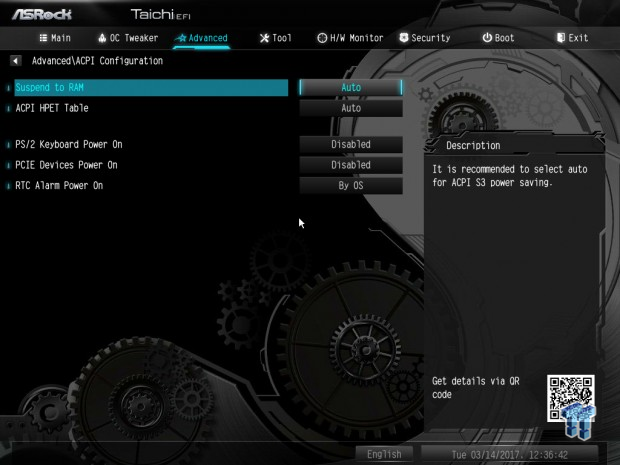
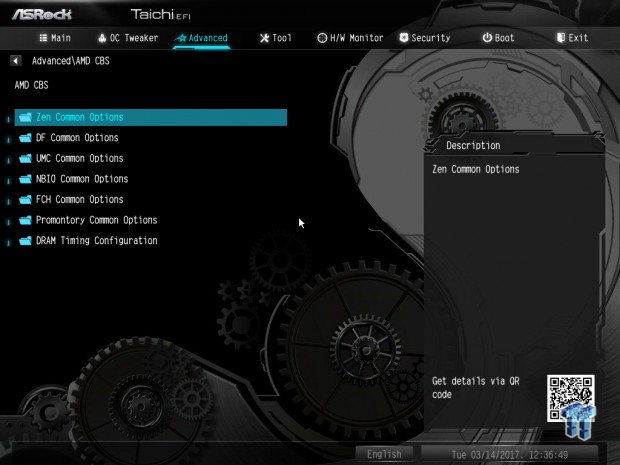
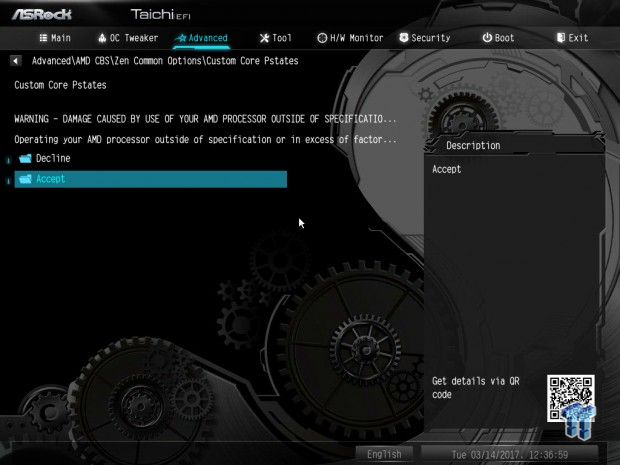
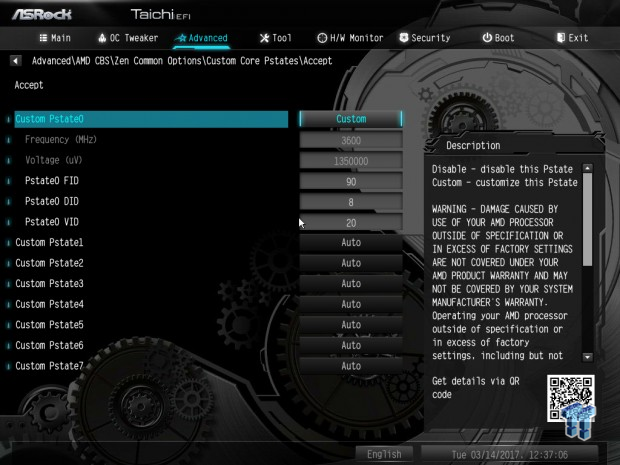
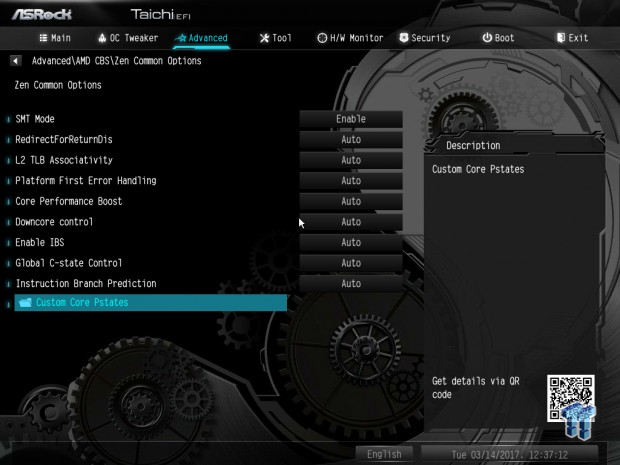
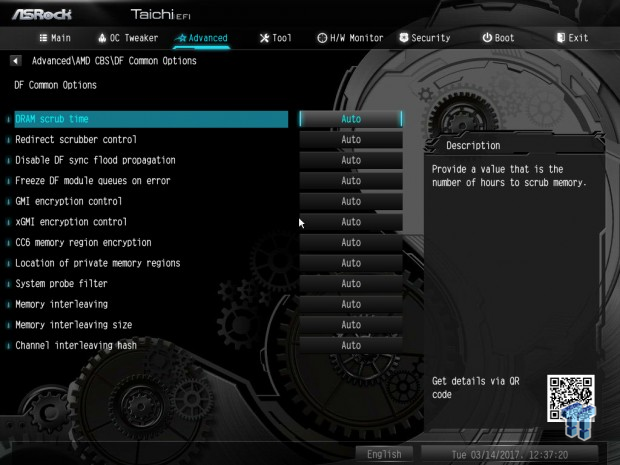
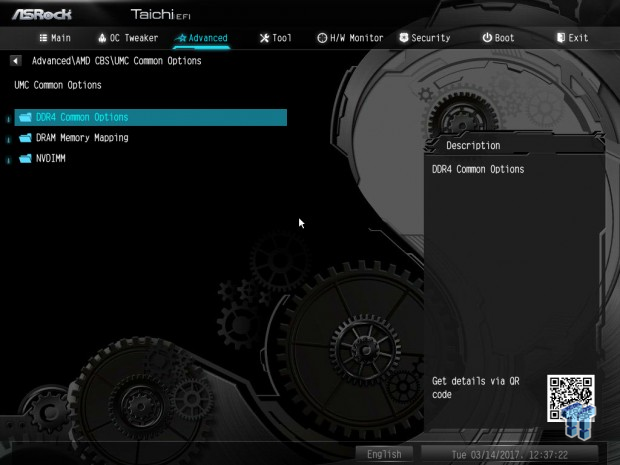
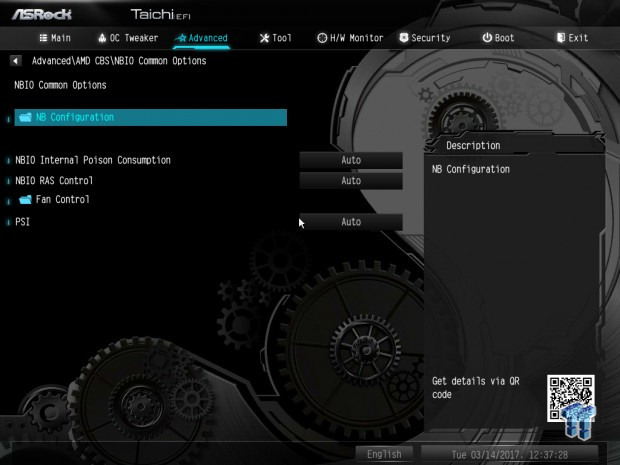
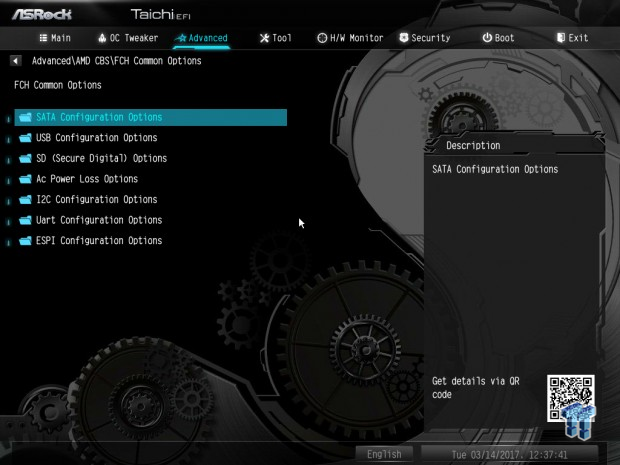
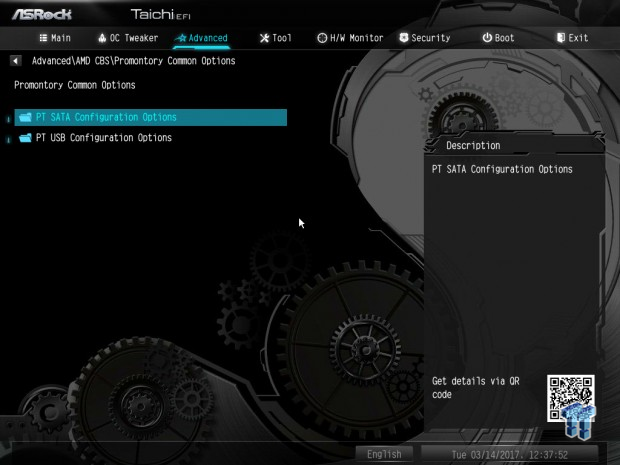
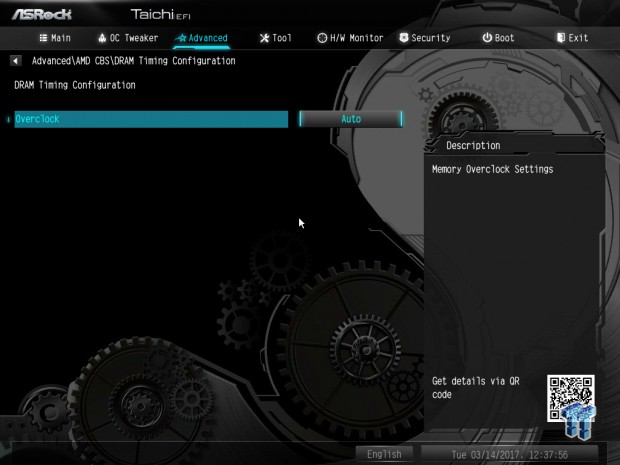
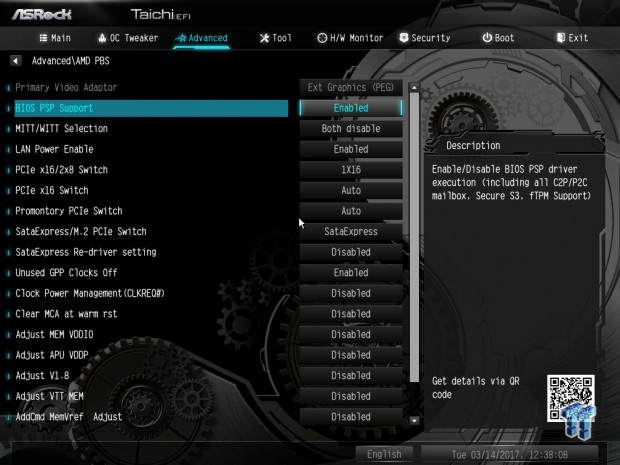
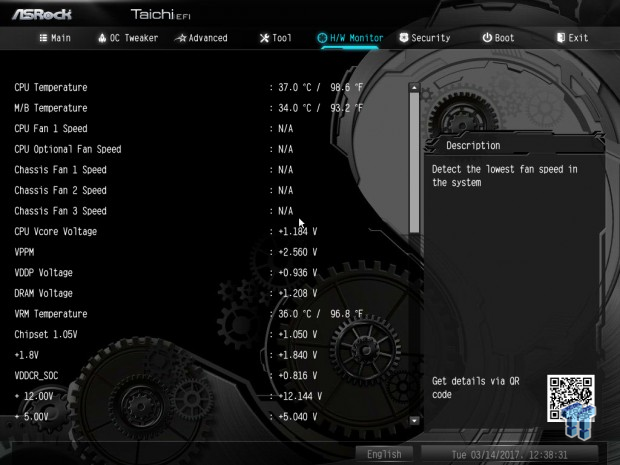
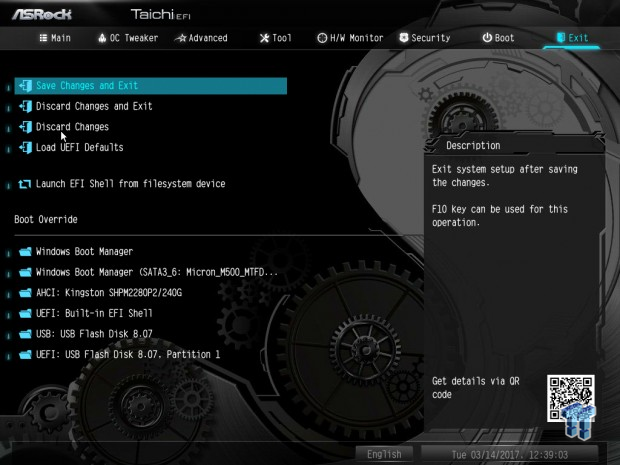
ASRock's UEFI features the same Taichi symbol as the motherboard. The UEFI is loaded with overclocking options, but since Zen doesn't require much, it's easy enough to setup your overclock. AMD's CBS options are available, and they offer per core P-state alteration, not all vendors have opted to include the CBS, since it's very complex and even setting a multiplier requires you to use FID, DID, and VID.
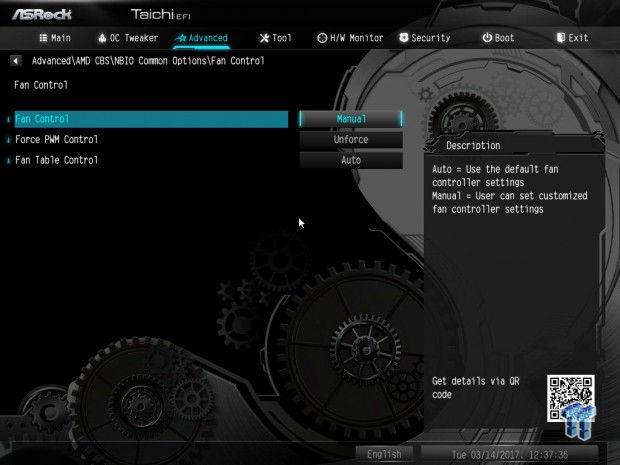
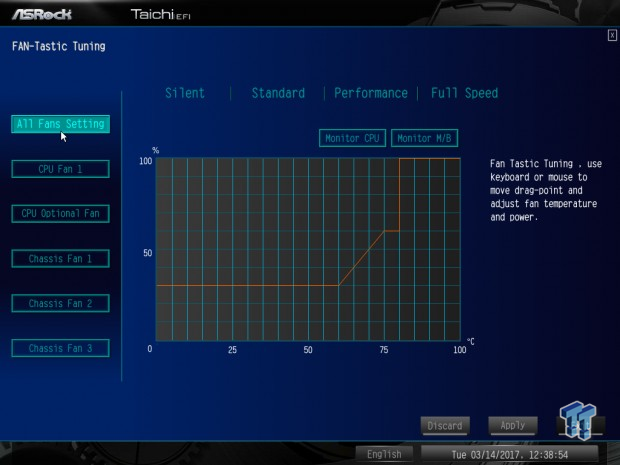
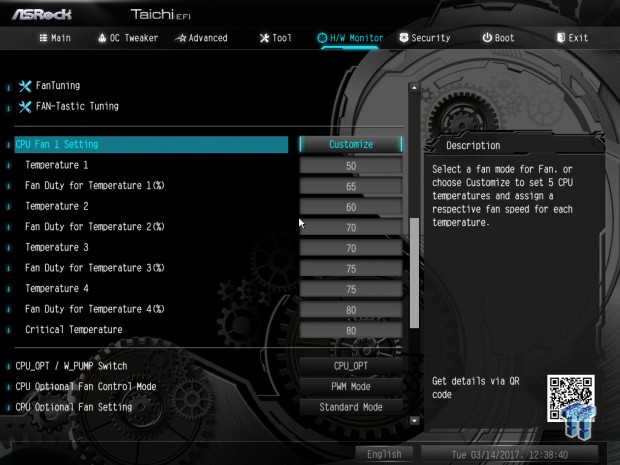
The motherboard's fan control through UEFI is quite extensive; you can alter fan speed through a GUI or through a menu where you manually input values.
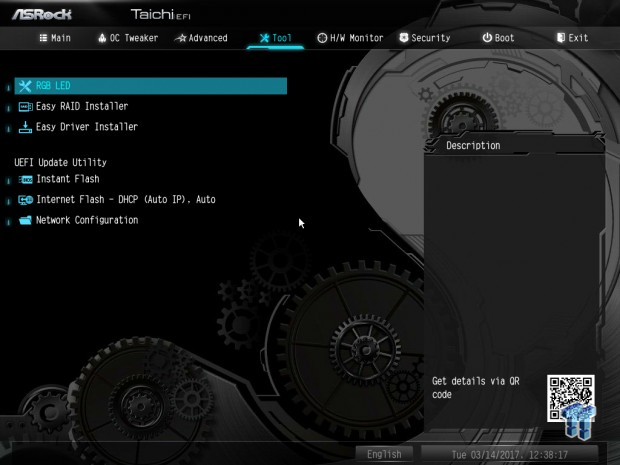
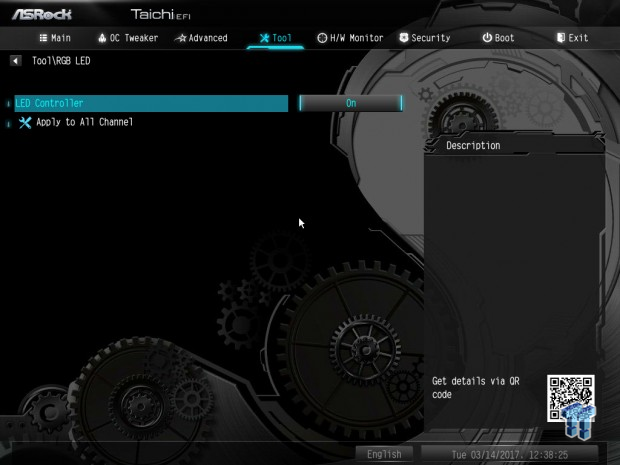
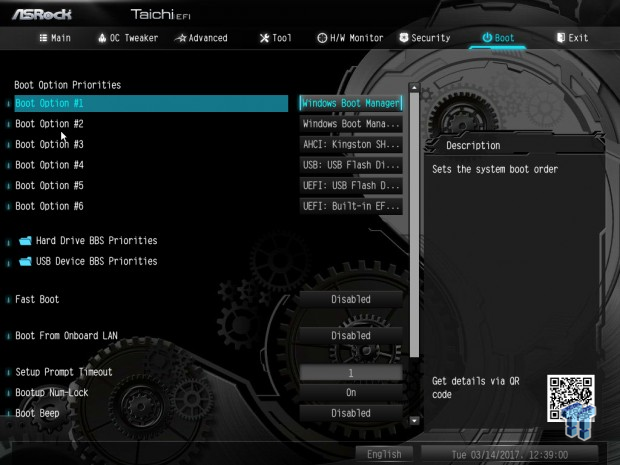
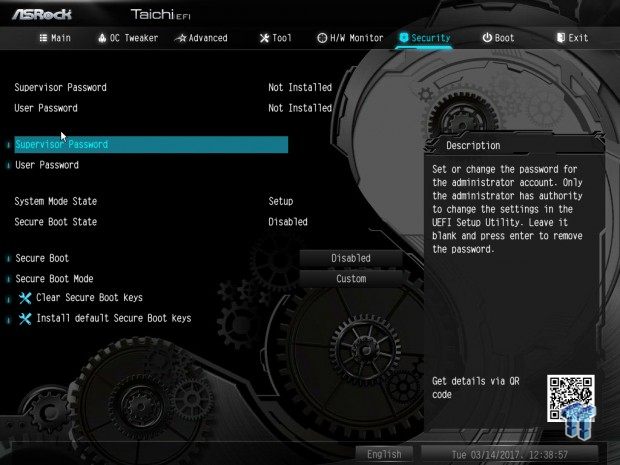
Software
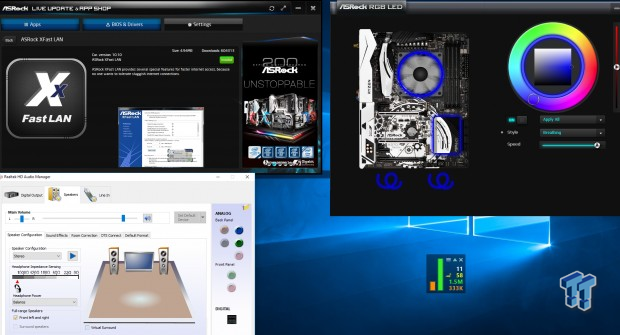
ASRock's software suite includes A-Tuning (overclocking and fan control), AURA RGB LED, APP Charger, X-Fast LAN, and APP Shop.
Test System Setup
Steven's Motherboard Test System Specifications
- Motherboard: ASRock X370 Taichi
- CPU: AMD Ryzen 7 1800X
- Cooler: Corsair H110i - Buy from Amazon
- Memory: Corsair Vengeance (2x8GB) 3000MHz
- Video Card: NVIDIA GeForce GTX 980 - Buy from Amazon / Read our review
- Storage - Boot Drive: Kingston Predator 240GB
- Storage - SATA6G Drive: Micron Generic 240GB
- Storage - USB Drive: Corsair Voyager GS 64GB - Buy from Amazon / Read our review
- Case: Corsair Obsidian 900D - Buy from Amazon / Read our review
- Power Supply: Corsair HX1000 - Buy from Amazon / Read our review
- OS: Microsoft Windows 10 - Buy from Amazon
- Monitor: ASUS PA328 ProArt 32" 4K - Buy from Amazon
- Keyboard: Corsair K70 LUX - Buy from Amazon
- Mouse: Corsair M65 PRO RGB - Buy from Amazon / Read our review
- Headset: Corsair VOID RGB Wireless - Buy from Amazon / Read our review
- BIOS: L1.55
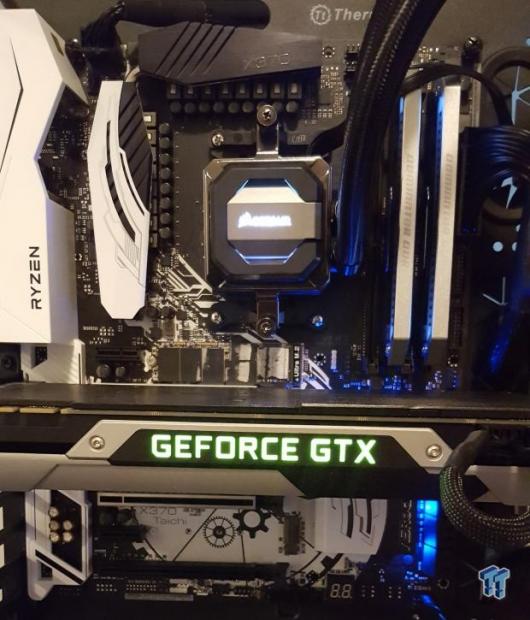
The X370 Taichi's white and black design is a simple and sleek design.
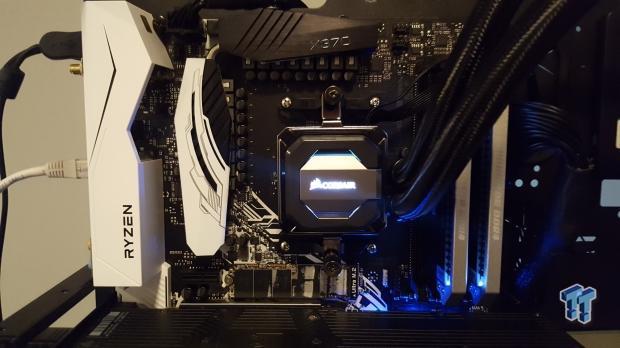
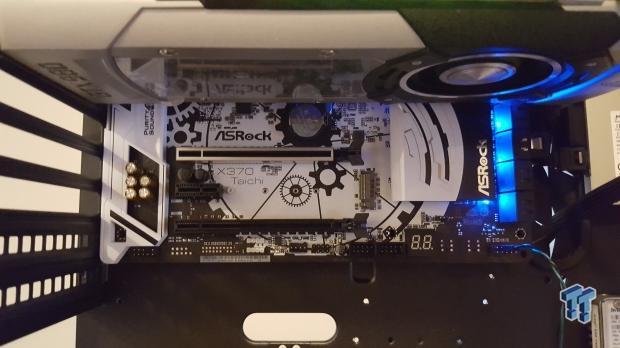
The only built in RGB LEDs are under the PCH area; they are diffused since they shine onto the underside of the PCH heat sink.
Overclocking
Overclocking Results
CPU Overclocking
AMD's Ryzen platform is quite new; AMD and its partners are working very hard on fixing issues and getting things to work across the board. The CPU also doesn't validate that much higher than its maximum stable frequency.
Memory overclocking is topped at 3200MHz on most motherboards, and bus adjustment is also very tricky. Don't get me wrong, the CPU can overclock, mine does 4.0GHz, and the best I can get a kit is to 3000MHz. I will go through and tell you exactly what I did to achieve my maximum stable overclock, and as AMD's ecosystem of compatible memory kits becomes larger, I will add in a memory compatibility section.
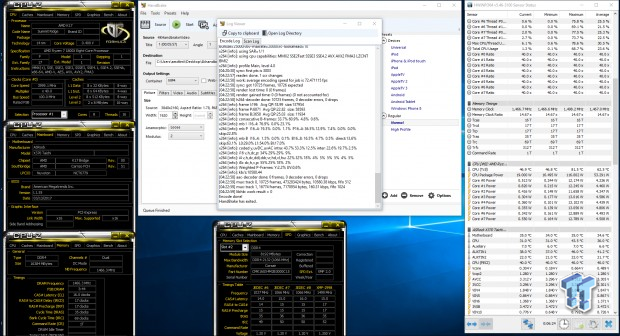
AMD overclocking is quite simple, especially because bus speed adjustment is quite difficult, so we only really have the multipliers to change for the CPU core and memory. I set the memory manually to 29.33x, DRAM voltage to 1.35v, and the SOC voltage to 1.15.
For the CPU I set 40x, and I let the motherboard automatically set the VCore and LLC level. ASRock and AMD's auto rules work very well, I have found that on almost all motherboards I have no problem with leaving the voltage on auto.
CPU, Memory, and System Benchmarks
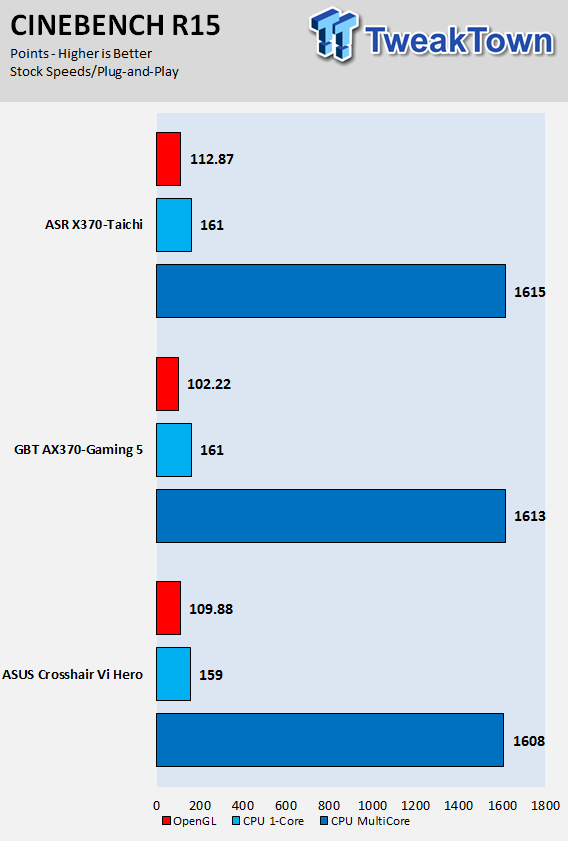
CINEBENCH R15
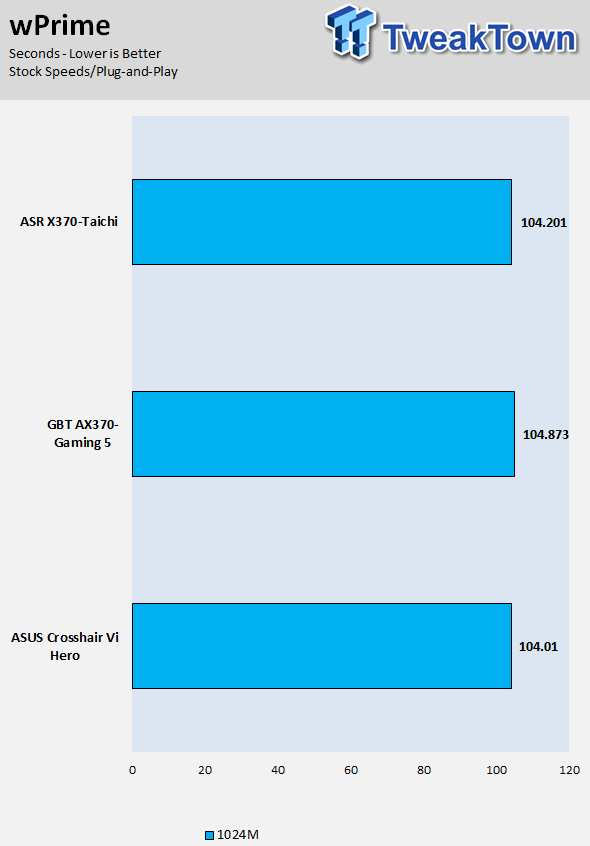
wPrime
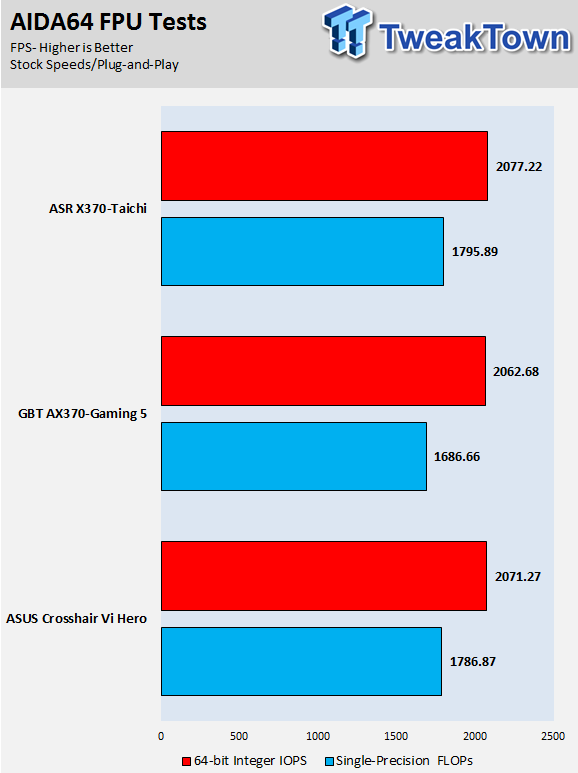
AIDA64 FPU
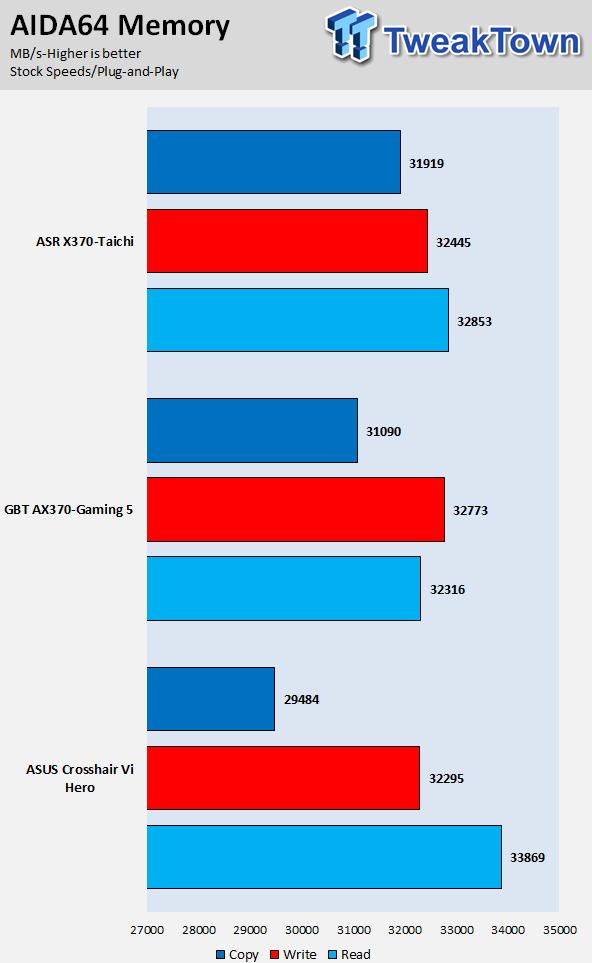
AIDA64 Memory
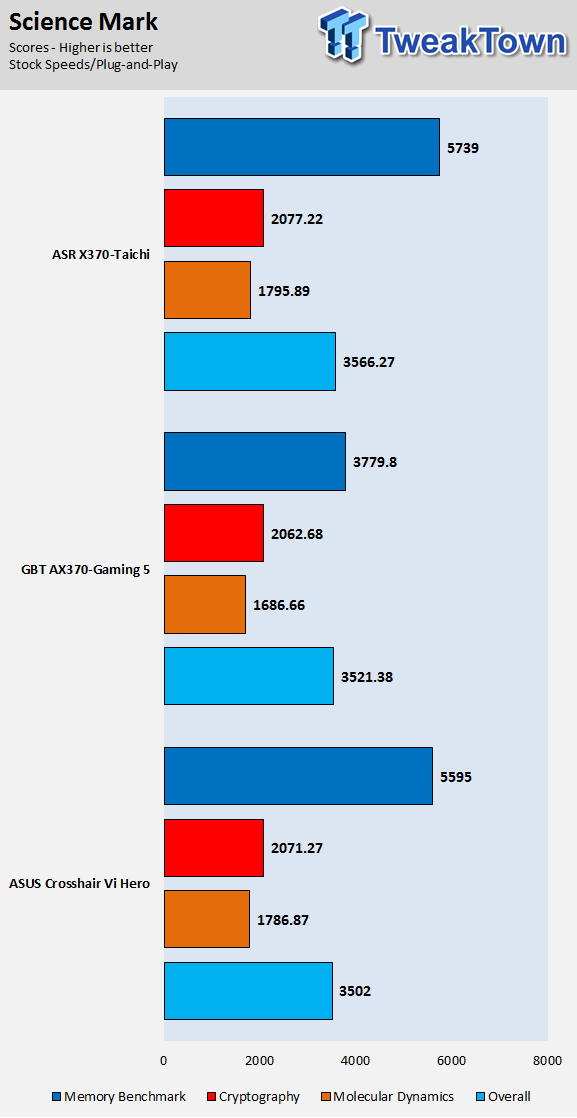
ScienceMark
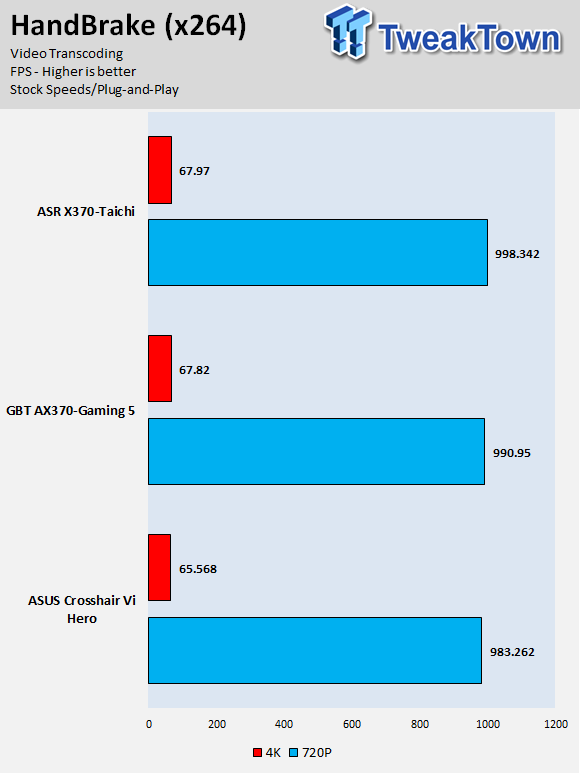
HandBrake
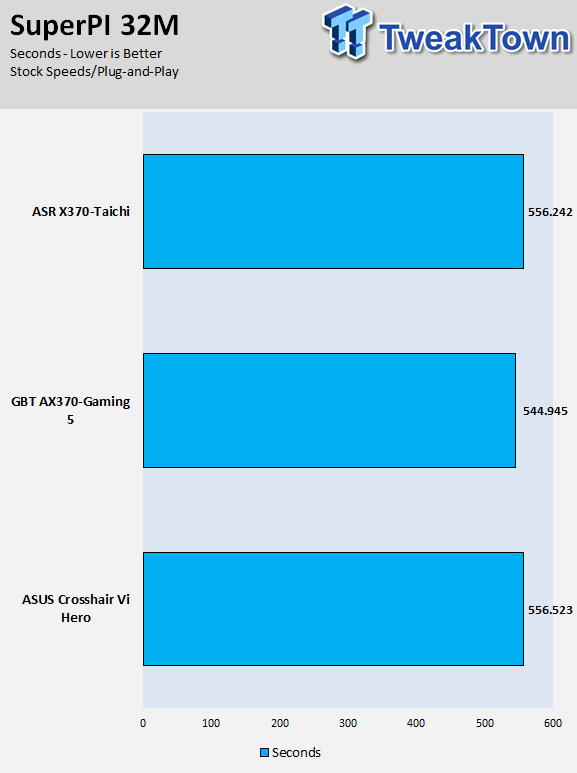
SuperPi 32M
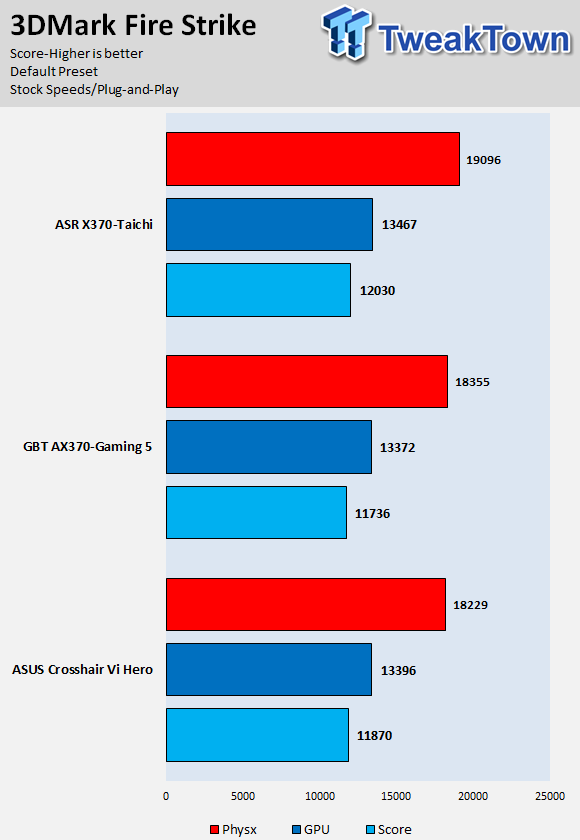
3DMark: Fire Strike
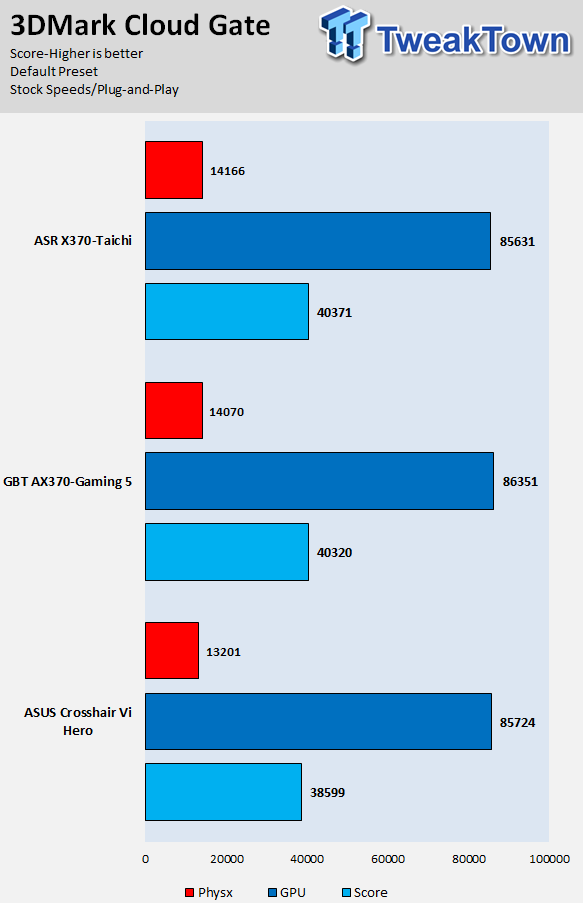
3DMark: Cloud Gate
ResidentEvil 6
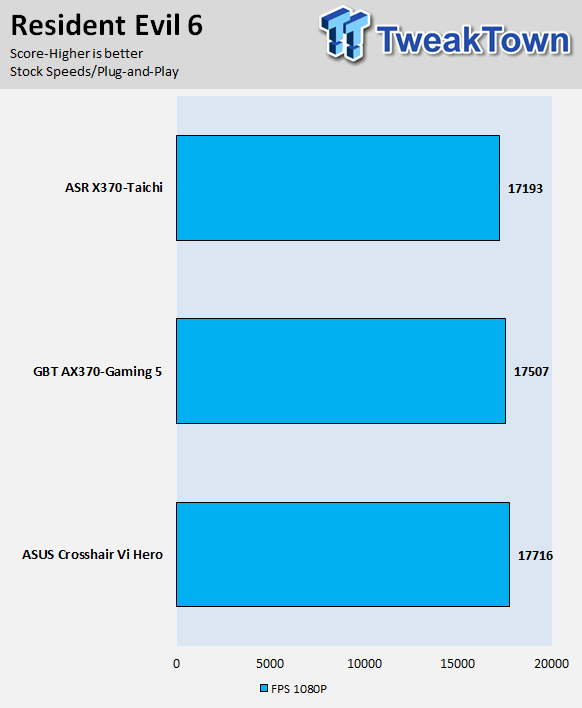
The X370 Taichi's performance is very strong, the BIOS version we use dictates a lot when it comes to overall system performance. AMD is continuously making tweaks, and it shows in the results.
Overall, the X370 Taichi offers excellent performance, albeit the motherboard's gains are most likely going to vary with each new BIOS release compared to its competitors.
System IO Benchmarks
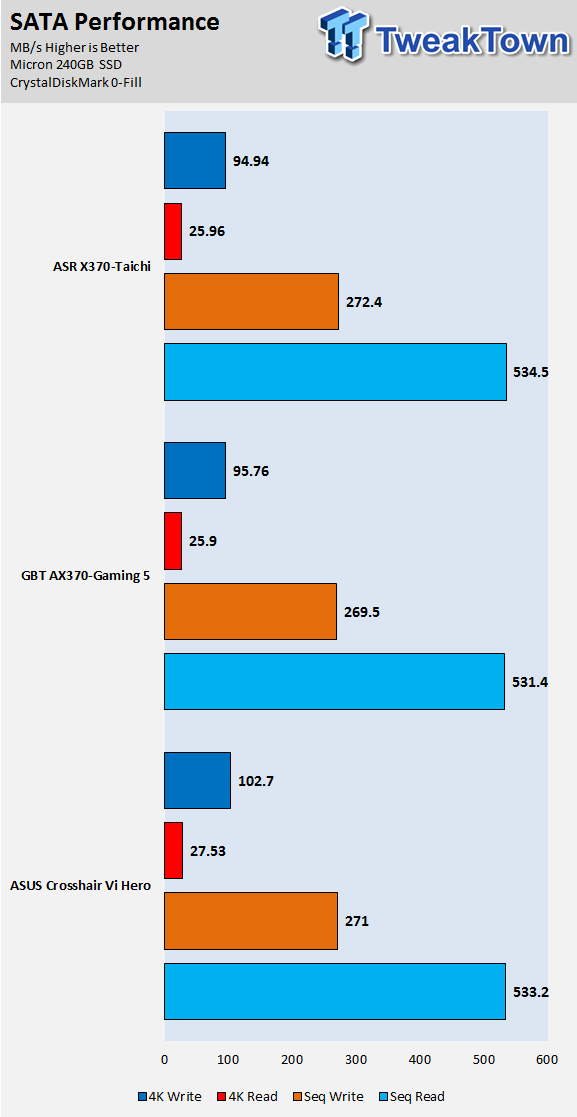
CrystalDiskMark SATA6G:
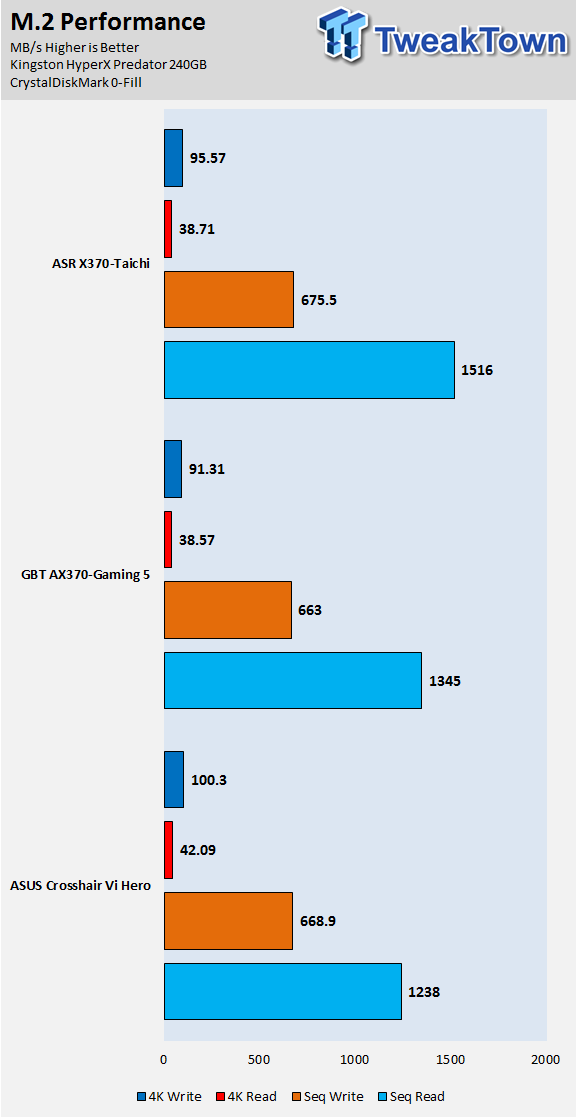
CrystalDiskMark M.2:
ixChariot Network Throughput:
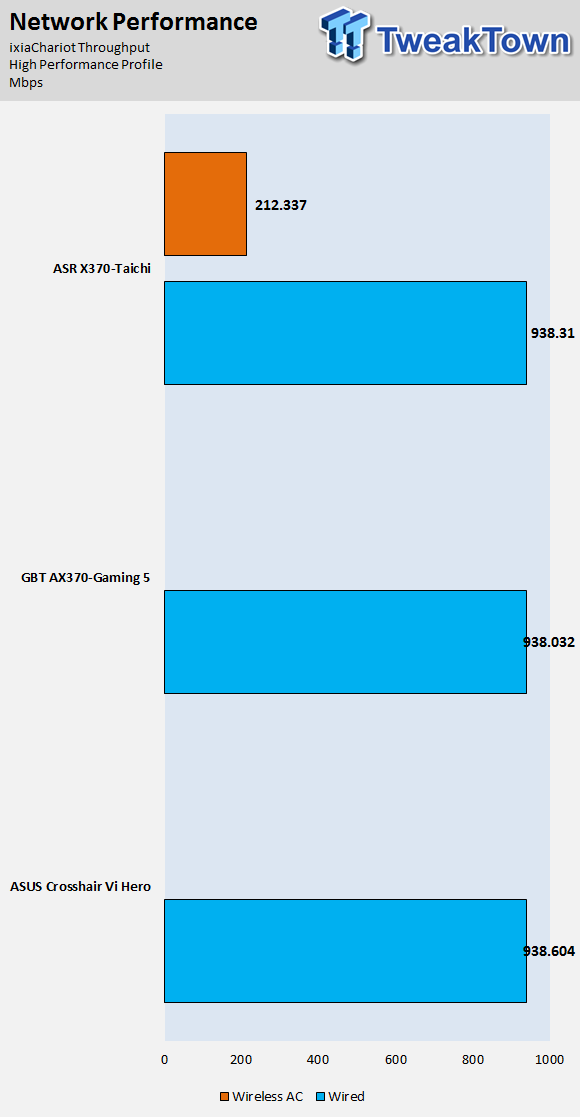
The X370 Taichi's storage performance is very strong, especially sequential read on the M.2 drive. Network performance is good as well.
Audio RMAA 5.5:
I disable all audio features, set the correct bitrates, and then test the audio with a loopback test.
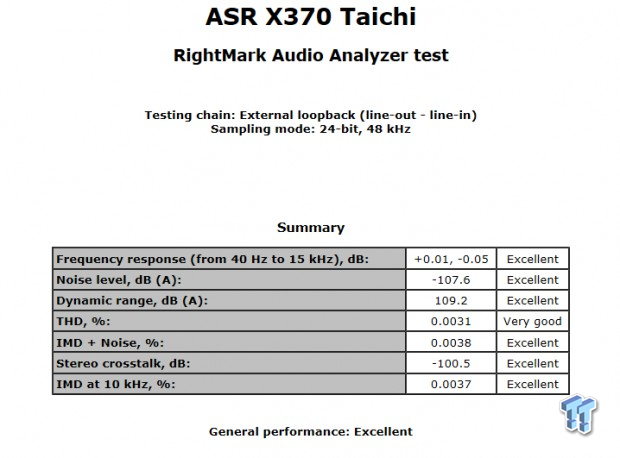
Sound Judgment by Ear: Excellent. ASRock's ALC1220 is excellent. There are five ratings for audio: 1. Problems, 2. Okay, 3. Acceptable, 4. Very good, 5. Excellent
Thermal Imaging and Power Consumption
System power is measured at the wall with an AC power meter.
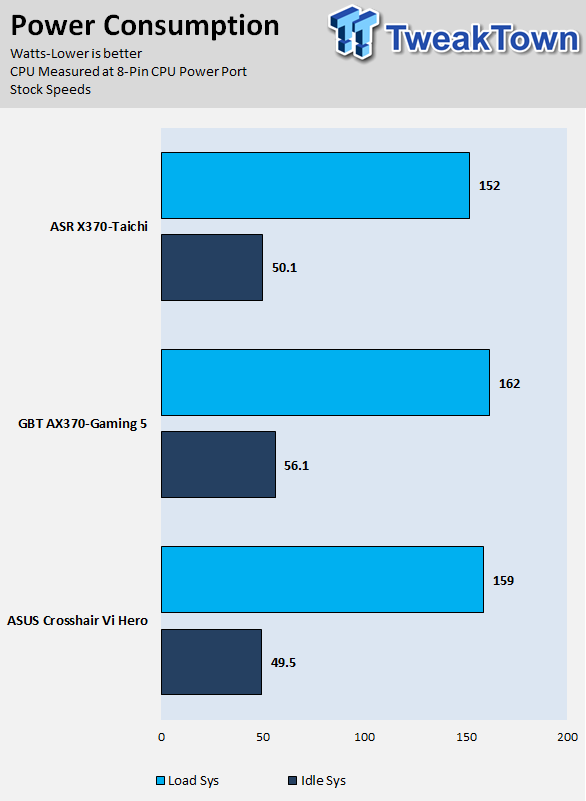
Note on Thermal Images: In the temperature section, we use our Seek thermal imaging camera to capture the surface temperatures of major components on the board. I look at the VRM and then all other things that light up the screen. If there is something to worry about, then I will state it. Otherwise, I will just show the hotter running parts of the board for fun. Unless some component is over 80-90C, then there isn't anything to worry about.
All systems will act differently, so I will look for commonalities, such as how far from the VRM the heat spreads through the PCB and the difference in temperature between the front side and backside of the PCB. Keep in mind, the majority of the heat from the VRM goes into the PCB as it is a giant soldered on copper heat sink. A larger difference in temperature between the back and front of the PCB points towards a more effective heat sink.
Thermal Testing at Stock Speeds:
The image on the left is always at idle, and the image on the right is at load. During ALL TESTS, fans above the VRM that cool the CPU cooler's (Corsair H110i) radiator are turned on to high (12v).
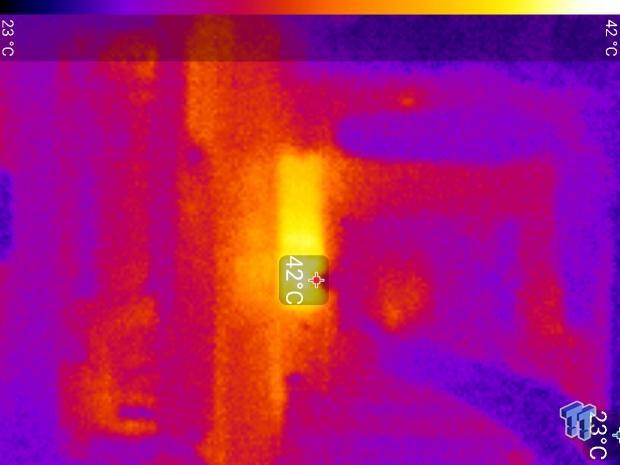
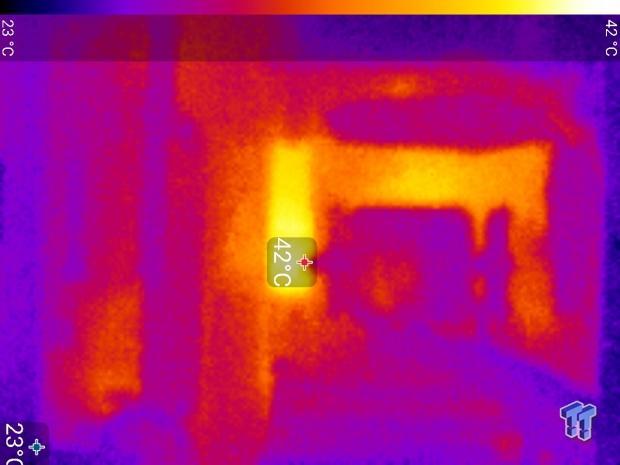
Full frontal.
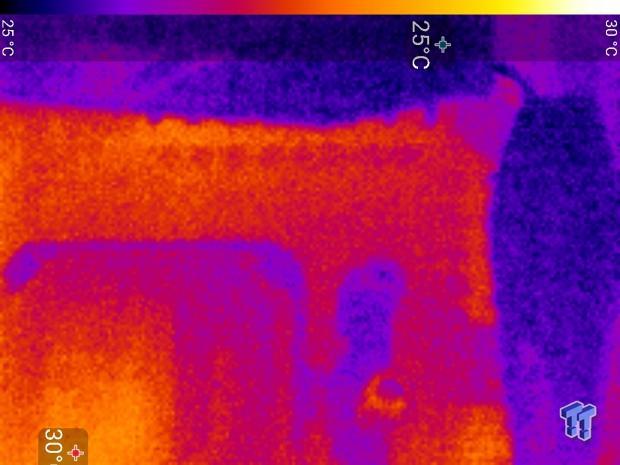
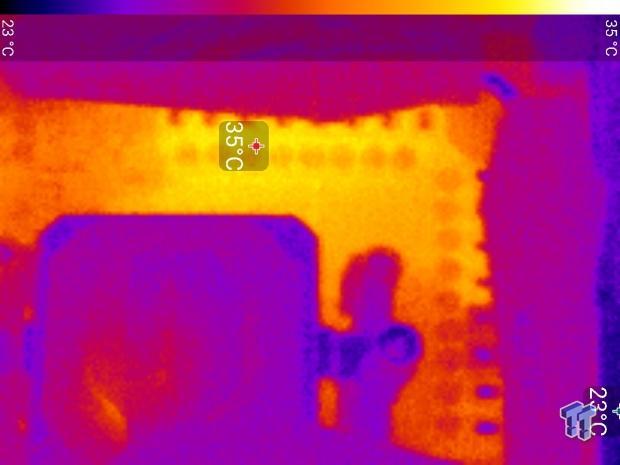
Up-close of the front of the VRM.
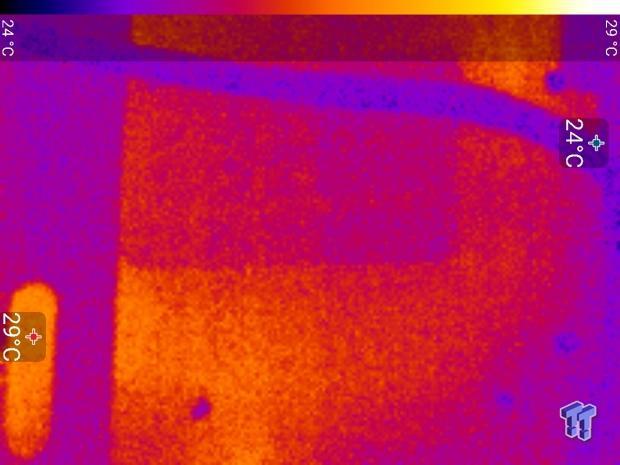
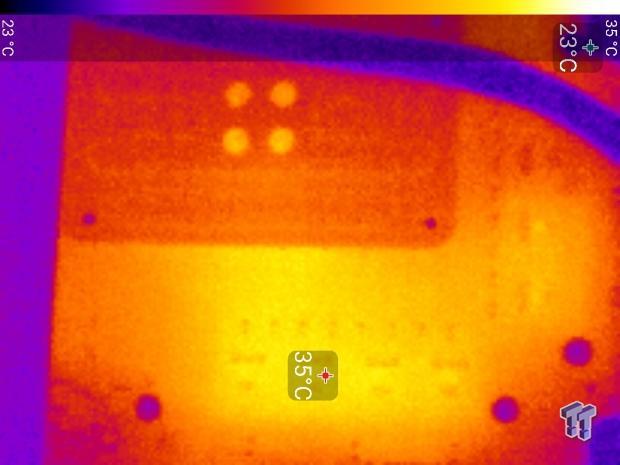
Up-close of the back of the VRM.
The X370 Taichi's thermal performance is excellent; it has one of the best VRM temperatures I have seen thus far. I expected as much because Ryzen can get power hungry, so a larger VRM with high-quality parts, like the one on the X370 Taichi, performs really well.
Anything under 60C is great, 60-80C is acceptable, and anything above 80C is a bit worrisome (if at stock).
What's Hot, What's Not & Final Thoughts
Here are key points about the ASRock X370 Taichi.
What's Hot
Excellent VRM: The IR controller matched with IR doublers, NexFETs, 60A chokes, and 12K capacitors results in some of the best thermal test results and performance I have seen so far. It is a bit overkill, but it should result in solid power delivery 24/7.
Two M.2 Slots: Almost all X370 motherboards feature one x4 PCI-E 3.0 M.2 slot that offers 32Gb/s of bandwidth. ASRock also decided to add in a second M.2 slot, but instead of getting x4 PCI-E 3.0 it gets x4 PCI-E 2.0. It shares that x4 PCI-E 2.0 with the last x16 slot, and can offer 20Gb/s of bandwidth. So if your drive doesn't really go over 2000Mbps, then you won't face a performance penalty by using the second slot.
Subtle RGB LED Use: While the silkscreen and heat sink aesthetic design isn't that subtle, the built-in RGB LEDs are. They diffuse under the PCH heat sink. The motherboard also offers three RGB LED headers, so if you want to add some light, you will not have any problems.
Tons of SATA: While most X370 motherboards have eight SATA6Gb/s ports, ASRock added two extra through an ASMedia controller. That puts the X370 Taichi in line with Intel's X99 offerings when it comes to SATA port count.
Extra Clock Generator: ASRock has added an extra clock generator onto the motherboard so that you can tune the bus speed, so when AMD fixes up their microcode a bit more you should be able to go above 3200Mhz if your kit and CPU can do it.
What's Not
A Bit Low on USB: ASRock opted to not invest into a second USB 3.1 controller, so you only get the basic two USB 3.1 ports from the chipset. The rear IO is also low on USB 3.0/2.0 compared to competitor motherboards.
Final Thoughts
The ASRock X370 Taichi was a surprise. I didn't expect it to be loaded with so much. It does trade some USB assets for extra SATA, and its second M.2 slot does not offer the same performance as the first one. The motherboard's VRM was the most impressive part of the product; it's the best one I have seen yet because of its high-quality output filter and phase count (although it's overkill).
The Taichi's aesthetic design has grown on me, but when you install your GPU, it will block a big section of the center gear.
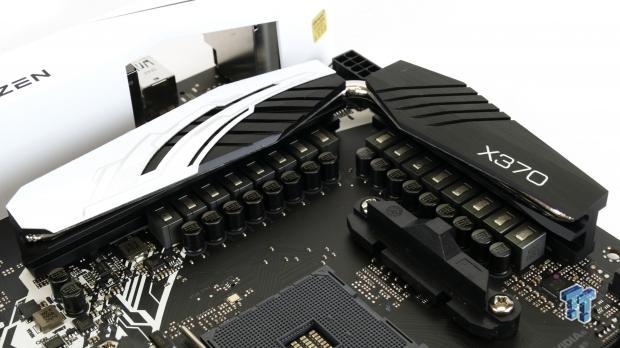
ASRock has done an excellent job with the X370 Taichi and has reasonably priced the motherboard, so its quality and features are very competitive.
If you want an X370 motherboard with a solid lot of features, an excellent VRM, and performance to match, the ASRock X370 Taichi is definitely worth a look.

