


Our Verdict
Introduction, Specifications, and Pricing
Corsair has released three new cases for the holiday season. In this trio, we have a "builder grade" offering, one that steps up the game a fair bit, and yet another that takes Corsair chassis design to a whole new level. As we bring forth these new cases, we are starting with the most affordable solution and working our way up from there. While this chassis we are about to show you may not be your first choice of the three new designs, it surely is the most affordable of them, and is handily one of the most builder-friendly designs we have seen for the money.
Even though this chassis is affordable, this does not mean that Corsair has just slapped their name on a basic black box, quite the contrary in fact. Just at a glance, we see many options like a side panel with a window, a plethora of cooling options, and even with a minimalistic design afoot, there is a dedicated cable routing area, hidden storage, and even a PSU cover. In this instance, you do not have to break the bank to obtain a chassis with much of the latest and greatest found in the case market today.
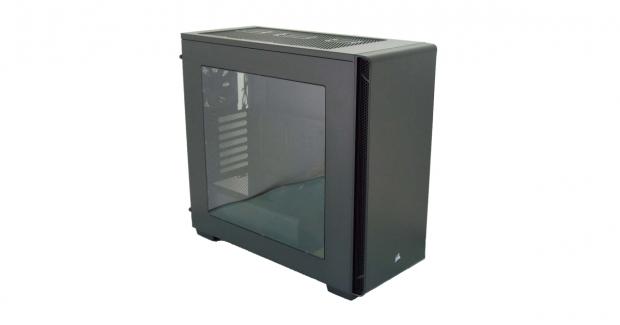
This chassis is yet another addition to the Carbide Series, and Corsair is calling this case the Carbide 270R. This case is not a flamboyant Carbide like the 500R, the AIR 540 or 740, nor does it share any of the aggressive stylings of the SPEC cases either. At the same time, we can see why it resides in the Carbide Series, and the 270R is no slouch. What you are about to see from this mid-tower chassis is plenty of features, aesthetics which are clean and minimalistic, yet attractive enough to satisfy much of their customer base. For what you get in the Carbide 270R, it is hard to argue with the low pricing that comes along with it, and could make the Carbide 270R wildly popular, even with those used to higher-end cases.
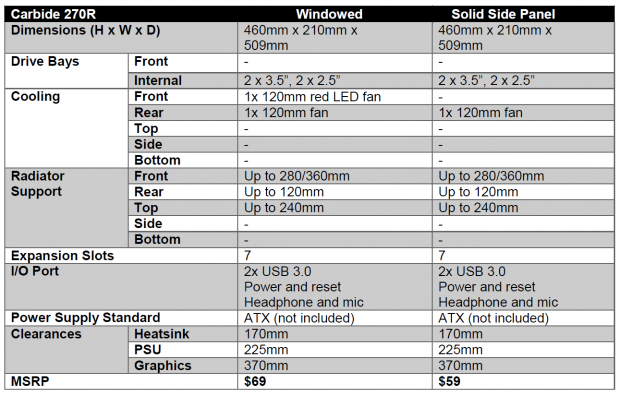
In our chats before the release of this chassis, we were sent information about it, such as the features we just covered, pricing information, and were supplied this chart covering the specifications of the 270R. In this chart, we are first given the 460mm deep, 210mm wide, and the 509mm height dimensions. There is no mention of weight, but we did see 17 pounds on the shipping label, so taking a rough guess, the 270R is close to 13 pounds without packaging included. We then move into the bay configuration, where we find there are no drive bays in the front of the 270R, but there are two trays hidden behind the motherboard tray for 2.5" drives. At the same time we are offered two trays for 3.5" drives closer to the front of the chassis, yet still kept out of sight.
We then move right into the cooling. In the windowed version of the 270R, you get a pair of fans, yet with the solid side panel version you get only one 120mm fan at the rear. In the windowed version, a second fan is shipped inside of the chassis, and it is also a 120mm fan, but it is also red LED lit when powered. As to the water cooling support, this does not deviate in either chassis option. There is room for a 360mm or 280mm radiator in the front, but the back can only support a single 120mm radiator. The top of the chassis is shown to only house a 240mm radiator option, but here the chassis is also drilled to house 140mm fans as well as 120mm fans.
The rest of the chart covers a few good points as well. We see the mention of seven expansion slots found at the back of the case. We also see that the front I/O includes a pair of USB 3.0 ports, a power and reset button, headphone, and microphone 3.5mm jacks, but no mention of the backlit power button or the HDD LED light found in the mix. For those who plan to air cool their CPU, the 270R has 170mm of room for those. The PSU has a groove it has to slide through, thus limiting its length to 220mm, and depending on the cooling used at the front of the 270R, there is 370mm of room for those.
As this review is being read, the NDA has lifted. We are not sure if Newegg or Amazon took early shipments to have the Carbide 270R in either flavor ready to go upon release. What we do know is that even if you do end up having to wait a little bit for the stock to become available, the prices found at the bottom of the chart are impressive. If you plan to opt into the 270R with a solid left side panel, you will only need to come up with $59 to obtain it. If you like to look at your hardware, you can opt for the 270R with a tinted window on the left side of the chassis, and on top of that, you also get a red LED fan, which requires only a slight hike in pricing to $69.
Our Latest Mid-Tower Cases Review Coverage
While we usually like to reserve our bang for the buck comments until later, just on paper, this Carbide 270R is worthy of every dime - but wait until you see it.
Chad's Chassis Test System Specifications
- Motherboard: GIGABYTE GA-Z68X-UD4-B3
- CPU: Intel Core i7 2600K (buy from Amazon)
- Cooler: Corsair H80i GT (buy from Amazon)
- Memory: G.Skill Ripjaws F3-12800CL6D-4GBXH
- Video Card: ZOTAC GeForce GTX 970 AMP. Extreme Edition (buy from Amazon)
- Storage: SuperSpeed 128GB SSD
- Power Supply: SilverStone SST-ST85F-G (buy from Amazon)
- OS: Microsoft Windows 7 Ultimate 64-bit (buy from Amazon)
Packaging
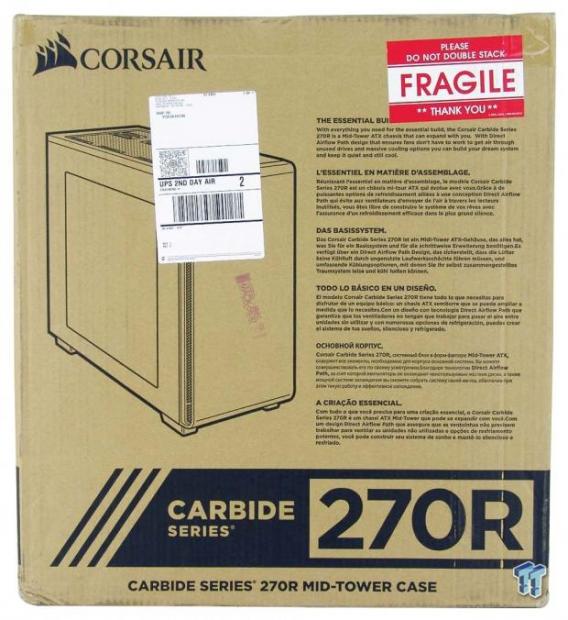
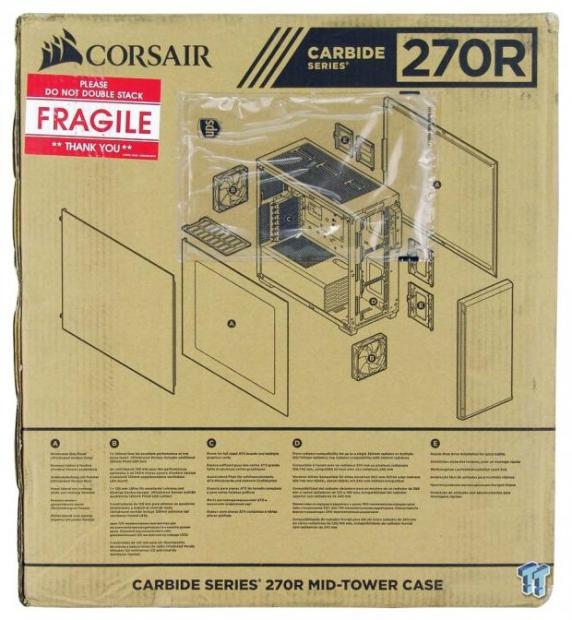
The packaging is typical to Corsair, using plain cardboard and black screen printing to convey what is inside. On the front panel, there is a rendering of the 270R to the left, while the right side explains what you will find with this design. Then, along the bottom, we are given the chassis name and told that this is a mid-tower case.
Along with more shipping stickers, there are Corsair stickers near the top, where you can find the model and serial number for the 270R, and another which shows the chassis color, and that this one has a window. Three specifications charts run across the middle, and a pair of renderings show the front and inside of the Carbide 270R.
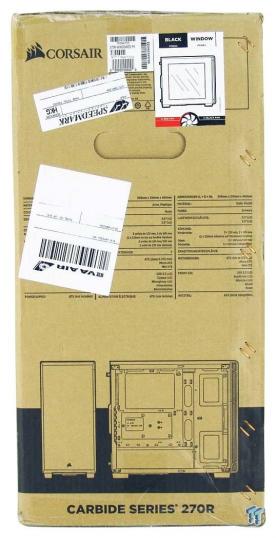
At the back, the name is found along the top this time. It is then followed by an exploded diagram of the chassis, showing off what is in the design, and where, in the chassis, all of these parts can be located. The major components are all marked A through E, and along the bottom, it is explained what each of these parts is.
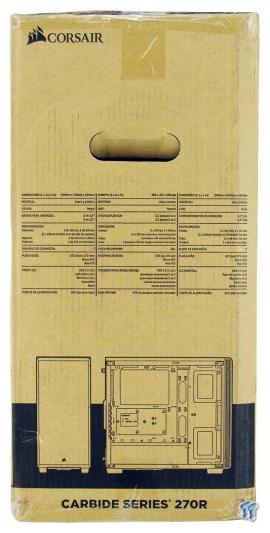
The last panel looks much like its opposing side, with only one minor difference. While we still get the same renderings at the bottom, the languages in which the three specifications charts are offered are different, totaling six regions this Corsair packaging ships to.

To protect the Carbide 270R in shipping, the first layer is clinging plastic sheets to both sides of the left side window. Outside of that, the entire chassis is wrapped in a clear plastic liner, which keeps dust out, and also keeps the thick Styrofoam caps at the top and bottom from rubbing against the paint. As for this particular chassis, it is in great shape, and ready for its photo session.
Corsair Carbide 270R Mid-Tower Chassis

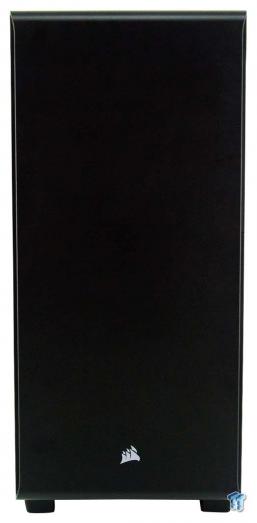
The front of the 270R is solid and made of plastic. There are curves at the top and bottom as the panel rounds to meet the rest of the chassis, but outside of the Corsair logo at the bottom, there is nothing to break up the bezel.
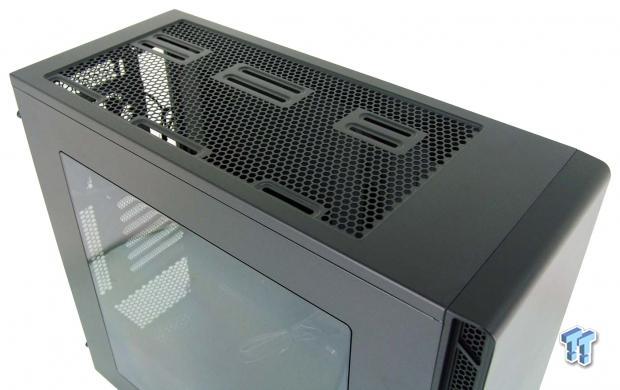
The top of the chassis is made of steel and offers a large honeycomb mesh design to allow air to flow through it. While it supports 120mm and 140mm fans, only the 120mm holes are offset enough to allow for a radiator to hang inside.
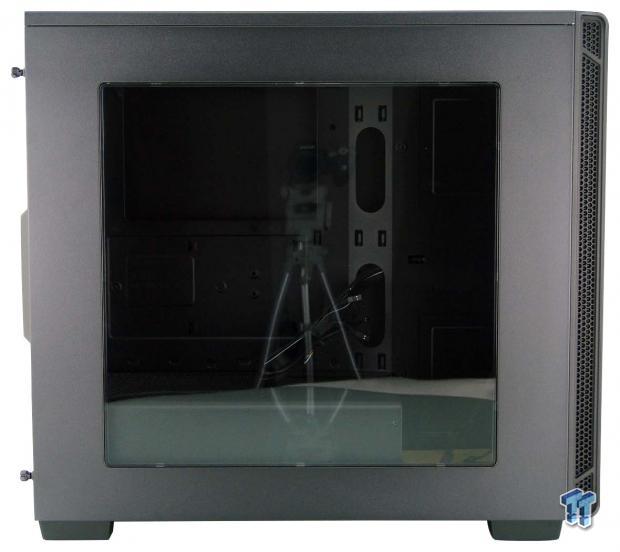
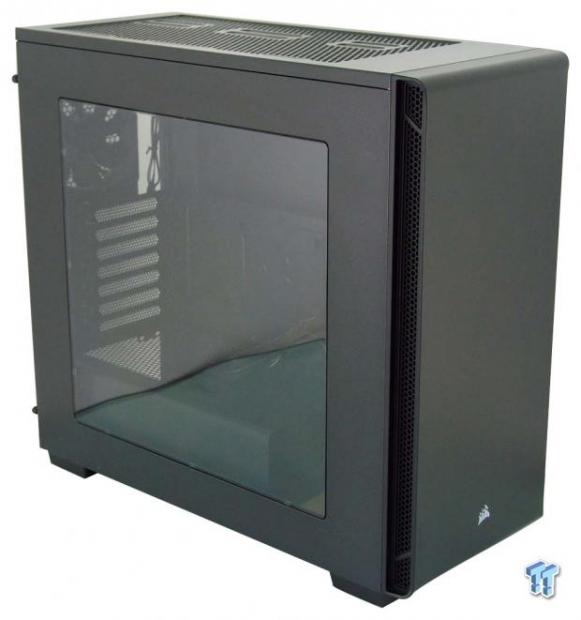
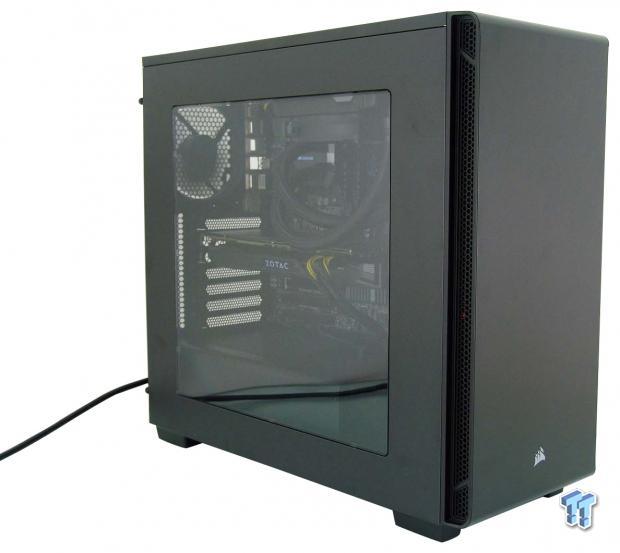
The left side of the chassis is also made of a steel panel, but in this instance, we see a large, slightly tinted, window to view the inside of the 270R through. There are chunky feet at the bottom, and to allow air to flow into the front of this case, the side of the bezel has mesh down its entire length to alleviate this concern.
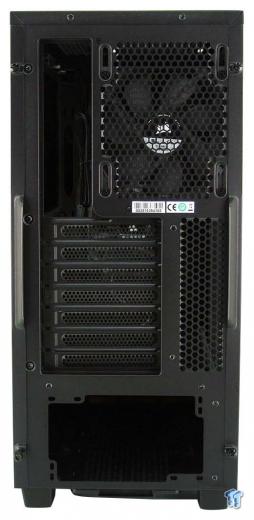
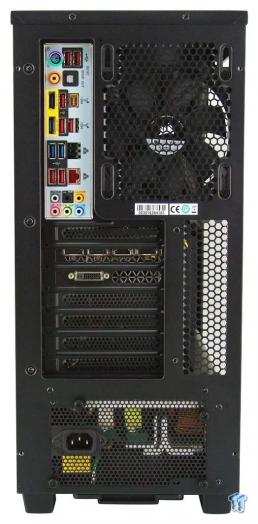
The back of the 270R comes with what we expect it to. At the top is the rear I/O area, and next to that is the 120mm exhaust fan location, and notice it can be adjusted in its ride height. Below those, we then find the seven ventilated expansion slots with passive ventilation next to them. At the bottom, we find room for the PSU, and we can also see the edge of the dust filter placed under the PSU.
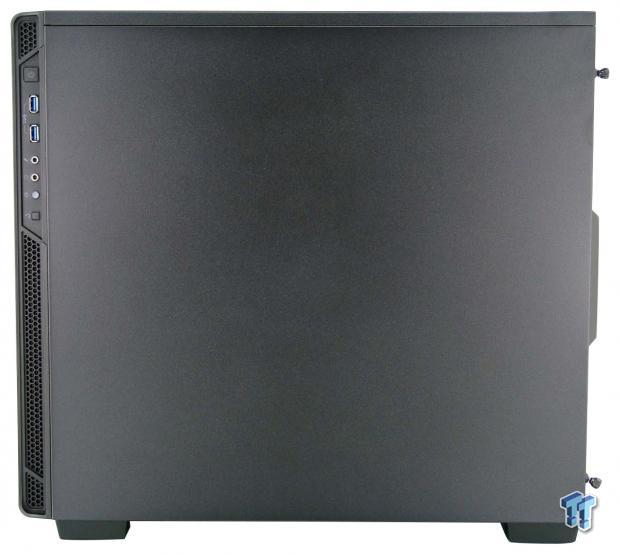
The right side of the chassis is flat and is mostly the right side panel. We see more of the ventilation in the side of the front bezel, but a section of it is blocked here by the front I/O panel.
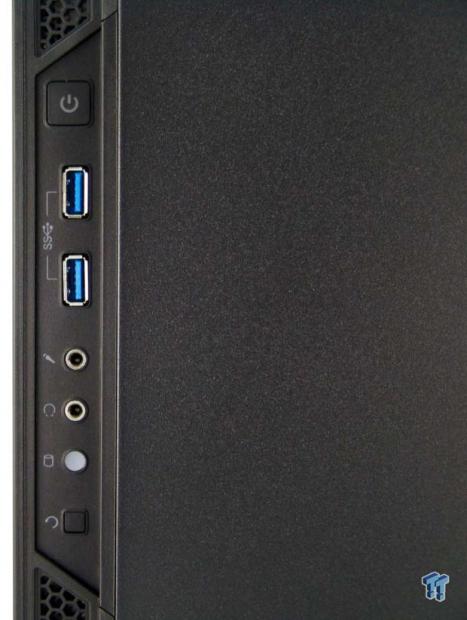
The front I/O panel starts at the top, offering a backlit power button. Following that is the pair of USB 3.0 ports, the 3.5mm HD audio jacks, an HDD activity LED, and at the bottom is a tiny square reset button.
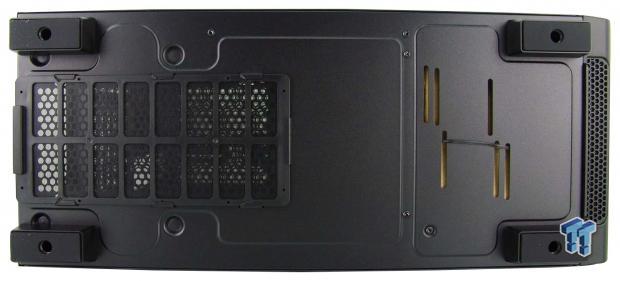
Looking under the 270R, we see the chunky rectangular feet are as close to the corners as possible, to deliver a supportive footing for it. The PSU cover is long and slides out the back of the chassis, but more impressive are the slots near the front feet, which are put there to support water pump and reservoir mounting.
Inside the Carbide 270R
While there is no gap offered at the bottom to remove the bezel, there is a raised section behind the mesh design to allow some grip to pop the pins out. The front I/O stays attached to the chassis, and as you can clearly see the fan installed in the front, there is not a dust filter present for the intake.

Our first look inside of the 270R shows that it is a vast open area, and we can see the box of hardware which has been wired to the floor, sitting just in front of the steel PSU cover. The wiring has also been tended to, to ensure it will not rub against the left side panel window.
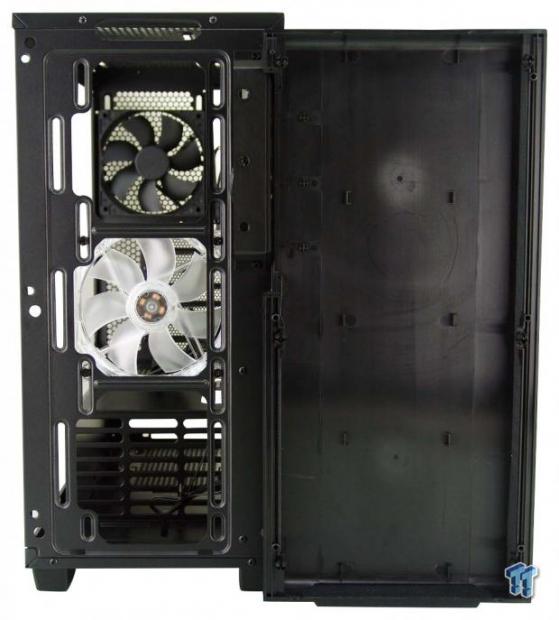
On the inside of the front of the 270R, there are no bays present, and we do get the extra fan. This fan is a 3-pin powered clear 120mm fan, which will glow red from four LEDs. In this area, you can use three 120mm fans or two 140mm fans, and it is entirely capable of supporting water cooling as well.
The motherboard tray offers six locations to pass wiring through along with 13 locations to tie the wires to, and has standoffs in place for an ATX motherboard, but will also house Micro-ATX as well as Mini-ITX. The CPU cooler access hole is large, and to the right of it, we see the tray is angled to allow the majority of the wiring to be hidden there and blocked from view.
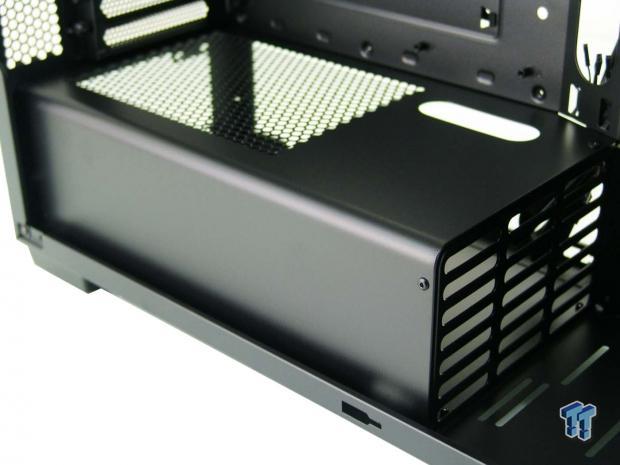
Below the main section of the motherboard tray, the floor is obscured from view due to this PSU cover. The front is vented to allow air to flow through while still containing wiring, it is curved gently at the edge, and offers an oblong hole for wires and is also ventilated to allow a PSU to be installed fan up or fan down.
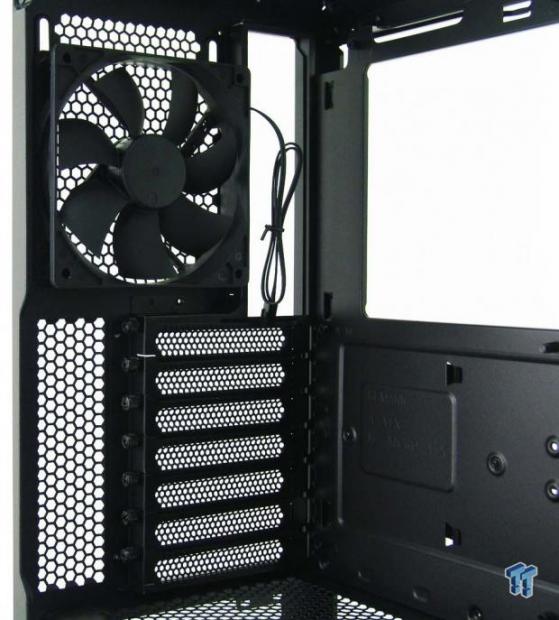
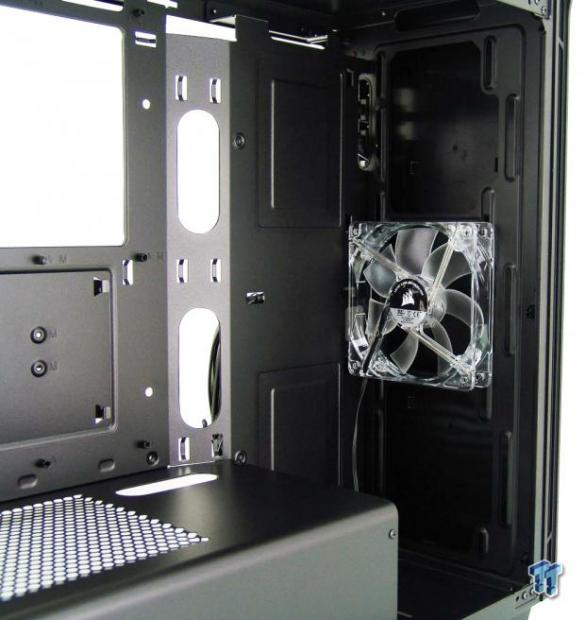
Inside of the rear of the 270R, we find the second 120mm fan, which happens to be black and is also 3-pin powered. We can also see that the expansion slot covers are held in with thumbscrews to make mounting cards here as easy as possible.
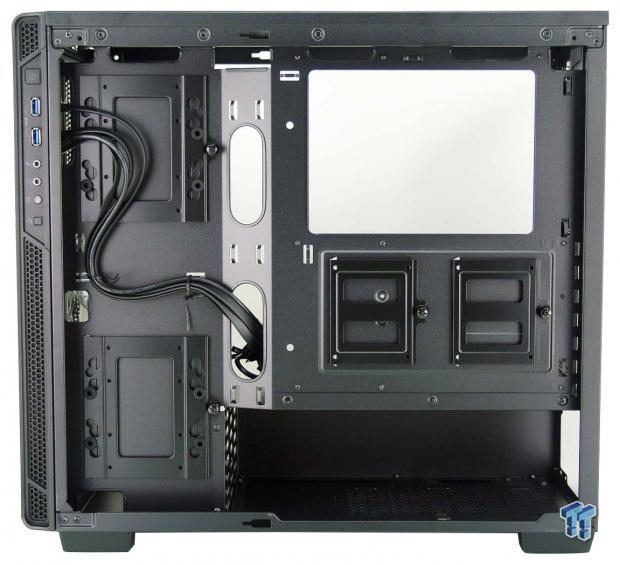
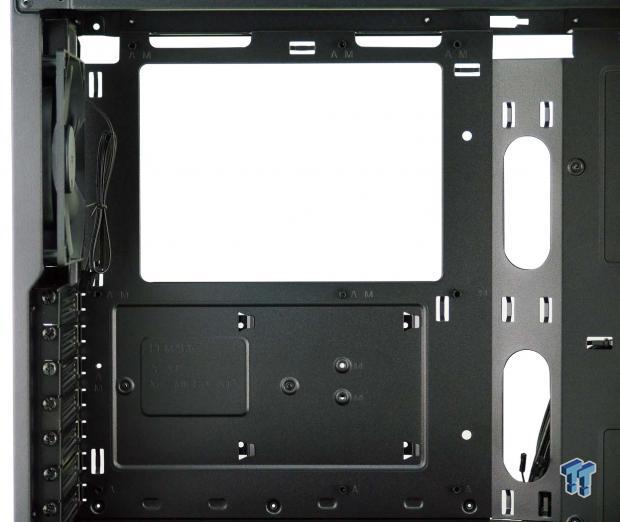
Behind the motherboard tray, we can see four drive trays. The two at the left are used for 3.5" drive mounting but can be used for 2.5" drives too, and the pair under the access hole are made to accommodate 2.5" drives only. The front I/O wiring is routed for you and is 25mm deep in that area.
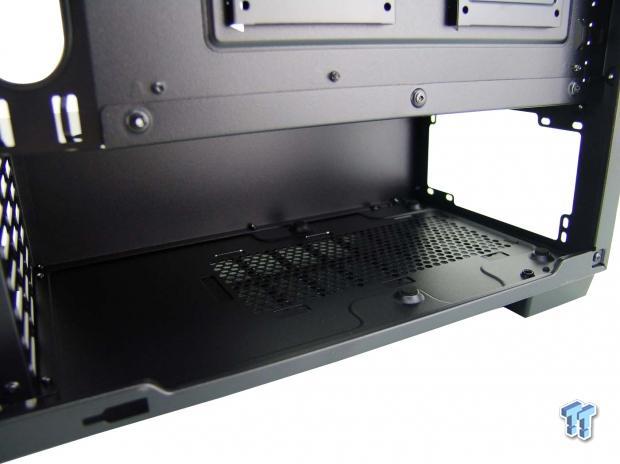
At the bottom of the back side, this is where you can slide the PSU under the cover. The bottom rail is cut away a bit to allow the PSU to fit, and we can see four rubber pads on raised sections of steel to support the PSU inside of the 270R.
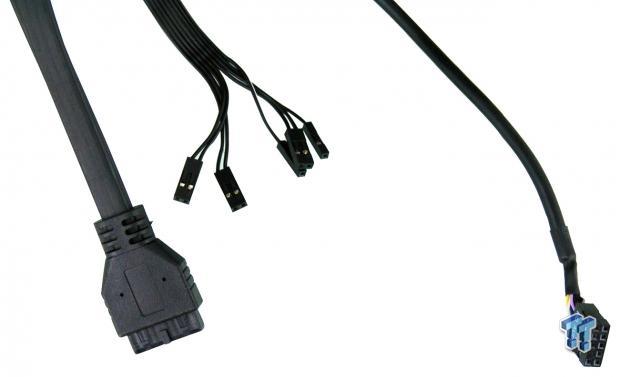
The wiring from the front I/O panel isn't the longest we have seen, but they can reach where it needs to go. In the 270R, you find a native USB 3.0 plug, the wiring for the switches and LEDs, and a longer cable to connect the HD audio.
Hardware & Documentation
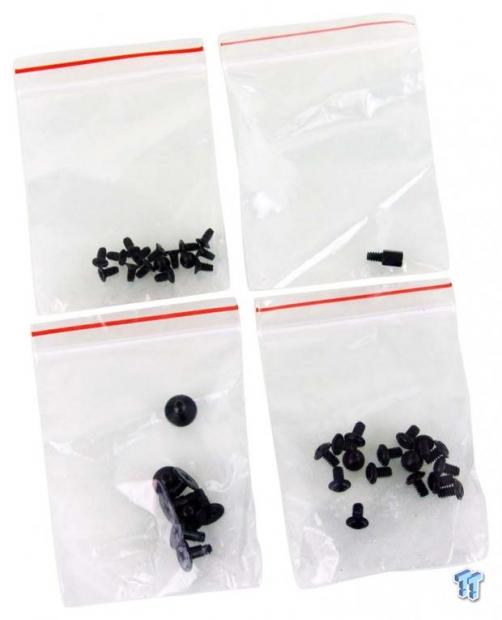
Part of what we located in the hardware box is shown in this image. There are M3 countersunk screws for mounting 2.5" drives, a standoff, HDD mounting screws, and the last bag has 6/32 screws for the motherboard and PSU.
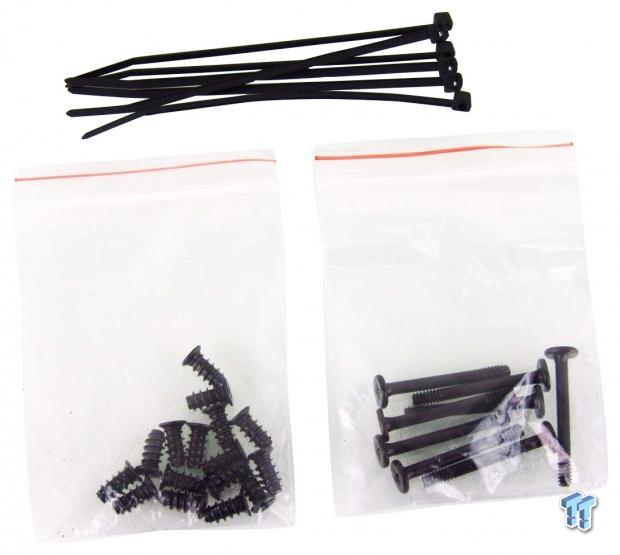
You should also expect to find six zip-ties to keep the wiring clean behind the motherboard tray. Since there are so many places left to fill with fans, Corsair also sends along standard fan screws, as well as a set of long screws to mount them on the front of the 270R.

Found outside of the chassis, there is yet another bag which delivers the installation guide and warranty insert. The guide covers all the parts you should have, and goes through the entire build process, showing how each device in the build is to be installed, leaving only the cooling out of the guide as each build would be different in optional cooling.
Case Build & Finished Product
Many of our frequent readers know we prefer front bezels such as this one. Even with the guts of the 270R filled to the brim with whatever you feel necessary to fit in there, the aesthetics here do not change. Also, in this digital age of downloads, we like that there are no removable bay covers in this design as well.
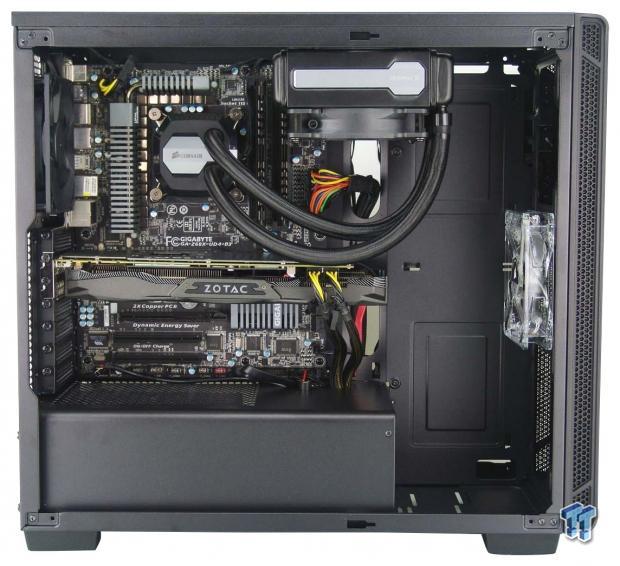
The Corsair Carbide 270R took on our test system and offered nothing out of the ordinary when it came to assembly. The AIO could have gone in the front or the back; we just happened to choose the top. The motherboard lines up well, but the video card is sagging quite a bit. We would have liked grommets too, but even without them, the build is still clean and tidy.
The dust shield snapped right into the designated area, and the video card does align level across the expansion slots. We also found no issues when it came to mounting the PSU, but we do recommend attaching modular cables before its installation since the front of the PSU cover is blocked off from access.

For our basic wiring needs, we found plenty of room at the back to hide the 8-pin cable, and the 24-pin cable did not conflict with the side panel either. As for the rest of the wiring, it hides well under the PSU cover, and with all the options to pass them through, we were not left wanting when it came to routing or managing the wires.

Almost ready for power, the Carbide 270R has a clean and simple look to it, but that large side panel offers an unimpeded view of the interior. We also like that the front I/O panel is hidden from view, but this can cause issues to the user depending on the placement of the case in your office setting.
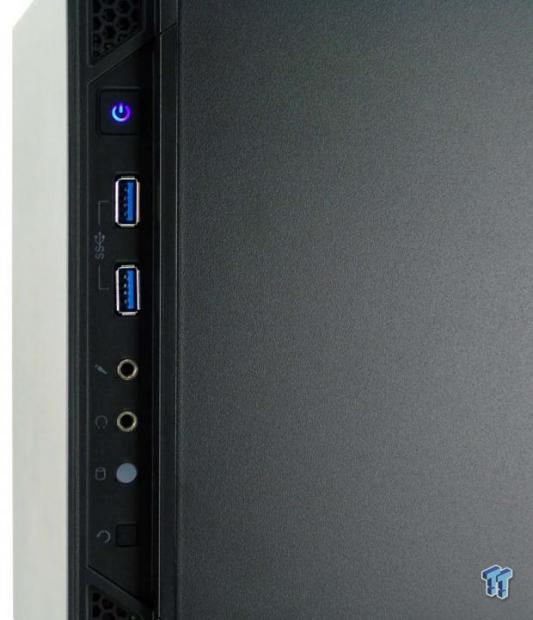
Powering up the Carbide 270R illuminates the power button with the glow of blue LED light. While we did miss the HDD activity LED in the five times we attempted to catch the flicker from the SSD, we saw it also glows blue, but were unable to get the timing down to see it here.
Once powered, the 270R comes to life with a slight hum at 28dB of noise, and if you are at the correct angle, you can catch the red LED glowing through the mesh on the front bezel. This fan is too far forward to see unless the room is dark to get some of its glow, but we will admit, this sure looks good regardless.
Final Thoughts
The Carbide 270R from Corsair is full of win. This chassis is affordable to anyone who wants to build a system. The aesthetics may be mundane, but there is something to be said about clean simplicity in chassis design too. The lack of noise coming from the case is great, but considering only two fans are cooling the inside at this time, we shouldn't hear much. The side panel option to have a window is excellent and shows off all of the gear inside of it well. We also like that we got a PSU cover in this design, as well as hidden storage. Of course, none of that matters if you opt for the solid side panel version, but it will make maintenance on these builds very easy.
There are only a select few downsides to this design that we have found. We did make mention that there was not an intake filter, at least in the traditional sense. There are thin screens that are located on the sides of the bezel, but if you live in a dusty environment, this will make the sides of the bezels dirty rather than allowing it to pass that tight mesh and get caught in front of the fans, hidden from view.
The second issue is the fact that they covered the front of the PSU cover. We understand it is done to contain wiring, and with water cooling in the front, it can keep wires out of the fans, but it makes it tough on modular PSU owners. While you can plug them in before installing the PSU, adding cables later for more gear as your build grows can be complicated by this.
The last thing that may be a miss in this design is the location of the front I/O panel. As many set the chassis on a desk, if it is off to the right to be able to gaze into the side panel window, reaching said I/O panel can get to be a pain. This also means that connections would need to be made blindly to the USB 3.0 and HD audio ports and jacks.
With such an affordable price point, and the idea being to solve all of the concerns of the market sticking within that budget, we do feel that Corsair did a great job with the Carbide 270R. It is packed with features found in high-end cases, it is sturdy enough to safely house your gear, yet at the same time offers plenty of room inside as well as behind the motherboard tray to keep the build looking clean to view through the optional side window. Being aesthetically simplistic allows this chassis to go in any environment and not stand out, and the 270R is something many will appreciate.
As tested in this review, you too can have all of this for just $69. Keep in mind, you can opt out of the side panel window and the red LED fan in the front, and obtain the base version of the Carbide 270R for just $59. The Corsair Carbide Series 270R is not only a chassis which is simple to work in and get terrific results, making it builder friendly, but it is also wallet friendly, and to most, that is the biggest factor when choosing a chassis to build in.
Chad's Chassis Test System Specifications
- Motherboard: GIGABYTE GA-Z68X-UD4-B3
- CPU: Intel Core i7 2600K (buy from Amazon)
- Cooler: Corsair H80i GT (buy from Amazon)
- Memory: G.Skill Ripjaws F3-12800CL6D-4GBXH
- Video Card: ZOTAC GeForce GTX 970 AMP. Extreme Edition (buy from Amazon)
- Storage: SuperSpeed 128GB SSD
- Power Supply: SilverStone SST-ST85F-G (buy from Amazon)
- OS: Microsoft Windows 7 Ultimate 64-bit (buy from Amazon)
 Lian Li B4-mATX Review: a compact mATX SFF case with excellent airflow and premium features
 Ocypus Sigma F36 BK ARGB Cooling Fan Review: high airflow and unified design in one frame
 PCCooler CPS RZ820 Display Review: a flagship-level CPU air cooler with an LCD screen
 MOAIPLAY ORA PRO G1 850W ATX 3.1 PSU Review: high efficiency and 10-year warranty for $119.99
 NZXT H6 RGB+ Compact Dual-Chamber Chassis Review
 KIOXIA begins sampling 10th-generation BiCS FLASH technology, more efficient and with an impressive 332 layers
 Razer unveils Wuthering Waves collection with a custom keyboard, mouse, and premium gaming chair
 Intel prepping Ryzen X3D rivals with new 22-core Nova Lake-S CPUs with 108MB of cache for PC gaming
 Lenovo starts shipping laptops with Chinese-made YMTC SSDs due to skyrocketing NAND Flash prices
 Gen Z would like esports and professional gaming taught in school, study finds
 OpenAI sued after man says ChatGPT fed his religious delusions before suicide attempt
 First Steam Machine spotted with 'red line of death' after playing No Man's Sky for 20 minutes
 Google unveils Android Halo, the new home for AI agent living in your smartphone
 This $6 indie is the best-selling game of 2026, beating major AAA releases
 Halo CE remake's LASO playlist clarified by Halo Studios
 The Super Mario Galaxy Movie (2026) 4K Ultra HD Blu-ray Review
 KTC H49S66 5K2K (5120x1440) 49-inch 180Hz Gaming Monitor Review
 HighPoint Rocket 1604L Gen5 x16 NVMe Software RAID AIC Review: half the price with full 59 GB/s speed
 Next Level Racing ERS3 Haptic Seat Review: immersive sim racing comfort with integrated haptics
 ASUS TUF Gaming X870-Pro WiFi7 W NEO Review - Tuffed up
 GIGABYTE GO27Q24G Gaming Monitor Review: Glossy OLED Gaming at 240Hz
 MSI MPG 322UR QD-OLED X24 Review: A Brighter, Tougher 4K 240Hz QD-OLED for $1099
 UGREEN NASync DXP4800 GT Review: powerful 4-bay NAS with AMD Ryzen and dual 10GbE ports
 Dell XPS 14 (2026) Laptop Review - Premium Quality, Impressive Performance
 How to Remap Keyboard Keys in Windows using Microsoft PowerToys
 7 tips to organize your Windows files for faster, easier access
 Intel Arc G3 Extreme first impressions with MSI's Claw 8 EX AI+ - Incredible power for an extreme price
 How to fix Wi-Fi Adapter Not Working on Windows laptops: troubleshooting tips
 Hisense U7SG 4K TV: Modern Entertainment for the New Age
 6 underrated Microsoft Word features worth using to boost your productivity
 Level Up Your PC Gaming with these Fantastic ASUS Prime Day Deals on GPUs, Motherboards, and More
 GIGABYTE Wants to Kickstart Your New Gaming PC or Upgrade with These Limited-Time Deals
 7 Windows settings to change right after installation for better privacy, security, and performance
 I stopped Windows 11 notifications from interrupting me with Do Not Disturb, Focus, and a priority list