


Our Verdict
Introduction, Specifications, and Pricing
If we look back to what Thermaltake has been up to for the past couple of years, we have seen the company rise from one which was delivering average cases with just a few spectacular offerings mixed in, to a company which seems to be in no shortage of ideas. You name it, if you have a desire for a particular style of chassis, Thermaltake now has something amazing for you to use in every segment. It does not matter if you are looking for something enormous, something tiny, open air, and even something specialized for the living room, we are confident that Thermaltake has something for you.
A lot of what we have been seeing from them lately has been from the Core series, which has been a huge hit since its inception. It does not matter if we are discussing the Core V Series, the Core X Series, the Core P Series, anything with the Core series name have been well thought out, and they are solid, yet at the same time offer a stylish aesthetic with a hint of industrial elements as well. Modularity has always been a big part of this lineup, as well as being LCS capable, which are huge hits with the masses. It is rare that a company or a series of cases have all been so dominating, where no matter the need that spawns the purchase, Thermaltake has a Core series case to fit exactly what you were looking for.
The latest Core series chassis to hit our labs is the Core G3, which brings in a new aspect to the Core series. The idea here is to stick with the styling which has made this line of cases so well accepted, but the primary reason for this design was to bring ATX gaming into the living room. This compact design is made to allow the beefiest of systems to be installed, so that you can game at 4K and with VR, from the comfort of your couch, without having to set some monstrosity next to the audio and video equipment. From what we have seen thus far, we are impressed with the Core G3, and as we continue, we plan to show you exactly why we think the way we do.
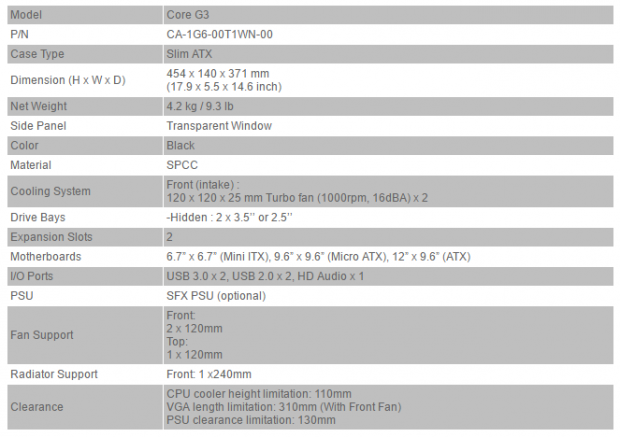
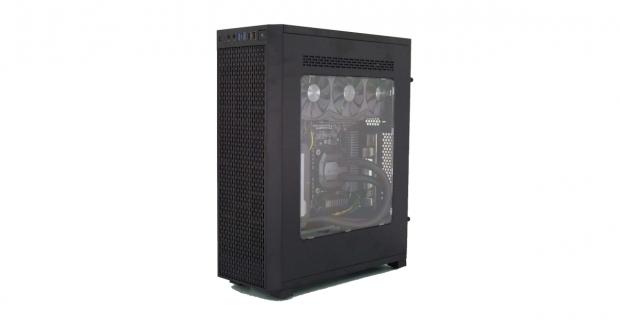
The Core G3 or the CA-1G6-00T1WN-00 chassis is a slim ATX case. Dimensionally, it is 454mm tall, 140mm thick, and 371mm deep, but it can also be laid on its side, which jumbles the measurements to 454mm wide, 140mm of height, and 371mm of depth. No matter how you want to position this chassis, it weighs in at 4.2 kg empty. There is a transparent side window, but with this layout, it happens to be on the right side, or can also end up on top depending on the orientation. The chassis is painted black inside and out, there are bits made of ABS plastic, but the bulk of it is made from SPCC steel.
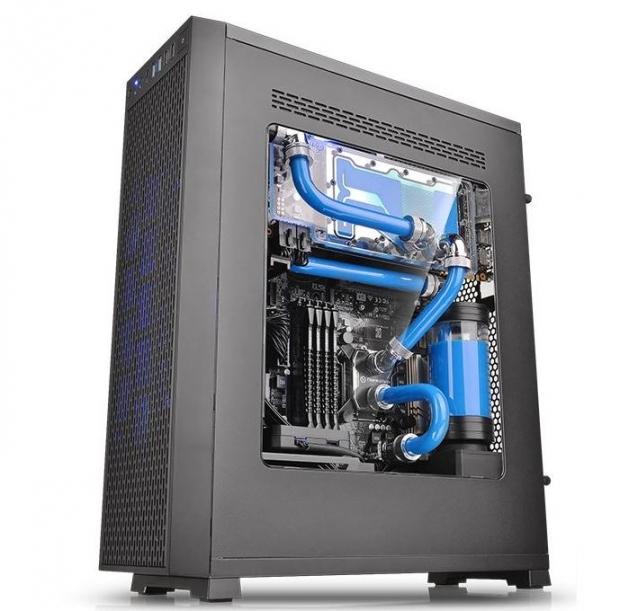
The Core G3 comes with two fans installed in the front of the case, and both are 120mm Turbo fans. Also inside we find a cage for housing storage drives, where either two 2.5" drives or two 3.5" drives can be installed. While there are only two expansion slots in this chassis, motherboard compatibility allows for Mini-ITX, Micro-ATX, and even ATX motherboards. The front I/O panel delivers a pair of USB 3.0 ports, a pair of USB 2.0 ports, HD Audio, a power button, a reset button, and a pair of activity LEDs. The major restriction in this design you need to be made aware of is that you cannot use a standard PS2 power supply, as only SFX units will fit.
As far as options go, the chassis can support a pair of 120mm fans in the front as we just mentioned, but it can also support the same size in radiators as well. Thickness depends on the components chosen to fill the chassis, but 30mm thick radiators are said to fit easily. There is also room in the top of the chassis for an additional 120mm fan, which can be used to source the video card with cooler outside air, or used as an exhaust. At the bottom, we do find the chassis limitations for various components, and here we find that CPU coolers can be only 110mm tall, video cards need to be 310mm or less in length, and there is 130mm of depth for your SFX PSU of choice.
We were able to find the Core G3 widely available at this time, and the pricing is fair in our minds. Looking at Amazon, we see the chassis is listed at $69.99 with free shipping to get it to your house. As for Newegg, they are asking the same price for the chassis, but unless you are a Premier member, they are also asking an additional $7.99 for shipping.
Our Latest Small Form Factor Cases Review Coverage
While this may not be the most spacious of designs, which is the whole point of making a case which fits in a living room without being gaudy, we feel the price is justified. Even though upon first glance, you may think how in the world I am going to fit my parts inside of this chassis, but once done, you are left with a stellar looking system with a full view through the clear window that fits in perfectly.
Chad's Chassis Test System Specifications
- Motherboard: GIGABYTE GA-Z68X-UD4-B3
- CPU: Intel Core i7 2600K (buy from Amazon)
- Cooler: Corsair H80i GT (buy from Amazon)
- Memory: G.Skill Ripjaws F3-12800CL6D-4GBXH
- Video Card: ZOTAC GeForce GTX 970 AMP. Extreme Edition (buy from Amazon)
- Storage: SuperSpeed 128GB SSD
- Power Supply: SilverStone SST-ST85F-G (buy from Amazon)
- OS: Microsoft Windows 7 Ultimate 64-bit (buy from Amazon)
Packaging
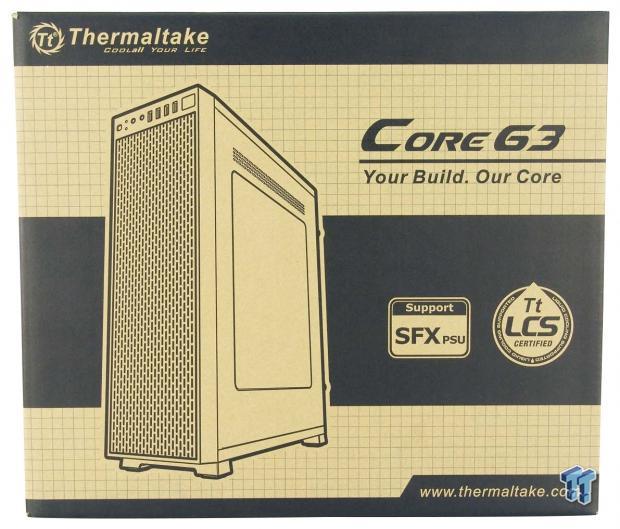
The packaging is typical of Thermaltake and the Core series, using plain cardboard, black bars, and a grid to highlight the rendering of the Core G3 off to the left. Along with the company name and site address, we also see notations to the SFX PSU support, as well as the LCS certification.
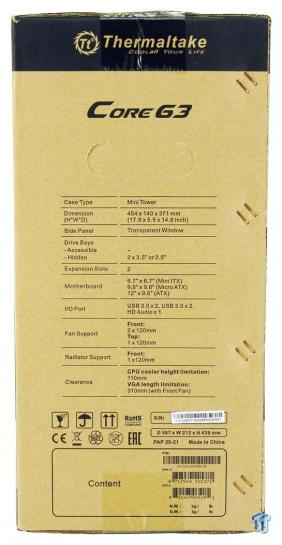
Moving to the next panel, we run into this. Thermaltake and Core G3 tops the panel, while the majority is used for the specifications chart like what we just covered. At the bottom, we find the serial number of this chassis as well as the package dimensions.

The back of the box tells all about this chassis design and layout. With the exploded diagram used to fill this panel, there is no way not to know what comes apart or where to locate specific parts of the Core G3
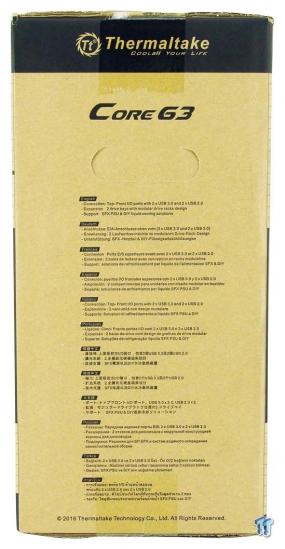
While the naming of the company and the chassis start things off again on this side, Thermaltake uses this panel to list features like the front I/O connectivity, the storage options, and support for the PSU and liquid cooling. These are then repeated a total of 12 times.
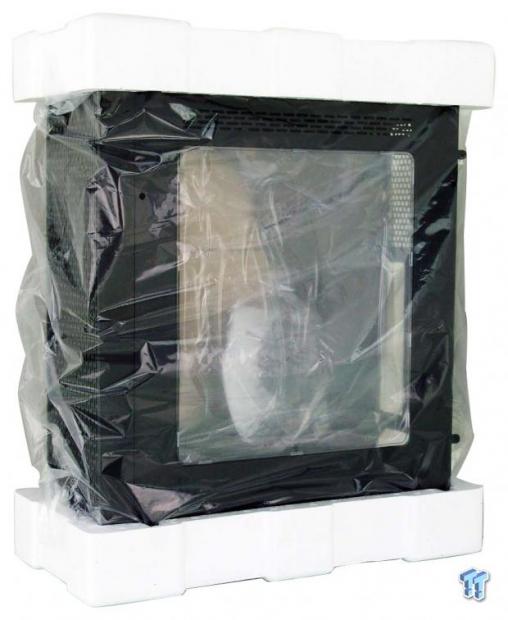
Freed from the cardboard confines, we get to see how this chassis is protected. A clear plastic liner surrounds the chassis, after clinging plastic has been applied to both sides of the window. Once that was done, the top and bottom of the chassis are protected with Styrofoam caps, which allowed our sample to arrive from the other side of the globe without a blemish on it.
Thermaltake Core G3 Slim ATX Chassis
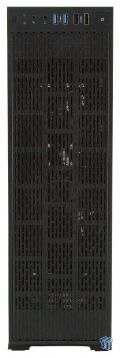
The front of the Core G3 is slim from side to side but stands almost as tall as an average mid-tower chassis. The majority of the panel is made of plastic, with rounded slits cut out of it, leaving just a bit of solid plastic at the top for the front I/O panel.
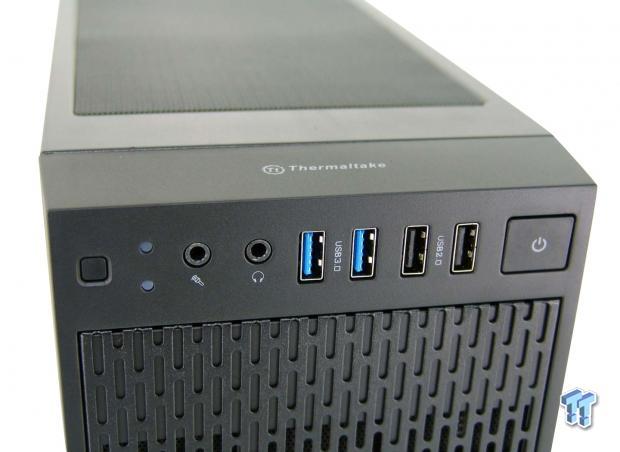
The front I/O panel starts with a tiny reset button, has a pair of activity LEDs, and moves on to the HD Audio jacks. Beyond that, we find a pair of USB 3.0 ports, a pair of USB 2.0 ports, and the large power button. Also note that the USB text is sideways, so that when the Core G3 is laid on its side, it reads correctly.
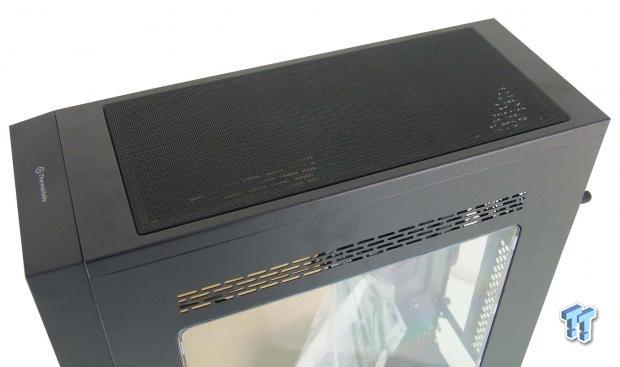
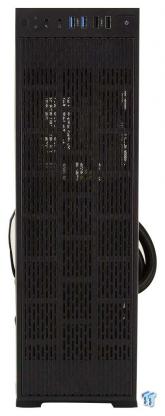
The top of the chassis is made of steel which was painted black, and taking up most of it is the magnetic plastic dust filter. There is room under this for a fan, so it has more of a purpose than just to dress up what could potentially be a large area of passive cooling.
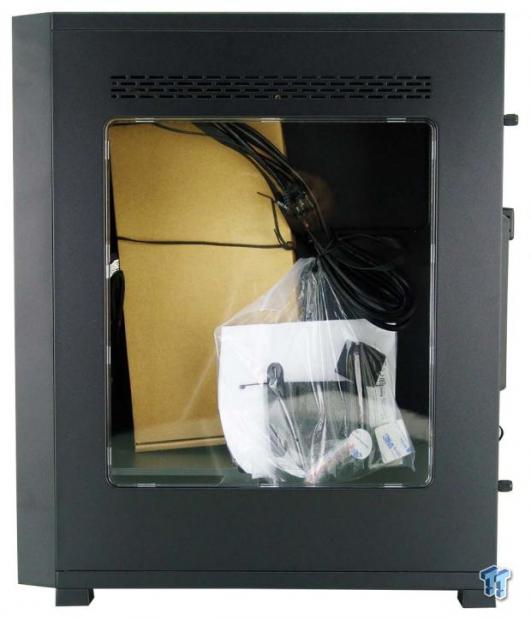
The right side of the chassis is where we find the side panel containing the clear plastic window. Around it is more steel, but at the top, there are slits backed with a magnetic dust filter, and is where your video card will source cooler air for its intake.
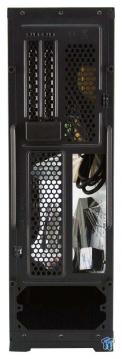
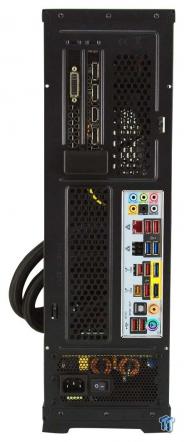
In this orientation, we find two expansion slots at the top, which are removed externally, under a plastic cover. Moving down, we see the space for the rear I/O, and passive ventilation is placed next to it and the slots. At the bottom, this is where the SFX PSU is to be mounted.
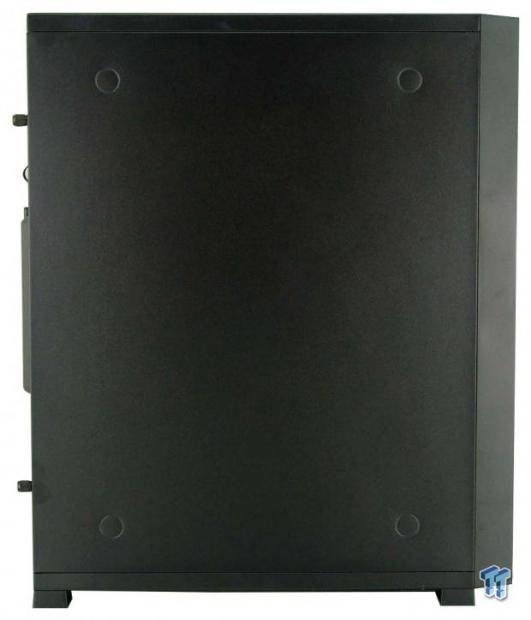
The left side of the chassis sports a solid steel panel. You may also notice the circles indented into the panel. These are used as guides when it comes to installing the optional feet, which allows this side of the chassis to become the bottom.
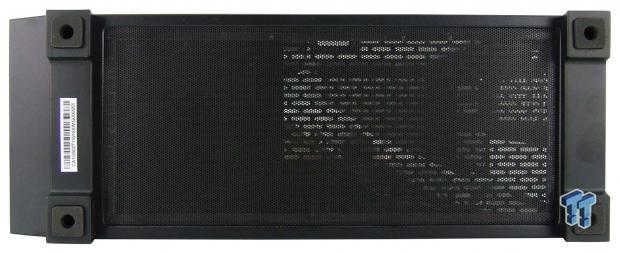
The rails at the front and back edges with rubber pads for the feet can be removed when using the optional feet. The majority of this area is ventilation much like the top is, and is again covered with a magnetic dust filter to keep the interior clean.
Inside the Core G3
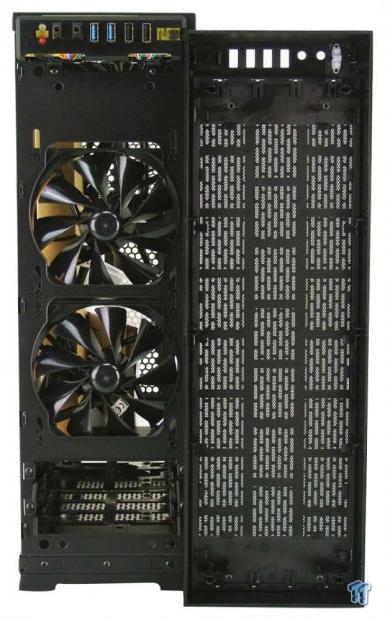
Inside of the front bezel, we do find a removable dust filter that is held in with tabs around it. The front of the chassis comes whipped with a pair of 120mm Turbo fans in the front, which offer good flow at 1000 RPM and do so in near silence.
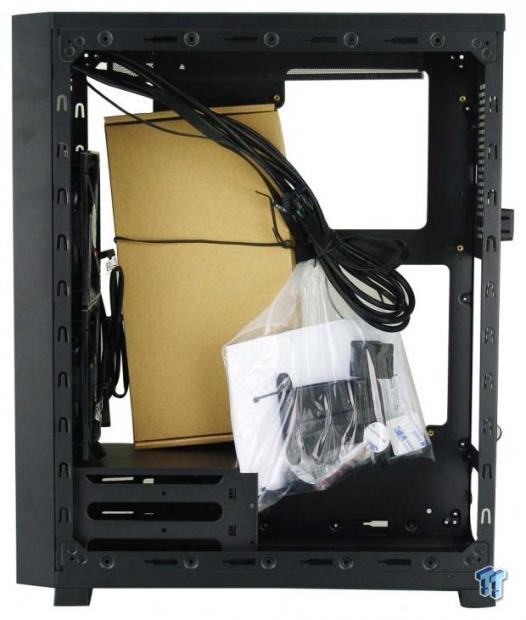
Peeking into the main compartment of the Core G3, we see this is where the wiring has been tied up, and the manual and some goodies are hanging in a bag from the same tie point. The box we can see in there is housing just one thing, the PCI-e riser cable.
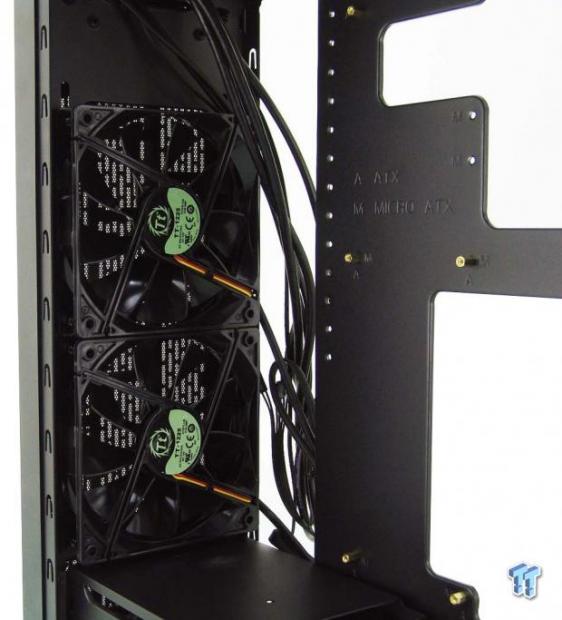
Inside of the front, we can see more of the TT-1225 Turbo fans. The wiring is hidden at the moment, but it is sleeved, and both fans are powered with 3-pin connections.
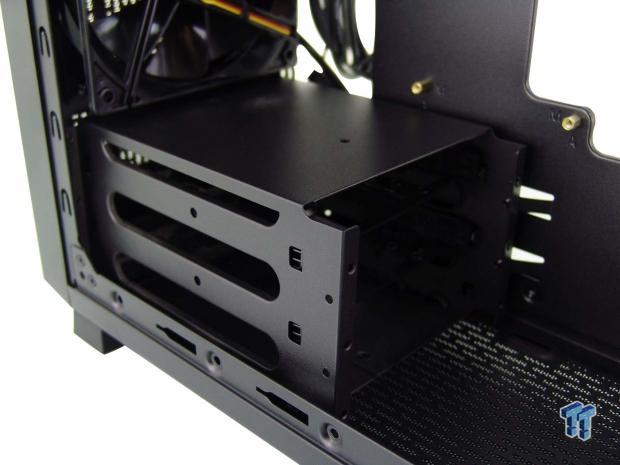
At the bottom, still, at the front of the chassis, we find this removable storage drive rack. This will only house two drives, but each tray has mounting holes for 2.5" and 3.5" drives. As an additional feature, since the chassis can be reoriented, screws ship with this chassis to lock the trays into the steel cage.

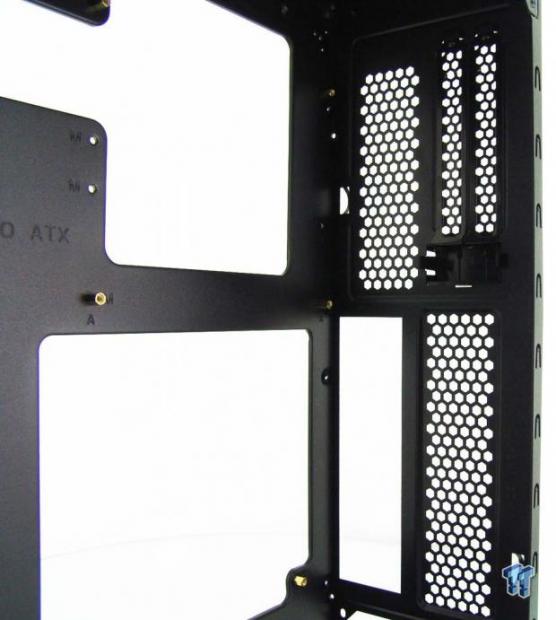
At the top of the Core P3, after removing the dust filter, we find the optional 120mm fan locations. Of course, the video card used and how you route the front I/O wiring may have a bearing on whether or not this location can even be used.
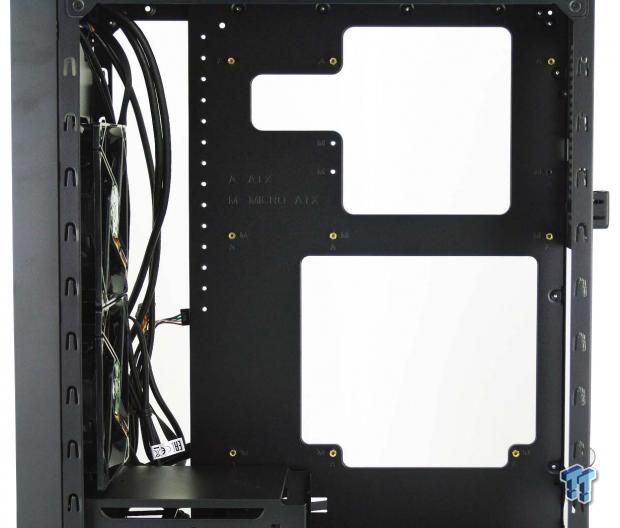
The motherboard tray offers a large access hole at the bottom for CPU cooler access, due to the inverted layout. The hole at the top is there to lessen the amount of metal used as our guess, as you do not need access to the PCI-e slots. The tray is clearly marked for various motherboards, and standoffs come pre-installed for ATX motherboards.
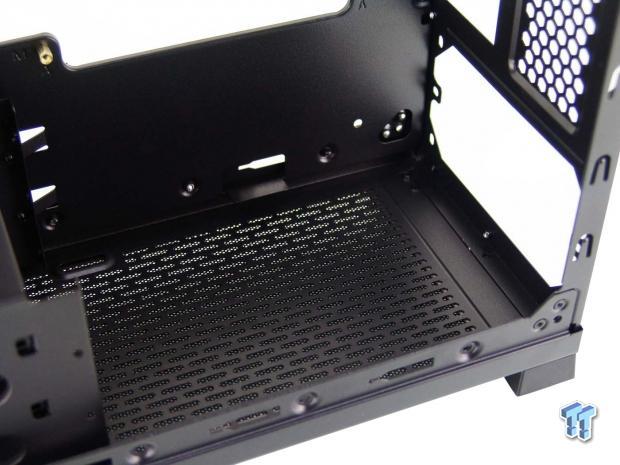
The bottom of the chassis, at the back, is where we can install an SFX PSU. There are no pads on the floor, but there is ventilation for the fans. The reason there are no pads is that the PSU does not rest on the steel section of the chassis once it is mounted with screws.
The view of the inside of the back of the chassis shows us much of what we saw from the outside. Since the expansion card secures from outside of the chassis, it leaves this plane flat from top to bottom.
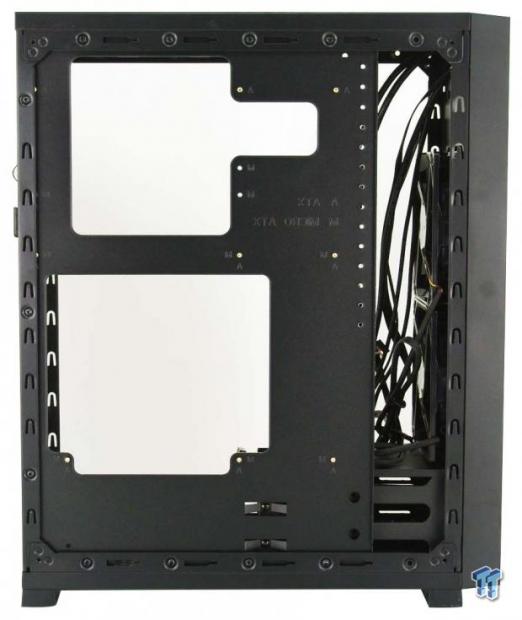
Behind the motherboard tray, there is maybe 3mm of room for wiring, but the right edge of it is bent over and blocks that ability. The holes you see running down the right side of the motherboard tray support video card brackets, which make sure the unusual way in which is it mounted, it is not left flopping around inside.
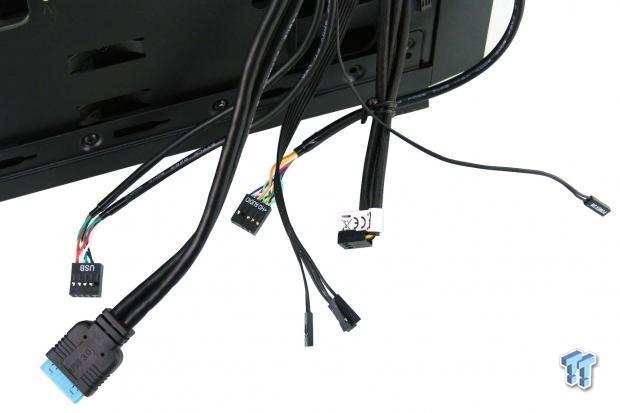
All of the wiring is black, and in this group, we can see the USB 2.0 and USB 3.0 connections on the left, HD Audio and most of the LED and switch wires in the middle, and we can also see one of the fan leads.
Hardware & Documentation
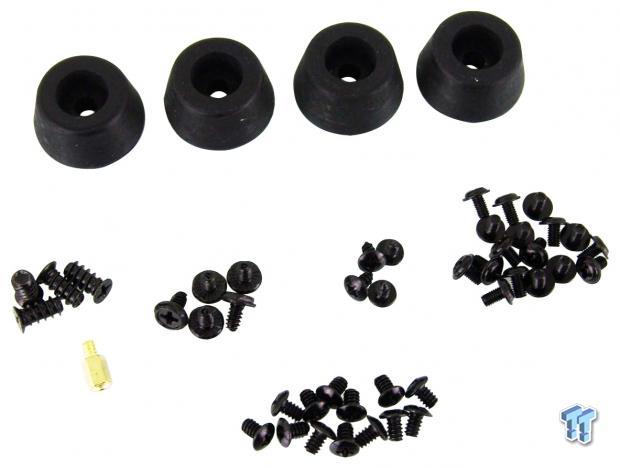
Here we have the optional rubber feet that have tape on them to stick to the left side panel's exterior for the horizontal layout orientation. There are also four fan screws, a standoff, PSU screws, HDD tray locking screws, and 2.5" drive and motherboard screws. The group at the bottom are used for 3.5" drive installation.
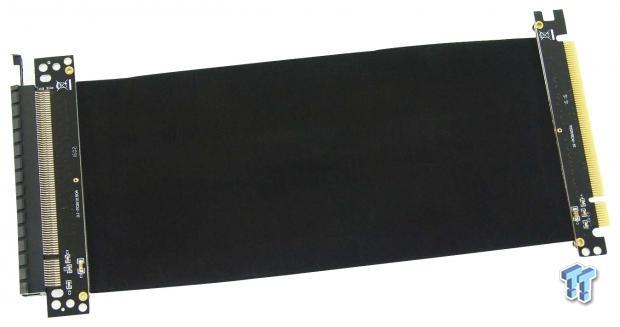
We also received a PCI-e riser cable inside of the cardboard box. This is the same model we got with the Core P3, and in this instance, it allows a standard sized card to fit inside of this thin chassis design.
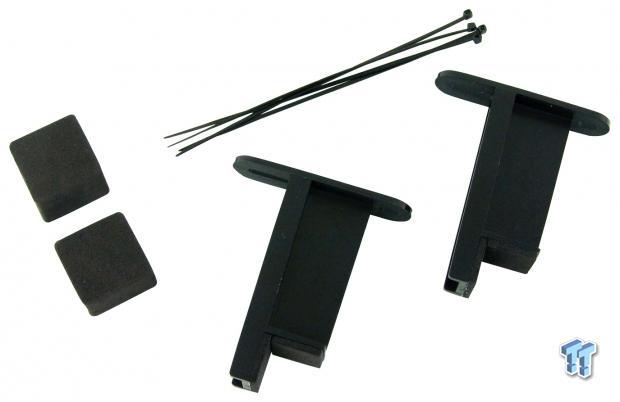
Here we have four wire tie strips to help manage what wiring may be hanging loose inside of the Core G3. We also get a pair of dense foam pads to help support the video card in the horizontal orientation. The brackets are what mount to the motherboard tray, and are what supports the video card in the vertical orientation.
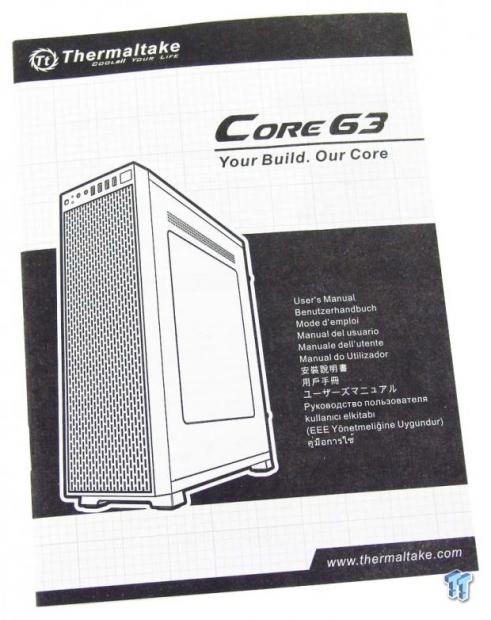
Thermaltake also ships the Core G3 with a full on manual. Inside, you will find what all of the parts are, how many you should have of each part. As you continue through the pages, it shows hot to install them all. Along with a step-by-step guide to installing all of your parts, there is excellent renderings and text to help explain the situations so that nobody should get stuck at any point of the build process.
Case Build & Finished Product
When the build is completed, more specifically to our build, the front of the chassis never changes in styling. The view has changed slightly, as you can see a bit of the SATA cable on the left, and the hoses for the H80i GT are plainly visible on the right.
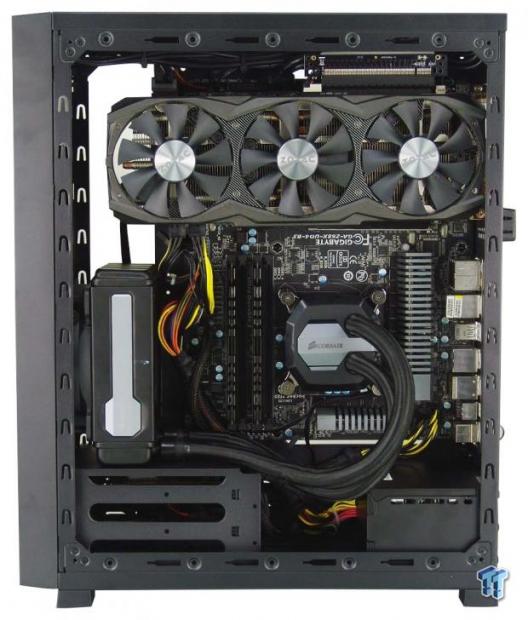
We like the layout, with the video card cooler facing the window at the top, and the motherboard hidden behind it. While we did remove the stock cooling, we were able to get the AIO in place without issue. While things are tight inside, everything we normally use in a regular chassis fits, except for a standard-sized PSU.
The card fits well into the expansion slots, and the dust shield popped right into place. We were not supplied an SFX PSU, so we turned to our parts shelf and grabbed our Fractal Design unit which had everything we needed to get this build finished.
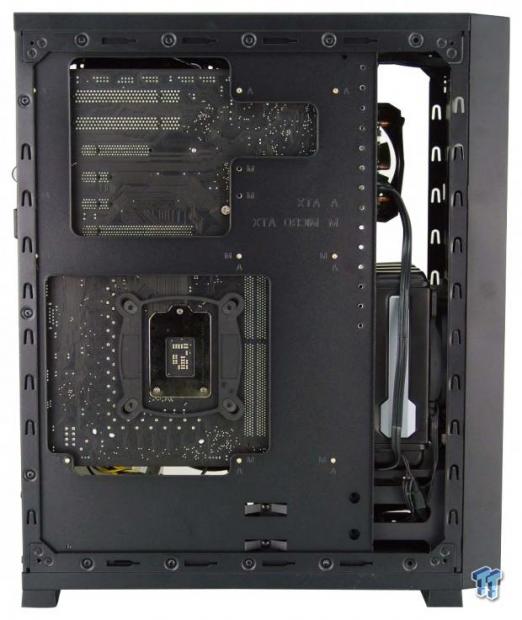
Behind the motherboard tray, there is not much to see other than bits of the PCB showing through the holes in it. We did run the SATA cable down the right side, and also used that gap to run the fan wiring for the AIO, everything else was contained on the other side.
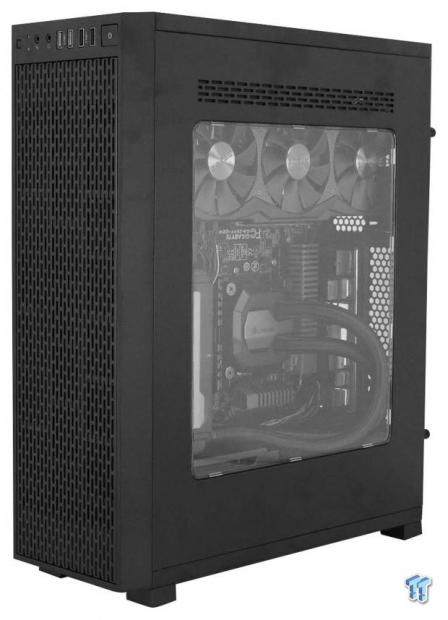
All put back together, we stopped to take a picture. We adore the view found looking through the side panel, where everything is on full display. At this point, everything is installed and supported, and we have no qualms in running this chassis in this orientation.
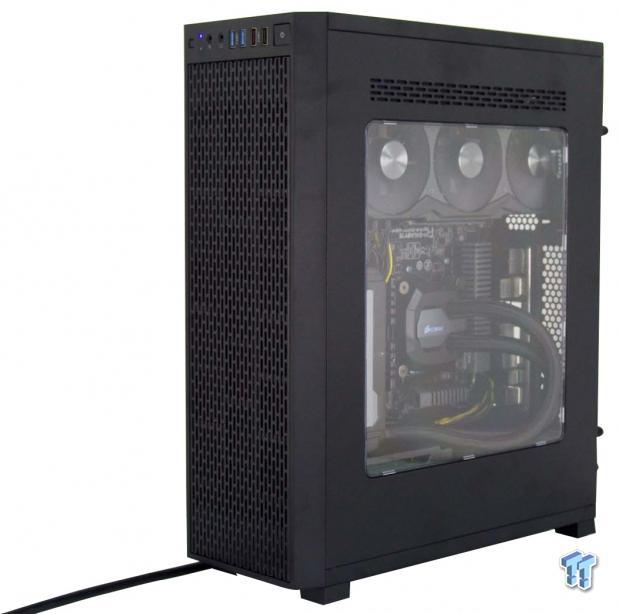
Once we added some power, we see the blue power LED glowing, and the HDD activity LED which we missed is also blue. While the Zotac LED is now facing the CPU, we do still see the glow from it, but we can see the Corsair logo on the head unit plain as day.
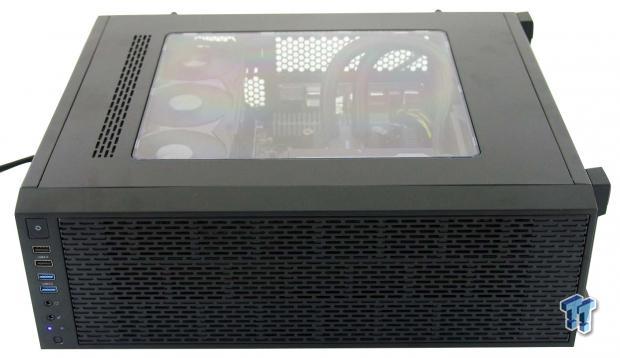
For those who wish to set the Core G3 on a shelf under the TV, you can opt for the second set of feet. Of course, you should take the other set of feet off, which we did not, but in either orientation, the chassis is designed to grab air from the front so that it will remain cool inside, no matter the choice of how it sits.
Final Thoughts
What strikes us first is that we are not used to having access to a chassis in which you can pack it full of powerful components, and ATX motherboard, and not have to deal with a large and wide chassis to do it. Of course, we are acutely aware of the media center PC cases, but most of them are either much smaller or are not made to orient vertically at all. Then we look at the fact that while they could have stuck with the usual layout, Thermaltake decided to make this a left hand drive chassis when it is upright, and the inverted ATX internal layout is something we have always liked as well. Then, you can also lay this chassis on its side, and slide it in on top of the Blu-ray player or over a receiver in the media center, making the Core G3 a special breed of chassis.
Cooling inside of the chassis is not perfect, as things can get warm dependent on your setup, but from the factory, we tested the stock layout. There is sufficient air flow from the pair of 120mm fans; the noise was kept to 27dB or less, and with all of the passive ventilation, and there is no real way to trap any air in pockets inside of this case.
The looks are good too, and we like the heavily patterned front panel design and the location of the front I/O panel. It is easy to see once you have tinkered with the chassis as long as we have, that the design is well thought out and everything has a purpose. Even when it comes to additional goodies that ship with the chassis, all of the parts work as intended. Thermaltake provides the ability to do things with your build you could not typically do in something that can also be called an HTPC, media center PC, living room gaming system, or a standalone tower chassis sitting on your desk.
With high availability, finding the Core G3 is not an issue. From what we have seen in the aspect of chassis design along with the included bits in the form of hardware and goodies, we feel the pricing is more than justified. Near $70 is a small price to pay to get such a great looking chassis that provides LCS support, a parallel mounting of the GPU to the motherboard, inverted ATX layout, and a huge window to see it all. The dual orientations is also a plus as it does not strand one buyer from the others. You do not have to use it any specific way and is part of the genius of this design.
For us, the Core G3 is well worth the investment, and if you are sick of cases too large for your needs, you can install a beast of a PC inside, and be ready for VR, 4K gaming, or stick with whatever works to power your current setup at the desk. The choice is yours.
Chad's Chassis Test System Specifications
- Motherboard: GIGABYTE GA-Z68X-UD4-B3
- CPU: Intel Core i7 2600K (buy from Amazon)
- Cooler: Corsair H80i GT (buy from Amazon)
- Memory: G.Skill Ripjaws F3-12800CL6D-4GBXH
- Video Card: ZOTAC GeForce GTX 970 AMP. Extreme Edition (buy from Amazon)
- Storage: SuperSpeed 128GB SSD
- Power Supply: SilverStone SST-ST85F-G (buy from Amazon)
- OS: Microsoft Windows 7 Ultimate 64-bit (buy from Amazon)
 Lian Li B4-mATX Review: a compact mATX SFF case with excellent airflow and premium features
 Ocypus Sigma F36 BK ARGB Cooling Fan Review: high airflow and unified design in one frame
 PCCooler CPS RZ820 Display Review: a flagship-level CPU air cooler with an LCD screen
 MOAIPLAY ORA PRO G1 850W ATX 3.1 PSU Review: high efficiency and 10-year warranty for $119.99
 NZXT H6 RGB+ Compact Dual-Chamber Chassis Review
 KB5101650 Windows 11 update is causing some Dell PCs to shut down unexpectedly
 Bethesda on Elder Scrolls VI, Fallout 5 Xbox exclusivity: 'It's too early to comment'
 Assassin's Creed Black Flag Resynced makes in one day what Shadows took four days to earn
 Bethesda gives news on Elder Scrolls 6, confirms 4 Fallout projects, new Starfield content
 GTA 6 can be ordered and delivered through Uber Eats
 Zenimax Online Studios leaders, including studio head, exiting as part of Xbox cuts
 Steam made a record $11 billion in just six months, analyst firm estimates
 GeForce RTX 50 Series owners are reporting GPU Hotspots of 100+ degrees now that monitoring is available
 Valve is now supplying replacement Steam Deck LCD batteries again, after reportedly ceasing support
 Intel Core Ultra 400 'Nova Lake' Series details leak, CPU naming and release dates
 SteelSeries Arctis Nova 7 Wireless Gen 2 Headset Review - New and Improved, But Is It Enough?
 AMD Ryzen 7 7700X3D Review - Days of Future Past
 Samsung 990 2TB SSD Review - Ninth Gen QLC at PCIe Gen4 Speeds
 ASUS ExpertBook Ultra (Panther Lake) 14" Business Laptop Review
 ASUS ROG Raikiri II Xbox Wireless Controller Review - Ready to Take Control
 MOZA FMP18 Panel Bundle Review: authentic F/A-18 Hornet cockpit controls for flight sims
 Micron 6600 ION 245.76TB Enterprise SSD Review - Best in Class Programming Speeds
 MOZA MA3F EFCM Flight Control Module Review: authentic Airbus A320 autopilot panel for simulators
 Turtle Beach Stealth Pro II Wireless Gaming Headset Review - Premium Sound, Fantastic Features
 MOZA MGX1000 Instrument Panel Review: a realistic Garmin G1000 replica for immersive flight sims
 Hisense U6SF 65-inch MiniLED TV: High Performance Meets Leisurely Convenience
 I stopped digging through Windows menus after I set up this one folder
 Don't sell your Windows laptop until you do these things
 6 PC cleaning mistakes to avoid for safer hardware maintenance
 Phison and Intel Take Aim at Local AI's Memory Wall with aiDAPTIV
 How to Remap Keyboard Keys in Windows using Microsoft PowerToys
 7 tips to organize your Windows files for faster, easier access
 Intel Arc G3 Extreme first impressions with MSI's Claw 8 EX AI+ - Incredible power for an extreme price
 How to fix Wi-Fi Adapter Not Working on Windows laptops: troubleshooting tips
 Hisense U7SG 4K TV: Modern Entertainment for the New Age