The Bottom Line
Introduction, Specifications, and Pricing
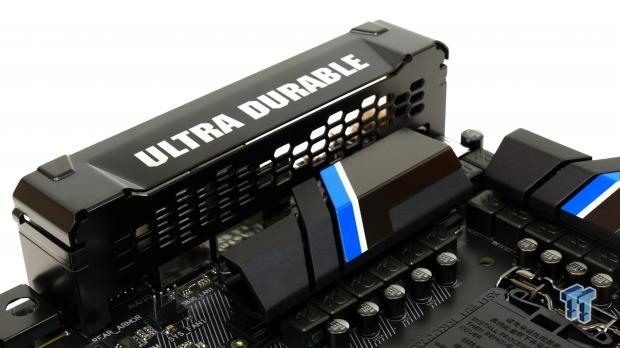
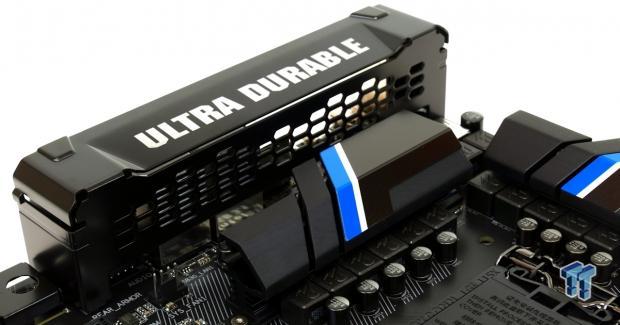
Intel's Z170 chipset launched almost a year ago, but that has not stopped manufacturers from producing refreshed models with new features or newer aesthetics (RGB LEDs). At Computex, GIGABYTE launched the X99-Designare EX and Z170X-Designare, providing their Ultra Durable line of motherboards a rebirth. Both motherboards carry features aimed at enthusiasts who want a mainstream motherboard with the latest in consumer technologies. The Designare name would hint that the product is for those who want to design their own systems. The Z170X-Designare offers RGB LEDs in multiple sections of the motherboard, hence facilitating more colorful case mods and accessories.
Apart from the purely aesthetic RGB LEDs, the Z170X-Designare is quite formidable in regards to features. It is one of few Z170 motherboards to carry a U.2 port and an M.2 slot, it has dual Intel NICs, and it has dual USB Type-C ports with a whopping 100W power output support. USB Power Delivery 2.0 specification mentions a 100W Type-C power mode, which would require 20v output at 5A. The highest DC voltage outputted by the main PSU is only 12V, so a boost converter is required to produce 20V output, and GIGABYTE's Z170X-Designare has one to facilitate the ports. At first glance, the Z170X-Designare doesn't look like much, but let's take a look and see if we encounter any surprises.
Specifications

The GIGABYTE Z170X-Designare has a lot of high-end features including Intel USB 3.1, U.2, M.2, SATA Express, support for 3-way Intel 750 RAID, and even dual Intel Gbit NICs.
Pricing
The Z170X-Designare is available from many large retailers for roughly $250.
Packaging and Z170X-Designare Overview
Packaging and Overview
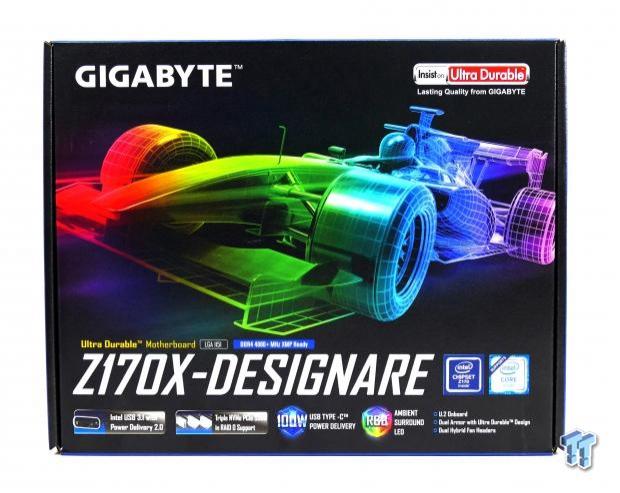
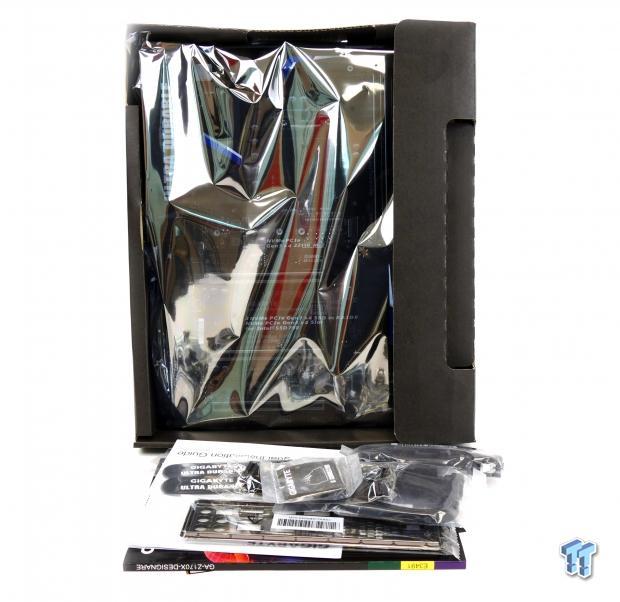
The Z170X-Designare's box has a rainbow colored racecar plastered on the box to represent the RGB LEDs and high-performance aspect of the product. Packaging is typical of that from GIGABYTE. The motherboard is in a secondary box and accessories are individually packaged.
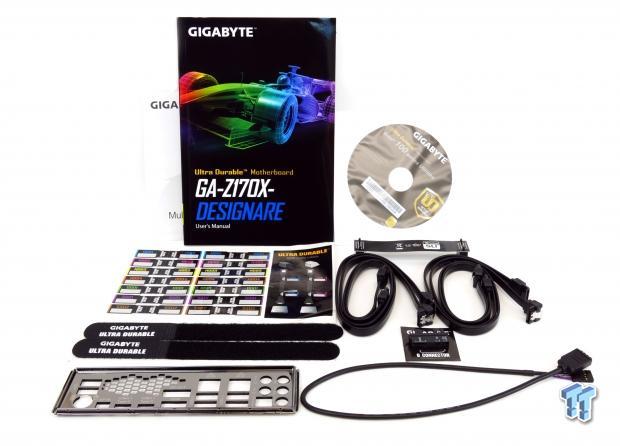
Accessories include 4x SATA6Gb/s cables, IO shield, SLI connector, RGB Cable extension, Velcro cable ties, G-Connector, storage device stickers, G1 case badge, door hanger, driver DVD, and manuals.
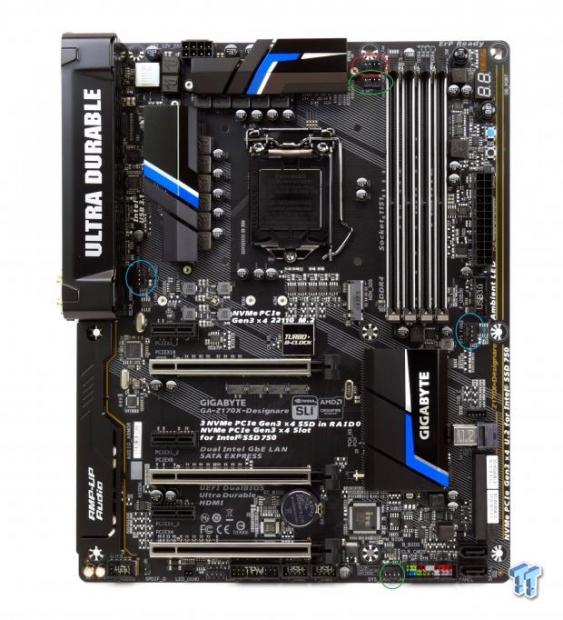
The GIGABYTE Z170X-Designare has a total of five 4-pin fan headers. The header circled in red is the CPU fan and supports PWM only operation. The two blue headers are voltage mode 4-pin headers, capable of controlling PWM and voltage mode fans through voltage mode. The two headers circled in green will support PWM or voltage mode fans, and you can select the control mode in the UEFI.
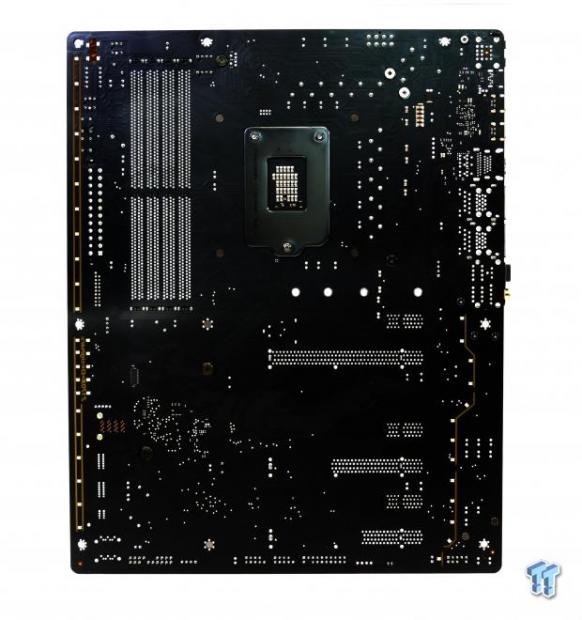
The motherboard has RGB LEDs all over, and you can change the color theme of the motherboard through the UEFI or Windows software. While the motherboard can change its color to your choosing, it goes well with blue since the heat sinks highlights are blue. The back of the motherboard is bare of components.

The IO panel on the Z170X-Designare carries four USB 3.0 ports, two USB 2.0 ports, mini DisplayPort, mini DisplayPort in (for ThunderBolt), PS/2 Keyboard/Mouse, USB 3.1/Thunderbolt 3 Type-C connector, DisplayPort, HDMI, 2x RJ-45 Intel LAN, and 7.1 gold plated audio outputs with S/PDIF.
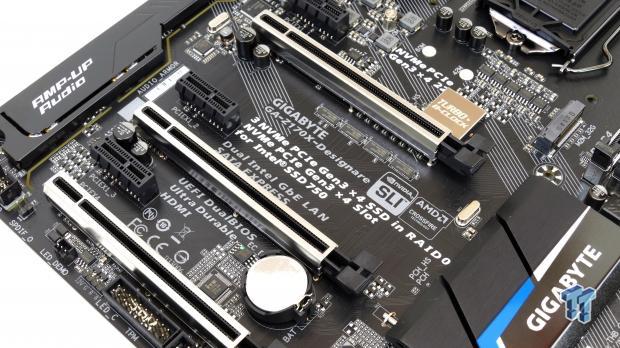
The PCI-E layout is very simple. The first and second reinforced x16 PCI-E slots are wired to the CPU and operate at x16/x0 or x8/x8 and support SLI/CrossFireX. The last full-sized x16 slot is electrically x4 and is connected to the PCH; it is also where your third Intel 750 drive would go in case you wanted to RAID three drives. The two PCI-E x1 slots are wired to the PCH.
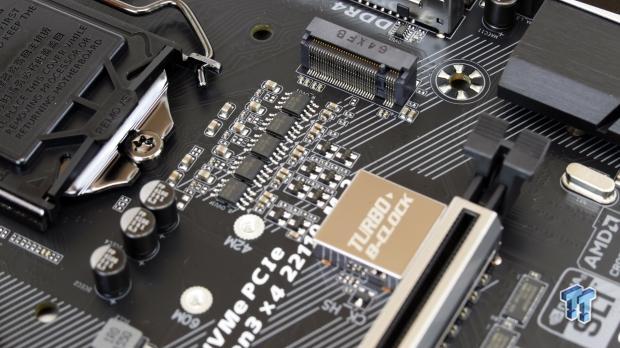
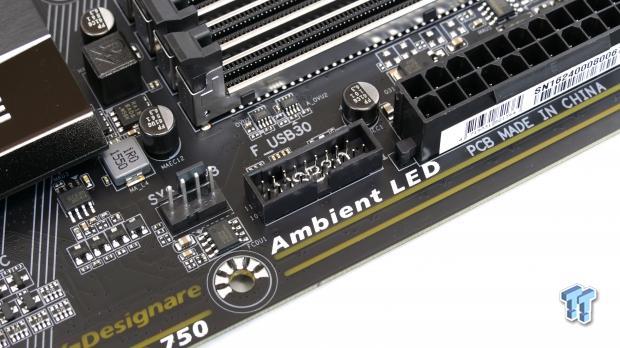
A x4 PCI-E 3.0 M.2 slot provides up to 32Gbps of throughput. A single USB 3.0 internal header sits below the 24-pin motherboard power connector.
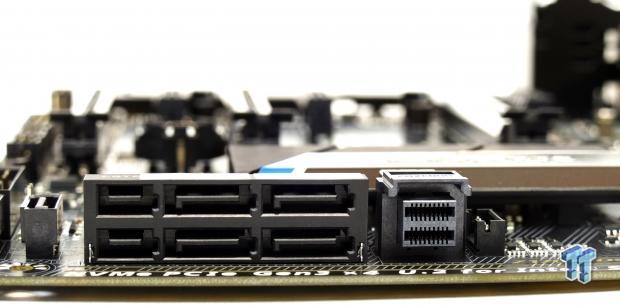
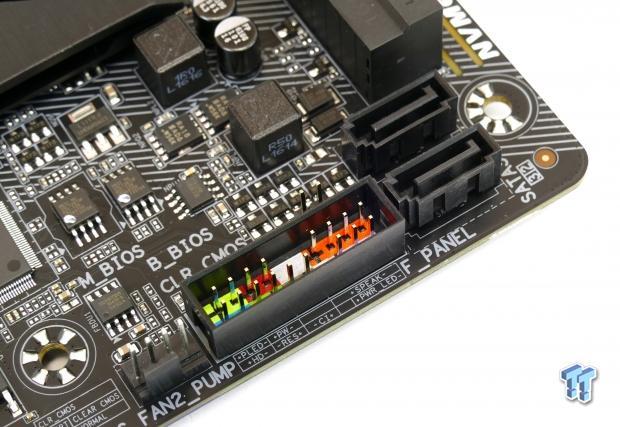
The U.2 connector that provides 32Gbps sits adjacent to the two SATA Express connectors that double as four SATA6Gb/s ports. Two other SATA6Gb/s ports sit straight up in the lower right-hand corner of the motherboard.
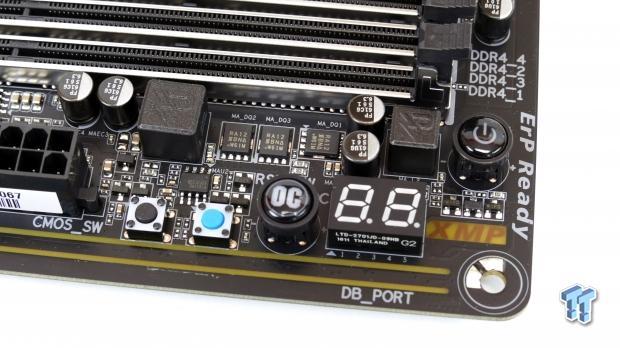
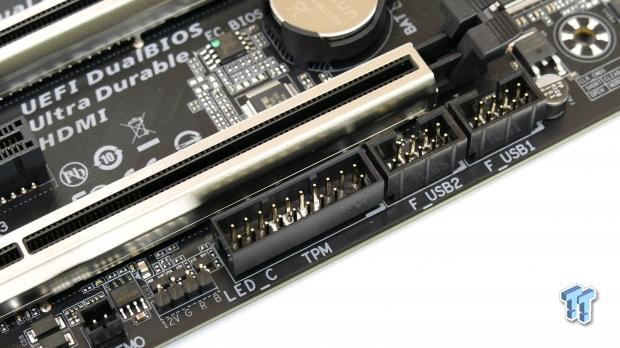
The Z170X-Designare even has overclocking features. A very useful POST code display is located at the top right-hand corner of the motherboard. There is also an easy OC button for a pre-programed overclock, power button, reset button, and clear CMOS button. At the bottom row of the motherboard, there is a TPM header, two USB 2.0 headers, and an RGB LED header.
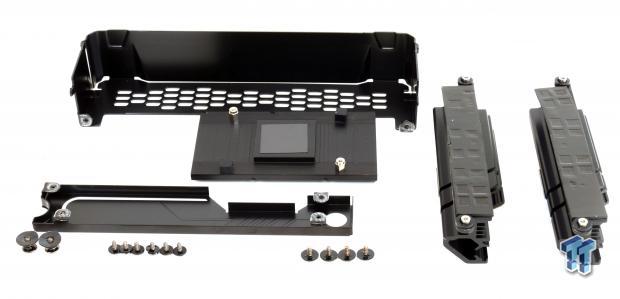
The heat sinks are all solid aluminum, as are the shields. They are all screwed down and make great contact with the motherboard.
GIGABYTE Z170X-Designare Circuit Analysis
Circuit Analysis
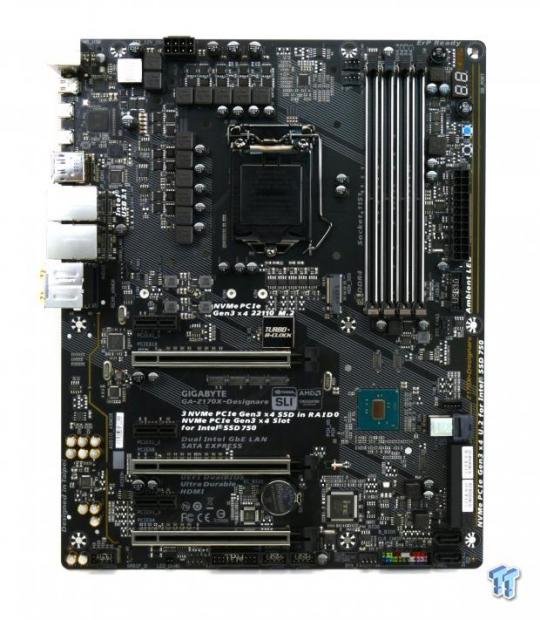
Another interesting motherboard in the nude.
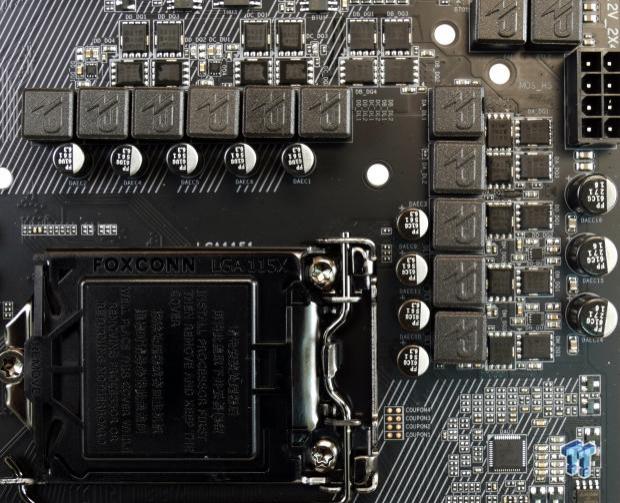
The VRM on the Z170X-Designare is an 8+3 phase VRM and uses custom branded Power inductors and 10K black polymer solid capacitors.
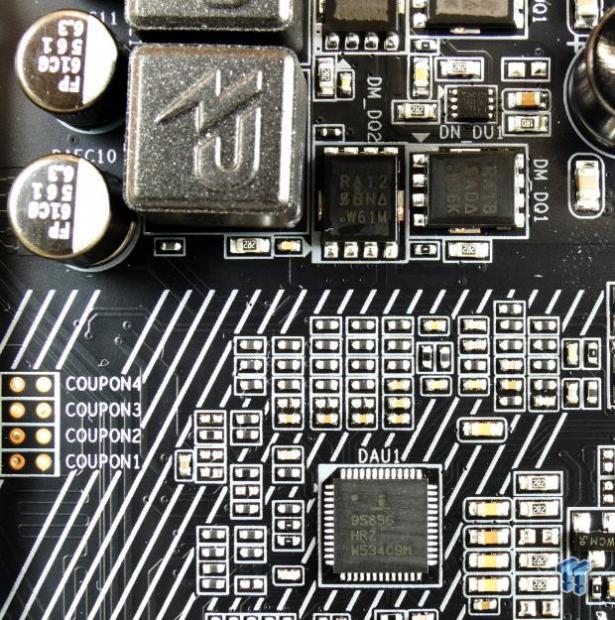
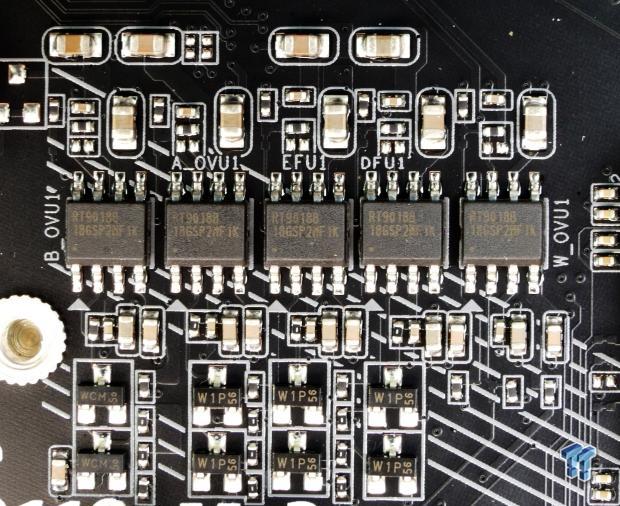
The Intersil ISL95856 is a 4+3 phase hybrid PWM that provides 4+3 phases that are then doubled to 8+3 phases, for the CPU VCore + integrated GPU. The ISL95856 has three integrated drivers, so GIGABYTE adds four more to support all the phases. Each phase uses a Vishay SiRA12 for the high-side MOSFET and a Vishay SiRA18 for the low-side. The MOSFETs are PowerPAKs. Phases are doubled by doubling the number of MOSFETs on each driver. The VCCIO, VCCSA, and other rails for overclocking come from a linear regulator circuit and a few LDOs.
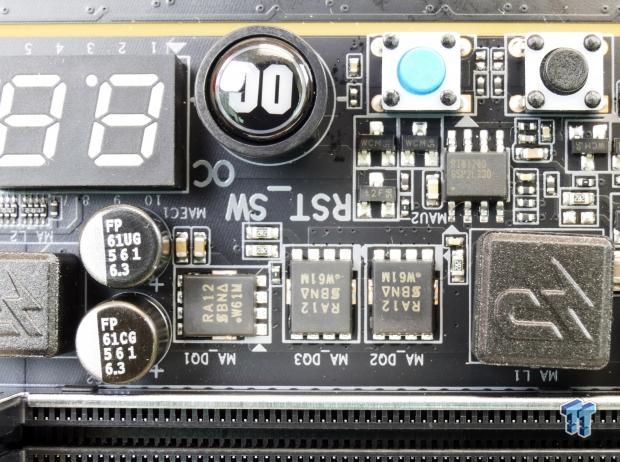
The memory VRM uses a Richtek RT8120D PWM controller with integrated driver and two SiRA12 low-side MOSFETs and one SiRA12 high-side MOSFET.
GIGABYTE Z170X-Designare Circuit Analysis Continued
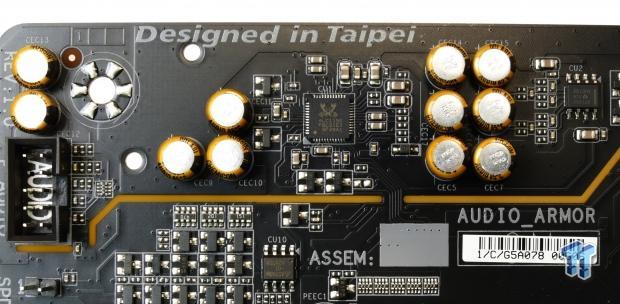
The Z170X-Designare uses a Realtek ALC1150 audio codec and an OPA1652 audio amplifier to improve audio quality. GIGABYTE also physically isolated the motherboard and added in 11x Nichicon Gold Plated Capacitors.
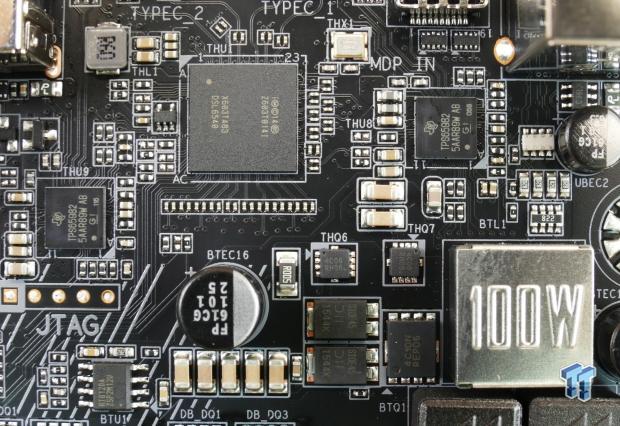
GIGABYTE is using the Intel Alpine Ridge USB 3.1/ThunderBolt 3 to provide two USB 3.1 Type-C ports that don't have Thunderbolt 3 certification yet, but GIGABYTE expects to get the certification since they provide the controller with x4 PCI-E 3.0 and have a mini-DisplayPort input on the rear IO. Two Texas Instruments TPS65982 are used for Type-C port switching and USB Power Delivery 2.0 control. One big feature of this motherboard is the 100W USB power support that comes from a boost converter capable of 20V at 5A for 100W.
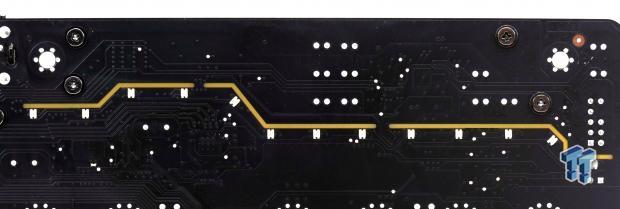
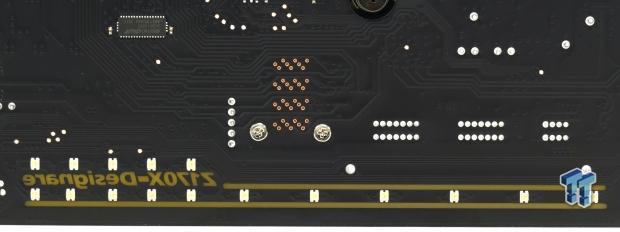
The Z170X-Designare has many RGB LEDs that will illuminate the PCB divides on either side of the motherboard.
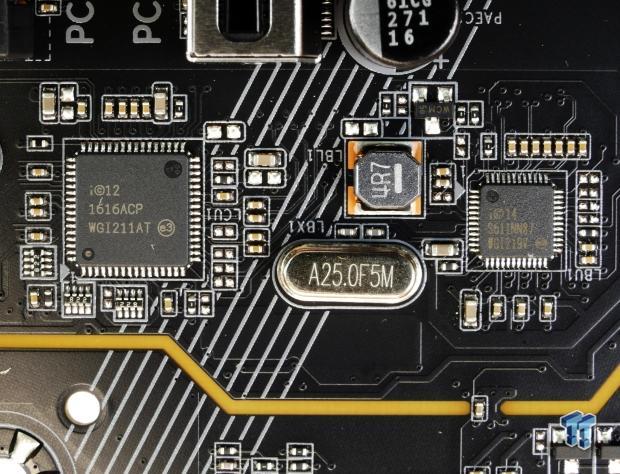
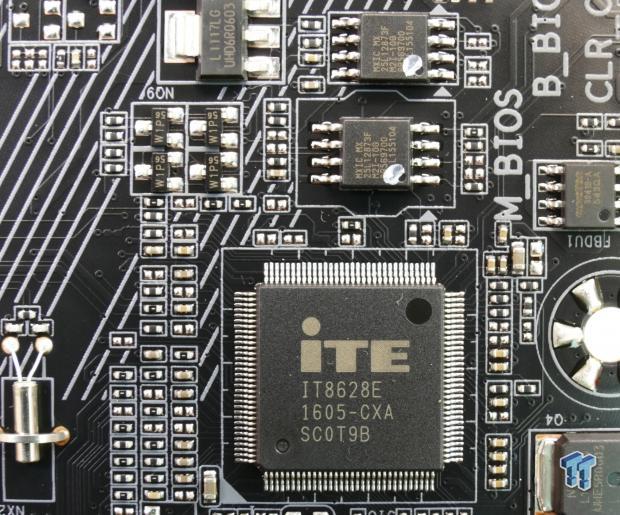
The Z170X-Designare has two Intel NICs. The first is from the integrated MAC and uses the i219v PHY. The second is an Intel i211AT that is a standalone network controller - you can team the ports. The iTE IT8628E is the main Super IO in charge of temperature and voltage monitoring, fan control, and the PS/2 port on the rear IO panel. There are two 128Mbit 16MB BIOS ROMs that provide enough space for GIGABYTE's new UEFI.
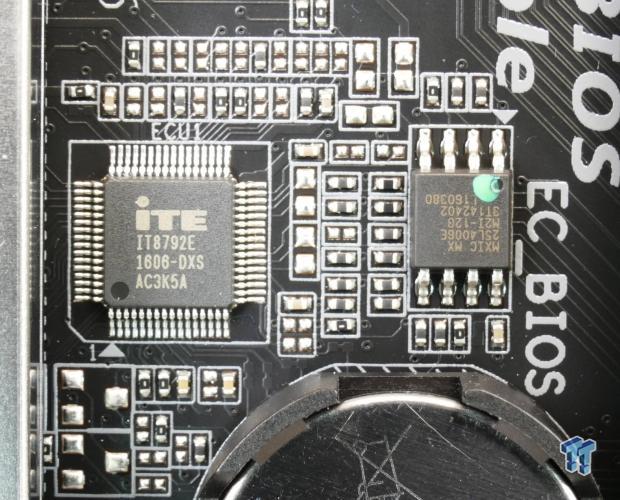
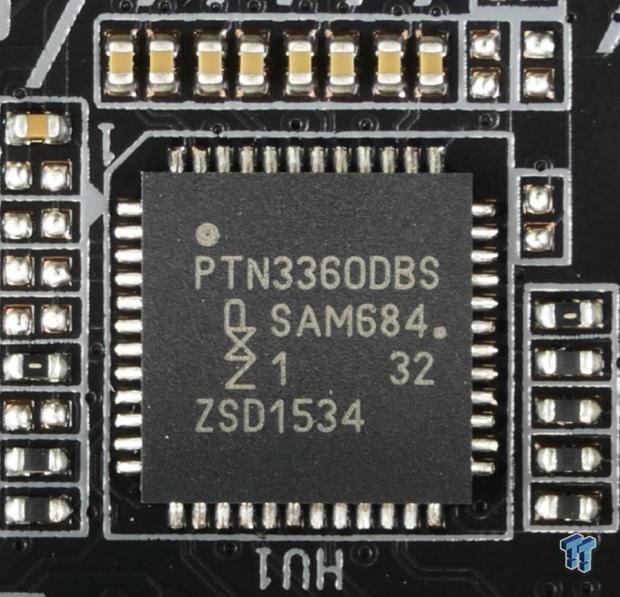
An iTE IT8792E acts as an embedded controller providing extra features such as better fan control and RGB strip control. A level shifter from NXP, the PTN3360DBS, provides the HDMI port on the rear IO from the digital video output from the integrated graphics in the CPU.
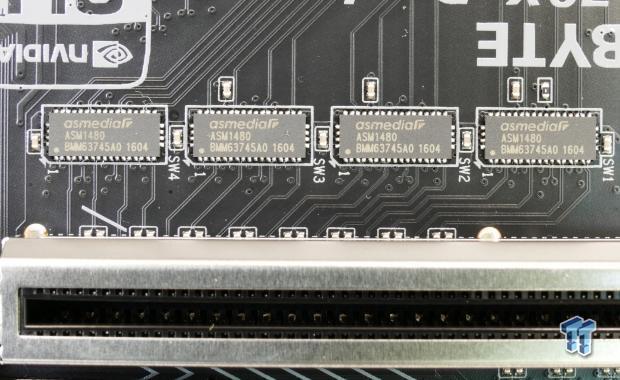
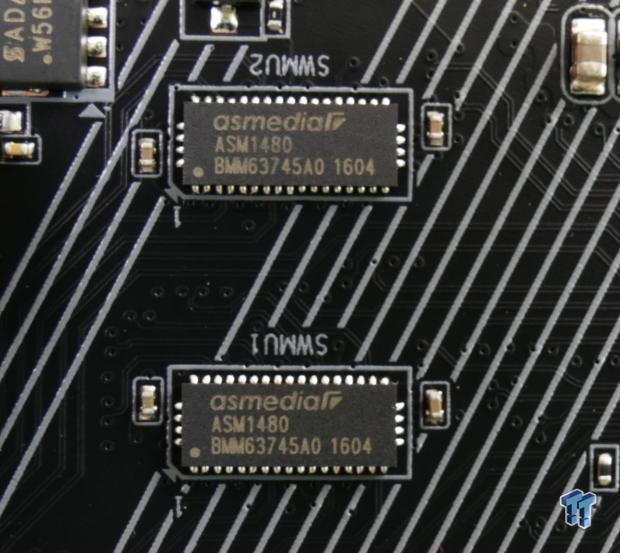
Many ASMedia ASM1480s switch around PCI-E 3.0 from the CPU and the PCH.
The BIOS
BIOS
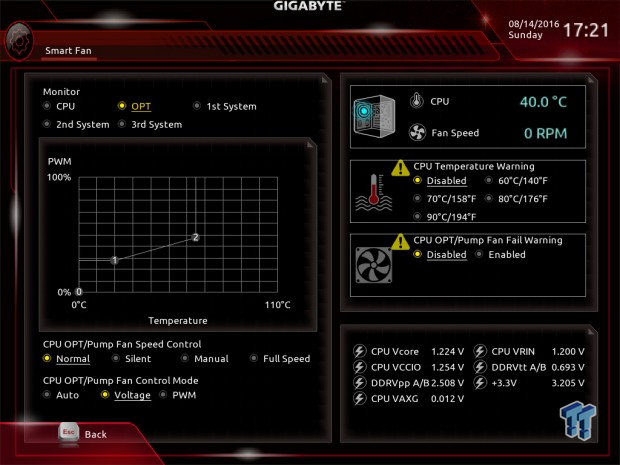
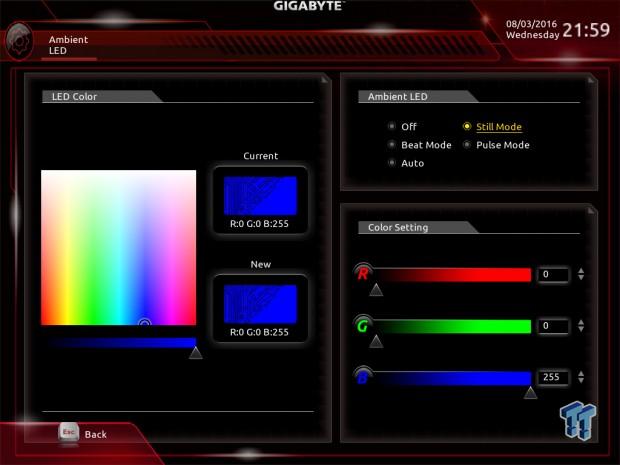
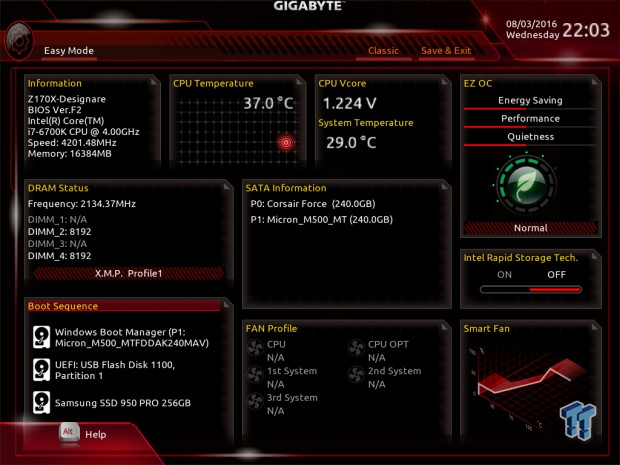
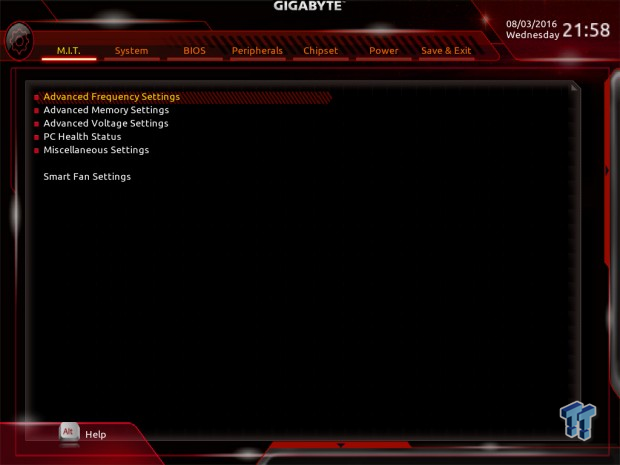
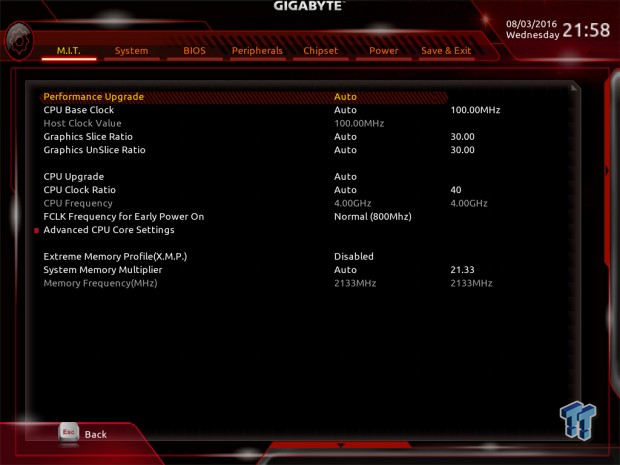
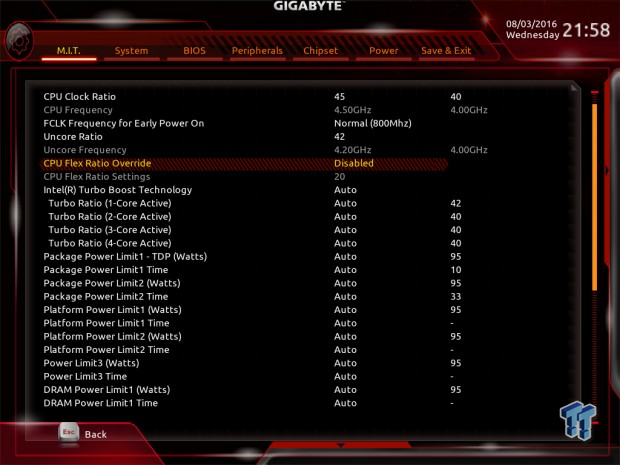
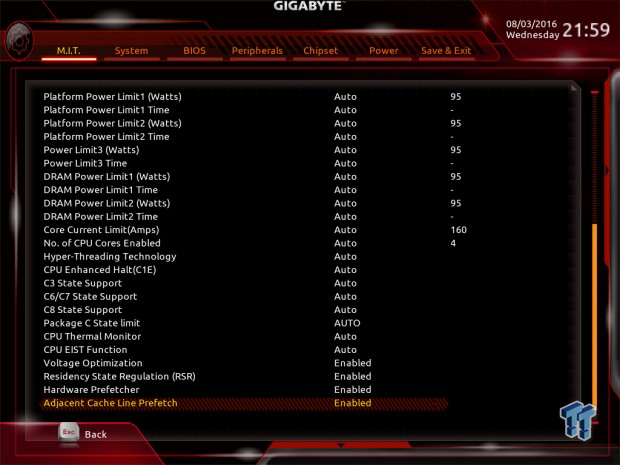
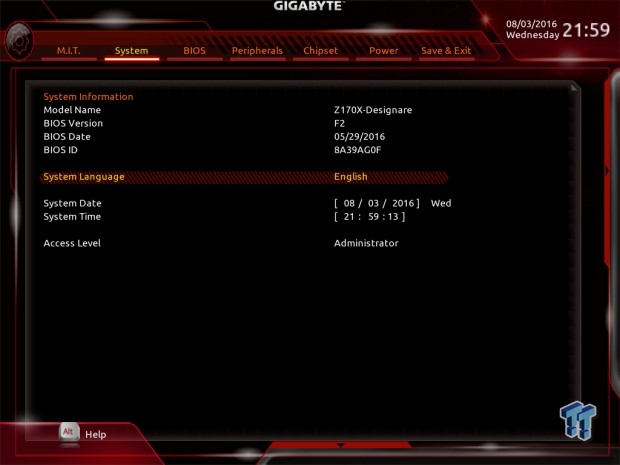
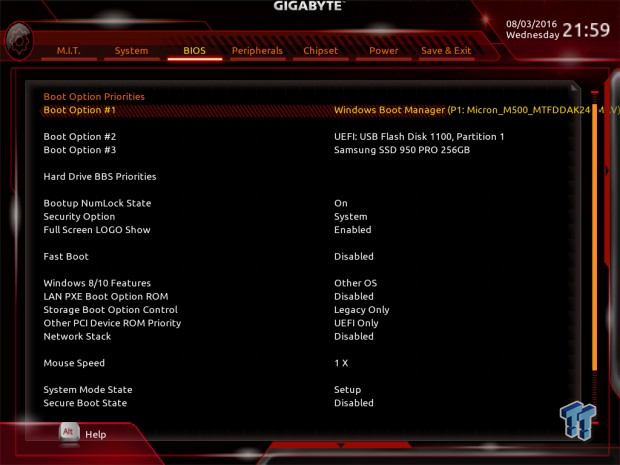
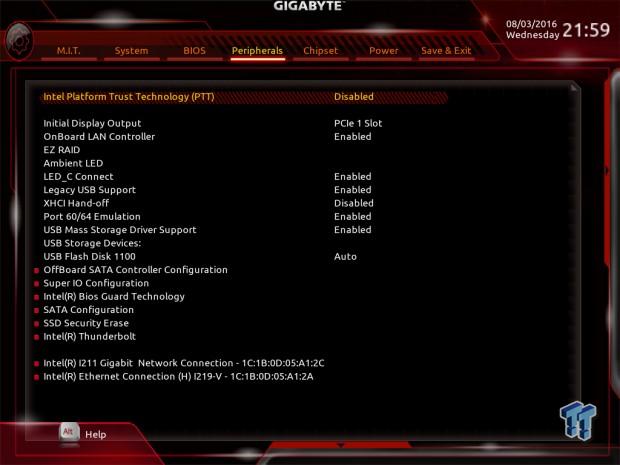
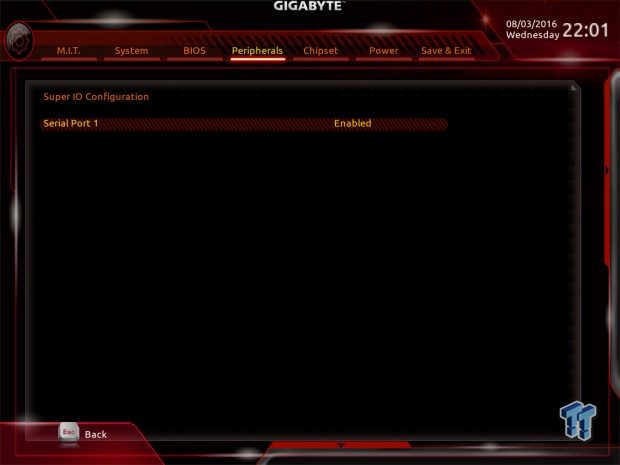
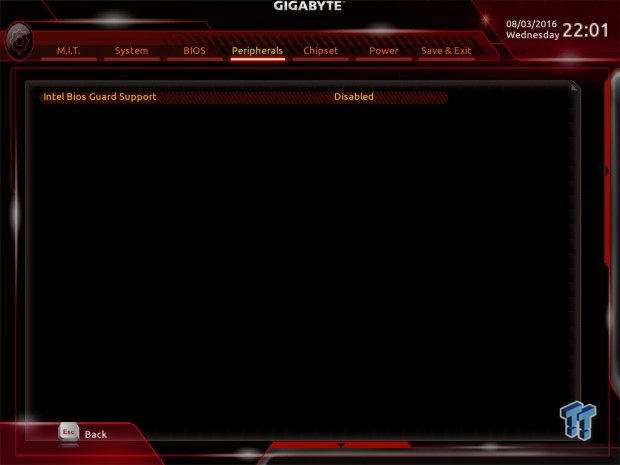
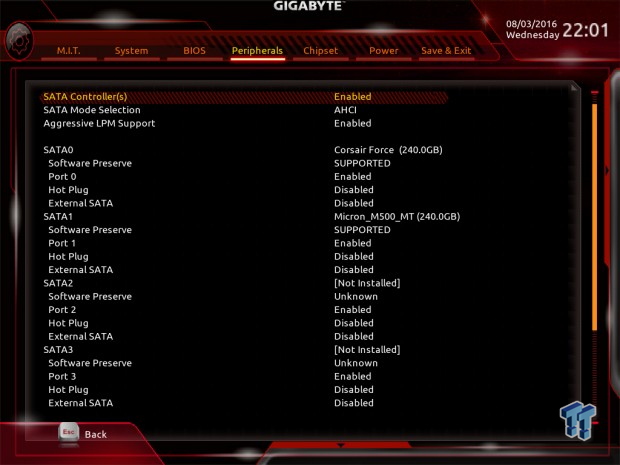
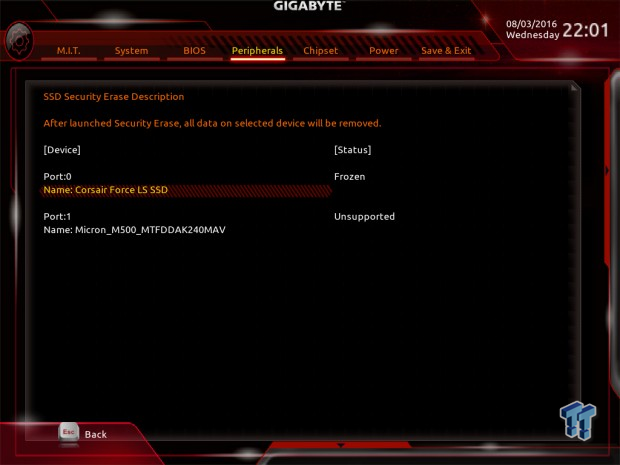
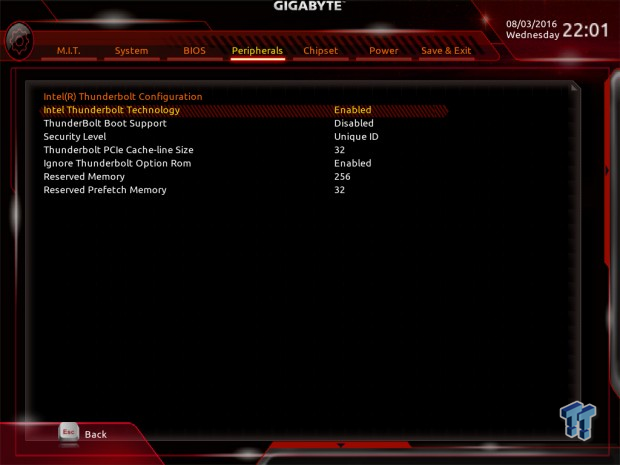
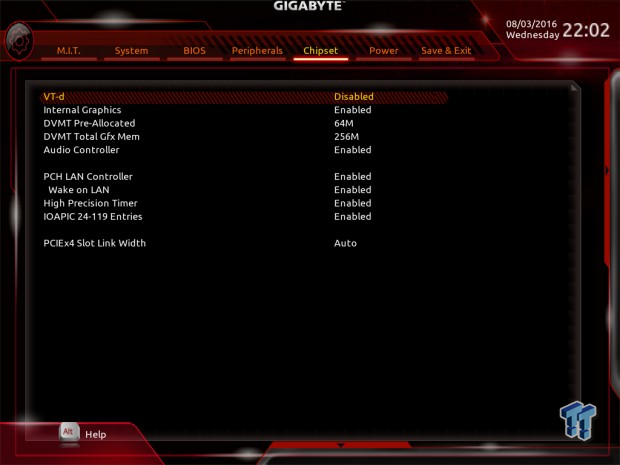
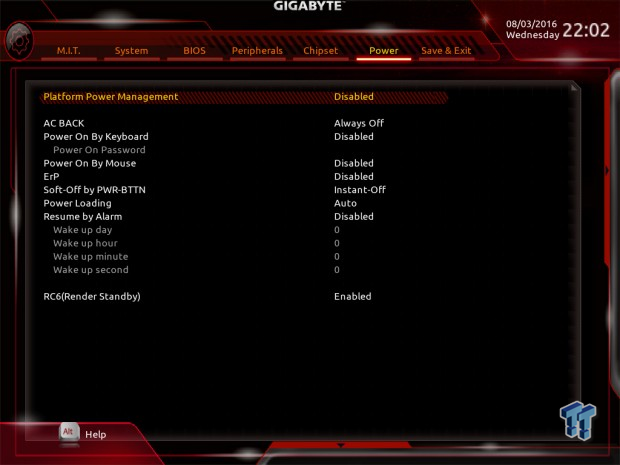
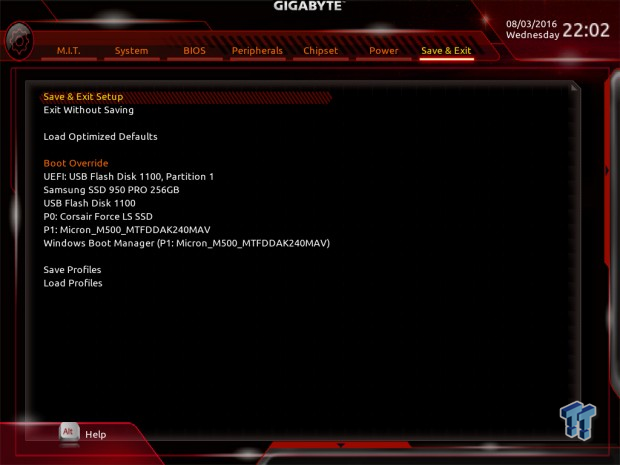
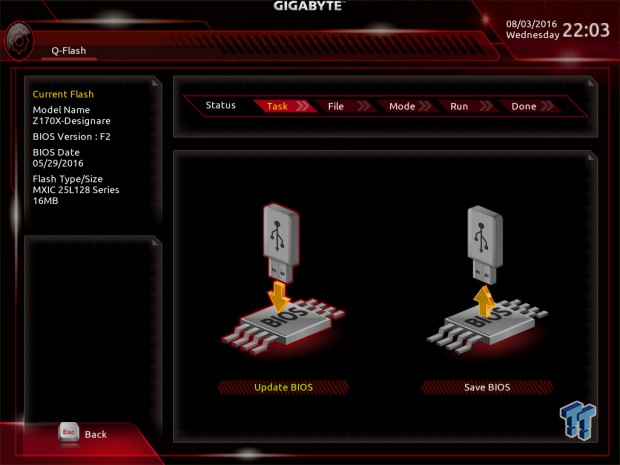
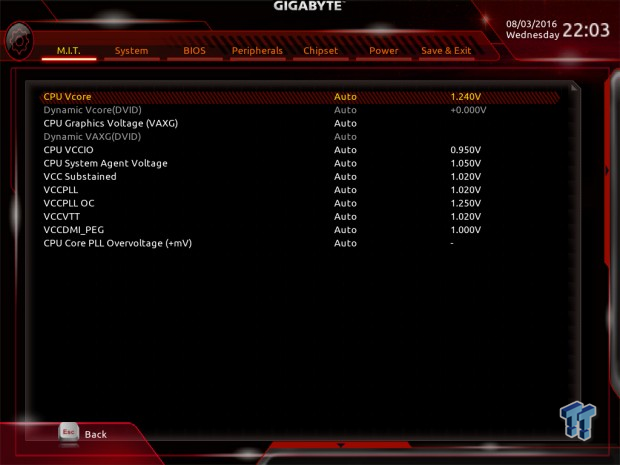
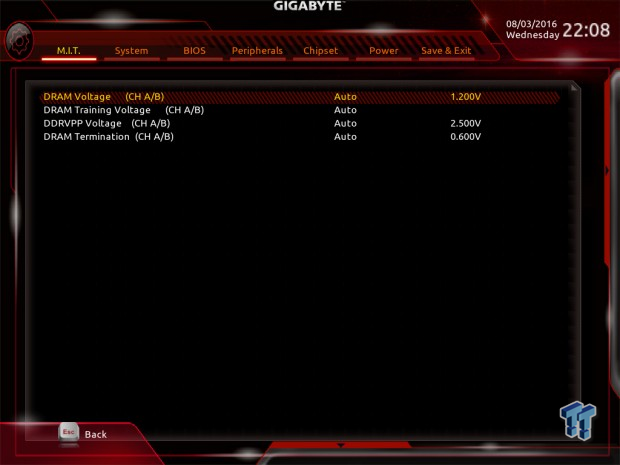
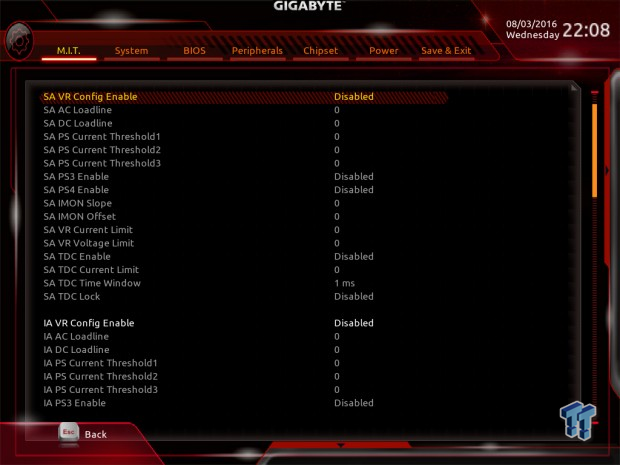
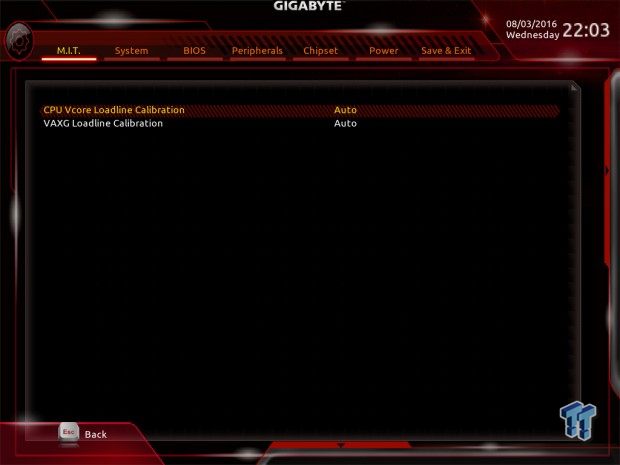
The Z170X-Designare, along with the rest of GIGABYTE's refreshed models, come with a brand new UEFI. Compared to GIGABYTE's last generation, the new UEFI has GUI-based fan control options, full RGB LED feature control, and still maintains the old layout style. Having used GIGABYTE motherboards in the past, I can say that their new UEFI brings their offerings up to par with the rest of the industry. In fact, their RGB LED control is more extensive than on many other motherboards with RGB support, the only thing missing is individual zone color control.
Overall, options are straightforward, and there didn't seem to be anything missing. There are fewer PWM control options, but that is because a different PWM controller chip is being used.


Software
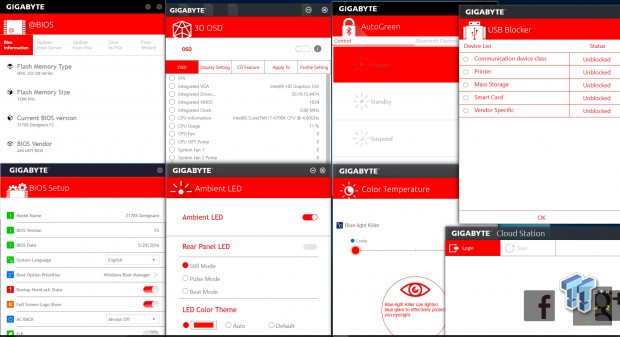
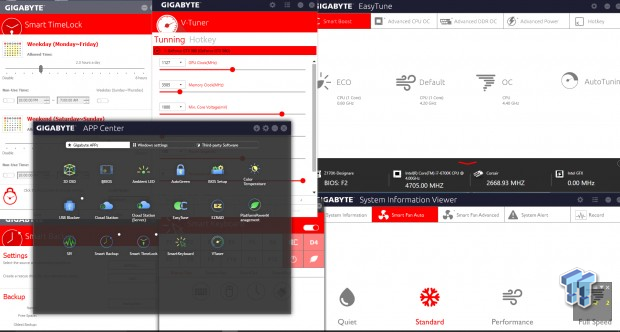
GIGABYTE includes many separate software applications, all of which can be found under the APP Center. They include @BIOS, 3D OSD, AutoGreen, USB Blocker, BIOS Setup, Ambient LED, Color Temperature, Cloud Station client and server, Smart TimeLock, V-Tuner, EasyTune, System Information Viewer, Smart Backup, EZ RAID, and Smart Keyboard.
Test System Setup
Steven's Motherboard Test System Specifications
- Motherboard: GIGABYTE Z170X-Designare
- CPU: Intel Core i7 6700K - Buy from Amazon / Read our review
- Cooler: Corsair H110i GT - Buy from Amazon
- Memory: Corsair Vengeance LPX 16GB (2x8GB) 2666MHz - Buy from Amazon
- Video Card: NVIDIA GeForce GTX 980 - Buy from Amazon / Read our review
- Storage - Boot Drive: Samsung 850 Pro 512GB - Buy from Amazon / Read our review
- Storage - SATA6G Drive: Corsair Force LS 240GB - Buy from Amazon / Read our review
- Storage - M.2 Drive: Kingston HyperX Predator 240GB PCIe x4 - Buy from Amazon
- Storage - USB Drive: Corsair Voyager GS 64GB - Buy from Amazon / Read our review
- Case: Corsair Obsidian 900D - Buy from Amazon / Read our review
- Power Supply: Corsair AX1200i - Buy from Amazon / Read our review
- OS: Microsoft Windows 10 Pro - Buy from Amazon
- Monitor: ASUS PA328 ProArt 32" 4K
- Keyboard: Corsair K70 LUX
- Mouse: Corsair M65 PRO RGB
- Headset: Corsair VOID RGB Wireless
- BIOS: F2
- Drivers: Intel INF: 10.1.1.9, Intel ME: 11.1.1.1162, NVIDIA Graphics: 353.82, Audio: 6.1.0.7727, Intel LAN: 20.7
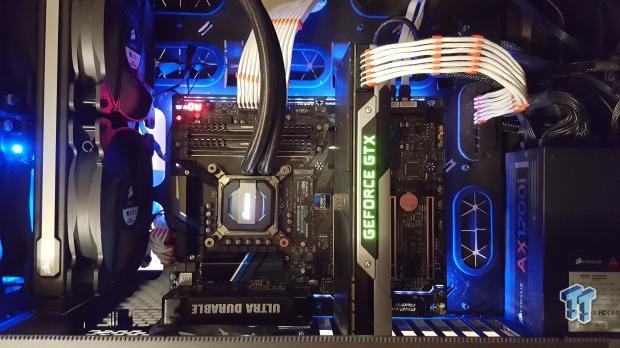
The RGB LEDs are a nice touch, and you can choose whatever color you want. Since there are blue highlights on the black heat sinks, selecting blue light produces a nice matching effect.
The new test bench is designed to test every aspect of the motherboard and IO. I have designed it so that the motherboard sits in a case and is cooled by fans always on at a constant rate to keep the conditions similar during all tests. I have cut out part of the case behind the motherboard so I can get thermal images of the back of the PCB where the VRM heat spreads. System and CPU power measurements are now digitally logged.
I am also using a Netgear Nighthawk X4 AC2350 for our network (including wireless AC) tests. The latest M.2, SSD, and USB technologies are also being utilized to test the maximum potential of the motherboards that are tested.
Overclocking
Overclocking Results
CPU Overclocking
I have decided to reduce the CPU VCore to 1.4v applied (I will measure real VCore at the output capacitors), and see how high I can validate. On most motherboards, it's 5GHz.
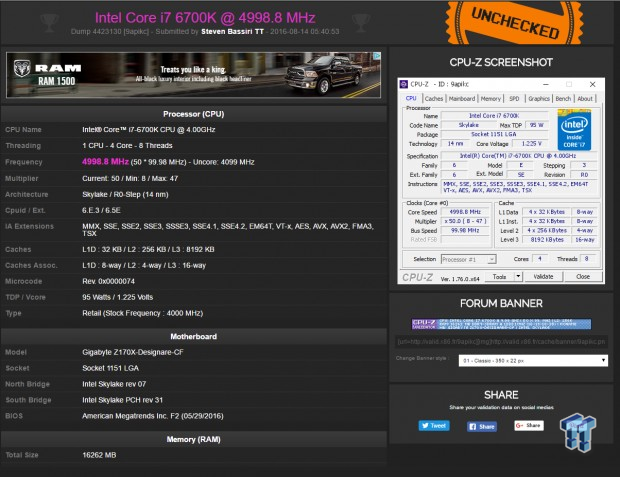
The Z170X-Designare hit 5GHz.
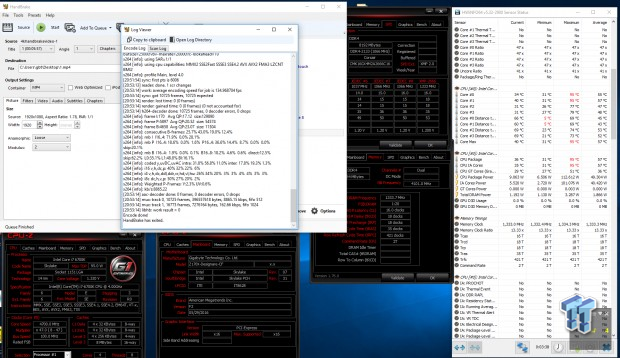
I was able to produce a stable 4.7GHz overclock.
Compatible Memory Overclocking Kits
Test 1: 2x8GB (16GB) Corsair Vengeance 2666MHz C16
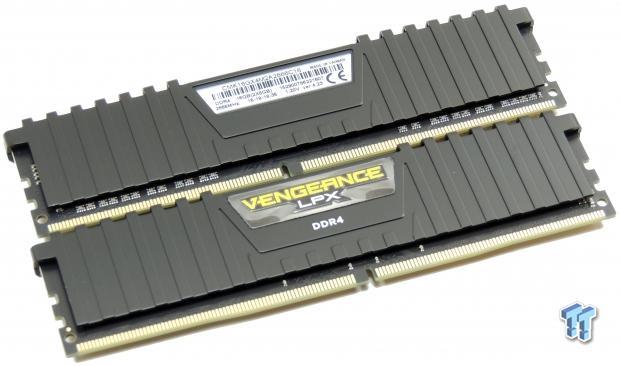
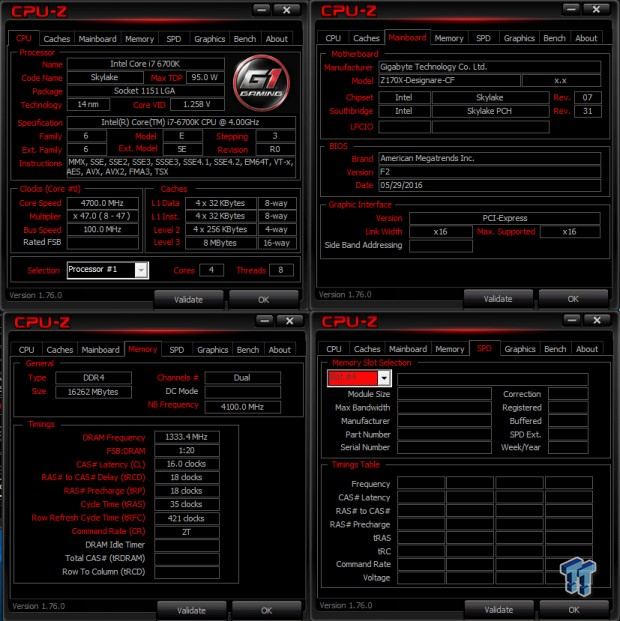
The Dominator Platinum worked without a hitch.
Test 2: 2x4GB (8GB) Corsair Dominator Platinum 3200MHz C16
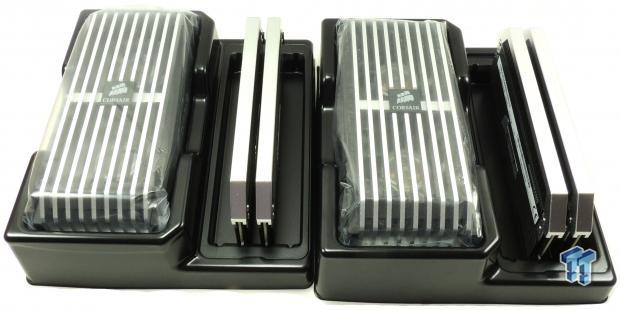
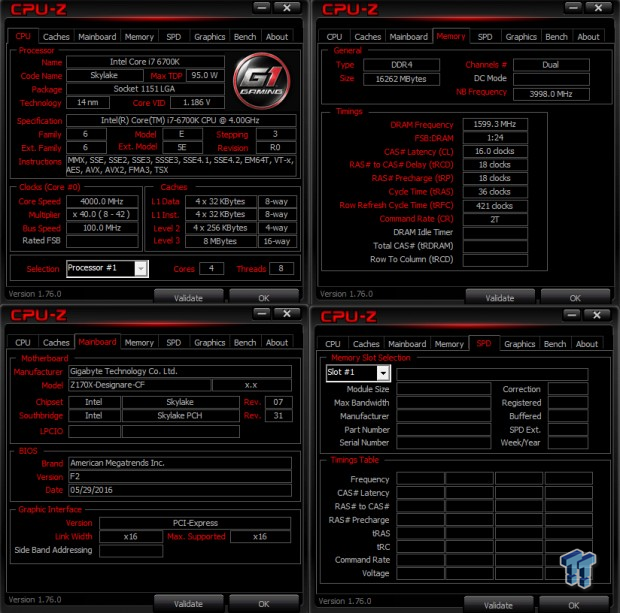
The Dominator Platinum works on this motherboard.
Test 3: 2x4GB (8GB) G.Skill TridentZ 3733MHz C17
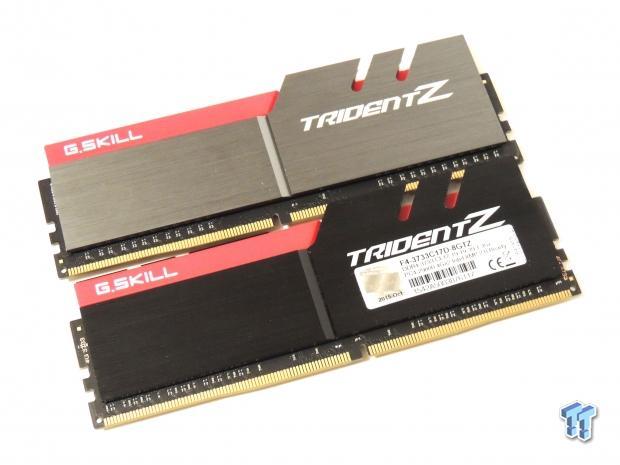
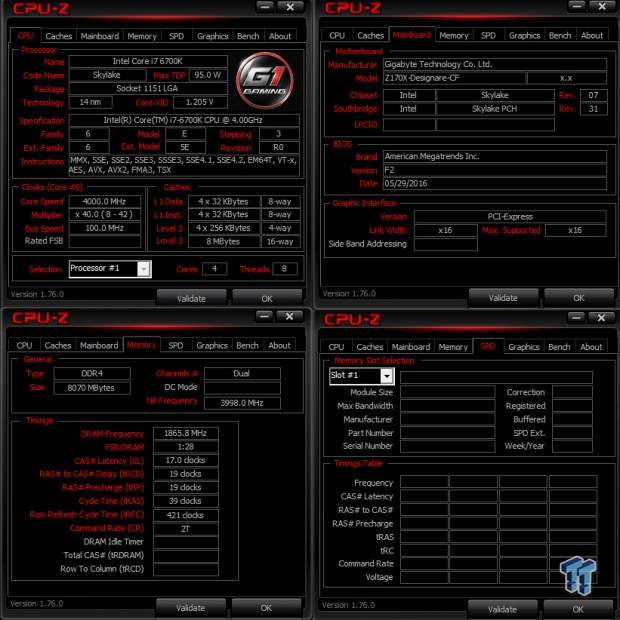
The TridentZ worked very well.
Test 4: 2x4GB (8GB) Corsair Vengeance LPX 4000MHz C19
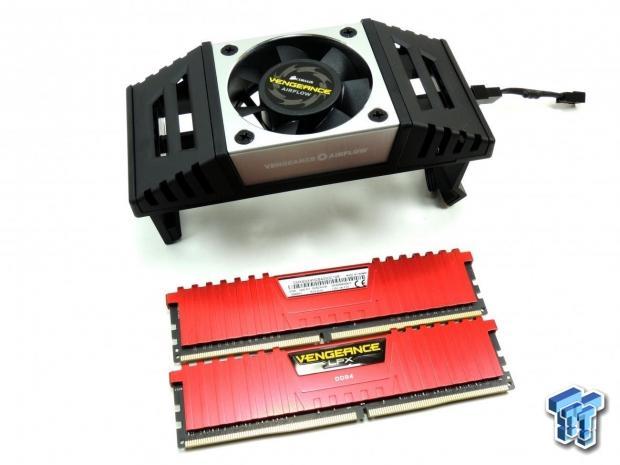
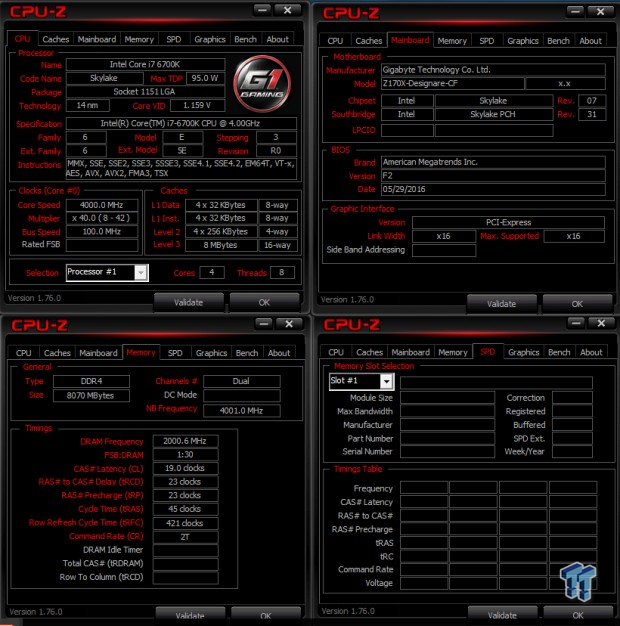
The Corsair 4GHz kit doesn't work on many Z170 motherboards, but it works fine on the GIGABYTE Z170X-Designare.
CPU, Memory, and System Benchmarks
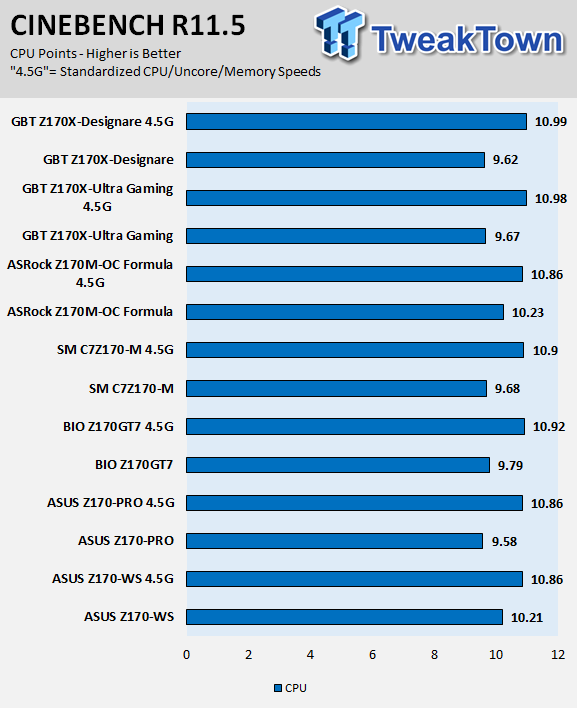
CINEBENCH 11.5
wPrime
AIDA64 AES and HASH
AIDA64 FPU
AIDA64 Memory
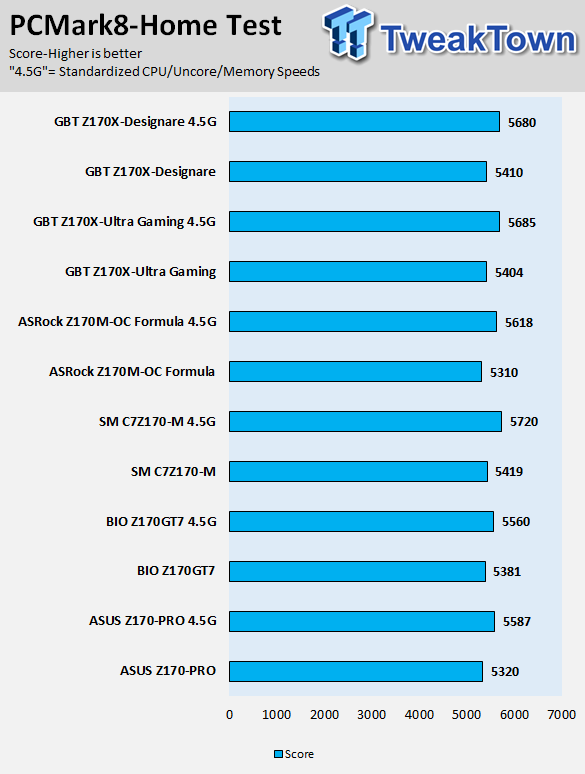
PCMark8 Home Test
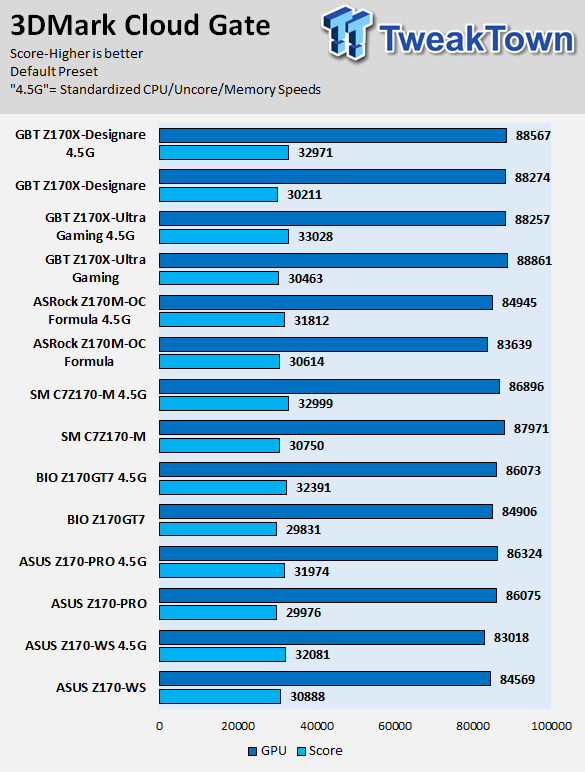
3DMark: Cloud Gate
3DMark: Fire Strike
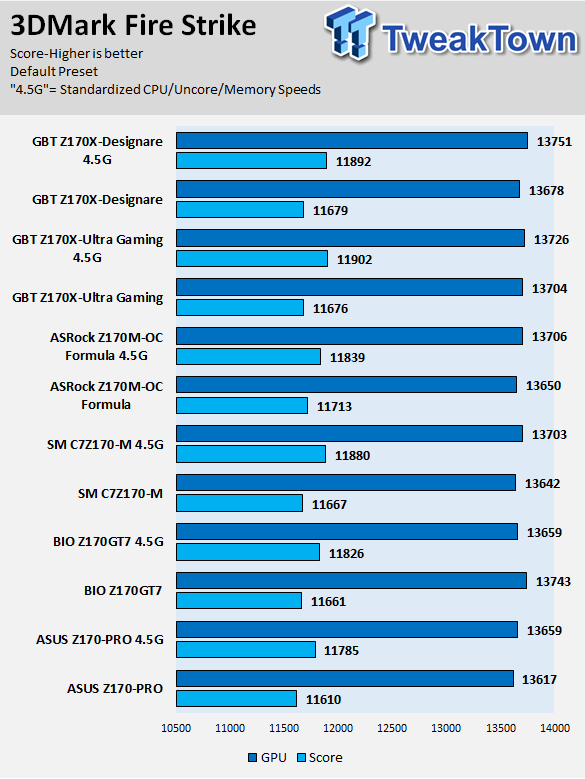
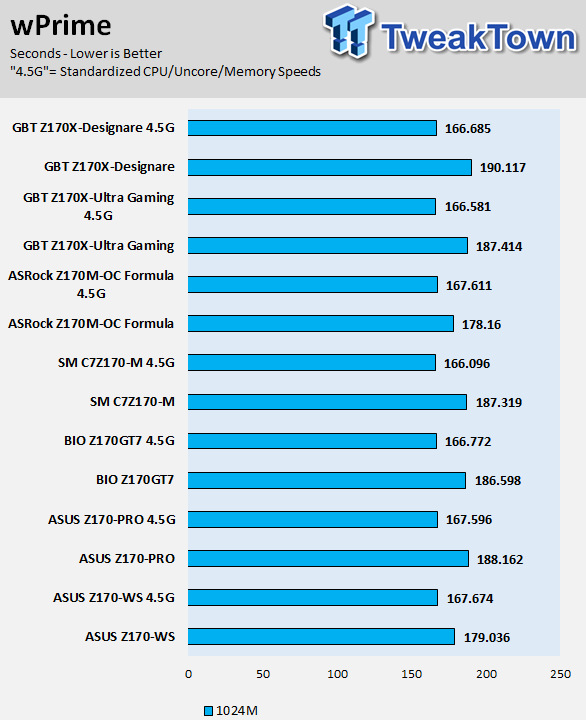
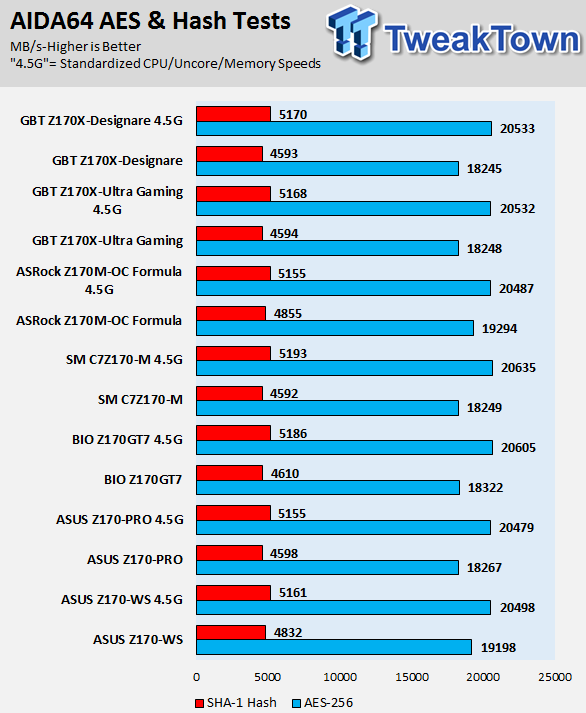
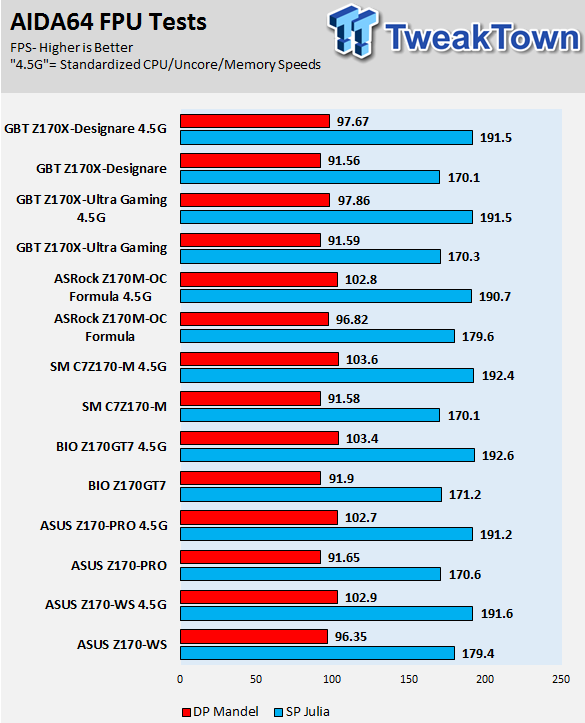
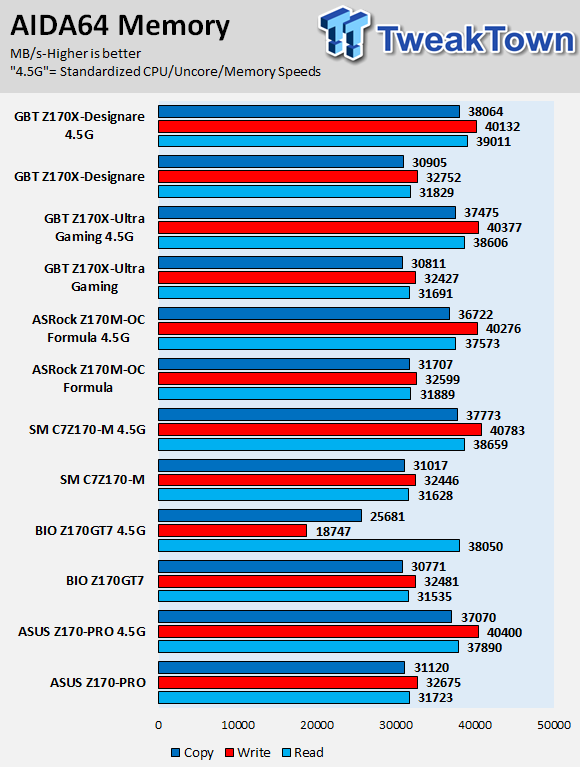
GIGABYTE's Z170X-Designare is very similar to the Z170X-Ultra Gaming in regards to performance. Although the motherboards are different regarding features and specifications, they have the same underlying BIOS and firmware. They should theoretically have the same performance, but there is a little difference between the two because of benchmark sway. Overall, the Z170X-Designare is a solid performance all around.
Some motherboard reviews put a lot of weight into motherboard CPU, memory, and GPU benchmarks, but for me, CPU, memory, and GPU benchmarks on motherboards should be more about finding anomalies, and I do that at standard settings (4.5G in graphs).
System IO Benchmarks
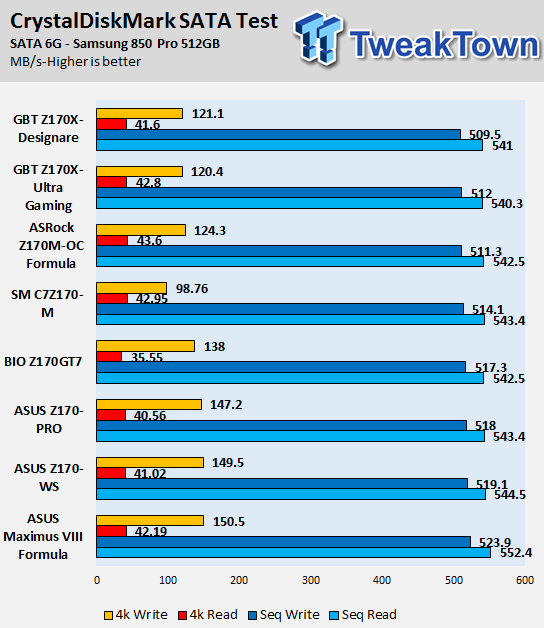
CrystalDiskMark SATA6G:
CrystalDiskMark M.2:
CrystalDiskMark U.2:
CrystalDiskMark USB 3.0:
ixChariot Network Throughput:
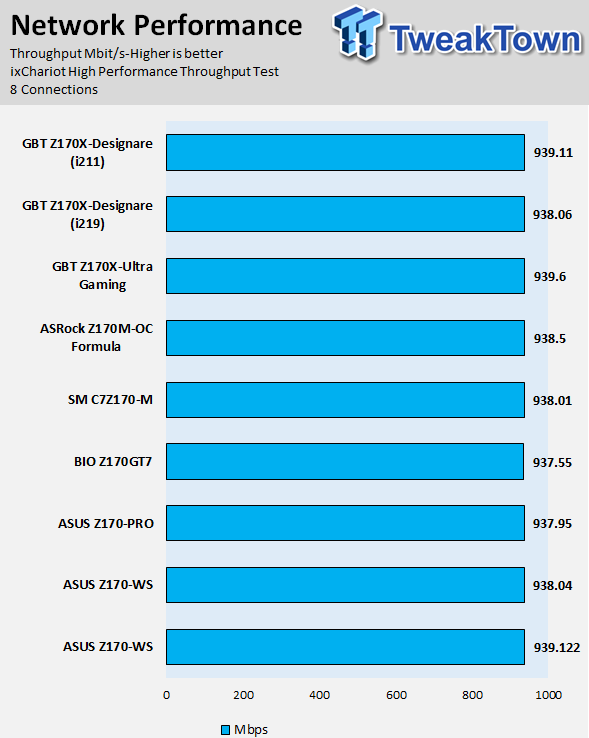
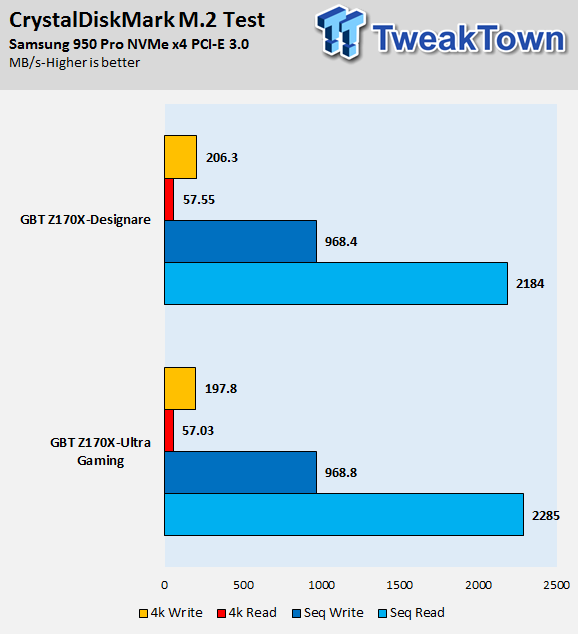
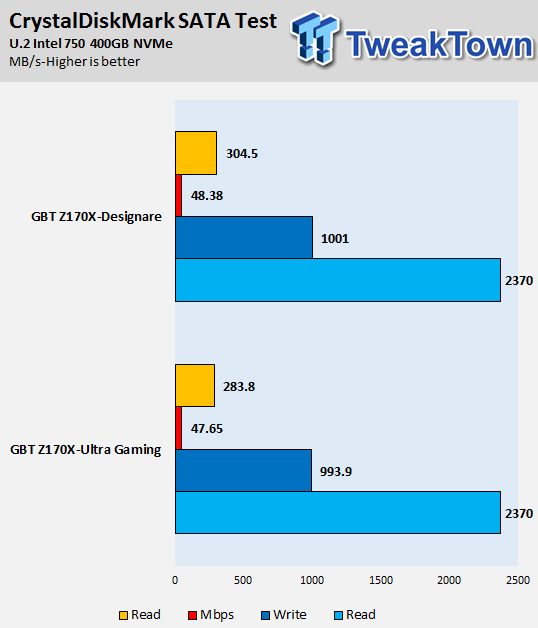
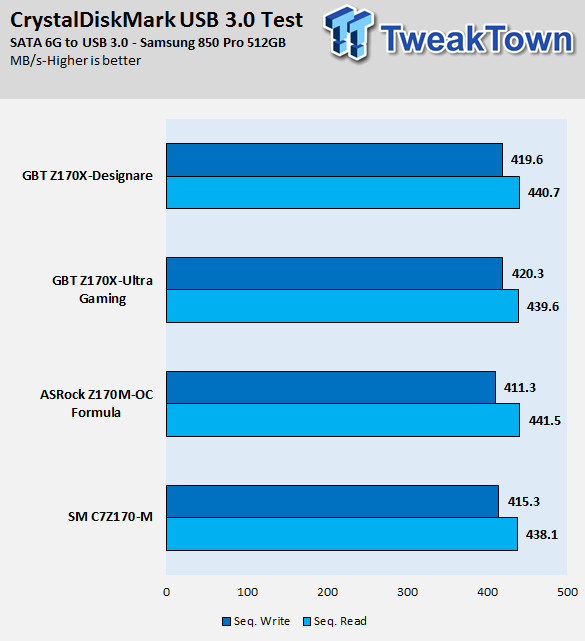
The Z170X-Designare has excellent SATA, M.2, and U.2 performance. Network performance is where it should be considering there are many motherboards with dual Intel NICs, so we know what the scores should be.
Audio RMAA 5.5:
I disable all audio features, set the correct bitrates, and then test the audio with a loopback test.
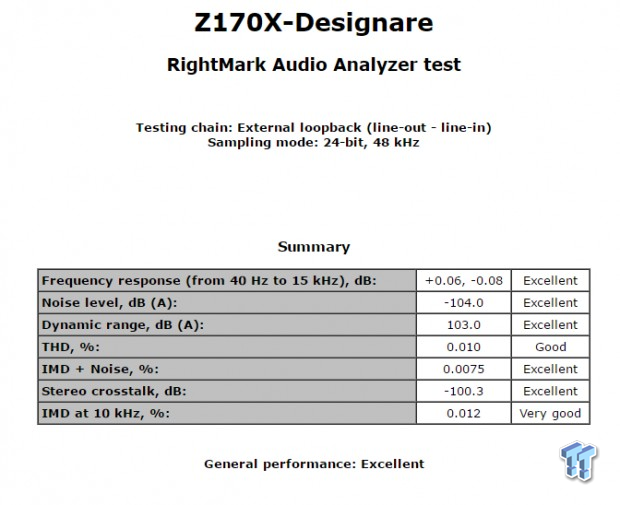
Sound Judgment by Ear: Very Good. There are five ratings for audio: 1. Problems, 2. Okay, 3. Acceptable, 4. Very good, 5. Excellent
Thermal Imaging and Power Consumption
System power usage is measured at the AC/DC PSU (the Corsair AX1200i) which I have connected to another system to measure the test system, and as a backup, I have a wall meter to verify. The CPU power is measured through the 8-pin connector, which is hooked up to a hall effect IC, which measures current and puts out a voltage in proportion to the current. That voltage is logged by a National Instruments ADC, which logs the DC voltage level that I then convert into current.
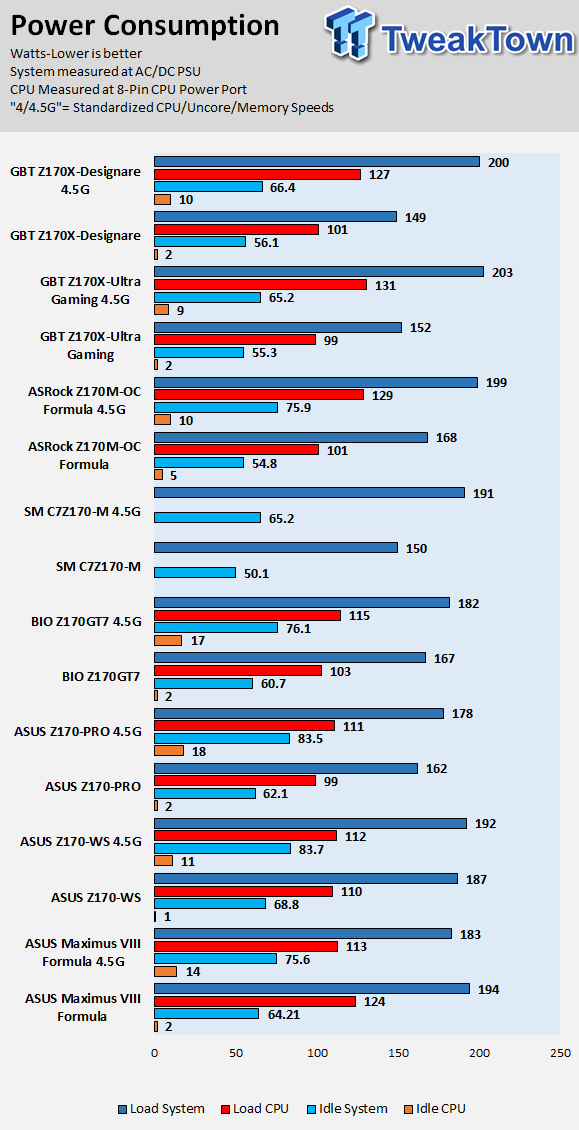
Note on Thermal Images: In the temperature section, we use our Seek thermal imaging camera to capture the surface temperatures of major components on the board. I look at the VRM and then all other things that light up the screen. If there is something to worry about, then I will state it. Otherwise, I will just show the hotter running parts of the board for fun. Unless some component is over 80-90C, then there isn't anything to worry about.
All systems will act differently, so I will look for commonalities, such as how far from the VRM the heat spreads through the PCB and the difference in temperature between the front side and backside of the PCB. Keep in mind, the majority of the heat from the VRM goes into the PCB as it is a giant soldered on copper heat sink. A larger difference in temperature between the back and front of the PCB points towards a more effective heat sink.
Thermal Testing at Stock Speeds:
The image on the left is always at idle, and the image on the right is at load. During ALL TESTS, fans above the VRM that cool the CPU cooler's (Corsair H110i GT) radiator are turned on to high (12v).
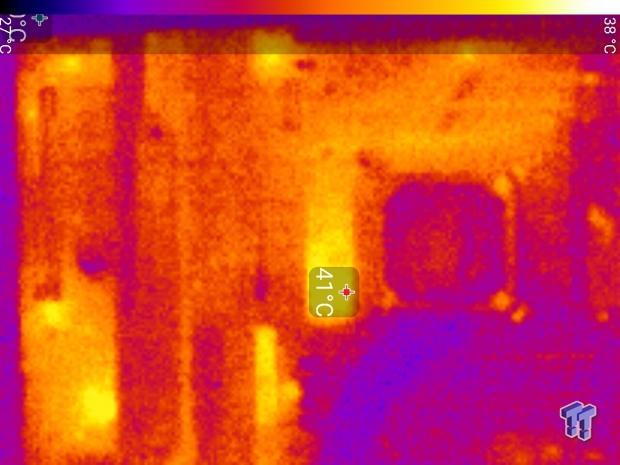
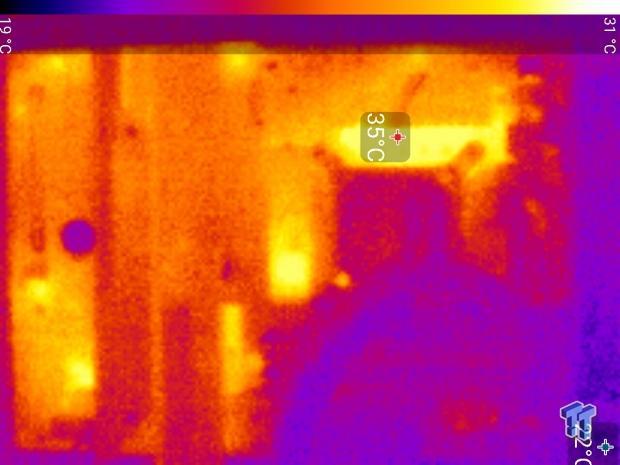
Full frontal.
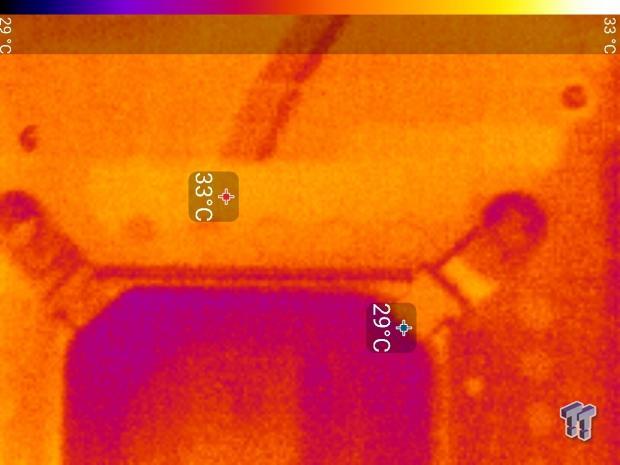
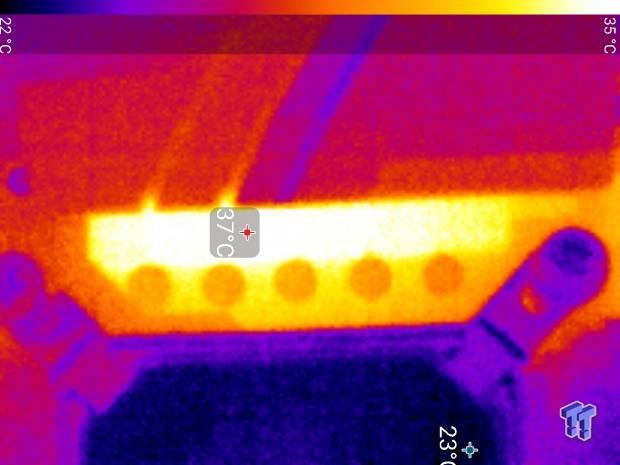
Up-close of the front of the VRM.
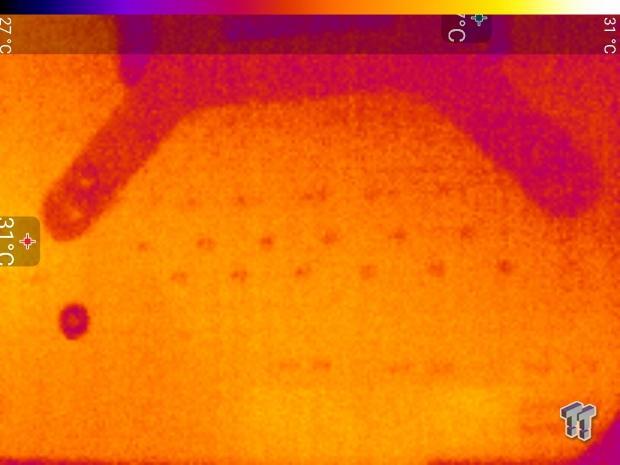
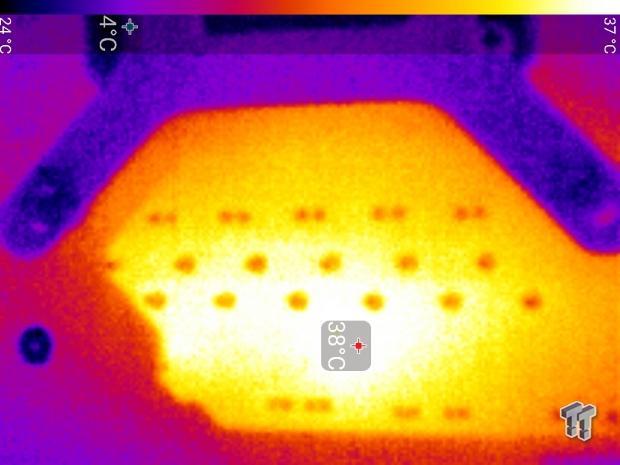
Up-close of the back of the VRM.
Thermal Testing at 4.5GHz Overclocked Speeds:
The image on the left is always at idle, and the image on the right is at load. During ALL TESTS, fans above the VRM that cool the CPU cooler's (Corsair H110i GT) radiator are turned on to high (12v).
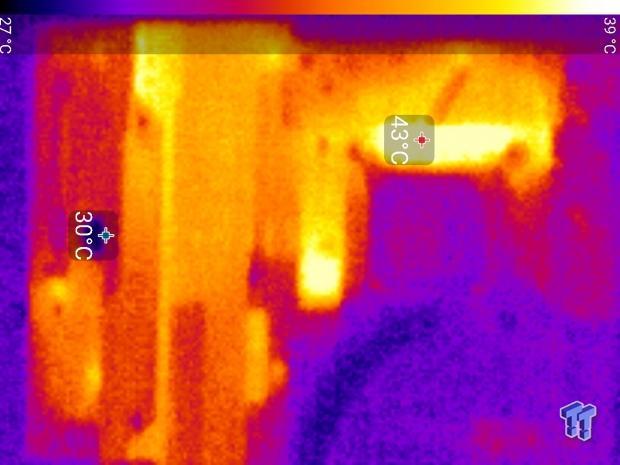
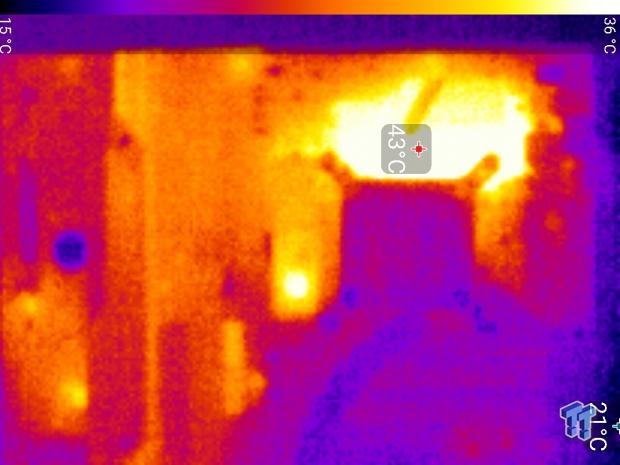
Full frontal.
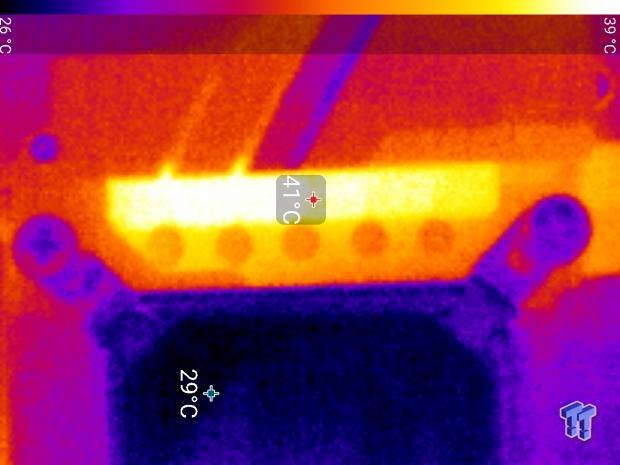
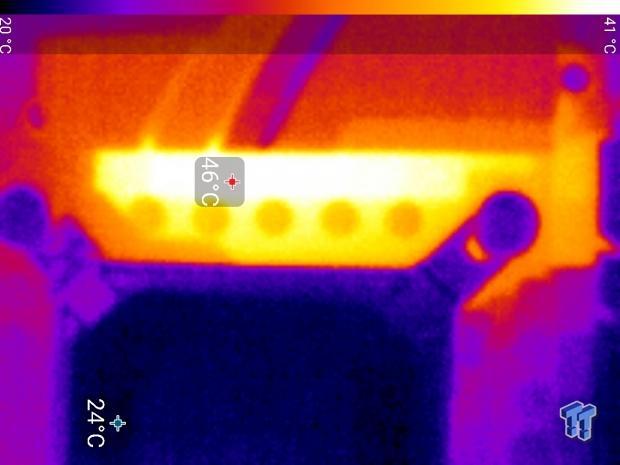
Up-close of the front of the VRM.
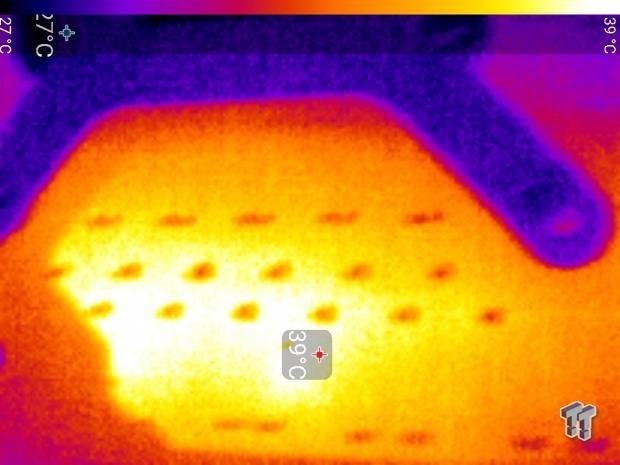
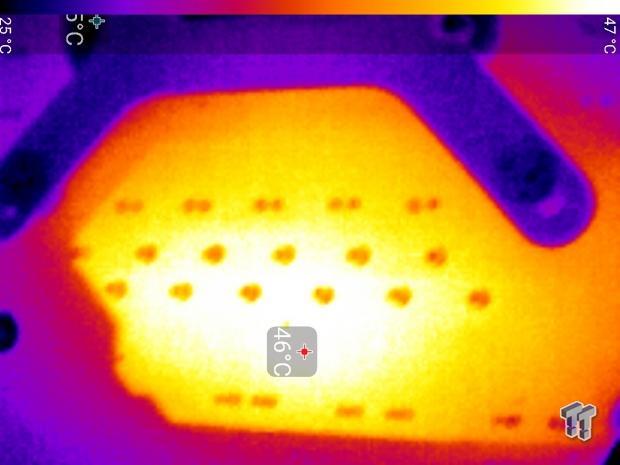
Up-close of the back of the VRM.
The VRM on the Z170X-Designare produces much better results compared to the Z170X-Ultra Gaming, mostly because it has double the component count. Overall, light load phase shedding was present, and when the CPU needed power, the VRM was able to deliver. Temperatures did not go much higher on the front side than on the backside of the PCB, which points towards decent cooling. Overall performance is great.
Anything under 60C is great, 60-80C is acceptable, and anything above 80C is a bit worrisome (if at stock).
What's Hot, What's Not & Final Thoughts
Here are key points about the GIGABYTE Z170X-Designare.
What's Hot
Triple NVMe RAID: The Z170X-Designare has M.2, U.2, and a PCI-E x4 slot that are independent and support RAID of three Intel 750 NVMe drives. The Z170 platform is one of the only Intel platforms that supports hardware RAID of multiple NVMe drives, and the Z170X-Designare is one of the only motherboards to offer the ability.
Dual Intel USB 3.1 Type-C with 100W Support: GIGABYTE isn't able to advertise Thunderbolt 3 since they haven't yet received certification on the motherboard, but there is a DisplayPort input port for support of the feature in the future. Regardless, the motherboard still supports USB 3.1 through both ports, and the 100W USB Power Delivery 2.0 support is icing on the cake.
So Close to Color Neutral: If the Z170X-Ultra Gaming had RGB LEDs, it would be the perfect color neutral motherboard with total customization potential. The Z170X-Designare would be perfect if it didn't have those subtle blue pieces on the heat sinks, but the good news is that they are not bright and can easily fade into the darkness, making the Z170X-Designare very color neutral. Overall, you can choose the color theme of the system, but blue does look best.
Dual Intel Gbit LAN: The motherboard already has two USB Type-C ports with 100W support, support for triple NVMe based RAID, RGB LEDs, and dual Intel Gbit LAN. The Z170X-Designare is basically the poster child for Intel's latest and greatest consumer technologies.
OC Features: I was pleasantly surprised to find a POST code display along with buttons for power, reset, and clear CMOS. There is even an OC button that will load a preset overclock.
What's Not
Color Accents with RGBs: The Z170X-Designare would have been much more designer-friendly if it didn't have blue color highlights on its VRM heat sinks.
Final Thoughts
GIGABYTE's Z170X-Designare is a poster child for the latest in Intel consumer PC technologies. The motherboard uses dual Intel NICs for LAN, Intel's Alpine Ridge controller for USB 3.1 and future Thunderbolt 3, and it even supports RAID of three Intel 750 NVMe SSDs. I don't think there are many Z170 motherboards with this level of recent technology, especially if you consider the 100W USB Power Delivery 2.0 support and the NVMe RAID capabilities. There isn't much the Z170X-Designare can't do.
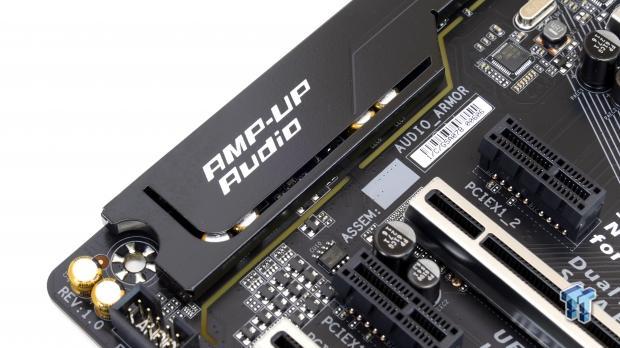
I was happy to see the addition of the POST code and buttons for overclockers, as that is something I feel has been missing from most of GIGABYTE's latest motherboards. The Z170X-Designare also carries GIGABYTE's new BIOS, which features GUI-based fan and RGB LED control.
Overall, the Z170X-Designare is loaded to the brim with the latest in innovative features and should prove to be decently future proof.

