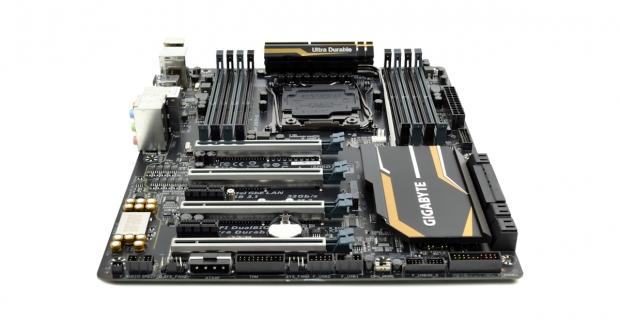
The Bottom Line
Introduction, Specifications, and Pricing
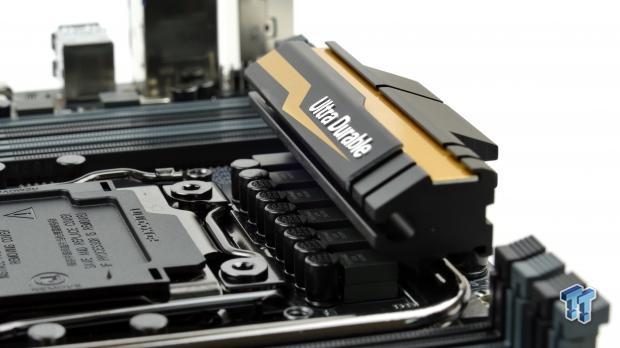
It has been a while since we have done an Intel X99 chipset based motherboard review. After the launch of the Intel Z170 chipset, many companies focused on launching new mainstream consumer motherboards and X99 seemed to fall by the wayside. However, as we get closer to the launch of Intel's next generation of CPUs for the X99 chipset, there has been a resurgence of interest in the X99 platform.
There is a glaring difference between the Z170 and X99 platforms and it lies in where the PCI-E resources are present. The Z170 platform is fully PCI-E 3.0 complaint, and there are more PCI-E lanes from the PCH. The X99 platform is a bit limited in scope when we compare the PCH resources, but the top X99 CPU has 40 PCI-E lanes which can be used for storage.
GIGABYTE's X99P-SLI provides the ability to run 3-way and 4-way CrossFireX and SLI, but also the ability to support a 32Gb/s M.2 slot and is the first X99 motherboard with Intel's Thunderbolt 3 and USB 3.1 controller. Follow me as I put it under the microscope.
Specifications
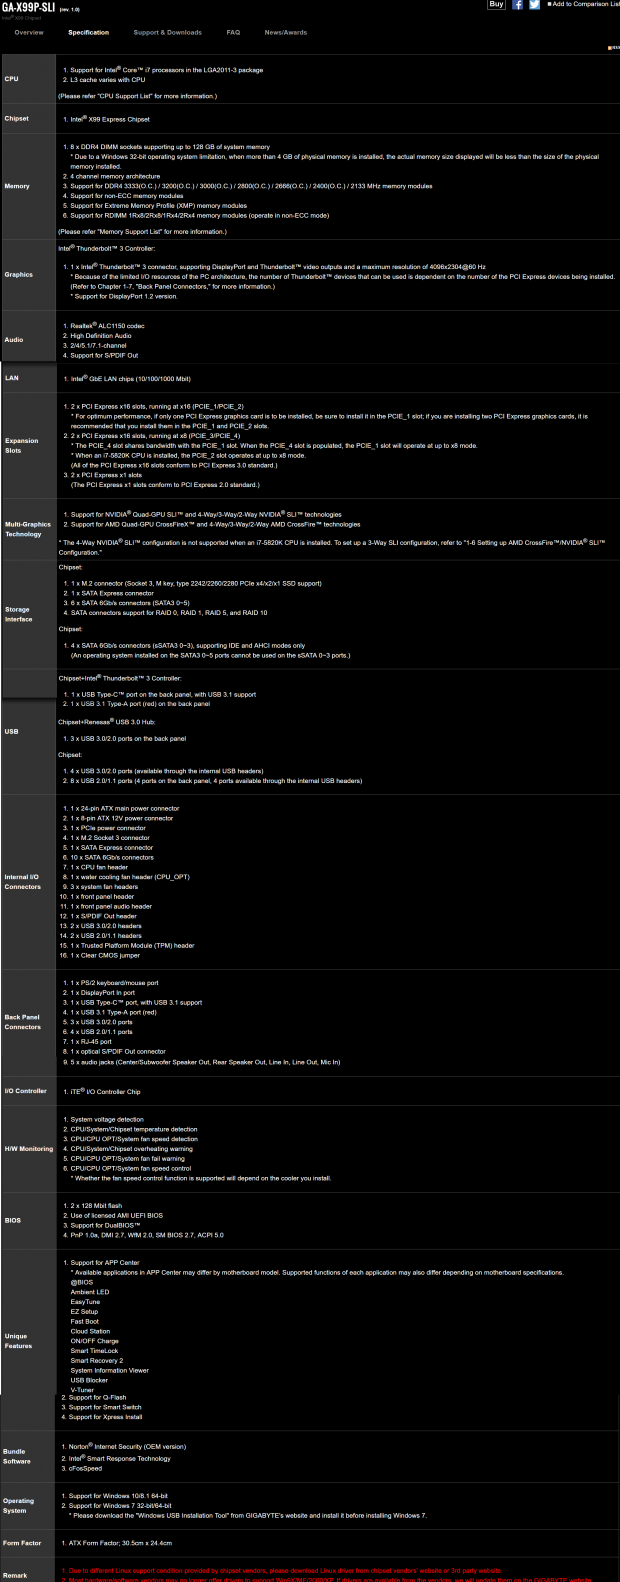
The GIGABYTE X99P-SLI has a very nice feature set compared to other X99 motherboards because Intel's Thunderbolt 3 controller is present. The Thunderbolt 3 controller also provides USB 3.1. GIGABYTE chose to use an Intel NIC for networking and provide a 32Gb/s M.2 slot for faster M.2 drives.
Pricing
The X99P-SLI is available from many large retailers for $249.99.
Packaging and X99P-SLI Overview
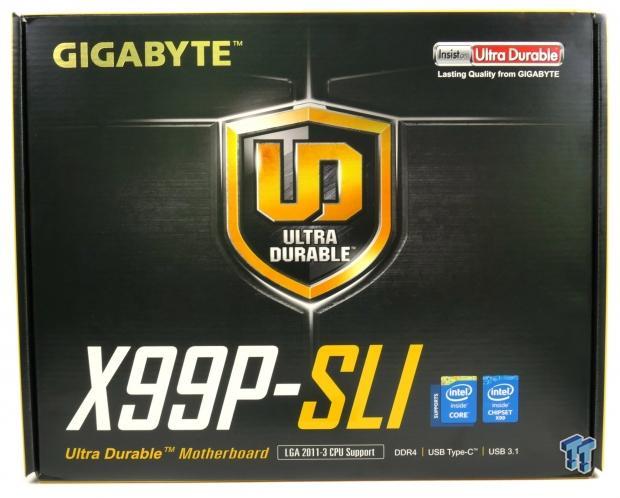
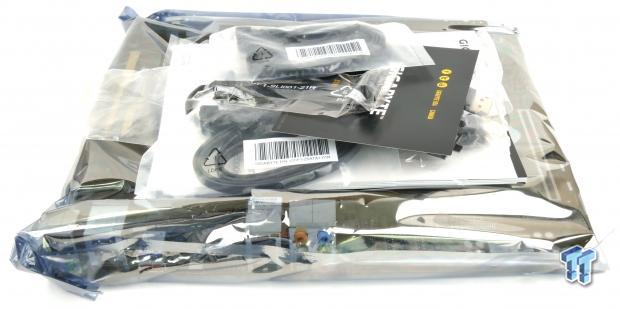
The X99P-SLI's box and packaging are simple and protect the board well enough.
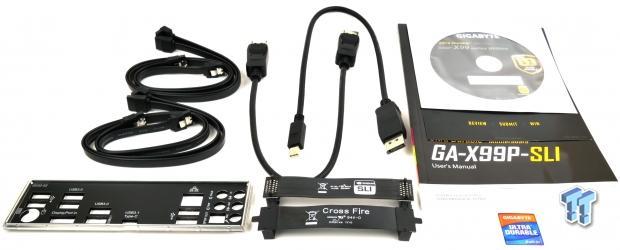
Accessories include 4x SATA6Gb/s cables, SLI Bridge, CrossFireX bridge, DisplayPort to DisplayPort cable, mini-DP to DisplayPort cable, M.2 screws, IO shield, case badge, manuals, and driver DVD.
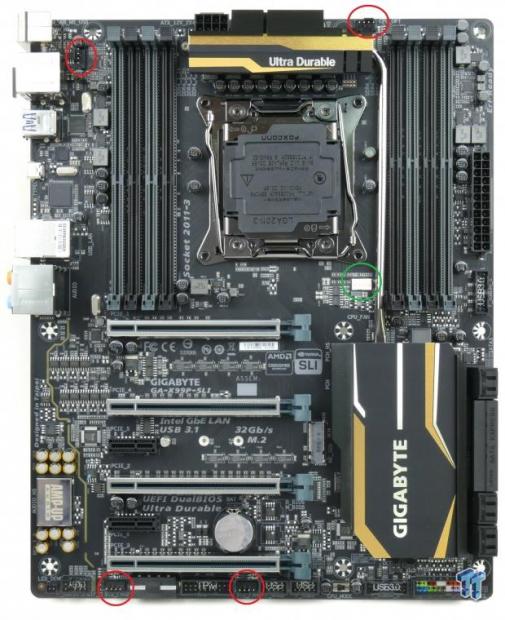
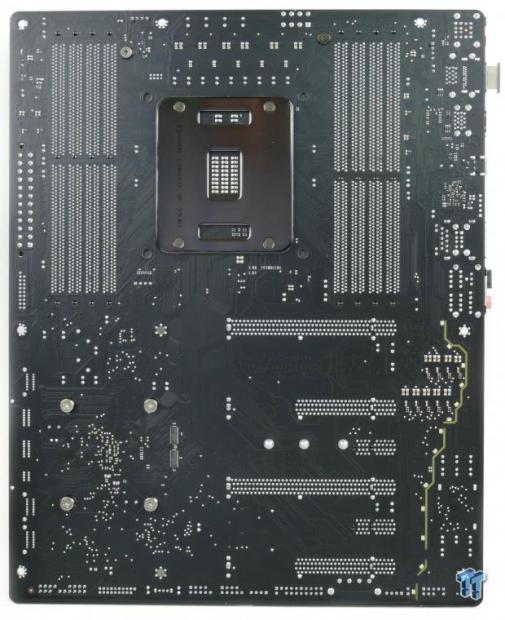
The GIGABYTE X99P-SLI has five fan headers. They are all 4-pin headers. The headers circled in red are voltage controlled and the header circled in green is PWM controlled. Basic fan controls are provided in the UEFI through profiles and manual PWM slopes, and GIGABYTE's System Information Viewer program offers more in-depth fan tuning.
The motherboard has a black and gold theme which looks nice in person but is drowned out inside a dark case. The silkscreen writing on the PCB is gray and blends into the black of matte PCB when installed in a case. The motherboard does have LEDs on the backside of the PCB along the analog PCB divide for the audio. These LEDs are RGB and can be controlled through the UEFI or Windows, and you can turn them off if you so choose.

The IO panel on the X99P-SLI carries four USB 2.0 ports, three USB 3.0 ports (from a hub), USB 3.1 Type-A (red), USB 3.1/Thunderbolt 3 Type-C, PS/2 keyboard or mouse, DisplayPort (input port for Thunderbolt 3 functionality), RJ-45 Gbit LAN, TOSLINK S/PDIF optical, and 7/1 audio outputs. While Z170 has video outputs from the Skylake CPU, X99 CPUs do not have integrated graphics. Thunderbolt 3 uses DisplayPort for part of its bandwidth and proper Thunderbolt 3 functionality on the X99 platform requires a connection to your GPU's video output to the input port on the IO panel. GIGABYTE provides two cables just for this purpose.
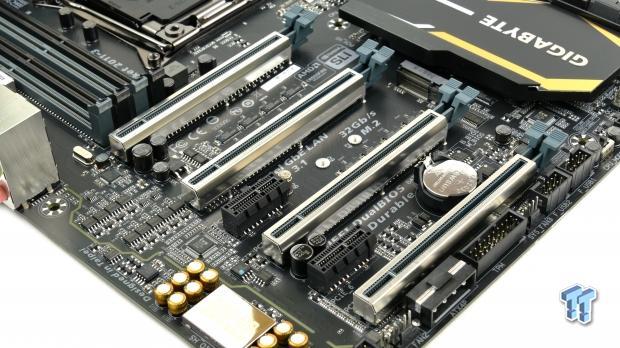
The PCI-E layout is designed to provide 32 PCI-E 3.0 lanes to up to four GPUs and supports up to 4-way CrossFireX and SLI when using a 40 lane CPU. The first and third full-sized PCI-E 3.0 slots support 16x/16x, and if the 16x slot below either is occupied, they will switch over 8x of their bandwidth. So the motherboard can operate at 16x/0x/16x/0x, 8x/8x/16x/0x, 16x/0x/8x/8x, or 8x/8x/8x/8x. All these 16x slots have metal shielding which helps strengthen the slots when a heavy video card is installed. A MOLEX port at the bottom of the motherboard provides extra PCI-E power for 4-way configurations. The 1x slots are PCI-E 2.0, and they are routed to the PCH.
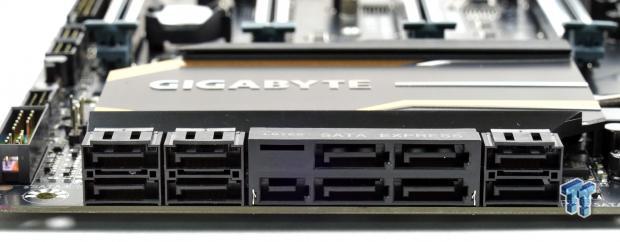
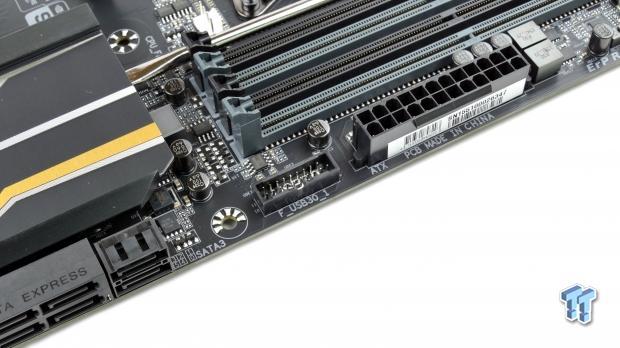
One advantage Intel's X99 chipset has over Z170 is support for many more SATA6Gb/s ports, all of the SATA ports are from the PCH. GIGABYTE also added an SATA Express connector. There are two USB 3.0 internal headers on the motherboard; one is located right below the 24-pin power connector.
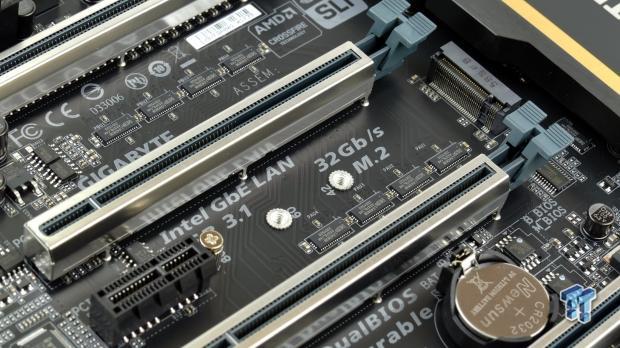
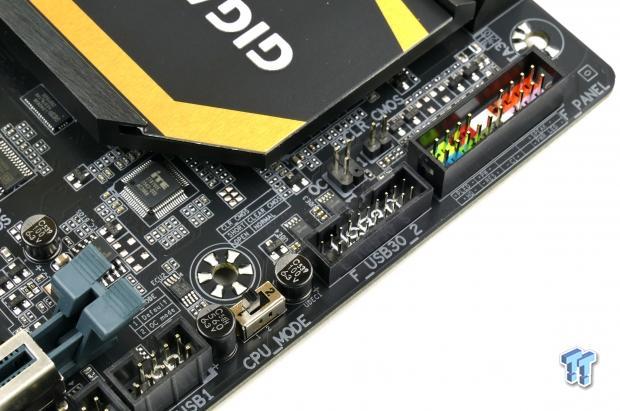
The motherboard supports a 32Gb/s M.2 slot, a first for GIGABYTE's X99 series. Located to the left of the front panel headers is the second USB 3.0 internal header. To the left of that is a CPU Mode switch that switches between Intel's standard socket and an OC socket mode. The switch will enable or disable special circuitry which will enable power to extra pins in the socket.
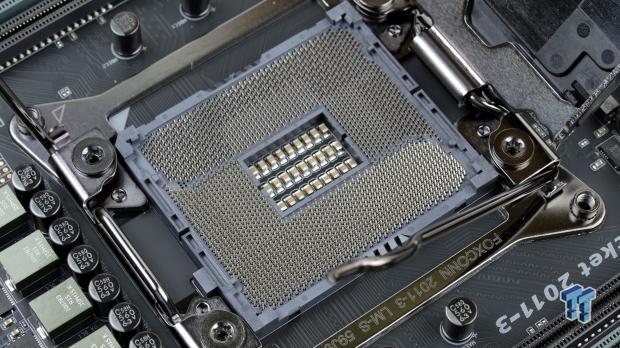
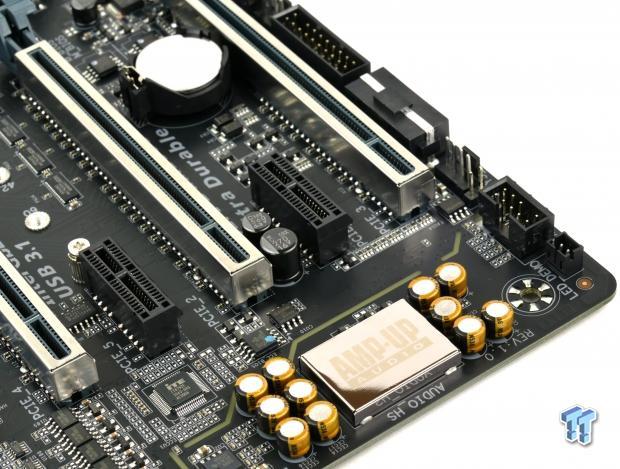
The socket has extra pins, which help with memory and cache overclocking. Without the extra pins and the switch in position 2, the cache cannot be overclocked over 4GHz, and the memory might have trouble hitting 3200MHz. GIGABYTE did upgrade the audio on the motherboard, and while RGBs light up the audio divide, there is an "LED DEMO" header which could output a signal that modders might be able to utilize.

The heat sink is a single piece with a heat pipe connecting the PCH block to the VRM block. Screws hold down the heat sink assembly.
GIGABYTE X99P-SLI Circuit Analysis
Circuit Analysis
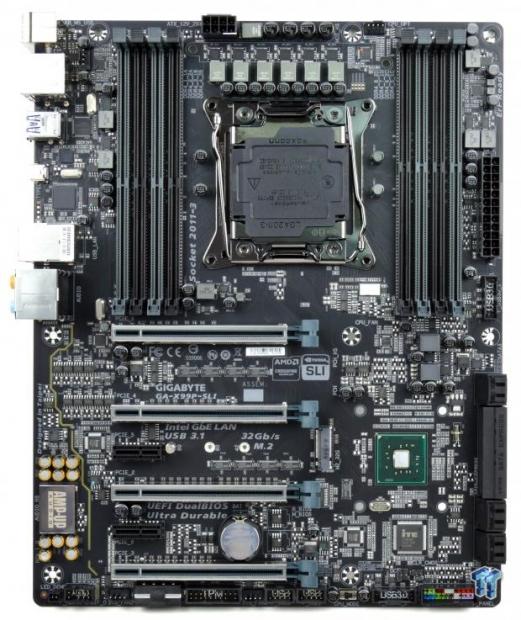
This motherboard looks quite good in the nude.
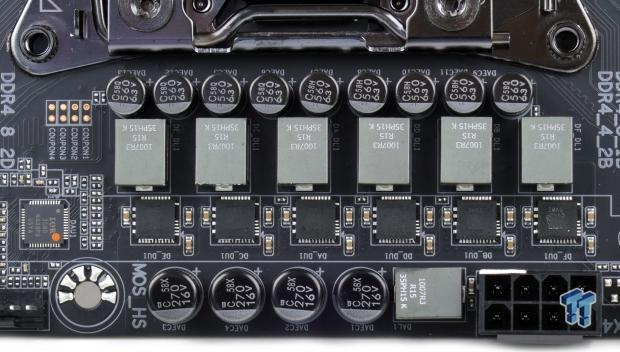
Haswell-E CPUs only require a single input VRM to supply power to the internal VRM. In this case, GIGABYTE has used a true 6 phase VRM utilizing some of the highest power density components available on the market. The inductors support 76A saturation current each, and the capacitors are custom-made 10K polymers.
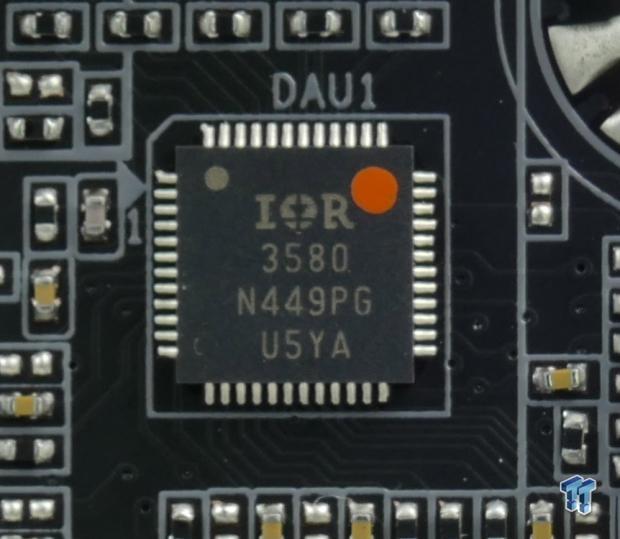
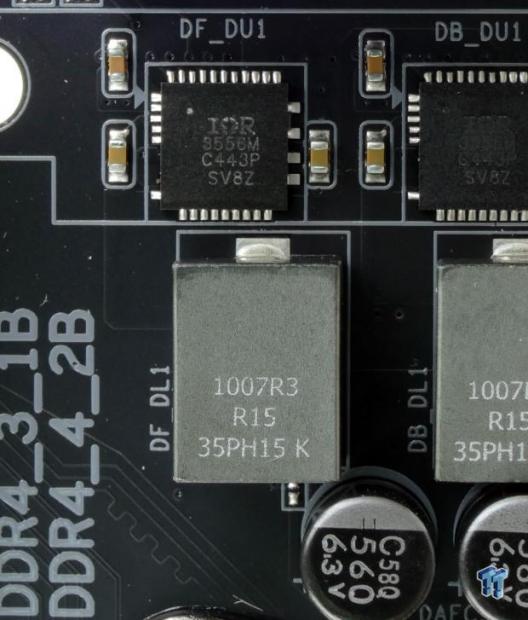
The PWM is International Rectifier's latest fully digital high-performance PWM. The IR2580 supports up to 8 phases, but only 6 are used in this case. Each phase uses an IR3556 PowIRstage, which supports up to 50A at 10W. This VRM configuration isn't unique to the X99P-SLI, a lot of other GIGABYTE X99 motherboards use the same components that have been proven to work well.
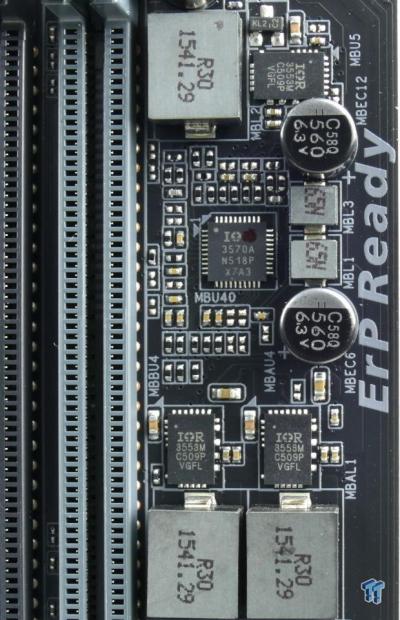
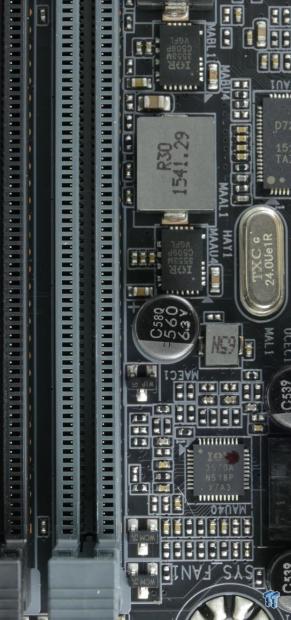
X99 requires two sets of two memory VRMs. The main DDR4 voltage and the VPP rail must come from VRs, and each set of four DIMMs gets a set of VRs. GIGABYTE has chosen to use an IR3570 fully digital 3+2 phase PWM along with two IR3553 40A power stages for the main voltage and a single IR3553 for the VPP. This power configuration is used for each set of DIMMs.
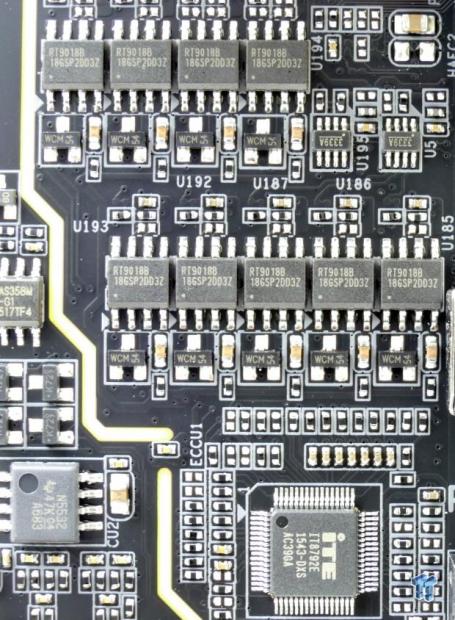
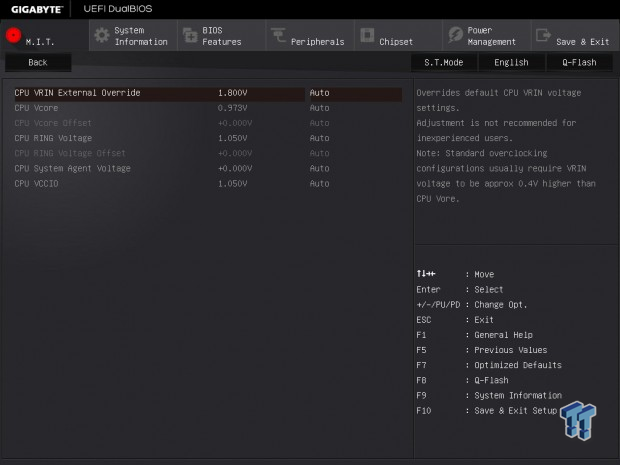
The extra pins in the socket that improve overclocking provide extra power and ground. GIGABYTE uses nine RT9018 linear regulators in an array controlled by an IT8792E embedded controller to provide power to these extra pins. You can control some of these voltages through the UEFI, and they only appear with the CPU Mode switch is in position 2.
GIGABYTE X99P-SLI Circuit Analysis Continued
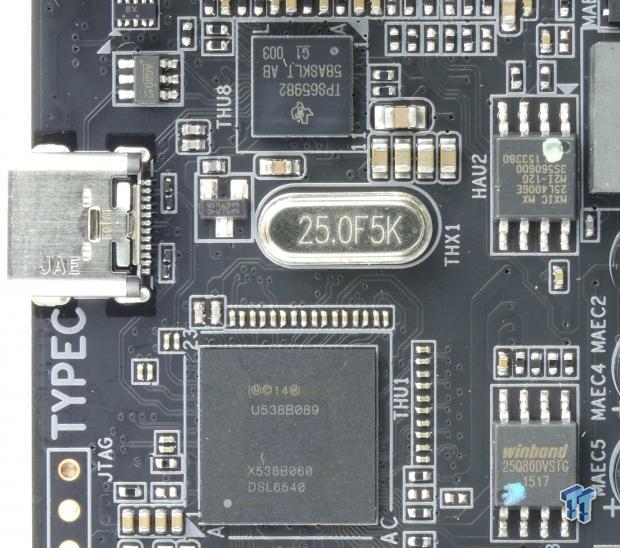
GIGABYTE is using the same "Alpine Ridge" controller found on some Z170 motherboards which support Thunderbolt 3. In this case, four PCI-E 3.0 lanes are connected to the controller. The controller provides USB 3.1 or Thunderbolt 3, and a TPS65982 provides advanced Type-C port power and switch capabilities.
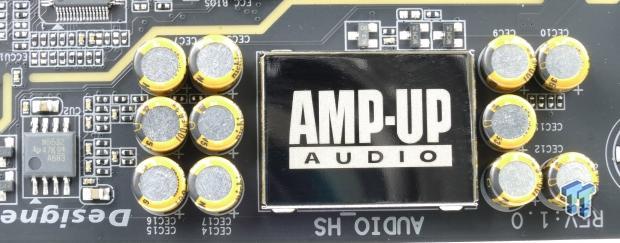
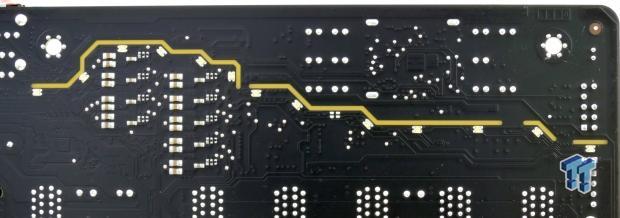
The audio uses an ALC1150 as the codec and a Texas Instruments NE5532 as the amplifier. There are 11 Nichicon Gold series electrolytic audio capacitors. There are 13 RGB LEDs located along the divide which illuminate the division between the audio section and rest of the motherboard.
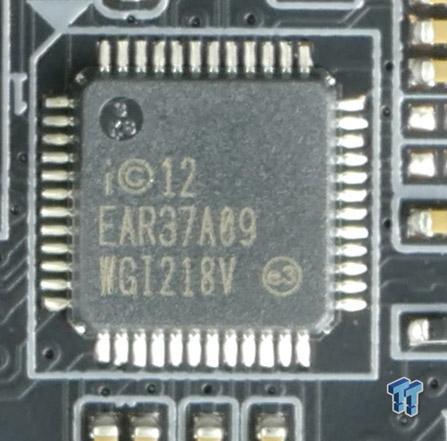
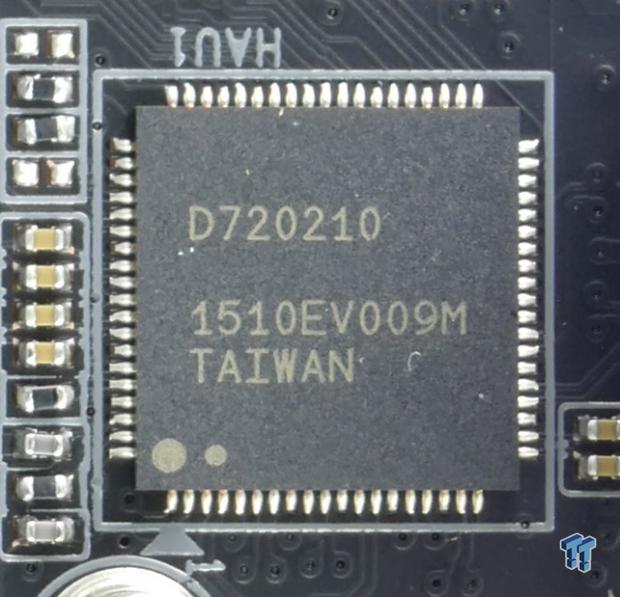
GIGABYTE decided to use Intel's i218v to support a full Intel NIC implementation. To expand some of the USB 3.0 on the backpanel, GIGABYTE utilizes a Renesas D720210 USB 3.0 hub.
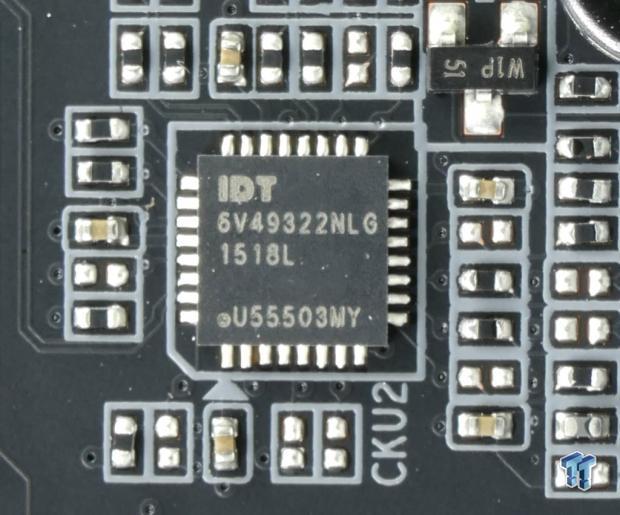
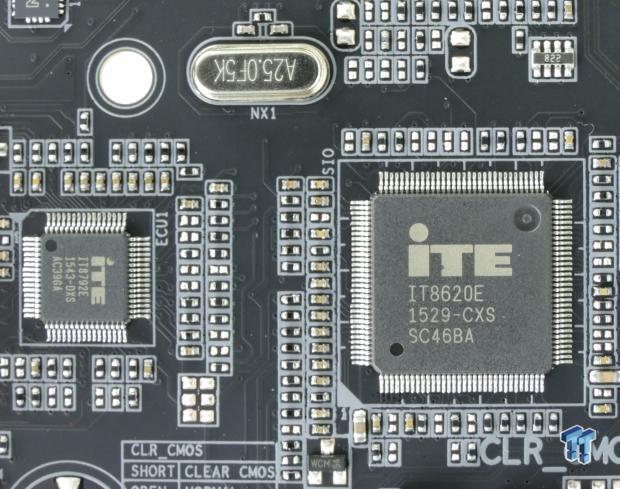
An IDT6V49322NLG clock generator expands BCLK margins. The main SuperIO is an iTE IT8620E and a secondary embedded controller, an iTE IT8792E, provides expanded fan control.
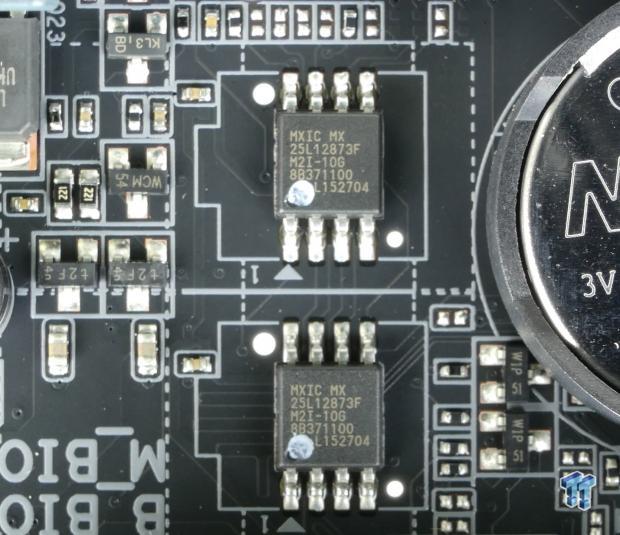
Two 128Mbit (16MB) BIOS ROMs provide dual BIOS functionality.
BIOS and Software
BIOS
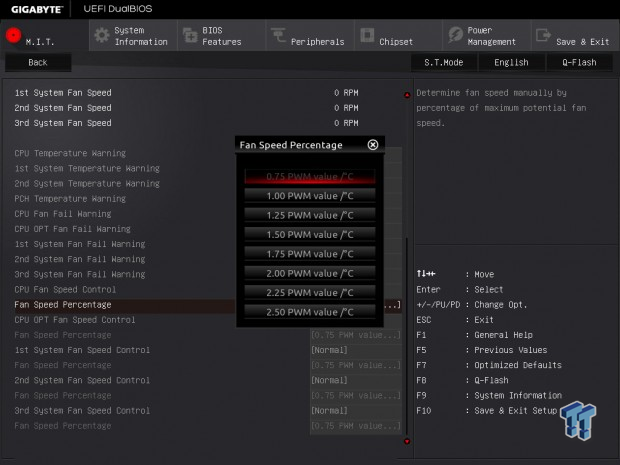
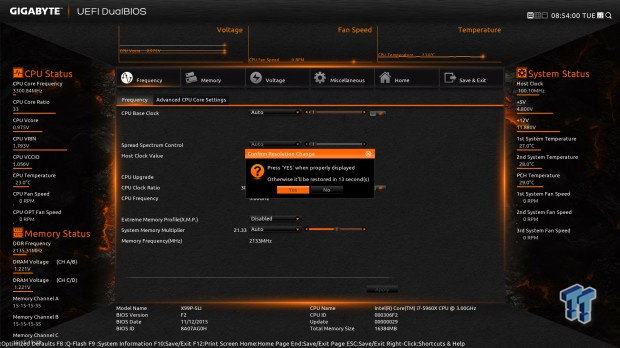
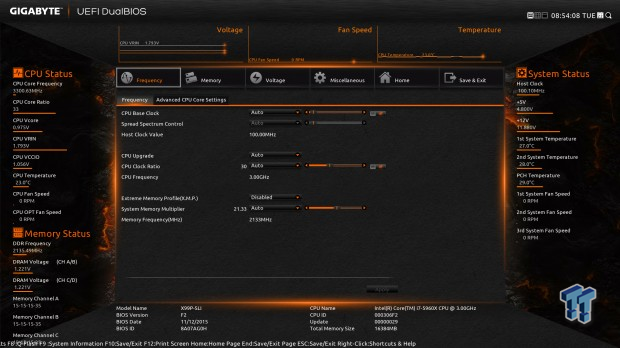
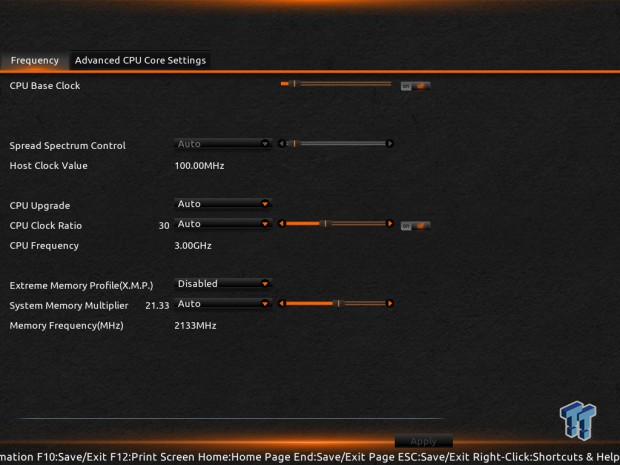
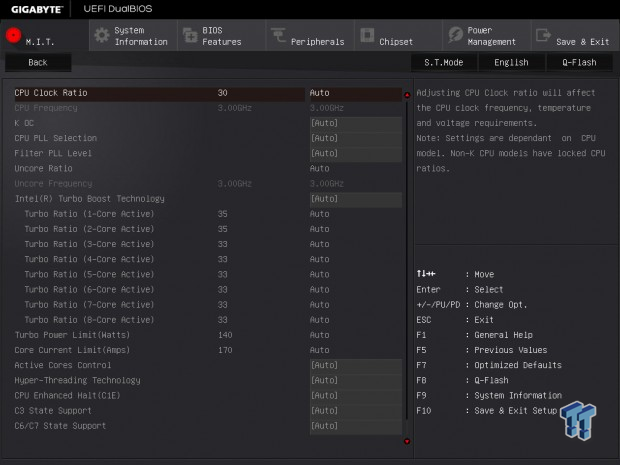
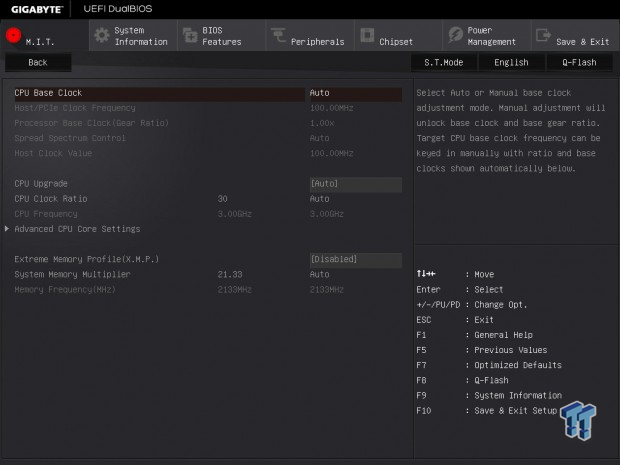
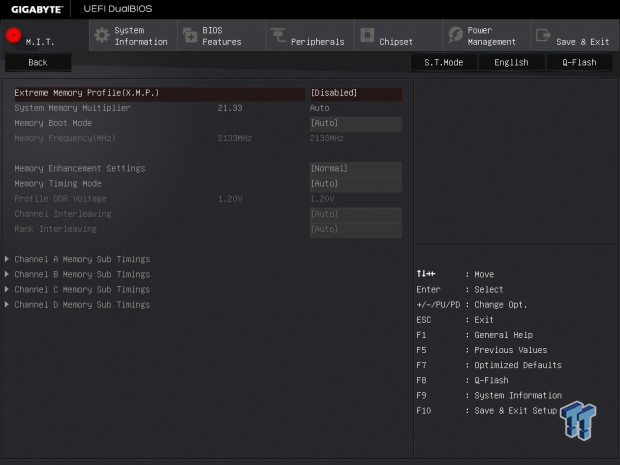
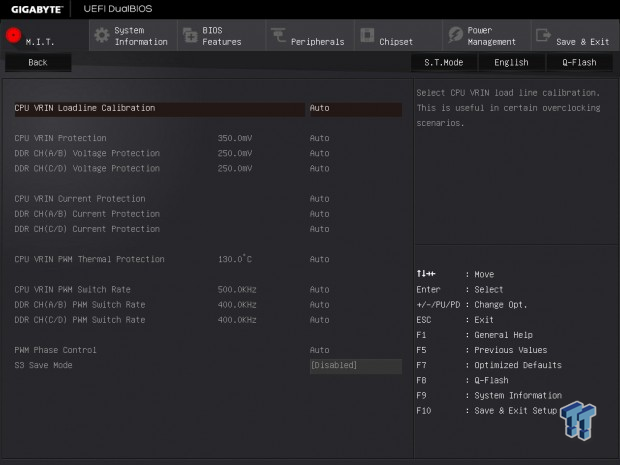
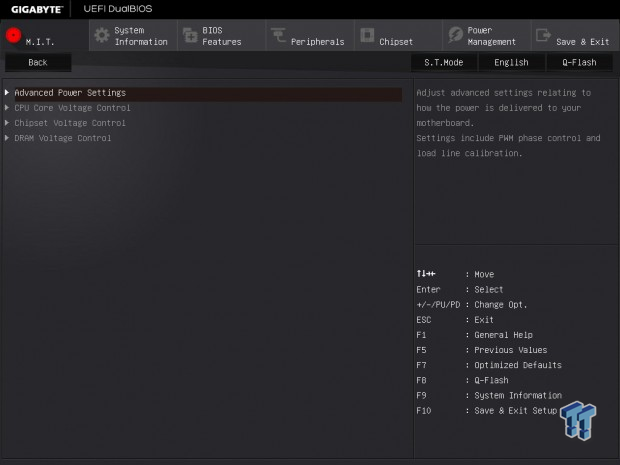
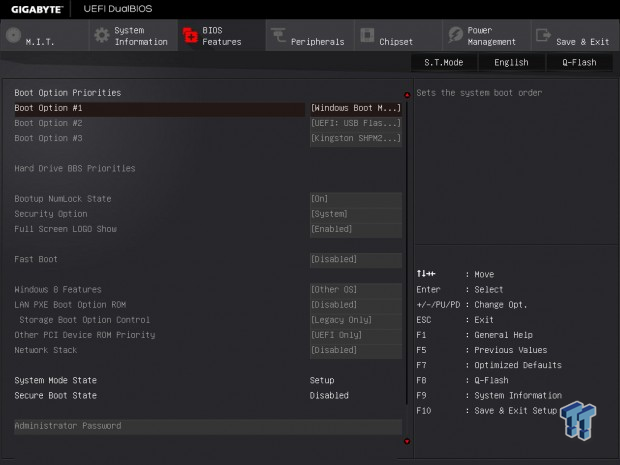
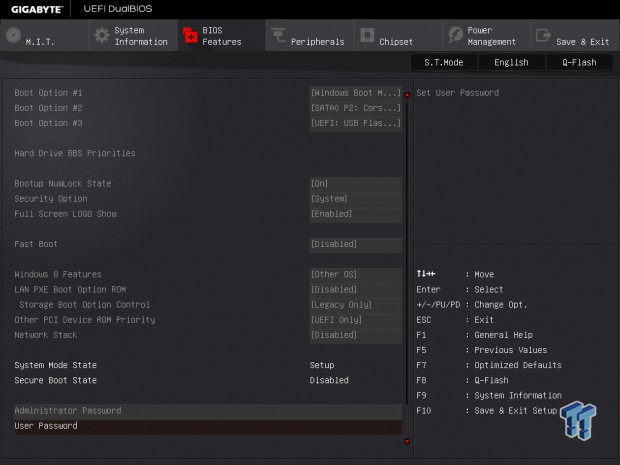
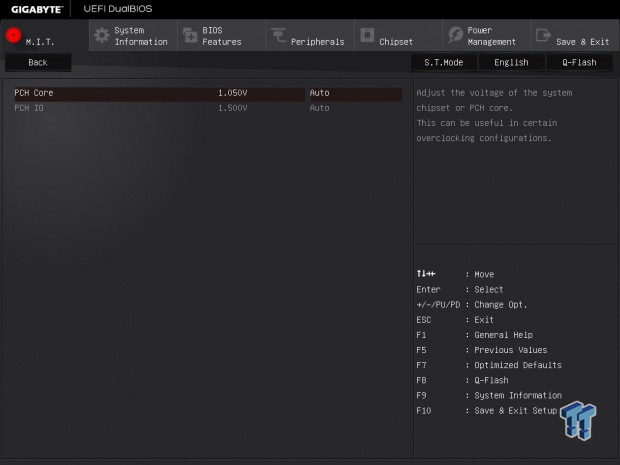
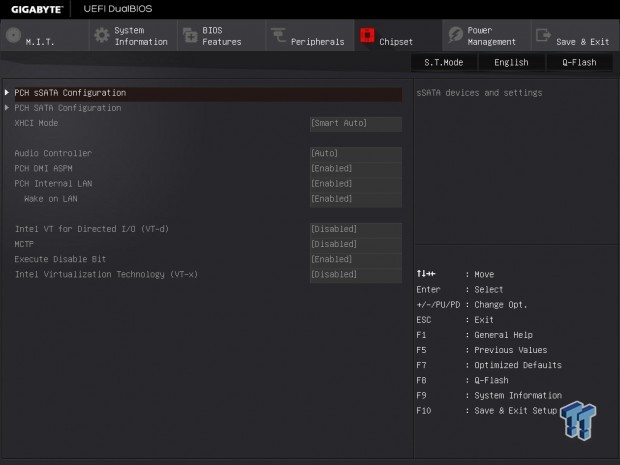
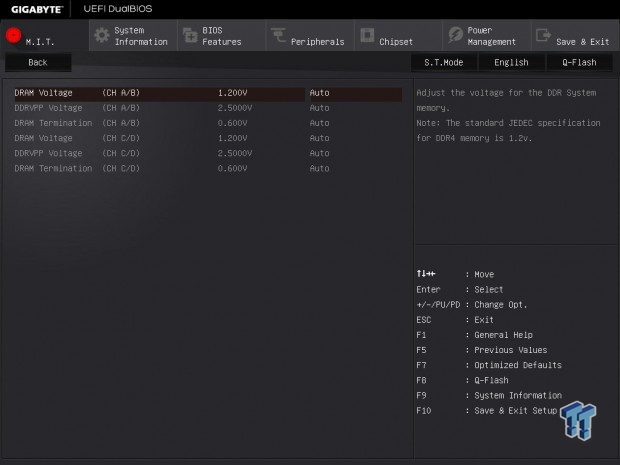
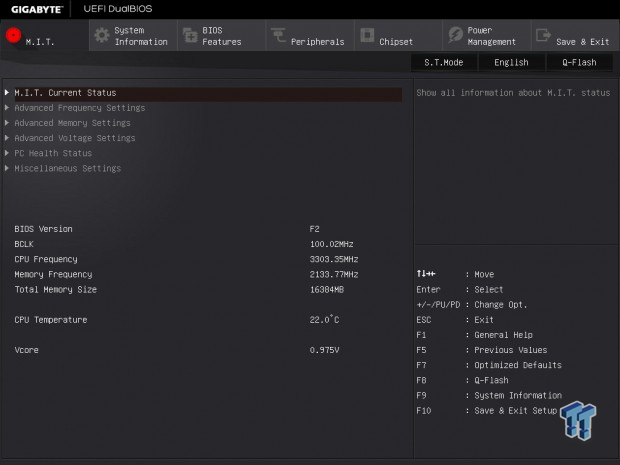
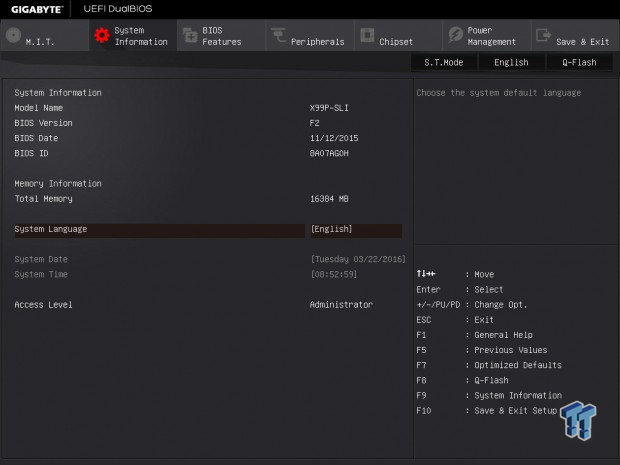
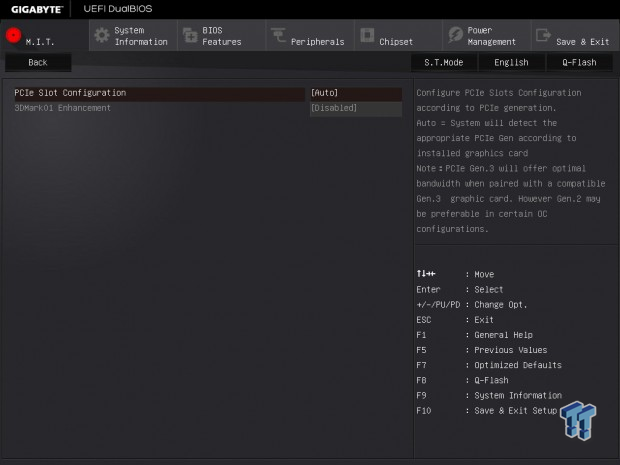
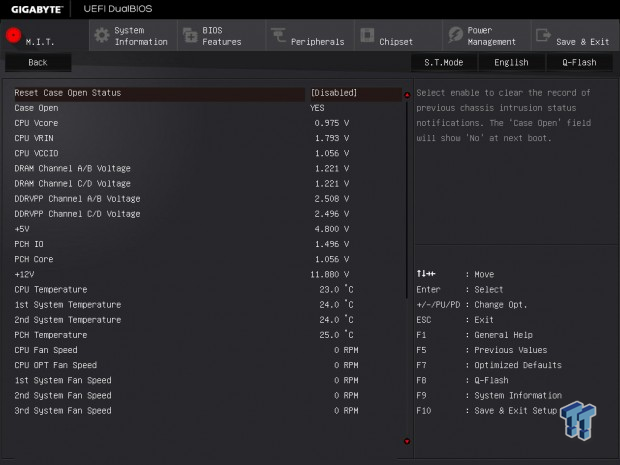
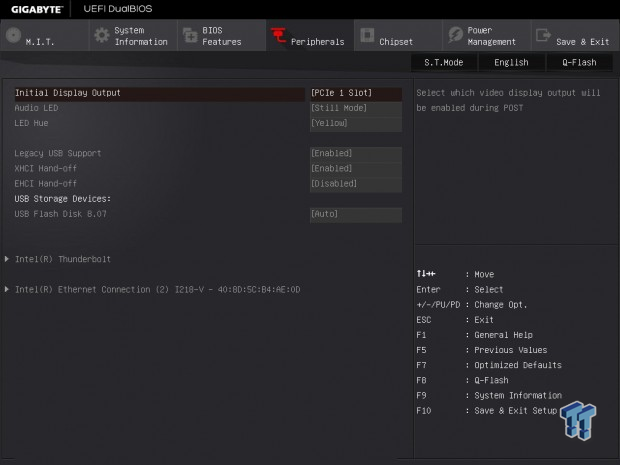
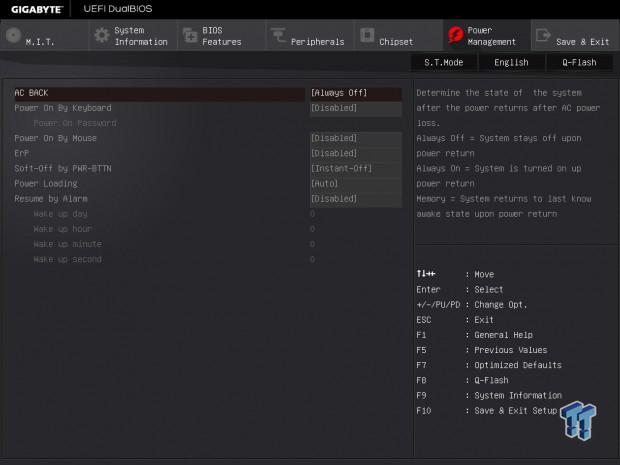
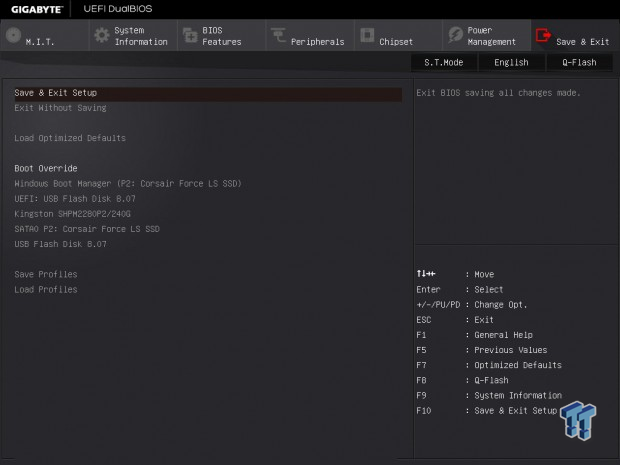
The X99P-SLI's BIOS has two distinct modes in the F2 version I have used. You can upgrade to the F20 series BIOS, which support the next generation of CPUs, but you will not be able to easily flash back to the F2 version if you face problems. If you are going to upgrade to the next generation of CPUs, you must flash to BIOS F20.
The two operating modes are a bit redundant. I would stick with the black and gray mode over the orange modes since the black and gray offers more options. Fan control is similar to other GIGABYTE motherboards; there are basic profiles such as silent and full speed, as well as manual control which allows you to set a linear PWM slope.
Software
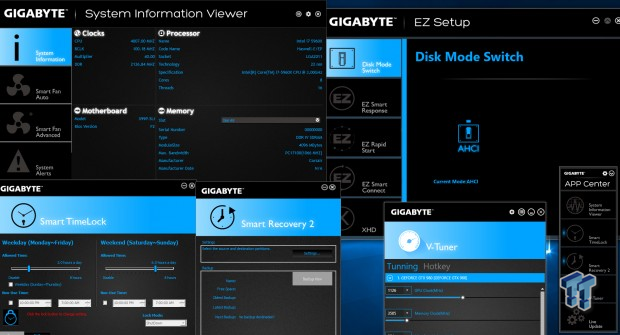
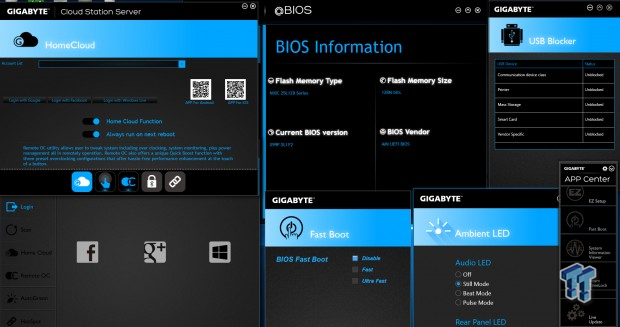
GIGABYTE's software suite is very extensive. Programs include System Information Viewer, EasyTune, EZ Setup, @BIOS, Smart Time Lock, Smart Recovery 2, V-Tuner, APP Center, Cloud Station Server, USB Blocker, Ambient LED, and Fast Boot.
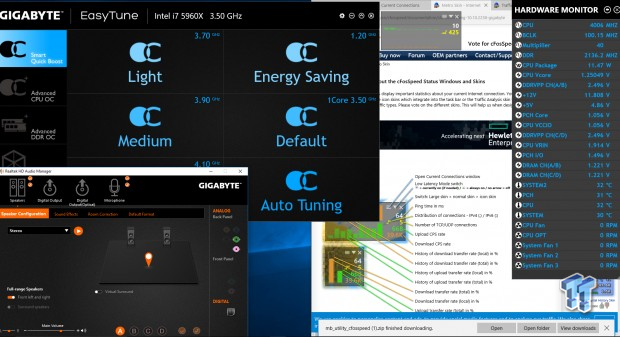
The Realtek HD audio manager gets an orange skin, and cFOS is provided to control LAN bandwidth allocation.
Test System Setup
Steven's Motherboard Test System Specifications
- Motherboard: GIGABYTE X99P-SLI
- CPU: Intel Core i7 5960X - Read our review
- Cooler: Corsair H110i GT - Buy from Amazon
- Memory: Corsair Dominator Platinum (4x4GB) 3200MHz
- Video Card: NVIDIA GeForce GTX 980 - Buy from Amazon / Read our review
- Storage - Boot Drive: Samsung 850 Pro 512GB - Buy from Amazon / Read our review
- Storage - SATA6G Drive: Corsair Force LS 240GB - Buy from Amazon / Read our review
- Storage - M.2 Drive: Samsung XP941 256GB
- Storage - USB Drive: Corsair Voyager GS 64GB - Buy from Amazon / Read our review
- Case: Corsair Obsidian 900D - Buy from Amazon / Read our review
- Power Supply: Corsair AX1200i - Buy from Amazon / Read our review
- OS: Microsoft Windows 10
- BIOS: F2
- Drivers: Intel INF: 10.1.2.10, Intel ME: 11.0.0.1158, Intel Thunderbolt 3: 15.3.40.275, NVIDIA Graphics: 353.82, Audio: R4.31, Intel LAN: 20.2
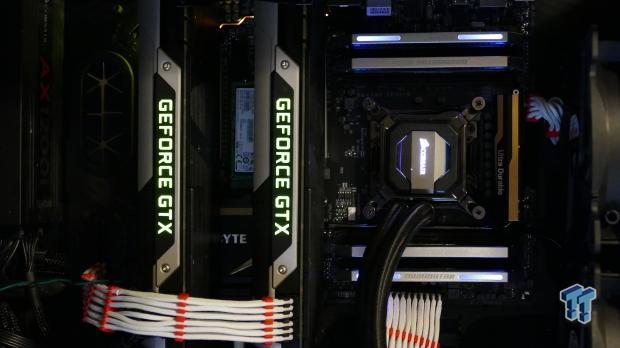
The X99P-SLI looks sleek inside the case. The gold accents add a nice touch.
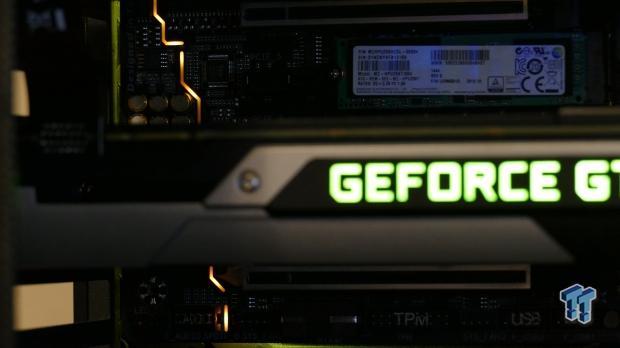
The LED illumination produces a neat effect. By default the color is yellow to match the gold heat sinks but you can change the color since they are RGB LEDs, or you can turn them off.
The new test bench is designed to test every aspect of the motherboard and IO. I have designed it so that the motherboard sits in a case and is cooled by fans always-on at a constant rate to keep the conditions similar during all tests. I have cut out part of the case behind the motherboard so I can get thermal images of the back of the PCB where the VRM heat spreads. System and CPU power measurements are now digitally logged.
I am also using a Netgear Nighthawk X4 AC2350 for our network (including wireless AC) tests. The latest M.2, SSD, and USB technologies are also being utilized to test the maximum potential of the motherboards that are tested.
Overclocking
Overclocking Results
CPU Overclocking
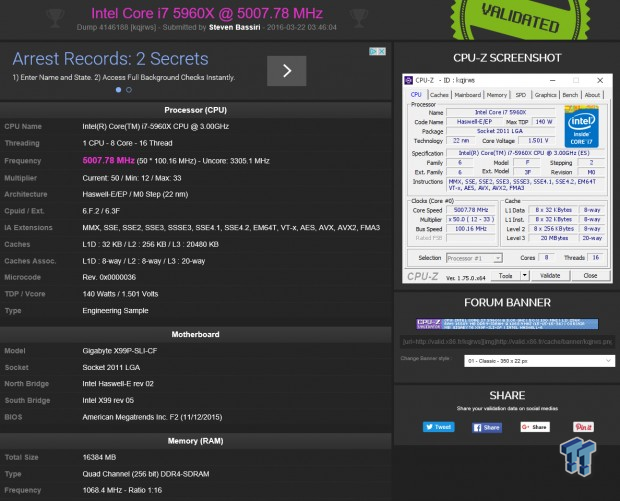
The X99P-SLI can take my 5960X to 5GHz just like other motherboards.
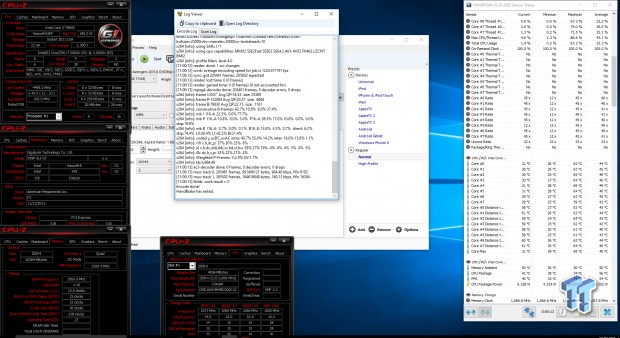
Stability is tested by Handbrake. I was able to run 4.5GHz and run the test. The overclock requires a 1.9v Input voltage and 1.3v VCore and 1.2v cache voltage.
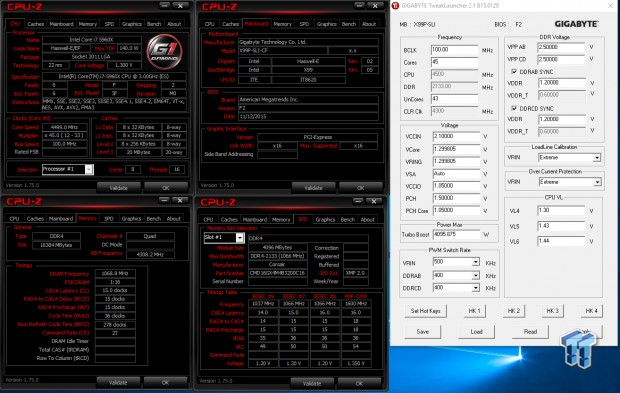
Overclocking the cache is done after I enable the extra pins in the socket. I was able to get the cache to 4.3GHz while the core was at 4.5GHz.
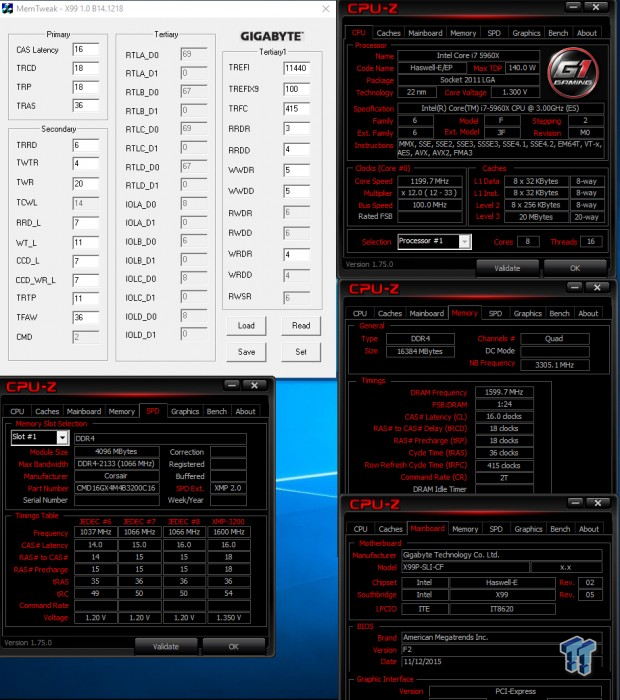
Memory overclocking consists of checking if XMP is working. I was able to get the Dominator Platinum kit to its rated XMP speed, 3200MHz.
CPU, Memory, and System Benchmarks
CINEBENCH 11.5
wPrime
AIDA64 AES and HASH
AIDA64 FPU
AIDA64 Memory

PCMark8 Home Test
3DMark: Cloud Gate
3DMark: Fire Strike
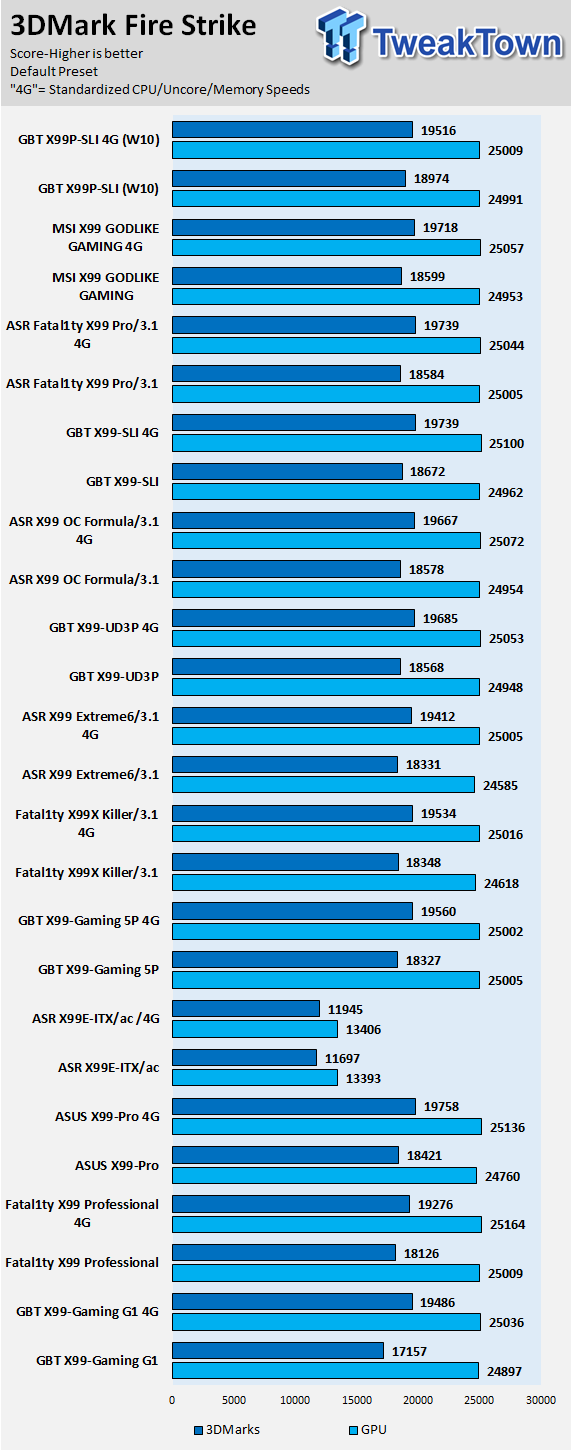
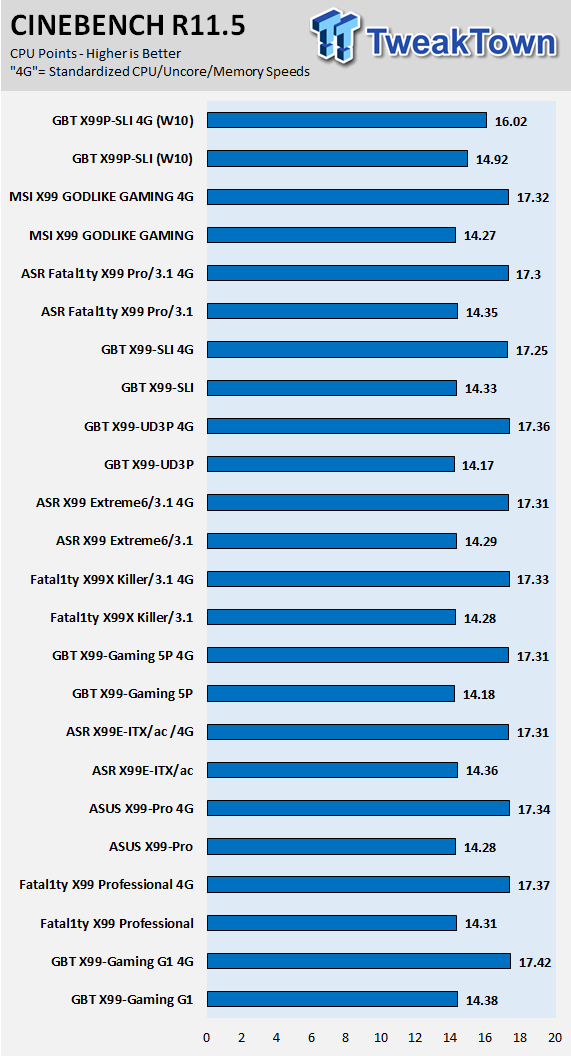
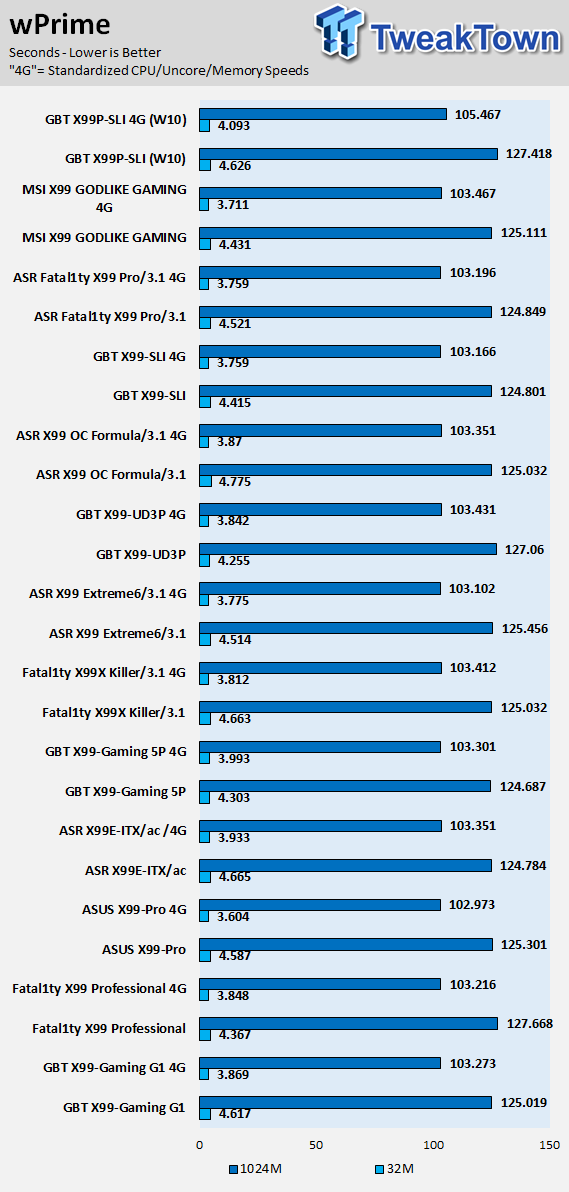
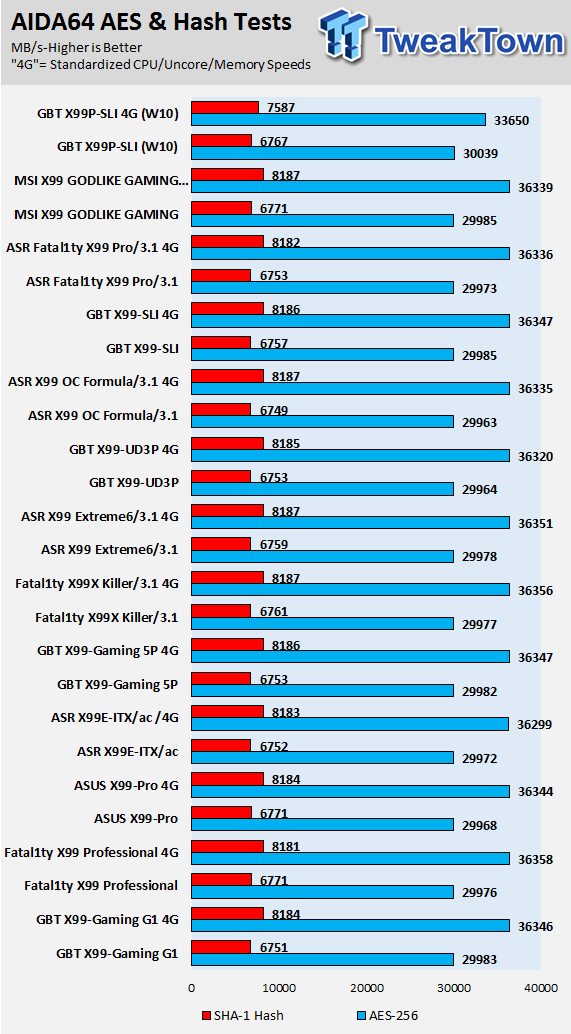
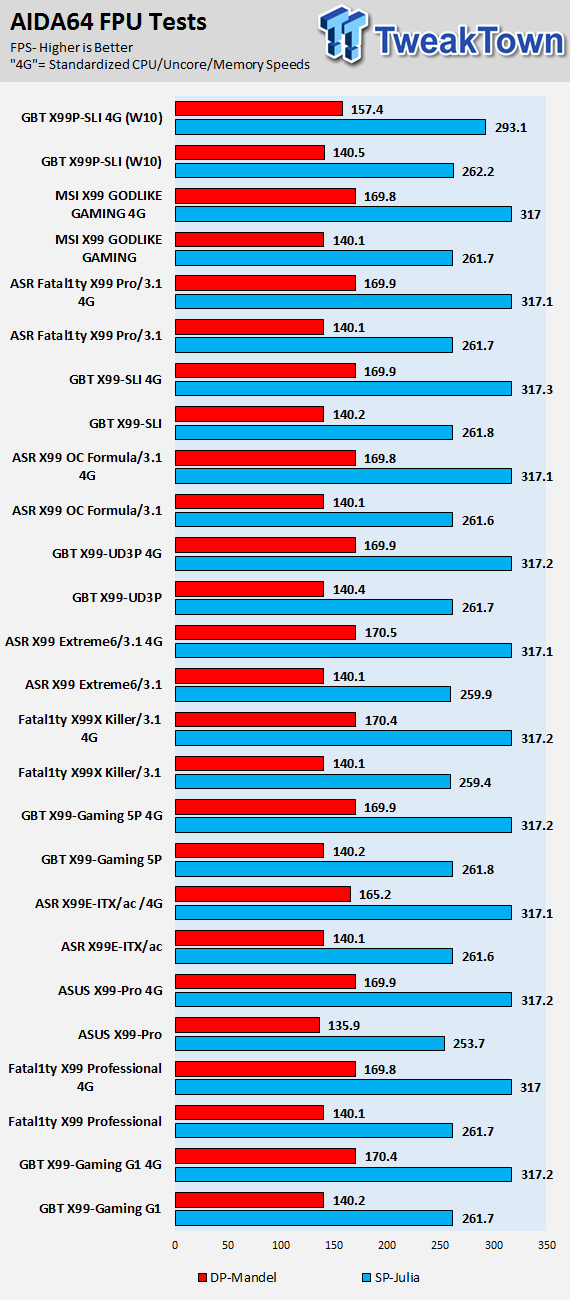
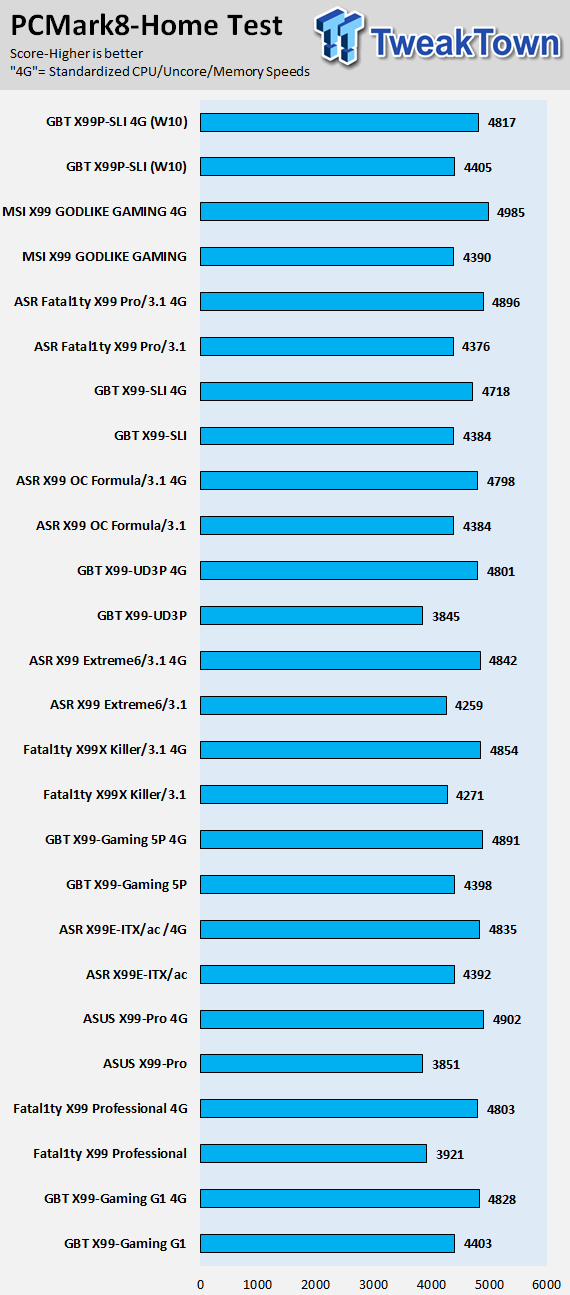
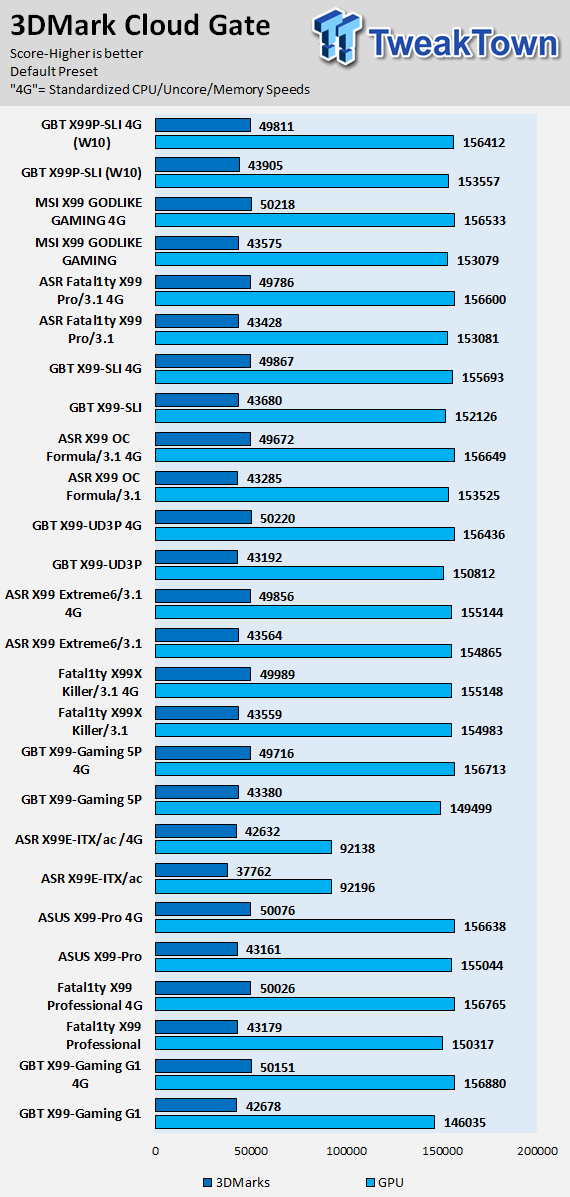
GIGABYTE's X99P-SLI is running on Windows 10, while the other motherboards were tested under Windows 7 or 8.1. Some synthetic benchmarks encounter performance issues when trying to compare performance across operating systems.
Also, if the CPU is stressed at stock to 100%, Turbo is above Intel's specifications, and can go up to 3.6GHz. I did not test F20 BIOSes since they are made for the next generation of CPUs. Overall performance seems to be in line with what it should be.
System IO Benchmarks
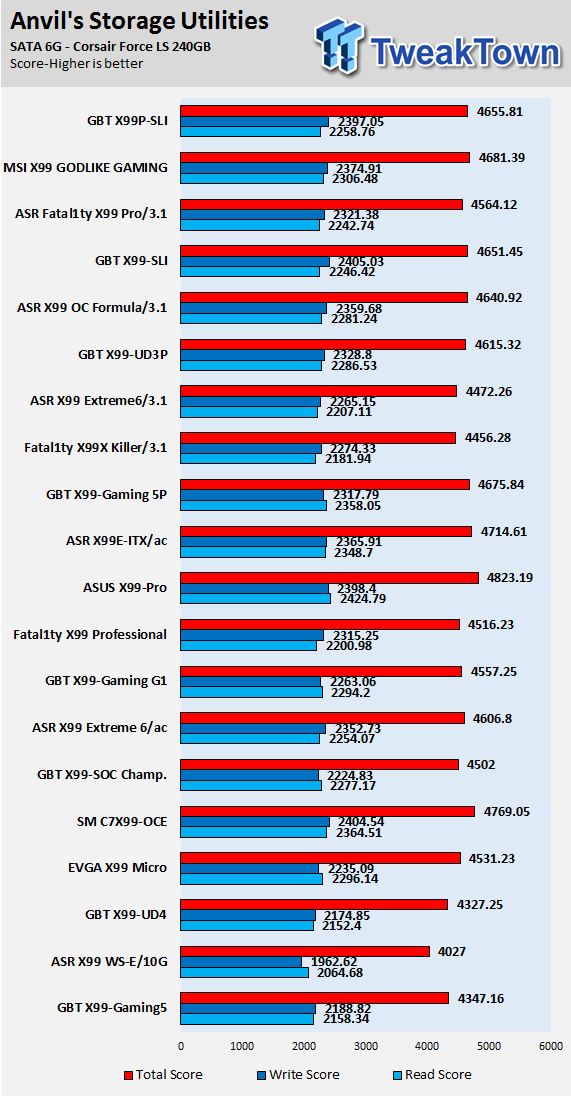
Anvil Storage Utilities SATA6G:
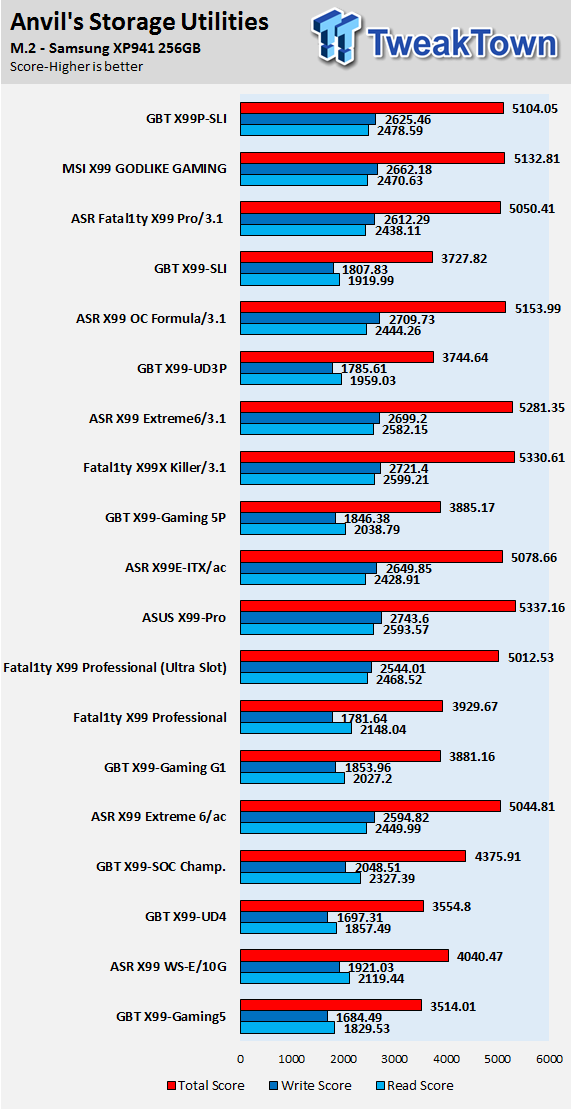
Anvil Storage Utilities M.2:
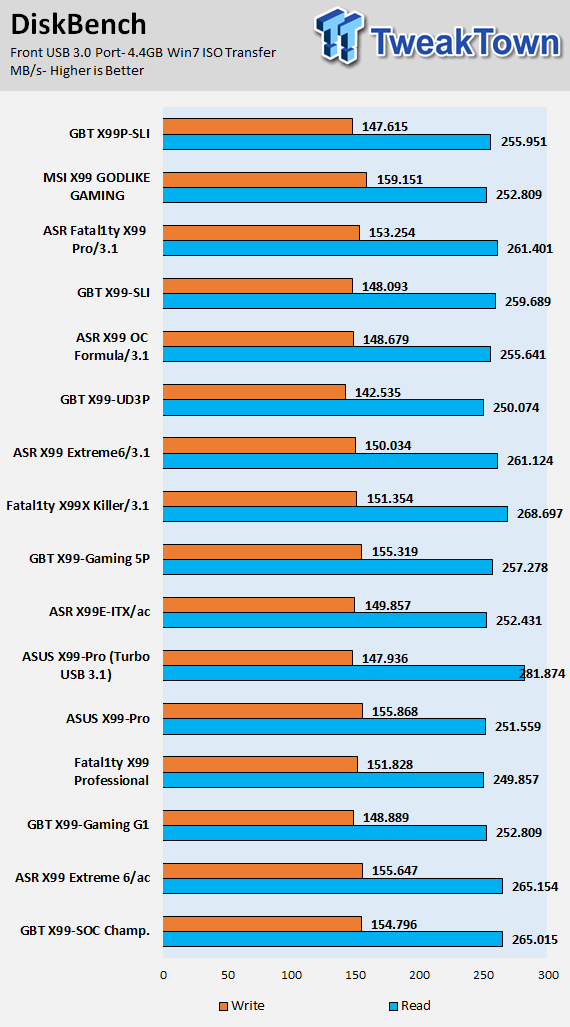
DiskBench USB 3.0:
ixChariot Network Throughput:
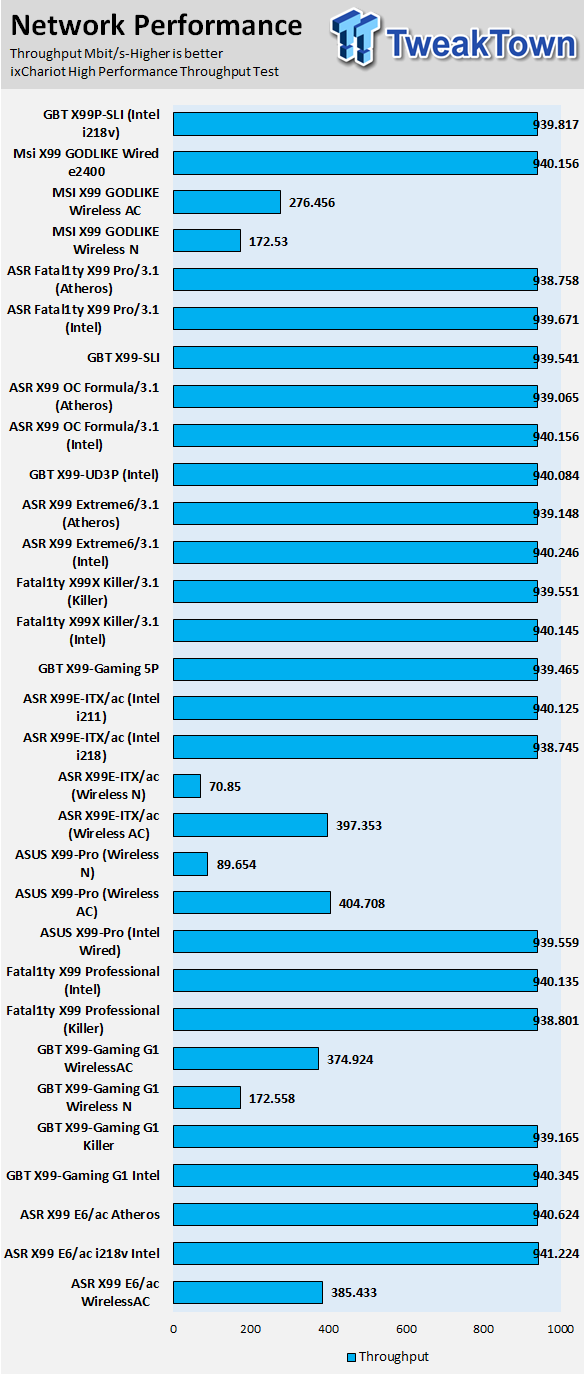
The X99P-SLI has excellent IO performance as well, on par with other M.2 motherboards that provide 4x PCI-E 3.0.
Audio RMAA 5.5:
I disable all audio features, set the correct bitrates, and then test the audio with a loopback test.
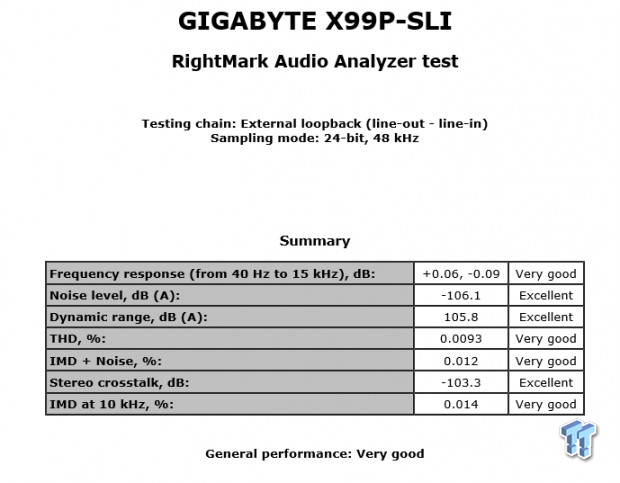
Sound Judgment by Ear: Very Good, quality was high. There are five ratings for audio: 1. Problems, 2. Okay, 3. Acceptable, 4. Very good, 5. Excellent
Thermal Imaging and Power Consumption
System power usage is measured at the AC/DC PSU (the Corsair AX1200i) which I have connected to another system to measure the test system, and as a backup, I have a wall meter to verify. The CPU power is measured through the 8-pin connector, which is hooked up to a hall effect IC, which measures current and puts out a voltage in proportion to the current. That voltage is logged by a National Instruments ADC, which logs the DC voltage level that I then convert into current.

Note on Thermal Images: In the temperature section, we use our Seek thermal imaging camera to capture the surface temperatures of major components on the board. I look at the VRM and then all other things that light up the screen. If there is something to worry about, then I will state it. Otherwise, I will just show the hotter running parts of the board for fun. Unless some component is over 80-90C, then there isn't anything to worry about.
All systems will act differently, so I will look for commonalities, such as how far from the VRM the heat spreads through the PCB and the difference in temperature between the front side and backside of the PCB. Keep in mind, the majority of the heat from the VRM goes into the PCB as it is a giant soldered on copper heat sink. A larger difference in temperature between the back and front of the PCB points towards a more effective heat sink.
Thermal Testing at Stock Speeds:
The image on the left is always at idle, and the image on the right is at load. During ALL TESTS, fans above the VRM that cool the CPU cooler's (Corsair H110i GT) radiator are turned on to high (12v).
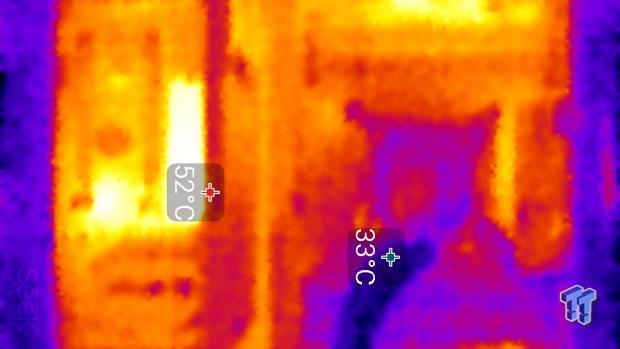
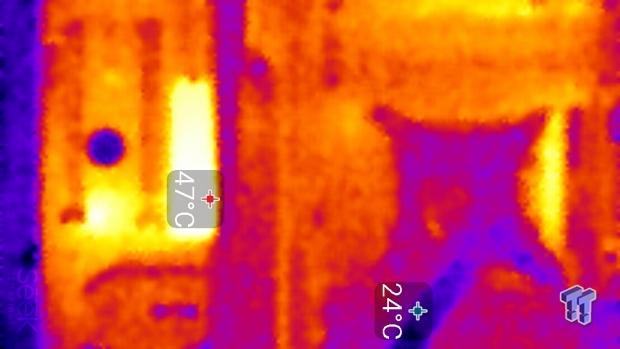
Full frontal.
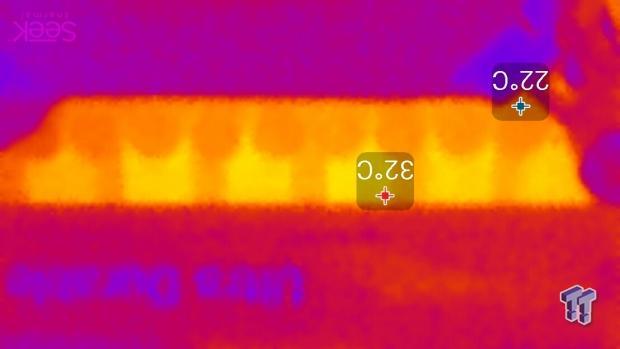
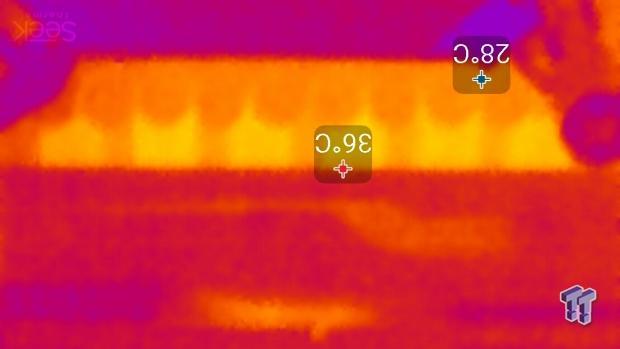
Up-close of the front of the VRM.

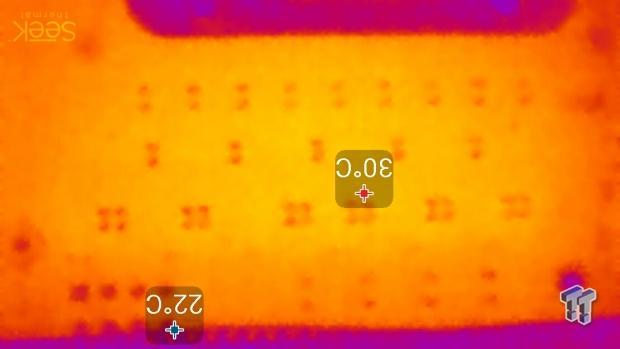
Up-close of the back of the VRM.
Thermal Testing at 4.5GHz Overclocked Speeds:
The image on the left is always at idle, and the image on the right is at load. During ALL TESTS, fans above the VRM that cool the CPU cooler's (Corsair H110i GT) radiator are turned on to high (12v).

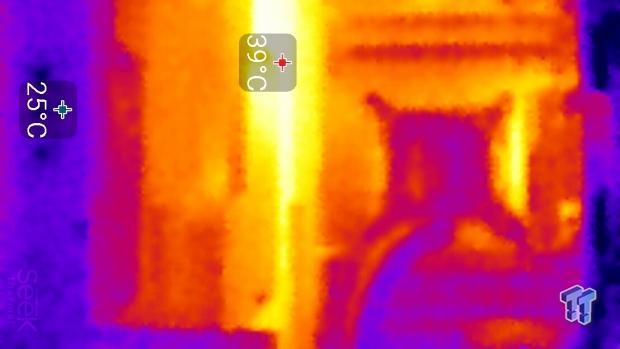
Full frontal.
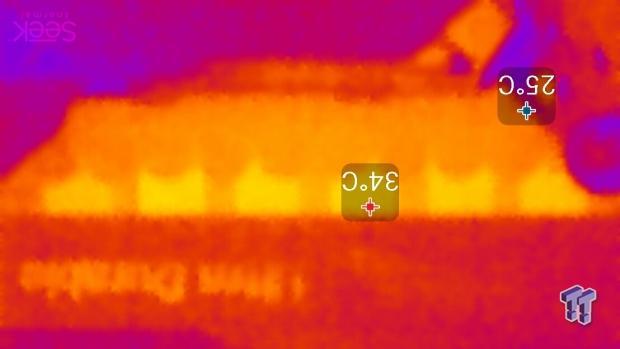
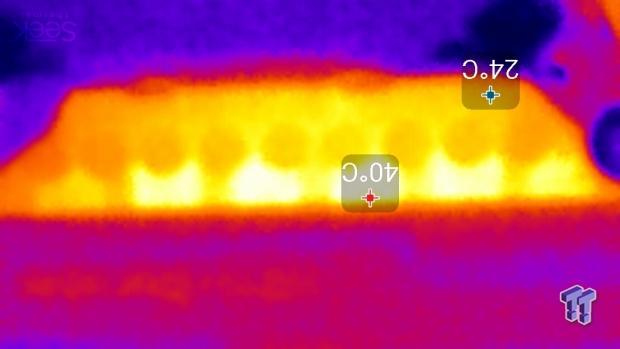
Up-close of the front of the VRM.
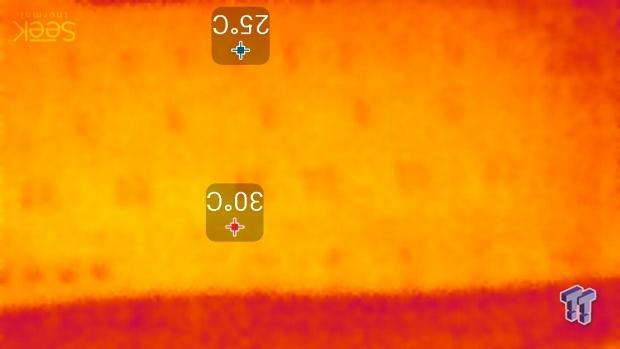
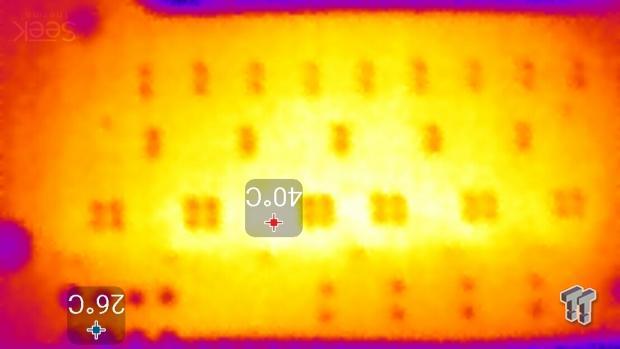
Up-close of the back of the VRM.
The VRM on the X99P-SLI is very powerful and efficient. The CPU is very power hungry, but the X99P-SLI has the right components to support over 300W of output without missing a beat. At full load, the VRM temperature didn't increase too much.
Anything under 60C is great, 60-80C is acceptable, and anything above 80C is a bit worrisome (if at stock).
What's Hot, What's Not & Final Thoughts
Here are key points about the GIGABYTE X99P-SLI.
What's Hot
Intel Thunderbolt 3.0/USB 3.1: The X99P-SLI is the first X99 motherboard with Intel's Thunderbolt 3 certification. The "Alpine Ridge" controller also provides USB 3.1 through the Type-C connector and Type-A connector on the IO panel. I have always looked at Thunderbolt 3 as a high-performance interface best paired with Intel's high-end platform (X99) as opposed to the mainstream (Z170) platform.
Socket with Extra Pins: GIGABYTE's X99P-SLI is towards the bottom of GIGABYTE's X99 lineup, but it carries the socket with extra pins and a switch to enable or disable them. Some people are afraid of the extra pins, and the ability to disable them is a pro for many.
Ultra-Fast M.2: The X99P-SLI carries a 32Gb/s M.2 slot. A lot of people are brand loyal, and those who are loyal to GIGABYTE will be excited to know the X99P-SLI's M.2 slot got an upgrade.
Strong VRM: Although some people might doubt six phases on an X99 motherboard, the X99P-SLI's VRM is quite formidable. It is all about component quality on X99; quantity doesn't provide much since the space for the VRM is so limited on X99. GIGABYTE has provided very high-quality components, even on this mid-range X99 motherboard.
Ready for Next-Gen: A lot of people will be looking to upgrade to the next generation of CPUs for the X99 platform, and the X99P-SLI is fully capable of supporting them with BIOS F20 and beyond.
What's Not
No POST Code: I think any motherboard that costs north of $200 should come with a POST code display for the sake of debugging. It is not a requirement; I just feel more at ease with the codes since it saves a lot of time if you run into hardware issues.
Final Thoughts
Intel's X99 chipset is high-end, by definition, any motherboard carrying the X99 chipset is considered high-end. However, until now, Z170 motherboards had more high-end features such as Thunderbolt 3 and dual M.2 slots. The X99P-SLI is based upon the X99-SLI, but for $40 more, you get Thunderbolt 3, USB 3.1, and a 32Gb/s M.2 slot which is a pretty good value considering the cost of the Intel Alpine Ridge chip. The X99-SLI was an excellent value motherboard, and the X99P-SLI is an excellent replacement, especially with the high-end features.
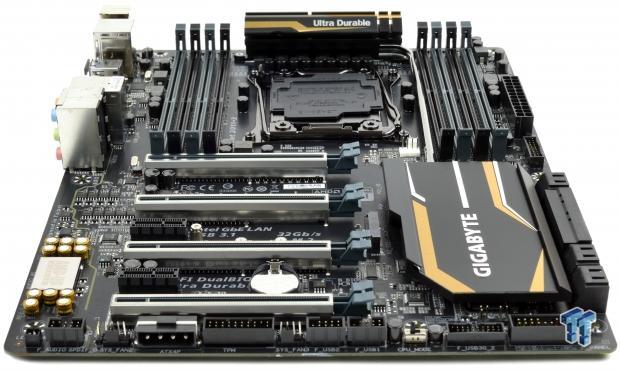
GIGABYTE did not cut any corners to offset the cost of adding in the Thunderbolt 3 controller. Voltage regulator quality is still high, and tiny improvements were made such as swapping in RGB LEDs and adding PCI-E shielding. I was very impressed with the value that this motherboard provided regarding features compared to cost.
For an extra $40 over the X99-SLI, you get a lot of value. If you are looking for a motherboard with the latest in connectivity at an affordable price, the X99P-SLI is an excellent option.

