The Bottom Line
Introduction, Specifications, and Pricing
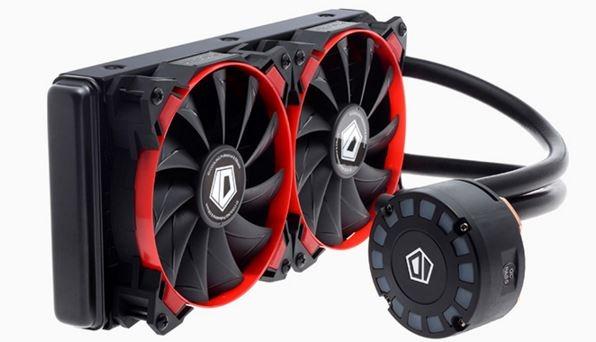
ID-Cooling so far has impressed us with the value offered in the Frostflow 120L, and then turned around and offered up the IS-VC45 cooler that even with high hopes for it initially, it did not overly impress us. However, they still have one bullet left in the chamber. We are back again with the Frostflow series, this time with a much larger radiator. In fact, the kit we are about to get to test here is also the basis of the Hunter Duet that cools both a CPU and GPU in one loop, also offered by ID-Cooling.
If you happened to have missed their last AIO to cross the bench, let's catch you up a bit. We found that the cooler was very cost effective in a market where similar coolers cost considerably more. We also found that while they did not change the style of the base unit, they do offer up a Comet-Tail LED display on the head unit and continue to match those red LEDs with bright red rings on the supplied fans. While the Frostflow 120L was not particularly a stellar performer, it was able to hold its own and fall into the charts right about where we would expect it to.
Well, it is time to move on from what we know the Frostflow 120L was capable of and move on to bigger and better things. Today we are bringing you the Frostflow 240L sealed loop AIO cooler from ID-Cooling. This is a dual 120mm radiator based system that is built to not only take on the heat load of just about any CPU on the market currently, as mentioned, they feel it performs so well that they also offer this kit with a GPU head unit and mounting plate tied into this cooler, sold under another name. From what we have just seen from Corsair, though, they have pretty much cornered the AIO game at the moment, and that stacks the odds against ID-Cooling, but let's see just what this cooler can do before we make any final judgments.
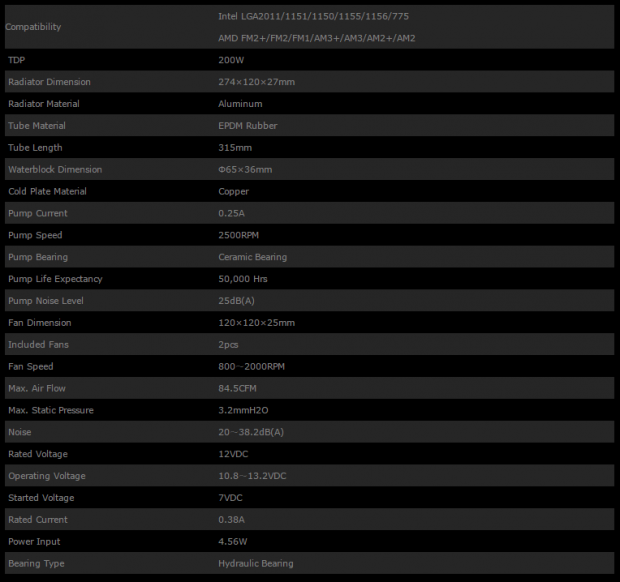
The Frostflow 240L sealed loop cooler is capable, with the supplied hardware, to fit Intel sockets LGA775 and newer, and for AMD users, anything since AM2 is fair game as well. The TDP rating has increased from 150W in the 120L to now 200W in this 240L. The dimensions increase to 274mm of radiator length, it is still 120mm wide, and also is again 27mm thick, and of course made of aluminum. Connecting the radiator to the head unit ID-Cooling uses EPMD rubber tubing in lengths of 315mm, which are secured at both ends with plastic-like collars. The head unit is 65mm in diameter and sits 36mm taller than the IHS on the CPU, and the pump and copper cold plate are contained in it encased in black plastic. Speaking of the pump, these sip power with just 0.25A of draw and is capable of speeds up to 2500RPM.
This time, we are sent a pair of 120mm ID-12025M12S fans to cool this 240mm radiator. These fans spin at a range of 800 to 2000RPM delivering 84.5CFM of airflow each. The static pressure is also higher at 3.2mmH2O to help push through the tight fin arrangement of these radiators. These hydraulic bearing supported fans are the same as what we saw in the 120L as well, and are strong from what we have seen in that design.
We run into the same issue with this Frostflow 240L we had with the last submission, though, availability is next to nil. In the usual searches, we cannot find a listing at the top five sites we tend to find just about anything we need. Once again, though, we did find just one listing as to where one may obtain this Frostflow 240L inside of the US, maybe the only source on this side of the globe. This is again listed at AliExpress.com for what seems super low for the product, priced at just $98.99. Usually when we are given a 240mm AIO, it releases at a price in the range of $119.99 to $129.99, so if you do like the overall design and aesthetic, you can also save around $30 opting for ID-Cooling and their Frostflow 240L over some of the better-known options out there.
Packaging

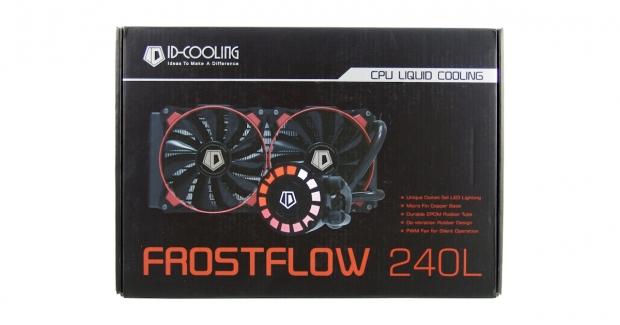
The top of the box offers an image of the cooler contained inside just off to the left. Above it we find the company name and that this is CPU liquid cooling. The bottom offers the Frostflow 240L naming in red, and a short list of features found in this cooler, also in red.
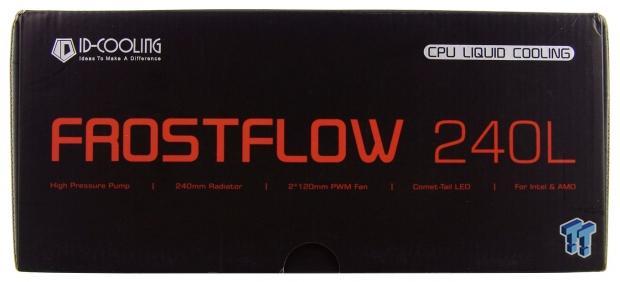
This side panel matches near everything we saw on the top of the packaging, just this time it lacks the image, and the features have been spread out horizontally this time.
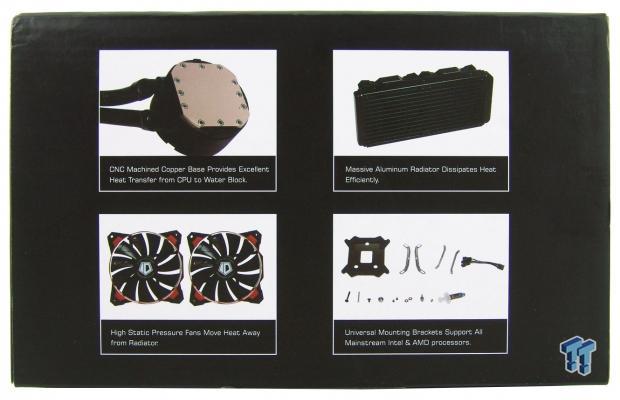
Around to the next panel, we find four images. Moving clockwise, these images cover the machines copper base, the aluminum radiator, the universal hardware and extra goodies included, and also shows us there are two high static pressure fans included.
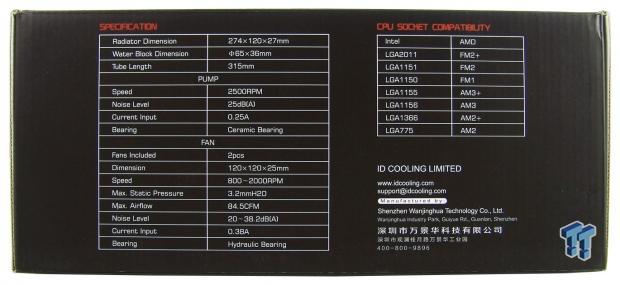
The second longer side of the box then offers the specifications chart for the cooler, its compatibility, and even the company information to help provide customers all the information possible at the point of purchase.
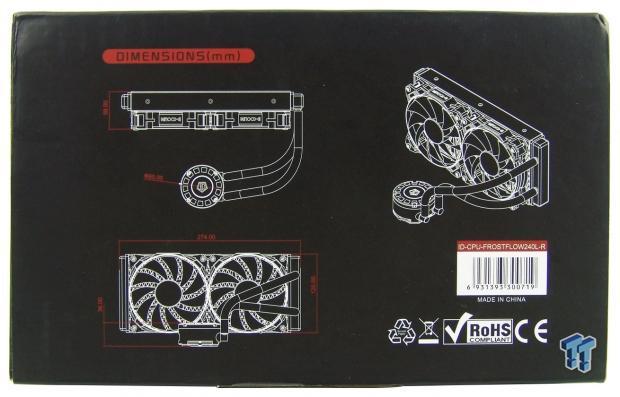
The last side of this box offers us dimensional renderings. The one at the top shows the 58mm thickness of the fans and radiator as well as the 65mm diameter of the head unit. The lower one then covers the radiators other dimensions as well as the head units height.
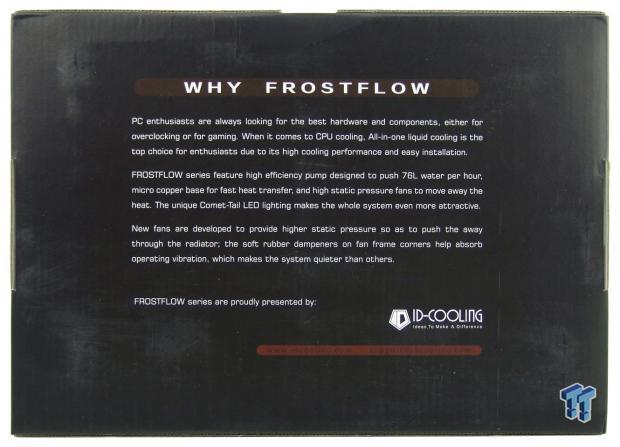
They again print on the bottom of the box as well. Here it explains that enthusiasts want this sort of cooler, and what makes the Frostflow special.
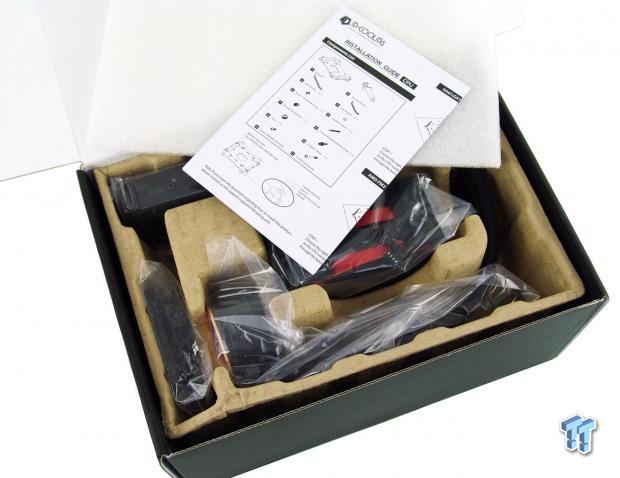
After breaking a seal, the top of the box opens, and we first see the instructions on top of a thin layer of dense foam. Under that, we find all of the hardware, fans, and bits of the AIO wrapped in plastic and slid into their own little special compartments that allow this cooler to show up in perfect condition for testing.
ID-Cooling Frostflow 240L CPU Cooler
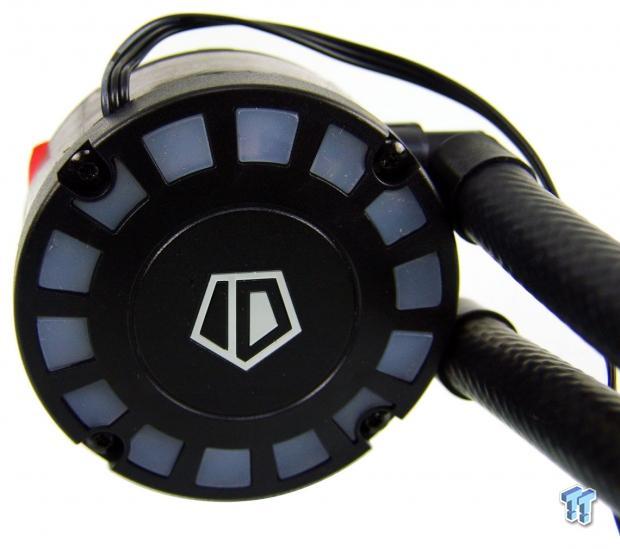
The head unit has not changed from the other model. We are offered a cylindrical head unit that provides a top plate sporting the ID-Cooling logo in chrome in the middle. Around the edge of the cap, there are windows that allow the LED Comet-Tail effect to happen.
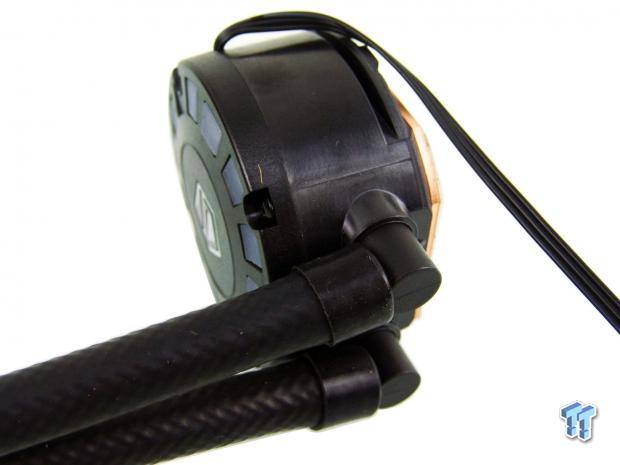
To get coolant in and out of the head unit, the tubing is connected to plastic ninety-degree swivel fittings. These allow a bit of flexibility to twist the tubing to a more relaxed state. Near the other side of the head unit, still along the top, we see the 3-pin lead emanating from under the cap as well.
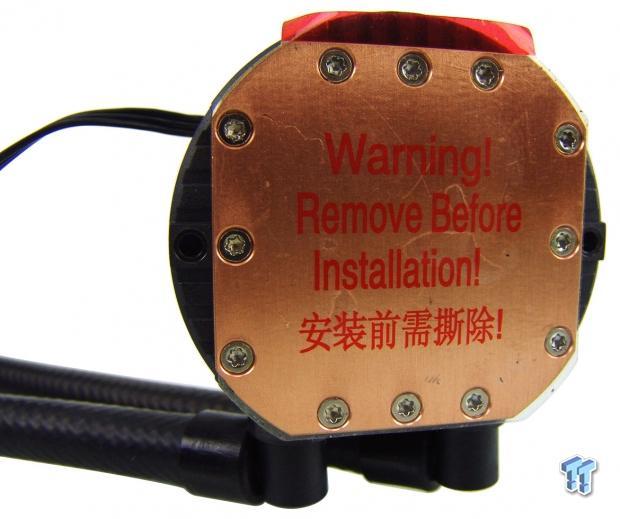
The copper cold plate is screwed into the head unit evenly on all sides, and once it is in place, they cover it with a clear sticker to fight oxidation mostly, but also to help protect the finish on said cold plate.
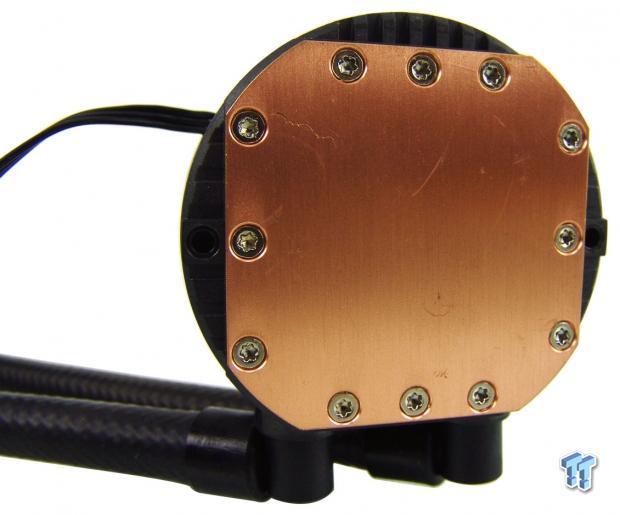
For the second time now, though, our cold plate shows definite signs of mishandling. Most of the scratches seen on the machined surface are not that bad, but there is a definite gouge at the top left corner. Someone needs to pay better attention to this.
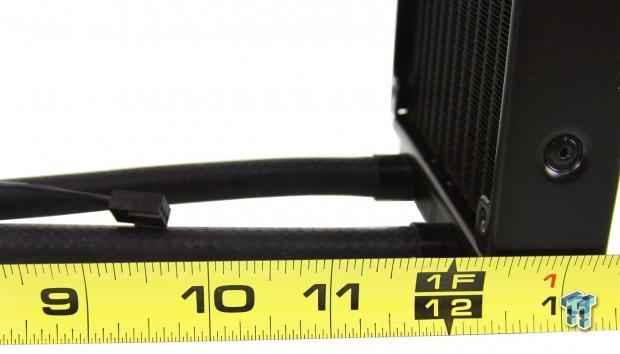
This time as we stretch out the tape measure, we find that the pump power lead is 9.5 inches rather than the 10 found on the 120L, and we also see the tubing is roughly a quarter of an inch shorter this time too. Neither are deal killers, they are still long enough, but some consistency would be nice.
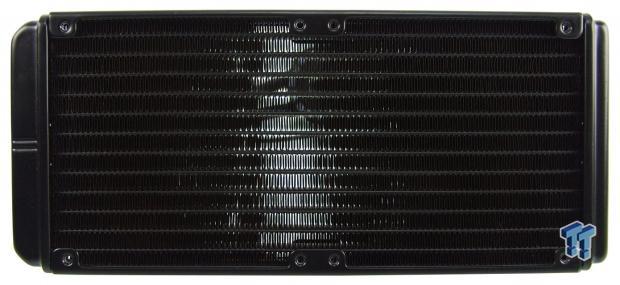
At last count, we got to 22FPI for this radiator. This is a high fin count and to get air through a tight mass such as this, static pressure is the key to making this all work well.
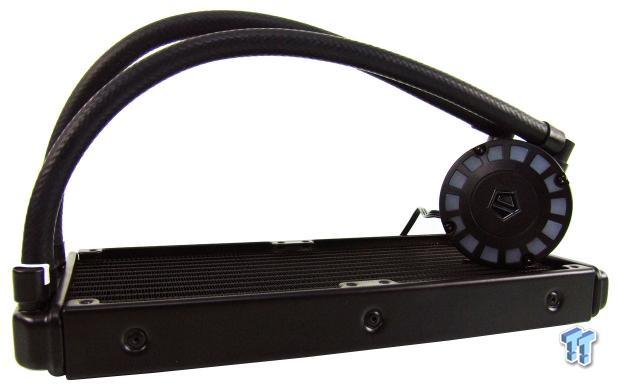
We found no stickers around this cooler to help identify the actual maker of these units, but from this angle we can see that they also offer the standard 27mm thick radiator, and there is no dressing it up on the sides, just three rivets to look at there.
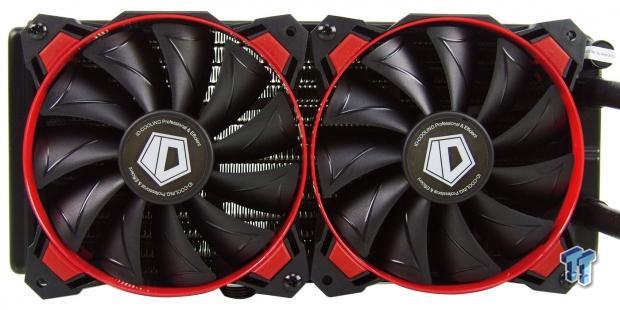
We went ahead and mounted up the fans to the radiator so you could have a clear view of the style and appeal that just a simple red ring on these can do towards dressing things up a bit.
Accessories and Documentation
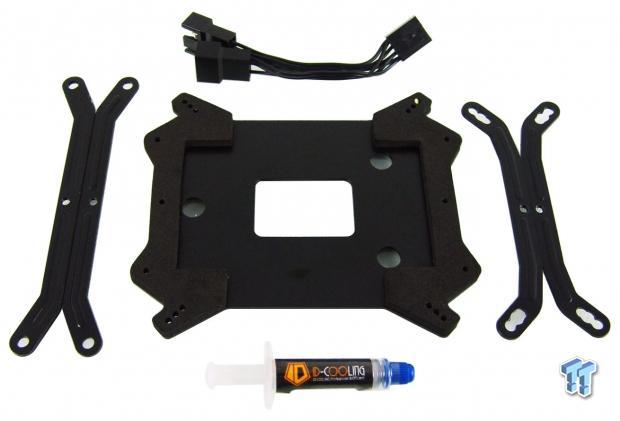
Here we have laid out the dual fan Y-splitter at the top with the universal backplate in the middle offering thick foam pads to isolate it from the motherboard. On the left, we have the AMD head unit brackets, the Intel ones are to the right, and below the plate is the supplied mini tube of thermal paste.
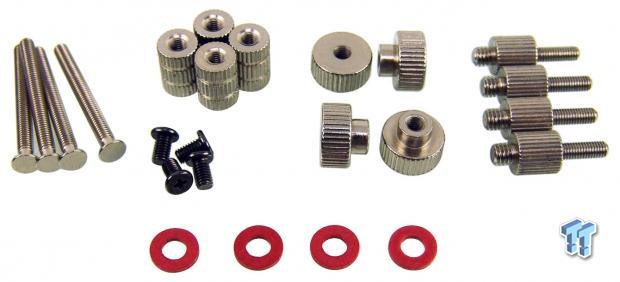
From left to right, we have the studs that pass through the backplate and motherboard followed by the spacers that lock said studs to the motherboard, and a tiny set of screws below that lock the brackets into the head unit. We then run into the nuts to lock the cooler in with the LGA2011 standoffs at the right. There is also a set of paper washers across the bottom that go under the spacer nuts to protect the top of the motherboard.
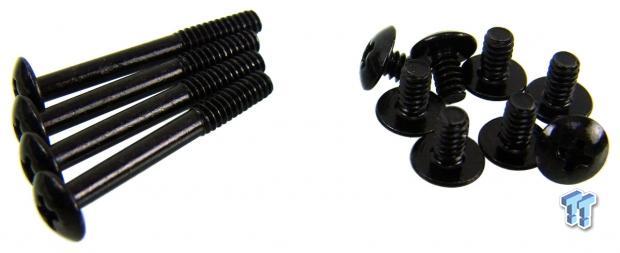
When it comes to fan mounting, someone forgot how to count at some point. While we are given eight shorter screws to secure the radiator to the chassis, they seem to have only supplied us with four fan screws and is why the previous image only had two screws in each fan.
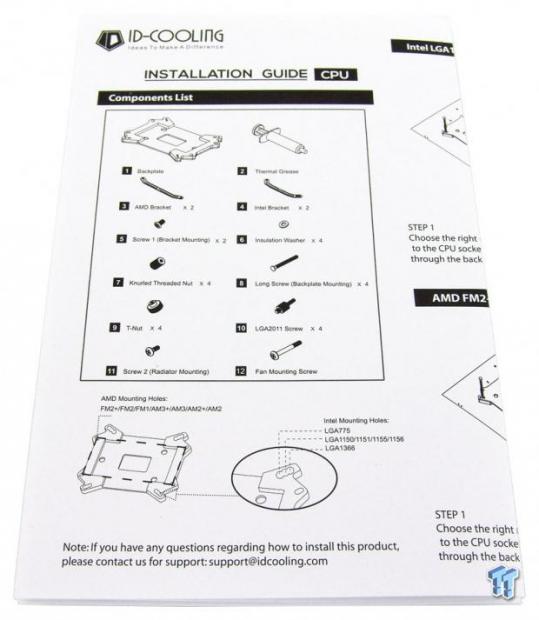
The guide provided to follow had pretty good renderings that explain everything along the way, and if you do manage to get stuck, there is ample text as well to work you through it. They also include a parts list to tell you what should be in the box, and it technically shows we should only have one, so I guess we got lucky.
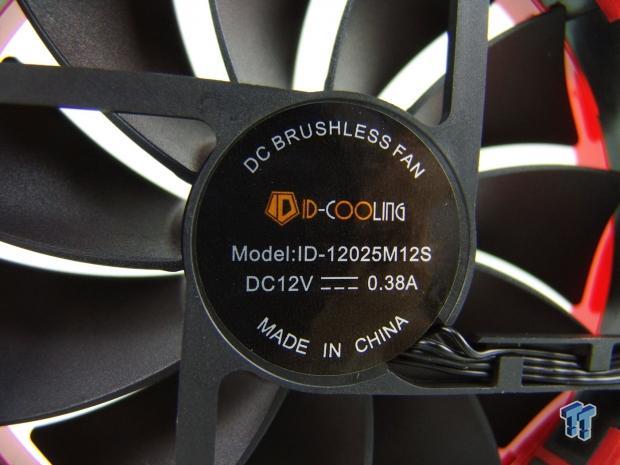
For those of you who may want to think about a push/pull setup on a cooler like this, since the cost of the unit almost justifies adding in more fans, we were sure to get an image of the model number for reference. As hard as this cooler is to find on this side of the pond, though, the fans are very rare it seems as we cannot locate them at all.
Installation and Finished Product
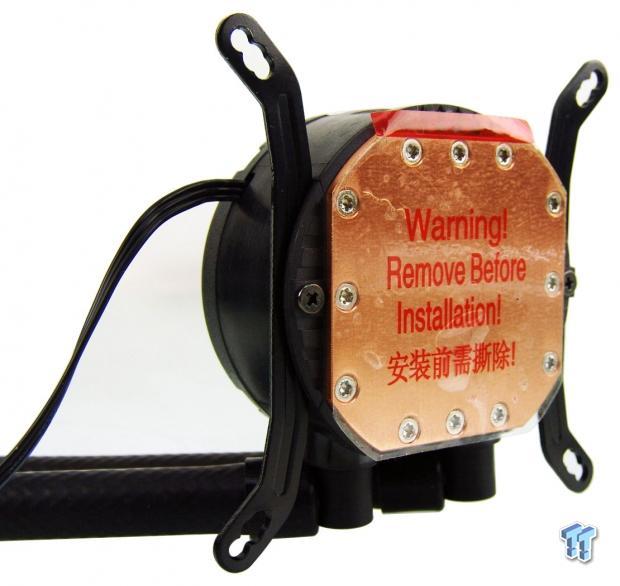
As we tend to do, we addressed the head unit mounting first. Here we just grabbed the Intel brackets, slid them into the groove near the bottom, aligned the screw hole, and sent the small Phillips head screw all the way in to lock them in.
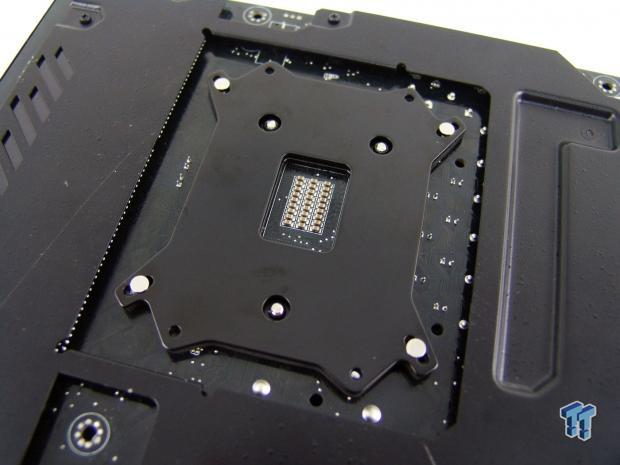
In our instance, we put the studs in the center holes for LGA115X, but that is it, they do not lock into place or have any polite way of keeping them from spinning.
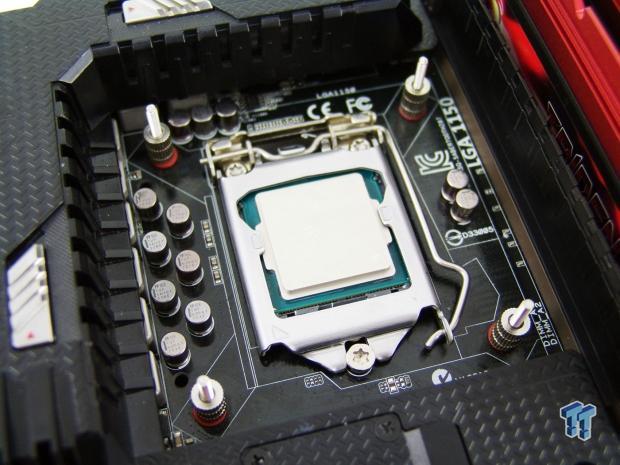
As we did for the 120L, the hardware for this Frostflow 240L also required a set of pliers to get the right amount of pressure to the socket. Without it the head unit just sat on the CPU with very little pressure, it was actually testing that made us go back and tighten this hardware again.
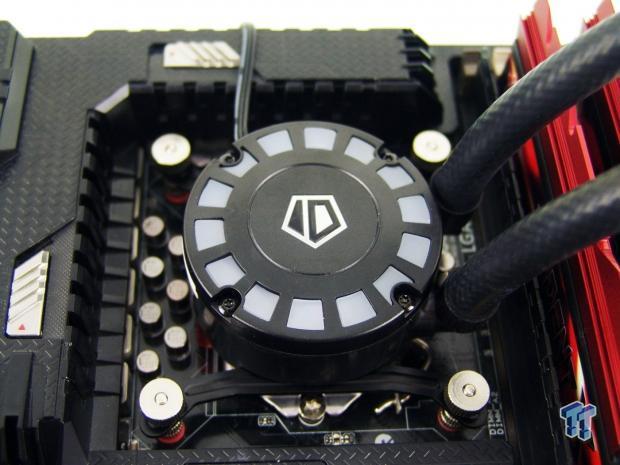
The next steps are pretty simple. Add some thermal paste to the CPU, set the head unit on the hardware, and take the nuts and lock it all to the motherboard. Also, there were no issues around the socket, it is clear of the memory, and, of course, has no issues clearing anywhere else for that matter.
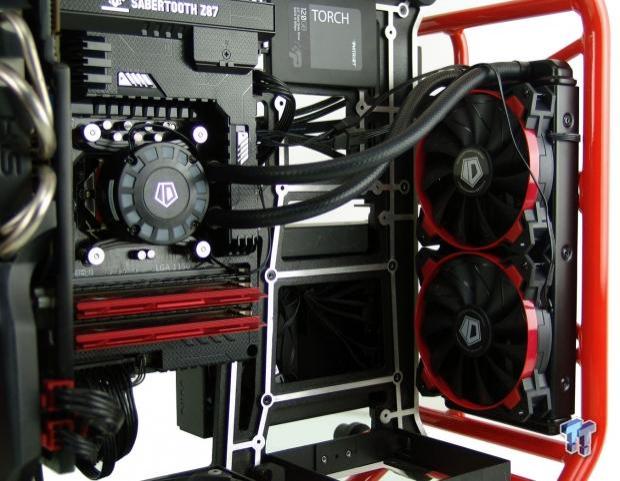
Reorienting the head unit to display the logo correctly for this image, we have installed the kit into our D-Frame. While we made mention of the tubing length earlier, there is still plenty of room to install this kit in even the tallest of cases. We also left the fan wire exposed to show just how far you can get with it.
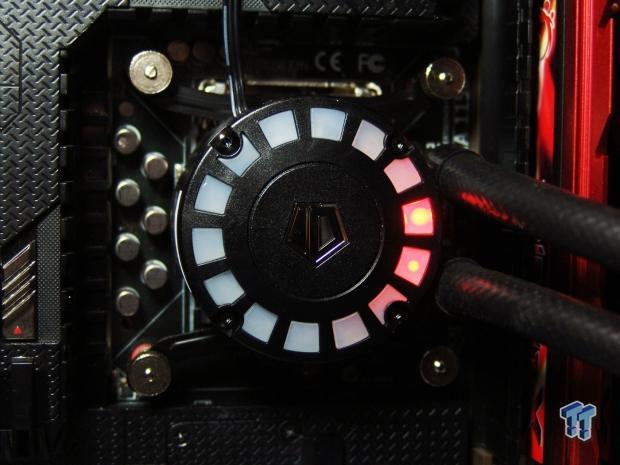
Once we powered the Frostflow 240L, the Comet-Tail LED system goes into effect. It rotates in a counter-clockwise direction at a pretty quick pace as the bright LED runs around with dimmer LEDs behind it. It isn't a bad effect, but it would be cool if it had other options.
Test System Setup, Thermal Tests, and Noise Results
Chad's CPU Cooler Test System Specifications
- Motherboard: ASUS Sabertooth Z87 - Buy from Amazon
- CPU: Intel Core i7 4770K - Buy from Amazon / Read our review
- Memory: G.Skill F3-2666C11D-8GTXD - Buy from Amazon
- Video Card: HIS Radeon HD 7950 IceQ - Buy from Amazon / Read our review
- Storage: Patriot Torch 120GB - Buy from Amazon / Read our review
- Case: IN WIN D-Frame - Buy from Amazon / Read our review
- Power Supply: SilverStone ST85F-G - Buy from Amazon / Read our review
- OS: Microsoft Windows 8 Professional 64-bit - Buy from Amazon
- Software: RealTemp 3.70, AIDA64 Engineer 5.20.3400 and CPU-z 1.72.1 x64
I would like to thank ASUS, InWin, Patriot, and Fractal Design for supplying products for me to test with.
To see our testing methodology and to find out what goes into making our charts, please refer to our CPU Cooler Testing and Methodology article for more information.
Thermal Results
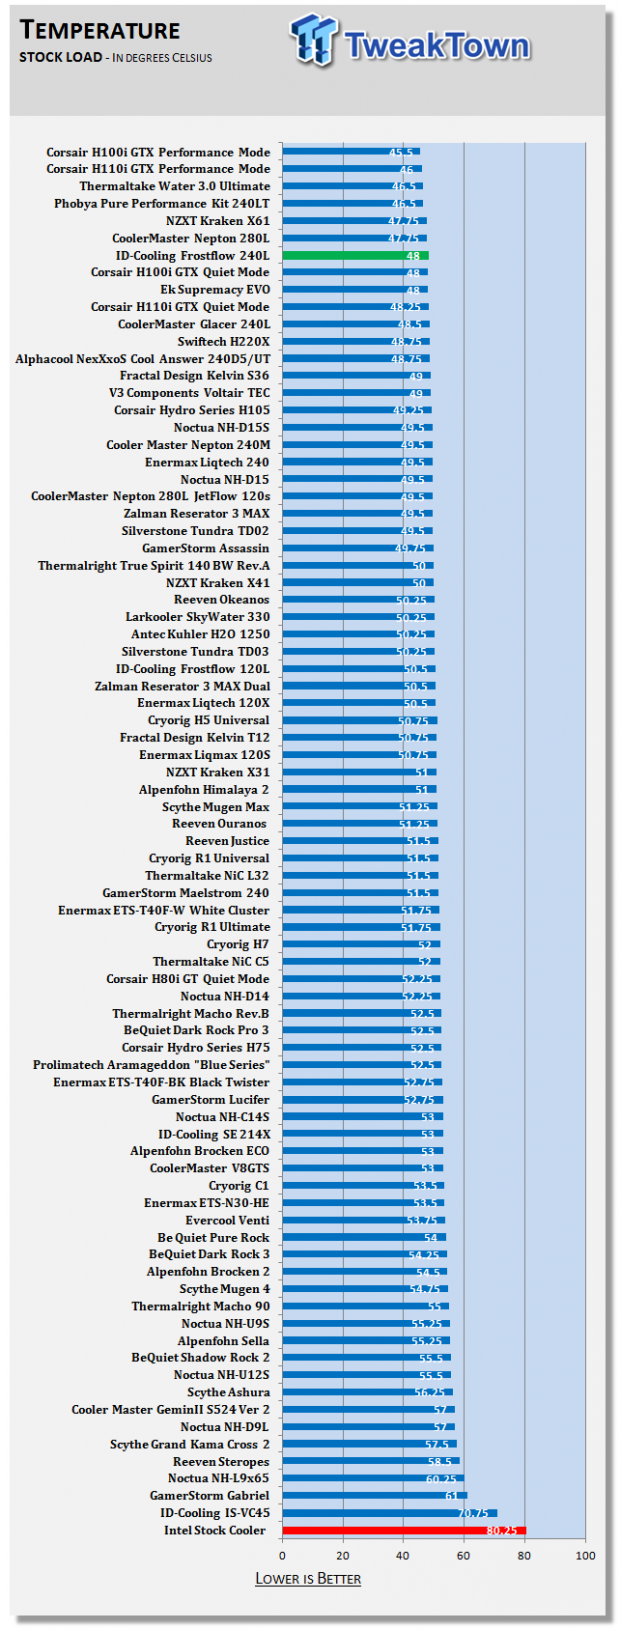
When it comes to stock CPU performance from the Frostflow 240L, there are no complaints. This 48-degree result is only 2.5 degrees from the top, and considering the coolers that are there and what it costs to own one, the ID-Cooling solution steps up a peg.
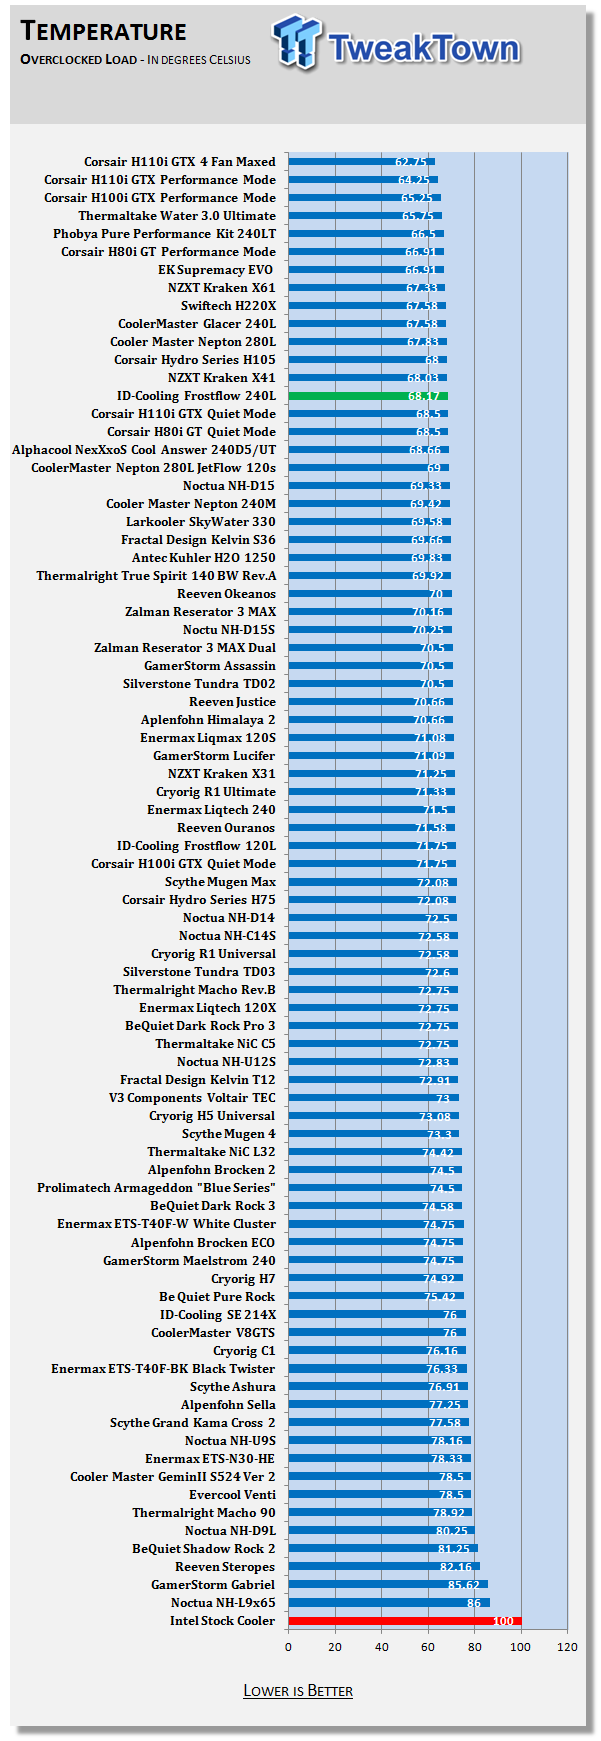
With our overclock applied, the Frostflow 240L did lose a bit of ground but still performs in a very respectable manner. 68.17 degrees at average is pretty good for any cooler. While a dozen or so coolers offer better results, all were more expensive when released, and is it worth all that for roughly five degrees?
Noise Level Results
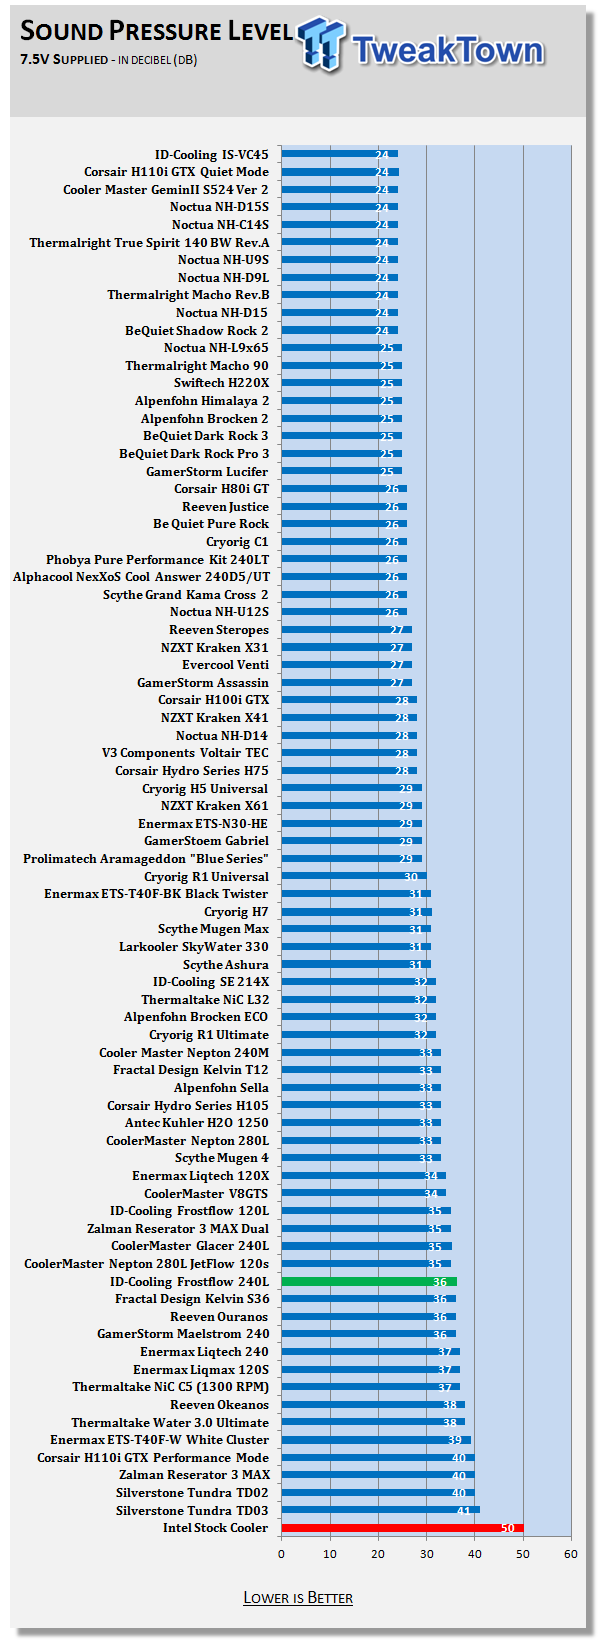
Just a tad higher than the average line in fan noise, these fans when running together offers up 36dB with 7.5V supplied and them spinning at 1450RPM.
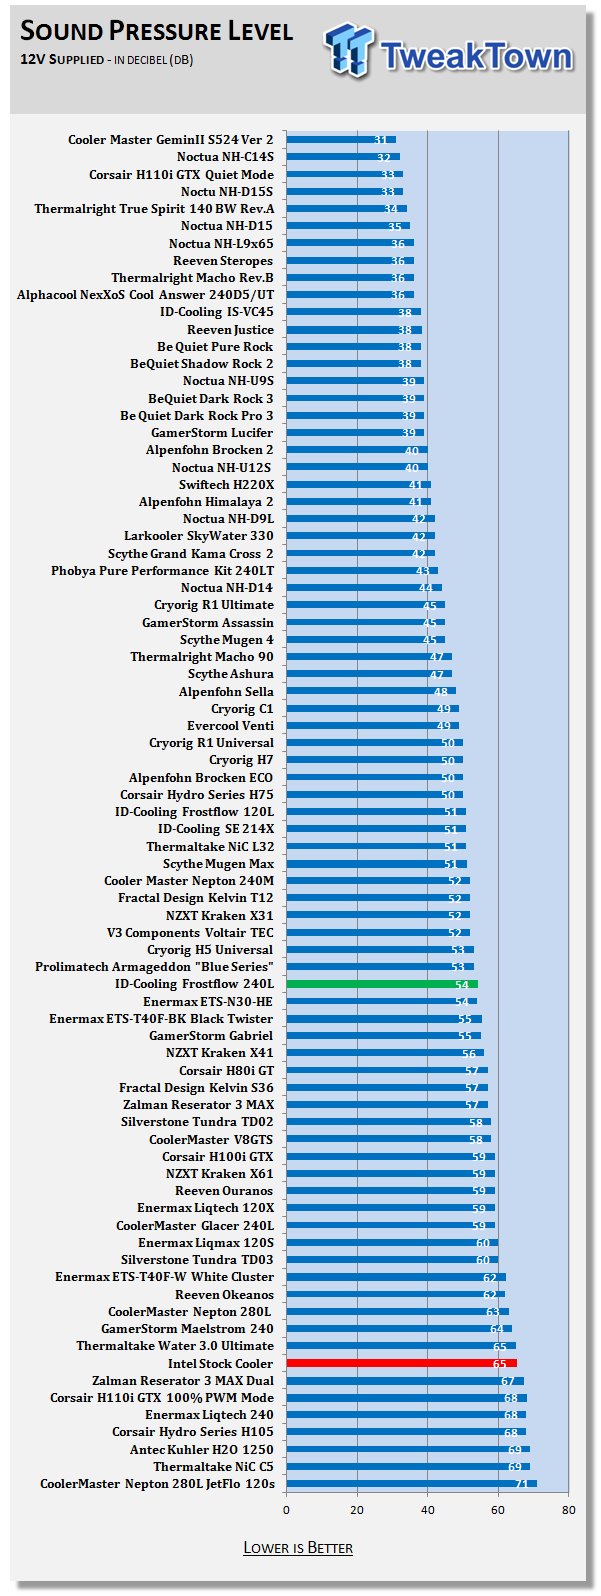
Noise picks up a fair bit when the fans were given 12V of power. Here we found them delivering 54dB of noise, which is not horrible, but noticeable. At this time, the fastest we saw these fans spinning was at 2000RPM, right on the dot.
Final Thoughts
The reality of what the Frostflow 240L has shown us is that it is possible to make an AIO, offer it slightly cheaper than the rest, perform admirably, and hope the light shines favorably on you for your efforts. We feel that ID-Cooling has a strong leg to stand on to begin with, they just need to get these products into wider markets so more people can have access to the low price and the performance offered in such a kit. We do also realize that there may be a legal issue on this side of the pond as our instincts are telling us that these are not Asetek built sealed loop coolers. This means that unless you find the oddball site like we did, you may never see these on this side of the pond at all.
We think they need a bit of work on the mounting hardware, in the sense that there needs to be a way to grab easily the stud that passes through the backplate. When we first assembled the equipment as instructed, you could only get things so tight. And when the head unit gets installed without pressure, testing showed it in the form of some eight degrees higher temps than its nearest competitor on the charts, we knew something was wrong. So, we went at it with a pair of pliers and fixed the mistake, greatly improving head pressure so we could deliver what this cooler is fully capable of doing. We wouldn't have rehashed this issue, but that on top of the fact that we only got two fan mounting screws, had we not had the Frostflow 120L on hand, it would have meant a trip to the hardware store to fix that issue too. Outside of these points, we did end up favoring such a design.
The Frostflow 240L may not have the best LED scheme, nor does it have software to monkey around with LED colors or fan controls, but then again it does not attack your bag of money like other coolers do when released either. ID-Cooling puts just enough flavor in this package to be unique, show off the head unit a bit with their LED setup they do offer, and the slash of red that matches the radiator to it is attractive as well.
We have no doubt that those looking for the best bang for the buck in sealed loop coolers for things like system builds, or even just to save money to build your own system, while a $30 difference in the overall build isn't much, that is halfway to memory or adding more capacity to the SSD in these builds. Overall we are impressed with what ID-Cooling was capable of offering, even if they never make it in mass to our shores, those that have access to these coolers should give the Frostflow 240L a try.

