


Introduction
Up until now, I truly wasn't even aware that MSI, the same people that bring you the Twin Frozer cooled video cards and Big Bang motherboards are also offering the chassis to house all of your MSI components in. To be blunt, whether I knew or not, this is a smart move. This way you know when buying the chassis, those MSI motherboards and video cards are very likely going to fit and line up well. In the instance of this chassis, they can even be color matched, as most of the boards are now cooled with blue heat sinks and even some have the memory and PCI-e slots that match as well.
Back to the chassis, though. This mid-tower has a couple of things that I have seen from someone else just before this. This chassis offers a feature called Super Charger and it's a port that will allow you to constantly charge a mobile device as long as the PSU is turned on. A handy feature, just like when I saw it from BitFenix. The other thing that resembles BitFenix designs is that this MSI chassis gets a Shock Resistant Finish (SRF) that is just like the SofTouch rubberized coating we have seen on a few cases previous to this.
The chassis we are going to be looking at today is one of a set of very similar cases and this version is called the Stealth. MSI seems to offer most of the conveniences found on some of the more, high-end designs and it seems that with the choices made to accent and "œtheme" this design, they very well may be onto something here. Love it or hate it at first glance, there is quite a bit to consider before I give them my seal of approval.
As always price is most important, but functionality, feature set, accessories, layout and of course the build and testing. Hang tight, as I work my way through this and decide just what to think about his new offering from MSI.
Specifications, Availability and Pricing
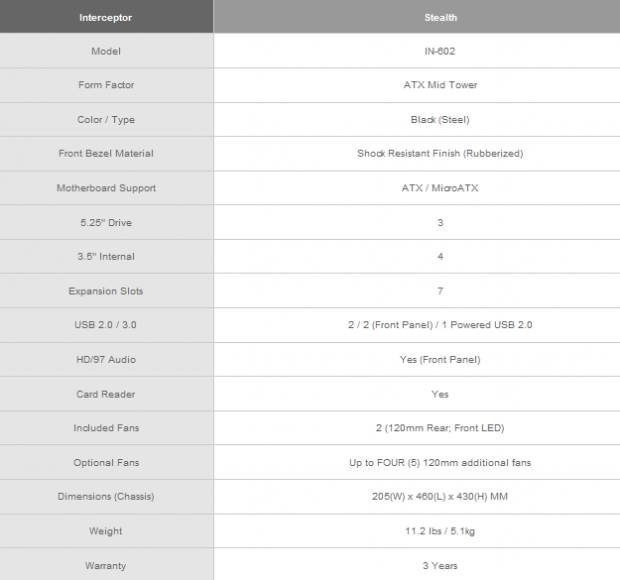
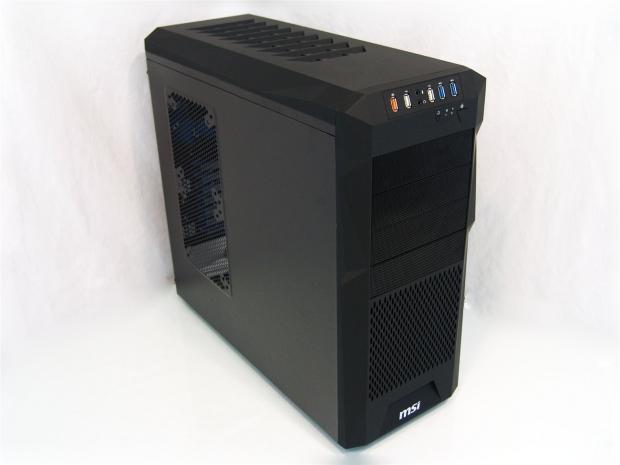
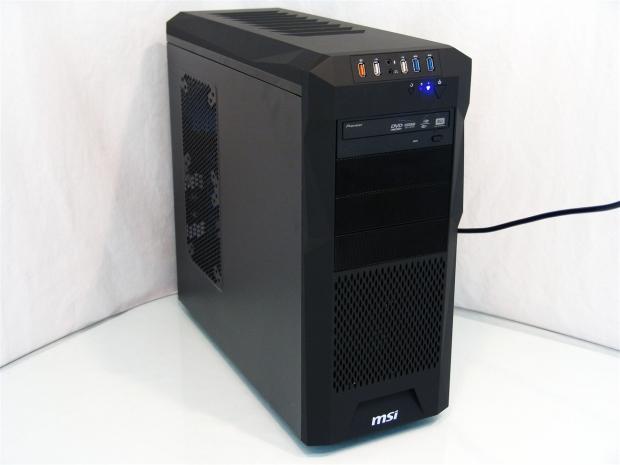
The IN-602 or Stealth from MSI is a mid-tower chassis that is made mostly of steel, with an ABS plastic top and front. Externally there is a mix of black paint on the steel and a matte black finish of the (SRF) finish. Beyond that, the front has four mesh covers for the 5.25" bays, while the bottom have has a much larger mesh area to allow for the chassis intake. The top of the chassis has more of the sharp angles on the sides that are found on the face, along with a full run of heavily angled vents directing the air out of the top of the chassis to the rear. The left panel is relatively pain, except for the mesh area near the real to allow you to install a pair of optional fans if you desire them. The right side of the chassis is flat and offers not much more than the painted steel panel.
On the inside there are four 5.25" bays, a VGA support system where the floppy drive bays should be and a rack with trays for four hard drives down the right side. The trays and the tool-free mechanisms on these bays are light blue and match more of the interior. Such as the motherboard tray that houses ATX, Flex-ATX, Mini-ATX, Micro-ATX or Mini-ITX motherboards, it is also blue. In the back of the chassis, the seven mesh expansion covers, the blades on the 120mm exhaust fan and the thumbscrews are also blue to match the rest of the chassis. Included fans are the 120mm fan in the front that is backed with blue LEDs along with the 120mm fan in the rear. Optionally, you have room for a 120mm in the floor, two in the top or multiple other sizes and two places in the door for 120 or 140mm fans.
Availability seems quite high and with offerings like most other feature rich cases, I was expecting quite the price to go along with the Stealth. There was a bit of sticker shock as I looked at the original pricing of almost $150, but there is currently a sale going on that drops that price dramatically. If you look at Newegg, they show the $149.99 MSRP, but the current sale listing allows you to purchase this chassis for $89.99. If that wasn't good enough, if you look a bit further, with a mail in rebate included, you can get this chassis $64.99 with a few weeks worth of wait. It's tough to find a well equipped chassis for $85, let alone for just less than $65.
Our Latest Mid-Tower Cases Review Coverage
I say we jump right in and see what MSI is bringing forth in the Stealth.
Packaging
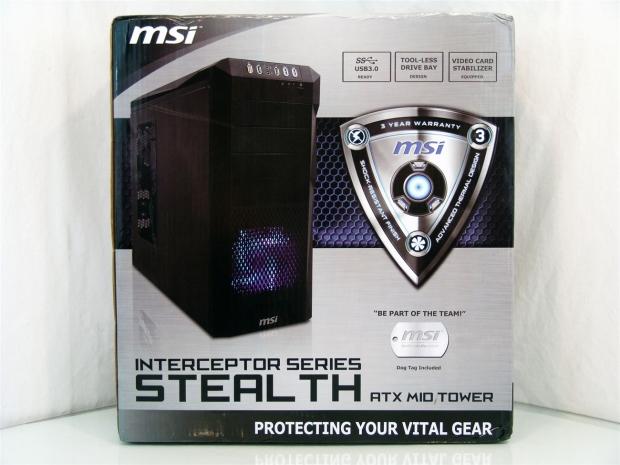
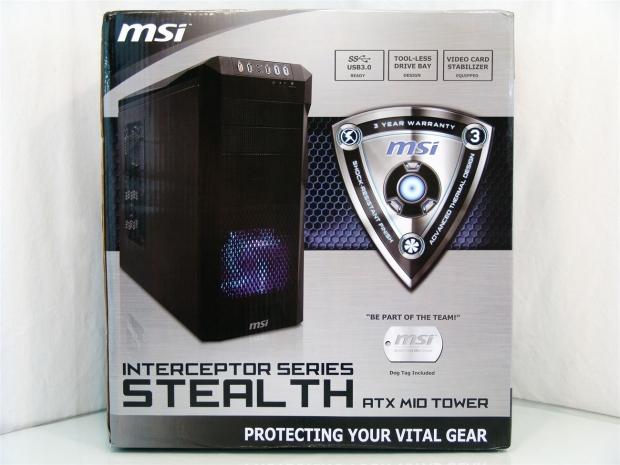
The front of the packaging is busy with the black and grey under the MSI logo and the image of the chassis over what looks like brushed aluminum and mesh with light coming through. On top of that there are three features listed, the badge for the warranty, cooling and rubberized coating and the inclusion of the dog tag to be part of the team. Then there is the name of the chassis, the form factor and the line "œprotecting your vital gear".
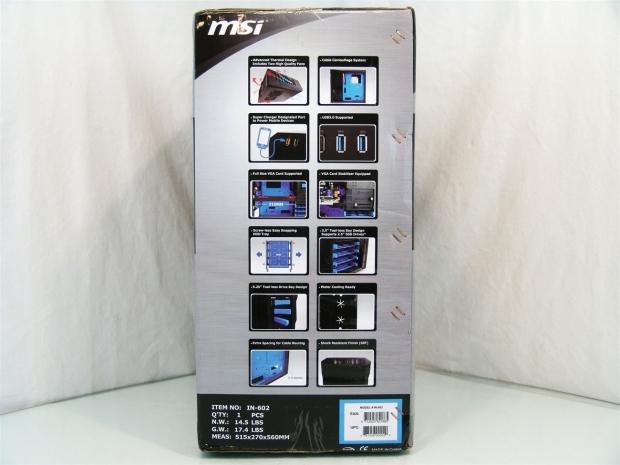
This side panel covers ten features that can be found around, on, or inside the Stealth. This list covers just about everything and these images give you a great idea of what you are buying inside of this cardboard and foam.
The back of the box is a repeat of what we found on the front of this package.
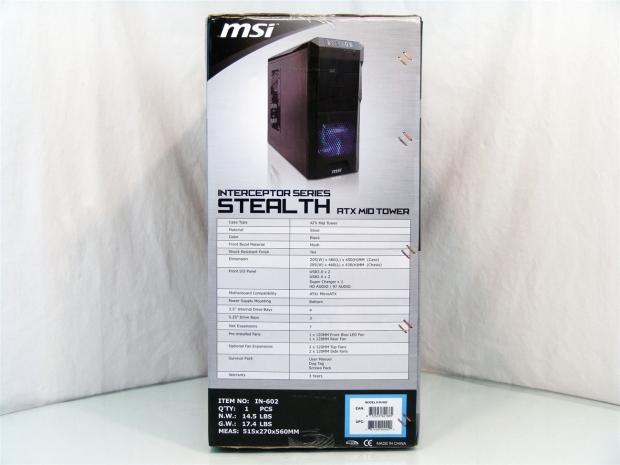
The last side offers you the same view of the Stealth, just a bit smaller and under that is the specifications list for this chassis.

It isn't very often that I find that a normal weight, mid tower chassis, getting shipped in this much high density foam to protect it. There is a plastic liner to keep things from getting scratched, but that foam does a great job of delivering a still true and square chassis to my door.
MSI IN-602 Stealth Mid Tower Chassis
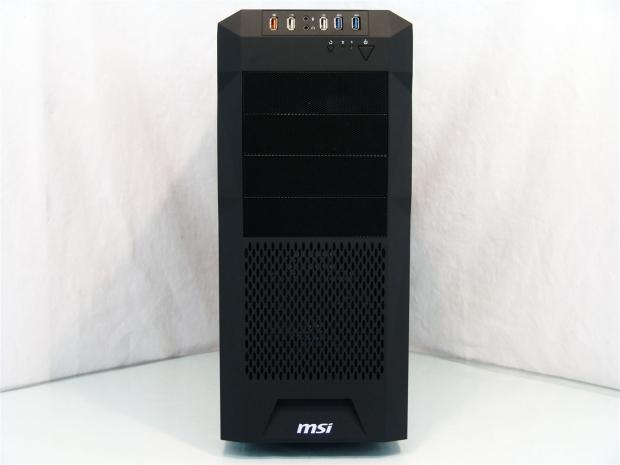
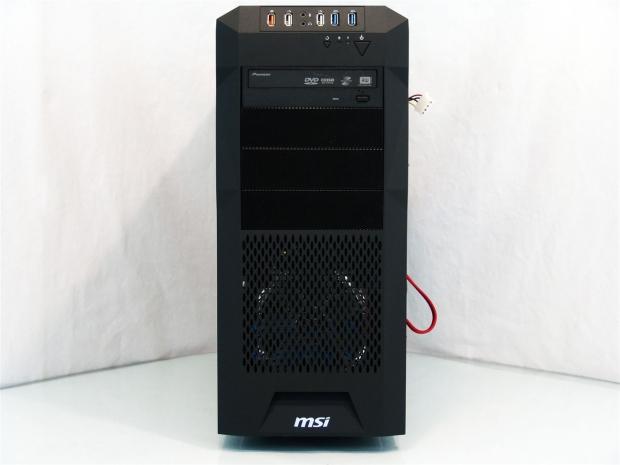
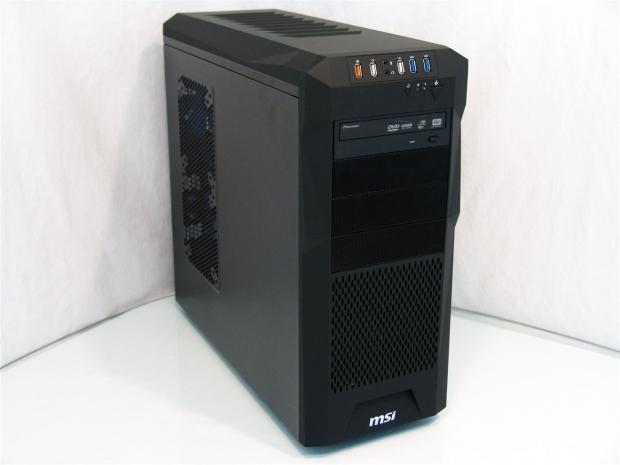
From the front you can start to see the play on sharp angles and the matte finish of the front of the Stealth. The SRF runs down the face and also covers the large diamond shaped mesh at the bottom above the MSI logo.
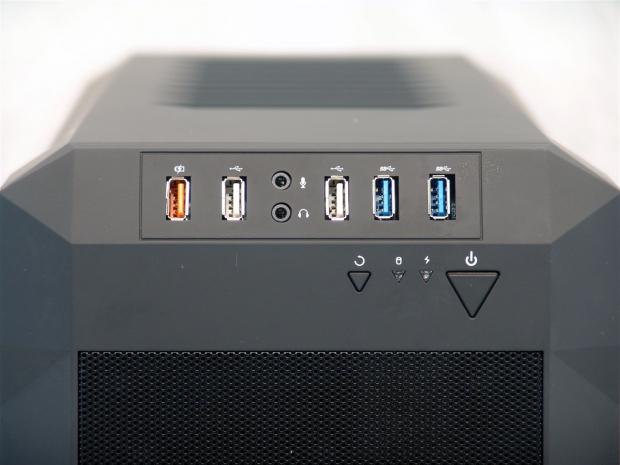
The front I/O panel consists of the yellow Super Charge port, a pair of USB 2.0 ports on either side of the 3.5mm audio jacks, finishing with a pair of USB 3.0 ports. The reset button, HDD activity LED, power LED and large power button are set to the right and even the buttons are triangles to keep with the theme.
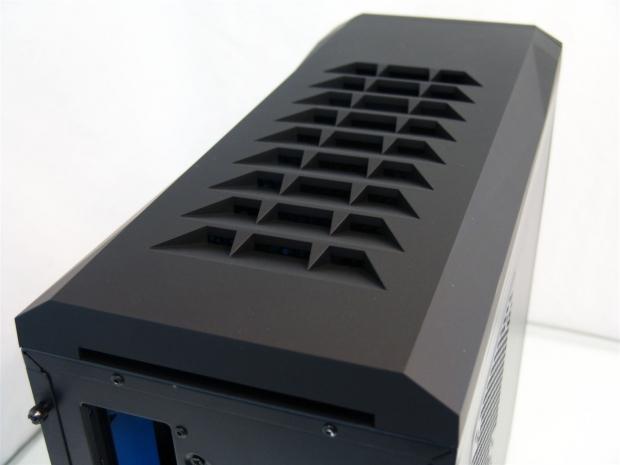
The top of the chassis also receives the SRF treatment and has nine vents that are broken up into three sections each. This takes the flow and blows it away from the user, if you install optional fans here.
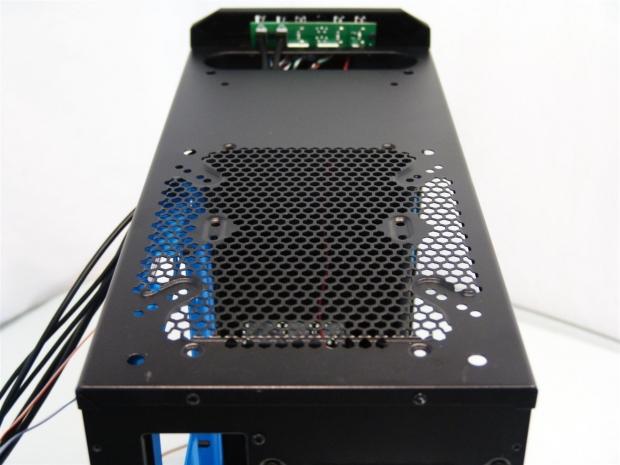
The cover will lift right off and give you access to install various sizes of fans here. I know you can install a pair of 120mm fan, but it looks like you could also use a 140mm, a 180mm, but I don't believe a 200mm fan will go in there.
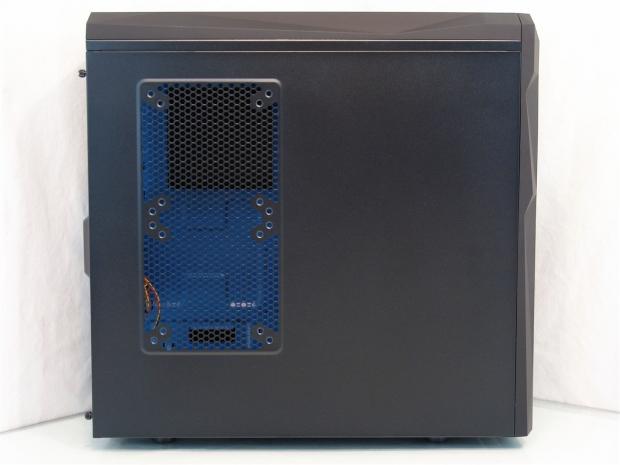
The left side carries the theme with the plastic top, as the side panel is flat and offers room for a pair of 120mm or 140mm fans to be installed in the mesh area near the back of the chassis.
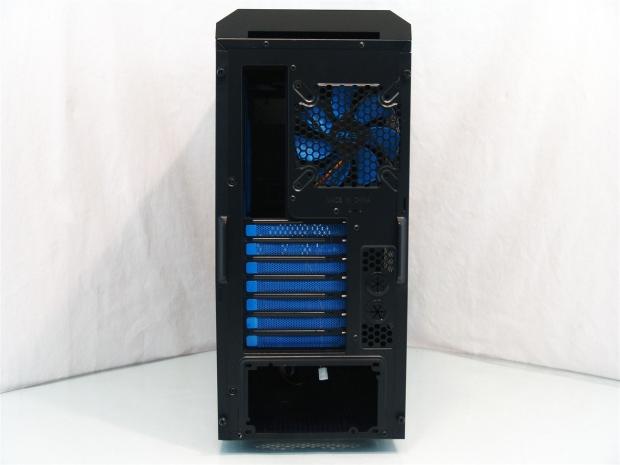
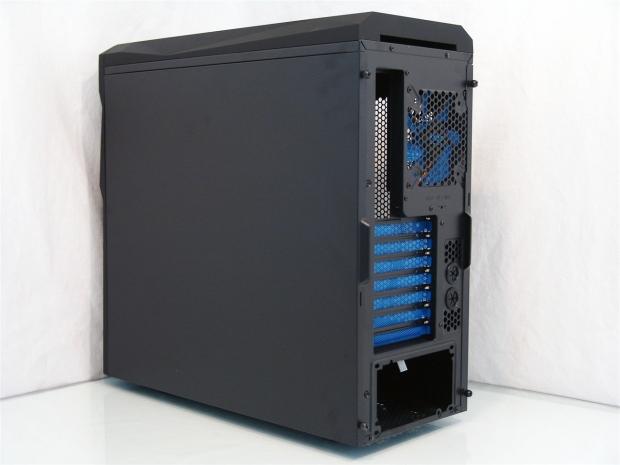
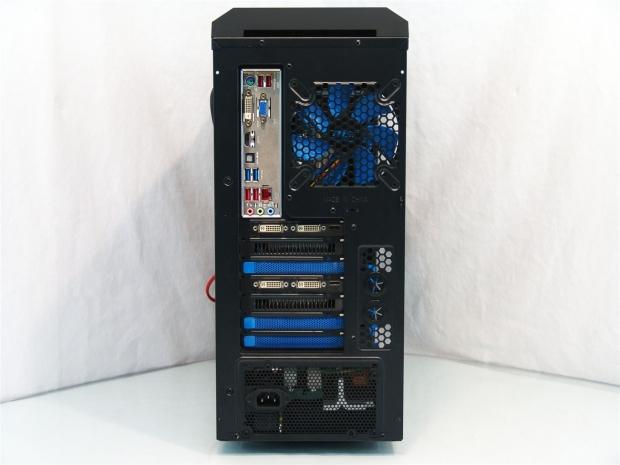
In the back, at the top you can see where you stick your fingers to lift the top. Below that is the rear I/O area next to the exhaust fan. In the middle are seven blue expansion slot covers and a pair of water cooling holes with grommets to the right of them. That leave the large hole for a bottom mounted PSU.
The right side of the chassis uses a plain steel panel to cover this side. As with most builds it will be against a wall most likely, so no real need to actually do much if nobody is going to ever see it.
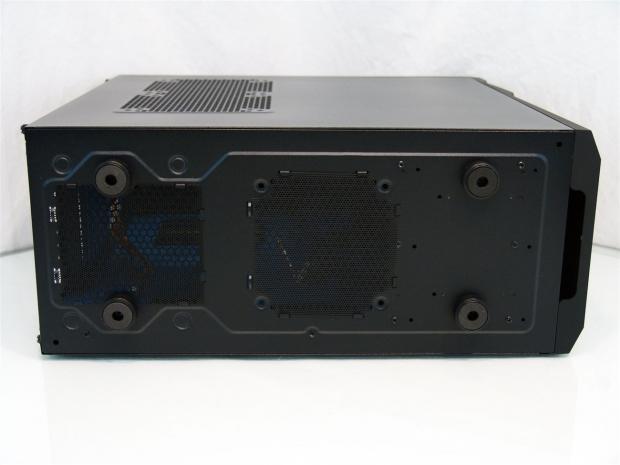
Under the Stealth is four medium sized plastic feet with rubber pads on them. Between the rear feet is a thin plastic, removable dust cover for the PSU and to the right of that in this image is a fan filter for the optional 120mm fan mounting position.
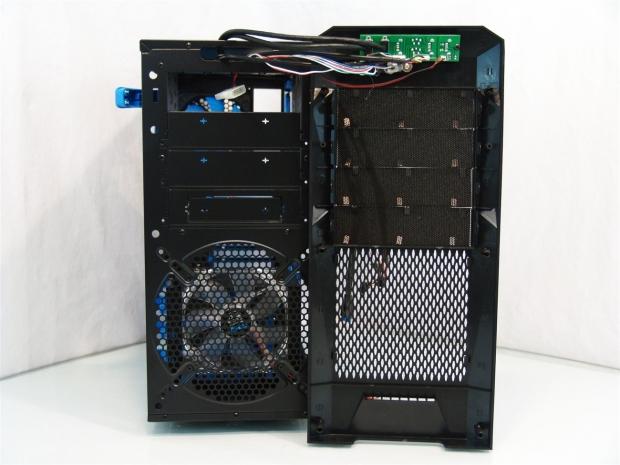
Inside the MSI Stealth
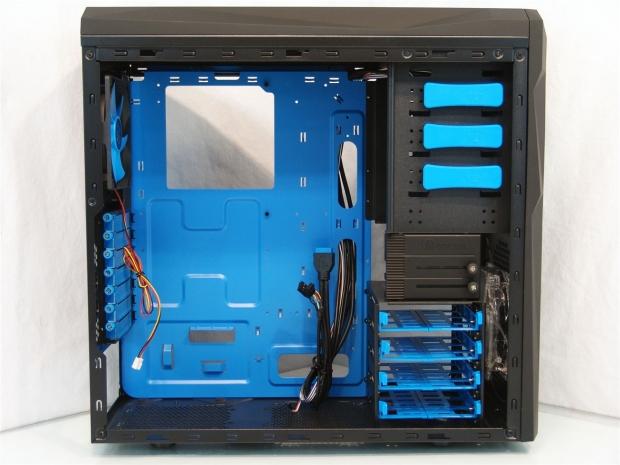
With the sides now off the Stealth we get our first look inside. The entire motherboard tray, expansion slots and screws, the fan, the tool-less latches and the hard drive trays are all sporting a light blue color while the rest of the interior is black.
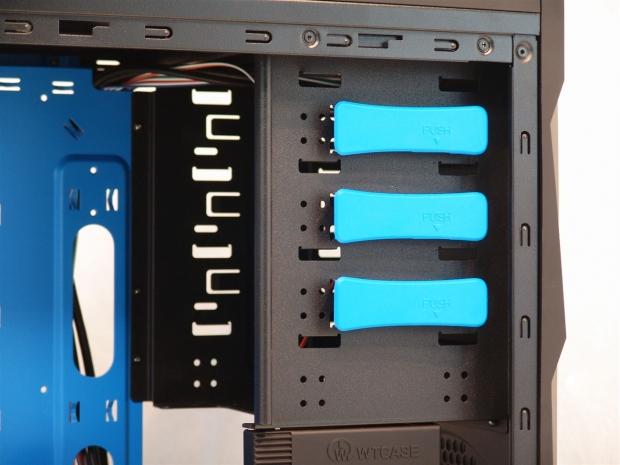
There are four 5.25" bays, three of which have tool-less latches to lock a device in place. There are also thumbscrews included to mount the fourth drive or secure the other side of the top three bays.
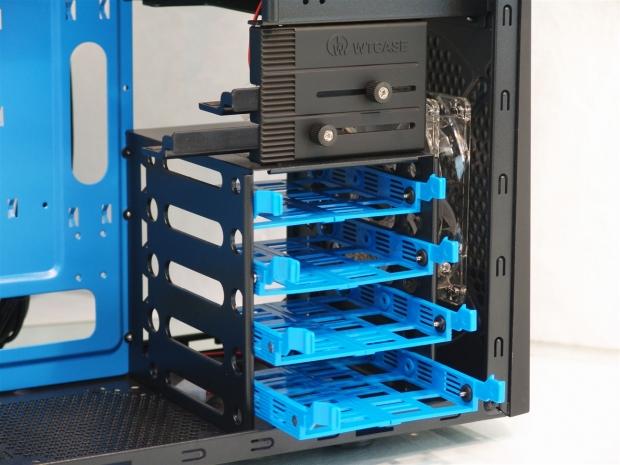
Under that you find the VGA support system that by loosening the screws, the plastic support slides out to set under a VGA or two. That leaves the four bays at the bottom for the installation of 2.5" or 3.5" drives.
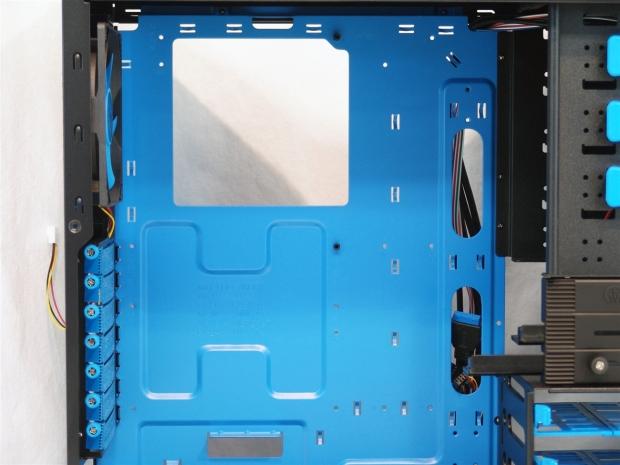
The motherboard tray takes four form factors of motherboards and offers two large holes on the right for wiring and the largest of the holes give access to the CPU cooler back plate. There are two smaller holes near the top and twenty-two places to attach wiring on the back.
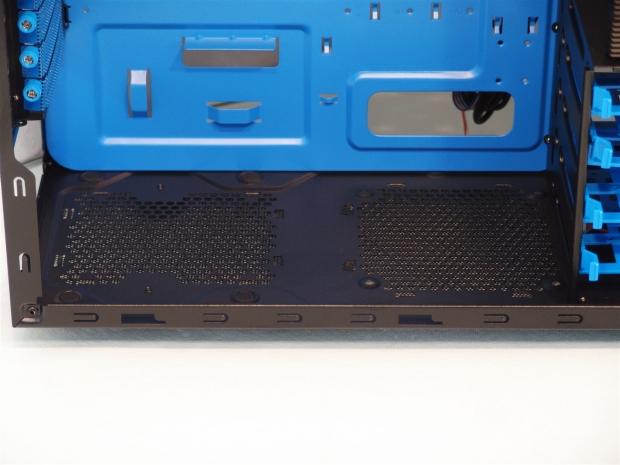
At the bottom there is a larger hole in the tray to allow all the wiring to terminate right in front of the PSU that will fit on the left side of the floor. Just to the right is room for an additional 120mm fan, but you will see that is very PSU dependent.
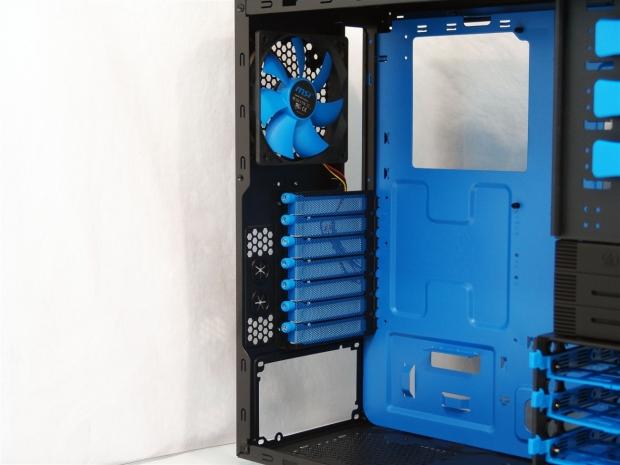
Inside of the rear of the Stealth there are the seven blue blades of the exhaust fan that keeps that light blue going on all sides. Even if you need to remove all of the covers, the thumbscrews still will add a bit of blue flavor to keep the look of the rest of the Stealth interior.
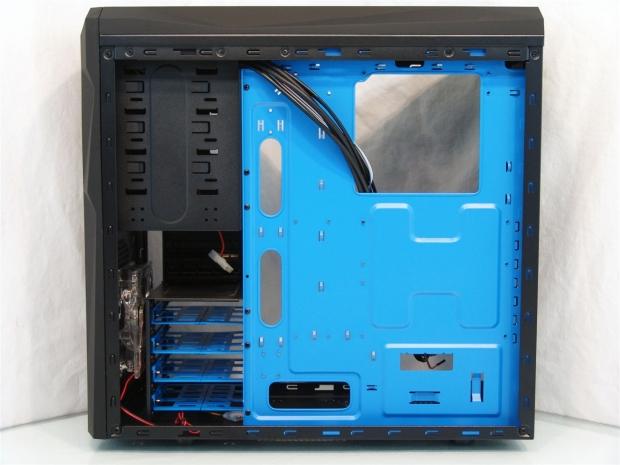
Even the back of the tray is blue and as I said, from every angle there is blue to be seen. More importantly, along with all the tie points for the wiring that will go here, there is three quarters of an inch of room between the door panel and the motherboard tray.
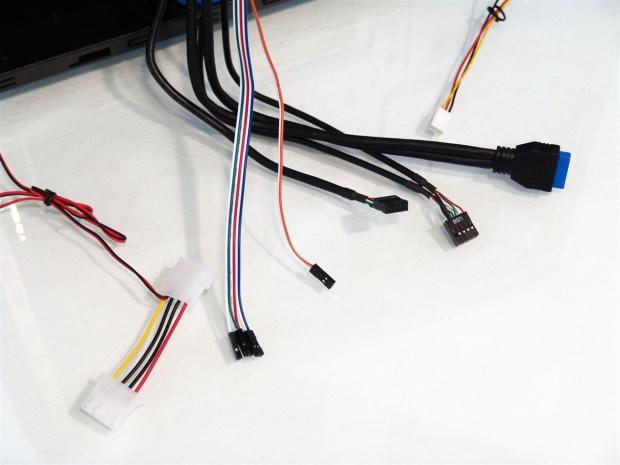
The wiring has the front control wires, USB 2.0, Native USB 3.0 and HD Audio cables. The 4-pin Molex is to power the Super Charger and as for the fans, the rear fan is powered with a 3-pin connector and the front fan uses a Molex connection.
Accessories and Documentation
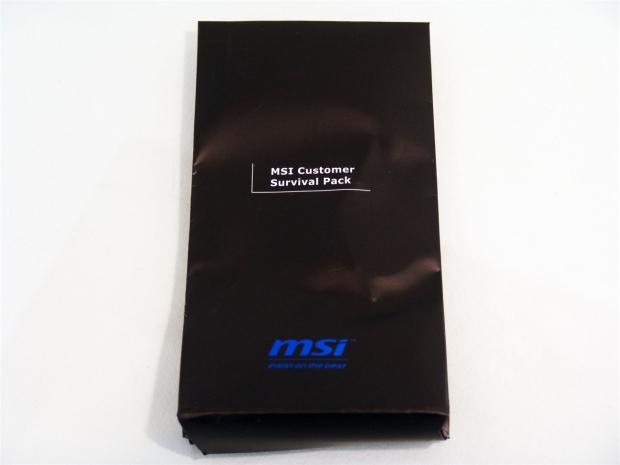
Tucked between the foam bottom section of the packaging and the plastic liner on the case you will find your MSI Customer Survival Pack. This light cardboard envelope carries all the hardware and literature shipped with the Stealth chassis.
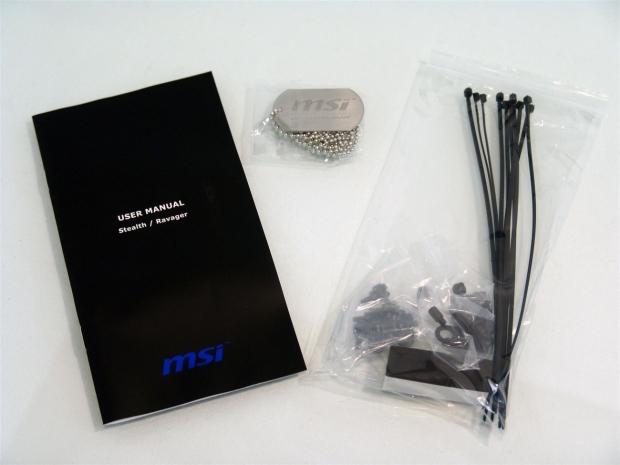
Inside that pouch is the User Manual which does a great job of getting through the tear down and installation process. You also get a dog tag and chain to feel like you are now part of the MSI team and there is a bag of hardware to get your components into this case.
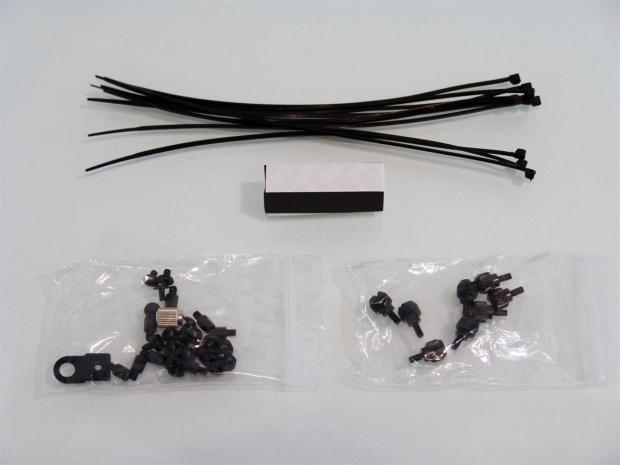
A closer look at that hardware shows we get long tie-straps, ten of them in fact to tidy up the wiring. The foam block is actually cut diagonally into wedges so that they can be used with the VGA support system for coolers that aren't flat.
The bag on the left has your PSU screws, Kensington lock loop, risers, motherboard screws and a socket to tighten the risers. The bag at the right has a set of thumbscrews to use with the 5.25" bay devices.
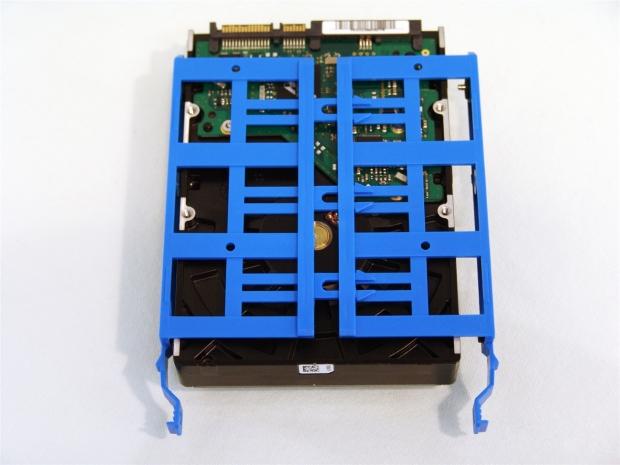
This is something I haven't seen before; expandable HDD trays. Instead of having to flex the tray around a 3.5" drive, you simply allow it to slide open, align the pins and slide it closed on the drive. There are also holes for you to be able to screw a 2.5" drive directly to the tray bottom.
The Build and Finished Product
Removing the front bezel to install the DVD drive, I released the clip on the left so it can slide right in. The front I/O panel is connected, so be sure to leave wiring undone until you get this situated. I get why a foam dust filter isn't used at the bottom, the LEDs wouldn't glow through that, but there is nothing for a filter at all here on the intake.
The drive went in smooth and the tool-less clip keeps the drive solidly in the case. Since the SRF coating is matte and so is the drive, there is little distraction from adding it, to the overall theme of the case.
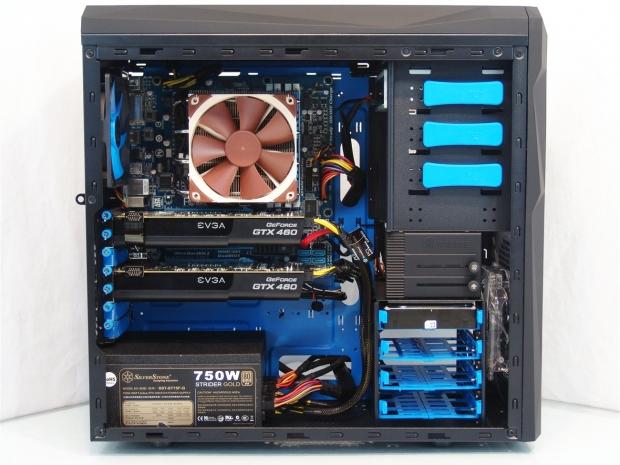
I used a Micro-ATX board for this build and threw in the SLI for nostalgia sake. Even though with the 460s I couldn't use the VGA supports, you can see how well they line up with the cards to use with longer and heavier VGA solutions. Everything went together well with no real issues to discuss.
The rear I/O dust shield snaps right in with little effort, the cards went right into the slots and are solidly supported with those blue thumbscrews and the PSU lined up perfectly.
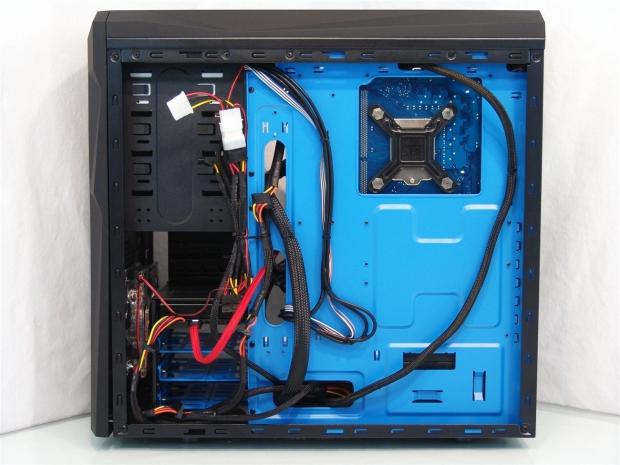
The three quarters of an inch that is left behind the tray allows me to hide all sorts of wiring here. The large Molex bundle on the left and the 24-pin cable fit back here easily and the cabling on the whole routed easily. Even when replacing the door panel, it took little effort to slide it over these wires.
With the panels back in place, I took a step back to take in the essence of the Stealth once again. Definitely has a distinctive shape, but isn't so out there that it should turn anyone away.
When my Stealth was powered on, the LEDs in the intake fan were not functional. The fan was spinning, but as far as lighting, there is none. At the top there is a really bright blue LED denoting the PC is powered on. Just to its left, there is the occasional red flicker for the HDD activity LED.
Final Thoughts
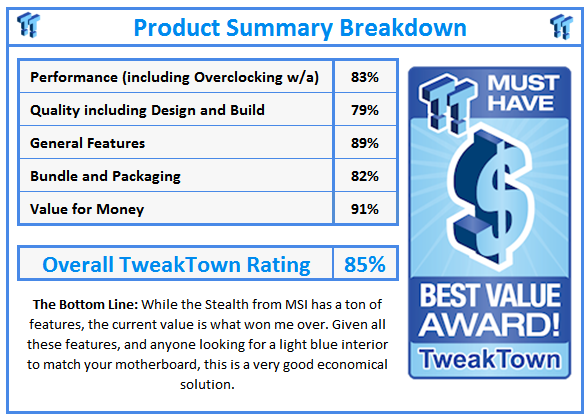
On most of the basic points the Stealth comes out on top. It is aesthetically cool to look at; it has the Super Charger, SRF and Native USB3 .0 on the outside. On the inside there is a light of light blue to deal with, but with the right motherboard and oddly, not most MSI boards, you could have a really slick looking build in here. Even with the components I used, I still liked the finished results with the bits of blue popping out everywhere. The VGA support system is pretty trick in a case of this cost and the unique design of the HDD tray to slide open and closed is really cool, too. All around the chassis there are things to brag about in this MSI Stealth chassis.
The build went pretty smooth for the components I chose for the build. There was plenty of room to wire things behind the motherboard tray and ample places to attach wires and pass them to the front with no fighting or issues. The motherboard risers go in easily on the clearly marked holes with a key to the form factors hole locations in the middle of the tray to remind you where to place them or want letter and numbers to follow. The front I/O wiring reached everything, but the HD Audio cable was pretty tight with the Micro-ATX build. The ODD went in and locked in place easily and using those slide-open style hard drive trays makes life easier, too.
That isn't to say there aren't things that are amiss or just struck me as odd. This chassis clearly reminds me externally of a BitFenix case with the Super Charger port and rubberized coating. There are dust filters in the bottom, but no effort to control it with the intake. The LEDs in the front fan didn't work, there are no rubber grommets internally and why paint everything on the inside blue and then not offer a window to see the completed results? There are plenty of options for fans in this case, but the one in the floor is sort of pointless. As soon as you install a PSU, you pretty much negate that option.
At the end, I am torn really. The Stealth chassis looks cool, the build was smooth and outside of a few little things, the chassis is pretty solid. I just don't get all the effort to paint the interior, a color other than what matches their own current motherboard lineup and then close it all away behind a steel panel with mesh that offers no view of any of it.
If we were looking at this chassis at the MSRP pricing I would definitely have to pass, there are much better solutions at or very near the $150 range. If we look at it from the standpoint of the fact that given a bit of time with a mail in rebate and a current sale at Newegg, I can grab the IN-602 Stealth mid-tower chassis for $64.99. Not only is that like half off and the total shipped price, that is a price that can make me overlook some of the shortfalls. While this isn't a chassis I would personally use for day to day around my house, I could see a lot of people wanting to grab thus chassis just because of the light blue interior and I bet they would jump on them even faster if this chassis had a window.
 MOAIPLAY ORA PRO G1 850W ATX 3.1 PSU Review: high efficiency and 10-year warranty for $119.99
 NZXT H6 RGB+ Compact Dual-Chamber Chassis Review
 Lian Li HYDROSHIFT II 360P OLED Curved Liquid CPU Cooler Review
 ID-Cooling FROZN A620 SLK CPU Cooler Review
 GAMDIAS Atlas P6 CG Dual Chamber Mid-Tower Chassis Review
 Apple's first foldable iPhone gets new rumored launch date and an astonishing price point
 GEEKOM A8 Mini PC now 20% off, lower than Prime Day pricing as huge storewide sale begins
 Anthropic's own $13 billion investor helped get the White House to ban the world's most powerful AI model
 Ubisoft cuts another 100 jobs at San Francisco studio in latest round of layoffs
 Intel is prepping to launch 'Raptor Lake Next' CPUs and bring back DDR4 memory support
 Synology's FlashStation FS200T is an ultra-compact and quiet NAS for homes and small offices
 AMD claims its entry-level Ryzen AI laptops crush the MacBook Neo in gaming
 Google unveils a Microsoft Flight Simulator 2024 competitor... kind of?
 Radeon RX 9070 XT is now AMD's most popular PC gaming GPU
 Corsair GPU Power Bridge, designed to handle 100+ degrees, melts GeForce RTX 4090
 Speed Racer (2008) 4K Ultra HD Blu-ray Review: a stunning remaster of the cult classic
 Navman MiVue Smart True 4K Surround Dashcam Review - Seeing In All Directions At Once
 IQUNIX Magi96 Pro Aluminum Low Profile Mechanical Keyboard Review - Premium Build, Satisfying Sound
 Asetek Forte S-Series Racing Simulator Bundle Review
 Razer Pro Type Ergo Wireless Split Ergonomic Keyboard Review - Built for Comfort and Support
 ASUS ROG Strix Morph 96 Wireless Gaming Keyboard Review - Great Performance, More Affordable
 SAPPHIRE Radeon RX 9070 GRE PULSE OC Review - A New 1440p Challenger Has Arrived
 ASRock Radeon RX 9070 GRE Steel Legend Review - The RDNA 4 Mid-Range Reshuffle
 8 Critical Warning Signs You Should Never Ignore in Windows 11
 This Windows security feature protects Documents from ransomware, but it is off by default
 Windows 11 already has a voice typing tool, and it is the one most people are not using
 Quick Assist is the only remote-support tool I open when a relative calls about their PC
 The PowerToys utilities I keep enabled on every Windows 11 PC, and the ones I turned off within a week
 TweakTown's Best of Computex 2026 Awards - The Best Hardware, Gaming Gear, and AI
 Phison E37T SSD Controller Exclusive Preview - The Fastest DRAMless SSD Platform Yet
 USB Ports Not Working in Windows 11? Try These Fixes
 ASUS WiFi Routers and Networking Solutions Deliver Long-term Security and Reliability with No Additional Cost
 Second Monitor Not Detected in Windows 11? Try These Fixes