Introduction
The second chassis I ever bought to build a rig in was the Antec 900 in its original configuration. Slowly as time went on, I found the need to paint the interior, as primed steel in my opinion is ugly to look at, especially in cases with windows. I had this chassis for quite some time, and the mods kept coming. They included a PSU hole in the bottom so I could flip my PSU, and eventually water cooling and the required mounting and routing of the tubes; these both required removal of all the components to make the mods happen. The chassis was cool inside, but from what I remember it sounded similar to a jet engine at take off; something I have tried to deviate from in my normal everyday use.
AzzA is taking a shot at replicating a great concept, but adding their own special touches and trying to improve the concept as they go. The configuration of the Solano 1000 is almost spot on with the Antec, but AzzA addresses many of the faults of its predecessor. Vibrations, noise levels, and better air flow are all taken into consideration. The last time I looked at an AzzA chassis it was the Fantom 900 Mid Tower chassis. From what I recall, the build was solid, and it had plenty of LED's for those who like their cases bright.
Today we are looking at the AzzA Solano 1000. While it shares similarities to both the Antec 900 and its smaller brother, the Fantom, AzzA takes it further and stretches the concept into a full tower chassis. The chassis is black, they kept the LED's, and there is a ton of circulation. Let's get down and answer a couple of the major questions. I am personally interested in the noise levels, as most chassis designs like this are a bit loud, and the second main concern is ease of use. From what I remember, my Antec was a real PITA to work in.
Specifications, Availability and Pricing
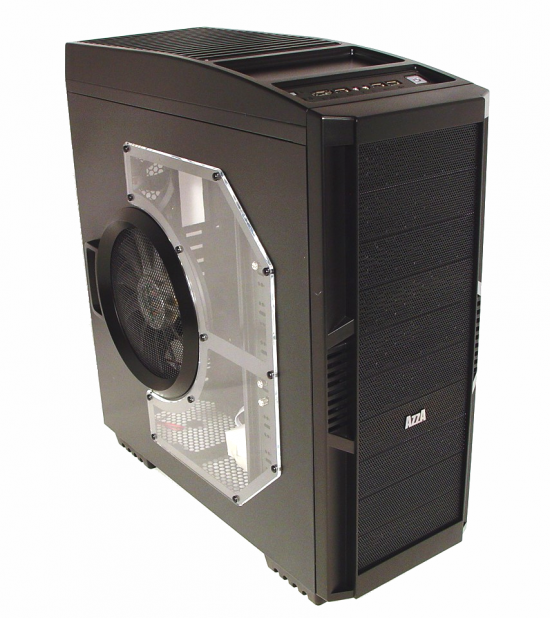
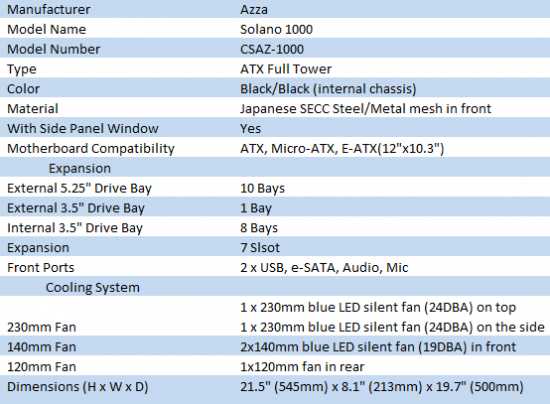
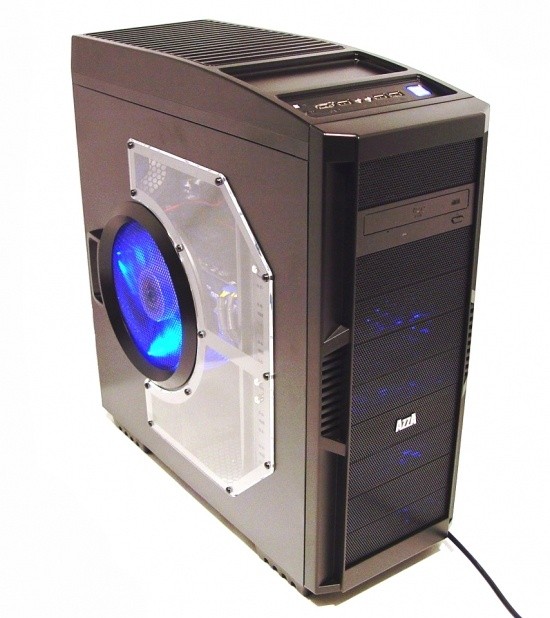
The Solano 1000 is made from steel and plastic, all of which, including the interior, is black. It does come with a side panel window, and that panel is also equipped with a 230mm fan rated at 24dBA, and housing bright blue LED lights. The top of this chassis has a vented area backed with the same fan. Three other fans are included. Those consist of two 140mm fans pushing air into the chassis, leaving your GPU fan and a 120mm that is mounted in the rear panel to exhaust all the warm air.
This full tower chassis is full of 5.25" bays, as the whole of the front can be configured as you want it, with a total of ten bays all together. The Solano also houses room for a possibility of up to eight 3.5" drives, one of which can be used externally. Like most other chassis' in the full tower market, this one has only seven expansion slots to exhaust or support your card needs. As I said, this chassis has endless options for drives and their configuration. Nothing says the optical drives can't go at the bottom if you choose that configuration. If the chassis sits on a desk, this can make life a bit easier.
The CZAS-1000 can be found almost anywhere you would normally look to buy a chassis. Prices vary from around $120 and up, depending on your store of choice. I was able to find a pretty sweet deal on the Solano 1000, making it drop right into budget minded builders grasp. I was surprised to see it as low as $79.99 at Newegg, after rebate, and the chassis has free shipping to boot. With a bit of time and paperwork, it brings the Solano to a very respectable price. Even at the $159.99 original asking price, it is priced well in its segment, but we all know $40 can get us a cooler, a drive, or a few beers to drink during the build.
Packaging
The Packaging
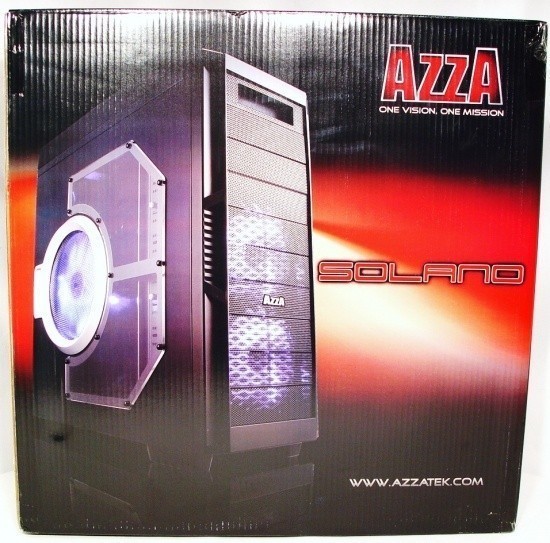
AzzA uses a black packaging with a bright red accent in the middle to make the image of the Solano 1000 stand out. As with a few others lately, the front and back are duplicates of each other.
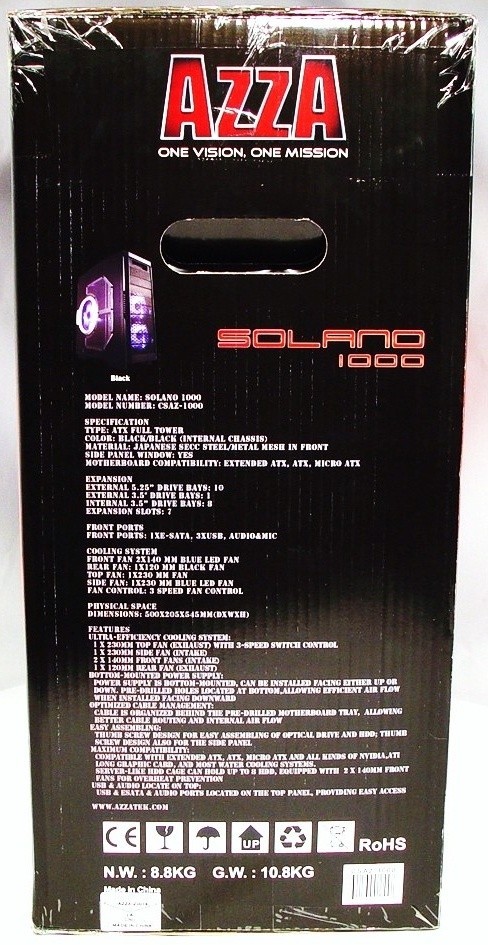
Both side panels look like this, all black with a small image of the chassis. Below that image you can find the specifications list, and the features list even further down.
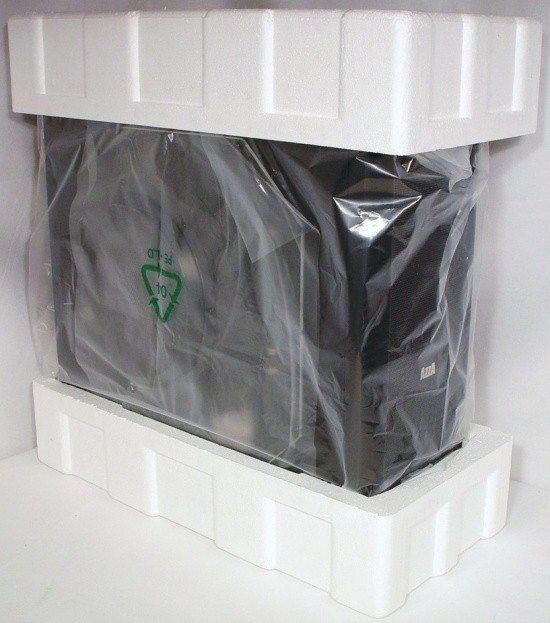
Getting the box open and sliding out the contents, I found the AzzA Solano 1000 is supported with Styrofoam on either end. There is a plastic bag inside of these to add an additional layer of protection. AzzA even took one extra step. If you look close you can see the clinging plastic applied to the door panel window as well.
The AzzA Solano 1000 Full Tower Case
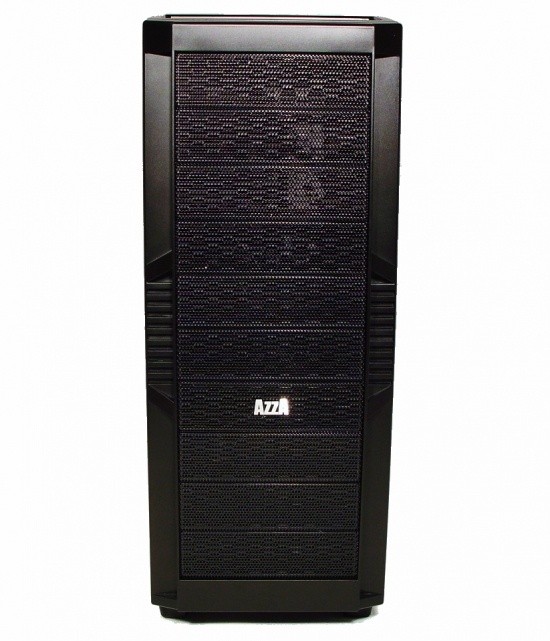
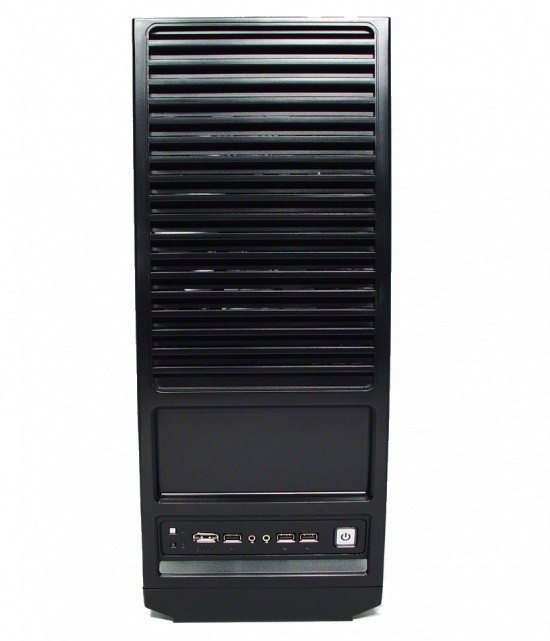
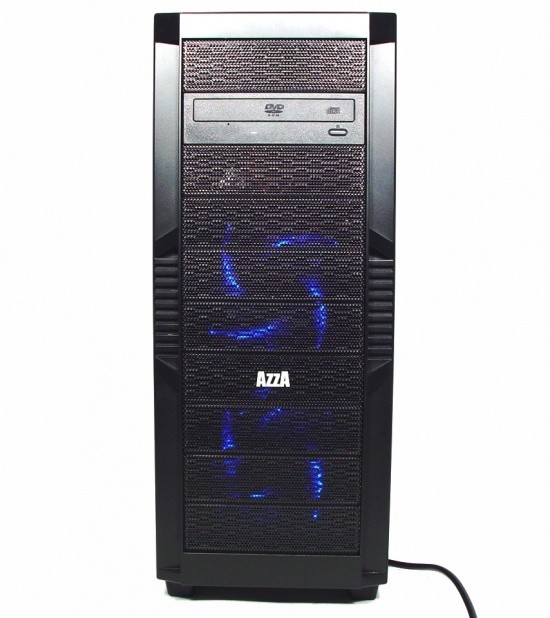
The front of the Solano is flanked in the middle with ten 5.25" bay covers. There are no limitations on how you choose to configure your optical and hard drives. One of these plates holds the AzzA Logo and can be moved as well. The surrounding plastic has a simple design, but is still appealing and structurally sound.
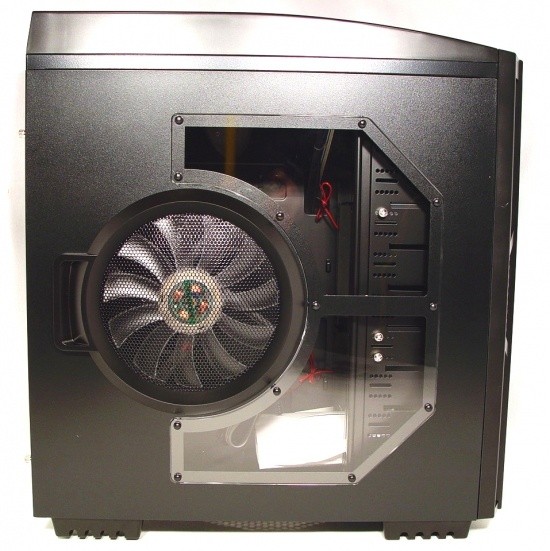
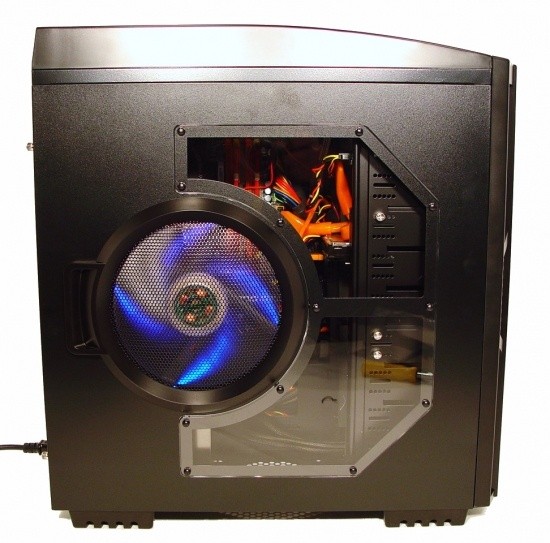
The left side of the chassis has the panel with a window installed. The 230mm fan takes up most of the panel's real estate, pushing the window forward giving a view mostly of the drive rack. Once the fan is powered up and spinning, you can see through it as well.
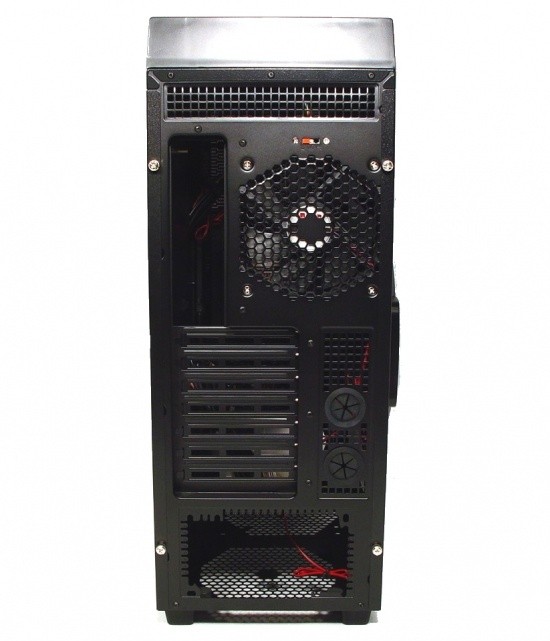
Looking at things from the back, the top's "cap" that holds the other 230mm fan is more pronounced. Just below is a ventilated section that will allow heat from the motherboard to have a place to escape, instead of being trapped in the corner. Below this is the rear I/O and 120mm exhaust fan with a three speed switch just above it for control. Next we run into the seven, vented expansion slots that have another vented area next to it, which also offers water tubing to pass through here. Last but not least is the spot for the bottom mounted PSU.
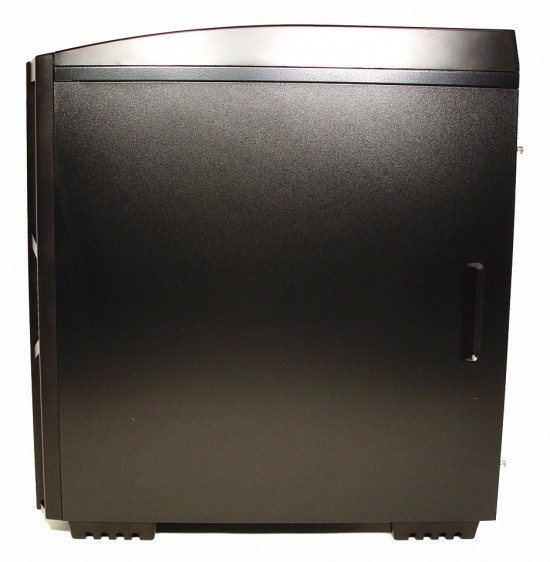
The right side panel of the Solano is solid and black like the rest of the exterior. There is a handy little finger groove near the back to get the panel off a little easier.
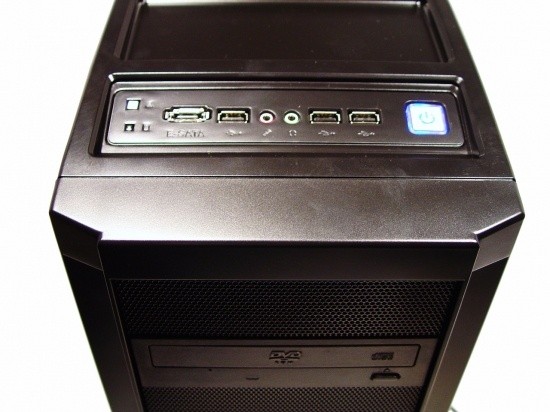
Looking down at the top of the chassis, the back two thirds of the top is vented for the 230mm fan to easily exhaust air. Just in front of this is a tray for USB drives, change, or other odds and ends. At the very front (near the bottom) is where the front I/O panel is located.
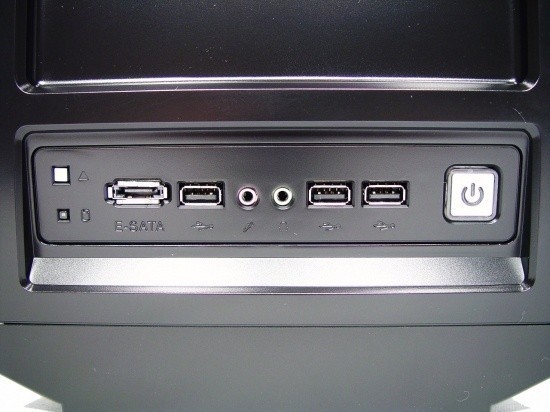
The front I/O panel incorporates the reset button and HDD activity light at the left. In the middle there are an E-SATA, three USB 2.0, and headphone and microphone jacks. This leaves the power button which is backlit with a blue LED used as the power LED.
Inside The AzzA Solano 1000 Full Tower Case
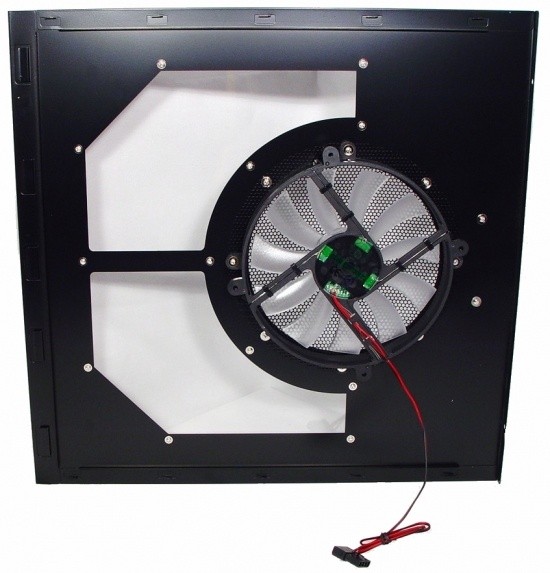
Unscrewing two thumb screws releases the side panels. The windowed panel consists of a full, one piece window, screwed in from this side. The 230mm LED fan is also mounted from the inside, keeping the exterior free from unsightly mounting hardware. This fan draws its power from a 4-pin Molex connection, and the wire is long enough to get anywhere the power can be found.
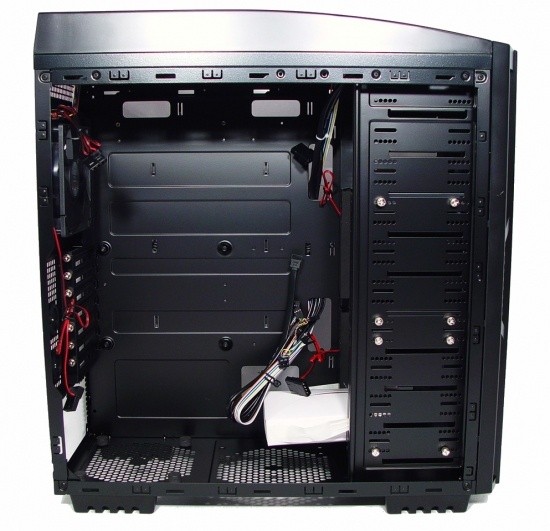
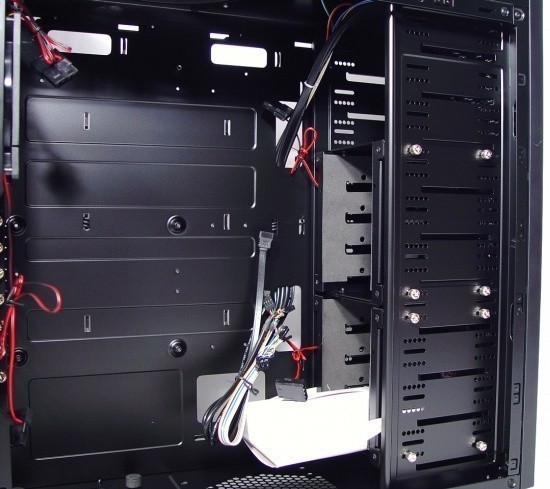
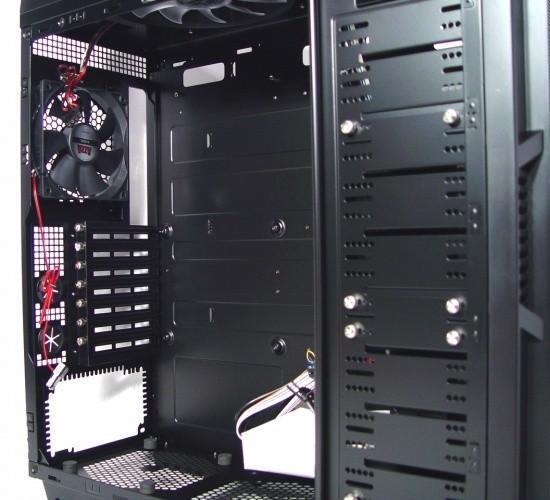
The inside of the chassis is fully painted black, so you don't have to do it! Wire management holes can be found all around the motherboard area allowing for a clean final build. A full front drive assembly allows you to choose what goes where, and there are two spots in the floor for ventilating the chassis from the bottom.
The foam padded hard drive racks are set in the bottom for shipping, but that's no reason to keep them there. Simply remove the four thumb screws for each cage and place them where ever is most convenient. The "goodie box" can be found taped into the bottom cage. AzzA even secures the front panel wiring to keep it from messing with the paint finish during shipping, so you get a flawless interior when it arrives to your door.
Looking inside of the chassis, you can now see that the switch is to control the fan in the top. It and the 120mm exhaust fan have 4-pin Molex power headers, just like the ones found in front of the HDD cages. The expansions slots have thumb screws like many others, but in the bottom mounted PSU are also some rubber pads to isolate any PSU vibrations from the chassis.
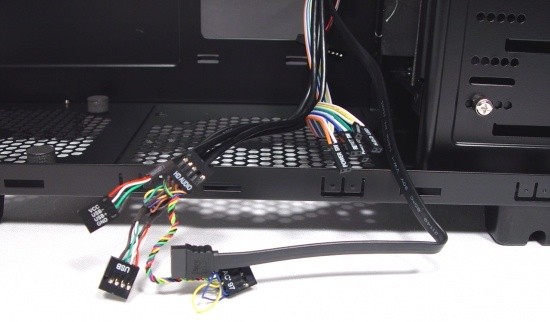
I would have liked a bit more length to the cabling, but it was sufficient to get most of these connected. I did run into a little bit of trouble hiding the audio cable, but it did get there none the less. There are the power, reset HDD activity, and the power LED connections as usual. Then you get a USB 2.0 connection and a lead for half of the power of a USB connection. HD and AC97 audio are included as well as the E-SATA cable.
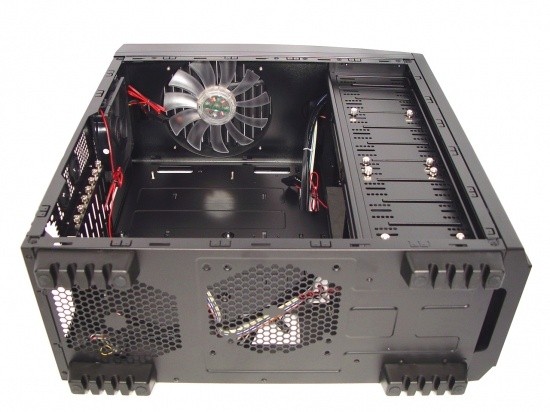
Laying the chassis on its back, I can get both the fan and the bottom of the chassis in view. The large, 230mm blue LED fan is wired directly to the switch, and then has a power lead above the 120mm exhaust fan. The floor of the chassis has honeycomb venting for both the PSU to draw air in at the left, but one that is drilled to hold both an 80mm as well as a 120mm fan to add more air into the chassis. At all four corners you will find some very chunky rubber feet, which add great stability to the Solano 1000.
Accessories and Documentation
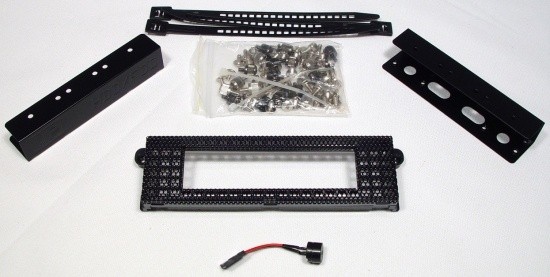
Inside the "goodie box" you will find this assortment of hardware. At the top are three wire management straps to hold wiring together wherever you need them. The metal brackets, at the left and right, are for converting a 5.25" drive bay to a 3.5" bay for a floppy drive. In the middle is a bag of various screws, risers, and a couple of zip-ties for getting everything mounted inside the chassis. There is also the vented cover for adapting the front of the case to house a floppy drive. Last but not least, there is an included motherboard speaker.
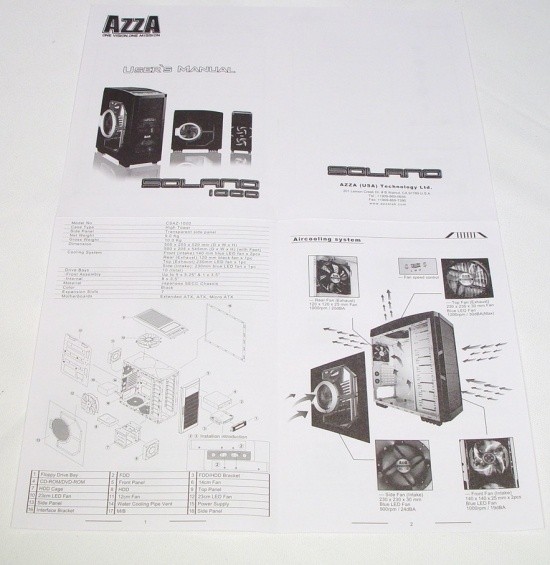
The front of the instruction sheet shows an exploded view of the Solano 1000, a specifications chart, and the right side shows an air flow diagram of the assembled chassis.
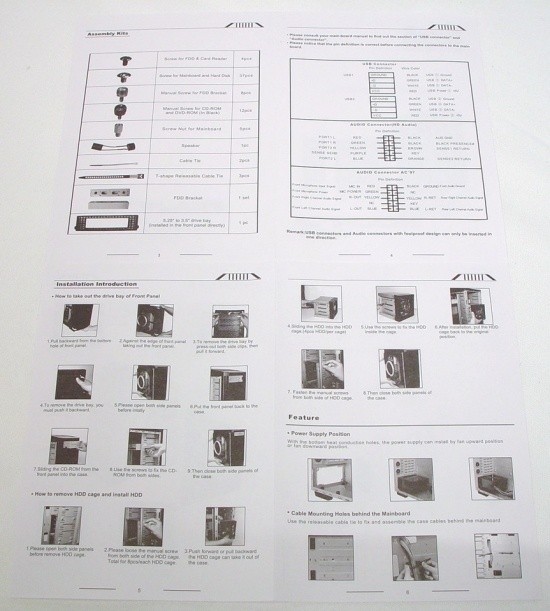
This side of the instructions shows both a check list for parts and a wiring diagram of the front I/O wiring. The bottom half covers all the installation points you will need to get things underway with the build.
The Build and Finished Product
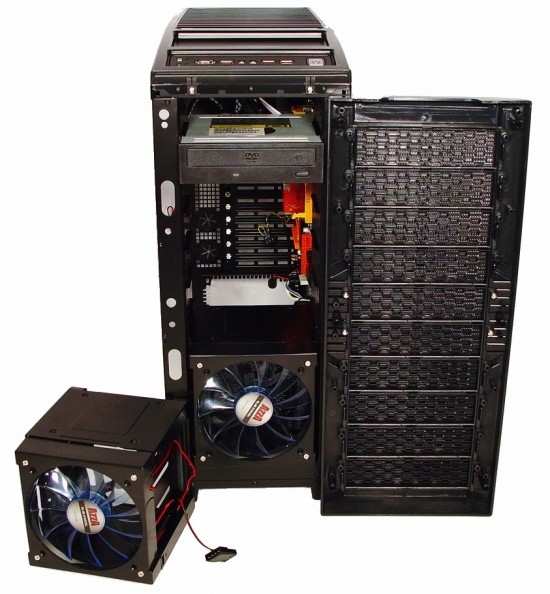
Jumping into the build feet first, I got the motherboard installed at this point and saw I needed to remove the front panel. There are six clips under this panel that allow it to pop off and out of the way. I added the optical drive, and had to remove a cage to install a hard drive, so I figured what a great time to look at the front and how it is all put together.
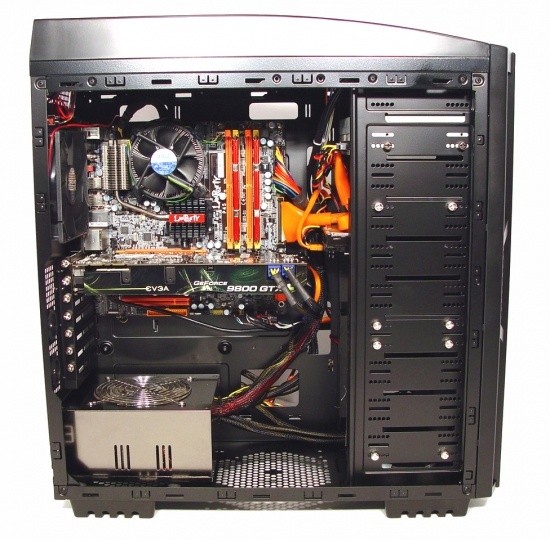
With everything in place, I still have some extra space. I did use a m-ATX board, but you can see SLI or Crossfire is not an issue inside of here. One thing I don't like that is a carryover from owning the 900, and that is the proximity of the HDD to the graphics card. In my situation, it wasn't so much an issue, but those with a five drive RAID setup and SLI may find things to get a bit tricky to get everything installed. Most of the wiring is hidden, and the reason the 24-pin wire is out is the fault of a short cable, not that it didn't fit behind the tray.
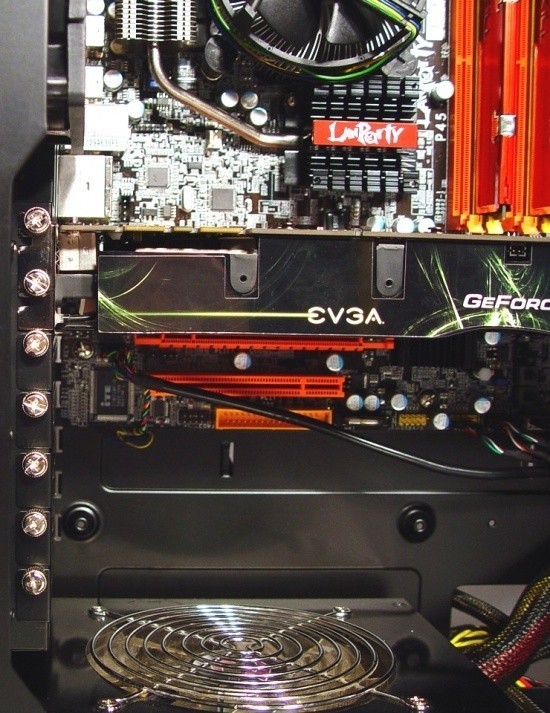
A feature I found worth special mention, the cutout for access to the thumb screws. Most designs don't incorporate access to the Phillip's head of the screw. This makes installation a pain, not here!
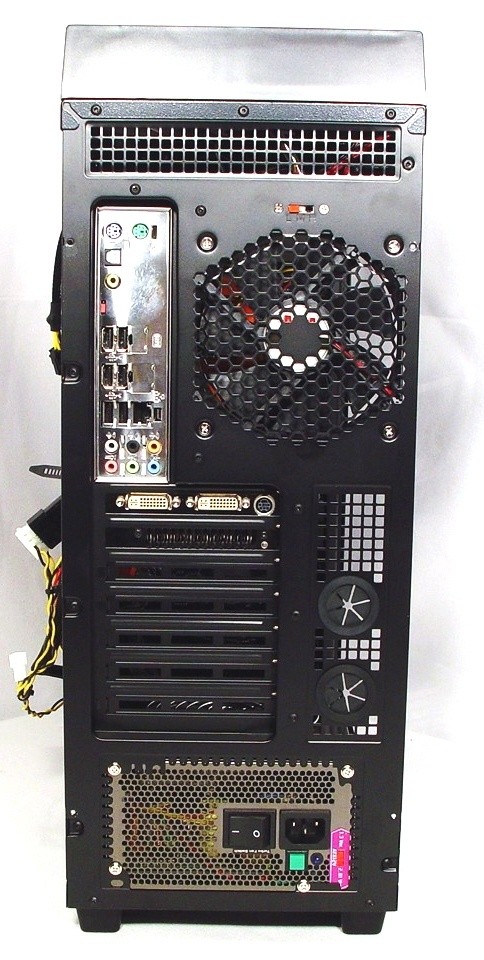
The rear of the Solano, once everything is installed, is clean and everything lines up right where it should. There were no issues with alignment of the I/O plate or getting the PSU in on top of those rubber pads.
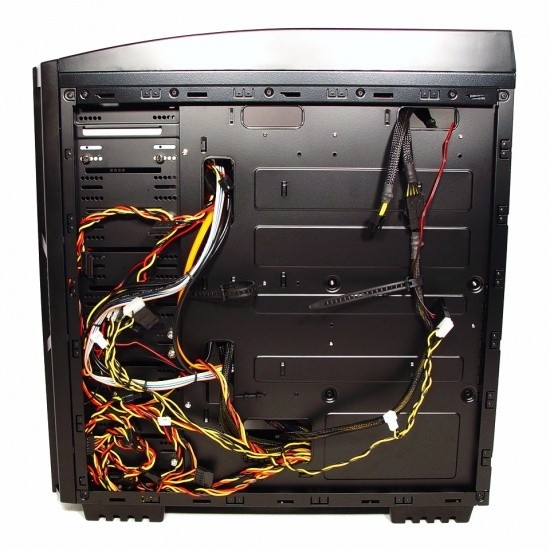
My PSU has a few too many wires, but even with another PSU, unless it was modular, would still have trouble hiding themselves. I tucked and I strapped, and I just got the rear panel back into place with the wiring you see here. Taking a fair bit of elbow pressure on one side, while I eyeballed and worked in the opposite side, I was able to get it on and locked into place.
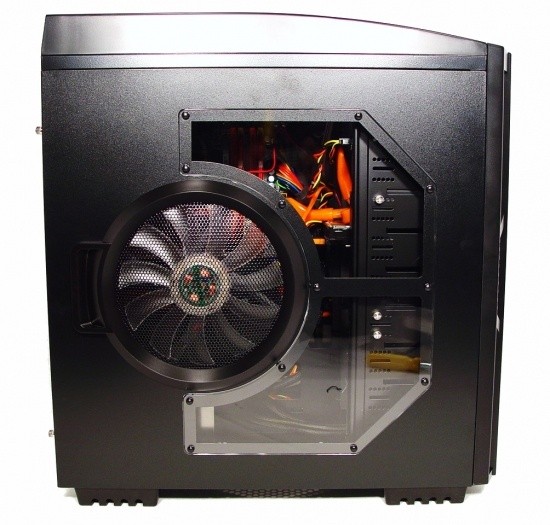
Everything is tucked away and both doors are back in place awaiting power. As you can see, or not see rather, the window doesn't allow for much of a view for the components. I see my PSU wiring, the hard drive rack, and the right stick of RAM through this. There is give and take here, though. For great air flow, you have to give up a bit of the view.
Once the side panel fan is powered up, it is fairly easy to see through it. The bright lighting needed for the image negates it, but I assure you, in normal lighting the view is quite good.
The front I/O, once powered up, should light up the power switch in blue LED like this. My timing stinks; out of the three images I took I wasn't able to time the flashing HDD activity's amber LED when it was active.
The front of the AzzA Solano 1000 allows for the two LED fans in the front to shine through both the honeycomb plastic inside support and the fine mesh grills.
Just wanted to take a step back and get this image, so you can appreciate it all at once.
Final Thoughts
What are the finer points of the AzzA Solano 1000? The triple black packaging of the front panel, exterior, and interior colors is a good start. Terrific air flow isn't far behind. I was able to spend a bit of time playing around with the switch and allowing all other fans to run at 12V power. I can tell you that this chassis is by far, much more quiet than my 900 ever was. Increasing the front fans from 120mm to 140mm really helps this, and the fact that there are dual 230mm fans that make very little noise on their own are a huge plus. With a little bit of runtime in this build, I found temperatures to be very acceptable and a few degrees cooler than I am used to seeing in other similar chassis'.
With all the benefits the Solano 1000 offers, there are a couple of issues I did run across. Having all the holes in the motherboard tray is nice for wire management, and keeping things tidy. The issue is getting the rear panel back on even if you just run a couple of Molex lines up the back. There simply isn't that much room to pass cabling other than what is supplied in the chassis. The other issue is more of personal taste. While when the fan is active, the view isn't horrible, I just feel that if you are going to offer a chassis with a window, what can be seen should be kept high on the list of having it there in the first place. I would have been just as happy with the fan in the door and no window.
All things become relative once pricing is put into the picture. Can you find a better chassis? Simply, yes. But the realization is, to get everything you "want" in a chassis, you are going to pay way over the $200 mark, and for some this just isn't an option. With pricing in mind, AzzA does do a great job of offering superior cooling ability, fully painted, inside and out, and still looks and sounds good doing it. Most retailers offer the Solano 1000 Full Tower for around the $120 USD mark. There is one heck of a deal currently going, and that is the $79.99 deal at Newegg, after rebate, with free shipping. When I first looked at this link it showed currently out of stock, but in the time it took me to piece this together, Newegg is now showing stock of this chassis. The $80 pricing makes it one of the beat offerings to both budget builders as well as those who want the mods done before the chassis arrives.


