


Because we'll be writing software and installation guides as Tweakipedia goes on, we might as well start right from the beginning and show you the tools we'll be using, and how you can use them too.
We'll be using VMware Workstation 9, where you can get the free trial here. The use of virtual machines can be great in the right hands, or for the right tools, and thanks to our core- and RAM-heavy systems these days, virtual machines are a perfect way to test out new software.
We'll be using virtual machines so we don't trash our installs of Windows, or require SSD after SSD to have a bunch of different operating systems installed. First up we'll walk you through how to install Windows 7 through VMware Workstation 9.

The first step, is to select Create a New Virtual Machine - you can choose different options if you're an expert at VMware, but if you're reading this, then you're probably not - so click the first option.
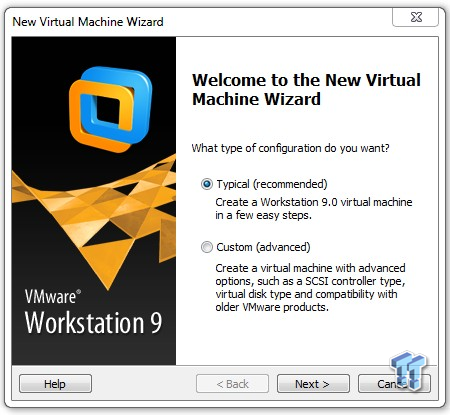
The next step, is to choose which type of configuration you want. The Typical option will walk you through just a few steps, with the Custom option going into great detail on the specifics of you virtual machine installation.
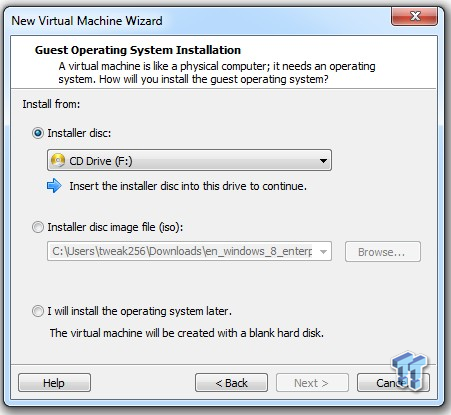
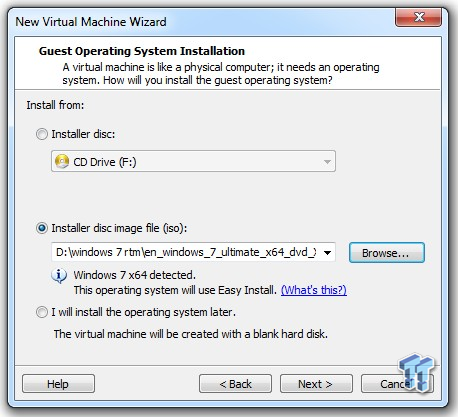
The third step is to select where your source image, or CD is coming from. If you've got a physical retail Windows disc, then you would go with the top option of using the Installer disc, and choose your optical drive. If you're using an ISO file, which we are today, then you would choose the Installer disc image file (iso).
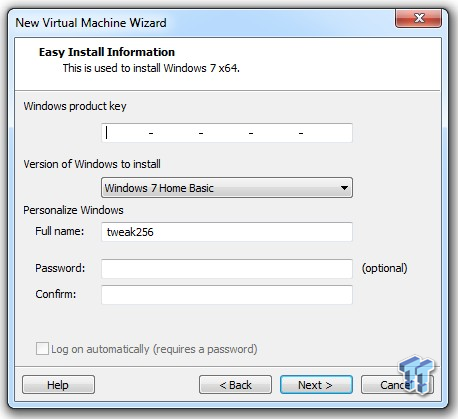

The next step is to enter in your Windows product key, but this is something you can skip over and enter in once Windows is installed - you have 30 days to activate Windows anyway, this just saves some time. Obviously if you've got it handy, enter this key now.
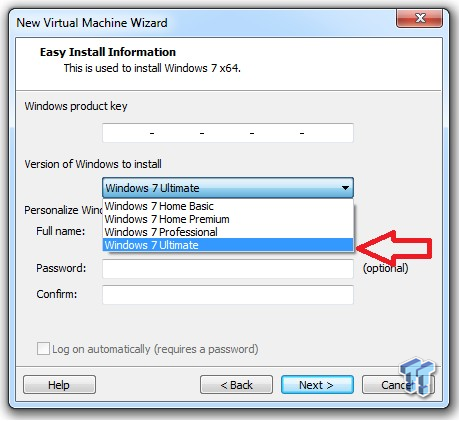
Within this same part of the installation procedure, you'll need to choose your version of Windows to install - we're installing Windows 7 Ultimate. You can enter in your name, and password for your new Windows 7 virtual machine.
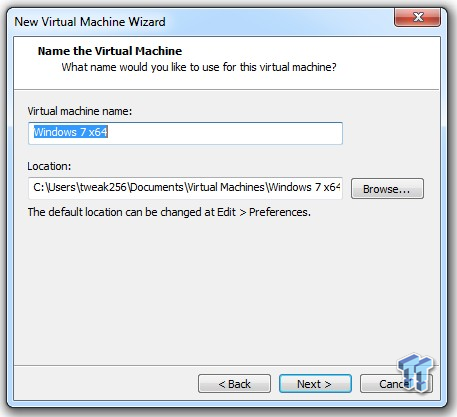
The next step is to give your virtual machine a name, as well as the location of your virtual machine image.
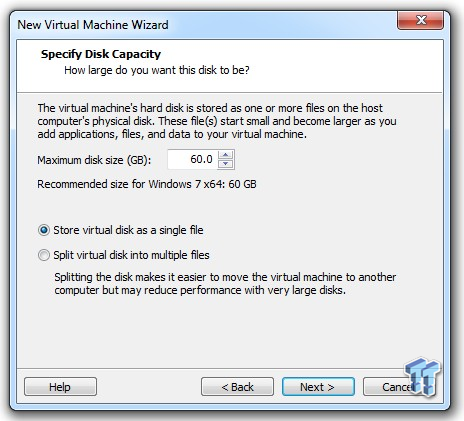
This step allows you to choose the maximum disc size of your virtual machine, where we'll be using 60GB thanks to Corsair supplying us with some uber-fast 240GB Force Series GT SSDs. You can also choose to store the virtual disc as a single file, or split into multiple files. We've chosen to go with the single file option.
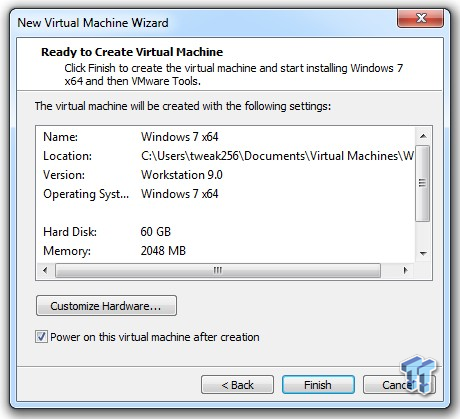
The final step is to double check all of your options, as you're ready to create your virtual machine. This is just a run down of the settings you've chosen through this guide. There's an option down the bottom of the last step to Power on this virtual machine after creation - which we've ticked, so we can get right into it.


That's it! Now Windows 7 is installing on our system. Because we're using an SSD-based system, the installation took mere minutes to complete.
Last updated: Nov 3, 2020 at 07:12 pm CST
 Apple sues OpenAI, accusing it of engaging in a 'strategy to extract Apple's confidential information'
 Another RTX 5090 power connector melted, and even ASRock TempGuard failed to save this one
 Reverse scam: Redditor orders a Ryzen 7 7800X3D but gets blessed with a 9800X3D instead
 Colorful iGame Shadow II DDR5 memory with CXMT ICs hits 8600 MT/s
 ASRock says there are no plans to sell its Taichi 10th anniversary concept components
 Sony CEO sells $4.7 million worth of stock days after PlayStation announces disc phase out
 Black Flag Resynced is a win for Ubisoft, pirate remaster achieves 2 million sales in 24 hours
 Giveaway: Win an NZXT H6 RGB+ Case, Kraken Elite AIO, RGB Fans and 1200W PSU
 Ubisoft responds to Black Flag Resynced DLC critics by telling them they're 'not a requirement'
 Micron 6600 ION 245.76TB Enterprise SSD Review - Best in Class Programming Speeds
 MOZA MA3F EFCM Flight Control Module Review: authentic Airbus A320 autopilot panel for simulators
 Turtle Beach Stealth Pro II Wireless Gaming Headset Review - Premium Sound, Fantastic Features
 MOZA MGX1000 Instrument Panel Review: a realistic Garmin G1000 replica for immersive flight sims
 Simagic Zeus Formula Steering Wheel Review: premium build and advanced inputs for F1 racing
 GIGABYTE X870E Aero X3D Dark Wood Review - A woody goody
 The Super Mario Galaxy Movie (2026) 4K Ultra HD Blu-ray Review
 KTC H49S66 5K2K (5120x1440) 49-inch 180Hz Gaming Monitor Review
 HighPoint Rocket 1604L Gen5 x16 NVMe Software RAID AIC Review: half the price with full 59 GB/s speed
 Next Level Racing ERS3 Haptic Seat Review: immersive sim racing comfort with integrated haptics
 Don't sell your Windows laptop until you do these things
 6 PC cleaning mistakes to avoid for safer hardware maintenance
 Phison and Intel Take Aim at Local AI's Memory Wall with aiDAPTIV
 How to Remap Keyboard Keys in Windows using Microsoft PowerToys
 7 tips to organize your Windows files for faster, easier access
 Intel Arc G3 Extreme first impressions with MSI's Claw 8 EX AI+ - Incredible power for an extreme price
 How to fix Wi-Fi Adapter Not Working on Windows laptops: troubleshooting tips
 Hisense U7SG 4K TV: Modern Entertainment for the New Age
 6 underrated Microsoft Word features worth using to boost your productivity
 Level Up Your PC Gaming with these Fantastic ASUS Prime Day Deals on GPUs, Motherboards, and More