
The Bottom Line
Introduction, Specifications, and Pricing
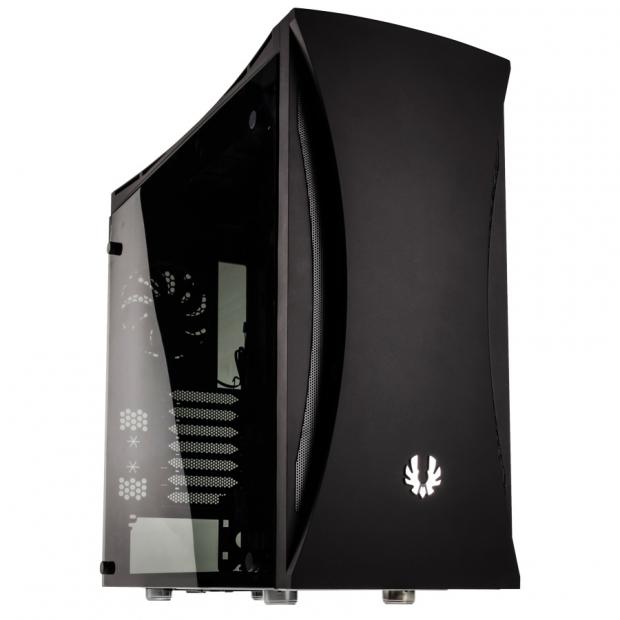
As long as we have known BitFenix, and this goes all the way back to their inception, one thing is for sure; they love to try new and stylish ideas when it comes to their cases. Just as an example, they started with the Colossus, which was a head-turner, but then things got rolling, and they offered up the Prodigy, which was a market killer for any other company trying to sell Mini-ITX cases. Of course, there have been another eighteen cases that have been sent over the years, and while many carry on a legacy from some of their original ideas, whether a success, or whether we did not care for certain ones, BitFenix strides forward. It seems their pursuit to take on every segment of the chassis market with a stylish and innovative design is endless.
The chassis we are about to get friendly with here over the next few pages does not carry a torch from previous designs. In this instance, it is an entirely new design that has taken a lot of comments from the masses of users, and BitFenix has tried to implement all the good ideas along with a few most users likely never thought about. While chassis lighting is nothing new, keep your eyes peeled for an idea that we have seen in no other design to date, which addresses LED lighting in a special way. With a select few companies offering tempered glass side panels for their cases, BitFenix has taken this idea and used it to their benefit but have done so in a way in which the final presentation is sleek and clean, and does not show wiring like INWIN cases have in the past.
The BitFenix Aurora mid-tower chassis is a blend of elegance, sleek yet stylized aesthetics, and an interior that is laid out well for beginning users, or even those with advanced skill and desires as to what can be housed inside. A lot is going on in this mid-tower chassis, and if you pay attention along the way, it is easy to notice some of the spectacular features that this chassis brings forth, especially considering this is just a mid-tower chassis. While no chassis will have quite the success the Prodigy has had on the PC market, this Aurora chassis from BitFenix may just be the second best chassis we have ever seen from them.

The Aurora is available in midnight black with just an exposed metal logo to break up the coloration, or there is also an arctic white variant, but the mesh and case badge are black in this version. Both options are made mostly of steel and use ABS plastic for the front bezel and top cover. Inside of this chassis, you could house a Mini-ITX, Micro-ATX, ATX, or even an Extended-ATX motherboard, which is asking a lot for most mid-tower cases. The CPU air cooler can be 160mm tall, and there is 400mm of room for video cards if you do not use the front of the chassis for liquid cooling. There are seven expansion slots in the back, four bays in total for 3.5" drives, and up to three locations for 2.5" drives. As for the I/O panel on the front, it offers USB 3.0 and USB 2.0 ports, HD Audio jacks, but also sports a reset, power, and even a LED lighting button.
As the Aurora is shipped from BitFenix, there is only one fan in the chassis, and that is a 120mm fan at the back of the case. However, the front of the chassis has options for a pair of 120mm or 140mm fans, and can be used for water cooling as well, but it will lessen the space for the GPUs. The top of the chassis offers the same setup as the front does, and again can be used for water cooling, and this section is raised to move it away from the motherboard for thicker components. The rear of the chassis can also be used for water cooling, but will only house a single 120mm radiator. The last bits we should cover about this chassis are found near the bottom of the list. It is there that we see a 220mm PSU limitation, the 10.58kg weight, as well as the 215mm width, 490mm depth, and the 520mm height.
The last section covers highlights of the chassis, and this is where we get the first mention of the BitFenix LED Lighting Controller and the SSD lighting bracket. The controller is used to supply the call for certain LED colors via the switch on the chassis, and this lighting choice is shown on the front of the SSD bracket. There is a maximum of 25mm for cable management, this is where they mention the dual 280mm radiator support, and also make mention of the removable lower HDD cage, as well as the removable dust filter found under the PSU.
Going from the date we had been provided from BitFenix, we would have assumed to see stock on shelves with an early August public release of this chassis. However, when looking to Google to sort out where we might find it, or venturing directly to Amazon and Newegg, we came up empty for a listing every time. What we do know, is that with the press release, BitFenix did make mention of a $99.99 MSRP for this chassis. This is what we like to think is the top of the mark for pricing on well-equipped mid-tower cases, and with the angle that BitFenix took in designing this chassis, you certainly do get quite a bit of chassis for the investment.
Chad's Chassis Test System Specifications
- Motherboard: GIGABYTE GA-Z68X-UD4-B3
- CPU: Intel Core i7 2600K (buy from Amazon)
- Cooler: Corsair H80i GT (buy from Amazon)
- Memory: G.Skill Ripjaws F3-12800CL6D-4GBXH
- Video Card: ZOTAC GeForce GTX 970 AMP. Extreme Edition (buy from Amazon)
- Storage: SuperSpeed 128GB SSD
- Power Supply: SilverStone SST-ST85F-G (buy from Amazon)
- OS: Microsoft Windows 7 Ultimate 64-bit (buy from Amazon)
Packaging

Had FedEx not taken the liberty to plaster the front panel with their shipping literature and stickers, we would have seen the BitFenix logo and the Aurora name across the top. The main area of the panel is used to show a rendering of the Aurora. Since the side panel is glass, it is hard to "tint" that area, so it appears to have no side panel at all.
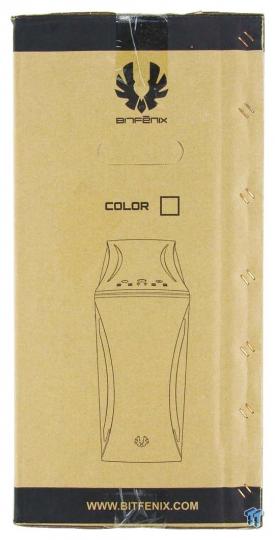
Things start with the BitFenix logo again, and below the handle is an area that should denote which color chassis is inside. Since we got this one early, that sticker was not placed. The lower section of this side offers a view of the front and top of the chassis.

The back panel starts things off noting the dust filter, the RGB Chroma Controller, the Alchemy SSD Chroma bracket, and ends with the cable management space along the top. The larger rendering at the bottom shows the GPU room inside the Aurora, denotes the removable HDD cage, and shows that a 280mm radiator can go in the front and the top.

The fragile sticker covers the company logo, and below the handle, we see the naming in the sticker shows that this is the black Aurora with a window inside of the box. This leaves the rest of this panel to offer a specifications chart identical to the one on site.

Dense foam is used at the top and the bottom, rather than Styrofoam, to protect this chassis from any drops that will occur in transit. Along with the fact that the entire chassis is wrapped in a plastic liner, there is also plastic clung to the glass on either side, making certain the Aurora arrives in terrific condition, as ours did.
BitFenix Aurora Mid-Tower Chassis

The Aurora is offered with a unique front panel. Here we see a slender midsection as the concave curves run down each side. The steel mesh just behind it follows those curves, and the last step down is ABS plastic like the face is, but while it is curved along the top, the sides are square with the chassis.

At the top of the case, just behind the front bezel, we find the front I/O panel. Nearest the front of the chassis are the USB 3.0 ports, the HD Audio jacks with the HDD activity and power LEDs just in front of them, and the USB 2.0 ports to the right. The back row offers a smaller LED button for the Chroma system, the larger power button, and a smaller reset button.

The top of the chassis tries to mimic the front but has its design elements. The center is curved to match the front, but the venting to either side is a bit different. Also where the top panel drops off at the edge, there is more hidden ventilation in the slots along the length.

The left side of the chassis is flanked with dark tinted glass as the side panel, which is held in place at the corners with thumbscrews. The glass aligns well, and we also see the smaller feet under the chassis with their metal looking wrapping.
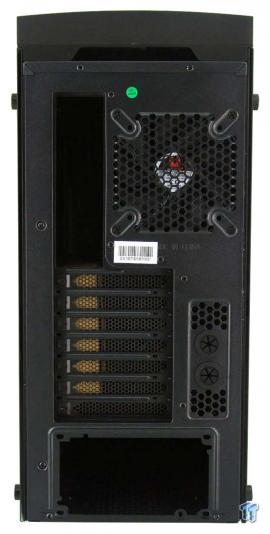
The back of the Aurora starts with a raised section at the top which allows for additional cooling support. Below that we find the rear I/O area and the exhaust fan. There are then seven ventilated expansion slot covers with passive ventilation and grommets for external water cooling to the right of them. At the bottom, in the large hole, is where the PSU is placed.

The right side of the chassis is a mirror image of what we found on the left side, except for one detail. Rather than offering a tinted glass panel, this time, the inside of the glass is painted black. There is no way for the wiring behind the tray to be seen once the build is completed.

The feet are small for the size of the chassis, but its footing is secure and stable. There is nothing hidden down here for parts removal, but near the back of the Aurora, we do find the removable dust filter for the PSU.
Inside the Aurora

Removing the front bezel is easy with the opening at the bottom allowing it to be pulled off. Inside of the bezel is steel mesh in front of a honeycomb of plastic, no external bay cover to remove, and the bottom has a large plate blocking some of the intake. The front of the chassis has a raised section that allows either a pair of 120mm or 140mm fan to be placed there.
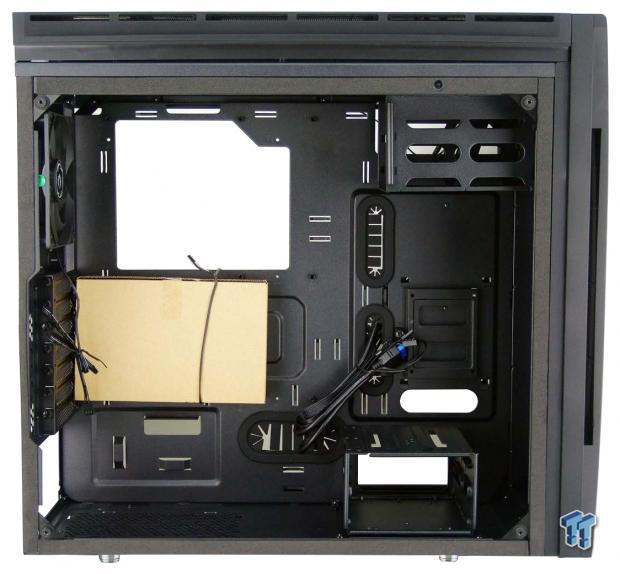
Inside of the Aurora we see the hardware is strapped to the motherboard tray on the left side, and the wiring is bundled and held in a grommet to keep it from rubbing the inside of the glass panel. There is also a dense foam ring around the chassis opening, which keeps the glass from being scratched or vibrating against the steel.

Typically, this is where we would discuss a pair of 5.25" bays, but since the bezel is solid, this area sports a rack for 3.5" drives. This rack uses slides for the drives to go in with, so there is no need for, nor are there any screw holes.

In this image, we see a 2.5" drive tray mounted to the motherboard tray. Just below that, placed on the floor of the chassis, is a cage for an additional pair of 3.5" drives. If you planned to water cool in front of the chassis, this is removable and allows for better access for such needs.
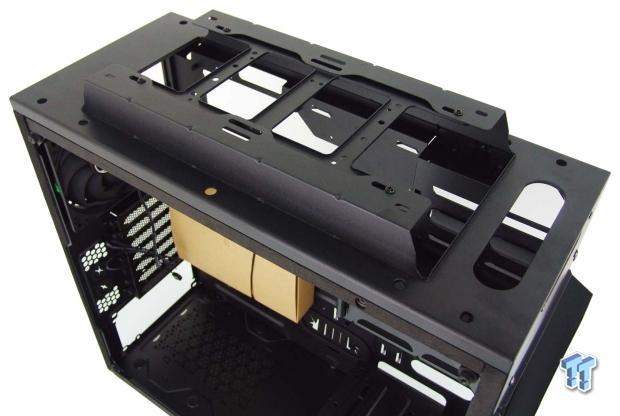
At the top of the chassis, once we removed the top cover, we find the 120mm and 140mm mounting. This section is raised so that fans and a radiator can be installed, and not cause conflict with the top of the motherboard. BitFenix has also installed a reservoir mounting bracket in this area, which can also be used in front of the chassis.

The motherboard tray is accepting of most form factors, even up to E-ATX, and has a large hole in it to access CPU cooler back plates. There are five holes along the top and right sides, some with grommets, and seventeen places to tie up the wiring.
Inside the Aurora Continued

The lower section of the motherboard tray offers a large wiring hole with a grommet and two additional tie points. The floor of the chassis is ventilated to allow the PSU to be installed with the fan on the bottom, and it is supported by four rubber pads stuck to the floor.
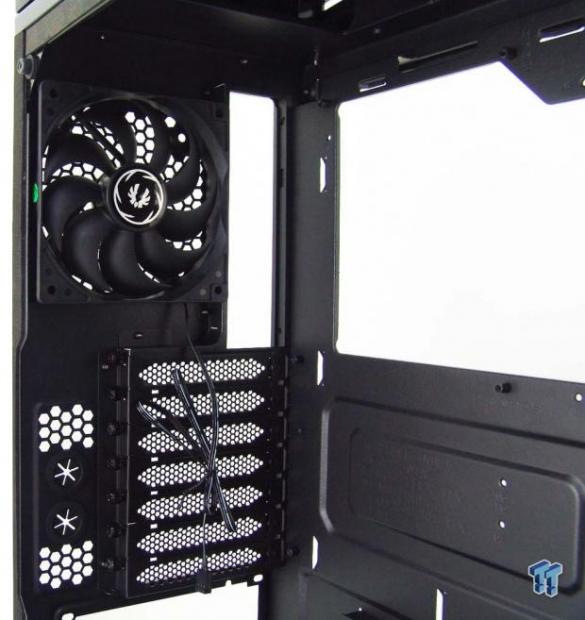
Inside of the rear of the Aurora, we find the one and only included fan with this chassis. It is a 120mm fan with no LEDs and uses a 3-pin connection for power. As for the expansion slot covers, and what holds in the video cards, this chassis uses thumbscrews.

Behind the motherboard tray, we are offered 20mm in some areas and 25mm in others for wiring. We see a large hole at the bottom, behind the lower drive cage for ease of wiring, and we also see an additional pair of 2.5" drive trays above it.

Near the top of the motherboard tray is this PCB. This is the controller for the SSD Chroma feature. The wiring from the bracket plugs in at the top left, the control switch wiring is already plugged in at the right, and the large plug at the bottom takes a 4-pin Molex connection for the power of this system.

We like that every bit of the wiring is black - the wires and the connections at the ends. There are the wires for the buttons and LEDs in the front I/O panel and the USB 2.0 connection next to it. There is the USB 3.0 connection next, and lastly, we have an HD Audio cable with an extension on the end. This way you can shorten it for smaller boards, or leave it in place for the larger boards with that port at the bottom left corner of the motherboard.
Hardware & Documentation

In a small bag, we found all the hardware needed to get the system built. There are four thumbscrews, which we are not sure why they are included, a motherboard speaker, and a socket and a few standoffs. There is also a large amount of fan screws, PSU screws, Chroma bracket screws, SSD screws, and the motherboard screws.

Standard plastic rails are also offered to install the 3.5" drives. Simply align the pins into the screw holes of the HDD, and slide them and the drive into the cage until the clips lock into place. There are thin rubber pads around the pins which should help to eliminate any vibrations that might otherwise pass through them and into the chassis.

BitFenix includes five plastic zip-ties to help manage the wiring. They also send along this AURA ready Chroma SSD bracket. This mounts to the bottom of an SSD or any 2.5" drive, and with the switch on the front of the chassis, it will illuminate the LED strip to the right in many color choices. Just keep pushing the button until the desired color is achieved.

The manual is thorough, covers how many of each bit you should have in the hardware, and through large renderings and a few choice words here and there, they should get you through the build process.

BitFenix also sent us a few fans, and with a bunch of empty holes to fill, these white LED Spectre Xtreme LED fans will fill this chassis nicely. We will be testing the chassis with just the stock fan, as well as with it filled up, but keep in mind this is a $57.97 upgrade.

In that same box, we also found these sets of Alchemy 2.0 LED kits. On the left are 30cm and 60cm kits of LED strips. But they come with a magnetic control box as well as magnetic switches to turn the LEDs on and off, or adjust the various colors. The kits to the right are the standard variety, but can be added on to the end of the other two kits. At the minimum, to have this amount of lighting to add in, this is at least $80 is lighting, and realistically much closer to $100.
Case Build & Finished Product
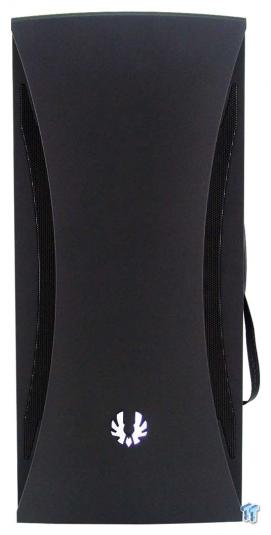
Nothing about the front of the Aurora changed during the build process, and we dig that about this chassis. From the front, it is all about style, and nothing will break up the sleek and curvy design of the front of this chassis.

Everything fit well inside of the chassis and we have plenty of room for more. The SSD Chroma bracket is installed on the SSD and does function as described. We also placed the remote switches for the Alchemy 2.0 LEDs on the top of the HDD cage, and all of it being magnetic made installation a cinch.
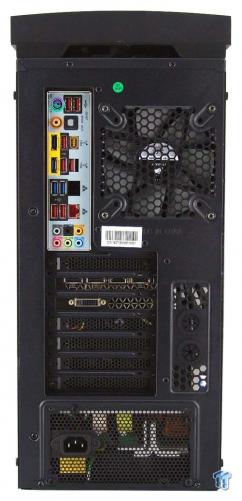
There were no issues found with the back of the chassis either. The dust shield fit right in, our AIO was installed as it should, the card installed without forcing the chassis into alignment, and the PSU slides right in as well.
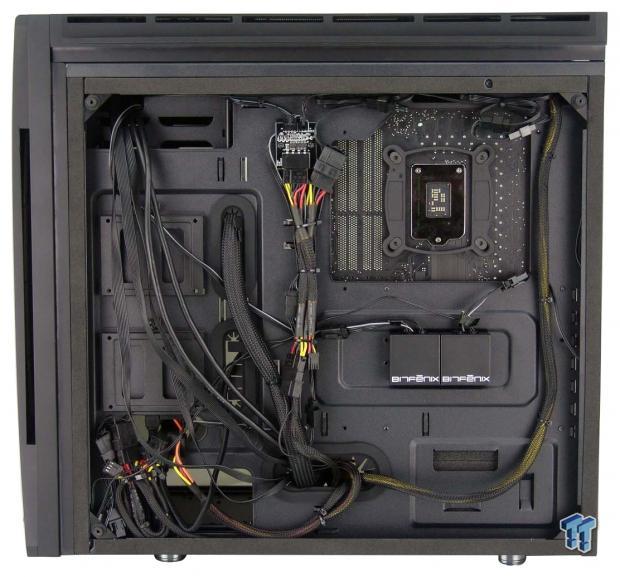
Our wiring did not come out all that impressive, but we were able to fit quite a bit behind the motherboard tray. With most of the wiring running on the left side, it left the area below the CPU cooler access hole to place the magnetic control boxes for the LED strips, and we were also sure to make the connections for the Chroma SSD bracket at the top.

With the Aurora all reassembled and ready for power, we found no issues getting to the point or with the placement and securing of the glass side panels. We do notice that without something like we have, with tons of light and a white backdrop, can you see anything going on inside of the chassis.
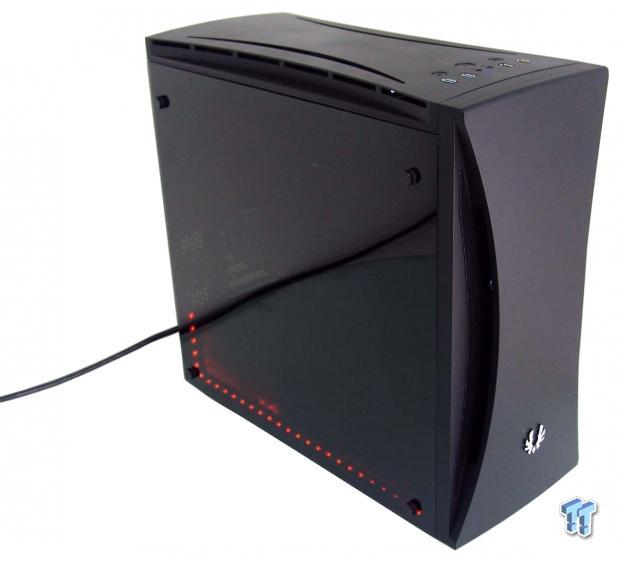
Once we powered things up, we can see the LEDs from the Alchemy 2.0 strip along the bottom, and just a bit of the white LEDs through the mesh on this Aurora. As for a view of the components inside, the only way this is possible is with much more light than we have with three LED strips lit, or each component must be lit like the Zotac and Corsair logos which are barely visible.
Final Thoughts
This chassis hits all of the check boxes when it comes to features and layout. There are plenty of options for hard drives, and with three 2.5" trays to populate, it is easy to keep it down to two HDDs so that you can remove the lower cage. The number of tie points for wiring is impressive, the holes are all in the right locations, and with 25mm of space, and we hid quite a bit behind the motherboard tray. All of our components went in without issue, and this build seemed to go smoothly, even with all the additional fan and LED installation.
The design is something that is not normal to the chassis market, and we feel that whether you pick black or white with black trim, the Aurora is a chassis that is designed to impress aesthetically. The fact that the side panels are glass just takes its looks up a few more notches, and we like that the right side panel is painted black to hide what is behind it. The SSD Chroma is cool for a few minutes playing around with it, but after you figure out which color you would like to use, it gets little use.
There were some downsides to this design, though. First of all, we tested thermals with just one fan in the back and let's just say we were unimpressed. While it was near silent at 26db of noise coming out the back of the chassis, things were a bit warm inside at this time. Adding in near $80 in fans rectified the airflow or lack thereof, but we get why BitFenix did this. They assume that you will be filling this chassis with your bits of kit, and with the ability to house a pair of 280mm radiators, it is likely that you will already have fans picked out to go there.
The only other thing that seemed a bit off was the level of tint applied in the left glass panel. While we like the dark and mysterious look of the Aurora, we feel that many users would love to have a better view of their hardware inside. Outside of these two personal issues with the Aurora, we found it to be a fine specimen in mid-tower design and feel that it will be loved and purchased by many.
For those who like to maximize their options, yet get things like an E-ATX motherboard and a bunch of water cooling inside of a chassis, this sleek and stylish chassis is worthy of your attention. Not many mid-towers come this feature rich, and of those that may come close, none of them look like this. We have seen cases with glass side panels, some we broke, some showed too much, and some are a pain to install, but not with the Aurora. Considering we get the Chroma additional goodies to play with along with everything else we covered that the Aurora mid-tower chassis from BitFenix has to offer, at just $99.99 as long as the MSRP rings true, we can find no real reason to try and dissuade you from making this purchase. You get your money's worth in this design; it can last for years with many builds in it, it will grow with your needs, and all that time delivering an attractive case.
Chad's Chassis Test System Specifications
- Motherboard: GIGABYTE GA-Z68X-UD4-B3
- CPU: Intel Core i7 2600K (buy from Amazon)
- Cooler: Corsair H80i GT (buy from Amazon)
- Memory: G.Skill Ripjaws F3-12800CL6D-4GBXH
- Video Card: ZOTAC GeForce GTX 970 AMP. Extreme Edition (buy from Amazon)
- Storage: SuperSpeed 128GB SSD
- Power Supply: SilverStone SST-ST85F-G (buy from Amazon)
- OS: Microsoft Windows 7 Ultimate 64-bit (buy from Amazon)

| Performance | 91% |
| Quality including Design and Build | 97% |
| General Features | 99% |
| Bundle and Packaging | 97% |
| Value for Money | 98% |
| Overall | 96% |
The Bottom Line: A sleek and sexy mid-tower chassis with all the bells and whistles! The BitFenix Aurora brings forth an open interior with plenty of options, and the addition of glass side panels gives this product an elegance not found in most cases. At this price, we feel it should sell very well.
PRICING: You can find products similar to this one for sale below.
 United
States: Find other tech and computer products like this
over at Amazon.com
 United
Kingdom: Find other tech and computer products like this
over at Amazon.co.uk
 Australia:
Find other tech and computer products like this over at Amazon.com.au
 Canada:
Find other tech and computer products like this over at Amazon.ca
 Deutschland:
Finde andere Technik- und Computerprodukte wie dieses auf Amazon.de
What's in Chad's PC?
- CPU: Intel Core i7 13700K
- MOTHERBOARD: ASUS ROG Maximus Z690 Hero Eva
- RAM: TEAM DDR5-7200 32GB
- GPU: ASUS GeForce RTX 3090 Eva
- SSD: addlink m.2 2TB
- OS: Windows 11 Pro
- COOLER: Fractal Lumen S36
- PSU: be quiet! Dark Power Pro 1500W
- KEYBOARD: ASUS ROG Strix Scope TKL Electro Punk
- MOUSE: ASUS ROG Strix Impact Electro Punk
- MONITOR: ASUS ROG Swift OLED PG42UQ
Similar Content
Related Tags

