


Our Verdict
Introduction, Specifications and Pricing

Anyone who pays half the attention to cases that we do, have seen a great proliferation in chassis designs that have come from Thermaltake over the past year or two. In the olden days, they tended to make the more usual suspects when it came to cases, but always had something in their lineup that put them ahead of the curve, even if they were too expensive at that time for most of us to enjoy them. Now it seems things have sort of flipped the script. More and more now we are seeing many very cool designs and feature implementations in their cases, and while once out of the range of most users to get the best of what Thermaltake had to offer, it seems now, that almost all of Thermaltake chassis designs are indeed affordable and attainable for most to enjoy.
Coming fresh from the Core series cases that are all the rage at the moment, and highly sought after for the large interior and mod-ability that has launched a competition, we venture into the more typical chassis design this time around. The thing is though, that while we are now speaking of taller and slimmer designs like the more standard Core cases, the idea of needing to make changes along the way is not lost on Thermaltake. While most of their designs as of late have been top notch with tons of in your face features along with a few hidden ones, there was one logical step for Thermaltake to make this time around.
That step is of course to take all of what we are loving in these newer case designs, and putting it inside of a chassis that is made with silence in mind. Of course, nothing is lost with this design either; we still get the hidden goodies, and a lot of the one off features that come only in Thermaltake designs, but major strides are made this time around to deaden any and all noises typically associated with a standard PC design. All of this has culminated in the chassis that we are bringing you today, which is the Thermaltake Suppressor F51 mid-tower chassis.
Get comfortable and ready the time needed to have a look, because this is one of those cases that you just don't want to miss.

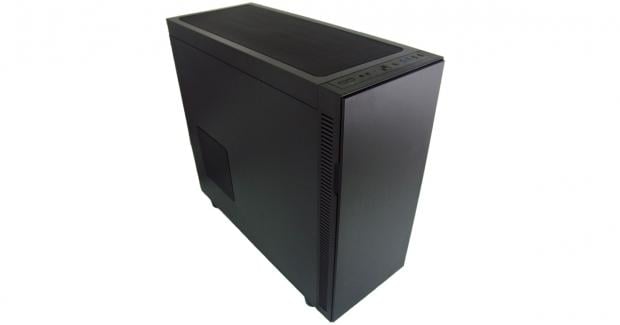
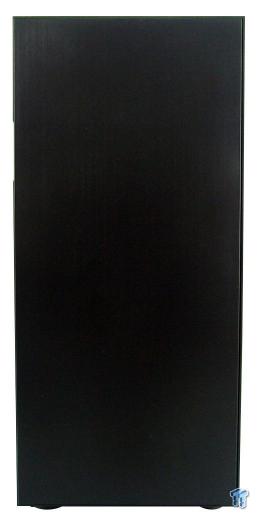
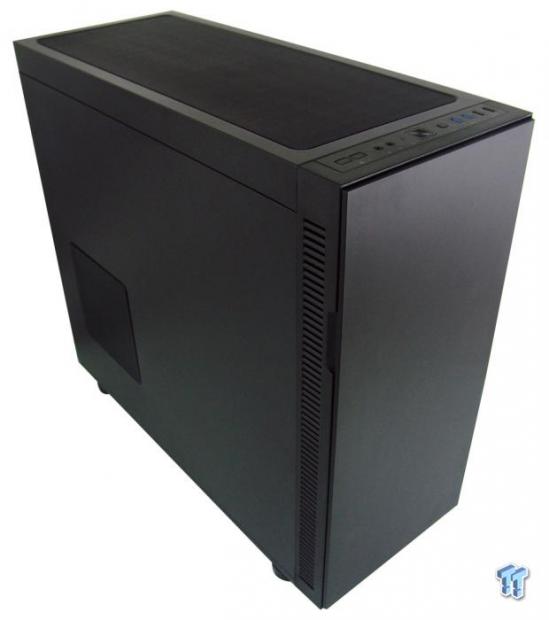
A quick glance at the specifications shows we have a lot to go over before we show you the actual chassis, so let's dive right in and get this out of the way. The Suppressor F51 is a mid-tower design that measures 525mm in depth, is 230mm in width, and stands 577mm tall, weighing in at 12.7kg empty. While there is a windowed version out in the wild, ours is the windowless version, and everything about this chassis is black, inside and out. Externally, this chassis may appear to resemble other Tt designs, but looking deeper at the closed off front panel, the amount of dust filtration, and the fact that every hole that isn't currently populated with a fan offers sound deadening materials in those locations. With a brushed aluminum front panel that is plain, sleek, and simple, along with the flat side panels in this design allows users to enjoy its simplicity and lack of noise in the office due to the tricks and design elements that Thermaltake has employed.
Inside the chassis there is also a lot to cover. This chassis is cooled with a 200mm fan in the front, and uses a second fan at the rear, a 140mm fan to exhaust the chassis. There are two removable 5.25" drive bays, and these trays are also drilled in the floor for storage as well. Below that, we find six 3.5" bays that are used for storage, and each tray in the rack also accommodates 2.5" drives too. One thing not mentioned is that even with the ODD bays and HDD bays removed, there is still room to house two of the HDD trays behind the motherboard to allow for much needed storage locations if you plan to fill this chassis to its limits with water cooling. Since we have an image that you will see in the hardware and accessories, that show all of the cooling options, feel free to read the listings there, but we feel the image is worth a thousand words and also simplifies life a bit when it comes to cooling options. Outside of that, the chart ends with limitations, like 185mm for a CPU cooler, 310mm or 465mm of video card spacing depending on the removal of the HDD rack, and we have 220mm of room for a PSU, and even an adjustable support for the front, and it comes equipped with a gasket at the back of the chassis for the PSU as well.
As for the availability of this chassis, technically we were under an NDA until the June 2, but someone broke said NDA and is why we get to bring this chassis forward a bit early, but as of this moment, we cannot find a retail listing for this chassis. Even so, we were in fact given the MSRP that we should soon find this design available for from just about any e-tailer, and even what you can buy direct from Thermaltake for, and we were told that price is just $119.99. Astonishing if you ask us, the level of features, the look and appeal of this chassis design, and the customizations that this chassis will allow for to us is very much worth this asking price, not only on paper, but in real life.
Our Latest Mid-Tower Cases Review Coverage
Packaging
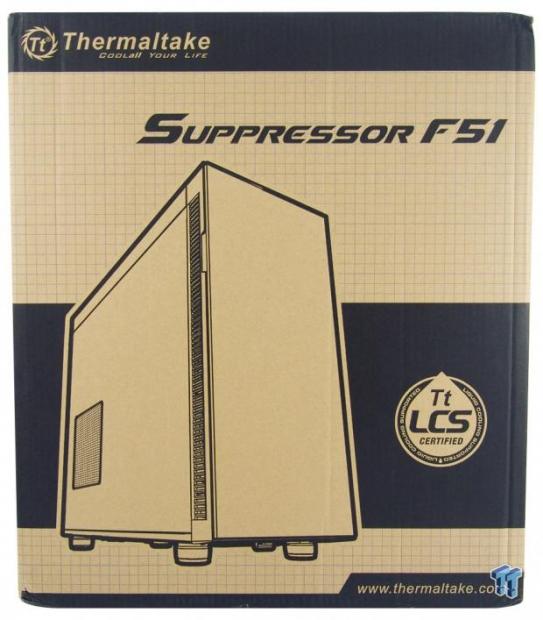
Packaging is typical for Thermaltake with black printing used on plain cardboard, even down to the grid used as the background. On the front, we find Thermaltake and Suppressor F51 printed above a rendering of the chassis, and above where they show the web address, we are also informed this chassis is indeed Tt LCS certified.

Spinning the box to the left, we run into this much thinner panel where we again find the naming and rendering of the chassis. The real reason they used this panel was to inform us that there are USB 2.0 and 3.0 ports, use of 200mm and 140mm fans, 6+2 expansion slot layout, and again with the LCS support.
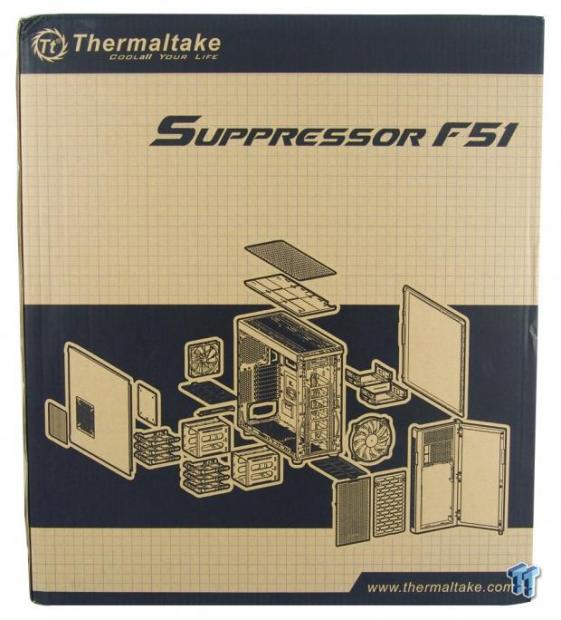
While the back mostly replicates what the front of the packaging offered, we always liked how they offer an exploded rendering of the chassis on the back like they do here. This allows anyone who sees the box before buying this chassis what comes out to customize it, and all the bits that are part of the interior and exterior design.
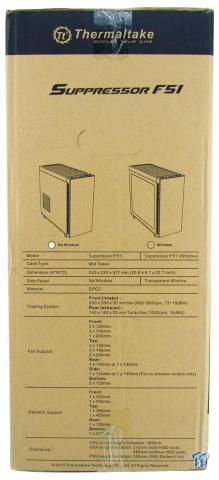
The remaining panel not only offers us the specifications chart at the bottom, and it is not simplified in the least, it also shows at the top that we indeed got the solid side panel version, and not the window option.
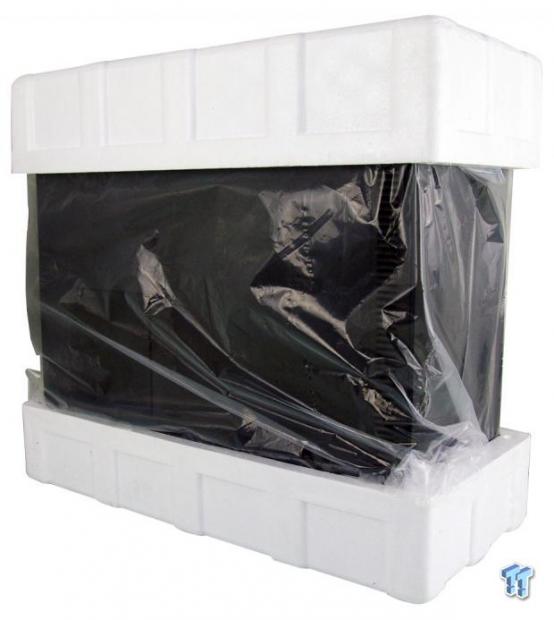
Sticking to what works, we find the Suppressor F51 inside of the box wrapped up in the standard inner packaging. Along with the plastic inner liner to keep the paint and finishes from being marred in transit, they also went with the thick Styrofoam end caps. Considering this chassis went halfway around the globe to get here, and is still in perfect shape, says a lot for the packaging used here.
Thermaltake Suppressor F51 Mid-Tower Chassis
It does not get much simpler when it comes to a front panel for a chassis. The F51 offers a full cover door to the front, and while there isn't any naming to break it up, there is a light brushed aluminum finish added to dress it up.
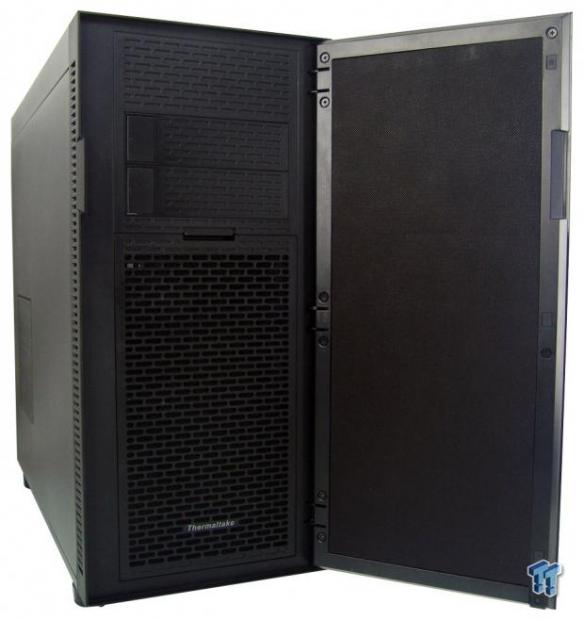
The door opens to the right, and sadly is not reversible, but inside the door, we get the first look at the sound deadening material used there. As for the front of the chassis, there is a large section at the top, and then we run into two removable bay covers. Below that, along with the Thermaltake plate at the bottom, it is all open for air to flow into the chassis.
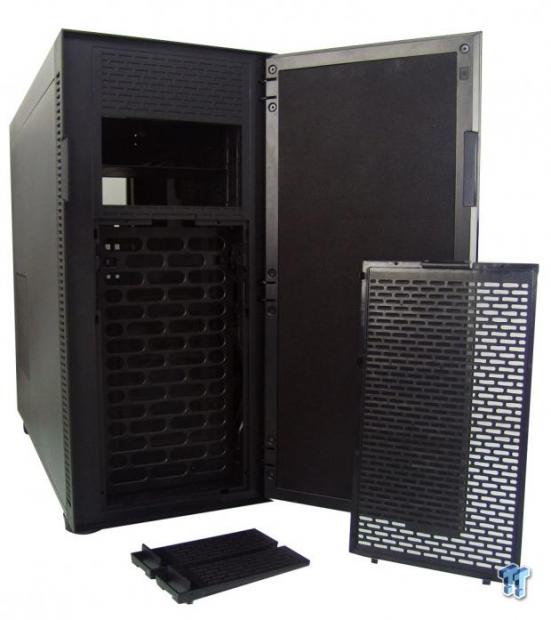
Going a little deeper, we see that the bay covers are easily removed from the outside of the chassis, and we have also removed the first of two intake filters found in the Suppressor F51.

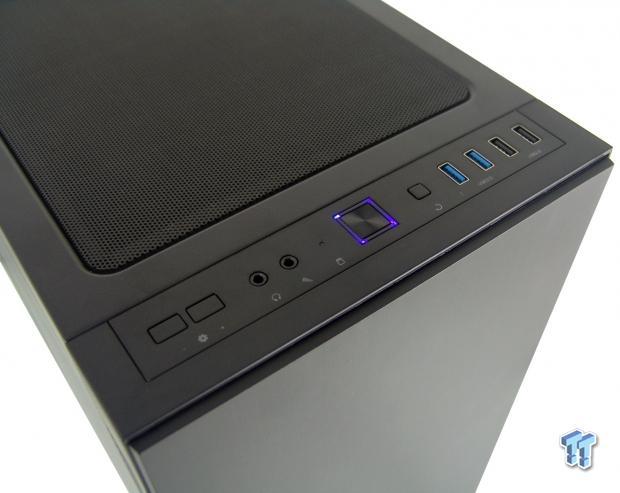
As we move up to the top of the chassis, we immediately run into the front I/O panel. Here, starting from the left, we find the controls for the built-in fan controller, HD Audio jacks, HDD LED, the power button, the reset button, and then a pair each of USB 3.0 and USB 2.0 ports.
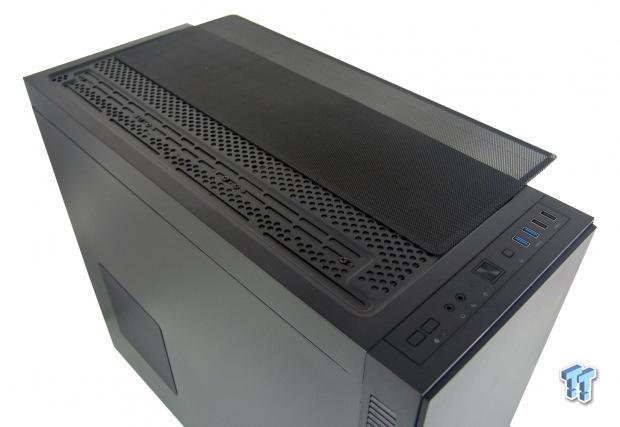
The rest of the top of this chassis is intended to maximize ventilation with the plethora of fan mounting options offered here. Out of the box, however, under the magnetic cover for the top of the chassis, there are currently sound deadening pads installed here.
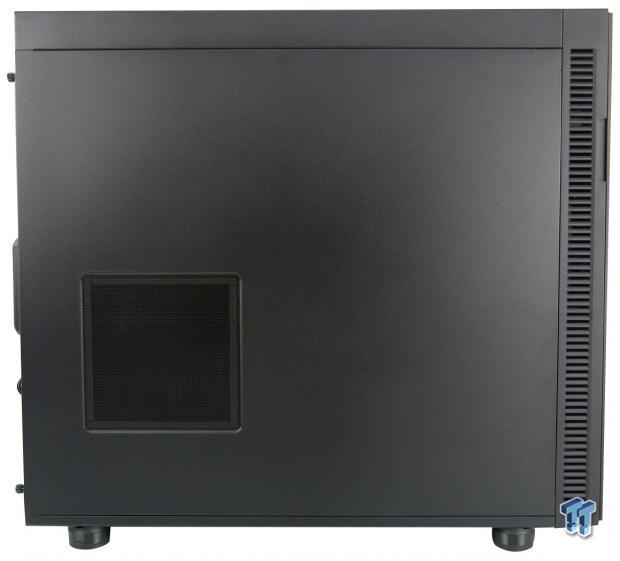
The left side of the chassis is mostly an expanse of steel since we did not get the full window option. In place of the window, there is an option for a GPU cooling fan to go under yet another magnetic cover that we see there now. Also, just like at the top, currently this hole is covered with more sound deadening measures.

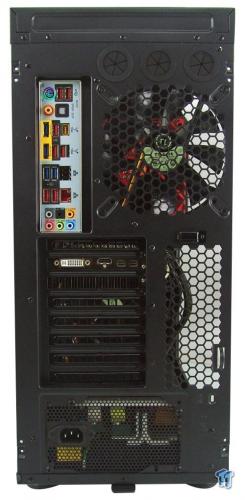
As the fine print mentioned, some things in the specs may change when the chassis goes retail, and along with the grommets, rear I/O area and the exhaust fan, we find eight standard expansion slots and not the 6+2 configuration the box alluded to. Of course that leaves the large hole at the bottom for the PSU.
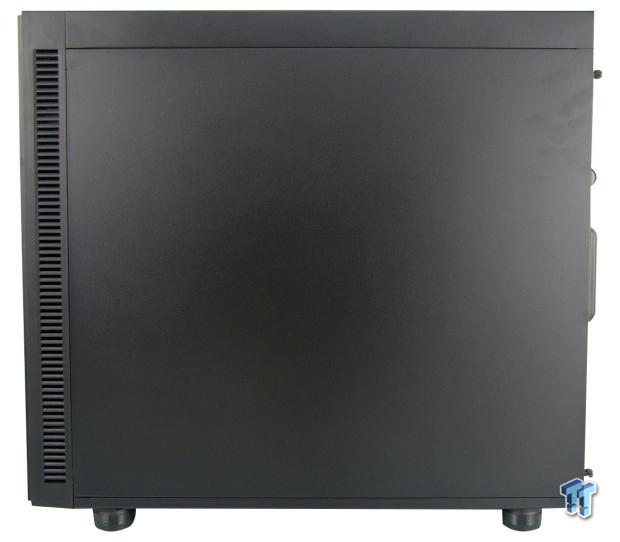
The right side of the chassis looks identical to what we saw on the left, of course sans the fan location this time. We also see that on both sides of the bezel that the noise is reflected away from the user by means of the ventilation that the intake draws from.
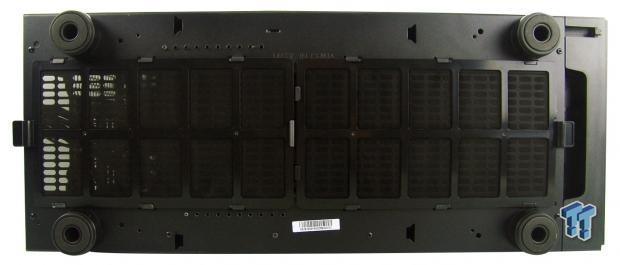
Under the chassis, we find the case supported with round feet very near the edges, and each has a rubber pad on it to keep the chassis from moving around or damaging the surface it sits on. Also, down the middle, we find two dust filters. Splitting them up makes it much easier to remove, and if you do not cool the floor of the chassis, mainly the rear one is all you will pull and clean regularly without the need to pull out 20 or so inches of filter to do so.
Inside the Suppressor F51
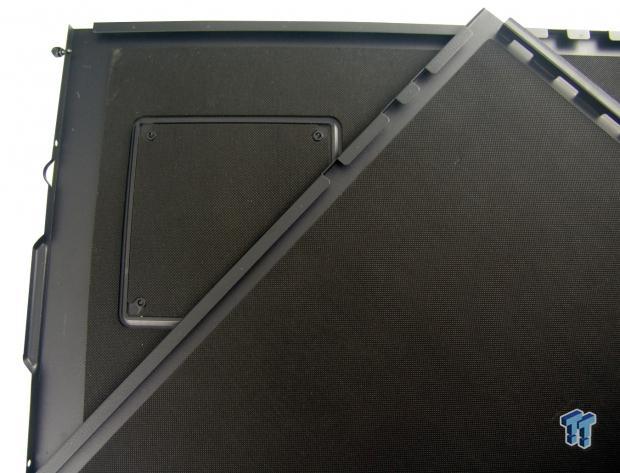
As we removed the panels and felt the heft of them, we flipped them over to see near edge to edge coverage with sound absorbing material. The left panel, where the optional fan goes, there is a bit of a bump to help strengthen the panel, but currently there is a removable pad in place to close it off when not used.

Back to the front of the F51, we have removed the bezel to find there is nothing attached to it. We also found the second dust filter that resides in the frame of the chassis and not in the bezel. While great for dust protection, a double filter will likely reduce the intake fans efficiency.
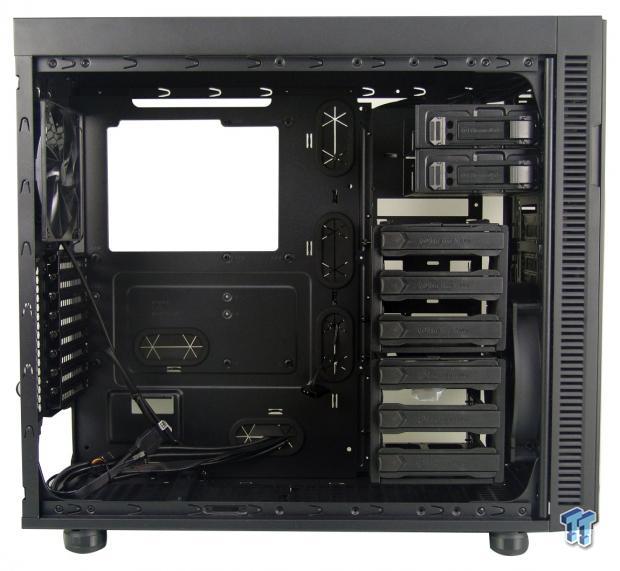
Looking inside the main section of the chassis for the first time, we see that the wiring has been run to the bottom of the chassis and passed inside and tied up to keep them safe in transit. We also found a bag in the HDD bays, that you can just see a bit of hanging below the fourth tray down.
There is a lot of room above the ODD bays for water cooling options, but should either of these tool-free ODD bays get in your way, they are both made to be easily removed so that they can get out of the way for anything you need to put in here.
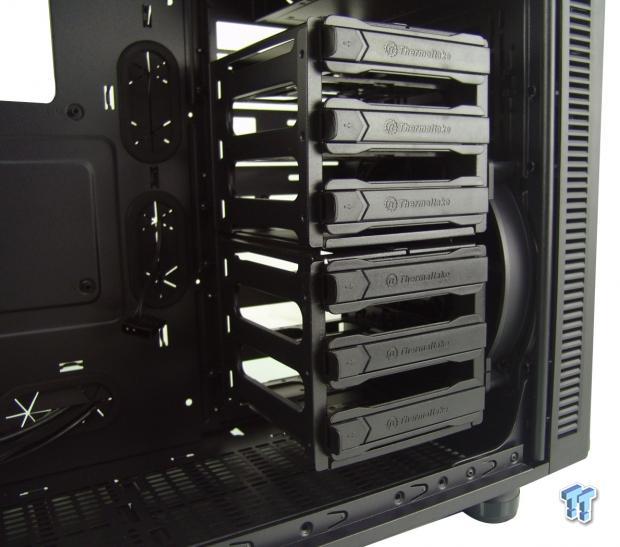
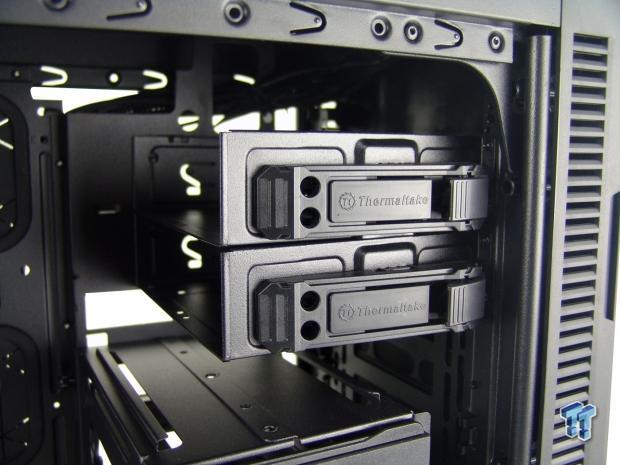
Almost free standing, if not for a few thumbscrews into the motherboard tray plate of the chassis, these six HDD bays are just waiting to be filled with either 3.5" or 2.5" drives, as they are built to do both.
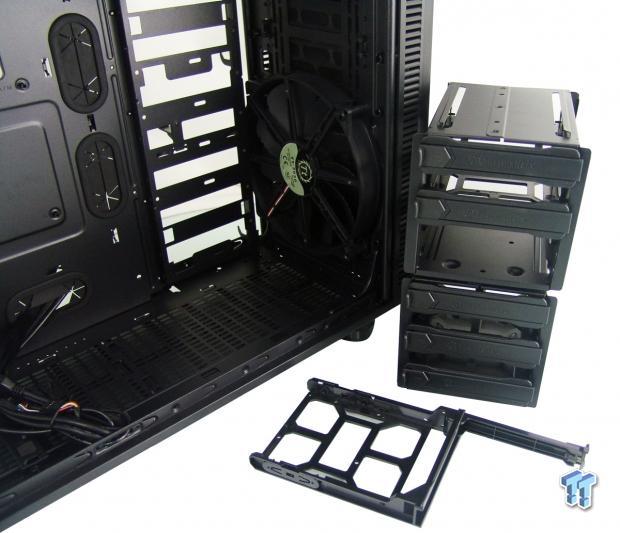
If you have plans to water cool the front of the chassis, or just don't have the need for all these drive bays, you can also remove the entire setup, or break it up and use half the bays. If you do remove the bays, keep the tray handy, as there is another place they fit in this chassis as well.
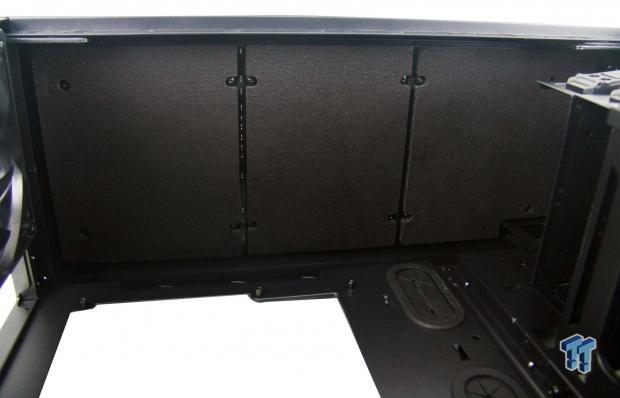
Just like the front and side panels, one look inside of the top, and it is obvious we are greeted with more sound deadening material. It is also sectioned off so that if you need only one or two of the fan locations, you can leave the unused locations covered.
Inside the Suppressor F51 Continued

The motherboard tray offers a lot of room at the top before the first row of pre-installed standoffs show up, leaving plenty of room for fans and radiator. The tray is clearly marked for ATX and Micro-ATX motherboards, has plenty of wire management with and without grommets, and has a huge CPU cooler access hole.

The floor of the chassis is completely open for ventilation, but the important features we found here are the rubberized, adjustable, support rail for the PSU, and at the back of the chassis is a dense foam gasket put in place to absorb any vibrations the PSU may cause.
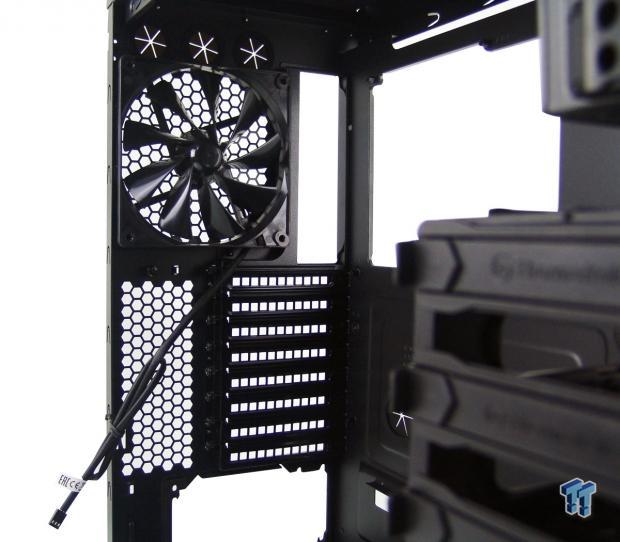
The grommets are still easily accessible above the 3-pin powered 140mm exhaust fan. We also see that the eight ventilated expansion slot covers are held in with thumbscrews, and are what will hold your cards securely in place.

Out of the box, the wire management isn't all that bad, and it also shows off the depth of near 25mm in the deepest recesses behind the tray. While we did not add the tray just yet, to the left of the motherboard tray, there are some clips that allude to the ability to clip something in there.
Moving in much closer, and since the fan controller leads are much too short to go in with the normal wiring image, we took this to show not only that it offers three fan support on the controller, but that it is powered via a Molex connection as well.
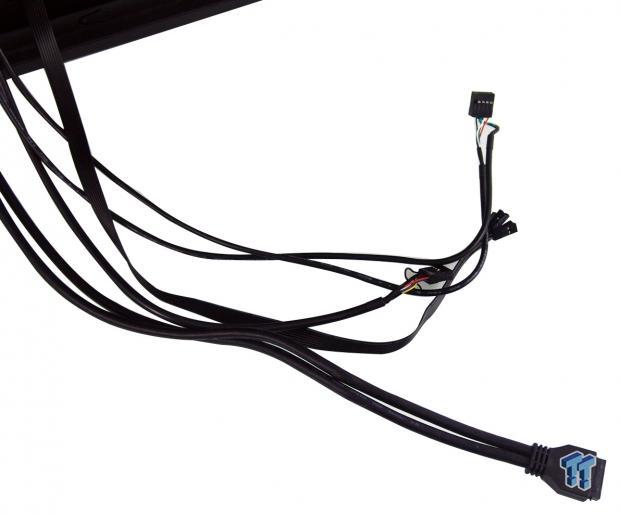
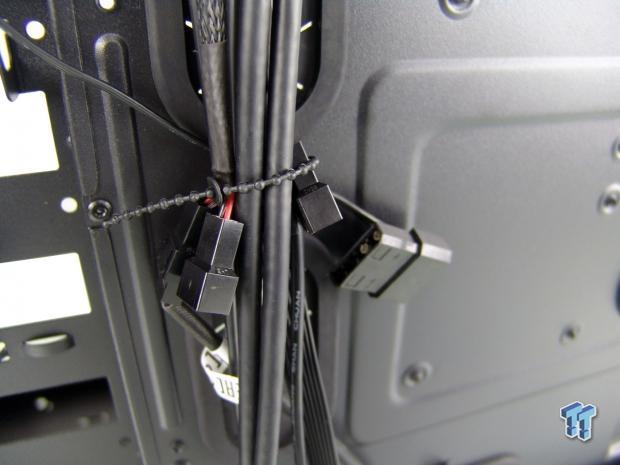
As to the rest of the wiring, it is all done with black sleeving, and here we find the front panel lighting and switch connections, HD Audio connection, USB 2.0, and native USB 3.0 connections.
Accessories and Documentation

When it comes to hardware, Thermaltake does not leave you hanging in the slightest. Here we find the PSU screws, standard fan screws, longer ones for the front of the chassis, and some standoffs and a socket to drive them in the top row. The bottom offers SSD screws, ODD screws, and then the motherboard screws.

We also received five reusable tie straps that allow you to add or remove wiring without killing the tie strap in the process. We also found a motherboard post speaker as well.
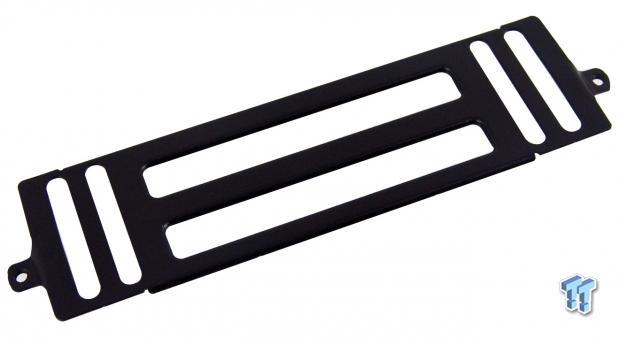
If you have plans to use a large/long radiator in the front that requires that the ODD bays be removed, this bracket installs in that location to offer solid mounting for the top of the radiator, where otherwise it would just hang in limbo there.
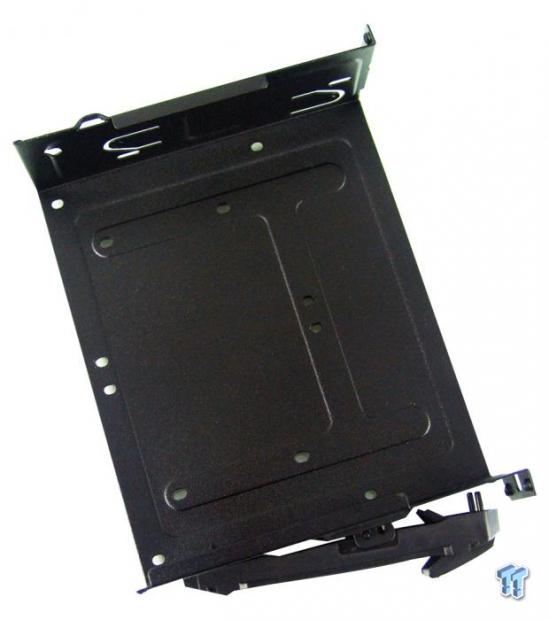
In case you were wondering what we meant when we made mention of the ODD bays being drilled for storage, well here you go. Each bay will allow for a pair of 2.5" drives, or a single 3.5" drive should you need them to be used for such reasons.
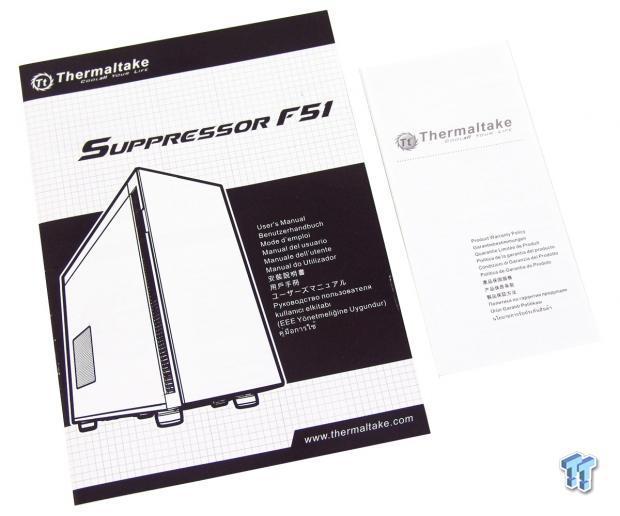
We get a top notch manual to guide you through making sure you have all the needed gear, through any hurdles the build process may bring, and even makes sure to show off what the cooling options are. We also find the warranty insert covering the fine details of the warranty.
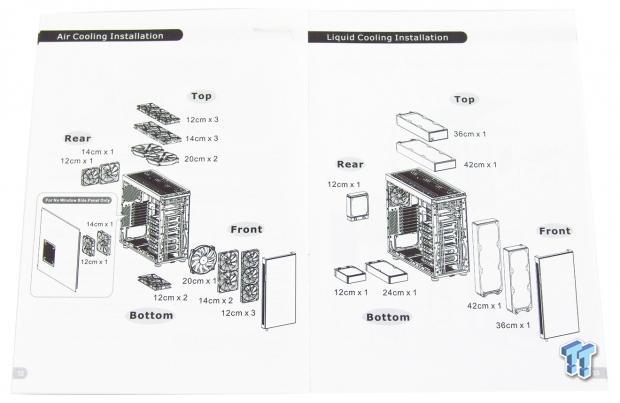
As we mentioned in the specifications section, rather than to discuss all of the options in text, we took this image to plainly explain it to anyone. To the left are all of the fan options, and to the right are all of the radiator options in the F51.
Case Build and Finished Product
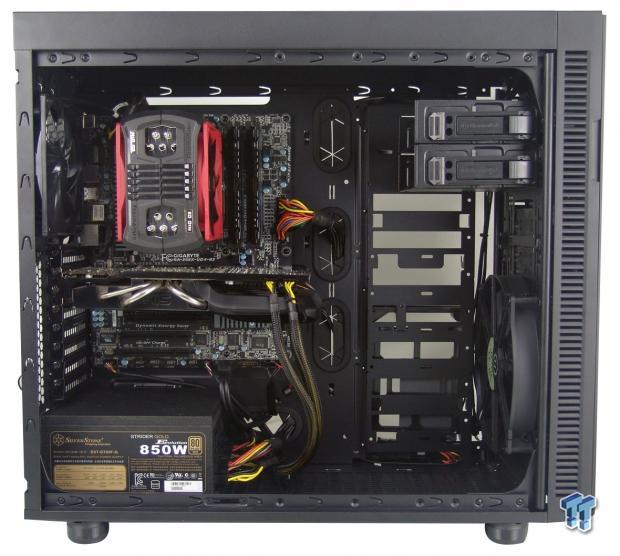
With our standard system installed, it is easy to fathom the amount of room left for LCS support. Plenty of room above the motherboard, and with the bays out of the front, there is a ton more room, and even with a decent length PSU in play, we could also still opt for cooling in the floor as well.
The back of the chassis fills out as we would expect. The dust shield snapped right in, we did have to flex the chassis ever so slightly to align the card, and the PSU fits snugly against the gasket.
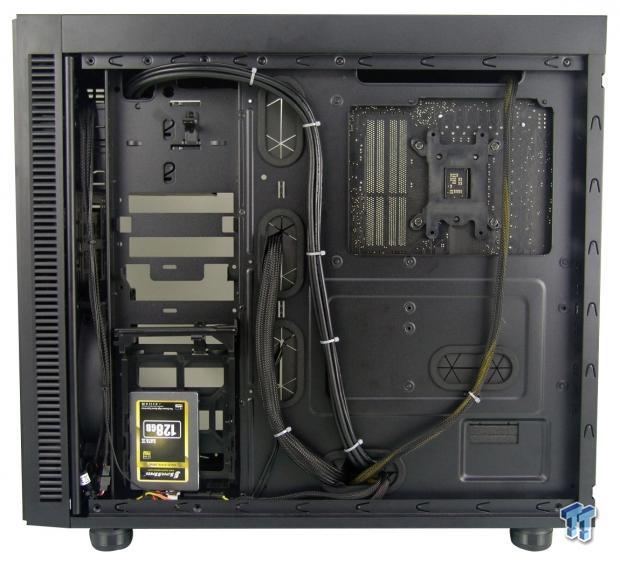
Behind the scenes, we took a bit of time to reroute the wiring and tidy things up as much as possible, and there is still plenty of room for power leads, fan hubs, or anything else like PSU extensions if desired. Also, we took the SSD, mounted it to the tray, and locked it into the lower of the two optional locations at the left.
Once everything is all bundled back together and the panels are securely locked back into the chassis, we find at this point, absolutely nothing about the aesthetics or outward design has changed, and is something we tend to like when it comes to chassis design.
Unless you are behind the chassis once it is powered on, the only way you would know it is on is by the LED backlit ring around the power button shown here. The light to the left also should illuminate, but we missed it in five attempts to get it illuminated with an SSD booting the OS.
Final Thoughts
First impressions of the chassis are that it is a rock solid ox of a chassis. While a tad heavy, nothing was missed in this design. Of course, there are all of the major features we covered, but there are also all of the smaller things like thumbscrews that do not come out of the door panels, a built in wire tending bracket behind the chassis, the plethora of easily accessible filters, all inside of a mid-tower design that seems to offer more than what its space allows for.
The sound absorbing material is of course the majority of that excess weight in this design, but as it is shipped from the factory, both from the front as well as the sides, there is nothing to be heard from a foot away from the chassis, it is only when you move around to the back that we took a 34dB reading of noise from the exhaust fan. The list of goodies found in this design truly goes on and on, and would likely take us another two pages to keep on gloating about everything we found to be on point or exceeding our expectations.
The down sides of this design are very short, and even then, we can make adjustments as needed. As shipped, the 200mm fan is choked off with dual fan filters, and of course is mostly blocked by the HDD cage, allowing temperatures to get a tad warmer than we are used to seeing. However, we can always remove the bays, and also remove one of the fan filters to alleviate this, but keep in mind that this chassis is intended to have all of the cooling replaced at some point with more fans if needed, and of course water cooling. Other than that, we do wish that the front door was reversible, but hey, you can't have everything custom to the way you want it.
For the mediocre amount of money that this chassis will cost you, you are definitely getting your money's worth, down to the last penny. It is super strong, tank-like if you will, and has a sort of Fractal Design feel to the level of strength and build, which is a good thing in our opinion. We love that everything is black, no surprises of blue or anything that would make a themed build inside of it look funny, and it is definitely a chassis that will be sitting in use much longer than the warranty is good for. This is due mainly to the fact that for a mid-tower design, you get full-tower accommodations, customization to suit your needs, and is a chassis that will grow as your builds and cooling needs progress in time.
While we do droll over a lot of cases, the Thermaltake Suppressor F51 has to be the most feature rich "standard" tower design chassis that Thermaltake has released in quite some time, and if you have not been taken by the Core series, or other various offerings that Thermaltake has to offer you, now is the perfect chance to dive right in feet first, because at $119.99, you are hard pressed to come up with something as feature rich and solid as the Suppressor F51 is.
 PCCooler CPS RZ820 Display Review: a flagship-level CPU air cooler with an LCD screen
 MOAIPLAY ORA PRO G1 850W ATX 3.1 PSU Review: high efficiency and 10-year warranty for $119.99
 NZXT H6 RGB+ Compact Dual-Chamber Chassis Review
 Lian Li HYDROSHIFT II 360P OLED Curved Liquid CPU Cooler Review
 ID-Cooling FROZN A620 SLK CPU Cooler Review
 The Legend of Zelda: Ocarina of Time fan remake for PC no longer in development
 Epic Games Store is being rebuilt to deliver up to 6.5X faster performance
 Anthropic says blocking China from Claude cost it hundreds of millions
 Microsoft adds 'Xbox Handheld' as new platform for Xbox, joining consoles and PC
 Diablo IV and Lord of Hatred DLC soft confirmed for the Nintendo Switch 2
 NVIDIA's AI agents taught robots to install GPUs into motherboards without any human help
 Another AMD AM5 CPU has reportedly swelled and died, this time a Ryzen 9 9900X less than a year old
 Valve just told Half-Life 3 dataminers it knows exactly what they are doing with new Dota 2 variable name
 Destiny 2 situation not result of Sony revenge plot, decisions are entirely financial
 Speed Racer (2008) 4K Ultra HD Blu-ray Review: a stunning remaster of the cult classic
 Navman MiVue Smart True 4K Surround Dashcam Review - Seeing In All Directions At Once
 IQUNIX Magi96 Pro Aluminum Low Profile Mechanical Keyboard Review - Premium Build, Satisfying Sound
 Asetek Forte S-Series Racing Simulator Bundle Review
 Razer Pro Type Ergo Wireless Split Ergonomic Keyboard Review - Built for Comfort and Support
 ASUS ROG Strix Morph 96 Wireless Gaming Keyboard Review - Great Performance, More Affordable
 SAPPHIRE Radeon RX 9070 GRE PULSE OC Review - A New 1440p Challenger Has Arrived
 I stopped Windows 11 notifications from interrupting me with Do Not Disturb, Focus, and a priority list
 I read the Windows Backup app screen carefully, and it does not back up what most people think
 Low Sound Volume on Windows 11? How to fix audio issues and restore normal volume
 8 Critical Warning Signs You Should Never Ignore in Windows 11
 This Windows security feature protects Documents from ransomware, but it is off by default
 Windows 11 already has a voice typing tool, and it is the one most people are not using
 Quick Assist is the only remote-support tool I open when a relative calls about their PC
 The PowerToys utilities I keep enabled on every Windows 11 PC, and the ones I turned off within a week
 TweakTown's Best of Computex 2026 Awards - The Best Hardware, Gaming Gear, and AI