


Our Verdict
Introduction, Specifications, and Pricing

Since we were sent the new H series coolers, Cryorig is back on our radar, and we are playing a bit of catch-up with a couple of their previously released designs as well. One of the two coolers we are looking at from Cryorig's recent past is a sleek C-style cooler that affords users a different way of looking at cooling the processor. Tower-style coolers tend to keep air flowing parallel to the motherboard, not truly being blown at anything other than the cooler, and using such a cooler could lead to higher memory and motherboard phase temperatures. One way of combating that issue is to employ the services of a C-style cooler. With a C-style cooler, the fins run parallel to the motherboard, and the fan blows down onto the CPU cooler, adding much more airflow to the motherboard and components close to or under this cooler.
In our time reviewing coolers at TweakTown, we have seen quite a few C-style cooler designs from most of the manufacturers out there, both in high-end coolers and in more economically friendly solutions as well. One thing we can say about this version of the C-style cooler right out of the gate is that we have never seen another that is as dressed up and as aesthetically pleasing as this one. On the cooler we are reviewing today, we have an attractive mixture of grey frame and black blades on the fans, white plastic shrouds, and even multi-section fins. This should give you some idea of the treatment this cooler received during the design phase.
The CPU cooler in question is the Cryorig C1. The Cryorig C1 offers a wide breadth across the motherboard to enhance surface area cooling, and also uses a thin fan to keep the overall height as low as possible for cases that do not offer the space needed for a typical tower design. Of course, when choosing a design like this, things like motherboard mounting, or the types of RAM that can be used under it come into play, but let's see what this cooler is all about before we jump to any conclusions.

In the circles across the top of the chart, we find the sockets that are compatible with this cooler. The socket compatibility for the Cryorig C1 goes back to LGA775 on the Intel side, and AM2 on the AMD side, covering all sockets since. Just below that we find four renderings of the cooler and the fan. Here we find that the C1 measures in at 144.5mm long, 140mm wide, and stands 74mm in height, and that is with the fan included. One other thing that last rendering shows is that if you plan to use this cooler, it will cover your RAM, and they do at least show us that the limit there is 42mm.
Continuing on with the text below the RAM limitations, we see that this cooler weighs in at 628 grams all told. We also see there are six 6mm heat pipes, but the renderings don't exactly show that the pipes run through two fin stacks and not just the obvious larger one. We do like that they show each of the 35 aluminum fins are 0.4mm in thickness, and keep a spacing of 1.8mm between them. The last bit we need to cover here is that the base and pipes are made from C1100 pure copper, but are also nickel plated once assembled to help fight oxidation and keep the orange color of the copper from clashing with the rest of the sleek theme of this Cryorig cooler.
As for the fan, we are given the Cryorig XT140, 140mm fan to cool the fins of the C1. This fan is only 13mm thick, but it can attain speeds of 1300 RPM, delivering 24 dB(A) of noise. Considering the thickness, and the somewhat limited RPM maximum, we are pleased to see that they have rated this fan to produce 65 CFM, and it is also able to deliver 1.49 mmH2O of static pressure at full speed.
In terms of availability, locating the Cryorig C1 is sort of a chore. While a few locations do show listings for the Cryorig C1, it seems only two locations have stock to back their listings. One of these valid listings can be found at Newegg.com with a listed price of $64.99 with free shipping available. We also found two listings at Amazon.com; one of them showed no stock and no pricing, and the other claims they have one in stock, but it will cost $219 to obtain it. Of course, nobody in their right mind would pay that, and this listing is not going to affect our opinion of this cooler. However, if people are charging that sort of price it is because they think they own a rainbow-coated unicorn, which should give you an idea of how slim the availability is out there. Considering the Newegg listing, we feel the pricing is fair, although it is a bit on the high side; but once again, let's see how things pan out in the testing phase before we pass our final judgment.
Our Latest CPU Air Coolers Review Coverage
Packaging
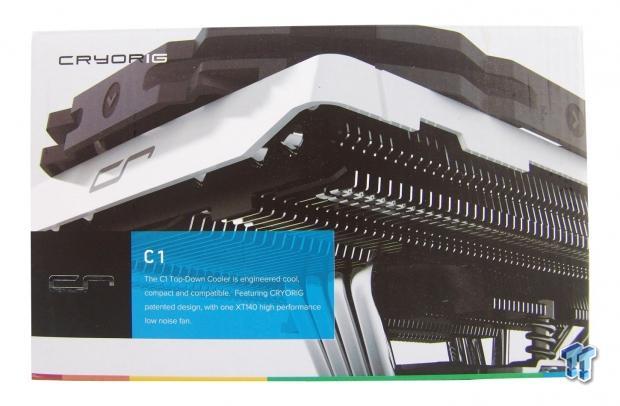
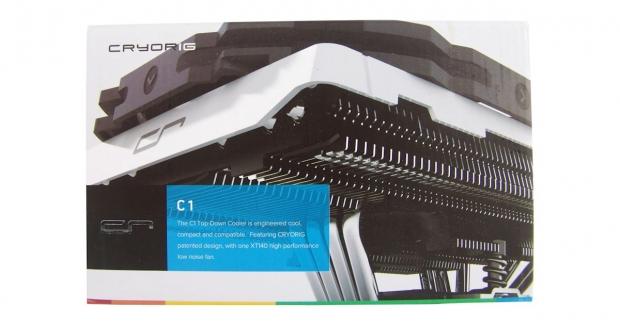
On a white backdrop, we get very up close and personal with the C1 image used on the front of the box. We find the company name at the top left corner, and we find their logo in the black section below. In the bright blue box at the bottom, Cryorig offers the cooler naming, a bit about the design, and some information on the included fan.
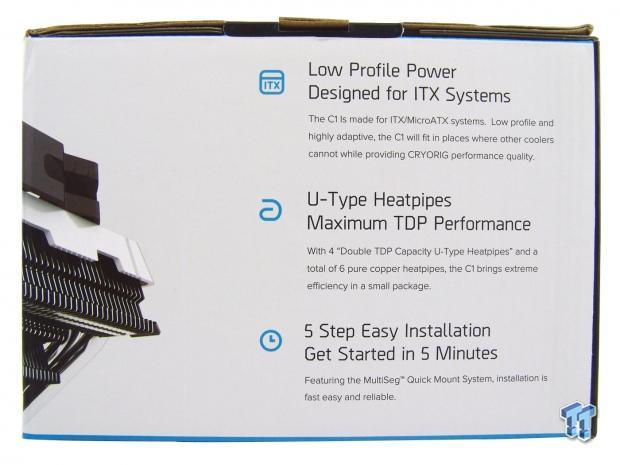
As the image of the C1 makes its way around to the right side of the box, we see that Cryorig uses the larger white section to cover the low-profile design, and that it is made with ITX systems in mind. They also cover the U-shaped pipes to make the cooler more efficient, and this cooler can be installed in five minutes or less.
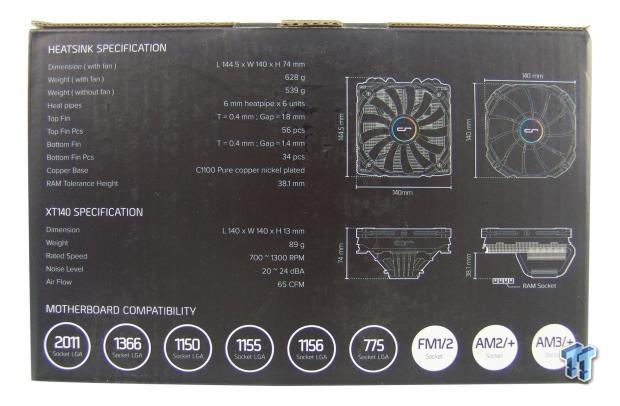
We find a solid black panel on the back of the packaging. This panel is used with the white text to show the socket compatibility and specifications we covered on the last page.
The last panel is also black, and there are lines that run to a rendering of the C1 cooler. On top of this panel is the chromed C1 moniker for the cooler inside of the box.

As with all Cryorig boxes, almost immediately upon opening the box there is a reminder to the customer to register this cooler. Registering this cooler not only extends the warranty for three additional years, but it makes you eligible for other goodies as well.
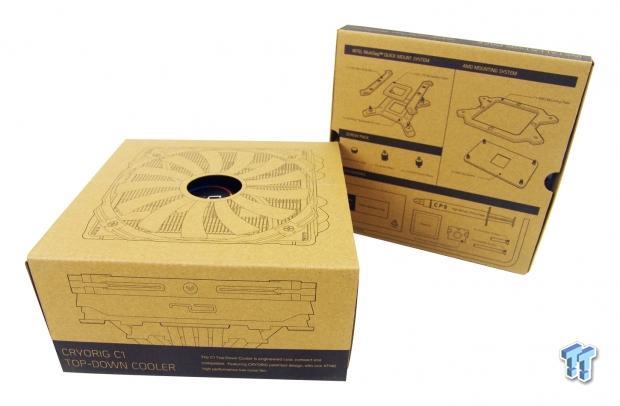
There are two boxes to remove from the inside of the packaging we just showed. One of the boxes is thinner and has all the hardware inside of it; the other box is larger and contains the fan and cooler. As for our sample, the packaging worked as intended, and our Cryorig C1 got to our door without a scratch.
Cryorig C1 CPU Cooler
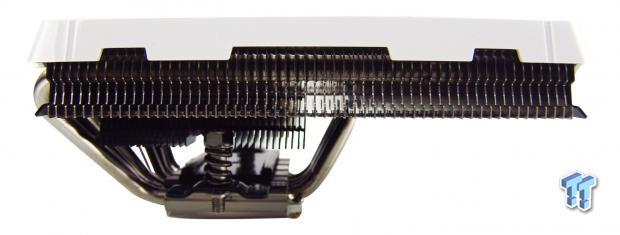
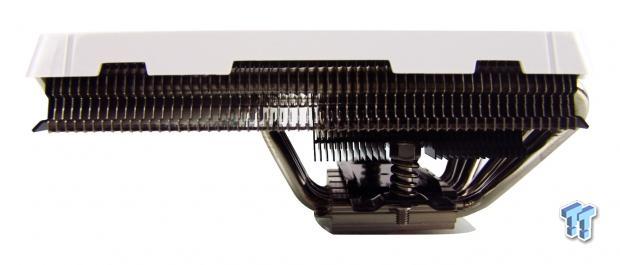
Beginning with this side of the C1, we see that there is a white plastic shroud used at the top of the fins, and we can also see the fins sticking out below it. The cross bar for mounting the cooler is already on the base, and the fins have holes to allow for easy mounting.
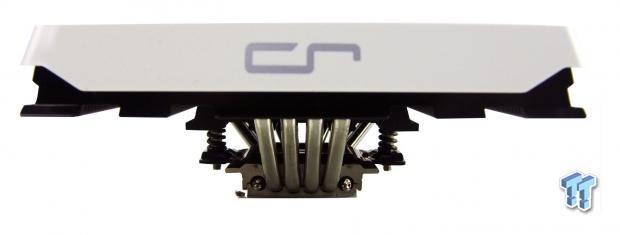
Here is a view of the front of the cooler. The shroud has the "cr" logo painted on it in silver, and at this angle the view of the fins shows they are black. Just under the fins we can also see that the pipes are very close together on this side, but we will discuss that in greater detail later.
Looking at the C1 from the opposing side, we find a mirror image of what the other side offered us. The only thing left to cover from this angle is that there is a partial view of the second cooler that hides under the larger main section.
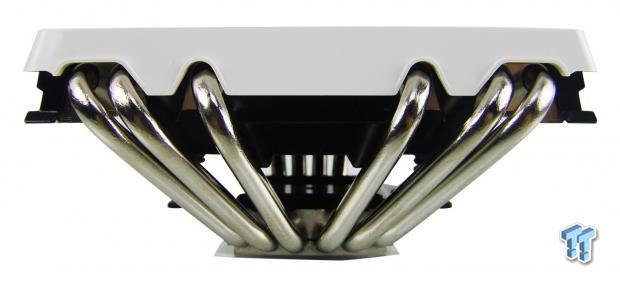
On this end of the cooler, the shroud goes further down this side than the other sides. Here the shroud goes around the heat pipes. The spacing for the pipes is much wider here, as they spread the heat load through the main section of fins.
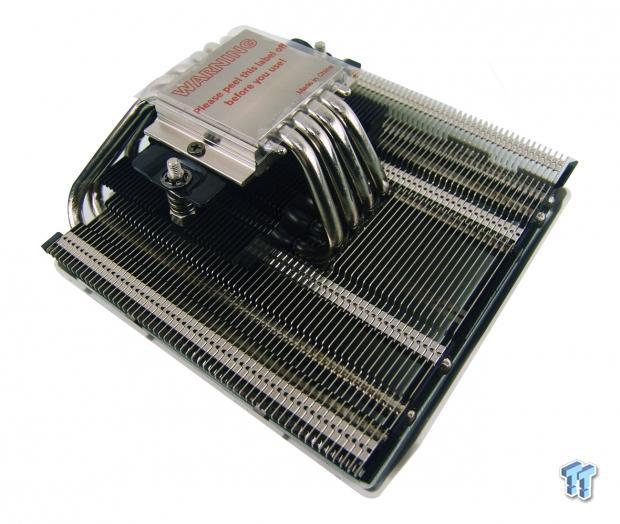
After flipping the C1 on its back, we see that there are plenty of support tabs in the fin array to keep the spacing correct without blocking much of the air flow. We also see that the base of the cooler is protected by a sticker, and you will need to remove the sticker prior to installation.
Now let's discuss why the pipes on the longer side have to be kept so close together. The pipes are set up this way due to the smaller all-black set of fins that (along with the U-shaped design of the fins) greatly increases the surface area that can be cooled at one time. Hopefully this set-up increases the efficiency of this cooler over other coolers of its type.
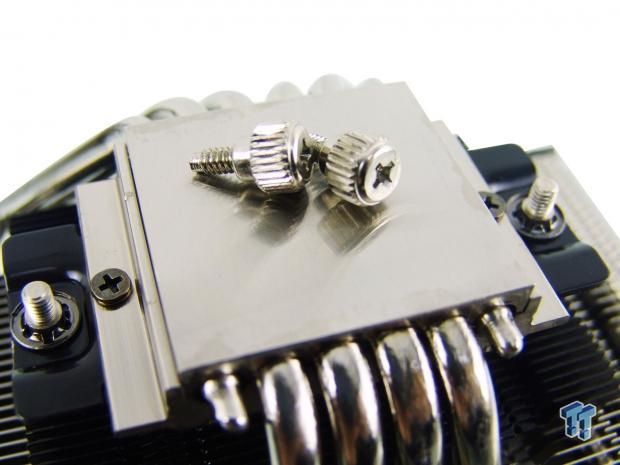
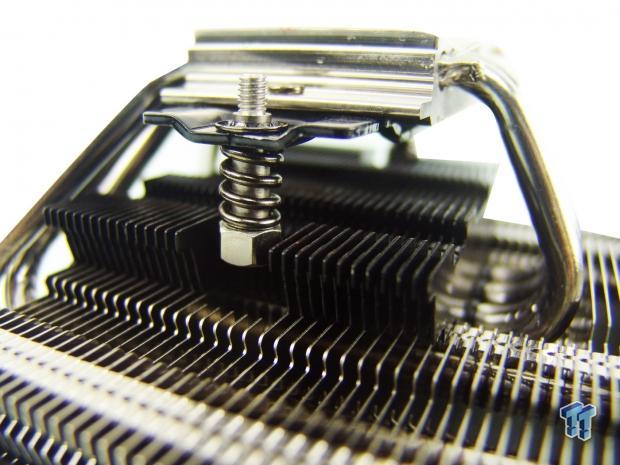
The base of the cooler has defined milling marks, as we can see in the reflection of the thumbscrews on the base. It is also slightly convex in the center with just a slight bit of deviation near the edges.

For those who are eager to see what the C1 looks like with the fan installed, we jumped ahead a bit to put the fan in place. All told, coming in a 74mm in height does make this cooler a great option for SFF chassis designs, and it will provide any motherboard with a wide cooling area that not only reaches the CPU, but the surrounding area as well.
Accessories and Documentation
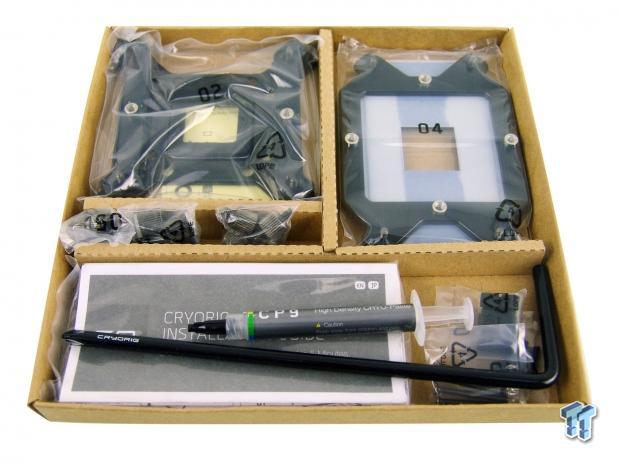
The hardware and extra bits you see here all come in the thinner box we showed earlier. All of this, except the paste and screwdriver, was sealed in plastic to ensure everything arrived intact.
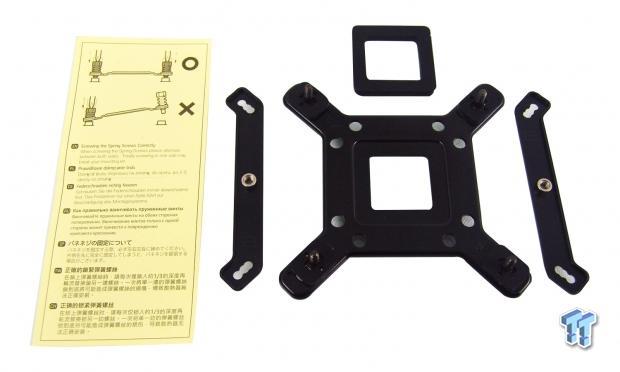
You need to use the bits shown here for LGA775, 115X, and 1366 sockets. There is the backplate with adjustable studs at each corner, top brackets, and there is a black rubber preload spacer if you are using LGA775. There is also an insert that comes along with the hardware that tells you to tighten the mounting screws evenly.
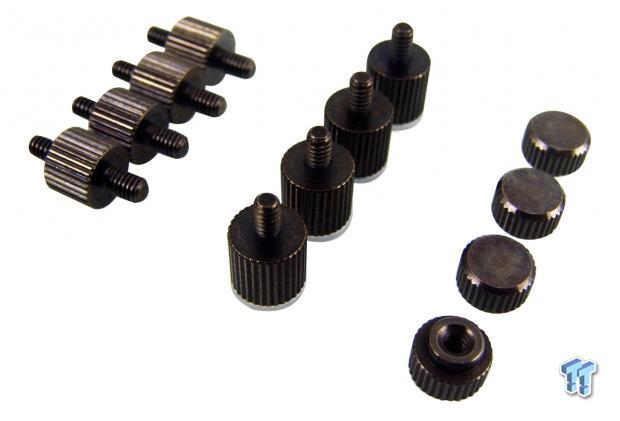
At the left, we have the set of four LGA2011 screws that will screw directly into the socket. In the middle, we have the universal standoffs with isolating washers beneath them. The set of thumbscrews at the right secures the top brackets to whichever lower hardware you need to use.
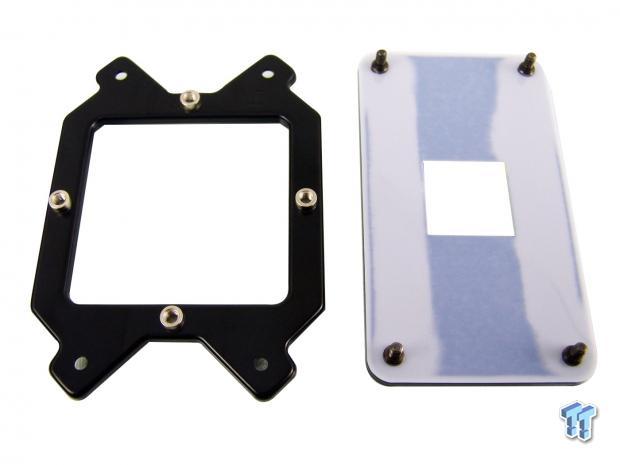
AMD users will be pleased to see that there is an included back plate, and it is well isolated with the entire surface covered in plastic. We also see that the AMD top bracket is designed so the cooler can be mounted correctly regardless of socket orientation on the board.
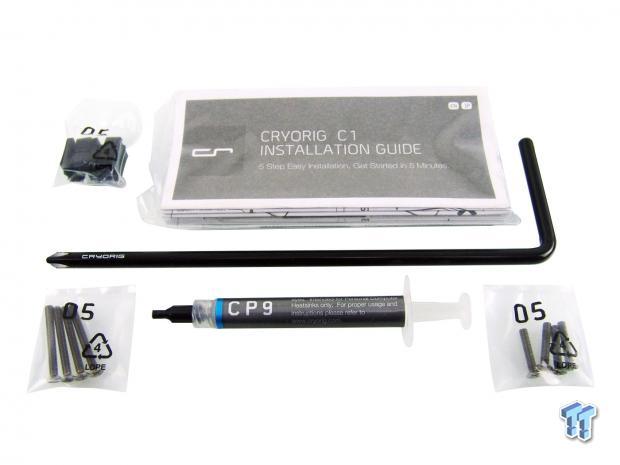
The rest of the bits and bobs in the box are shown here. First there is an unused bag of clips, which is shown off to the right of the well-written instruction sheets. There is also the ninety-degree screwdriver, a set of short screws for the stock fan, and a set of longer screws if you chose to replace the fan with a thicker version. In the middle is the tube of CP9 paste that offers enough paste for a few applications.
Installation and Finished Product
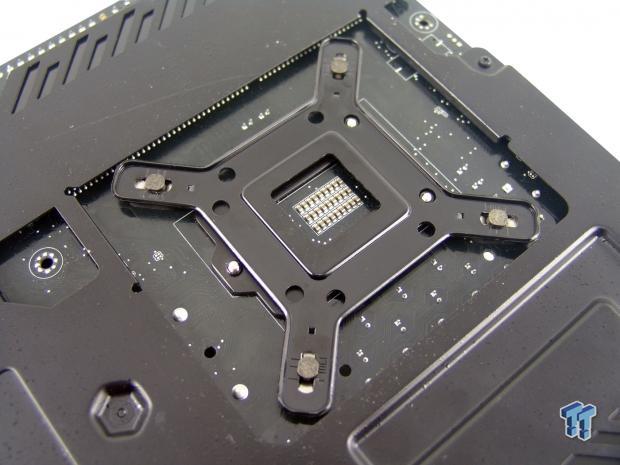
While each corner is plainly marked (A for 1366, B for 115X, and C for LGA775), we found them to be very stiff and hard to move. While that sounds great in principle, it was difficult to set the B slots because the force needed to move them would invariably take you from A to C, and back again almost every time. Although, with all sides drilled the same, the orientation of this back plate is of no concern.
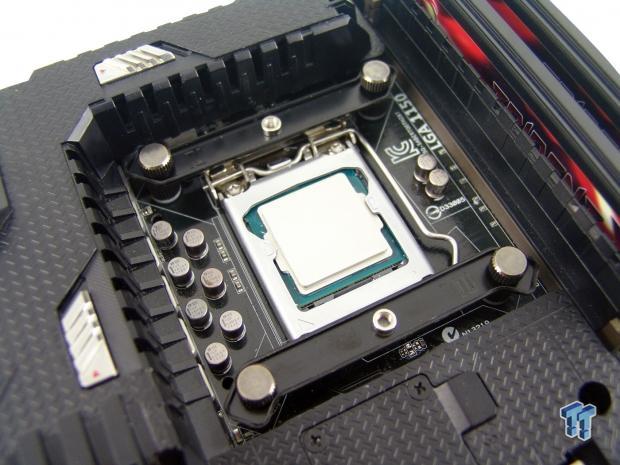
To get to this point, we flipped the motherboard, and attached the standoffs to the backplate. After installing the standoffs, you can install the top brackets, angled inward, and secure them with the thumbscrews. Also, to help orient the brackets, there is a sticker at the bottom of the threaded holes to let you know they need to be flipped if you cannot see threads to screw the cooler into.
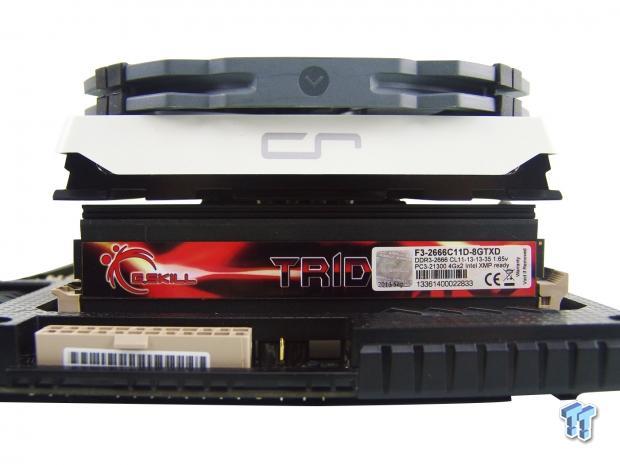
After sliding the screwdriver through the fins to mount the cooler to the board, we secured the fan above it. With the cooler now installed and viewed from the angle we typically see our setup at, you can see we did have to lose the flame tips on this memory.
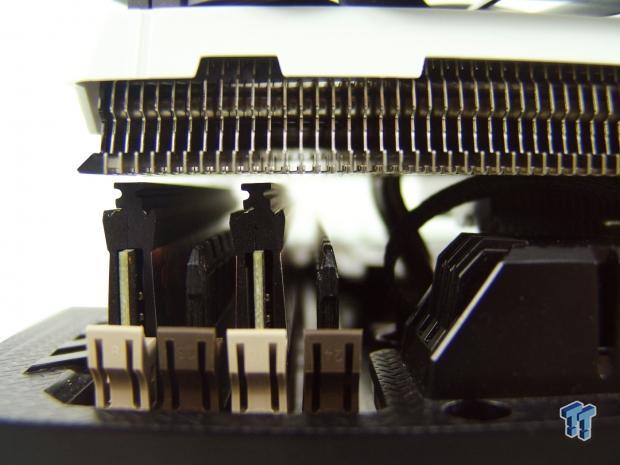
We know it cleared above the RAM, but we also find the heat pipes that wrap back into the cooler are cleared to the right. We may only have a few millimeters of daylight, but that is all you need to get this cooler mounted.
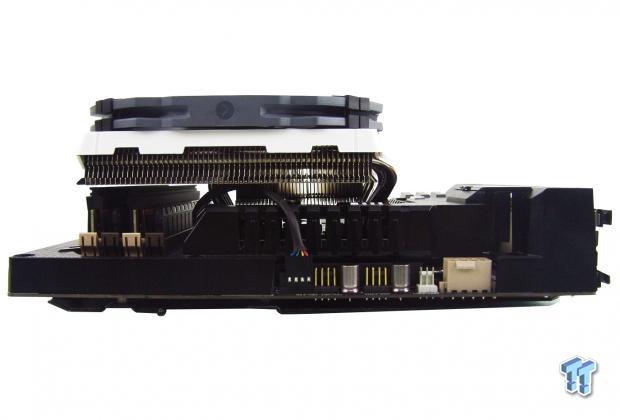
For our best use with this motherboard, we have the shorter side of the cooler with the exposed heat pipes facing toward the rear I/O. We did try other orientations, but we found the pipes either got in the way above the CPU, or below the CPU. While the cooler will install in the reverse of this orientation, we chose this orientation because it will definitely lend to cooler memory as well.
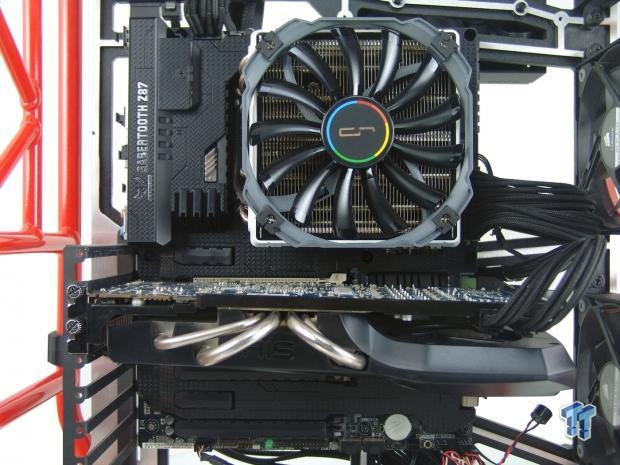
While two of the screws on our ATX motherboard closest to the socket are covered, this cooler is designed for ITX systems, and the screws will be easier to access with the cooler in play on an ITX motherboard. We also see that the cooler just clears the PCI-e slot on this board, but this is something to consider on an ITX motherboard with low socket placement.
Test System Setup, Thermal Tests and Noise Results
Test System Setup
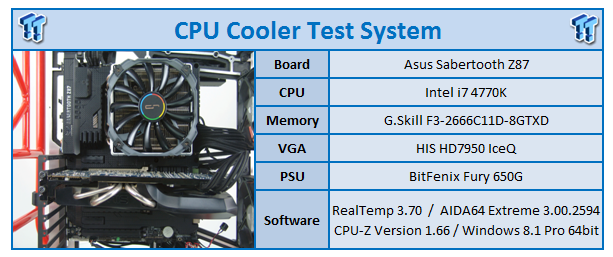
I would first like to thank ASUS, InWin, Patriot, and Fractal Design for supplying products for me to test with.
To see our testing methodology, and to find out what goes into making our charts, please refer to our CPU Cooler Testing and Methodology article for that information.
Thermal Results
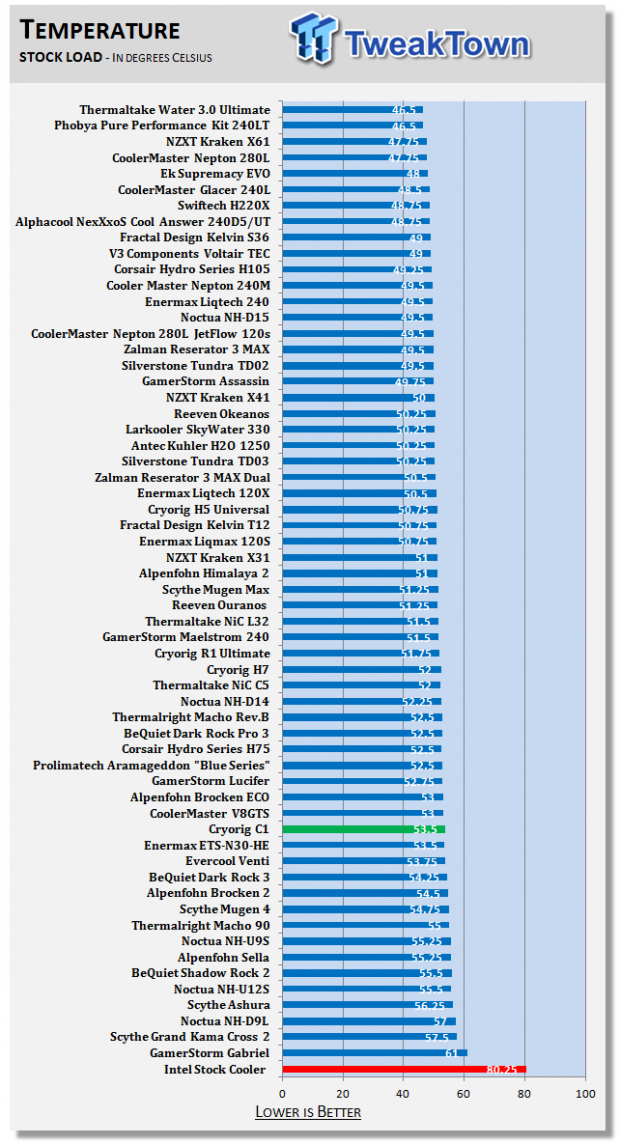
As we started off with the stock settings, our processor was idling at 27 degrees. Once we loaded up the test, the temperatures climbed up to 53.5 degrees. Considering all of the surface area, we expected this cooler to perform a bit better, but the fan included is fairly limited in what it can accomplish.
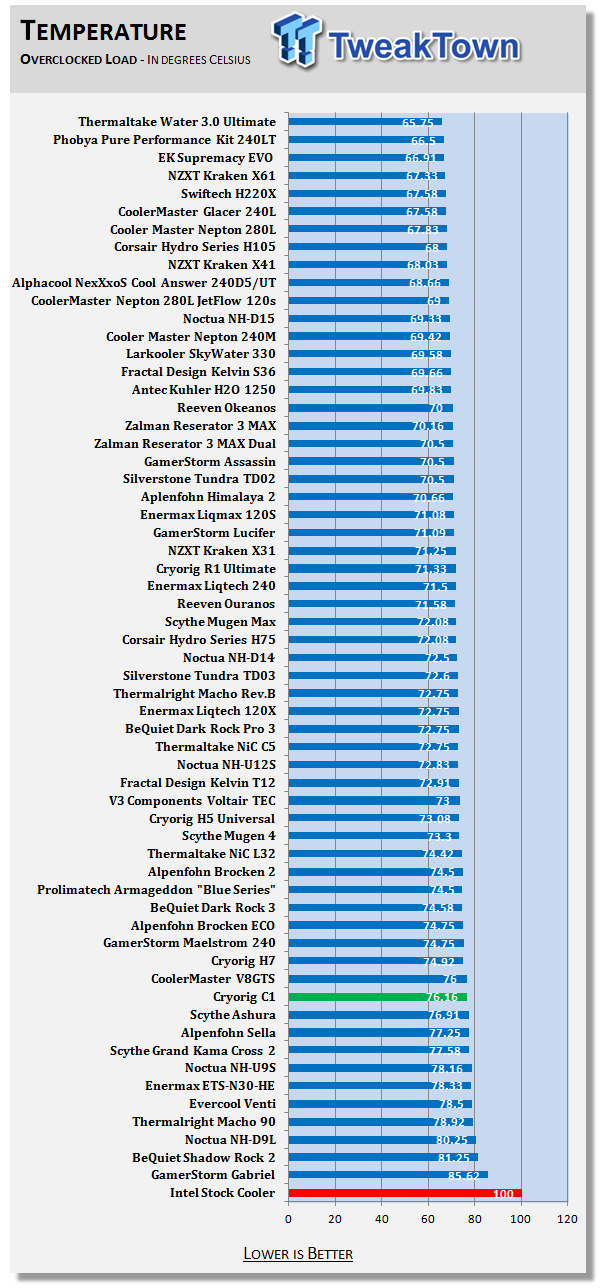
Once we applied the overclock, our idle temperature only increased by half of a degree. When we let the testing suite do its thing, we found the C1 cooler was able to offer a 76.16 degree result. Again, not what we had expected, but the mid-seventies is plenty cool enough, and you would not need to worry about an overclocked processor at these temperatures.
Noise Level Results
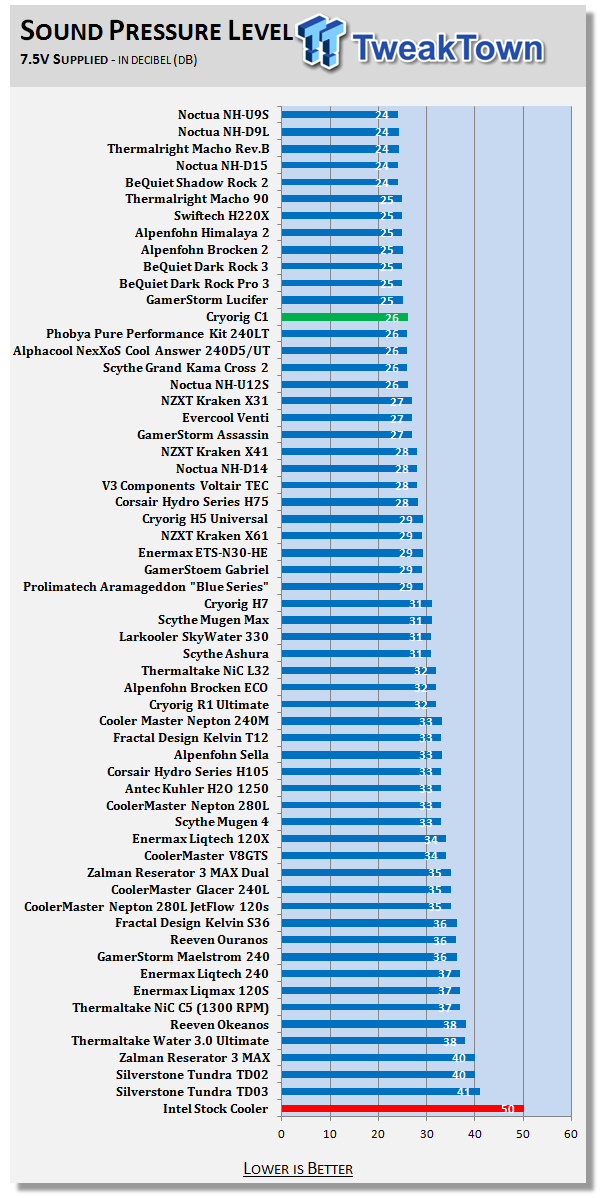
With the 140mm fan spinning at 1110 RPM, with just 7.5V running through it, there was only 26 dB of noise emitted.
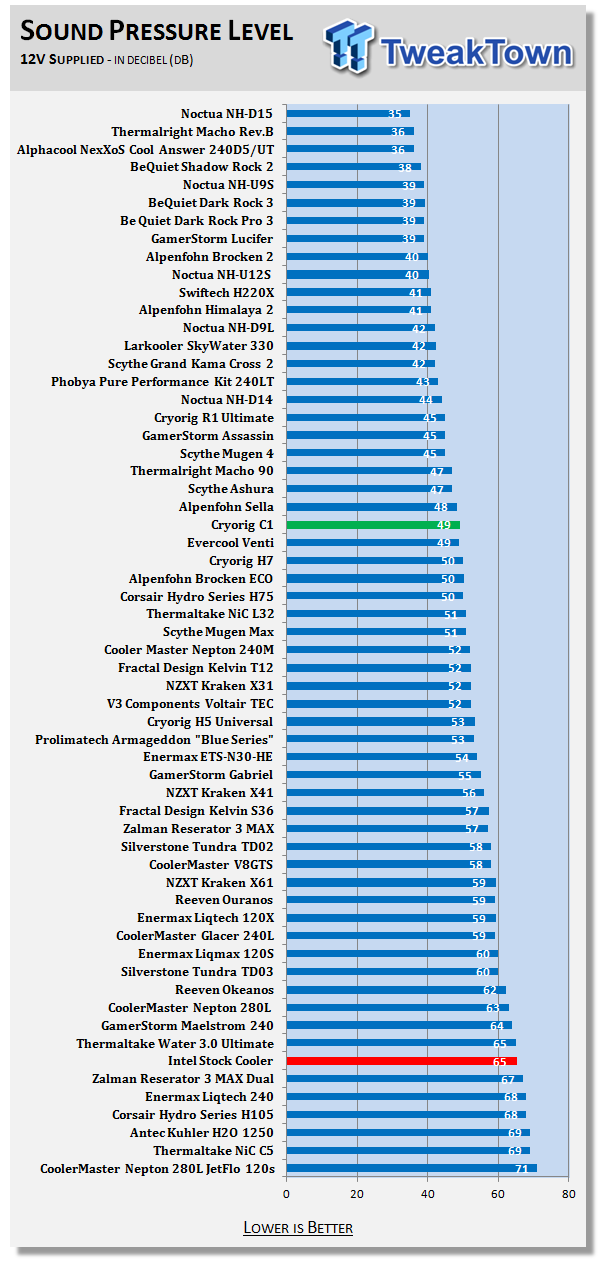
With the fan spinning at 1440 RPM (over spec, but within margin of error), our meter showed that the fan was emitting 49 dB of noise into the office.
Final Thoughts
There is a lot to like about the Cryorig C1 cooler. This cooler is much more dressed up than most other coolers, but it is still very classy looking. The low-profile design lends its use to many systems where tower designs and even some smaller coolers may not fit. Of course, there is the slight hindrance of 42mm of memory clearance; however, that is the only real concern with this cooler on a functionality level, and it is not that big of a deal. We like the hardware because it is strong, secure, and easy to use overall. This cooler really can be installed in under five minutes. The Cryorig C1 is also more than capable of taming our CPU, even with an overclock, and the amount of noise delivered while doing so is not all that bad either.
This isn't to say this cooler is off the hook for anything we did not like. Again, memory clearance could be an issue if it is not planned for properly. However, if you do take the time to plan for clearance issues, you can easily compensate for the clearance limitations of this cooler. Additionally, even though the cooler looks great and has a solid construction, we feel the pricing is a tad high for the level of performance it offers. Considering the coolers that are keeping this company in the charts, there are more affordable solutions to be had, but they may not fit in the niche for which this cooler was intended. In that respect, compared to the other compact designs, the performance is on par, so perhaps we just expected more from Cryorig.
Overall, the Cryorig C1 is pretty impressive for a C-style cooler of this stature. Even with pricing set to $64.99 for a cooler we feel would be better suited for the $50 range, for those who need a cooler like the Cryorig C1, many of the other coolers on our charts simply won't do. Even when it comes to coolers from Scythe and Noctua who have been making C-style coolers for what seems like forever, most of their designs were not intended specifically for ITX system users, nor are they designed to fit in places that this Cryorig C1 can fit.
So, while we do feel the Cryorig C1 only suits the needs of a niche market, we feel it is up to the task it is required for, and that all we really want in a cooler for ITX based systems. Cryorig has the answer to ITX cooling all wrapped up in this C1 cooler.
 Lian Li B4-mATX Review: a compact mATX SFF case with excellent airflow and premium features
 Ocypus Sigma F36 BK ARGB Cooling Fan Review: high airflow and unified design in one frame
 PCCooler CPS RZ820 Display Review: a flagship-level CPU air cooler with an LCD screen
 MOAIPLAY ORA PRO G1 850W ATX 3.1 PSU Review: high efficiency and 10-year warranty for $119.99
 NZXT H6 RGB+ Compact Dual-Chamber Chassis Review
 Anthropic gives thoughts on open-weights models, especially those from China
 Xbox explains why its massive outage locked players out of games they owned
 Take-Two doubles down on GTA 6 release date, expects net bookings to increase by 22%
 Lenovo's Legion C700 is a thin Android handheld built just for local game streaming
 YouTube Premium subscribers in the US will get Peacock Premium bundled for free starting in 2027
 Redditor turns Steam Deck into a spike-covered, taser-equipped fortress to scare off family
 Apple delays its smart glasses to build privacy features rivals don't have
 Xbox console gamers get free copies of Ubisoft titles on PC
 Xbox outage turns ugly as players use Xbox App glitch to download and play titles for free
 Xbox servers go down just days after PlayStation outage, giving us a glimpse into our digital-only future
 Biwin M560 2TB SSD Review - Best Overall Retail-Ready DRAMless SSD
 Logitech G512 X 98 Analog Mechanical Gaming Keyboard Review - An Innovative Two-in-One
 Thrustmaster T.Flight HOTAS 5 MSFS Edition Review
 SteelSeries Arctis Nova Pro Omni Wireless Headset Review - One Headset to Rule Them All
 SteelSeries Arctis Nova 7 Wireless Gen 2 Headset Review - New and Improved, But Is It Enough?
 AMD Ryzen 7 7700X3D Review - Days of Future Past
 Samsung 990 2TB SSD Review - Ninth Gen QLC at PCIe Gen4 Speeds
 ASUS ExpertBook Ultra (Panther Lake) 14" Business Laptop Review
 ASUS ROG Raikiri II Xbox Wireless Controller Review - Ready to Take Control
 MOZA FMP18 Panel Bundle Review: authentic F/A-18 Hornet cockpit controls for flight sims
 Printer Not Working in Windows? How to fix detection, print queues and drivers
 The Ultimate Guide to Personalizing Your Windows 11 Taskbar
 How to Turn Your Windows Laptop Into a Second Monitor with Miracast and Wireless Display in Minutes
 6 Mistakes to Avoid When Buying a Windows Laptop
 I capped Windows Update's bandwidth with Delivery Optimization, and my downloads stopped choking
 I use this decade-old free tool that finds files faster than Windows Search does
 I install and update most of my apps with this Windows command now, and I stopped downloading sketchy installers
 Hisense U6SF 65-inch MiniLED TV: High Performance Meets Leisurely Convenience
 I stopped digging through Windows menus after I set up this one folder
 Don't sell your Windows laptop until you do these things