


Our Verdict
Introduction, Specifications, and Pricing
Thermaltake is a company that needs absolutely no introductions, as it seems they have been in the game as long as there has been a game to be in. For some reason, when Thermaltake started, they were always viewed as a lower tier company, which is likely due to being tied to some lame brick and mortar stores in that timeframe. However, Thermaltake has always been on the ball, delivering at least one product from every lineup that was a huge hit - insert things like the Sword M, or any of the original Orb series CPU coolers. In our time as reviewers, we seen major changes in Thermaltake's team members that have led to a very forward thinking design team. Moreover, Thermaltake has definitely shaken off much, if not all of the old stereotypes associated with the Thermaltake name, and has become a brand that everyone now wants a part of to use in their day-to-day life.
Of course, we could sit here and list all of the products that fit the bill for our statement above - like the introduction of the Level 10 series of products, or any of their latest series additions for that matter - but if we did then we would be here forever. So instead, let's simplify things, and just stick with the Core series cases we were introduced to on our last trip to CES. When we saw the design then, we were impressed to see the direction taken in chassis design. Thermaltake was ready to begin pulling ahead of other chassis manufacturers with this new series. Rather than letting designs get stale and trying to beat a dead horse, the team at Thermaltake is always trying to improve upon their ideas, as was obviously seen in the Core V71 we rated so highly.
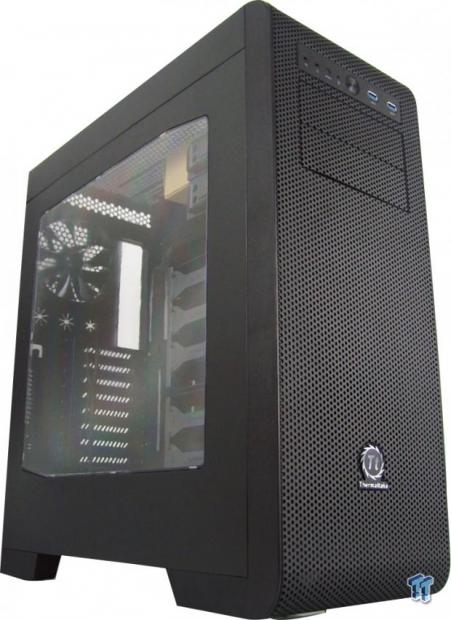
That brings us to the reason we have you here today. We had no issues with the Core V71, and there was plenty of hardware to fill it and the room to house it; in our opinion, there was no real conceivable reason not to own one. Then we realized that not everyone has the room or desire to employ a full-tower chassis in their rooms. So, for those of you who love trying to fit as much gear as physically possible into a smaller design, Thermaltake has you covered. The design we are reviewing today has almost all of the same design elements, aesthetics, and even the same level of customizability, only this time it's all wrapped up into a mid-tower design. Now, allow us to formally introduce the design in question, the Core V41, an awesome, more traditionally styled, mid-tower chassis.
As the chart below shows us, we are dealing with the Core V41, a mid-tower chassis that stands just over twenty inches in height, and weighs 17.6 pounds while empty. The Core V41 offers a large side panel window, and the rest of the exterior is comprised of black painted SPCC steel, and various components made of black ABS plastic. Of course, this design also incorporates the entire front bezel with the small, round-holed mesh, and it keeps that same traditional feel on the outside.

On the inside, we find two removable 5.25" drive bays, with six 3.5" drive bays in removable cages below. The motherboard tray will house Mini-ITX, Micro-ATX, and ATX motherboards, has a large access hole, and also offers wire management holes, but this time there are no grommets in any of them. On the floor, there are no limitations to the PSU length; however, the CPU cooler has a 170mm limitation, and the GPUs are limited to 275mm if the HDD cages are left in place. At the back of the chassis, we find plenty of passive ventilation, as well as eight expansion slots.
For a mid-tower chassis, Thermaltake has really topped off the cooling capabilities. As far as fans are concerned, the front will hold a pair of either 120mm or 140mm fans. The top has room for three 120mm fans, or two 140mm fans, and even a pair of 200mm fans, if that is what you are after. That just leaves us with the floor of the chassis, and as shipped, it will house a single 120mm fan, but after removing the drive cages, there will be room for two of them. As for the radiator support, it follows the fans in all locations. The front will house a 240mm or 280mm radiator. The top will hold a 360mm radiator, or a 280mm radiator. You can stuff a single 120mm radiator in the back of the chassis, and the floor still offers room for a 120mm or 240mm radiator as well.
As usual, we shopped around online to locate the best price. Oddly enough, Amazon has every other chassis that Thermaltake has made, but does not show the Core V41 in any fashion, so off to other locations we went. Looking at multiple locations, it seems that the current going rate to obtain the Core V41 is $89.99, and most listings also require a bit more for shipping. We like that while making the choice to go from the much larger Core V71 to this more manageable Core V41 mid-tower, you are also saving $30. Compared to the rest of the mid-tower market, $89.99 is less than that magic $100 mark; and as you will soon see, the Core V41 is well worth the cost.
Our Latest Mid-Tower Cases Review Coverage
Packaging
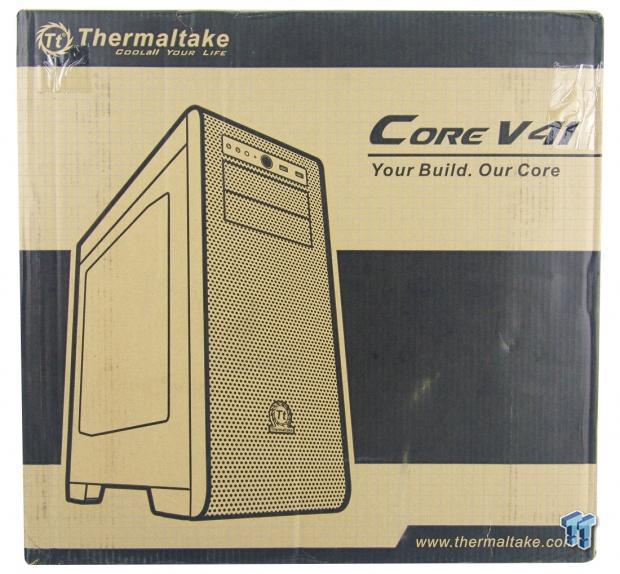
While Thermaltake usually uses a plain cardboard box and only black printing for their packaging, this time a blue grid is also applied. The front of the box offers a large rendering of the Core V41, its naming and tag line at the top, and the Thermaltake web address at the bottom.
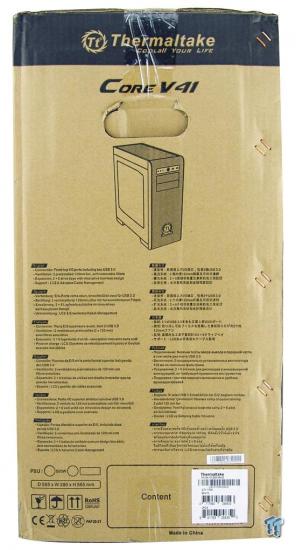
Here we find a tiny rendering of the chassis, followed by a multi-lingual section where the front I/O connectivity, the ventilation, expandability, and LCS support are covered.
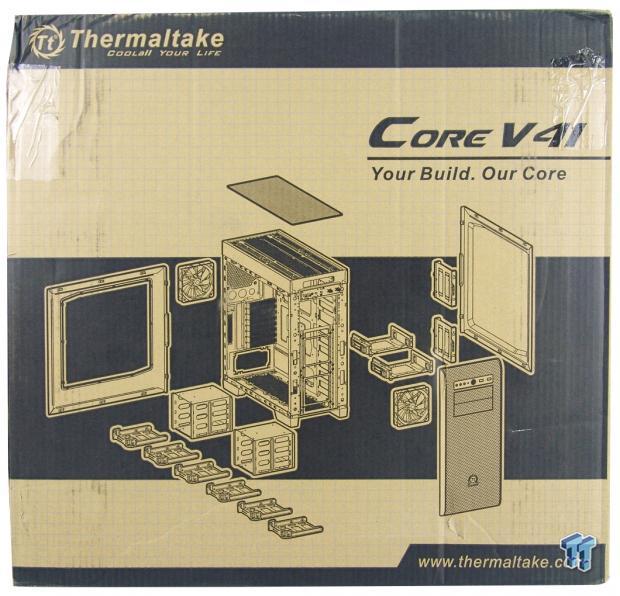
While the majority of the back panel is identical to what we found on the face of the packaging, this time the rendering provides all of the information. An exploded diagram of the Core V41 really brings everything that is possible in this design to light with one look.
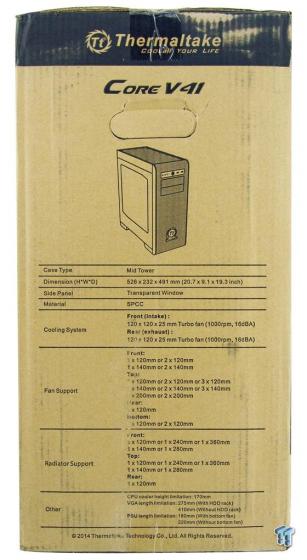
The last of the four side panels offers a specifications chart much like the one we have already discussed. The chart covers everything, even down to what fits, and the restrictions - if you want to call them that.
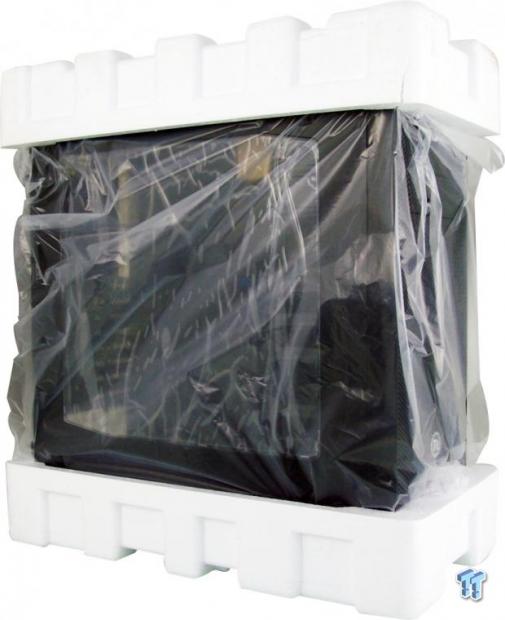
Inside of the box, we find the Core V41 wrapped in a plastic liner, and Thermaltake was sure to line both sides of the window with plastic as well. At the top and bottom, they have used thick Styrofoam caps for protection, and even with the hit taken (indicated by the visible damage on the box and the broken foam at the top), our Core V41 still showed up damage free.
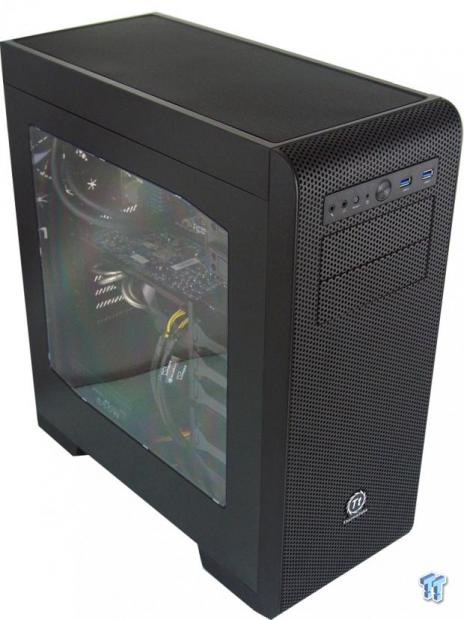
Thermaltake Core V41 Mid-Tower Chassis
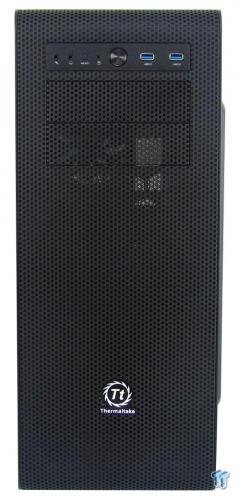
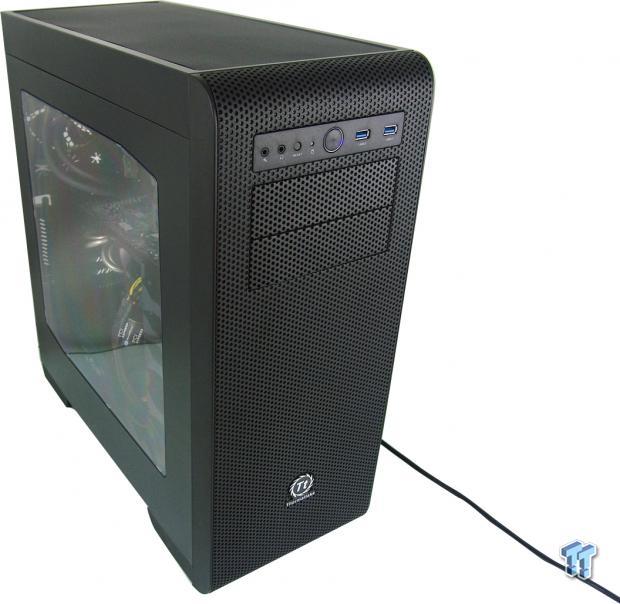
Looking the Core V41 dead in the face, we find the entire front panel is steel mesh with small, round holes to allow air through. At the top is the I/O panel, followed by two removable bay covers, and the Thermaltake name and logo near the bottom.
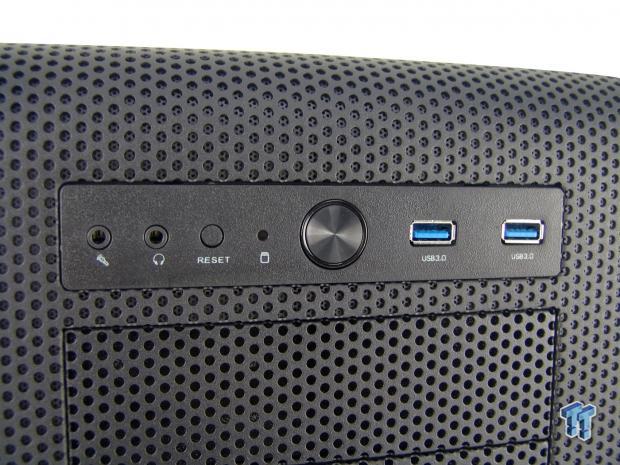
As for the I/O panel, to the left there is the microphone and headphone 3.5mm HD audio jacks, a small reset button, and a red HDD activity LED. In the center is the blue-ringed power button, and there is a pair of USB 3.0 connections at right.
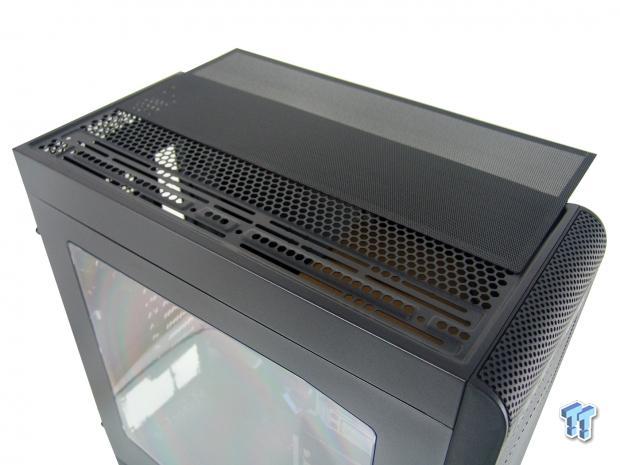
As the front curves back to meet the top, the front bezel stops, and you run into the steel top with a plastic dust filter that is held in place with magnetic strips on all sides. Under the filter, there is a large honeycomb mesh section with slots and holes to accept either spacing for radiators screws.
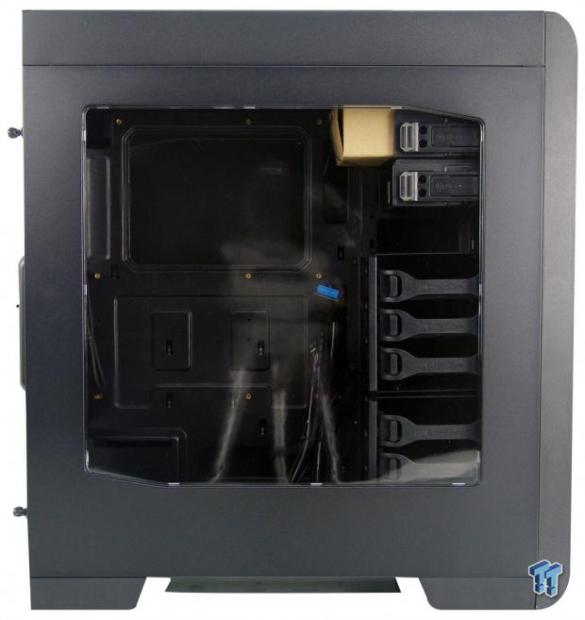
From the left of the Core V41, we find thick plastic used at the top, down the front, and even the feet at the bottom help to keep that chunky look. As for the steel side panel, the majority of it has been removed to fit this large window that offers a view of everything inside.
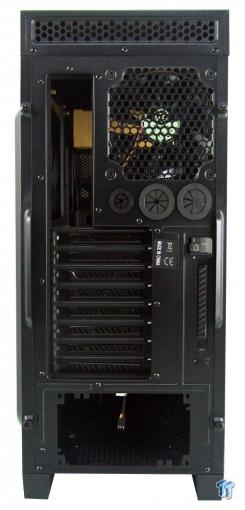
As we get to the back of the chassis, we find passive ventilation at the top, above the rear I/O, and a 120mm rear exhaust fan with water cooling holes and grommets just under it. We also see there are not just eight slots, but an 8+1 setup for a controller to run vertically. Then, of course, the PSU goes in the hole at the bottom.
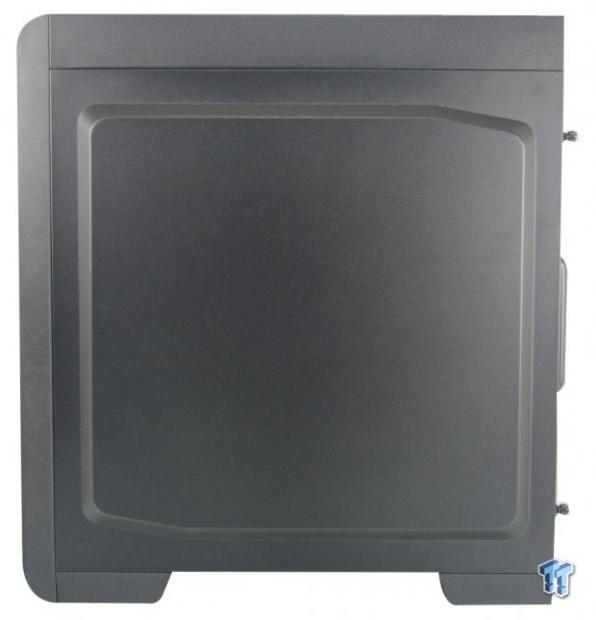
The right side of the chassis mimics the shape of the window we found on the left, but rather than just a line for styling, this panel has been bumped out by 5mm to add extra room for wiring.

Now, looking at the bottom of the Core V41, we find those chunky feet also have rubber pads for grip and protection, and the entire center is covered with a removable plastic dust filter to take care of the PSU and optional floor fans.
Inside the Core V41
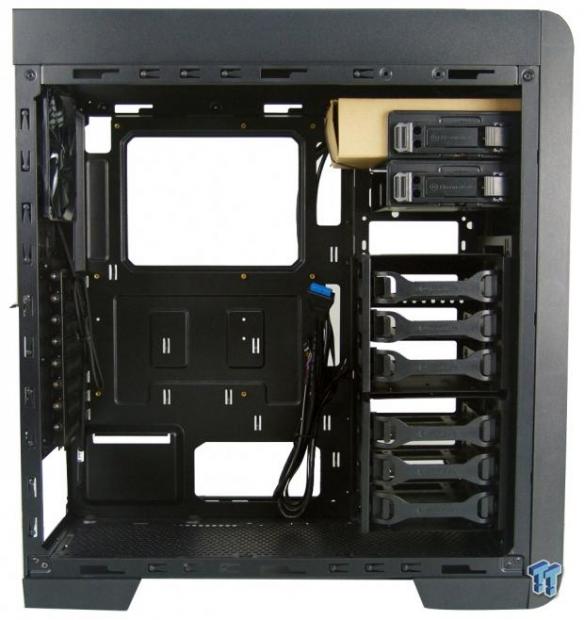
Removing the panels gives us our first full view of the interior layout. We also see that there is a large hardware box strapped into the ODD bays, and the wiring has been tied up, and run through a few holes to keep it in place for transit.
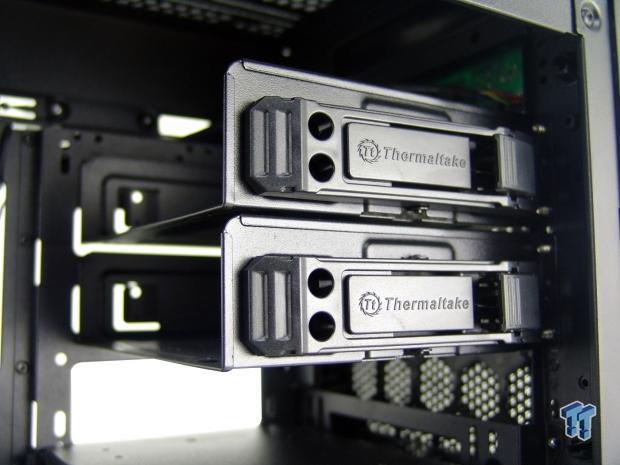
Inside the chassis at the top, we find the pair of tool-free 5.25" trays. We use "trays" rather than "bays" here, as these are three sided, completely removable, and even have thumbscrews for easy removal.

Below, still at the front of the Core V41, we run into the six 3.5" and 2.5" bays. They are split into groups of three in each cage, and these are also removable to provide more room for cooling, or you could leave half, and just have more room for video cards.
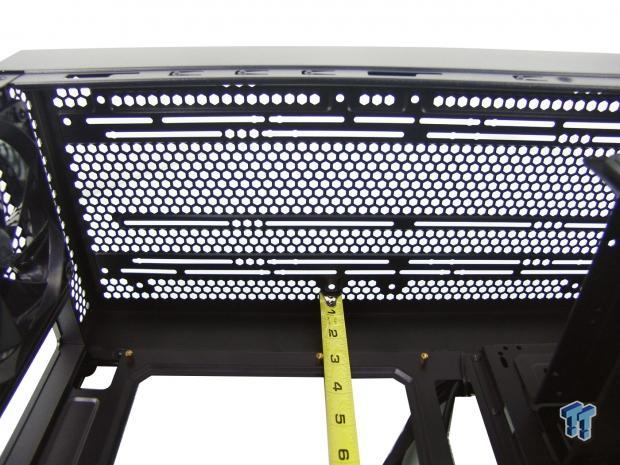
While we already showed off the top panel, with the filter now gone, you get a much better idea of the multiple layouts to accommodate almost any water cooling setup. We also see there is 2.75" from the top of the chassis to the first riser to allow for thicker radiators, or fans on both sides of a thinner one.
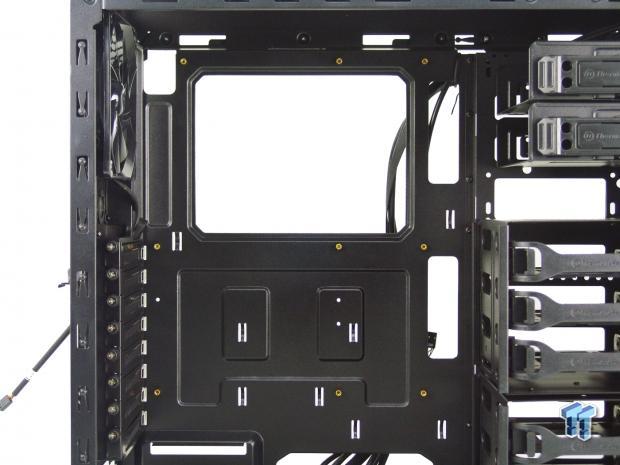
The motherboard tray will house most motherboards up to ATX, offers a very large access hole, five holes for wire management, and has eight tie points stamped in it as well. We also see that the standoffs are pre-installed to speed up the build for ATX users.
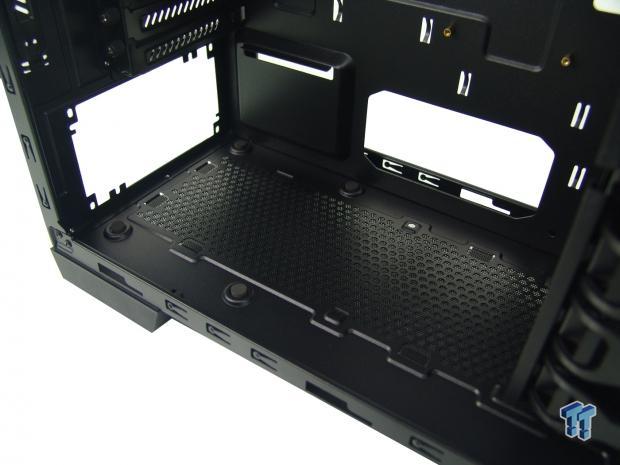
On the floor, we find rubber pads to keep the PSU high enough that the fan grill is off the floor, and there is room for a 120mm fan in front of it. Had we chosen to remove the HDD cages, there would also be another fan location available.
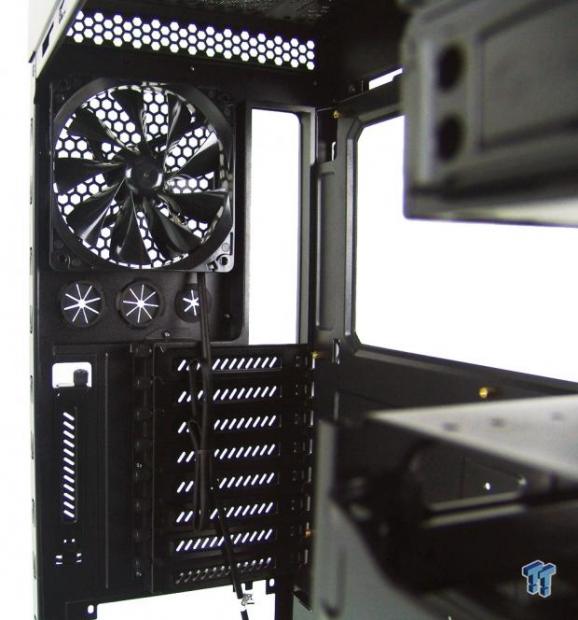
Along with the 120mm fan found at the front of the chassis, we also find a match to it in the back of the chassis as the exhaust fan. These fans deliver very little noise, and use a three-pin connection for power.
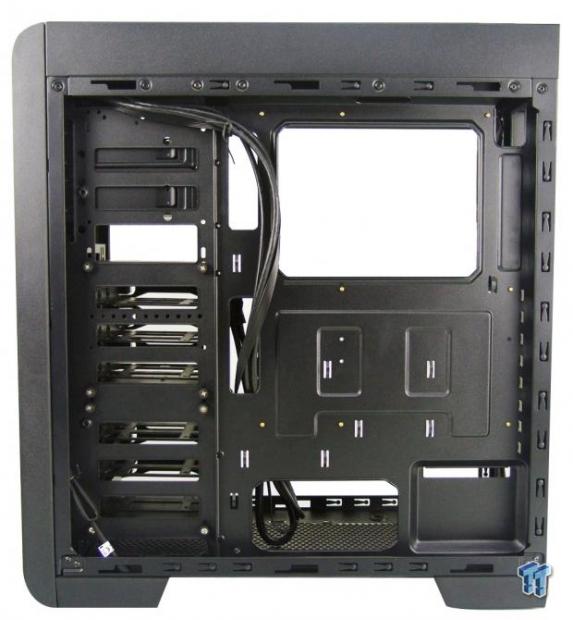
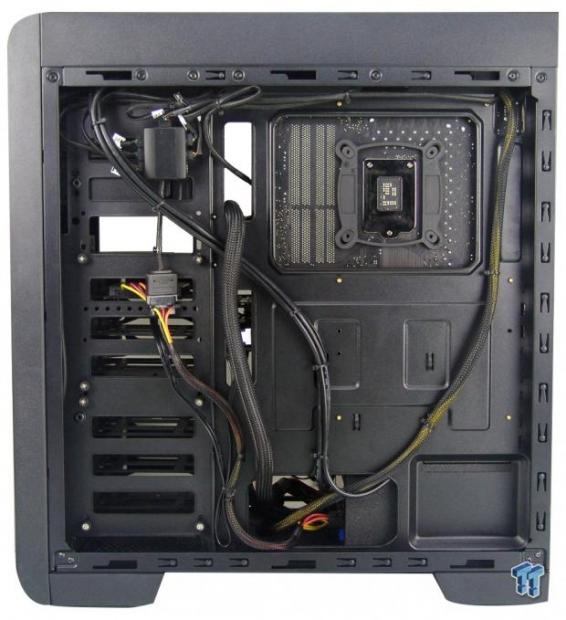
Behind the motherboard tray there is easily 10mm of room where the frame is shaped and folded as support to the steel, and closer to 15mm everywhere else. We can also see the thumbscrews that are keeping the HDD cages locked into place at the left.

All of the wiring is black in color, but there are only the basics to connect. There are the small connections for the LEDs and buttons on the front, the USB 3.0 cable, and the HD Audio to connect, all of which are long enough to do so with wiring left over.
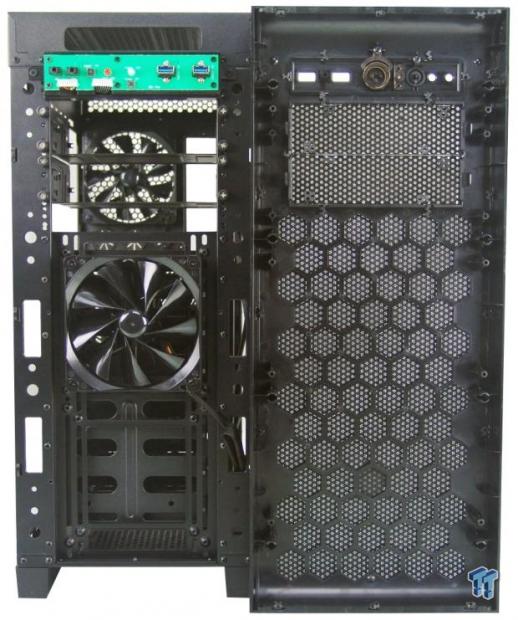
With the front bezel off the Core V41, we see the 120mm intake fan that Thermaltake supplies, and room for more in that location. Behind the bezel is where you remove the bay covers, but for cleaning, you just wash the entire bezel. We also see that the I/O stays with the case to make that super easy to do.
Accessories and Documentation
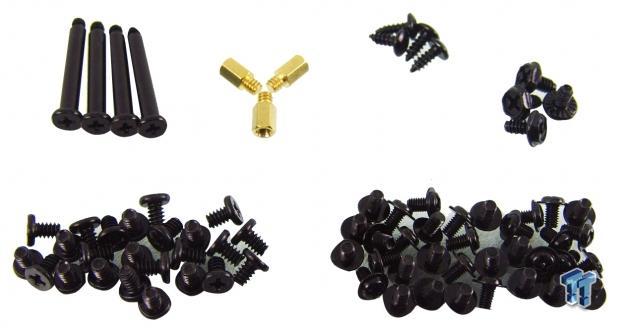
In that huge box, we find a lot of goodies to cover. Here we have a set of long fan screws for the front of the chassis, a few extra standoffs, bay adapter screws, and the PSU screws along the top. At the bottom are the 6/32 and M3 screws, both of which we get a small handful of.
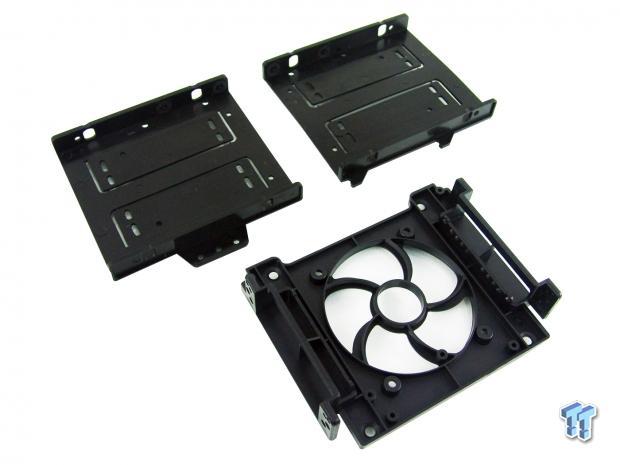
Since there are screws for bay adapters, here we have the adapters. In the front is a single 5.25" to 3.5" adapter, which is cut to keep the drive cool. As for the pair in the back, the bits of the floor fold up, and you can then take 3.5" bays and turn them into a 2.5" bay. Of course, all of the trays in the HDD rack are pre-drilled for 2.5" drives, so we can only assume these go in the ODD bays, screwed to their floor.
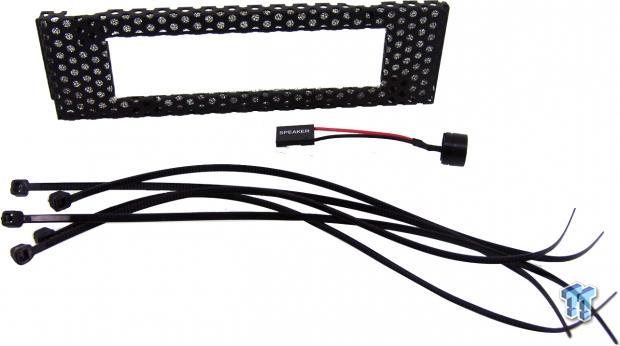
In yet another bag of goodies, we find a mesh 5.25" to 3.5" bay adapter to use in the front of the chassis, a motherboard speaker, and a set of five long zip ties.
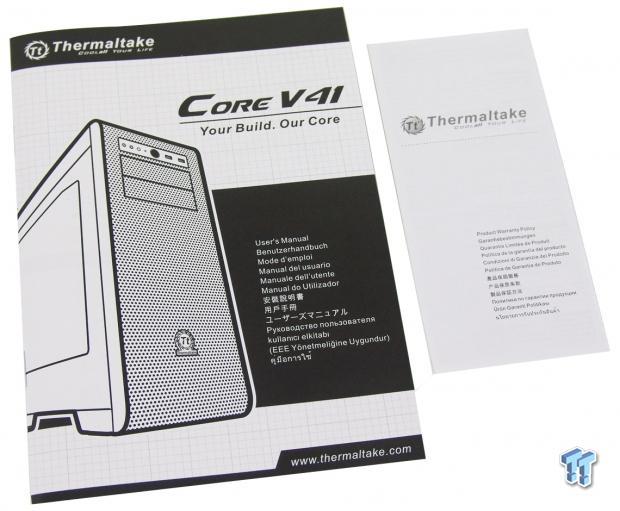
When we first opened the top of the box, outside of the inner packaging, we found a bag of paperwork. In that bag we found the user's manual for the chassis that takes you through everything from parts, through the build, and even shows off the options this chassis offers. There is also an insert included covering the warranty terms and conditions.
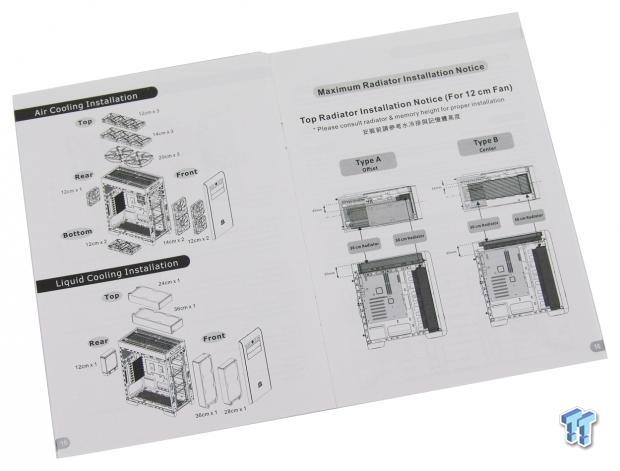
If the cooling options were still sort of vague, this image should clear all of that up. To the left is a diagram covering all of the fan placement options. To the right, we find two diagrams that show what will fit, and where to install, depending on the screw spacing.
Case Build and Finished Product
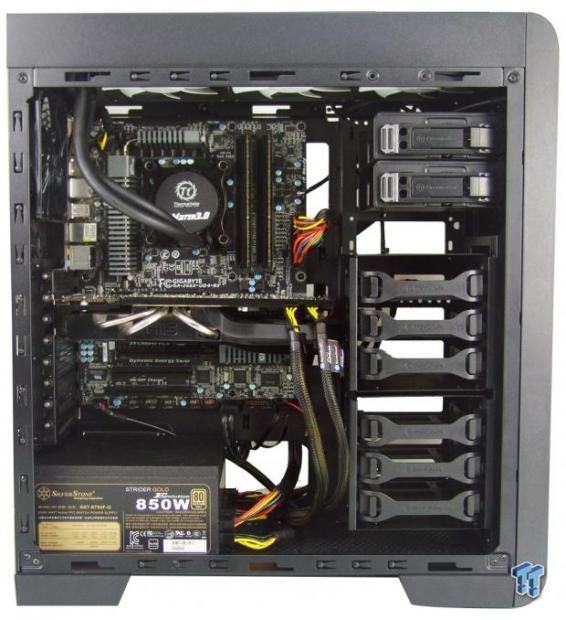
Leaving everything intact, as we found it, we were still able to complete the build without a single clearance issue. There was plenty of room for the AIO, the card fits snugly, but went in fine, and since we had no plans for a fan in the floor, there was plenty of room to get everything wired up easily.
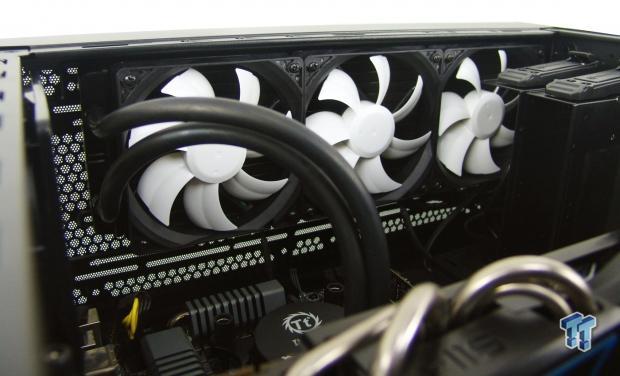
Even with the ODD bays in, there is still plenty of room for this 360mm AIO, and the fans. Also, notice how far away from the motherboard the rails in the roof permit use. Wiring, memory, and even motherboard heat sinks are of no concern for this installation.

The dust shield snapped right into place, but when it came to the video card, we did have to flex the back slightly to align the holes. As for the PSU, it almost falls right into place on the rubber pads, and sits ready to accept screws.
While this could be better, we did find wiring the chassis is a pretty simple and speedy procedure. Even though we added a fan hub to power all of the fans, we still could have packed much more in here since the panel is pushed out, and gives us even more room to deal with the wiring.
With everything now all ready to go, and the panels back in place, we find that without the use of an ODD bay, the only thing that changes about this chassis is the view through the window, which affords a great view of all of the components.
With things powered on, and the hub offering PWM control, there is 32dB of noise at a foot away during idle, but keep in mind, we are hearing five fans now, and not just the two. When loading the system up, we found the PWM kept everything quiet with the chassis fans, and it was our cooler that actually overpowered them. As for lighting, the ring around the power button is blue, but dim, and there is only the occasional flicker of red from the HDD activity LED.
Final Thoughts
With the design of the Core V41, you really don't lose much of anything from its much larger brother. Of course, there are a couple less hard drive trays, but did you seriously need eight of them anyway? However, there is the modularity, allowing you to completely strip or reconfigure the layout to the bays. This time, since there are a few less bays in the layout, Thermaltake tries to make up for it by allowing the ODD bays to be repurposed with adapters. So, you really don't lose out at all in the end.
As it ships, we found no issues with fit or room, even with a longer than standard VGA involved, and a 360mm AIO thrown into the mix. What really helps in this design is the love given to the top of the chassis. Multiple trails and various locations of holes allow you to use any form of water cooling within the limitations, no matter the maker, and even more importantly, it keeps everything far from the motherboard, and any clearance issues.
While the air flow inside of the chassis is limited as it ships, we still had lower than average thermals due to our choice in CPU cooling. As for the video card though, it was a touch warmer than usual since the HDD cages block most of the intake fan's air flow. Of course, the idea here is to allow the user to reconfigure the cooling and interior to allow just enough to hold your gear, while opening the air flow and improving upon it with your own personal choice of cooling. As a result, we cannot really fault Thermaltake too much for that.
We also really liked the fact that outside of the AIO installation, we installed all of our gear with just seventeen screws; everything else either uses removable thumbscrews like the bays and expansion slots, or they have captured thumbscrews that unscrew, but are not removable. This is all to help speed things up and make the build process as easy as possible, while still keeping a firm grip on everything, leaving you with a very solid and structurally sound chassis, even when gutted.
Considering all of the water cooling options, the modular bays and adapter trays, the customizable layout, the sleek, yet chunky looking design similar to the Core V71, and the pricing below $100, it is hard to deny Thermaltake their dues with the Core V41. Against the entire market, this is a very feature packed mid-tower, and for $89.99, it offers a lot of bang for your buck. The mid-tower market is truly flooded with offers, and with companies having to take everything to the next level to appeal to the customers, we get to sit back and reap all of the benefits. The Core V41 is surely in our top five of all mid-towers we have ever seen, and that is really saying something.
 Montech TG3 Mid-Tower Chassis Review
 Noctua NL-LC1-36 Liquid CPU Cooler Review
 Lian Li B4-mATX Review: a compact mATX SFF case with excellent airflow and premium features
 Ocypus Sigma F36 BK ARGB Cooling Fan Review: high airflow and unified design in one frame
 PCCooler CPS RZ820 Display Review: a flagship-level CPU air cooler with an LCD screen
 Sony has secured enough memory to meet PS5 sales targets through March 2027 and says no further price hikes are planned
 Reddit is building a video and audio listening experience for the viral post format it accidentally created for TikTok
 Seagate says Mozaic 5 50TB hard drives are on track for 2027, with 100TB already on the roadmap
 MSI adds a BIOS toggle to tighten standard DDR5 timings closer to EXPO ULL kits
 Keychron is building an open-source gaming mouse firmware called ZGM
 Assassin's Creed Odyssey gains 90% more players due to Christopher Nolan's 'The Odyssey'
 AMD Radeon GPU prices set to increase by 10% in August
 Redditor buys an RTX 4080, opens it up to find no GPU die or VRAM inside
 NVIDIA GPU rumors swirl claiming major price hikes of 20 to 30% - or more - are coming, as VRAM costs climb
 AMD's RX 9050 GPU comes up short in first review, but there's a good reason why it lags behind NVIDIA's RTX 5050 here
 ASUS ROG Strix X870E-A Gaming WiFI7 Neo Review - A New Enticing Option
 Logitech G316 X 98 Wired Gaming Keyboard Review - Retro-Inspired Board that Falls a Little Short
 Biwin M560 2TB SSD Review - Best Overall Retail-Ready DRAMless SSD
 Logitech G512 X 98 Analog Mechanical Gaming Keyboard Review - An Innovative Two-in-One
 Thrustmaster T.Flight HOTAS 5 MSFS Edition Review
 SteelSeries Arctis Nova Pro Omni Wireless Headset Review - One Headset to Rule Them All
 SteelSeries Arctis Nova 7 Wireless Gen 2 Headset Review - New and Improved, But Is It Enough?
 AMD Ryzen 7 7700X3D Review - Days of Future Past
 Six File Explorer tips every Windows user should know
 I switched my PC to encrypted DNS in Windows 11, and browsing felt more private
 Printer Not Working in Windows? How to fix detection, print queues and drivers
 The Ultimate Guide to Personalizing Your Windows 11 Taskbar
 How to Turn Your Windows Laptop Into a Second Monitor with Miracast and Wireless Display in Minutes
 6 Mistakes to Avoid When Buying a Windows Laptop
 I capped Windows Update's bandwidth with Delivery Optimization, and my downloads stopped choking
 I use this decade-old free tool that finds files faster than Windows Search does
 I install and update most of my apps with this Windows command now, and I stopped downloading sketchy installers
 Hisense U6SF 65-inch MiniLED TV: High Performance Meets Leisurely Convenience