


Introduction, Specifications and Pricing
Lian Li has always been a huge player in the small form factor case segment, but while many of the designs we saw in the past were a tad on the boring side visually, in the last year or two, things certainly have been different. Anyone who pays attention knows of the train they built to house a computer, and the changes that have happened in their full-tower designs we have seen more recently. Also, when it comes to their smaller case designs, Lian Li has flipped the script since the introduction of their mini-suitcase cases; we have started to see them break the mold of previous designs.
Among the various designs we have seen in the Lian Li SFF lineup, the older designs of course have limitations, as many SFF chassis are plagued with. While these designs were sexy with all the brushed aluminum they featured, many users out there wanted more out of the designs. Access is usually another problem associated in SFF designs, but we promise you that Lian Li has done as much as possible in this latest design to make installation a breeze, and even pleasurable.
Another great aspect of this latest design has to be the view. Most cases offer some sort of a side panel window to view the hardware, but with horizontal motherboard trays in a lot of these designs, who wants to see the blunt edge of the motherboard, and maybe a view of just the video card? Well, Lian Li addressed this issue as well, but in ways you may not think of right out of the gate. However, once you see it in practice, it just seems like an obvious fit for the way they have designed this chassis.
It is nice to see Lian Li stepping away from the status quo and trying their hands at entirely new designs that make the end-user's life a bit more enjoyable. Of course, being Lian Li, this new PC-Q36 still features plenty of brushed aluminum to admire, but this isn't a typical Lian Li chassis.
Stick with us as we cover all aspects, features, and the practicality of this PC-Q36 mini-tower chassis. While this chassis may seem like a few others on the market at first glance, when it comes to aesthetics and attention to detail on the interior, you will be hard pressed to find anything out there like the PC-Q36 you are about to see.
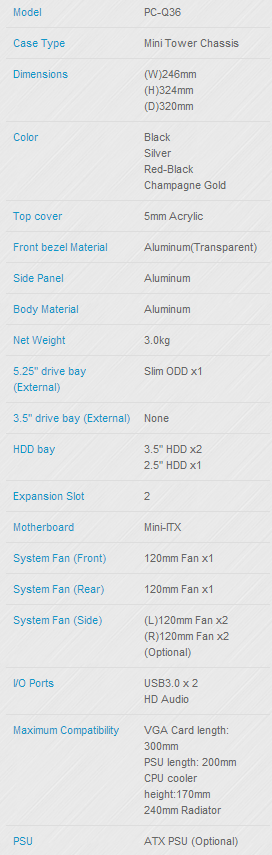
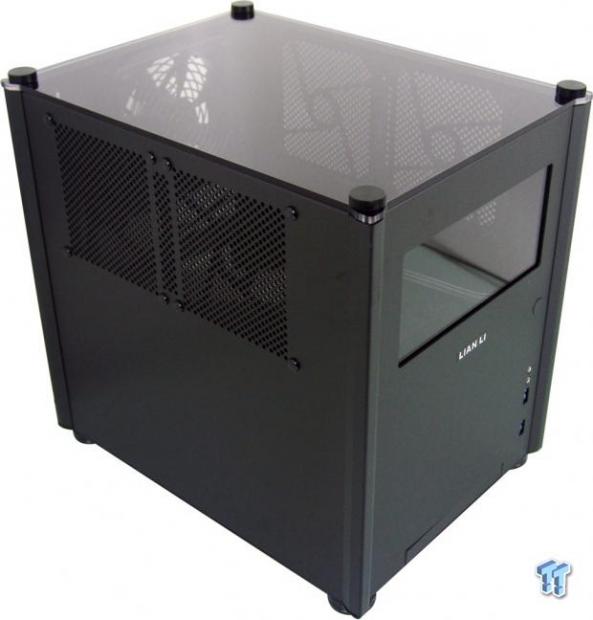
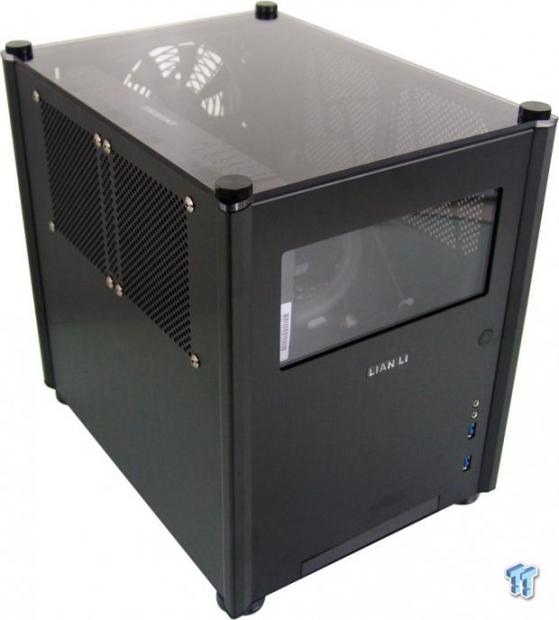
The provided chart covers every aspect of the PC-Q36, and what it has to offer. This mini-tower chassis is contained within the space of 246mm of width, 324mm of height, and it is just shorter in depth at 320mm. Of course, the chassis is comprised almost entirely of aluminum, but there are also two acrylic panels found in this design, a smaller acrylic section in the front, and the entire top of the chassis is made of 5mm thick acrylic. An added bonus with this design is that you can not only get the natural and black anodized aluminum versions, but there is also a black and red version, as well as one in champagne gold.
In the chassis there is a single optical drive bay, and it happens to be a slim optical bay at the bottom of the front bezel. There is a cage capable of housing a pair of 3.5" storage drives inside of it mounted just above that bay, and it also provides room for a single 2.5" drive to hang from the side of it. This design will only house Mini-ITX motherboards, and as such, the rear of the chassis offers only two expansion slots. There are some other limitations to this design as well. The PC-Q36 will only hold a maximum of 300mm of video card length, the PSU is limited to 200mm in length, the CPU cooler has a height limit of 170mm. While there is room for a 240mm radiator, if you do opt for one of this size, then you should realize the use of a video card is out of the question.
Our Latest Small Form Factor Cases Review Coverage
To keep this chassis cool, there is one fan pre-installed by Lian Li, and that is the 120mm fan used as the exhaust on the back panel. Both sides of the chassis are also vented to support a pair of 120mm fans, and this is also where the radiator can be supported. We did notice that the chart shows room in the front for a fan, but you will soon see this is an error, as the front panel will not support a fan.
Availability is nonexistent at the time of writing this review. While news of this chassis and its release were seen over a month ago, no matter where we tried to hunt down the PC-Q36, we could not even find a pre-order listing, or a coming soon listing. However, pricing information was provided to us, and we have a MSRP of $149.99 to go off of. While this chassis does share a few design elements of a well-known BitFenix layout that is already doing quite well on the market, we can assure you, this chassis is quite different. Even though there appears to be small similarities, almost all of those aspects have been changed in some way, or in many other instances, Lian Li has done things that take this PC-Q36 to a whole other level of use.
Packaging

Lian Li has gone with green and black printing on plain cardboard to package the PC-Q36 in, so they can inject as much of the cost as possible into the actual chassis. We see this is part of the Mini-Q series, and it is the finest quality, made in Taiwan.

While the specifications told us there were four color options, we found that may not be the case at all, since our box offers only two color choices. Underneath the section that indicates the black version is inside of the box, we were also given a condensed specifications chart.

We found that both of the large panels on the box are identical, which keeps packaging costs down even further.

The same thing rings true for the smaller panels as well, and it would be much easier to see if various shipping companies had not covered it almost entirely with stickers and packing slips.

After removing the box, we found there were four Styrofoam caps used to secure the PC-Q36. Even though the caps are thinner and smaller than most companies would use, with the help of the plastic liner, this very light chassis arrived in great shape. You may also notice the brownish color of the front window. This window, and the top panel, ship with protective film on the acrylic to ensure there are no scratches.
Lian Li PC-Q36 Mini-Tower Chassis
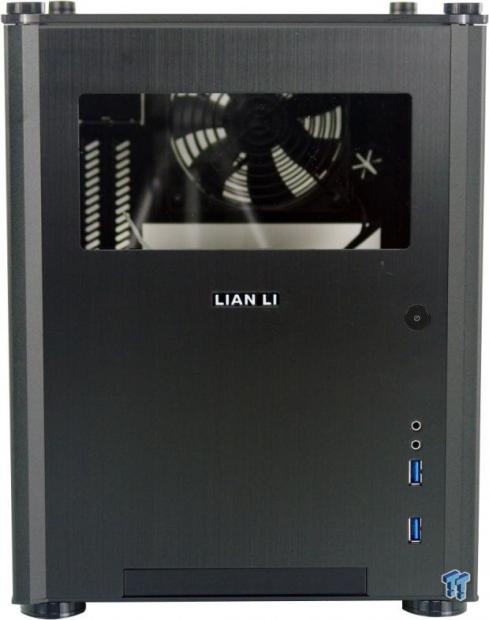
Starting at the top, we can't see much other than the edge, but we can also see wide screws holding it down. Both sides of the bezel are made with extruded aluminium to form the frame, while a brushed aluminium insert is slid between. On the bezel there is window at the top, a Lian Li badge, the front I/O at the right, and the slim optical drive goes at the bottom.
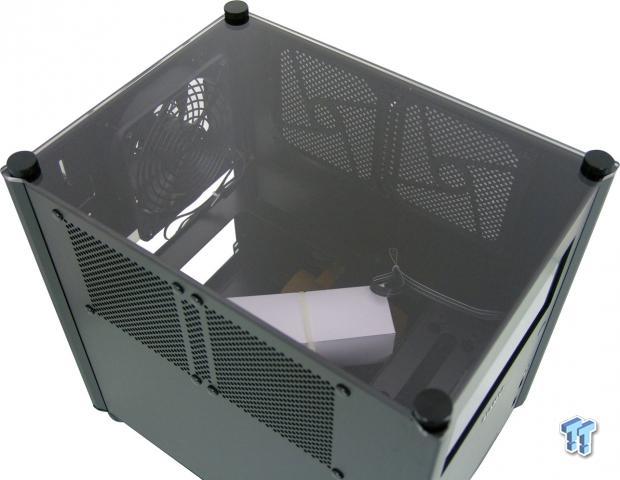
We did have to remove the protective film to get this image, but now we can plainly see the slightly tinted, 5mm thick acrylic top. This top, accompanied by a horizontal motherboard tray, offers a great view of the components inside of the chassis.

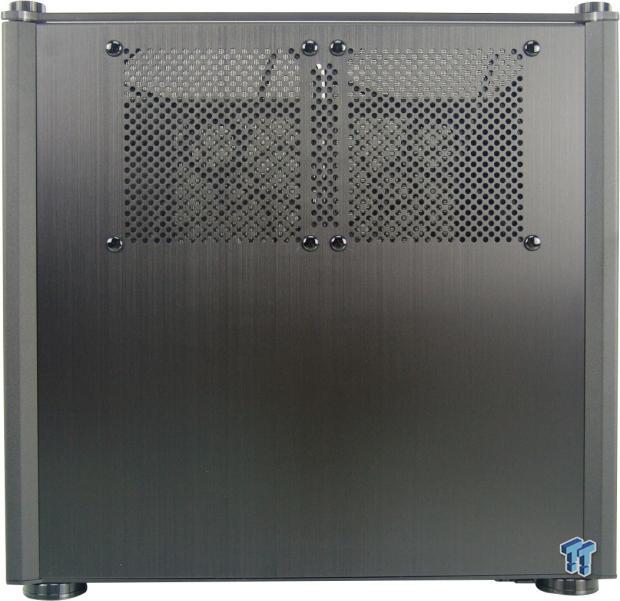
The left side of the chassis is more along the lines of what we expect from Lian Li. Here we found a vast expanse of brushed aluminum, but at the top there is venting, and holes to allow an optional pair of 120mm fans.
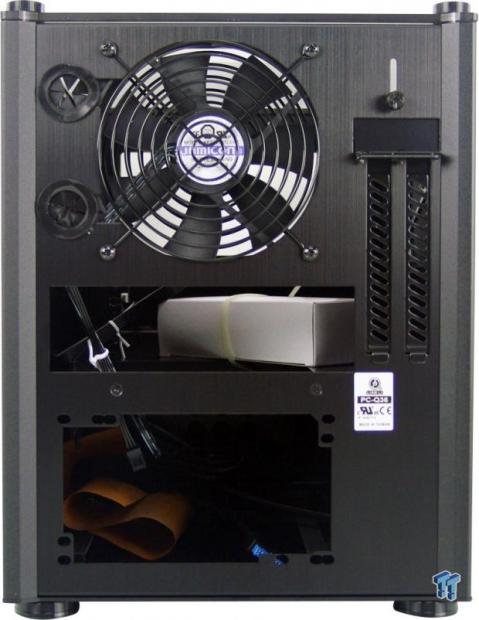
At the back of the chassis we saw two water cooling holes with grommets, which are also grooved to the exhaust fan to allow for AIO support on the outside of the chassis. There is a sliding cover to lock in the expansion slot covers, and we could see the hardware through the rear I/O, which just leaves the large hole at the bottom for the power supply.
The right side of the chassis mirrors the left. The panels could be swapped for one another, but the fan locations are offset from center, and if you add fans or a radiator to them, then it can cause conflicts in clearance.
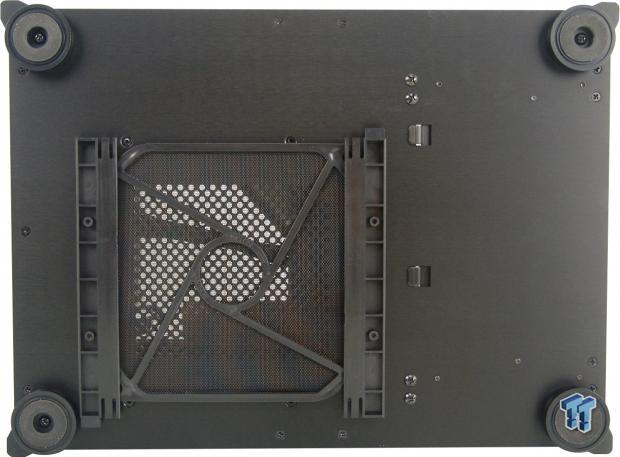
Under the chassis, we could easily spot the removable dust filter covering the ventilation for the power supply. If you look a bit closer, you can see loads of screws used to allow the removal of almost every component that touches the floor of the chassis.
Inside the PC-Q36

After removing the top acrylic panel, both sides of the chassis will easily slide upwards to be removed. On the inside of both side panels, we found Lian Li used those plastic nubs we saw outside to attach the dust filters to the inside of both panels.
With the top and sides removed, the floor does flex a bit, and it sags in the center. With good access to see the hardware and wiring tucked under the motherboard tray, when it comes to the build process, there is so much more to be seen.

Below the window on the front panel, there is a thumbscrew to lock the panel and the storage drive cage into the chassis. By removing another thumbscrew on the floor, the storage rack and the front bezel can be completely removed, the latter of which takes the I/O wiring along with it.

Once that storage rack is removed, and four more screws are removed from a plate it sits on to get it out of the way, we finally get a view of the slim optical bay that is still screwed to the floor. Of course, this is also removable to make mounting that drive much simpler.
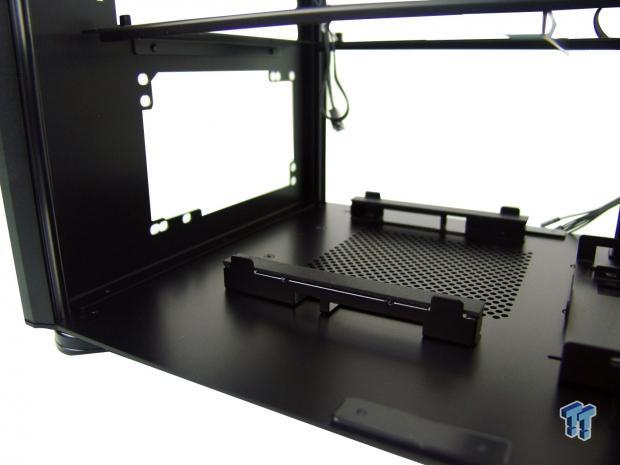
Behind the slim optical bay, and still on the floor of the chassis, we find two support rails with rubber pads on them to mount the PSU on. The rails are removable, but now you can just slide a PSU in.

The motherboard tray comes with standoffs already installed, and has a huge access hole for back plates, or m-SATA cards. Also, this plate has two screws to the right, and by removing those, along with another pair of screws from the outside rear of the chassis, you will be able to pull the motherboard tray out completely.

Looking inside of the rear panel, we see the I/O area is well placed, and with that 120mm fan there, it will evacuate most of the CPU heat in a hurry. This fan offers enough wire to get anywhere in the chassis, and requires a three-pin header for power.

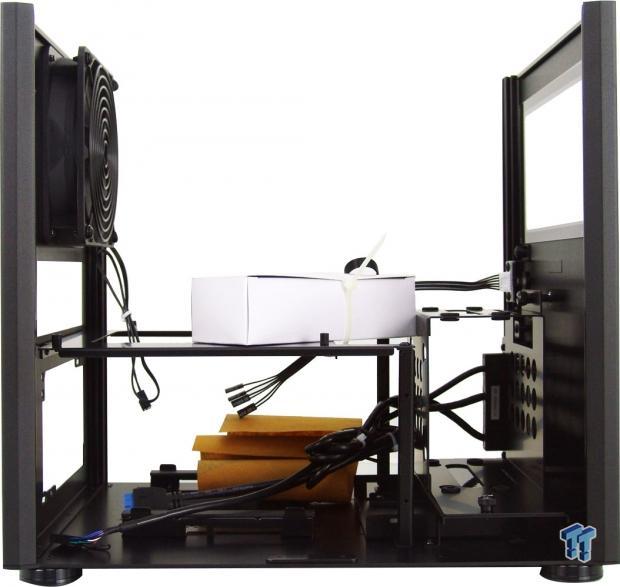
Before we slid the front panel out of the chassis, we made sure to get a good view of the wiring. They have bound up some of the excess wiring already so that the front panel connections, the native USB 3.0, and the HD Audio connections, should get where they need to be as-is. However, there are a few additional inches of cabling for each that is available for those long runs when needed.
Accessories and Documentation

The hardware box we found strapped to the motherboard tray offers what you see displayed here. At the top there is a native USB 3.0 to USB 2.0 adapter. In the middle there is a bag of slim optical drive mounting screws, along with ones used to mount a 2.5" drive. The bag to the right holds the motherboard screws, HDD screws, and PSU screws. That leaves the bag at the bottom, which contains a pair of zip ties, four rubber grommets for the 2.5" drive, and a motherboard POST speaker.

Along with the hardware, we also got two books covering the native languages of all the countries that Lian Li sells products to. Each section is contained on two pages, and offers the basics of how to get into, and fill up this PC-Q36. Although, with the simplistic layout of this chassis, it all comes natural once you can see what is going on, and we found little need to refer to this during our time with the PC-Q36.

With such a dark image to go off of previously, we went ahead and filled the storage rack, and got another image. We later found out that the HDDs were in backwards, and in this orientation they do conflict with the I/O wiring, but there is plenty of room for a SSD to hang from the side as well.
Case Build and Finished Product
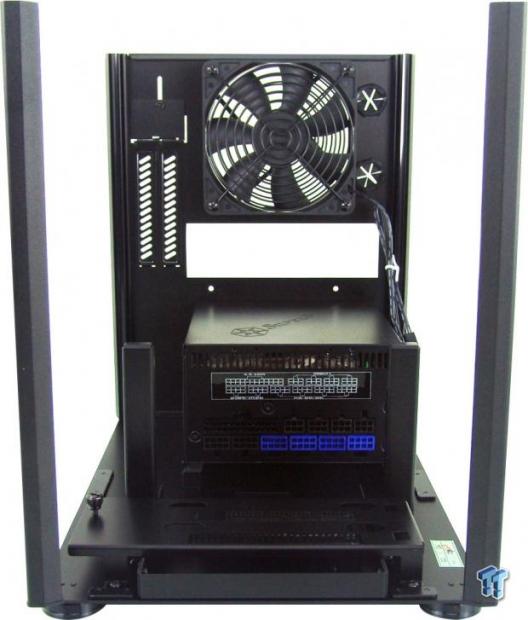
At this point we have the chassis stripped down to its essentials, without removing any of the vertical support structures. With the drive bays, panels, and motherboard tray all out of the way, you can simply set the PSU gently on top of the rails, instead of trying to jam it in from the sides.

It is also a great idea to pre-wire the leads to the PSU before you move too much further into the build. They specify that there is room for much more PSU than what we installed, but if you want to keep the storage bays, you need to look into much shorter power supplies.
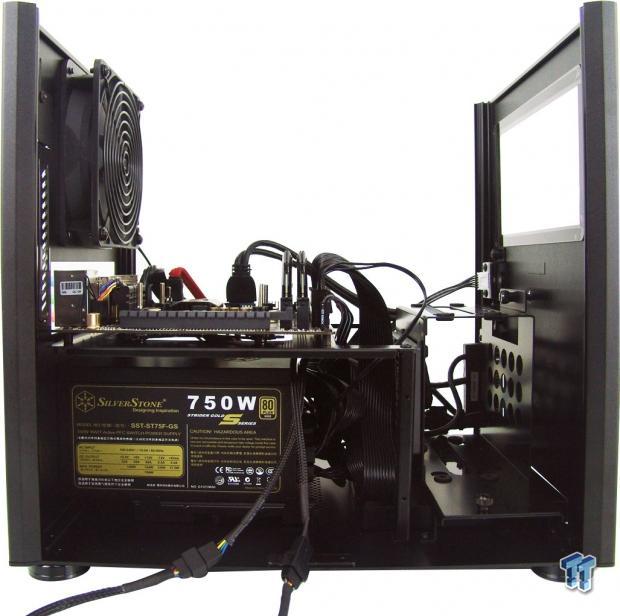
With most of the gear in place, we did remove the HDDs entirely due to the conflict, and it made life much easier. We still saw a bit of sag to the chassis, and it is flimsier when unassembled, but it is very solid structurally once it is all back together.

While we do not have a dust shield for the ASRock motherboard, we did snap one in for testing, and have no issues to report. We also did not use a video card for this build, and we opted for an AIO, but even there, no issues arose. We also had no issues with the PSU.
Next to the motherboard tray, there is a few millimeters of space to allow for some of the wiring to be kept, and with the AIO almost covering the PCI-e slot, we do not see a card in this build. This again shows that longer PSUs can be an issue, as we had just enough room in front of it to tend to our wiring.

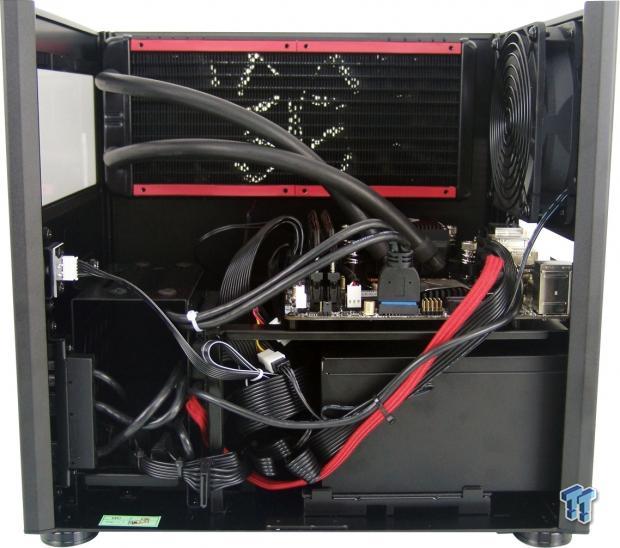
We now have the PC-Q36 all back together, and this is when the brilliance of the acrylic top panel comes into play. Unlike other cases, the PC-Q36 offers a full view of all of the components.
Stepping back slightly, we can now take in the PC-Q36 in full perspective. We do like the front window, but in most instances, you will only see the memory and cooler, and possibly the top of the video card. In ours, we see tubing up front, but we get a full view of the motherboard as well.
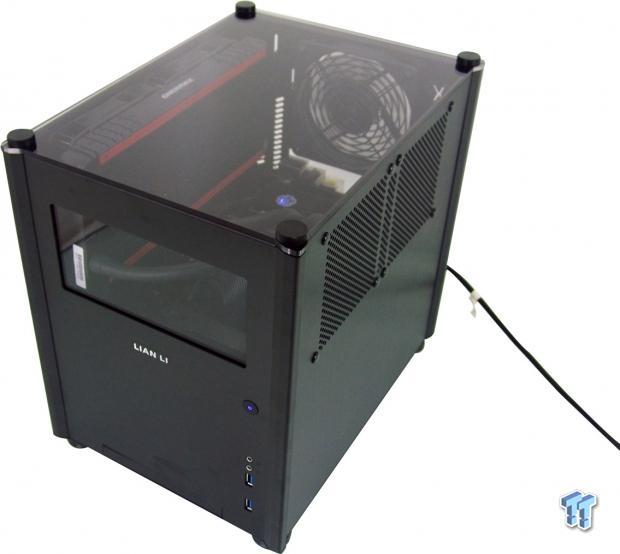
Once powered, we found the fan at the back runs in the 40dB range with full power; of course, this can be controlled if desired. We also like that we can see the head unit lit up, and this just makes us want to add LEDs, and more shiny things to show off in this chassis.
Final Thoughts
Looking this from just a features perspective, the PC-Q36 offers a great set to consider. While there are quite a few solutions out there that will house a Mini-ITX motherboard in similar space constraints, looking past the obvious, Lian Li really starts to stand out. Of course, all similar solutions offer removable storage, but that list narrows with just the mention of a removable motherboard tray. Continuing on this path, while most similar solutions allow access from the sides, Lian Li is the only company that has made a chassis that will completely disassemble into all of its major components.
Even if you don't want to take things quite that far for your next build, allowing all of the panels to be removable (including the back panel that we did not remove), and leaving just the vertical supports to deal with, makes installation simple, easy, and a lot less frustrating than most others. To put the cherry on top of this whole plan, the 5mm thick acrylic top graces this design, and affords some really nice views of the hardware inside. How many other cases can you recall off the top of your head that offer all of this, at any price?
We only really have three "issues" to discuss. First, Lian Li needs to fix the chart, as there is no front fan support in this design. Secondly, we did have an issue with the front I/O wiring. Even when trying to flip the drives, we found the HDDs would still press against the wiring. This sort of forced where the wiring went, and with such little room there once filled with drives, we would have had little choice than to leave the bulk of the wiring visible.
Then we ran into the tradeoff. We wanted to use an AIO to show off the capabilities of this design, but in doing so, we lost room for any form of a video card. We tried flipping sides, but found the offset pushed the radiator into the rear fan. This is where flipping the doors to the opposite side comes in handy. Doing so would allow for clearance of the AIO on the right, and still allows a video card to fit. The last bit is concerning your choice of power supply. We used a power supply made specifically to be compact and fit in such cases, but we quickly ran out of space. If you have plans to fit something longer into this chassis, be prepared to have to lose the drive rack.
Since all of our "issues" could be worked around pretty simply, after reading this, with careful planning and parts selection, you should not run into the stumbling blocks we have pointed out. When completed correctly, this Lian Li PC-Q36 is one stellar looking chassis. The views afforded of the interior are above average. Also, with all of that brushed aluminum, and knowing how well every bit of this chassis is designed, even if there is no availability at the moment, and they are asking near double the price of the Prodigy, we feel that the PC-Q36 mini-tower chassis is well worth its price. The Lian Li PC-Q36 blurs the line between superb chassis design, and a work of art, or even a display case for all the hardware inside of it.
 SAMA S50 Mid-Tower Chassis Review
 Montech Ten SFF Chassis Review
 PCCooler CPS RZ620M X CPU Cooler Review
 Cooler Master Cosmos Alpha Full-Tower Chassis Review
 SAMA L70 360mm ARGB AIO Liquid CPU Cooler Review
 Assassin's Creed Black Flag Resynced is a REMAKE, not a remaster, confirms Ubisoft
 Destiny 3 not in development, Bungie to hold more layoffs following Destiny 2's retirement
 Fallout 4 mod storage increases to 100GB on Xbox Series X/S and 15GB on PlayStation consoles
 GTA 6 expected to help drive record $8.1 billion earnings for Take-Two
 Hitman devs show off new engine tech in 007 First Light including new real-time global illumination and software ray-tracing
 AMD launches the Ryzen AI Max PRO 400 series of CPUs, up to 16 cores with 192GB of unified memory
 Take-Two CEO reiterates GTA 6's November release date in latest earnings report
 Infinity Ward is reportedly preparing to unveil its next Modern Warfare game
 GTA 6 marketing strategy confirmed to be short and impactful
 Subnautica 2 hits 4 million sales in 5 days, now makes up more than 21% of total franchise sales
 SAPPHIRE Radeon RX 9070 XT NITRO+ PhantomLink Review - RDNA 4's Beast Mode
 MSI Roamii BE Pro Wi-Fi 7 Mesh System Review - Affordable price, good mid-range performance
 Memblaze PBlaze 7 7A40 Ocean 61.44TB Enterprise SSD Review - Oceans of QLC at 3.3 million IOPS
 MOZA SGP Sequential Sim Racing Shifter Review
 COLORFUL iGame GeForce RTX 5070 Ultra OC Review - When Style and Performance Meet
 GIGABYTE Z890 AORUS Elite WiFi7 Plus Motherboard Review - Right in the sweet spot
 PNY GeForce RTX 5080 Slim OC Review - A Compact 4K Powerhouse
 The Send To menu is the right-click feature on Windows 11 that nobody bothers to customize
 Windows 11 will not let you pin a folder to the taskbar, but a 30-second workaround does
 ASUS ProArt Displays Unlock Creativity with Professional Monitors for Everyone
 What Happens If You Don't Activate Windows 11? 5 Downsides Explained
 Fast Internet on Your Phone but Slow on Your PC? Try These Fixes
 The Snipping Tool quietly became the only screenshot app I keep installed on Windows 11
 How to Set Up a Windows Computer for a Senior User
 Bluetooth Toggle Missing in Windows? Try These Fixes
 GPU Overclocking Basics in Windows 11: Safe Performance Gains Without the Guesswork
 GIGABYTE's new Ultimate OLED Gaming Monitor Bundle includes Xbox Game Pass