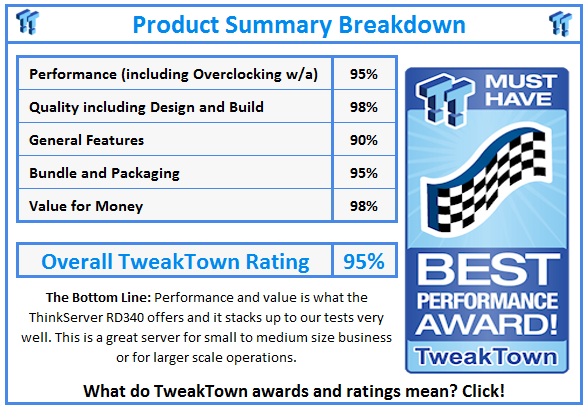
Introduction and Packaging

The Lenovo ThinkServer line up provides a user with a feature-rich load out and offers great performance and value.
Not only do users want great value for their purchases, but they also want a vendor that will provide support and services that go along with that. Lenovo has a great line up of machines that are backed by an online suite of services to provide a user with configurations designed for their needs and to provide ample software to aid the users in setting up and managing servers.
The server we will be looking at in this review is the ThinkServer RD340-70AB. This server comes with dual CPU capability and four storage bays.
There are several other versions of the RD340 that expand on storage capabilities, with 4, 6, and 8 storage bays, depending on what you need. This gives the RD340 line up a storage capacity of up to 16TB of storage in a 1U package.
The ability to use just one CPU (out of two possible) gives expansion abilities. This gives flexibility on starting costs to get servers up and running. The RD340 can use up to two Intel Xeon E5-2400 v2 series processors with up to 10 cores each. This is a huge amount of CPU power in a 1U package
When looking at just what the RD340 can provide as far as services go, you can head over to Lenovo's ThinkServer Buying guide found here. Lenovo ThinkServer Buying Guide
This shows that a client can expect a ThinkServer RD340 to handle: up to 75 users for Windows Storage Server & Windows Server 2012 R2; up to 1,000 users for email and messaging; up to 400 users for Apache Web serving; up to 25 users for Active Directory; up to 50 users for Microsoft SQL Database; and up to 15 VMs. These are approximate numbers, and server load outs can affect these numbers, so only use this as a guide.
Packaging
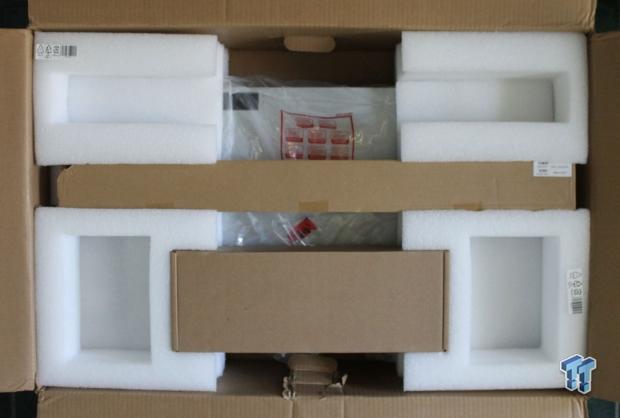
Opening the shipping box, we find the contents' layout, foam packing, and accessories. Removing the accessories, we find that the foam inserts split into two halves. Taking out the two top sections of the foam inserts allows easy removal of the server itself. We prefer this way of packing as it eases taking out the server, which can sometimes be very heavy. The shipping box did take a hit to the side, but because of the ample space and foam inserts, there was no damage to any of the contents.
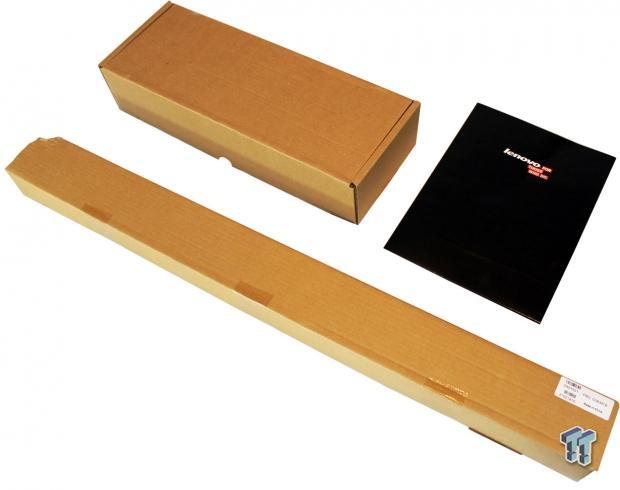
Here we have the accessory boxes laid out, and you can see one box is the rail kit and the other is filled with accessories. There is also folder with contact information in case you might need to contact support.
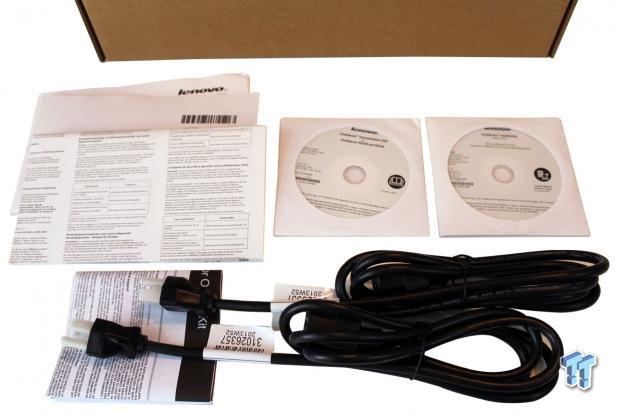
The accessory box has two power cords, a software and manual disk, and installation instructions.
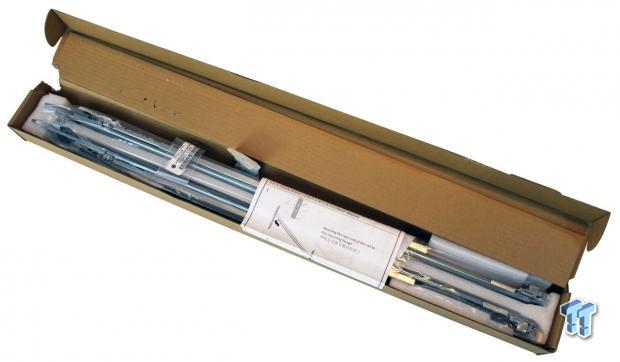
Here we have opened the rail kit box and get a chance to see the contents.

The kit comes with everything you need to install the rails: two sliding rails, two mounting screw packages, and instructions for how to install the rails.
Specifications, Layout and Installation
Specifications
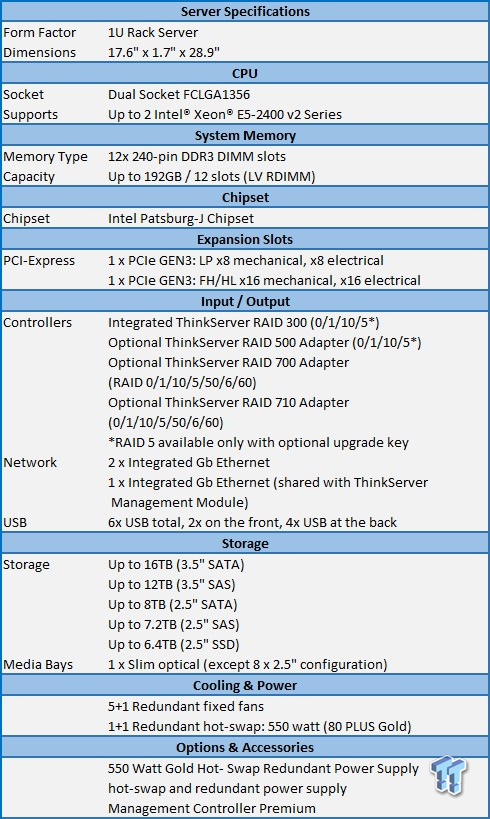
The RD340 has a wide range of storage options and plenty of LAN ports for connectivity. Optional RAID adapters can greatly increase storage performance. The RD340 can also use an impressive 192GB of RAM.
Layout

This is the front of the Lenovo ThinkServer RD340. You can see the four hard drive bays with a DVD drive at the top right. The left hand side has the power button, two USB ports, and status lights. The two red buttons on each side are for locking the server into place after it has been installed.

Looking at the back of the server, we can see the I/O layout. The power supply on the left can slide out by unlocking the red lever and pulling.
To the right of the power supply, we see the green serial port and the LAN/Remote Management port. Next is another LAN port and the VGA output, followed by four USB ports and the last LAN port.
Above these ports are two cutouts that allow for expansion cards.
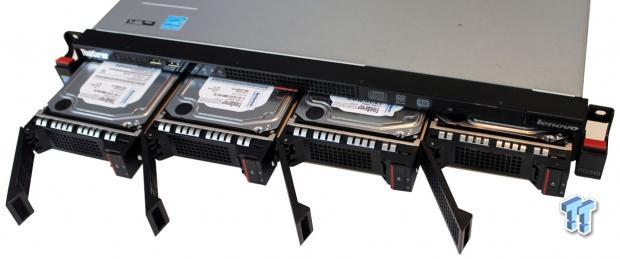
Each of the hard drives can be removed by pressing the button on the right side of each drive; this releases the locking arm, and then you simply pull out the drive. We had no issues installing or removing drives; they are very sturdy and well grounded.
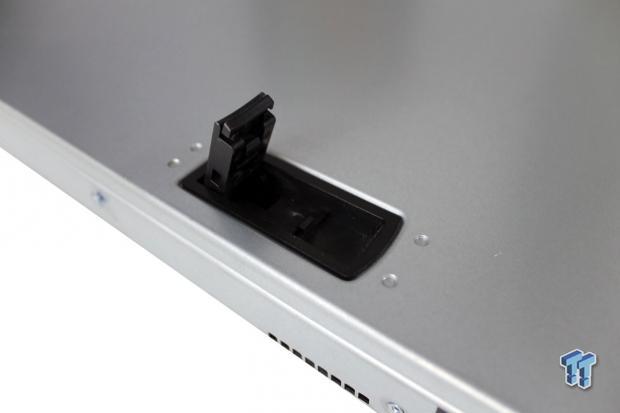
In order to remove the top of the server, there is a simple latch that pops open and allows you to slide the server lid right off. We like this method of accessing the insides of the server over other methods, such as having to remove screws on the sides. When the server is installed in a rack, this is very easy to access the inside.
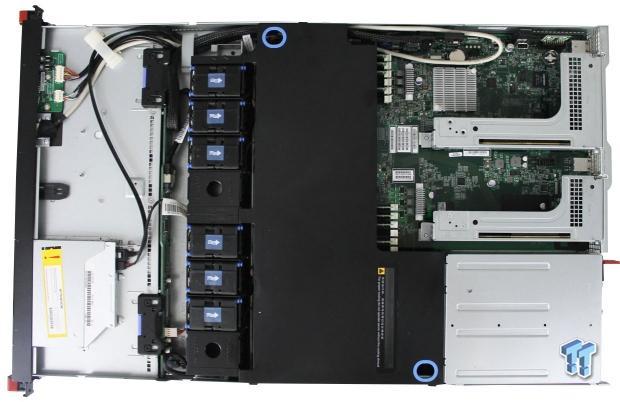
With the lid off, we get our first look at the insides of the server. The layout of the server is nice and clean. To remove the air shroud, simply pull up on the two blue holes, and it pops out for access to the CPU and RAM.
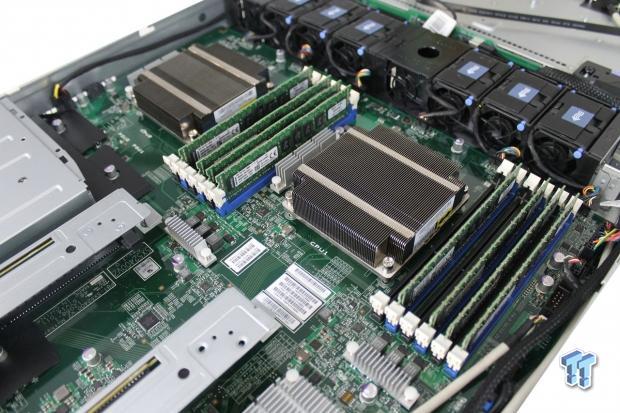
They layout of the CPU and RAM in this server provides good airflow, which is a requirement for 1U servers. Heatsinks for chipsets are also located in good positions for proper airflow. Cables are laid out on the left side of the case, so they do not block air from reach parts that run at high temperature.
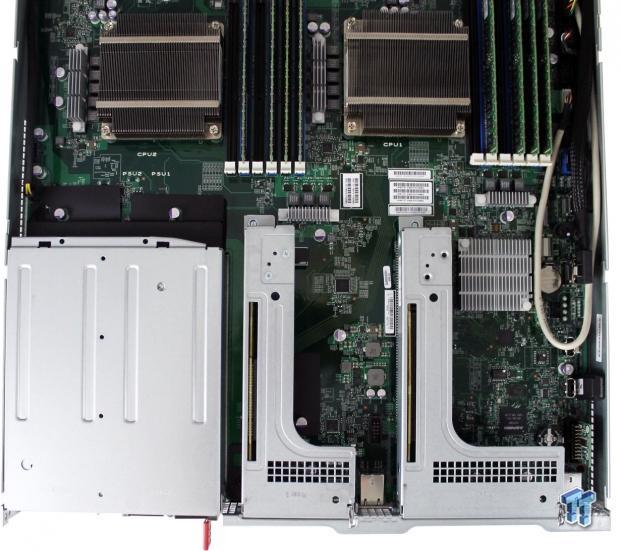
Looking at the back of the server, we can see where the expansion cards would fit. There are two expansion bays in this server, and each one can also receive good airflow to help keep them cool.
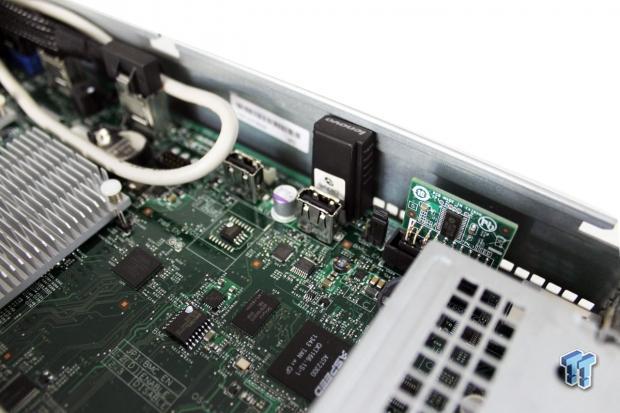
Looking from the back of the server, on the right side, we see the TPM module; behind the first USB port is where the Lenovo management controller premium is located.
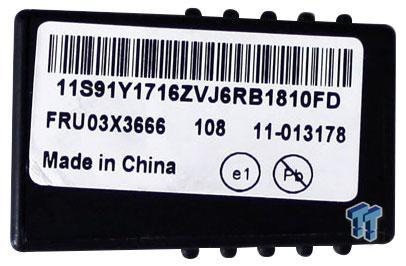
The Lenovo management controller premium is an optional accessory that appears to be a simple dongle type of device. This unlocks KVM abilities through IPMI remote management. If you do not use this module, you will still have IPMI, but you will not be able to remote in by KVM.
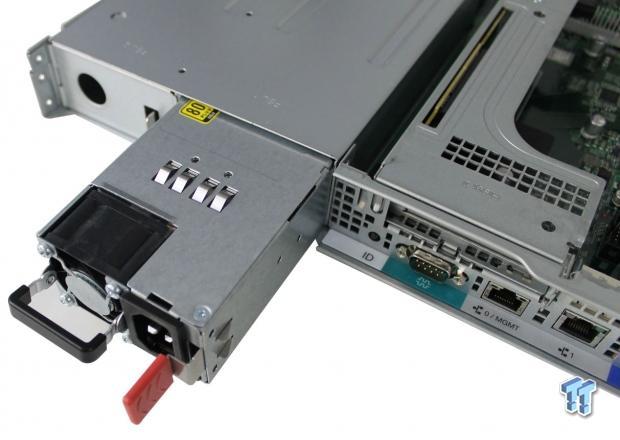
The server that we have uses only one power supply. It simply unlocks and slides out for replacement if it is ever needed.
If needed, an optional redundant power supply can be ordered.
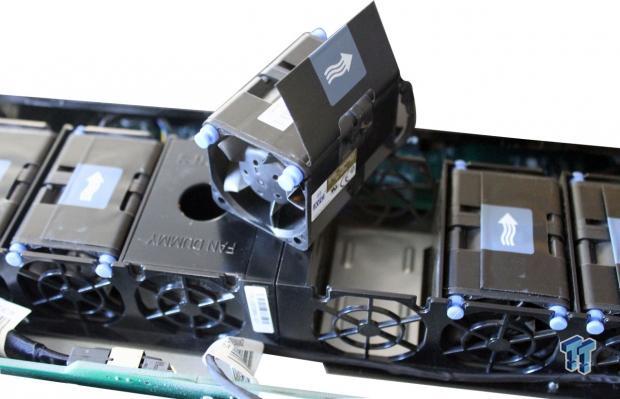
The fans on the cooling bar are simple to replace. Simply pull up on the tab and lift the fan out.
With the 1U servers that we have run in the past, we found them to be very loud, much like F-16s. The fans in the RD340 did not make a lot of noise; we could sit right next to the server while under full load, and the noise level was not that bad. These little fans do move a lot of air and keep the server very cool.
Installation
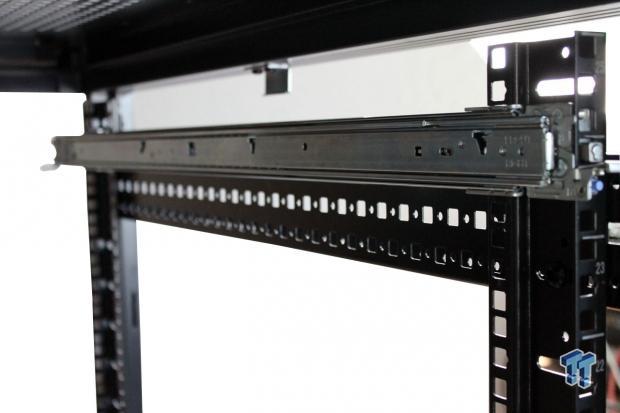
Lenovo rails are a little different to install than others we have used. Once we figured out how these snap into place, we found them to be easy to work with.
Position the back of the rail into the slots where you want the server to go. There is a locking lever and blue release button at the bottom.
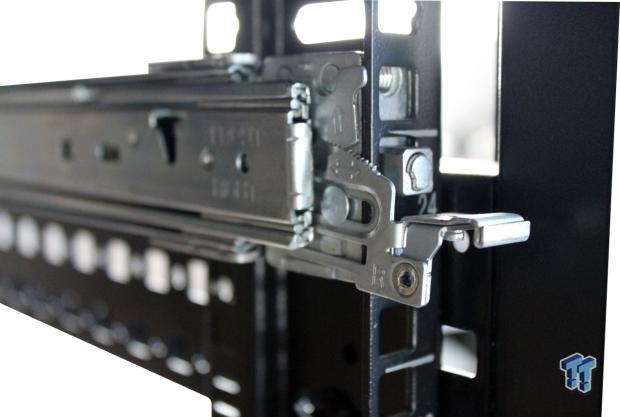
On the front end, push down on the rail lock lever and insert it into the rack. Then you lift the lever to lock it in place.
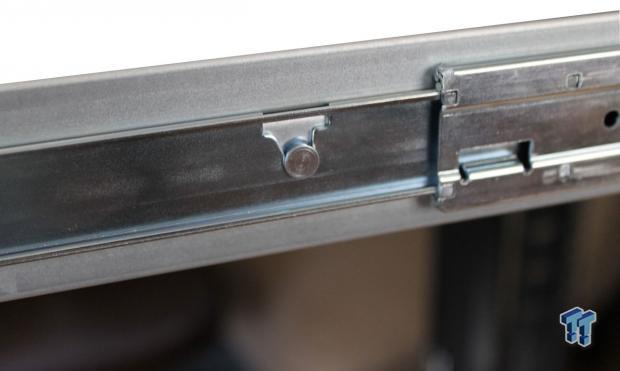
Each rail has three groves that line up with guides on the sides of the server. Lift the server in place so that the guides line up with all three groves and lower it into place.
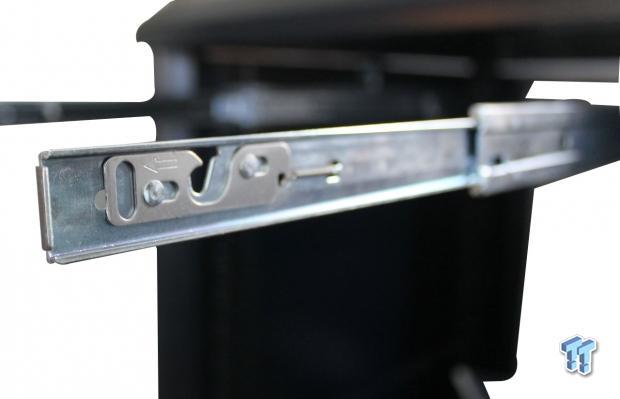
The very front of the rail has a lock that snaps into place when installing the server. To remove the server, slide the lock to the front. You can now lift the server up and out of the rails.
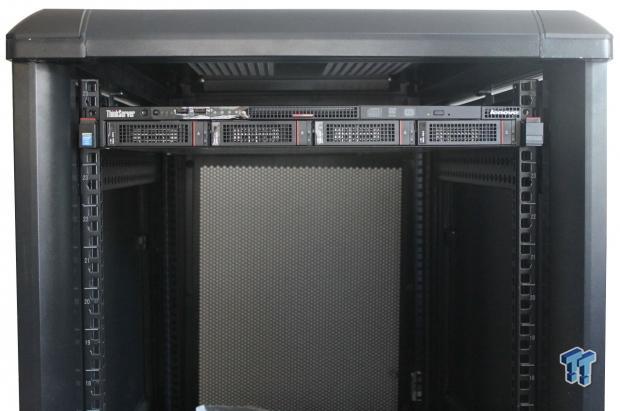
Here we see the server installed in our test rack getting ready to be tested. The two red buttons on each side of the server allow it to be locked into place or released to slide it out.
The complete racking process took us a little bit to figure out, but overall, the whole process was rather simple.
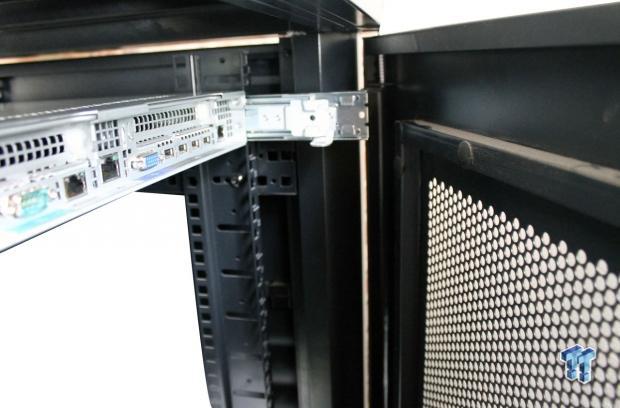
One of the drawbacks we found was our test cabinet was not deep enough, so we could not close the back door. The extra extension to the rails that we show here is for an optional cable management bar, which can be useful for large deployments.
BIOS and Software
BIOS
The BIOS for this server is typical, so we will only show key BIOS screens.
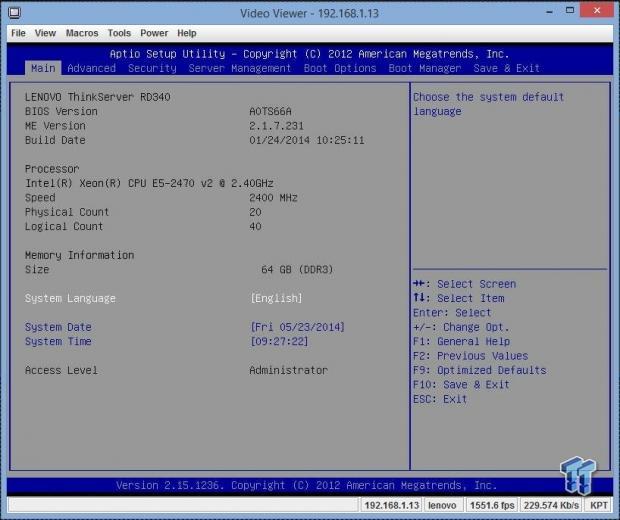
This is the main BIOS screen you see when you first enter the BIOS.
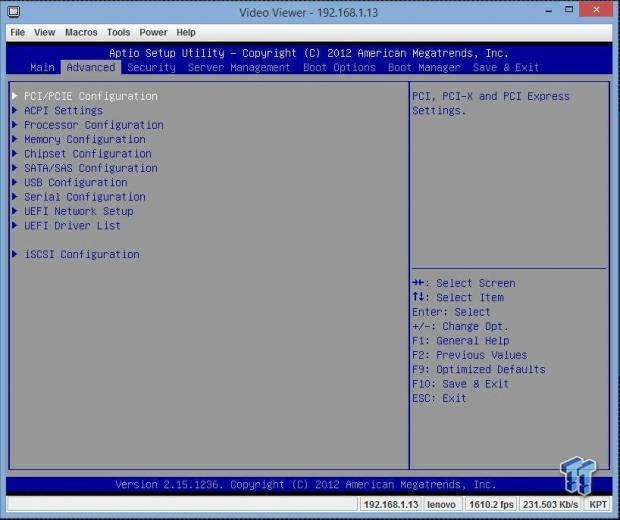
Here we see the advanced tab.
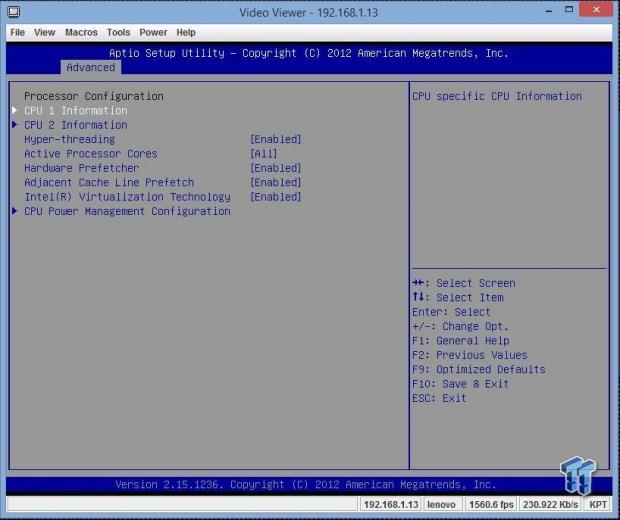
This is the advanced processor configuration tab. We set this server up so that SpeedStep and other power features were turned off in order to get the maximum performance out of the server while we test.
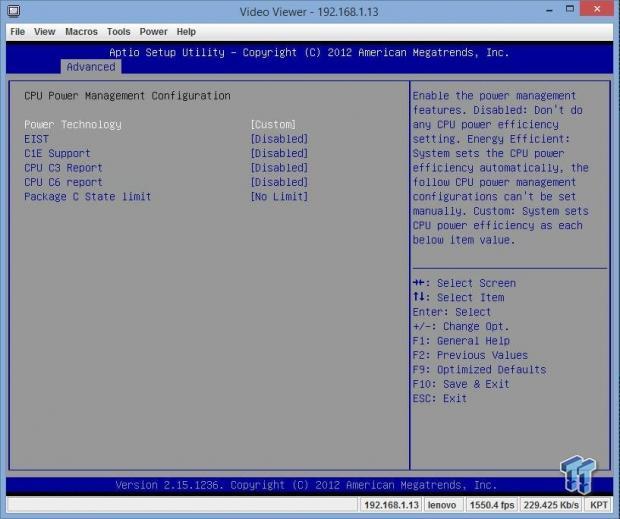
In the advanced power management tab, we turn off all power saving features for our tests.
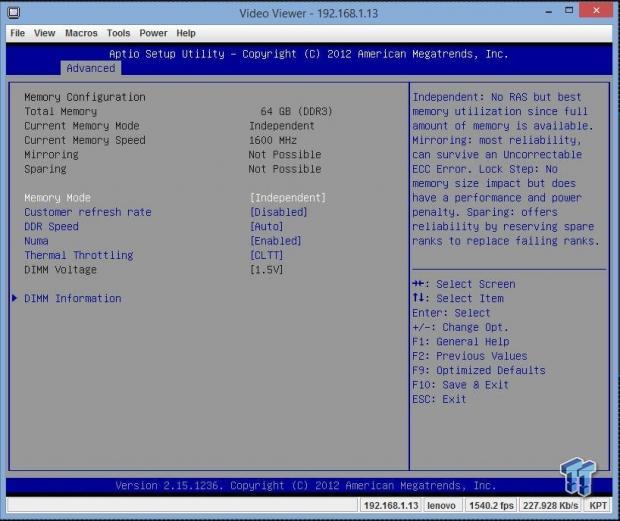
Here we see adjustments that are in the memory configuration tab.
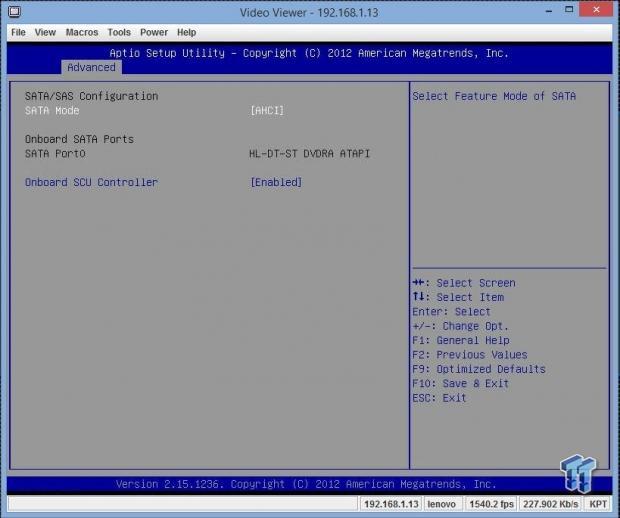
You can change these controls under the SATA/SAS configuration.
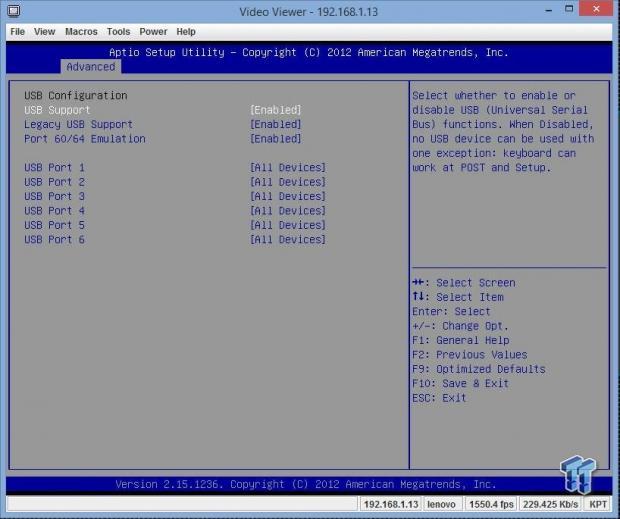
We are now looking at the USB menu and the options that are available.
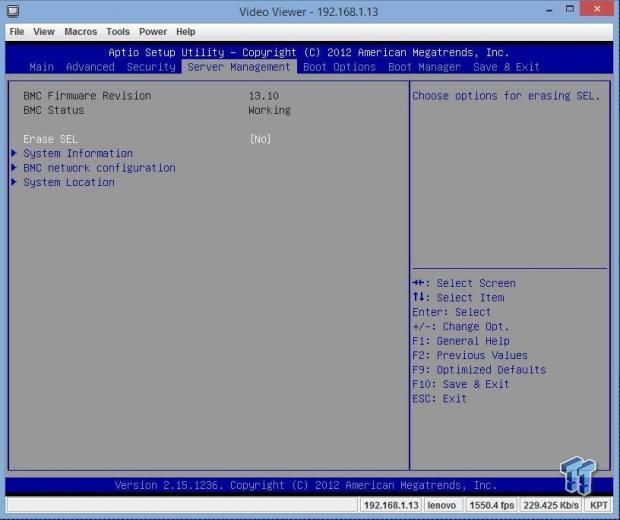
This is the server management tab. If you select the BMC network configuration menu, you will find the IP address to use for IPMI and remote management.
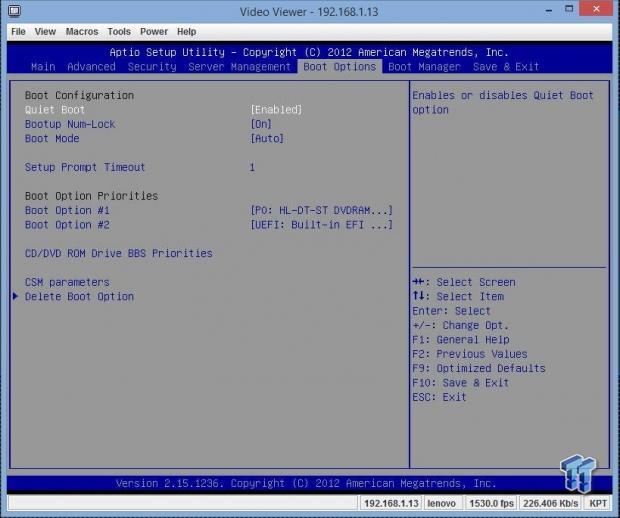
This is the boot option tab where you can change what device the server boots from.
Software
The Lenovo RD340 comes with two disks. One disk has drivers and setup programs to aid you in setting up this machine. The other disk has user manuals.
You can simply insert this DVD into the DVD drive and boot the machine. It will take you to the ThinkServer EasyStartup program.
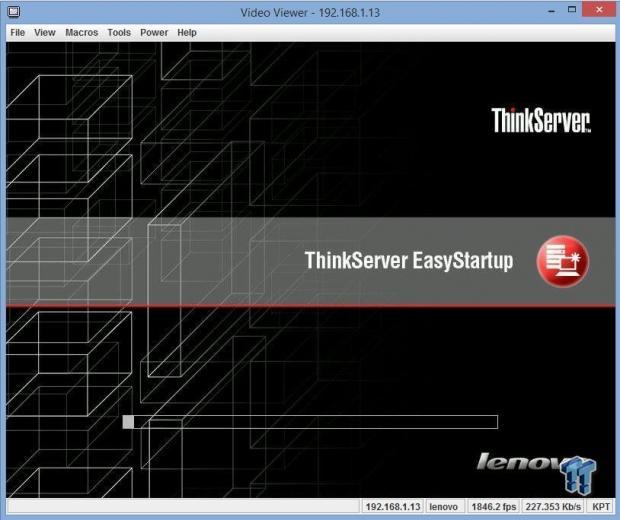
When booting from the software DVD, you will enter the ThinkServer EasyStartup program, which will guide you through getting the machine up and running.
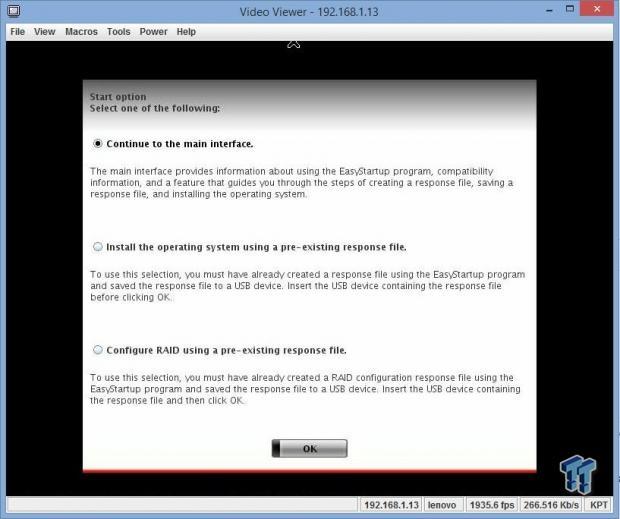
After this boots, you go through two other screens, agree to the terms and conditions, enter the date/time, and then you will come to this screen.
Much of this process is self-explanatory, so there is no need to show every screen that you encounter. Many are just confirming settings and hitting the next button.
Continue to the main interface if you are setting up a new server for the first time. After you work through that, you can create a response file on a USB drive that you can use for other servers. This includes RAID drivers, OS type, and everything else you would need. You would then use this USB drive for any other new servers.
If you have one these made already, then pick the second option. If you have the same setup but wish to use a different type of RAID, then use the last option.
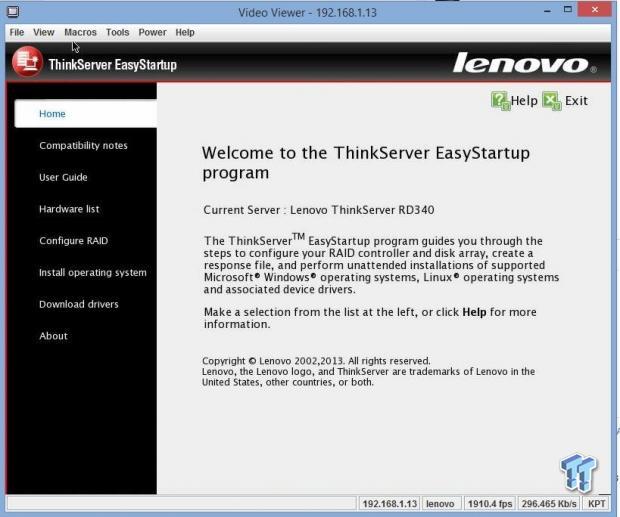
This is the home screen you will see after you select the first option from the step before this. You can see on the left side all the steps you will need to go through to complete this procedure.
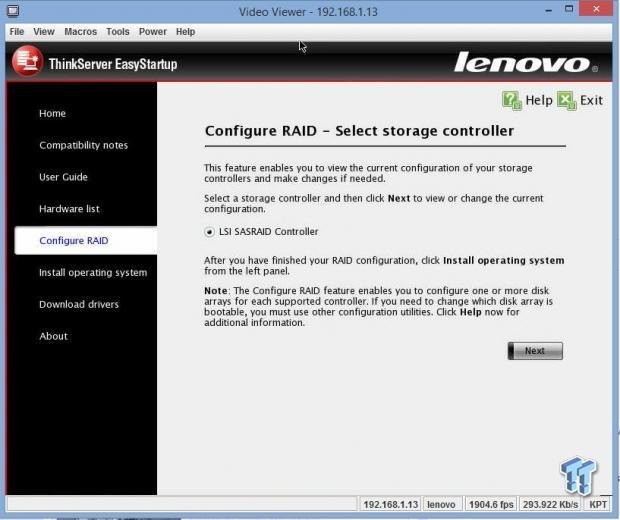
We skipped ahead a few steps to show you how the RAID array is setup.
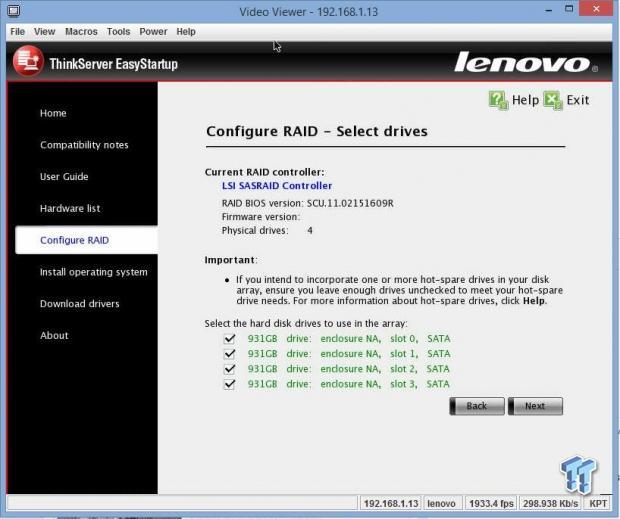
The ThinkServer RD340 that we received had four Western Digital 1TB hard drives installed. You can see here how they show up in EasyStartup. We selected all four drives for our RAID array.
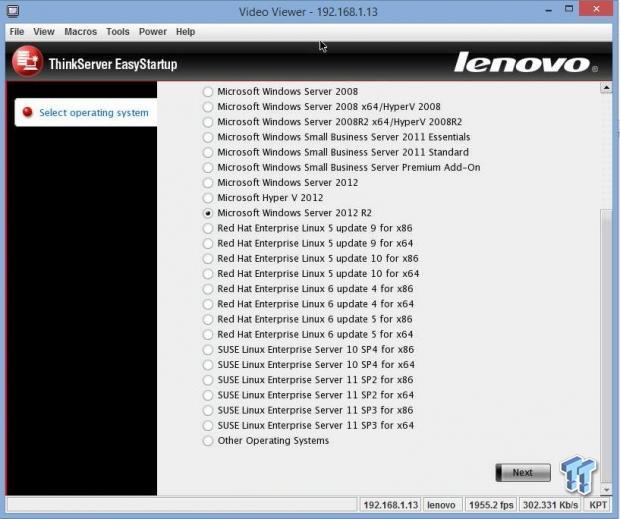
Here you can select the OS you want to install; we will be using Windows Server 2012 R2. After this step, you can proceed to enter your OS key, admin username, password, and a few other pieces of information; you will then have the option to write all this to a response file on a USB stick to use on other installs.
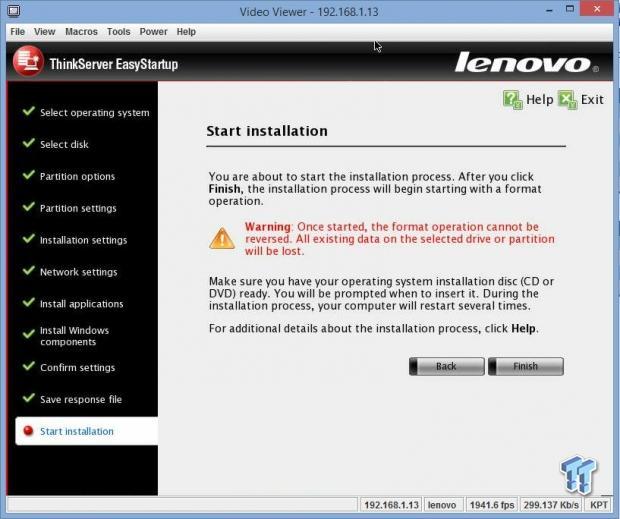
This is the last step in the EasyStartup process. Once you click finish, the install procedure will take over and get everything all setup for you.
There are other ways to setup the RD340 if you wish to do it manually. The supplied software disk should have all the drivers that you would need, and that process is very much like setting up any server you would run across.
The EasyStartup program makes this an easy process for anyone just starting out setting these up.
Remote Management
There are several ways that you can do remote management and IPMI on the RD340. Just like any server with IPMI, simply enter in the IP address, which you find in the BIOS under server management/BMC network configuration, into your web browser. In our case, that was 192.168.1.13. After that, you see the login screen.
On the back of the RD340, there is a dedicated LAN port for BMC, and we connected to that for our tests.
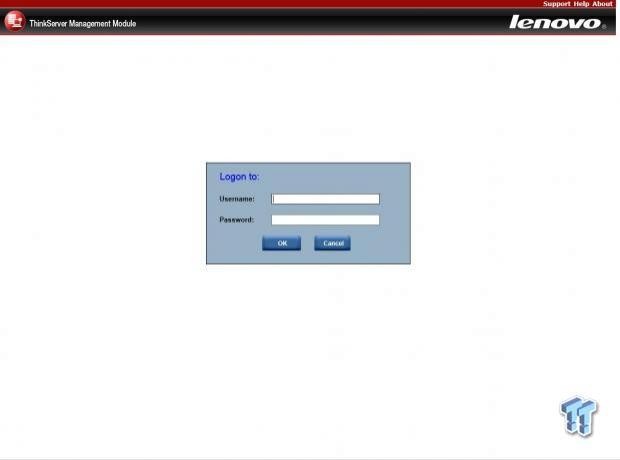
The login information for the Lenovo ThinkServer RD340 is:
Username: lenovo
Password: len0vO
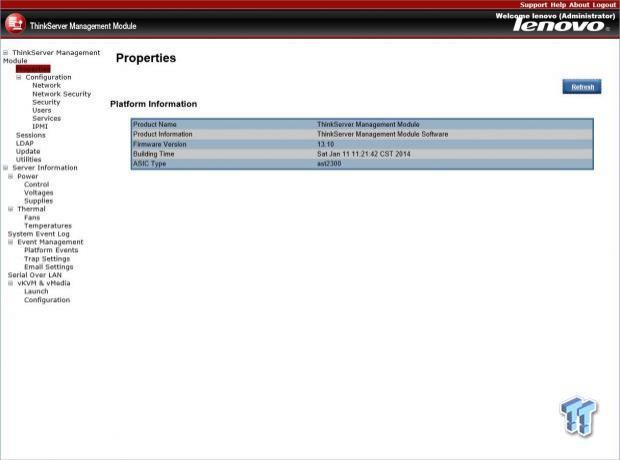
Here we are looking at the home screen for the ThinkServer management. The rest of the menus are typical for IPMI/BMC setups, so we will not show all of them.
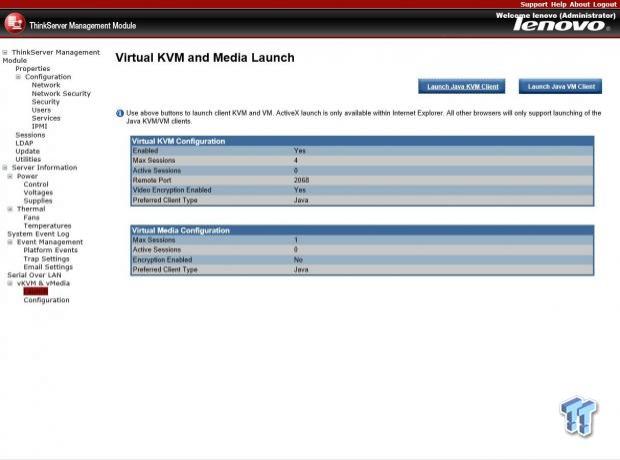
If you have the management controller premium module installed, you will see the menu options for KVM. These will not show up if there is no module installed.
Hitting the launch Java KVM client will allow you to remote right into the server.
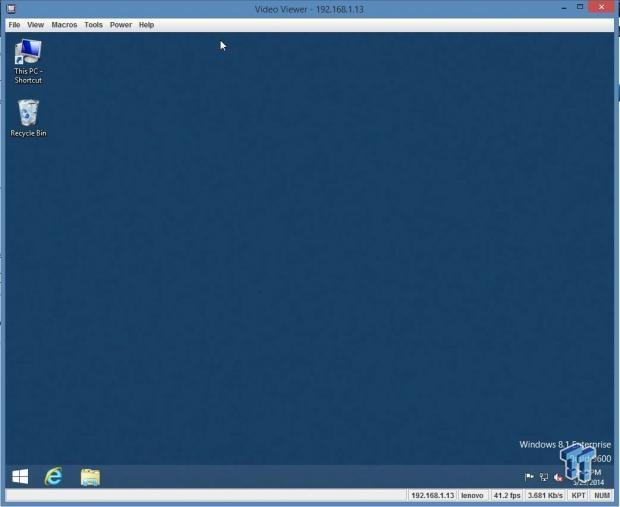
After entering the Java KVM client, we can now control the machine from the BIOS level all the way to the desktop.
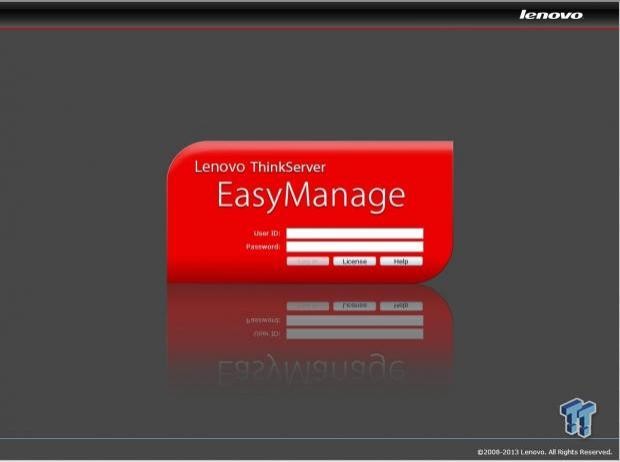
The next method to control the server is with a software package called EasyManage. Instal EasyManage on your host machine and use this to control many servers in your network.
After installing EasyManage and then running it, enter the login information below:
Login: server
Password: manager
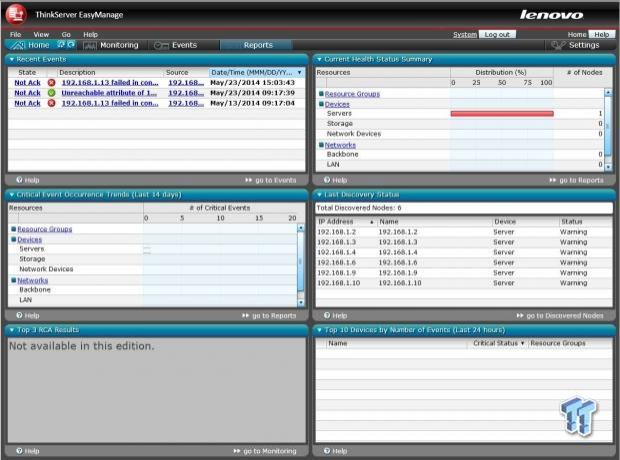
This is a typical screen for EasyManage. This program has many features that are useful in managing a number of different servers.
Test System Setup
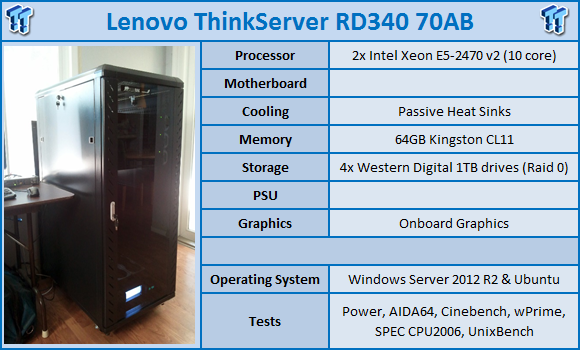
For all tests that we ran, we used optimized BIOS settings for maximum performance.
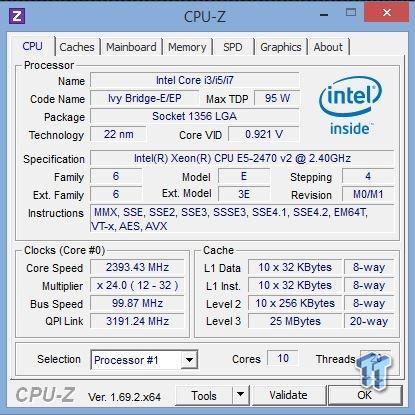
This is the CPUz screen showing the various stats of the Xeon E5-2470 v2 CPUs. As you can see, this CPU has a max TDP of 95 watts and a core voltage of 0.921V.
These CPUs launched Q1 of 2014, so they are relativity new. They use socket FCLGA1356, and they are Ivy Bridge architecture. Using socket FCLGA1356, they support Tri-Channel memory.
Each CPU has 10 cores, and we will be running a dual CPU system. This gives us 20 cores and 40 threads total.
System and CPU Benchmarks
Cinebench 11.5
CINEBENCH is a real-world cross platform test suite that evaluates your computer's performance capabilities. The test scenario uses all of your system's processing power to render a photorealistic 3D scene. This scene makes use of various different algorithms to stress all available processor cores. You can also run this test in single-core mode to give a single-core rating.
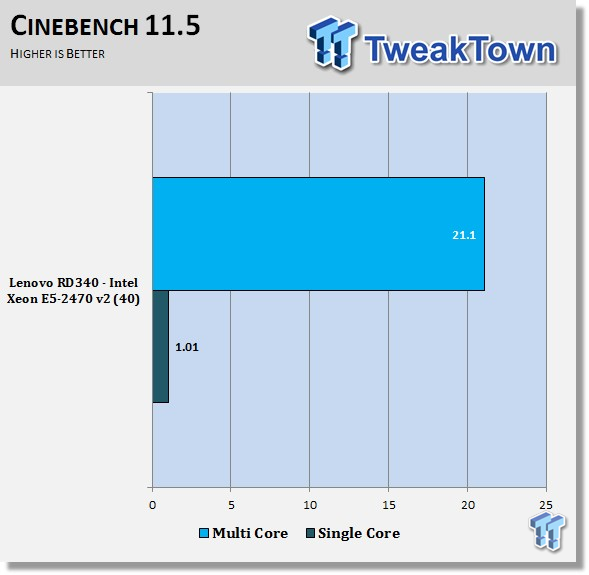
The lower stock speed of the 2470 v2s hold this back in single-threaded tests, but with 40 threads running, it really takes off. This is a good score for a 1U server.
The ASUS Z9PE-D8 WS claimed the number one spot in this test, but only by a small amount.
Cinebench R15
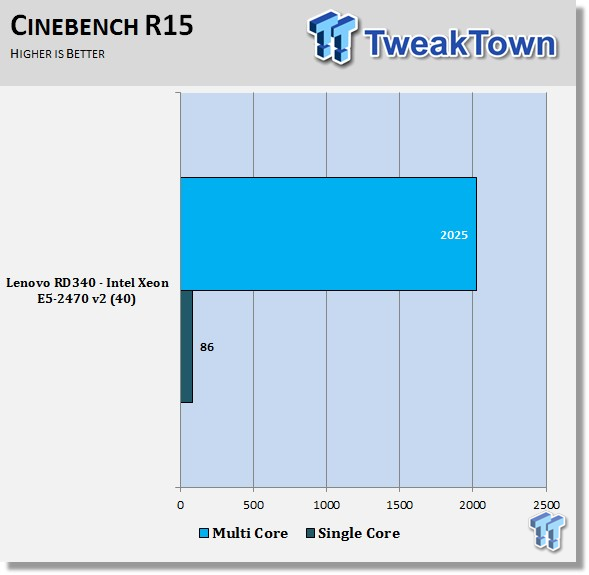
Just like in the Cinebench 11.5 results, we see a lower single-threaded score and a much higher multi-threaded score.
We like the multi-threaded scores on this server; it really shows a lot of power installed into a 1U server.
wPrime
wPrime is a leading multithreaded benchmark for x86 processors that tests your processor performance. This is a great test to use to rate the system speed; it also works as a stress test to see how well the system cooling is performing.
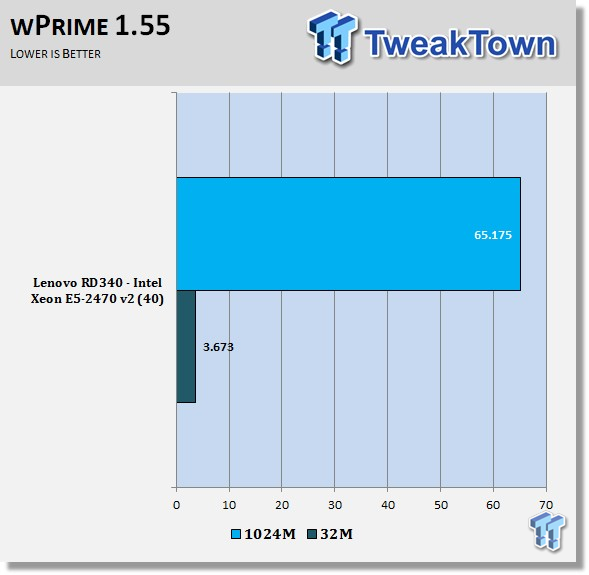
Just like in the Cinebench scores, wPrime shows similar results. The 2470 v2s do not have high clock speeds in order to keep heat down, but it still has a lot of potential.
Memory Benchmarks
AIDA64
AIDA64 memory bandwidth benchmarks (Memory Read, Memory Write, and Memory Copy) measure the maximum achievable memory data transfer bandwidth.
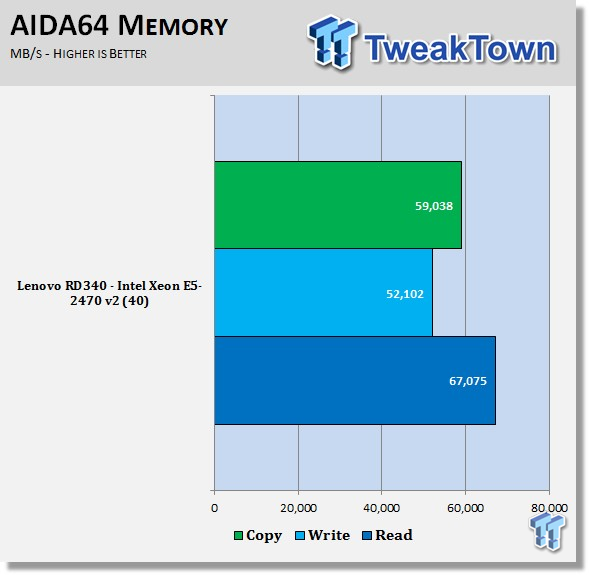
AIDA64 memory tests show the RD340 using Tri-Channel memory has good memory bandwidth. To improve memory bandwidth, higher speed memory DIMMs would help.
LinX
LinX 0.6.4 is a CPU benchmark that measures floating-point operations per second, and it is used to compare CPU performance; it is also a very good stress test to run.
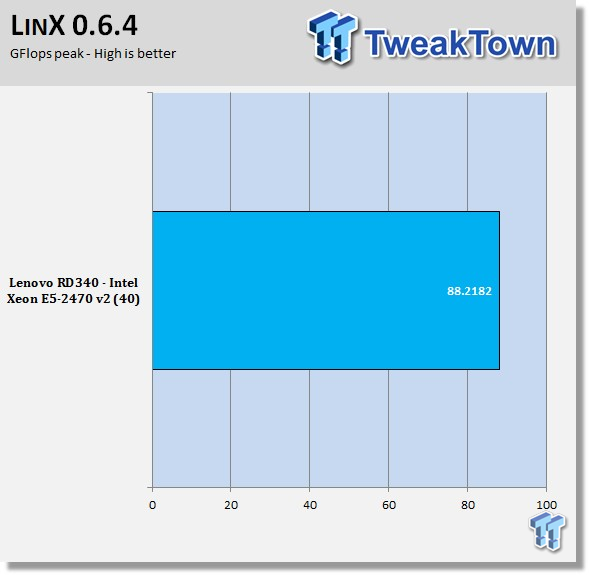
The RD340, using Tri-Channel memory, has good LinX results. Just like in the AIDA memory tests, higher speed memory sticks would improve this result.
UnixBench 5.1.3 and SPEC CPU2006v1.2
UnixBench
UnixBench has been around for a long time now, and it is a good general-purpose bench to test Linux systems.
This is a system benchmark, and it shows the performance of single-threaded and multi-threaded tasks.
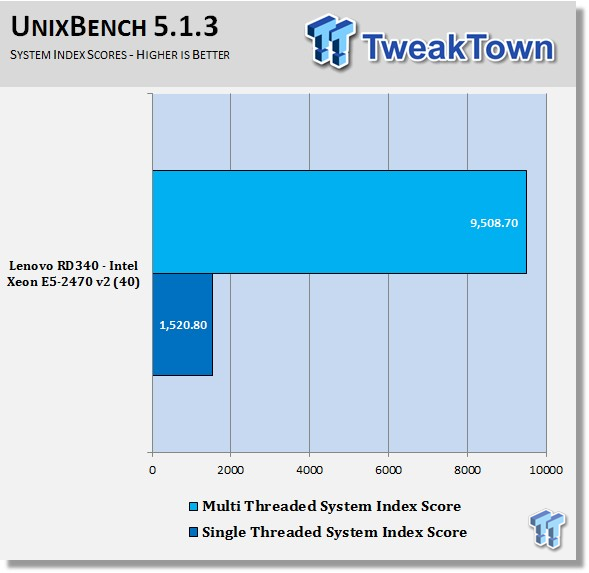
This shows the system indexes after a complete UnixBench run. Here we get an idea of how much of a performance gain we get using multi-threaded applications. However, many applications use single threads, so this number is really the base, and a higher clock speed will increase both indexes.
Now we are seeing that the 2470 v2s in the RD340 come very close to other systems we have tested. This is starting to look very good for the RD340.
SPEC CPU2006v1.2
SPEC CPU2006v1.2 measures compute intensive performance across the system using realistic benchmarks to rate real performance.
In our testing with SPEC CPU2006, we use the basic commands to run these tests.
Runspec –tune-base –config=tweaktown.cfg then int or fp
To do multi-threaded we add in –rate=40.
When SPEC CPU first came out, these tests could take up to a week to run, but as computers became faster, the test period shortened.
The user can do many things to affect the results of CPU2006 runs, such as compiler optimizations, add-ons like Smartheap, and different commands used to start the tests.
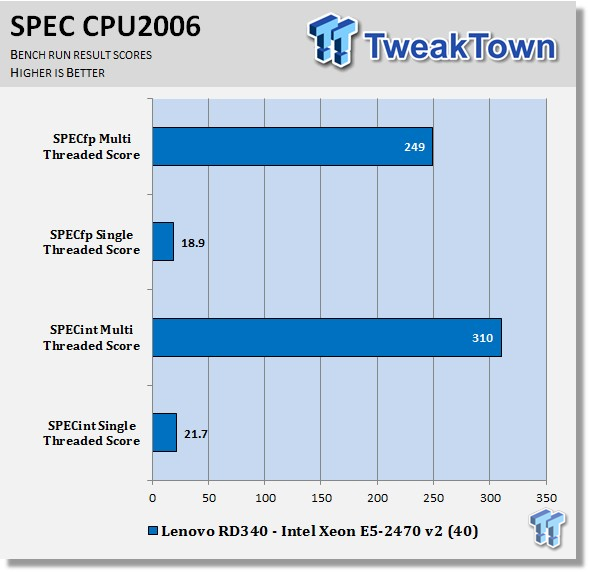
Here you can see the SPEC scores after full runs for Integer (int) and Floating Point (fp) tests.
Single-core runs show how fast (speed) a CPU can perform a given task. In the multi-core runs, we set SPEC CPU2006v1.2 to use all threads, and this is a measure of the throughput of the system.
The additional cores/threads of this system have a huge impact on performance in these tests and really show the amount of horsepower that a dual-socket system has over a single-socket board
Single-threaded results are still very important, but when you need lots of those to run, moving to a dual-socket setup is the way to go.
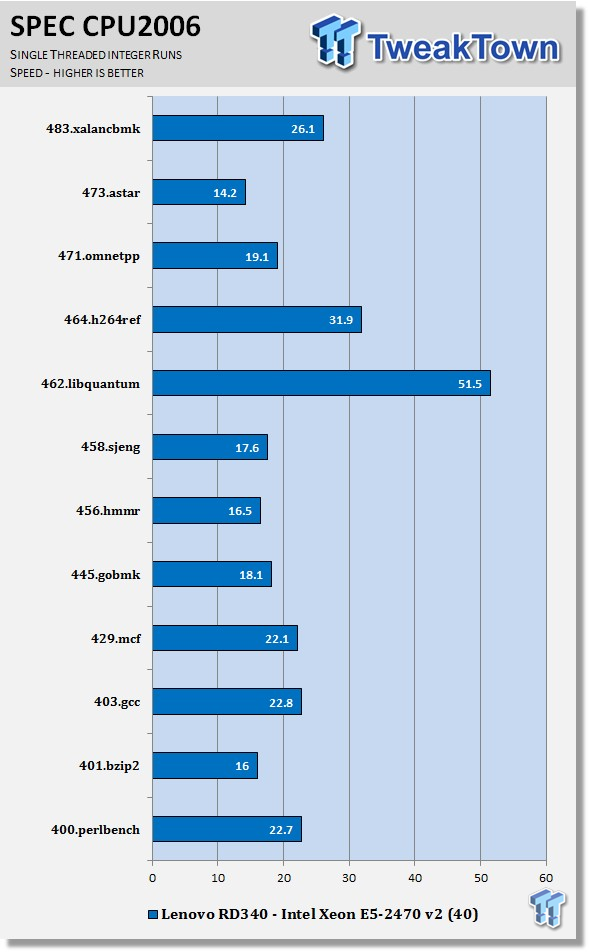
Looking at the results of single-threaded integer runs, we can get an idea of the speed at which the Intel Xeon E5-2470 v2s can crunch through the different integer tests. Not all CPUs are equal here, and ones that have a higher speed will perform these tests faster. In this case, this is the stock speed of the Intel Xeon E5-2470 v2s. Naturally, using an overclocked system or CPUs with a higher stock speed will generate higher results.
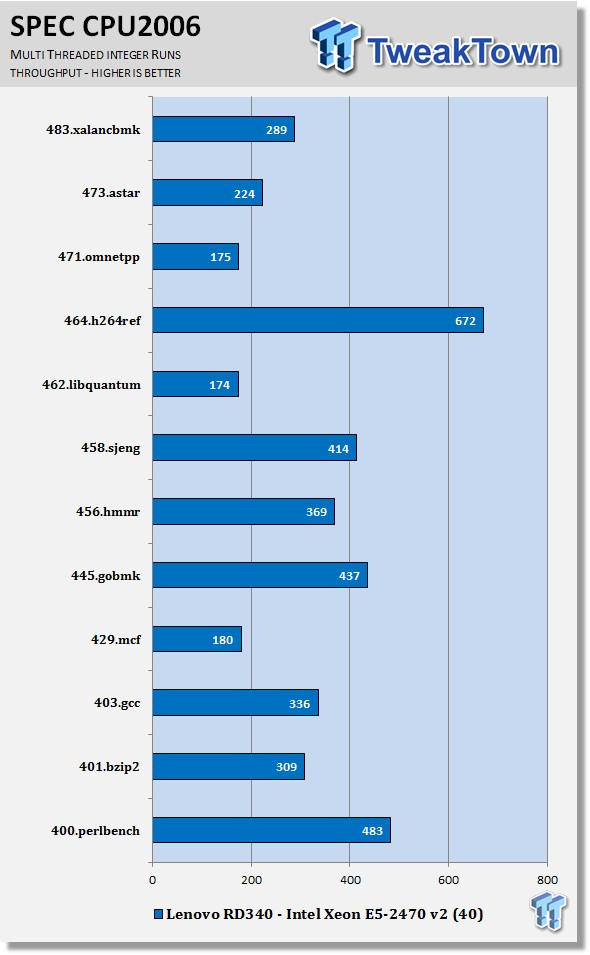
Now we run the test using all 40 threads of the Intel Xeon E5-2470 v2s to measure the throughput of the system. In this test, more cores/threads will have a greater effect on the outcome.
We can see a big difference here using the dual-socket setup, and a three to four times performance boost is seen in many cases.
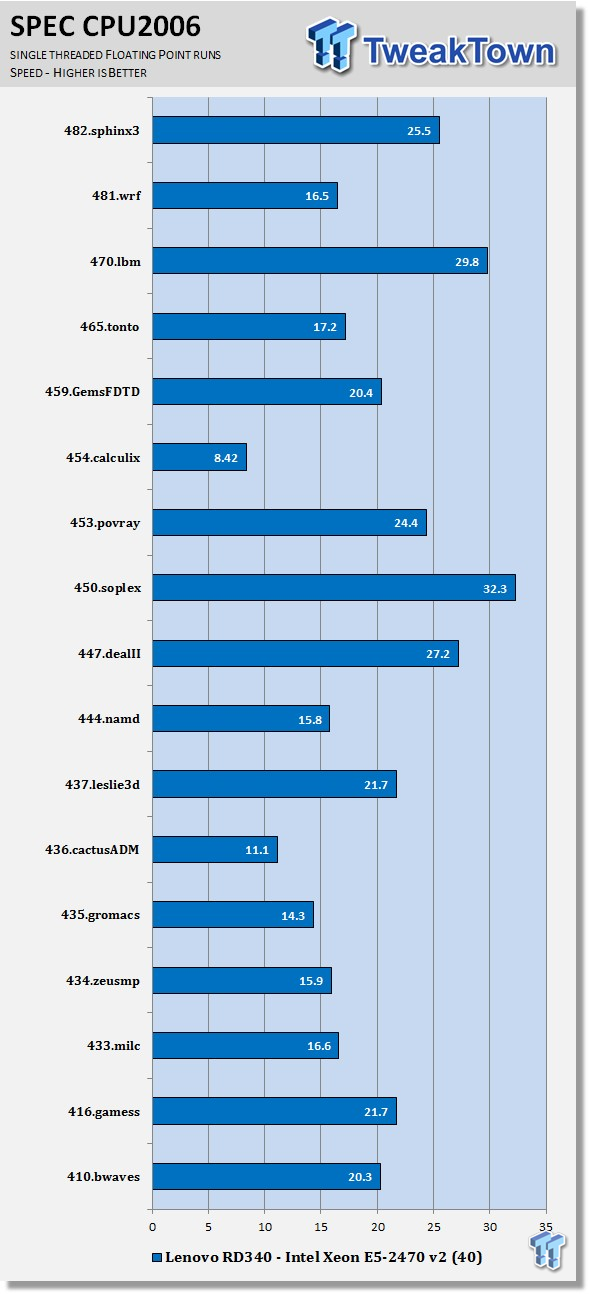
Just like the integer tests, we now run the floating-point tests in single (speed) mode. The lower clock speeds of the Intel Xeon E5-2470 v2s hold this bench back also.
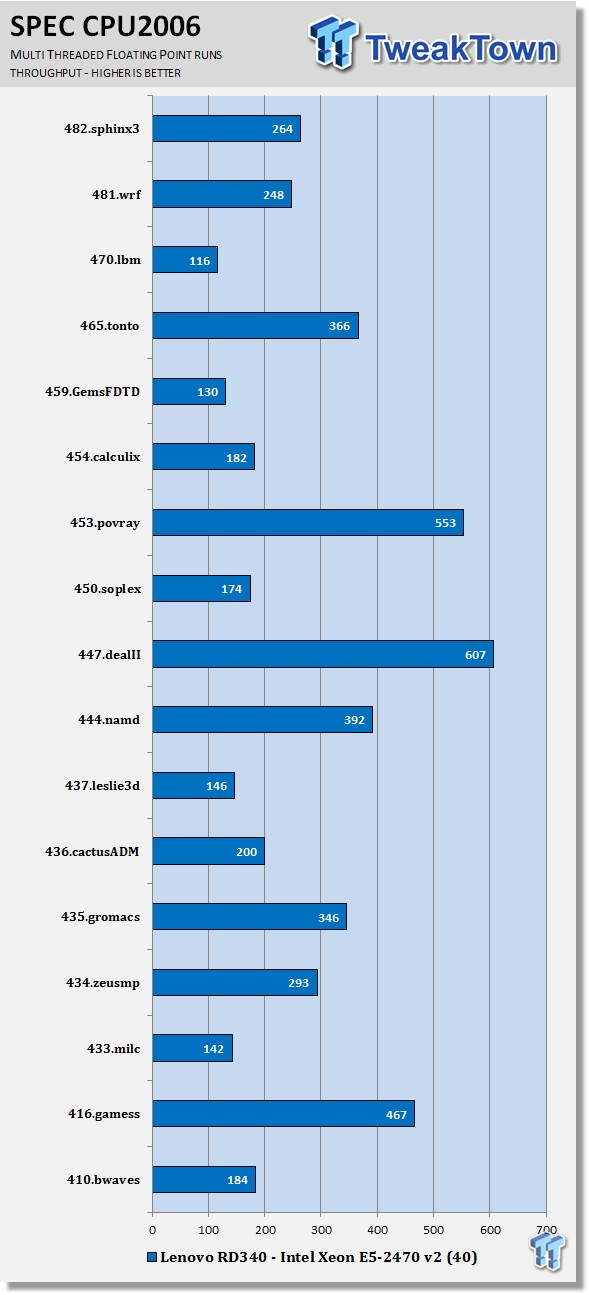
Here we see the results of the multi-threaded floating-point run that uses all 40 threads of the Intel Xeon E5-2470 v2s. Like the multi-threaded integer test, more cores/threads will have a greater impact on the test.
Power Consumption and Final Thoughts
Power Consumption
We have upgraded our power testing equipment and now use a Yokogawa WT310 power meter for testing. The Yokogawa WT310 feeds its data through a USB cable to another machine where we can capture the test results.
To test total system power use, we used AIDA64's stability test to load the CPU, and then we recorded the results. We also now add in the power use for a server from the off state to hitting the power button to turn it on and take it all the way to the desktop. This gives us data on power consumption during the boot up process.
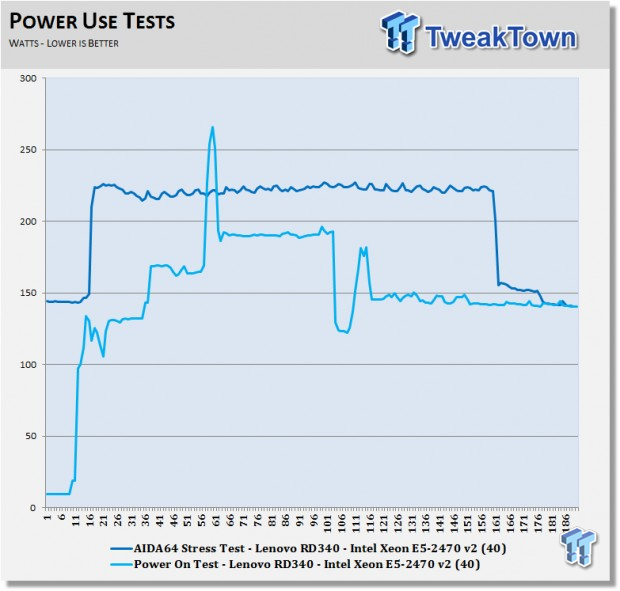
With dual-socket systems, power use can be rather high when fully loaded. The Lenovo ThinkServer RD340 did peak out at about 225 watts under load and at about 260 watts on boot up. Setting the server power features and CPU SpeedStep will lower these numbers. Overall, the RD340 does not use a lot of power compared to bigger systems. This is good as it also lowers heat output and makes for a cool running server.
Final Thoughts

The feature list for the RD340 is very much like other servers out in the market, so what sets the RD340 aside from the others?
The first thing that caught our eye was the ease of install and access to internal components. However, that was not everything; maintenance of components like fans was very simple to do. The air shroud comes off very easily, which allows for easy CPU and memory upgrades.
We also liked the EasyStartup DVD that simplified setup of one server to many servers. With the EasyStartup program, you do not have to worry about RAID drivers and other chipset drivers; it builds it for you. Setting up the OS is also painless. After you input the required information, EasyStartup takes over and does the install for you.
You can still do the install the manual method if you wish; everything that you will need is included on the software DVD. Remote management was also a snap, and Lenovo offers several ways to manage your servers, including IPMI, KVM, and EasyManage. We did not know about the management controller premium module at first, but we found Lenovo tech support to be fast responding, friendly, and helpful. They quickly shipped a module out to us.
Lenovo offers a great line of support for their servers also. Here you can see all the options they offer.
About the only complaint we could find is it feels a little like a closed system at first, but we did work around that when installing Ubuntu on the machine. Most of the more common operating systems are available for you to install. Ubuntu Server is not on the list, so you will need to work around that if you plan to use it.

