Introduction
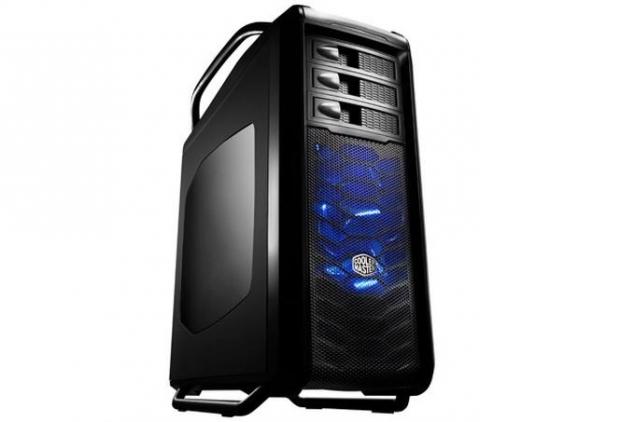
Looking at this chassis takes me way back to my roots as a reviewer, and the first chassis I ever reviewed. Back then it was the Cosmos S, not the original concept, but the slightly revised design. Being well over five years ago now and looking back, that chassis was well ahead of the curve, and is likely why it is still such a success today. When we were at CES, we got to peek at the new Cosmos II and all the pomp and circumstance that it delivered. Even today, I am still seeing modded versions of this chassis daily in social media, and I think while it's a huge case, it will always have a spot in a lot of PC users hearts.
But what about those who aren't in the market for a super tower, but still fell in love with the concept? Well, today is your day, as Cooler Master delivers a lighter, more agile, road and track version of the Cosmos design. Keeping all that is holy to the name Cosmos, it is obvious that this new chassis is befitting of the naming - it is more like they threw it in the dryer on high heat, and now we have a medium sized version. While the exterior carries a lot of similar things to the Cosmos II, with the reduction in size, the interior had to be reworked, but Cooler Master still figured out ways to add things that are firsts for ever being done before.
Over the last year or so, Cooler Master has really stepped up their game and want to run with the big dogs now. Everything from new AIO coolers coming out, to always keeping up and setting trends with their mice and keyboards, it doesn't surprise me that they are able to pull off new and insinuative things year after year.
Sticking with that trend, while really hard to destroy the name Cosmos anyways, even with the reduction in size, Cooler Master has run through this new Cosmos SE we are looking at today with a fine toothed comb, and truly thought of everything when putting together this aggressively sleek chassis.
Specifications, Availability and Pricing
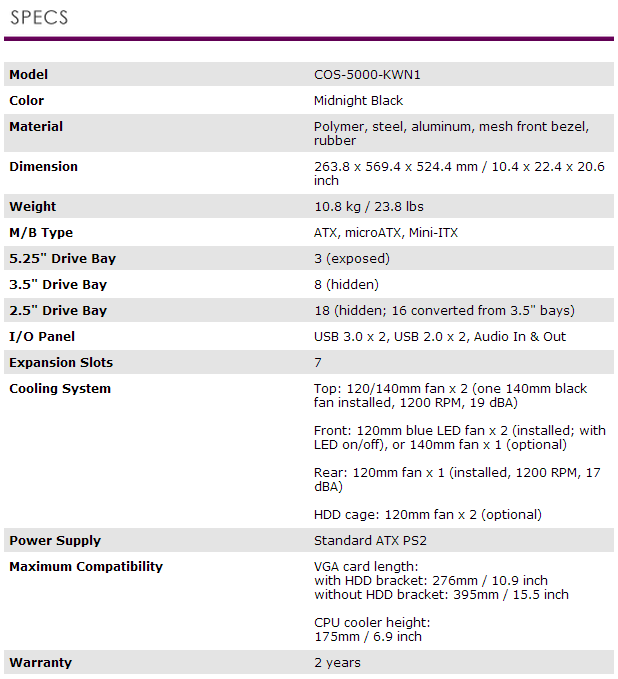
The Cosmos SE is painted in Midnight Black, and is darker than most other black cases we look at. There is a mix of polymer and mesh used in the front bezel and the top of the chassis, while the frame and doors are steel, and as any Cosmos should have, the four bars that surround the top and bottom of the chassis are made of aluminum. The left side panel offers a huge, slightly tinted, side window, and the right side is bumped out far enough that there is near 45mm of room for wiring. The plastic components are rounded and as with any other Cosmos, and while slightly smaller in stature this time around, there is no mistaking the lines, curves and aggressive design of what is a Cosmos chassis.
Inside there is a lot going on. There are two 5.25" bays, but there are three bay covers, due to the position of the pair of 120mm fans with blue LEDs installed there. Behind the fans there is a six tray rack for storage, and this rack will allow for either six 3.5" drives, but all the trays also allow for two 2.5" drives each, for a total of 12 in this section. Then at the bottom there are two more storage bays accessible via the front of the chassis. Again, these trays are for 3.5" drives, but still offer the ability for two 2.5" drives on each. Combined with the pair of hidden 2.5" racks behind the motherboard tray, you could install up to 18 2.5" drives in this chassis. If you remove the six bays from the front of the chassis, Cooler Master sends some support bars to allow for 240mm or 280mm radiators here. The top of the chassis is designed for a pair of 120mm or 140mm fans, and if a radiator comes into play, the fans fit into the top of the chassis, while the radiator stays inside the chassis.
The motherboard tray is well equipped with management options, tie points, and will house Mini-ITX, Micro-ATX or an ATX motherboard. The floor of the chassis offers room for the PSU and an optional fan, and as we move to the back, we are given seven expansion slots, with a plus two section next to it. This section offers two holes without grommets for tubing to pass through, but the back of the chassis also offers three holes with grommets for wiring and tubing.
With the Cosmos name comes Cosmos pricing, and even with the Cosmos SE, things are a touch pricey. Looking around, we were able to find that currently Newegg and directly from Cooler Master are the best options. At Newegg, the pricing is set to $169.99, and you still need to pony up another $17.99 to get it shipped. A similar story can be found directly via the CM Store. As far as full-tower's go, that is a costly endeavor, but I will promise you this, you have not seen a chassis designed like this before, and they offered just about everything you can pack into a design of this size.
The Cosmos SE is a coin toss. While pricey, there is nothing else like it on the market except for its much larger brothers, and on the flip side of that coin, this design is feature rich, and is at least worthy of some serious pondering, even at this price.
Packaging

Not that I am completely shocked that the shipping company appears to have taken a machete to this box, I am more shocked there were no internal damages. Cooler Master had a very nice image of the chassis on the left until it got chopped, but at least we see the features of the side window, water cooling and storage support and the fan LED toggle switch.
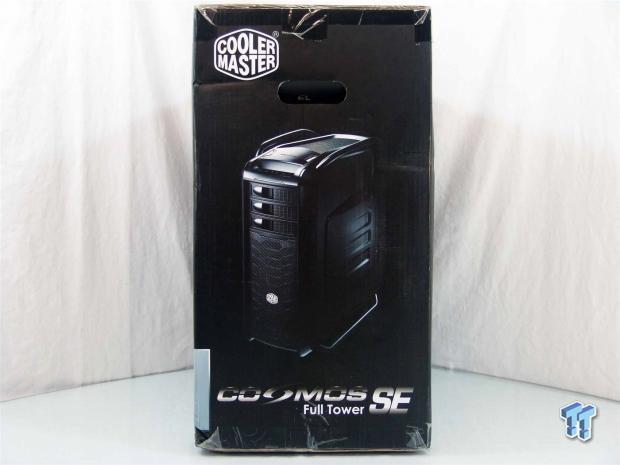
Moving on to the next panel, we find a much nicer image of the front, top and right side of the Cosmos SE. Because of the abundance of space left, they also added the Cooler Master logo and the chassis naming.
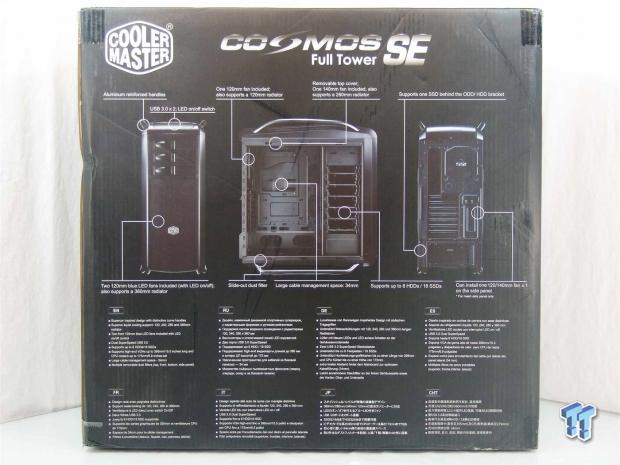
The back of the box offers three images across the top of this panel. There are three features shown for the front, five for the inside and two more at the rear. The bottom offers a list of eight features found in eight various languages.
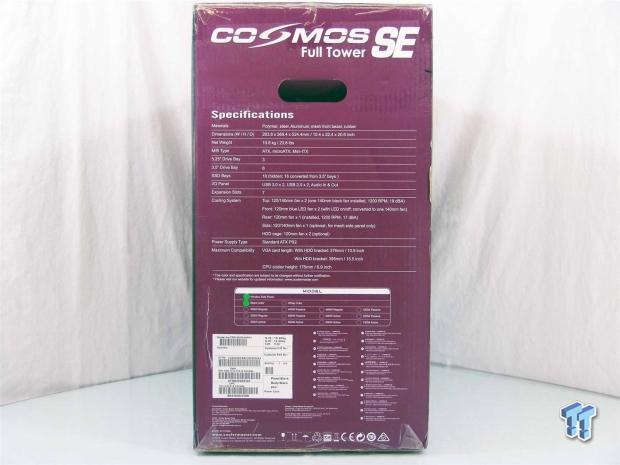
Then of course we have to have the purple side to coincide with other CM products. Here they chose to add the specifications chart, a box to mark the model inside of the box, and at the bottom it says this is a case and where to go for support.
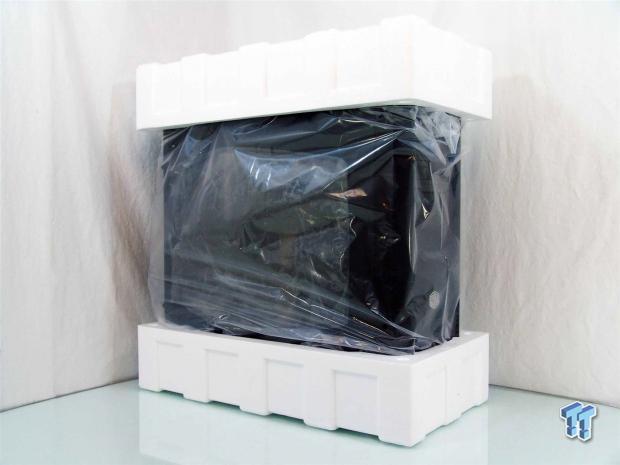
This is what protected this Cosmos SE from the machete bandit. The thick Styrofoam caps, the plastic inner liner, even clingy plastic applied to the widow all stood tall and were able to deliver a chassis that we thought was done for when the box arrived. It just goes to prove that you don't need to improve on an idea that has proven to work for years, when done right.
Cooler Master Cosmos SE Full-Tower Chassis
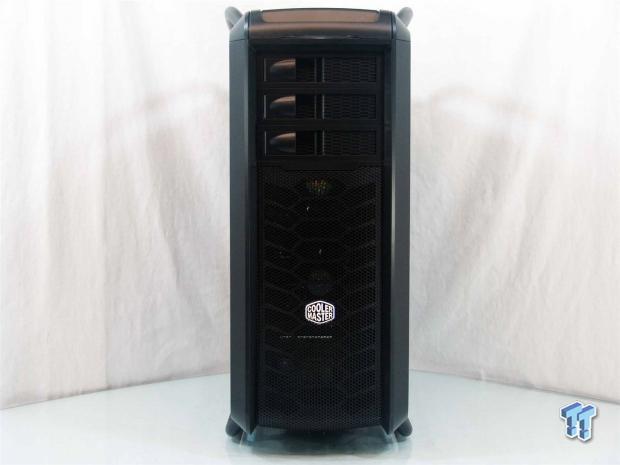
The front of the Cosmos SE starts at the top with the I/O panel between the aluminum bars, and the bezel curves its way down the face, offering a trio of bay covers and a large mesh panel with the Cooler Master logo on it.
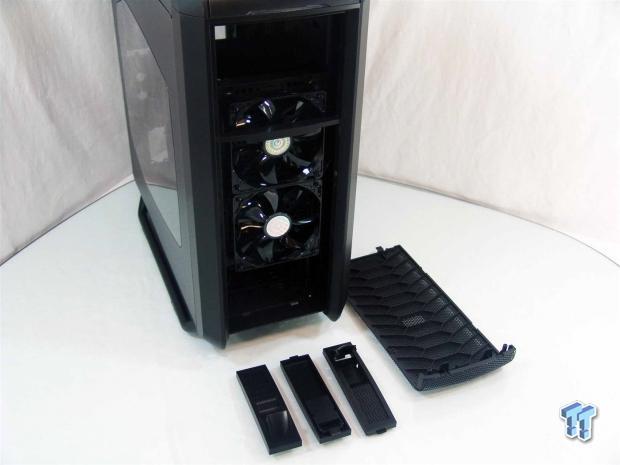
We removed the bay covers as well as the front mesh panel, which can now be taken to be cleaned. This view shows the pair of 120mm blue LED fans behind them, but notice that the fans are set higher than just the mesh covers.
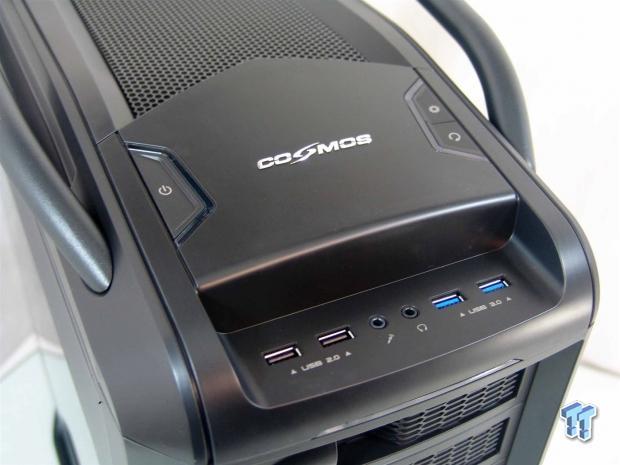
At the top of the front bezel there is the front I/O panel with the Cosmos name right in the center. To the left is a power button surrounded with a blue LED bar, and to the right is the reset and LED power switch with the same LED bar surrounding them. In the notch at the front there is a pair of USB 2.0 and USB 3.0 ports, along with 3.5mm jacks for audio.
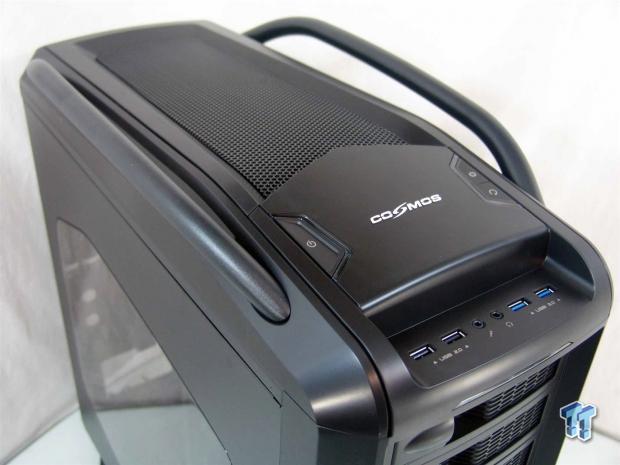
The remainder of the top panel is this raised mesh panel that will slide out the back of the chassis to allow access to install fans and radiators to the top of the chassis.
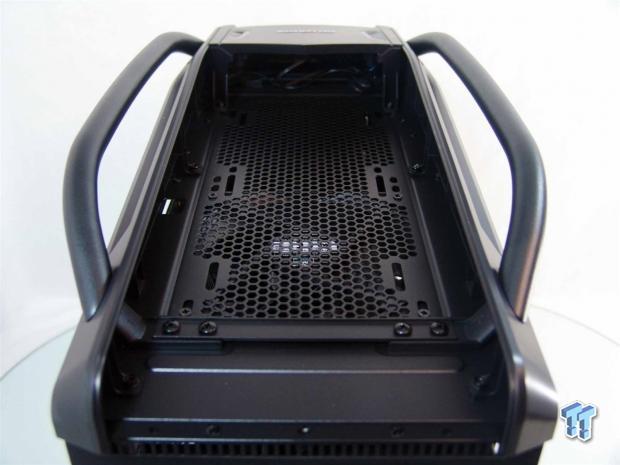
After removing a thumbscrew and sliding the panel off, you can see there is plenty of room for fans, even room for a radiator here if you want the fans to push rather than pull air through the fins.
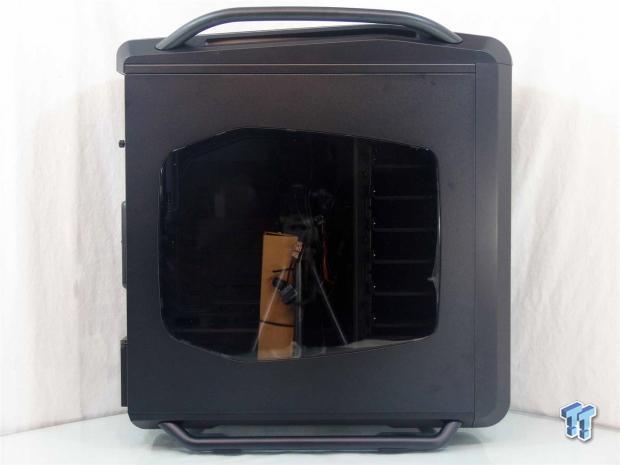
From the left side of this chassis, you can now see the shape of the handles and how the lines of the case try to stay with it. Even when it came down to the shape of the large window, it also mimics the top lines and those of the aluminum bars.
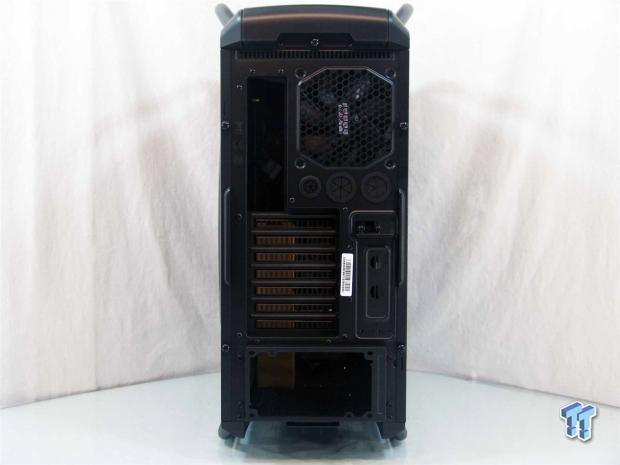
Viewing the back of this, at the very top is the screw needed to be removed to access the top of the chassis. Moving down there are the rear I/O, 120mm exhaust, and a trio of holes for water cooling and wiring. Then there are the seven plus two slots. The "plus two" plate offers two more holes in the steel plate, and that leaves the large hole at the bottom for the PSU.
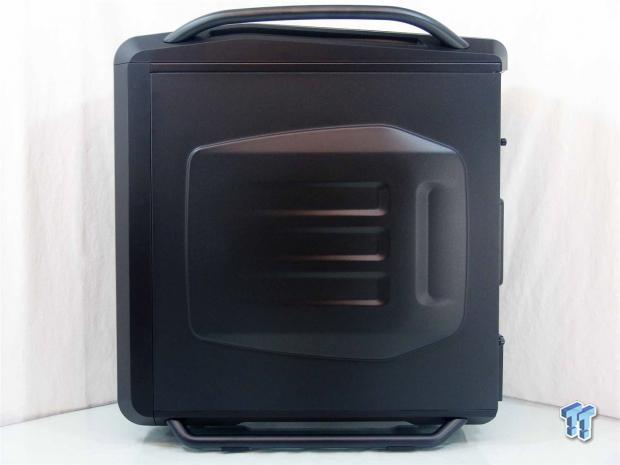
The right side of the chassis offers a flat panel with a very large design embossed into the steel. Looking much like a Cowl induction hood, the scallops and the shape stick to the styling and add a lot of room behind it for wiring.
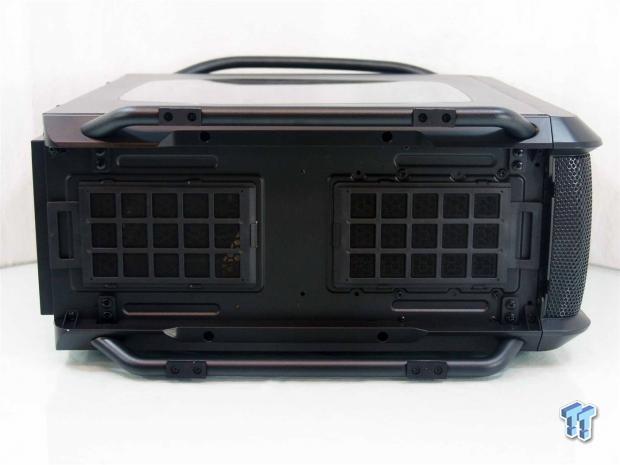
The bottom of the chassis is supported by the bottom two aluminum rails and rubber pads attached to them. It is easy to see where the handles are bolted to the chassis and the pair of dust filters that slide out both ends for easy cleaning, rather than one long one.
Inside the Cosmos SE
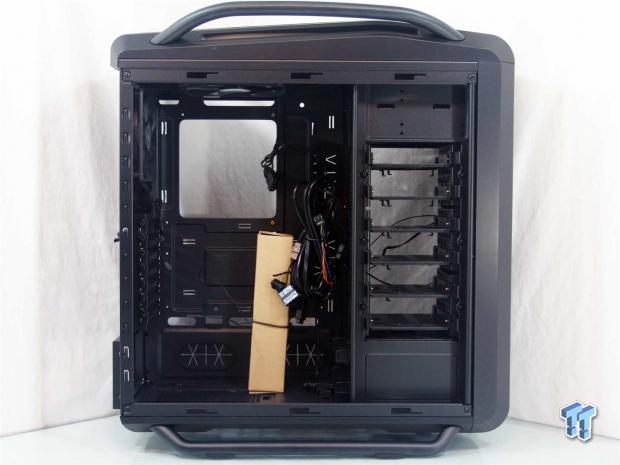
Covering the basics as we first glance inside of the Cosmos SE, we see the hardware tied to the motherboard tray next to what seems to be quite a bit of wiring. You may also notice at this point that this is more of a mid-tower chassis, just that the bars take it to the specifications for a full-tower design.
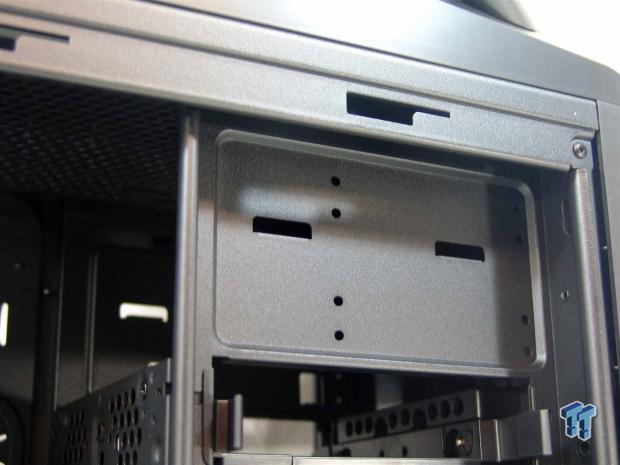
The front of the chassis starts out with this pair of 5.25" bays that will need the use of screws to mount things here, as there are obviously no tool-free latches present.
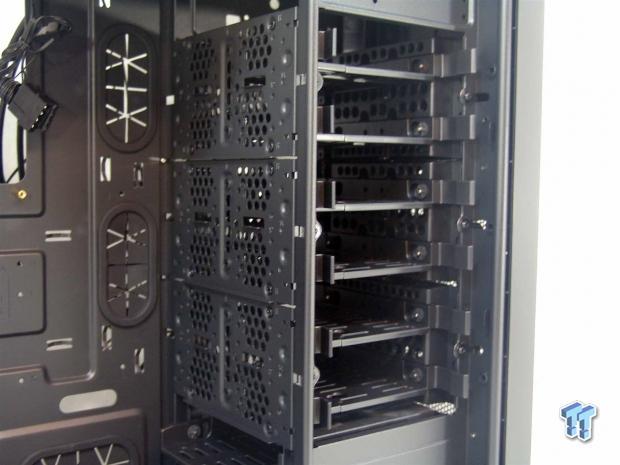
The six-bay rack seen here can house six 3.5" drives or 12 2.5" drives due to the offset screw holes in each tray. Also, if you remove the three plastic sections on both sides of the trays, these bays can all be removed, but the fans are attached to the front sections from the factory.
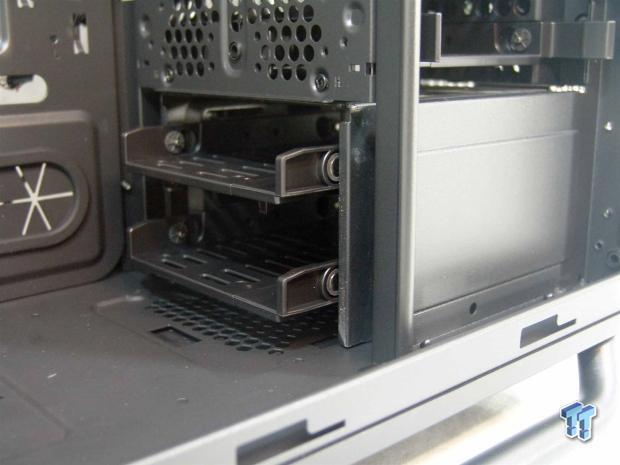
At the very bottom of the rack assembly, there are yet two more trays that will either hold a single 3.5" drive each or a pair of SSDs. To access these bays, you must remove the mesh section of the front bezel.
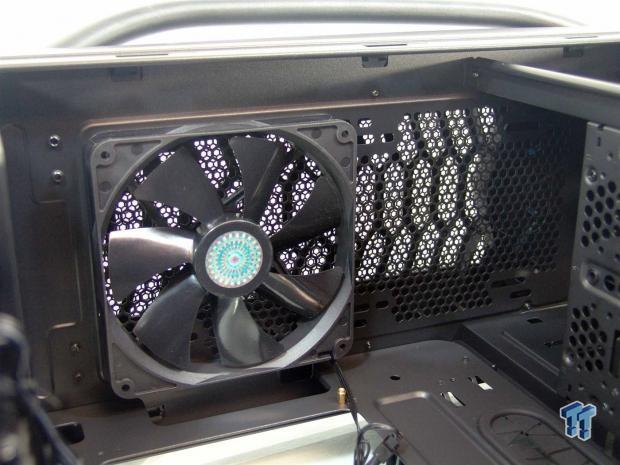
In the roof of the chassis, there is a single non-LED 120mm fan that Cooler Master sent installed. Again, this is designed for use with 120 or 140mm fans as well as dual radiators in each segment.
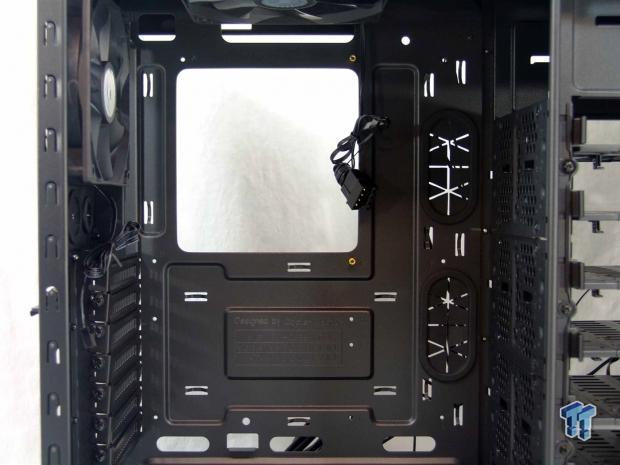
The motherboard tray offers a good sized CPU cooler access hole, eight wire management holes, and 14 places to tie up the wiring. Each of the standoff spots is labeled and a chart is given as to which to use for ATX, Micro-ATX or Mini-ITX installations.
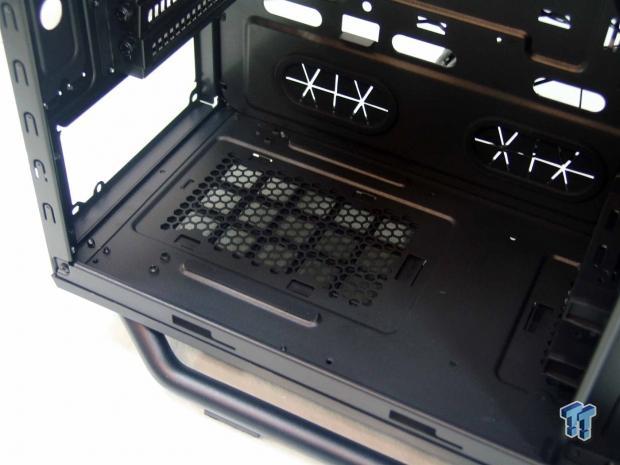
At the floor of the chassis there are two thin rails with rubber padding for the PSU to set on, and there are two more wire management holes. Also there is a PSU extender bracket in use to offer a bit more room inside for larger power supplies to fit nicely.
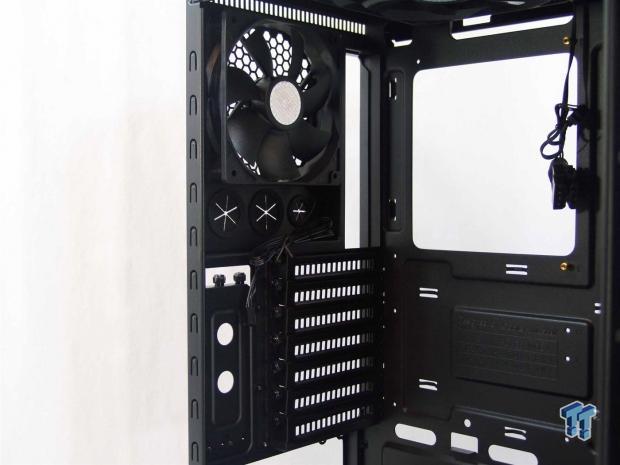
The 120mm fan installed as the exhaust is also non-LED, and all fans are 3-pin powered, but also come with Molex adapters. As for the seven ventilated expansion slots, they are held in place with thumbscrews.
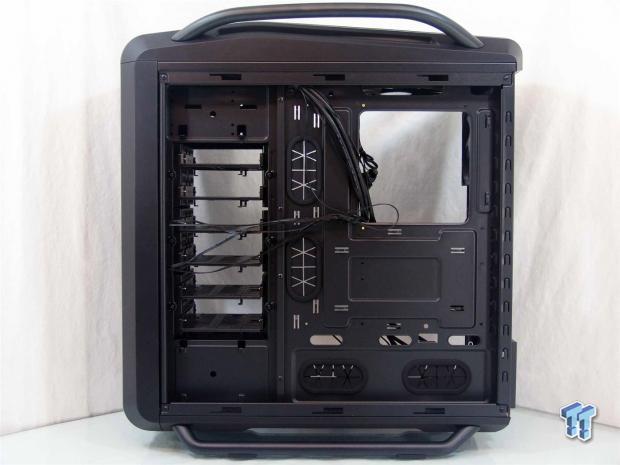
Behind the motherboard tray, there is already 25mm of space in most places without the bump in the door even coming into play. At the left, at both the top and the bottom, there are places that allow for a 2.5" drive to go in each for massive storage options in the Cosmos SE.
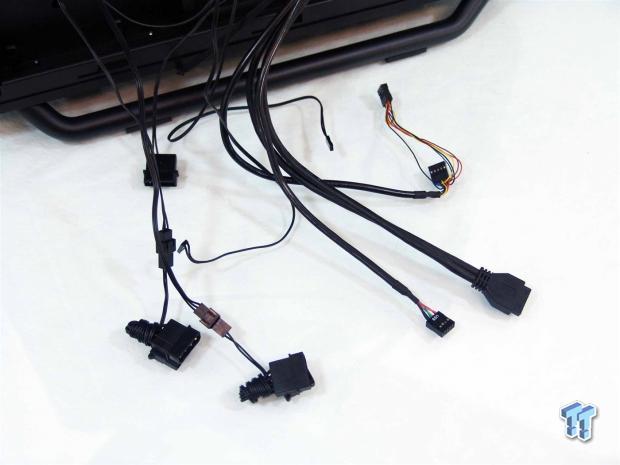
There is in fact a lot of wiring. There are four fan leads to tend two, two of which also have LED switch wiring connected. Then there are the front panel switch and LED wires, the USB 2.0, native USB 3.0 and the audio cable to deal with. All of them are long, and are black to blend into the build.
Accessories and Documentation
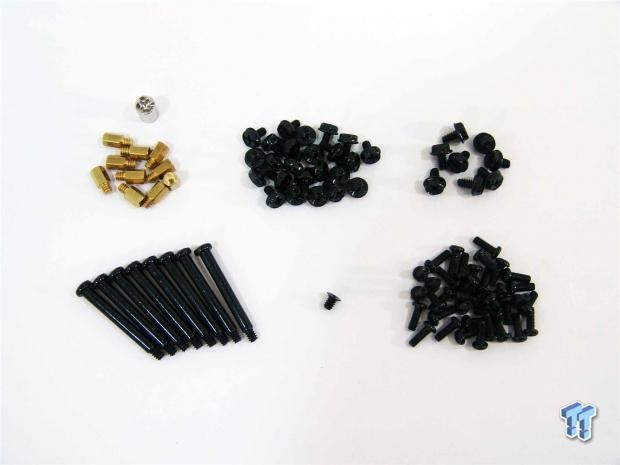
Part of the hardware bundle consists of the socket and ten brass standoffs, a bunch of screws for the motherboard and ODD bays, and screws for the PSU and radiator brackets. At the bottom there are eight long fan screws, a single countersunk screw for a Kensington lock loop, and a handful of screws for SSD or 2.5" drive mounting.
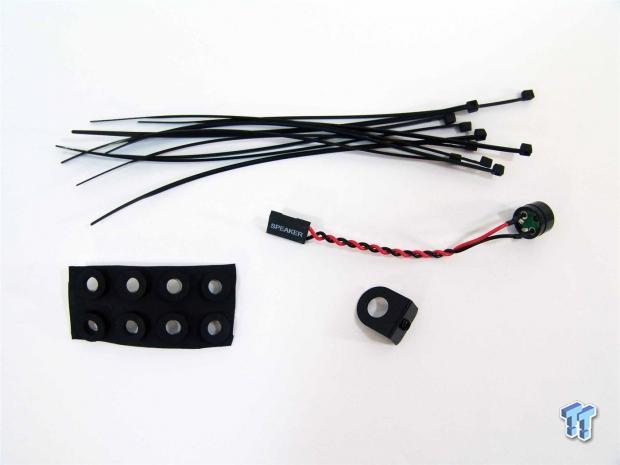
Also included in the hardware box are the ten wire ties, the motherboard speaker, eight thick washers for fan installation, and the Kensington lock loop to secure the right side panel on the chassis.
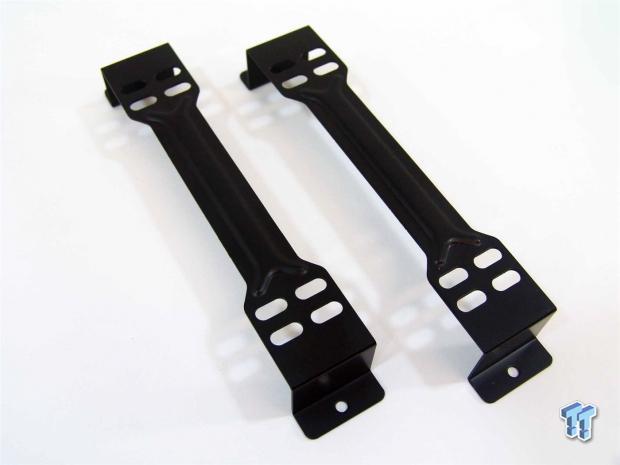
These brackets can be added to the front of the chassis once the six main drive bays are removed. These will allow for the depth needed, as well as offering 120mm and 140mm mounting holes.
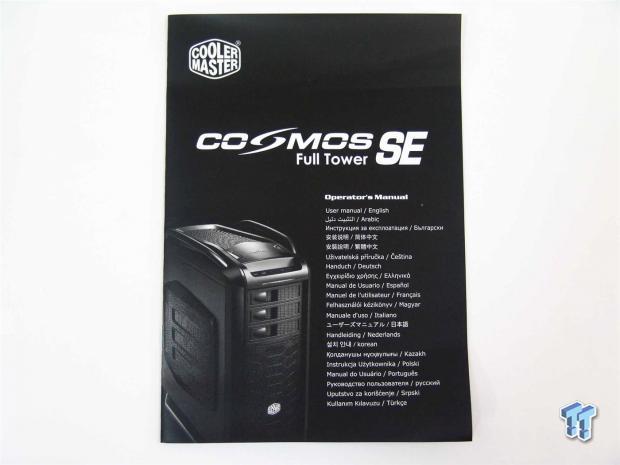
Here we have the Cosmos SE Operator's Manual. This is found outside the chassis, on the top, under the foam for easy access before even opening the chassis. Also notice the list of 21 languages that this manual covers.
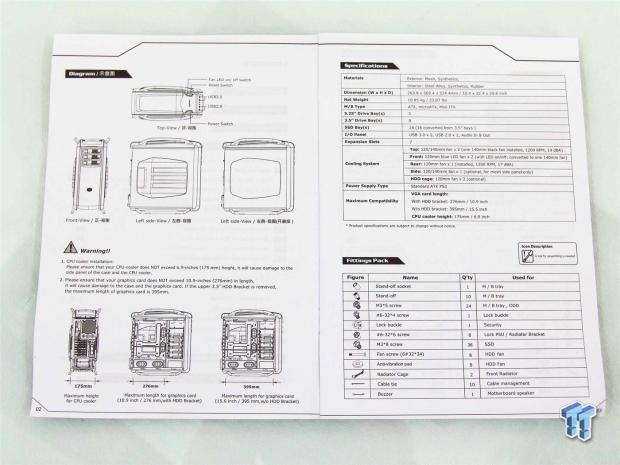
The manual starts things off with dimensional renderings and various views of the chassis and its features. The right side then covers the specifications as well as the parts list to verify all the parts needed are in fact included before the build process gets underway.
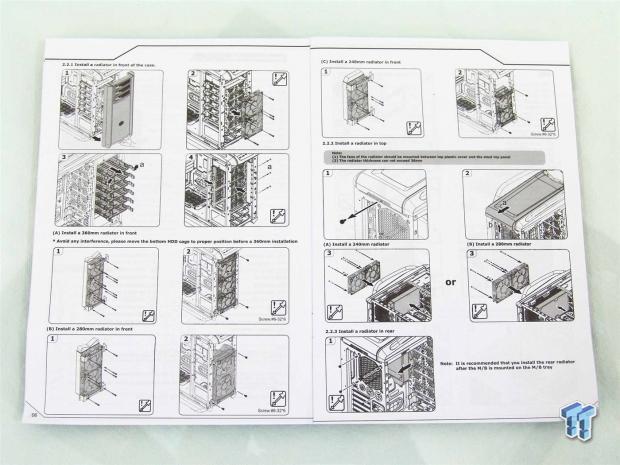
The rest of the instructional guide is very simplified. It comes down to multiple small images that will take you step-by-step through the build process as well as modifying the various parts to get everything needed into this chassis.
The Build and Finished Product
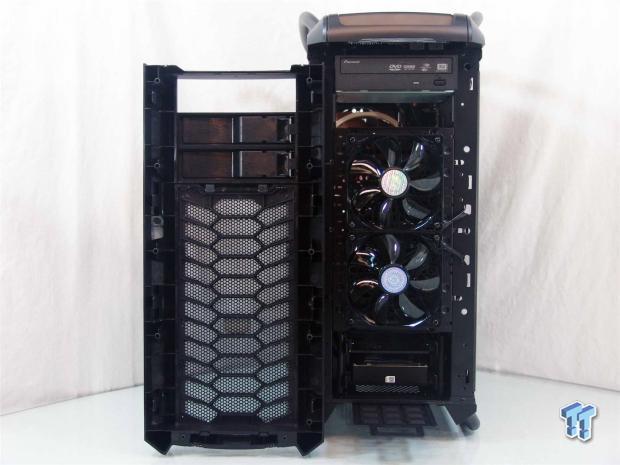
Just because we can, we mounted the HDD at the bottom of the chassis, and while there, we removed the bay cover and slid in the DVD drive. While the entire bezel does not need to come off, it is nice to see the chassis wiring is all contained above and it allows this to get out of the way for radiator installation.
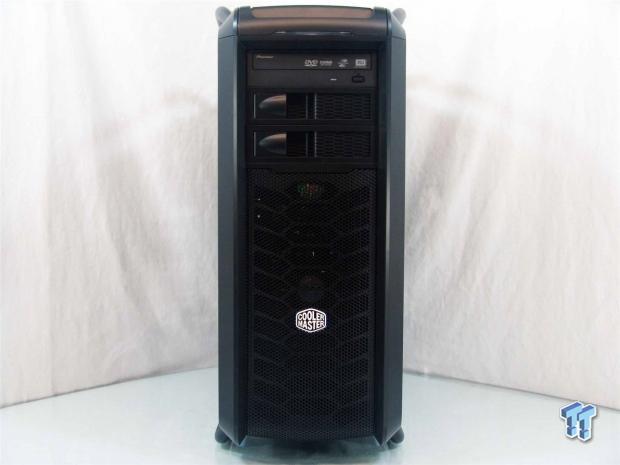
With the bezel back in place, even with the addition of the optical device, the styling that we were offered out of the box is still intact.
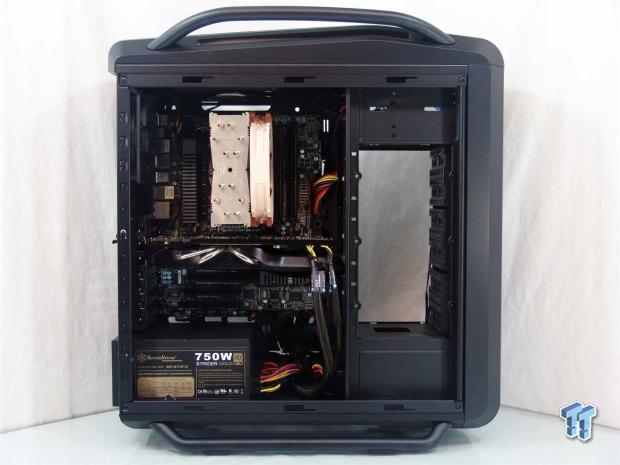
Things are a bit tight inside of the Cosmos SE, there is no way of denying that, but there is plenty of room if it is planned out slowly, and patience is applied. Removing the inner HDD side plates is needed for longer video cards like this one, but they will still fit. As for the rest of the build in here, it went pretty smooth with no issues to discuss.
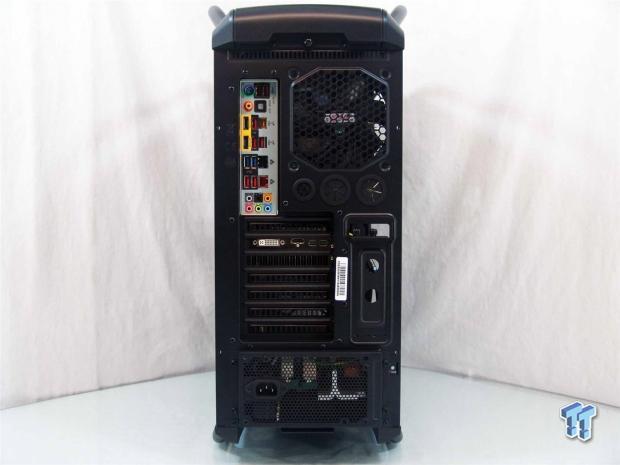
There were no issues mounting the dust shield, aligning and mounting the video card, or sliding the PSU into the bracket with it still attached to the chassis. You can remove it and attach it to the PSU and slide them both through the back, but because of the fan grill on the PSU, it slid in from the inside much easier.
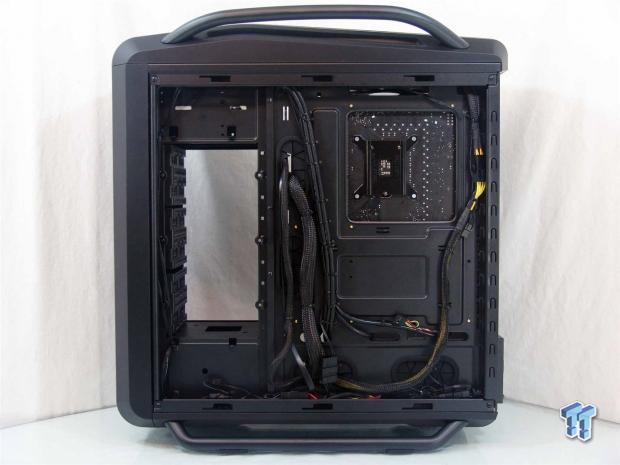
Wire management takes a bit of effort, but when done methodically, the results are quite nice. There were plenty of places to attach wiring, and the management holes are all very well placed and leave very little of the wiring even exposed inside of the chassis.
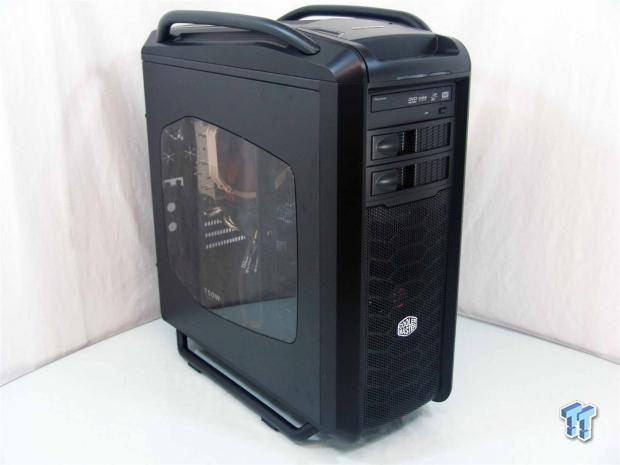
Packaged up and ready for testing, the Cosmos SE looks much like it did when we first gazed upon its sleekness. The one thing that does change is the view through the large side window. While a view of the bays is also part of the deal, there is great view of the entire motherboard and everything on it.
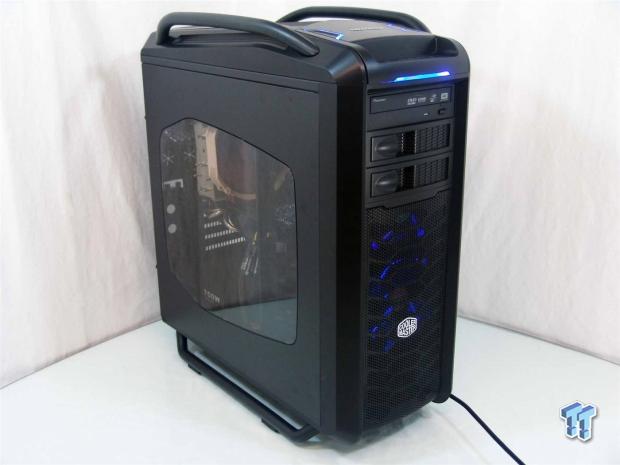
Powering up the Cosmos SE, it comes to life with a flood of blue LED lighting. Next to the buttons on the I/O showing system power, the thin line across the front showing that the drive is being accessed, along with the pair of fans in the front give the Cosmos SE a very appealing look both on and off.
Final Thoughts
Overall, I can't stop the smile from creeping up on my cheeks as I think about the Cosmos SE and what Cooler Master has delivered here. Externally it is everything a Cosmos chassis should be, and there is no question even from all the way across the room that you could mistake this design for something else. Even with the overall reduction from a super-tower to a full-tower design, that is only partially right. In reality, you are given a roomy mid-tower chassis, but the support bars made of aluminum that all of the styling and angle play comes from; taking the dimensions outside of the realm of what is permitted in the mid-tower market, so it is classified as a full-tower for this reason. Access to the top panel, removing the front mesh section, or taking out the bay covers is all very easy and makes cleaning and accessing certain parts of this design very pleasurable to deal with, and even while the wiring took quite a bit more time than usual to tend to, the end result is very pleasing and easy to accomplish.
Inside of the chassis there is more than enough air flow from the four 120mm fans installed around the chassis. While only delivering 33 dB of noise level to the environment at full speed, the thermal results are very good for this system on air cooling. Of course, that can be taken further by adding more fans for a total of eight of them, but there are also options for up to three radiators inside of this chassis at one time.
CM even offers plenty of ways out of the chassis for external water cooling solutions too. Then there is the storage configuration offered inside of this chassis. With room for a total of 18 2.5" drives as the chassis is delivered, even removing six of the bays, you can still accommodate six 2.5" drives, or a pair of 3.5" drives and a pair of 2.5" drives in the hidden racks on the back of the motherboard tray. Inside and out the chassis is loaded with styling, innovative ideas to simple questions, and delivered a solid, yet trimmer version of the larger Cosmos cases.
When you look at the Cosmos SE as far as the chart scoring is concerned, there is really nothing to fault them on. Performance is good out of the box both in cooling and in what is offered to help simplify builds. The quality is top notch, and even with the chassis completely stripped of panels, plastic fascia, and most of the HDD racks, it was still as strong as it was right out of the box - there is no flex or wobble to this design. The Cosmos SE is as feature rich as just about anything out there, and is only lacking a HDD dock if it is lacking anything, but in a design like the Cosmos, I would keep the lines and styling over a HDD dock that I would rarely use. The wiring is complete, long enough, and blends in well, the storage options are outrageous, and this offers some of the best cable management in any case. We know the packaging is top end, when you can gut one side of the box and the product arrives in perfect shape, and there was more than enough hardware to get any build completed.
While at the start I sort of frowned on the pricing, the more I got to know the Cosmos SE and what it has to offer, I found myself relaxing my grip on the money gauge and coming to the realization that there is nothing else quite like this, and with great end results in the build, I am really hard pressed to try to knock them down for the $169.99 asking price. I think they will have no issues at all over at Cooler Master selling the Cosmos SE, the chassis that finally took an amazing design and made it small enough for the masses to enjoy.


