Introduction
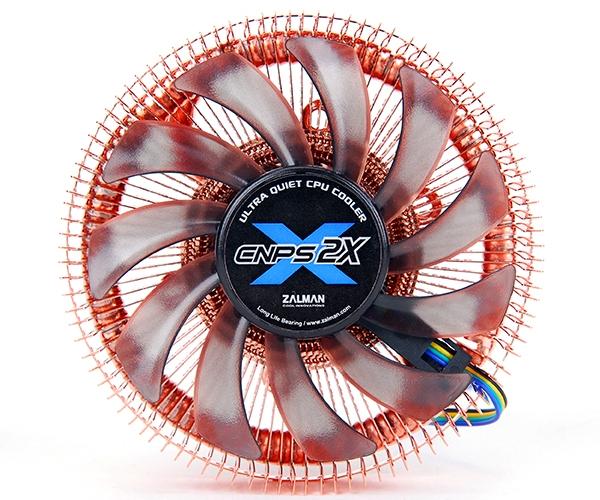
With manufacturers of cases going the route of ever smaller and smaller Mini-ITX offerings, there has to be a few companies of other components to step up to the plate and offer users major components to fit into these chassis designs. For instance, with a chassis like the TU100 we just saw from Lian Li, there was some room under the PSU for an air cooler, but there isn't enough for most of the "standard" selections on the market. We have seen things like the Silverstone NT07 back in the LGA775 days, and that was when companies were looking at improving on the stock solution, but not too far outside of the box. As time went by, companies really followed the Mini-ITX craze, and developed things like the NH-U9i, Samuel 17 and the PH-TC90LS, just to name a few. They hit the market showing that low profile cooling was capable outside of the realm of something resembling a stock cooling solution.
Zalman is now on the same boat as those others, and is delivering a low profile cooler with a bit of style to offer users of Mini-ITX systems something bright, copper, small, yet very good for systems where airflow somewhat limited to just chassis flow with no extra airflow being delivered to any components specifically. With this design that reminds me a lot of the Evercool Twinkle cooler we all used to replace NF4 chipset coolers with, Zalman uses a radius cooler design to allow for CPU heat removal, but the design also addresses the heat sinks around the CPU as well since this design pulls air in from the top and distributes it evenly around its side edge. I know some might say, why not just go with an AIO, well... they may cool the CPU much better, but they offer absolutely nothing as far as motherboard component cooling goes, and in tight confines, I would prefer air cooling for this exact reason.
Zalman takes what looks like a GPU cooler, and has added some super simple to use mounting hardware to make this new cooler a cinch for anyone to get this installed - something you don't typically see on a cooler as small as this. Even here Zalman stepped up a bit to offer a cooler with sufficient mounting pressure to take the best advantage of the single "S" shaped heat pipe.
As I said, this cooler is more specifically oriented towards those with little to no room for cooling, and I do like the design and looks of the new CNPS2X Mini-ITX CPU cooler, but see just how well it performs over the next few pages.
Specifications, Availability and Pricing
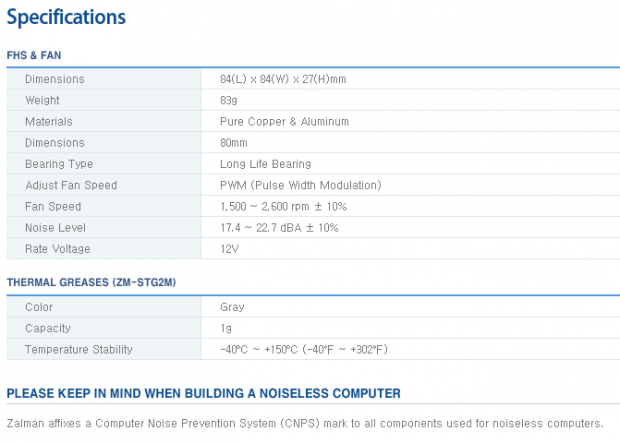
Following the chart above, Zalman shows this cooler is 84mm in diameter on the outer edge, and it stands only 27mm above the CPU. In total with the fan and copper cooler, it weighs in at 83 grams. They do mention aluminum in the construction, but the base is aluminum with the single 4mm heat pipes running through it, and of course it has been plated copper to match the rest of the cooler. The 80mm fan that spins on the Long Life bearing has 11 curved blades that are tinted black, but are mostly transparent. This fan is PWM capable and will spin at a speed near 2600 RPM at the top end, while only delivering 22.7 dBA of noise. Zalman also go on to cover the specifications on the ZM-STG2M thermal paste that is included.
What they don't show in that chart is very important. While there is the notation at the bottom of the chart that this is a Computer Noise Prevention System cooler (CNPS), you do not see the recommendations when using this cooler. They say that this must be used in conjunction with a 120mm chassis fan. They also show a warning about using liquid metal thermal compounds. Since the base is aluminum, compounds like Liquid Pro may damage the materials. They also don't address the 120W TDP that comes with the CNPS2X. This means that you can take on many Intel and AMD processors and this cooler should be able to deliver decent results, but we will see that soon enough. One major thing to keep in mind throughout this review is that the CNPS2X is designed with silence as its main feature. As I always say, something has to give, because it is rare that manufacturers get the main three - price, noise and performance - all into the same product.
In the week or so between me receiving this cooler and now where I am writing this, I have seen the availability grow. At this current time there is something like 25 listings of various e-tailers who are stocking the CNPS2X from Zalman. While I am seeing a few listings for near $26 to get this cooler delivered to your door, most of the listings go north of $30. Since I know most of you will shop at Newegg anyways, they are right near the top of the listings with a $29.99 asking price, and you will need to spend another $1.99 on its shipping.
At $31.98 to have this cooler at your house, that is a very reasonable price in my opinion, but for the whole "two out of three" adage, we now know it is quiet by design, and the price is something anyone can afford - I just hope my CPU doesn't throttle at this point.
Packaging
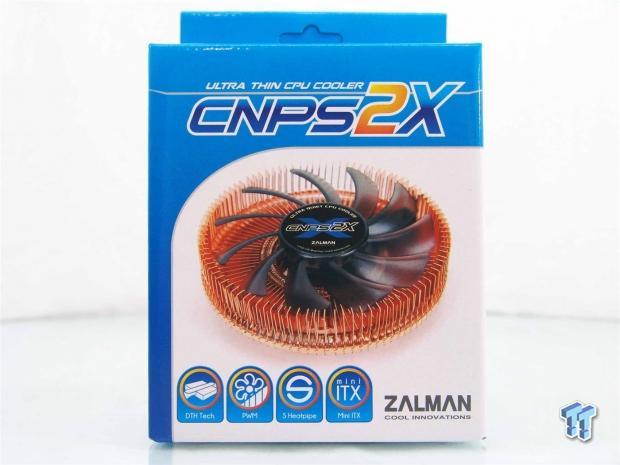
The front of the packaging has a white background with a blue stripe at the left that flows over the top. This makes for a place to put the name at the top and also allowed Zalman to place an image of the cooler in the middle. They also added in four features with little icons to the bottom of this panel.
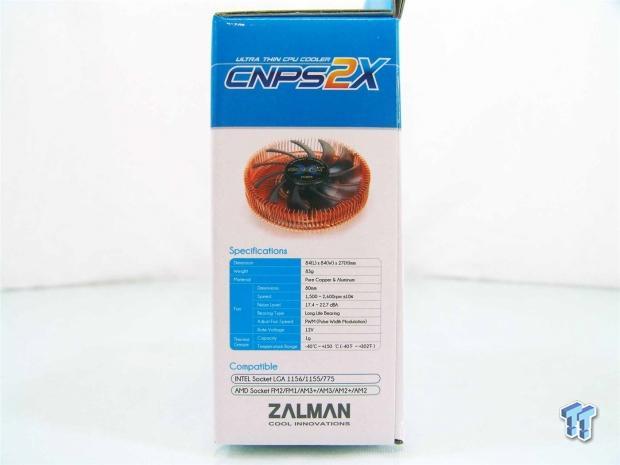
The blue striping continues around to this side, again with the cooler name placed on it. You also get another image of the actual cooler, but this time they are followed by a specifications chart and socket compatibility list.
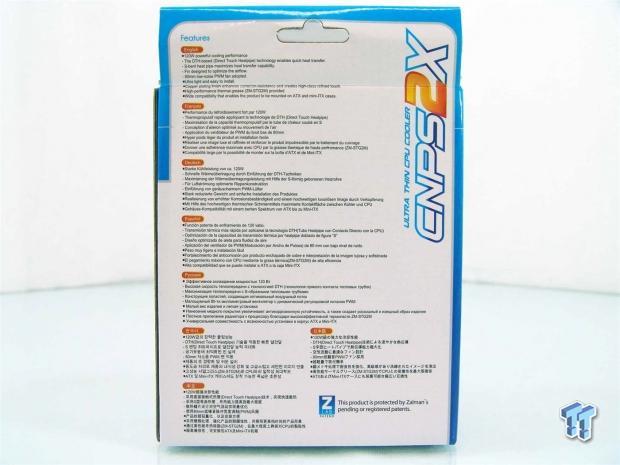
The blue coloring makes it to the back only as an accent because of all the information provided in various languages. Zalman is covering the 120W TDP, DHT, S-bent pipe, fin design, 80mm fan, weight, ease of installation, copper plating, provided TIM and the wide compatibility for mounting.
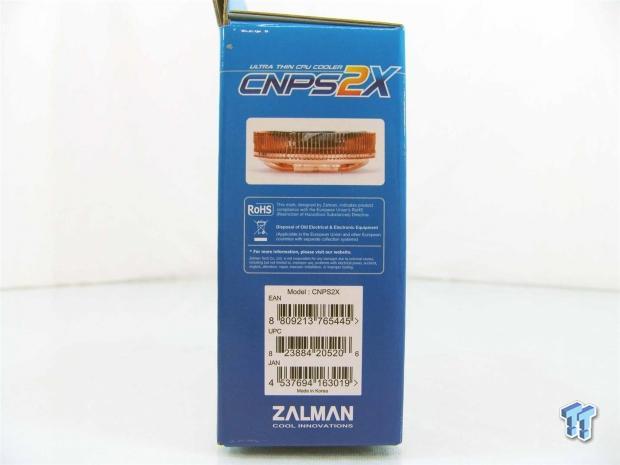
This last panel offers the name again at the top, but this time you see the CNPS2X from the side and get the first clue as to how compact this cooler is.
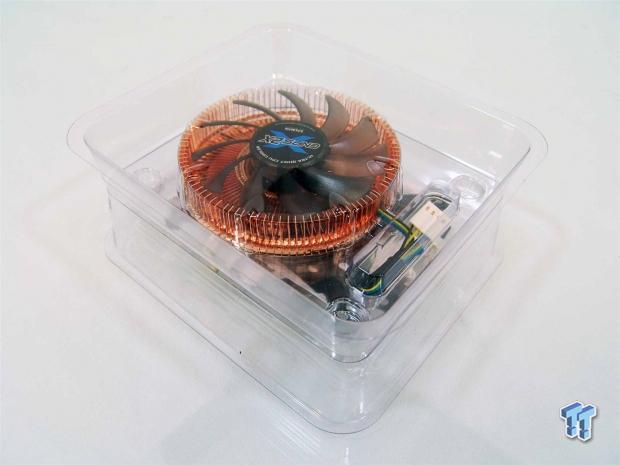
On the inside you will find a bag of hardware and a folded up bit of paperwork that rides under the cooler packaging as you see it above. The cooler is then put inside of a snap together plastic tray system that keeps the cooler centered in the packaging and away from harm.
Zalman CNPS2X CPU Cooler
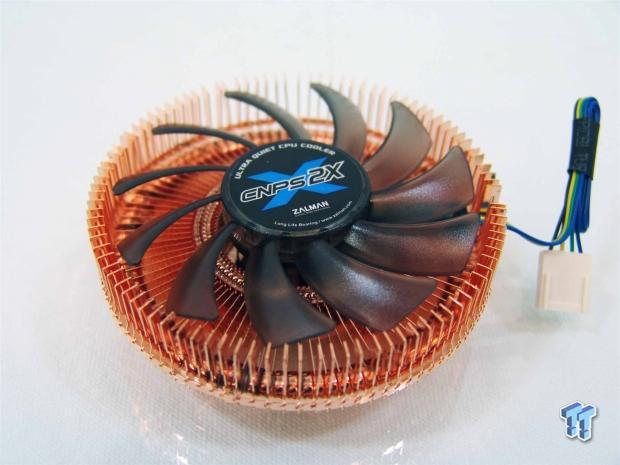
The CNPS2X has either 99 or 100 copper fins (I counted three times and got different results on each) surrounding the 11 blades of the 80mm fan with the responsibility of cooling these fins. The cooler is a bit fragile and the fins will bend easy as seen around the edge in this image.
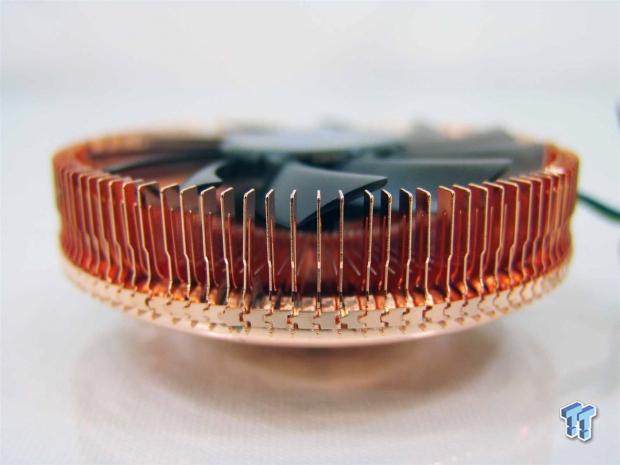
From the side of the cooler, you can see that each fin has a spacing tab to try to make the fins stay as symmetrical and perpendicular to each other as possible. Even with just the slightest handling, you can see that some of those are out of alignment already though.
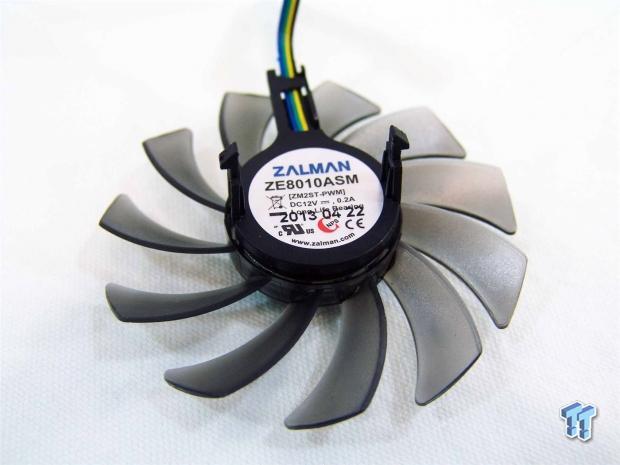
I removed the fan from the cooler to get a better look at what is going on with this cooler. Flipping the fan over, I found there is a model sticker here showing the ZE8010ASM naming. This also signifies that this fan is 80mm in diameter and stands only 10mm from the sticker to the front of the fan hub.
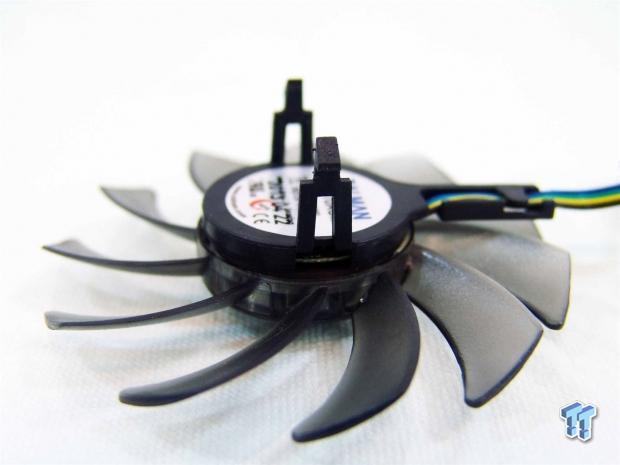
You will see the holes in the base soon enough, but that is where these angled tabs clip into the bottom of the CNPS2X. This is handy to allow for this to be removable as it should make cleaning it much easier. The only bad thing is you need the cooler off the board to remove the fan.
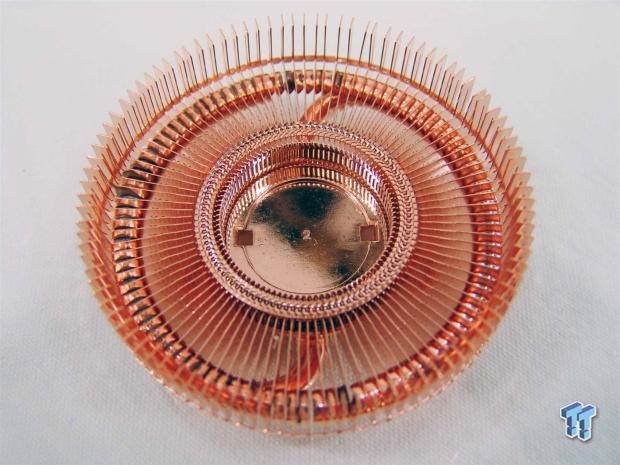
With the fan out of the way, you can see that the inside edges of the fins all start to radiate from on top of the puck in the center, and are soldered into place. The square holes on the wither side of the number 2 are where the fan clips in, and it is very snug once snapped in place.
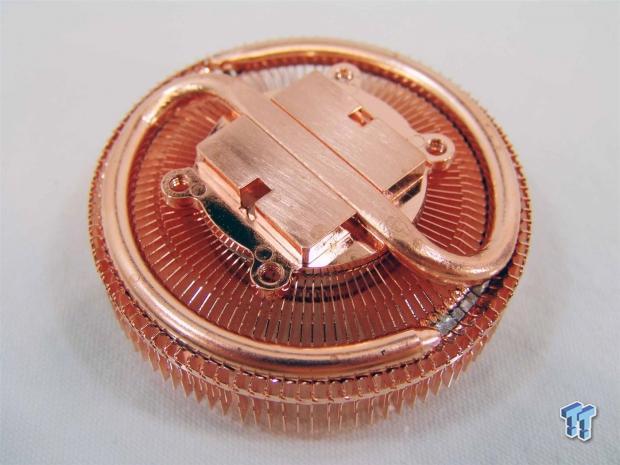
Once the cooler is flipped over is when you will notice the mounting system holes and the S-pipe. The S-pipe runs through the center of the base, and to add strength and better thermal transfer the fins are soldered to it. As for the four threaded holes around the base, those are for the hardware to mount to.
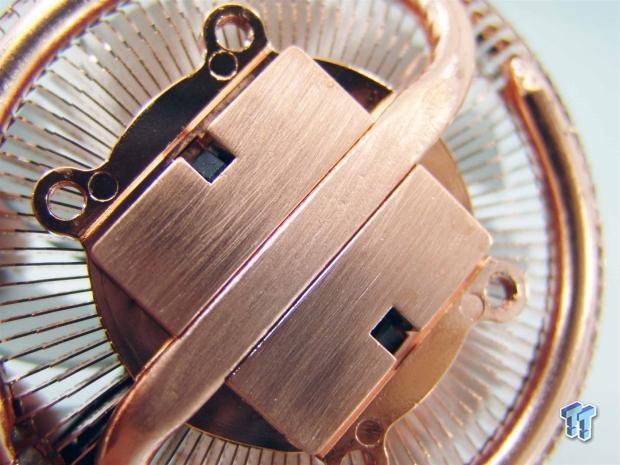
Moving in much closer, I did find gaps on either side of the S-pipe as it splits the copper plated aluminum base. The surface is flat across in both directions, but is left in the rough milled state. It is also stated that this pipe section should always be parallel with the ground when installed for best results.
Accessories and Documentation
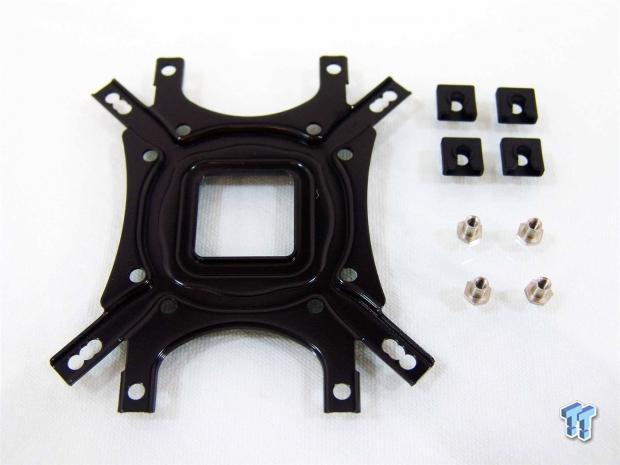
First out of the hardware kit is the back plate that is used for all installations since it has AMD mounting, Intel mounting, as well as holes drilled to accept socket bolts. For both sockets you are going to need the four threaded nuts and the retention clips to keep the nuts in the back plate.
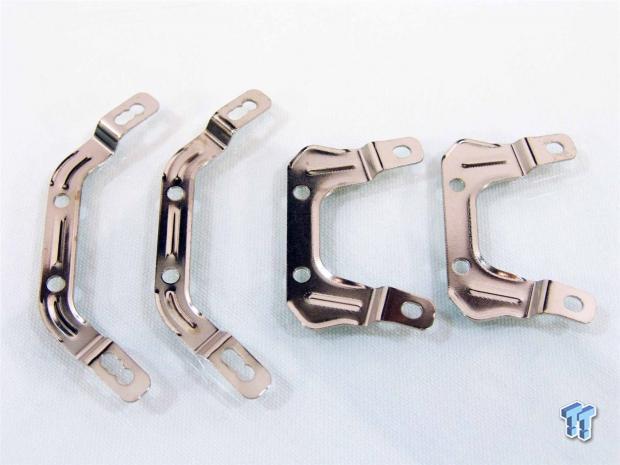
You are also given a pair of mounting legs for all Intel sockets that are shown to the left. On the right is the pair of AMD mounting legs what will fit any AMD socket since AM2. All four legs have the same holes at the center to allow these to mount to the base of the CNPS2X.
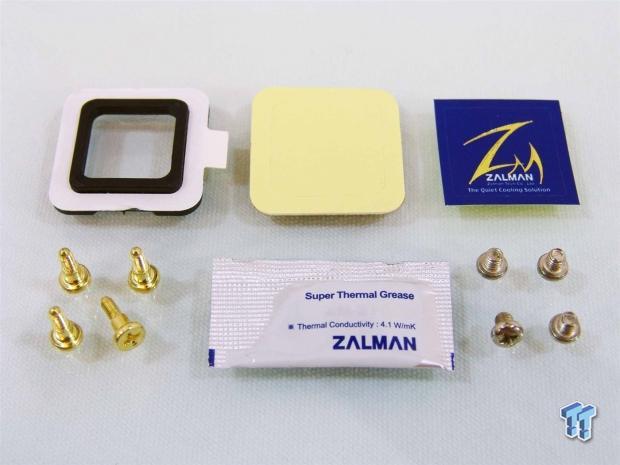
Here you are given the LGA775 spacer, as well as a padded sticker for that placed next to it, and you are also given a Zalman case badge. The bottom row offers the four gold screws to mount the cooler to the motherboard, a packet of ZM-STG2M and lastly the four screws for to mount the legs to the base.
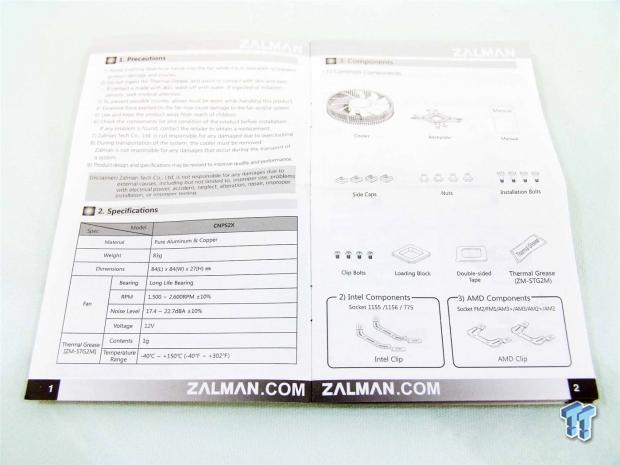
Inside of the manual you will find a list of precautions and the specifications chart on page one. On page two the components are all displayed and labeled so that as you continue through the manual, there is a point of reference if you get confused.
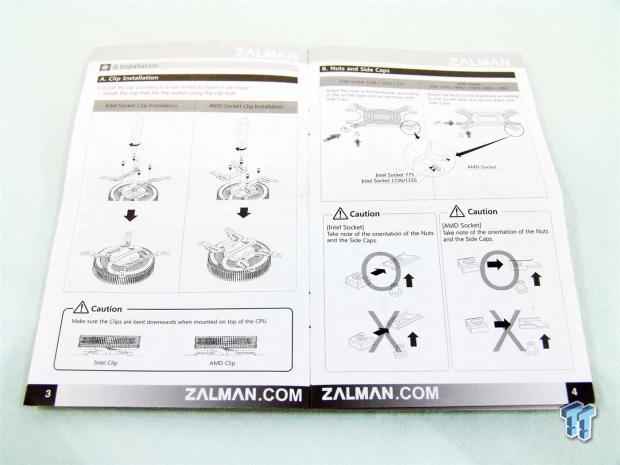
Page three offers instructions on applying the mounting hardware to the base of the cooler. It shows the cooler from the bottom as well as from the side so that the legs get put on correctly. Page four shows you how to set up the back plate with the threaded nuts, and also shows you what not to do.
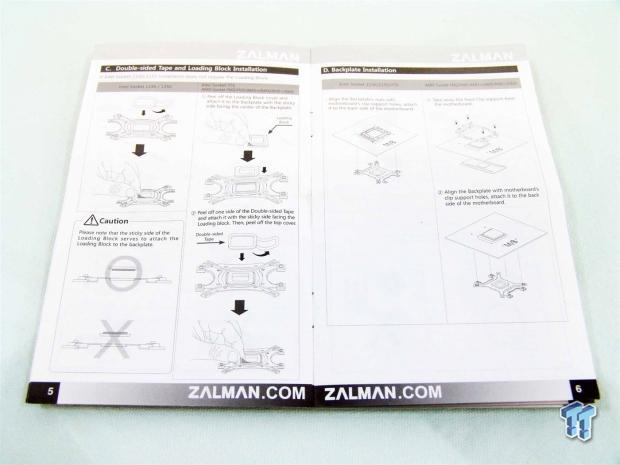
Page five then covers the use of the padding material and the loading block, and just where and how to arrange them. Page six then shows that you set the back plate behind the Intel board, but on AMD systems, you need to remove the stock retention system.
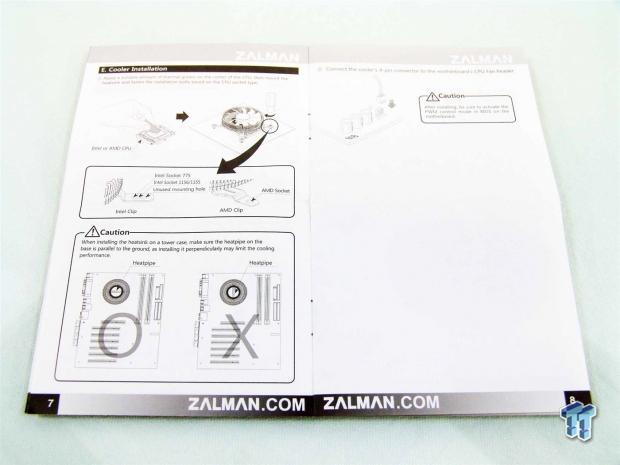
At the end of the English instructions it shows how to secure the CNPS2X to the motherboard, and explains the S-pipe orientation, and concludes with an image of how to plug in the PWM fan connection to the motherboard.
Installation and Finished Product
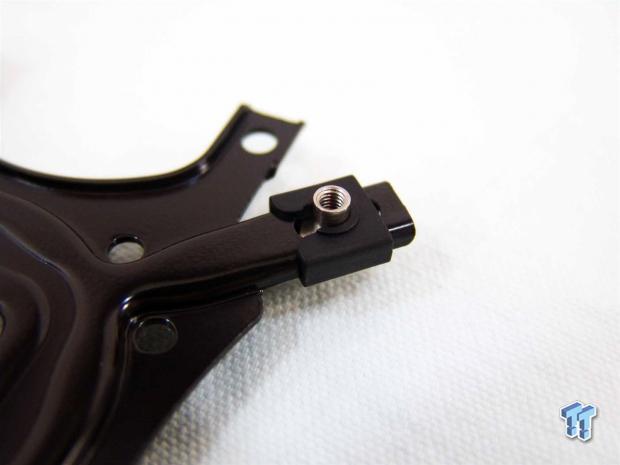
Just like I explained in the hardware section, you are going to need to set in the threaded nut and place the retention clip over it. Keep in mind, for both AMD and Intel, the bar is folded down, and you slide the nut in from the bottom. The clips will not work of the back plate is flipped.
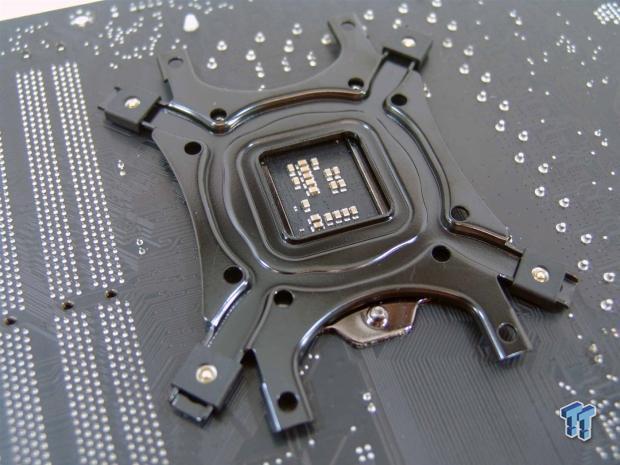
Align the nuts of the back plate with the retention holes. Since there are holes drilled on both ends, this plate will go on either way, end to end. The loading block is installed to add some space, making the cooler much snugger, and uses more pressure on the IHS.
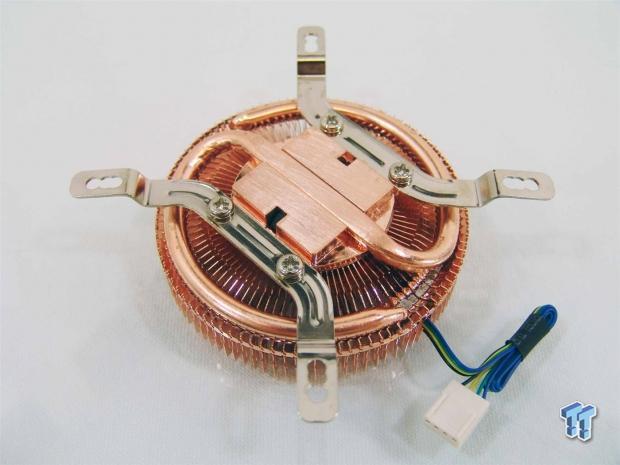
Going back to the cooler, I needed to install the Intel mounting legs. The only thing to keep in mind here is to make sure the legs get put on with the tabs bending away from the fins. It is going to be near impossible to install if these are reversed.
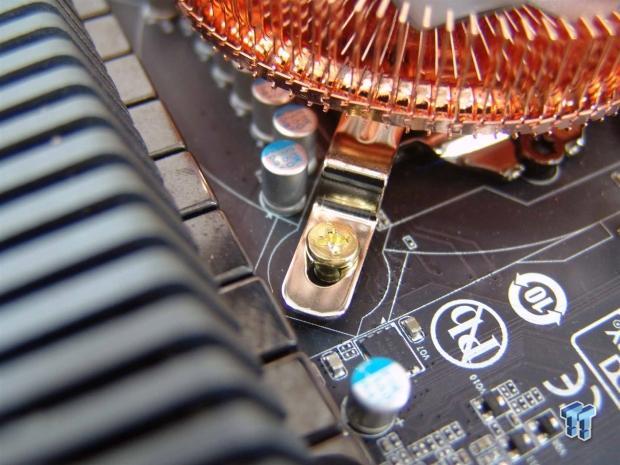
Once you apply some TIM to the IHS of the CPU, set the cooler into place, and grab the gold screws to mount the cooler to the back plate. These screws are only threaded so far up the shaft, and you continue to screw them in until the thread stop and you cannot screw them in any further.
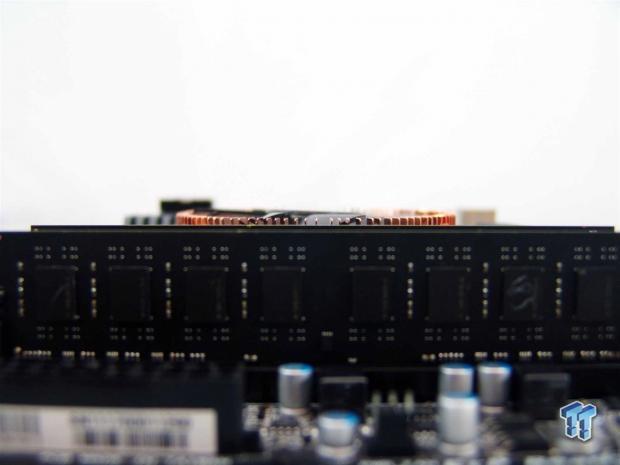
When I said this cooler is super low profile, I wasn't joking in any shape, way or form. As you can see, or rather it is what you cannot see over the memory that is impressive. Zalman really does offer a solution to go where not many other coolers can go.
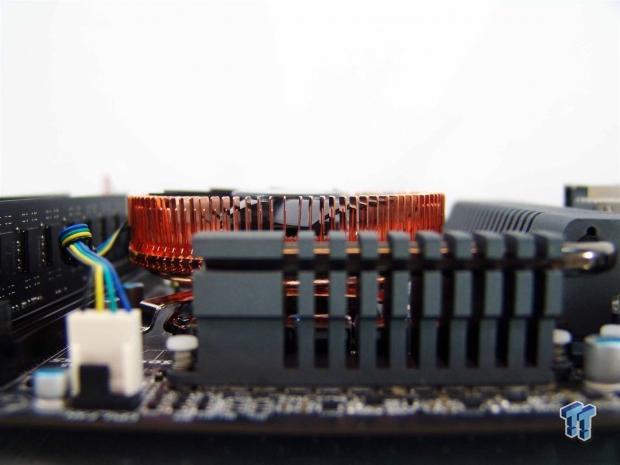
I also mentioned that since the fan takes are in through the center and blows out in all directions around its diameter, it should offer a fair amount of air flow to the heat sinks that surround the socket, helping to cool more than just the CPU in the very tight confines of some Mini-ITX cases.
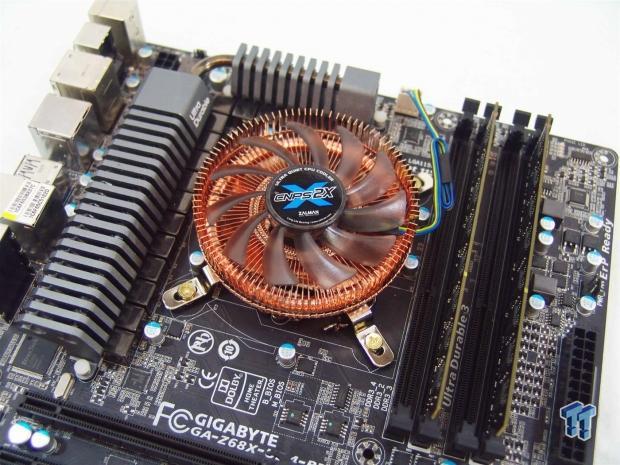
Stepping back away from the motherboard, you can now see the CNPS2X in all of its sexy copper colored glory. There definitely is not going to be any issues with getting to the 8-pin plug or sticking in whatever memory you want, we just need to get to the testing and see what this is capable of.
The Test System and Thermal Results
[img]97[/img]I would first like to thank HIS, GIGABYTE , InWin and AVADirect for supplying products for me to test with.
Testing for the CPU coolers is done with the use of RealTemp to ascertain temperatures, Intel Burn Test to deliver the load to the CPU and CPU-Z to verify the CPU speed and the voltage being used in Windows. All of the testing is done with an ambient temperature of 24.5-25°C and humidity is maintained to 35% sometimes less.
For the "stock" runs, it's more of a plug and play setup where the PWM of the motherboard is in control of the fans speeds for both the idle and load results. Speed Step is active and the processor idles at 1600 MHz and loads at 3500 MHz for the stock settings. I also set the memory to run at 1600 MHz for stock. As for the overclocked runs, I load the CPU at 4.5 GHz and idle results are obtained with 7.5V to the fans while the load run is set to deliver 12V to the fans. This allows me to gauge the lowest and highest fan ratings for my charts.
You will also see that the charts have been slightly adjusted. From now on I will mention the idle temperatures if there is something worth noting other than an average of twenty-five to twenty-seven degrees as the PWM controls and Speed Step allow for almost ambient results in most instances. What you are now getting is a stock speed loaded temperature chart and an overclocked loaded temperature chart. To clean up the audio results, I also removed all of the fans that aren't on the thermal charts. If you want to compare those results to new coolers, the old chart is still available in the older reviews.
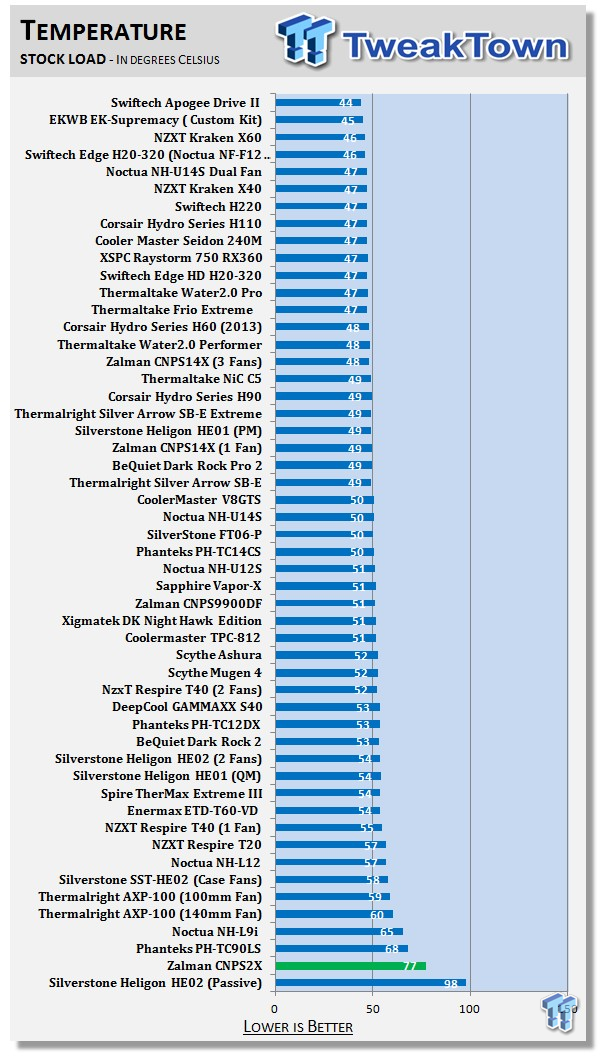
While there is a 120W TDP rating on this cooler, I would have to assume that is the point at which processors would be throttling. I know my 2600K is a bit power hungry, but at the stock testing, it is only using 85 to 90W of power, and as you can see, that 77 degree result isn't something to brag about. The two coolers just above it are all in the same category, as I have yet to have a case where I couldn't fit any of them into it, but the CNPS2X comes in 9 - 12 degrees hotter than its direct competition.
I did not run the overclocked testing, because, let's be honest, with my CPU pulling 125W at that point, there is no way on earth that this cooler will take that sort of a load and survive very long. If I would have run this test, we would have been recording the length of time until the cooler allowed my processor to throttle, and what is the point in that?
Noise Level Results
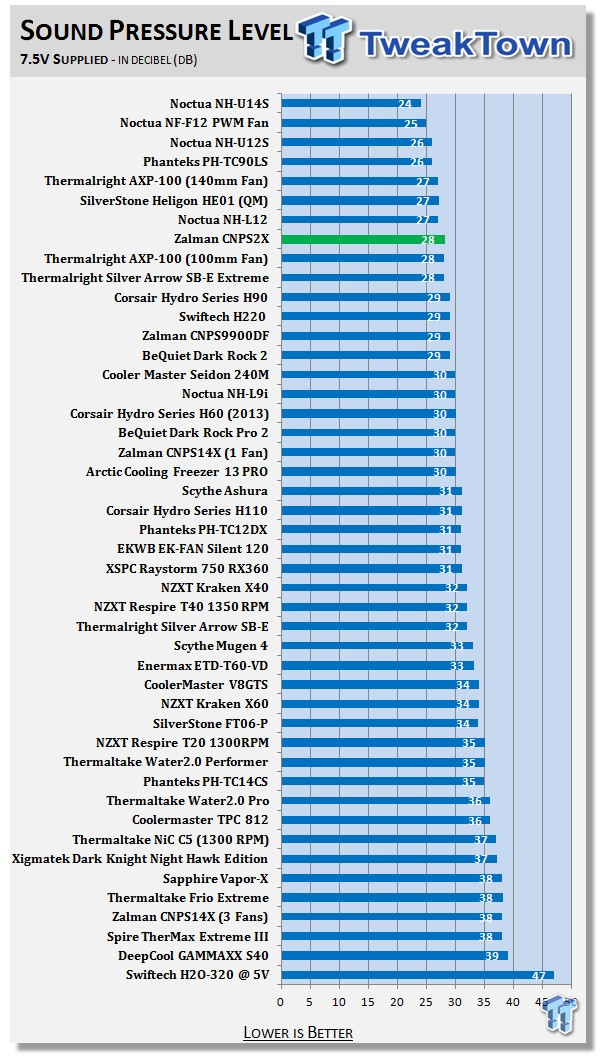
Limiting the voltage to 7.5 volts left the fan running at 1600 RPMs. I have to give Zalman big props on the CNPS part of this design; this 80mm fan is barely audible at the 28dB level that was present at this power level.
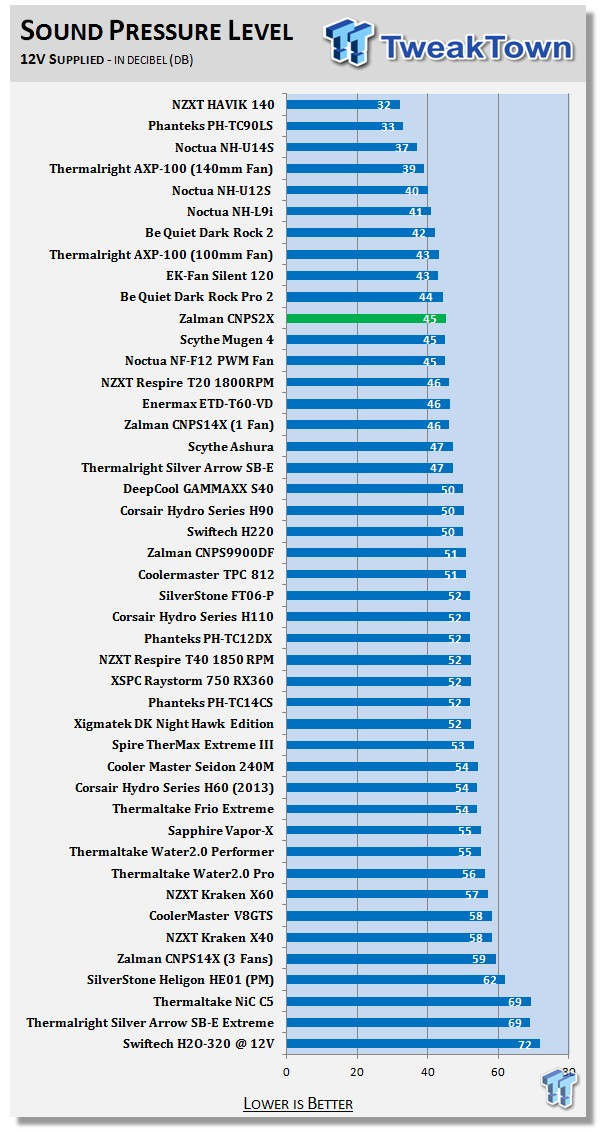
Once the fan was allowed to flex its wings, if you will, the speeds dramatically increase to near 2800 RPMs, and you can feel a subtle breeze around the cooler at this point. The CNPS portion is still working at this point as it delivered a 45dB level of noise in an open air system.
Granted, most cases will kill some of that noise, and with a PSU hovering over it, you aren't likely to ever see it, let alone hear it.
Final Thoughts
There is a lot about the CNPS2X that I really do like. Even though small, the packaging should be able to grab your attention on a store shelf, and the interior packaging is perfect for a cooler so tiny and delicate. The looks of the bright new shiny copper is stunning out of the packaging, and with around 100 fins in the design, it makes you really ponder what a pain in the butt it must be to assemble these. Everything from laying out the S-pipe taking the heat to an outer circle where it is soldered into the fins, and while the base is not perfect, is in no way a limiting factor to this design. The 80mm fan really spins its heart out to try to cool my CPU, and I really am a fan of its silence.
So, the CNPS wins on looks, design and noise levels, but there are still two things yet to consider. While the CNPS moniker on this cooler really means you can have a near silent system, the performance was just too lackluster. Think about it this way - I have the air conditioning on to keep solid ambient and humidity levels and my whole office uses a large fan to circulate the air. I have one fan in the front of the D-frame when I tested this, and I still hit 77 degrees. Considering I am giving this cooler the best chance it is going to have performance wise, creeping up to the middle 80's would be my guess as to where my processor would run in super compact mini-ITX chassis where room is the limiting factor for CPU cooler choices. For what it is worth to me, I would just keep my stock cooler, or opt for the Noctua or Prolimatech solutions in these instances.
At this point the count is one to one, as we move into the third aspect; cost. Here Zalman makes this very easy for me. With a price of $29.99 at Newegg, currently as I type this, of course this cooler is super affordable. But is that enough? To me, being reasonably priced and silent are indeed good qualities to have, but the performance is just too lackluster for me to recommend actually using this cooler as it is intended. Considering the cooler that comes with most processors will indeed fit in almost all Mini-ITX cases, I would say stick with that, because while much nicer to look at, what good is looks going to do with a solid side panel or a PSU covering the cooler? Very little, that's what.
I get why Zalman went this way with this cooler design, but I think it needs some work. Maybe less, but thicker fins, and maybe a better fan with more CFM, even if it does raise the noise levels a bit. The only way I could see myself going to this cooler is if I really had no other choice, but it does make a cool cooler to mod for other things, much like we used to do back in the old days of overclocking.


