Introduction

After a very stressful week at CES 2013, I came home and saw I had a few new cases in the kitchen from deliveries while I was gone. In that group was the Phantom 630 chassis from NZXT, and I thought it best to move them all to the basement to get them out of my way for that time, and after a good night's sleep I could get back into doing more reviews since my photo booth is down there. I woke the next morning to heavy footsteps rushing up my steps, and when I saw the look on my better half's face, I knew things weren't good. As we slept it rained all night and was still coming down when I woke up. After gaining my bearings, she explained to me that the basement was holding water. The saddest fact of the whole deal is while I did take on quite a bit of water, the Phantom 630 was on the bottom of a stack of cases, and got completely soaked with sewer water.
Writing that email wasn't something I wanted to do, but NZXT was more than understanding as I sent an image along of their chassis, completely soaked. They told me then not to worry about it because they had something down the line that they were going to send me instead of another Phantom chassis. That time has now arrived, and while the interior is very close to what was offered in the Phantom 630, this new chassis has that design, but on steroids. Of course there are some small changes here, but the main concept on the inside is much the same. As for the exterior, things are completely different this time around.
Two major changes are to be found in this new chassis from NZXT when compared to the Phantom 630. The first is the overall size, as this new chassis is enormous, and is classified and an Ultra-Tower. The second, and reasoning as to why it is now an H series offering, is that they have taken measures to limit the noise levels as much as possible.
With all of this fresh in your mind, let's jump right into the specifications and pricing to complete that mental image of what the new H630 from NZXT brings.
Specifications, Availability and Pricing
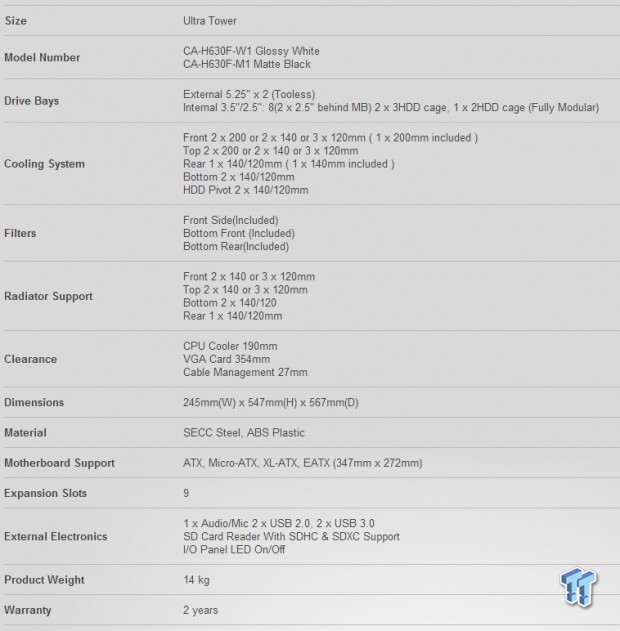
While we covered the fact that the H630 is an ultra-tower, it is the 245mm wide, 547mm in height and 567mm in depth - which is why this chassis is classified so high. This chassis does also come in two color options. You can get one in Glossy White, or you can get the model we are looking at, the Matte Black version. Externally, there really isn't a whole lot offered as far as style. In fact, aside from a few angles where the front bezel meets the top of the chassis, there really isn't much more to see than vast expanses of plastic and steel all with a matte, or slightly flat finish. The front bezel is made of plastic, is backed with very dense sound absorbing foam, and simply offers two removable 5.25" bay covers and at the very bottom NZXT applied their case badge. On the sides of the bezel along with the sides of the top panel, there are slots with mesh in them to allow for the chassis ventilation, but both door panels are completely solid and flat, but are also backed with the same dense foam the bezel has.
Inside the chassis there is a lot going on, and I mean a lot. In the front, you have room for two 200mm fans, and one is supplied in there from NZXT. You can optionally install a pair of 140mm fans or up to three 120mm fans, not including the optional room for radiators. The rack assembly here holds the two 5.25" devices with tool-free latches. Below those you will find a three section rack of eight 3.5" or 2/5" storage drive trays. The nice fact about these, if you want to leave them in, they offer a pair of 140mm or 120mm fans in the angle adjustable brackets on the left of the drive bays. If you want to water cool, all of these bays and the support tray are removable. The top of the chassis offers the same fan support as the front, and is set a few inches above the motherboard for maximum clearance there.
The motherboard tray can house anything from Mini-ITX on up to XL-ATX and EATX motherboards, has 18 places to tie down wiring, offers 11 various sized holes for routing the wires, and hidden on the back is a pair of 2.5" drive trays and essentially the NZXT Grid fan hub. The floor of the chassis will house any length power supply with ease, but you also have the option for fans and radiators. In this location you can also use two 120mm or two 140mm fans with or without a radiator. In the back you have room for a 120mm fan or a 140mm fan, the rear I/O panel, nine expansion slots, and it is well ventilated.
While you can find the much older Phantom 630 almost anywhere you look, I am still unable to find stock of the H630 anywhere I looked at the time of writing. What is funny is that the Phantom does offer slightly more on the outside as far as features go, but the H630 is larger overall, has a couple more tricks on the inside, and is said to retail cheaper than the Phantom version. From what I can tell, the MSRP of the new H630 is set at $149.99, and it should be filling shelves very soon. From what I have seen already, I can tell you; this is a lot of case for that kind of money.
Packaging and the NZXT H630 Ultra-Tower Chassis
Since the chassis was so fresh off the manufacturing line, when they sent this one to me, there wasn't even any packaging ready to go with the chassis. To get the H630 to my door, NZXT double boxed the chassis in a pair of plain brown cardboard boxes.
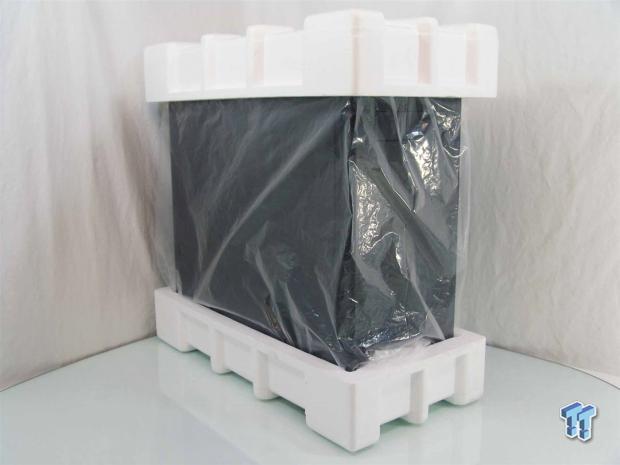
Inside of the boxes you will find the chassis wrapped in a plastic liner to protect the matte black finish. To keep the chassis from moving around and to take the hit from the delivery guys dropping this 30 pound chassis, NZXT uses very large Styrofoam end caps, and they did very well with my sample.
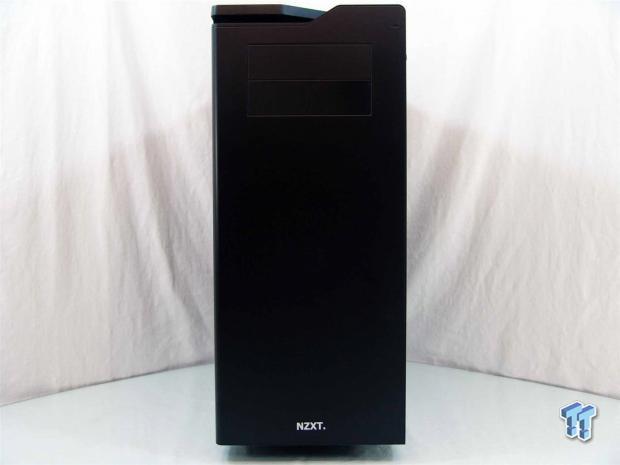
The front of the chassis is large, flat and matte black. You get some idea of the angles at the top I mentioned earlier, along with the pair of bay covers with an LED to the right of them, and the NZXT name at the bottom of the bezel.
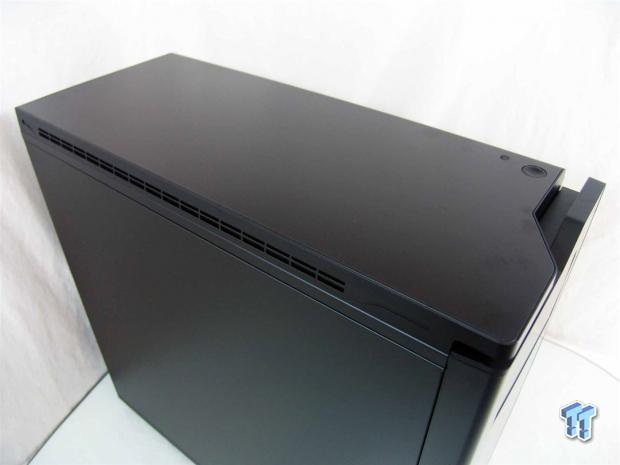
The top of the chassis is also just an expanse of painted steel, but it does offer the larger power and smaller reset buttons near the front on the right. The sides of this panel are ventilated to allow fans a way to vent out.
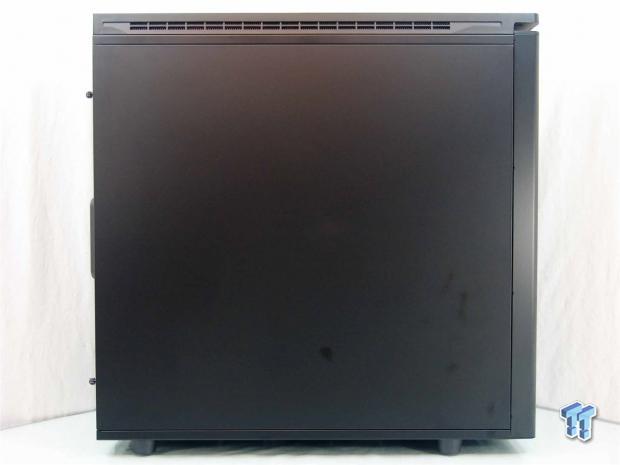
With silence being the key to this chassis, flat panels without windows or fan openings is a must. This also allows them to completely fill the inside of the panel with the dense foam used for dampening noise inside.
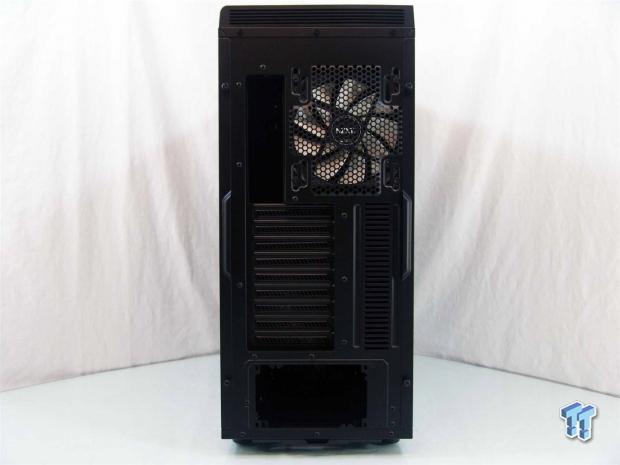
In the back of the chassis you get all the amenities you expect with an exhaust fan, the PSU at the bottom and nine expansion slots, but you also get lighting above the rear I/O panel as well as above the expansion slots to make connectivity in the dark much easier.
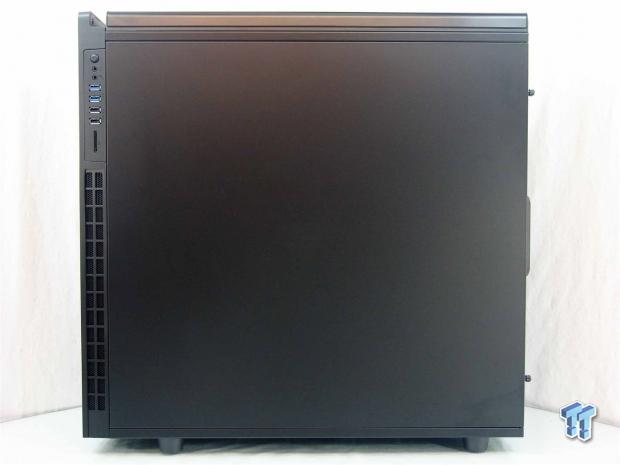
The right side of the chassis is much like the other side, no openings for noise to sneak out, and this panel is backed with material as well to dampen sound. At the left you can see the I/O panel, but below that is where the system gets its intake of air from, that mesh slot down the side.
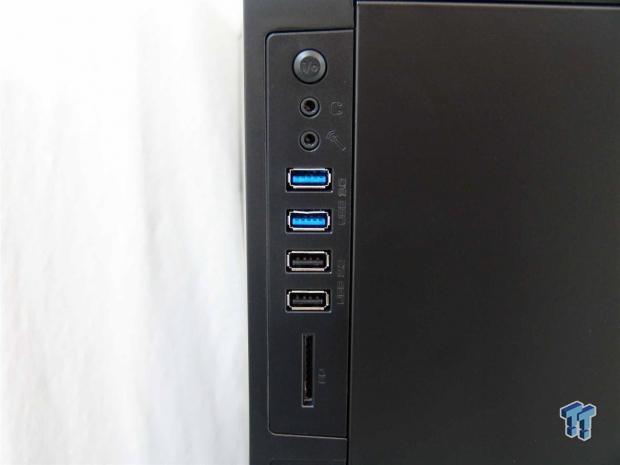
Getting closer to discuss the front I/O panel you see it starts with an odd looking button, and this is for the I/O lighting in the back. You then get the 3.5mm audio jacks, two USB 3.0 ports, two USB 2.0 ports and an SD card reader slot.
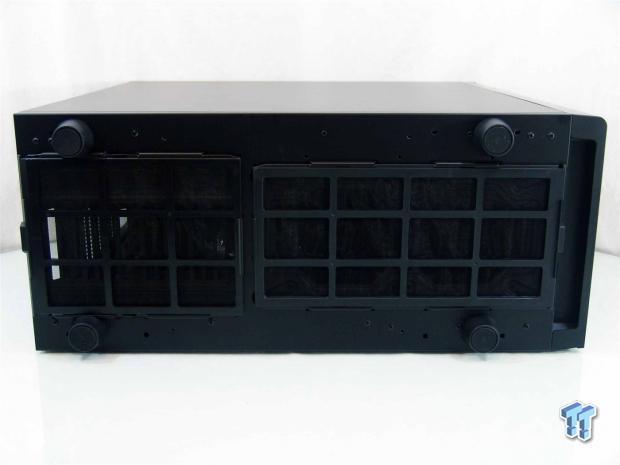
Under the chassis you will find four round plastic legs supporting the chassis, and they have rubber pads to keep it from moving around. There is also a pair of dust filters, one at the back for the PSU that pulls out of the back, and a longer one that removes out the front to cover the optional fan positions.
Inside the H630
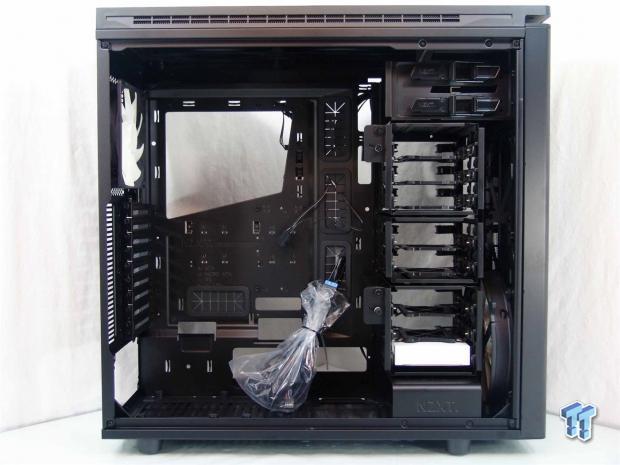
You will find the hardware in one of the drive bays near the bottom, and you can also see the wiring has been bagged for shipping. What is tougher to understand is the size of this chassis and just what sort of room you are playing with in here.
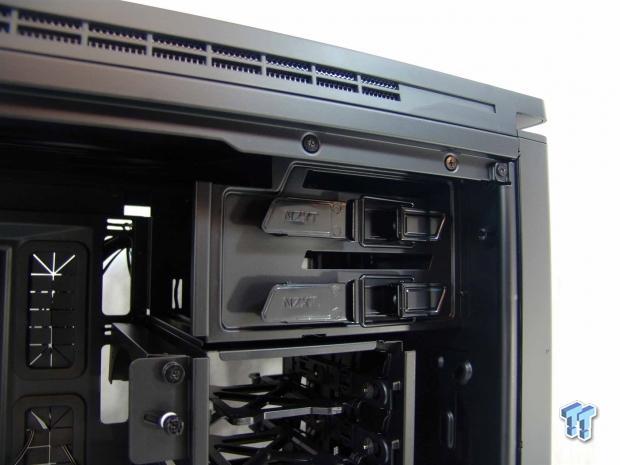
The pair of 5.25" bays at the top of the chassis are both equipped with these heavy duty, tool-free latches. There is no way to screw in the drives for backup, but these are super solid when clamped into the drive, and there is no real need for screws anyways.
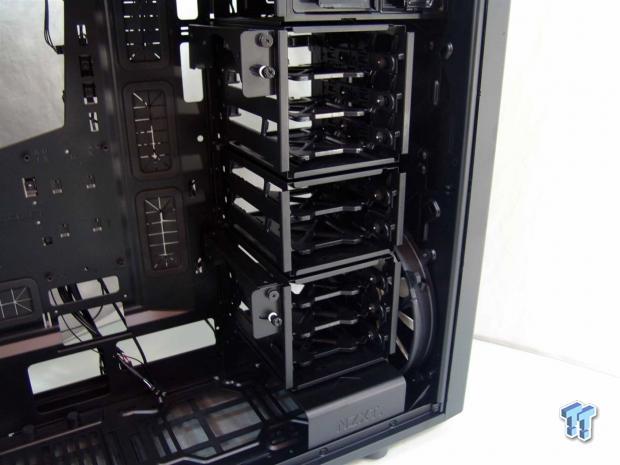
The entire leftover area is then dedicated to mass storage. Here the drive rack is broke into three sections, two with three trays and one with only two. On the left of them here, you can also see the adjustable fan brackets that are offered.
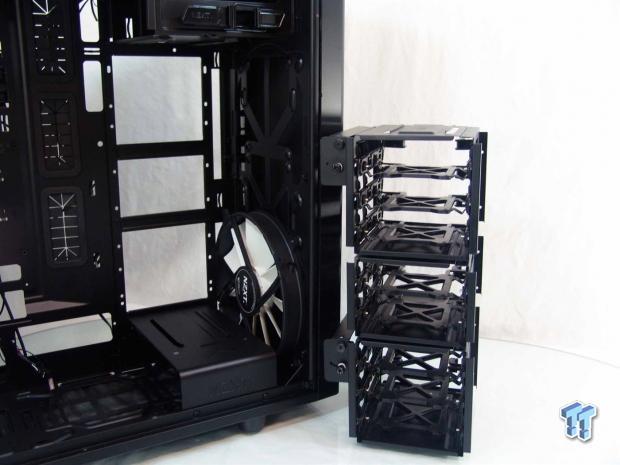
If you want to, you can remove, rearrange and leave just what you need. This allows access to the front for water cooling. You can also remove the steel plate that says NZXT at the bottom of the case to allow even more room, if needed.
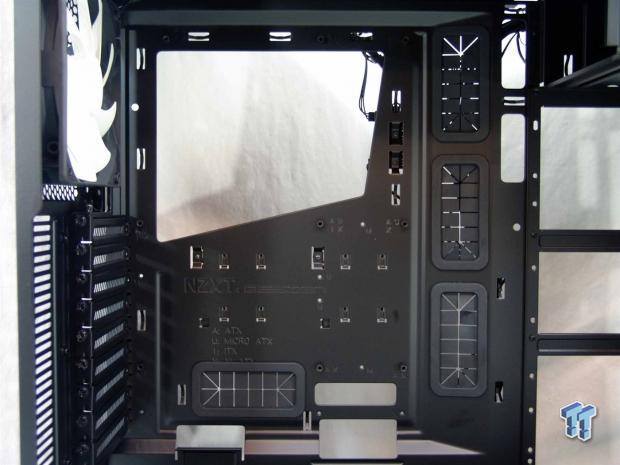
The motherboard tray offers a huge hole to gain access for coolers, and around it are plenty of tie points and management holes that you can even think to use. The tray comes with all the standoff set for ATX, but this can house quite a few other sizes as well.
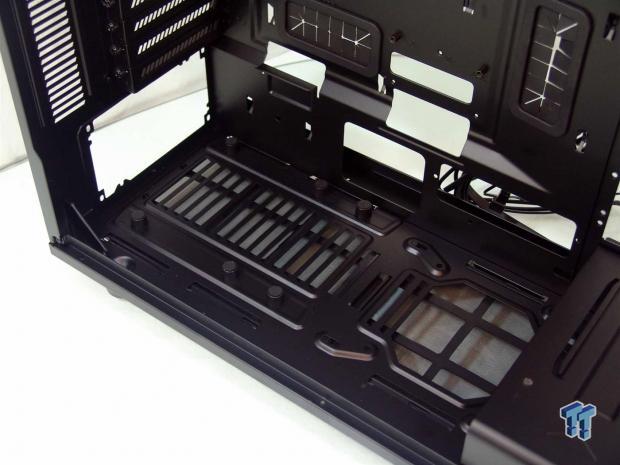
On the floor you have six pads to hold power supplies up off the floor. This way it supports both short and long PSUs. The floor is also well ventilated, and in front of the PSU you can see one of the optional holes for a fan.
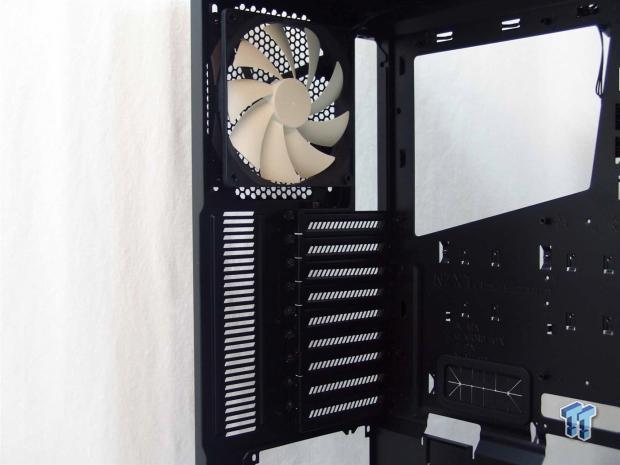
The back of the chassis there is the second fan, this time a 140mm version. Below the fan you can see that hex head screws are what holds in the covers and is what will lock you cards into these nine slots.
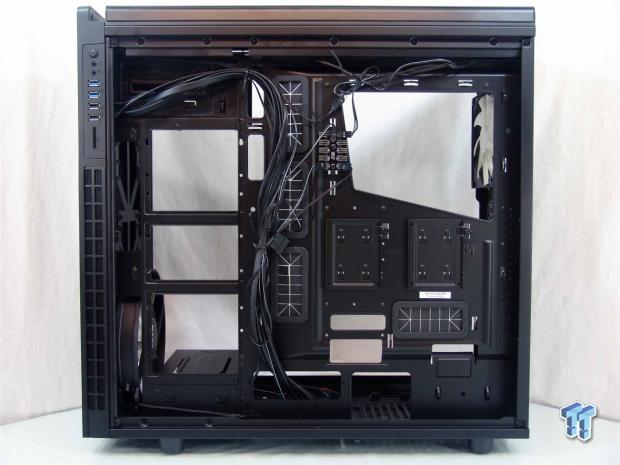
You can see NZXT does do some of the management if you wish to use it, and they do show the easiest route to take. This also shows off the depth back here with is 30mm at minimum. There truly is room for anything you think to need to power your build.
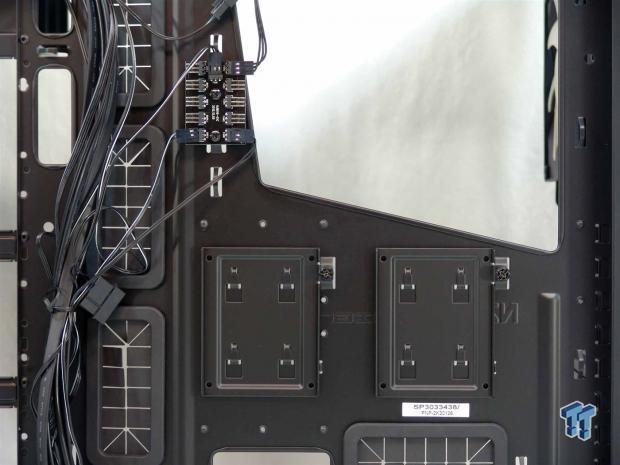
Moving in a bit closer you can now pick out the NZXT Grid without the external cover at top left. This will allow you to put 10 fans on this hub from one power source. Across the bottom there is a pair of 2.5" drive racks. This will allow you to house some storage or SSDs back here.
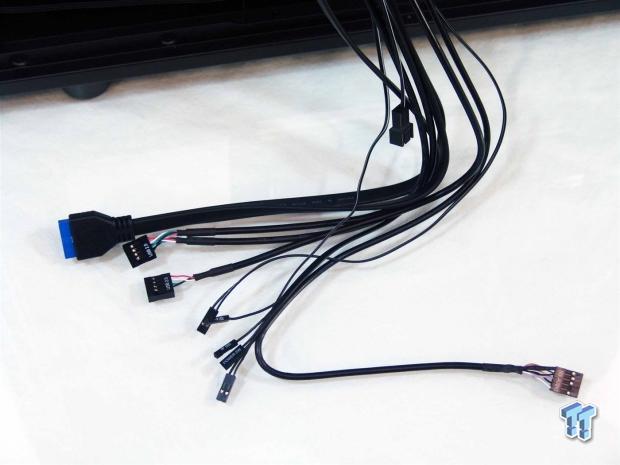
I like that all of the wiring is black, but there is a lot of it. You get the Native USB 3.0 and a pair of USB 2.0 connections, the front panel lighting and button connections, and a super long HD Audio cable to be sure to reach the port on any motherboard with ease.
Accessories and Documentation
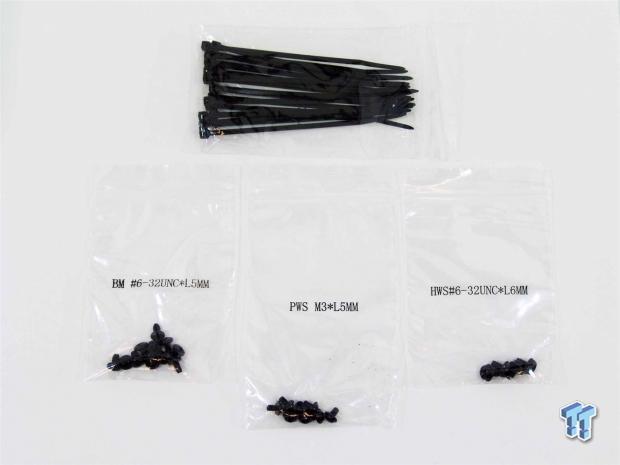
As part of the hardware kit, I have laid out the bag with 20 tie straps in it, the 6-32 by 5mm motherboard screws, a bag of SSD screws for the plates behind the tray, and the bag of PSU installation screws.
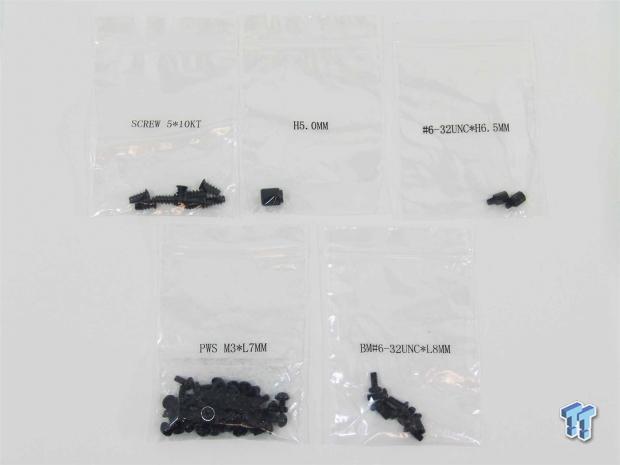
Here we have a bag of fan screws, a bag with a standoff socket in it, and a bag with a pair of extra standoffs on the top row. At the bottom are bags as well. The one on the left has screws for the ODD, and all HDD mounting for the slide out trays in the cages at the front. The last back is for cage installation, as you can replace the stock thumbscrews holding them in with these.
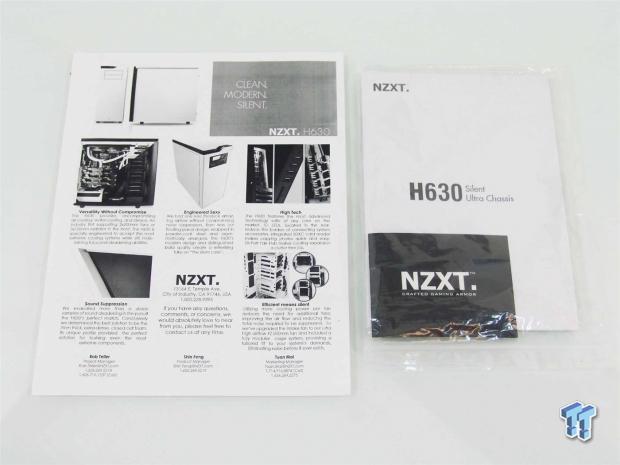
In my box I found a photocopied sheet explaining the five main features found within the H630. On the right you will find the chassis installation guide along with a product placement booklet to show everything else NZXT has to offer.
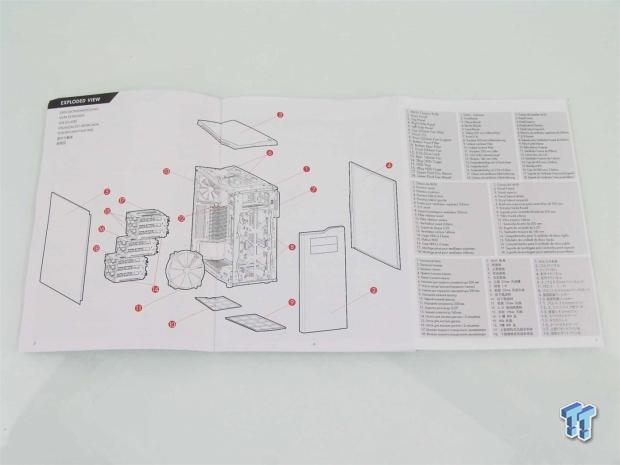
Skipping through a few pages, I then ran into this. There is a fold out section of the manual that shows an exploded diagram of the chassis and it labels each individual part. Then on the right there is a description of each number in these multi-lingual lists.
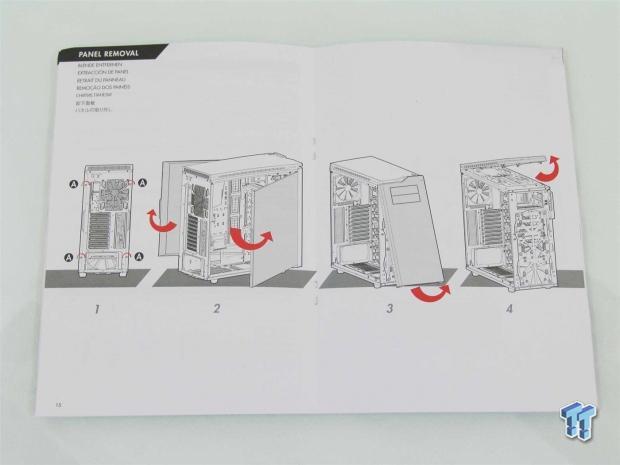
In the manual NZXT also show you how to remove all of the panels to keep you from breaking any clips. I did remove both the top and the front of the chassis, along with the doors. The doors swing out as shown and are easy to handle, but the top and front are super snug and require a lot of force to remove.
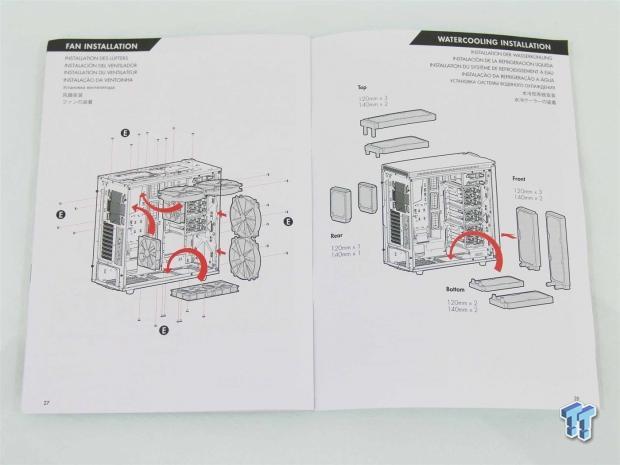
In case all of my earlier explanation of the fans and radiator placement was a bit confusing, these two pages should simplify it for you. On the left you see all of the fan locations with the largest fan that will fit being shown. On the right side you are given the radiator placements. Here it shows all versions of what will fit in each spot.
The Build and Finished Product
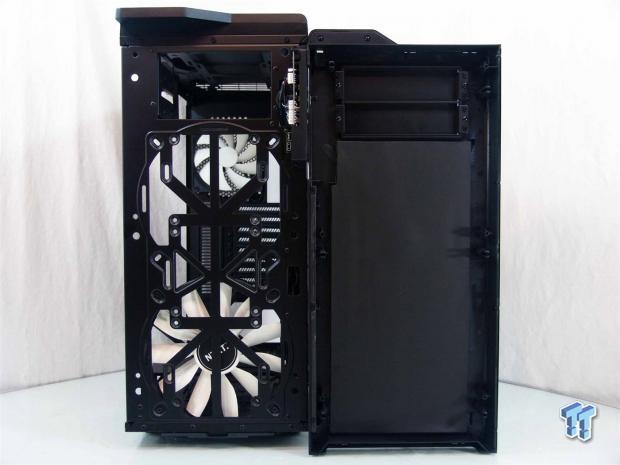
As I said, removing the front bezel is tough to do, and it is a good thing the front I/O stays attached to the chassis, otherwise you would rip it right off. On the back of the bezel you can see the dense foam applied here and to the inside of the doors, and you can see that the bay covers are screwed in place.
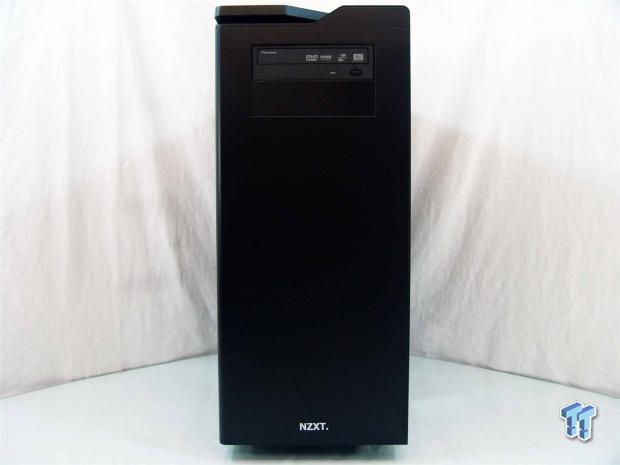
With the build now completed, I went ahead and slid in and latched the DVD drive into the bay, and put the bezel back on. Even here the clips take a good smack to get them to seat against the frame of the chassis.
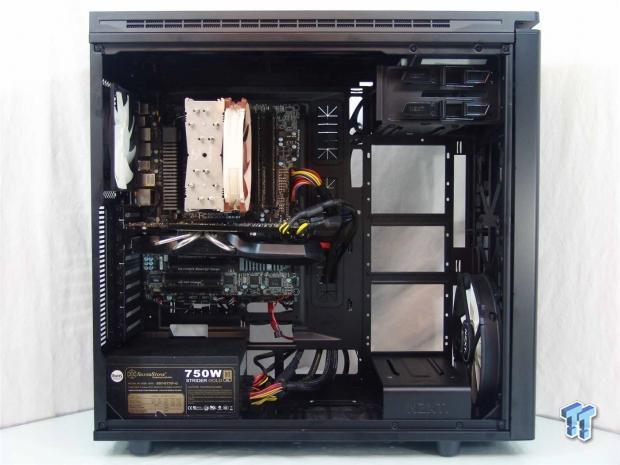
I did leave the chassis stripped down to its essentials to give you an idea of how large and roomy this chassis is. There is plenty of room up top and in the front for water cooling, and as I said, if you remove the plate at the right, you can do it at the bottom too.
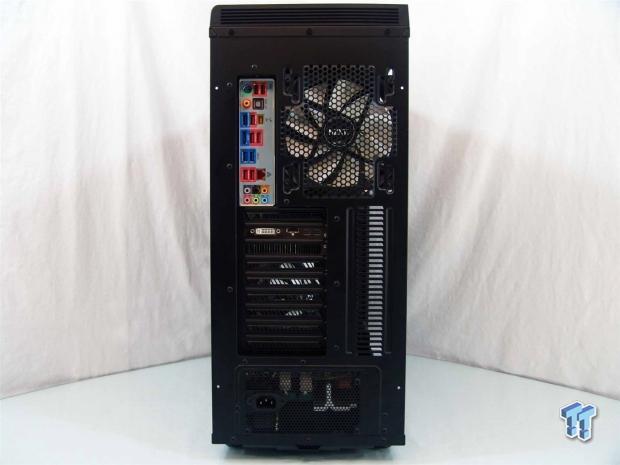
There is nothing unusual to discuss out back either. Everything fit as it should, screwed into place fine, and gave me no hassles.
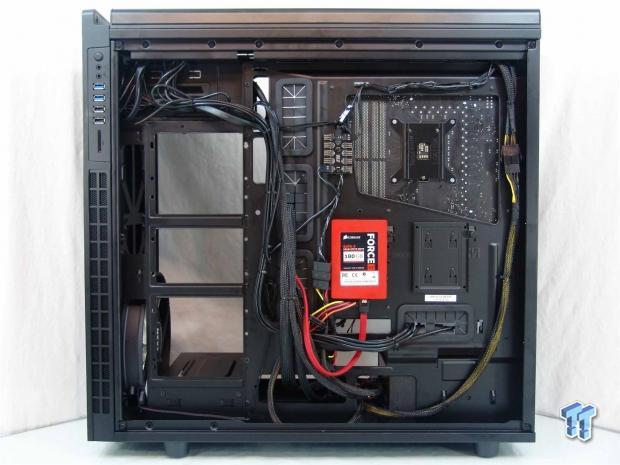
Behind the motherboard tray I took a little time to make everything tidy. With the drive bays at the left in place, it is much easier to hide the wiring like NZXT did for you out of the box. I wanted to try to use everything as it was and see what can be done, and I am impressed with how well it is laid out back here.
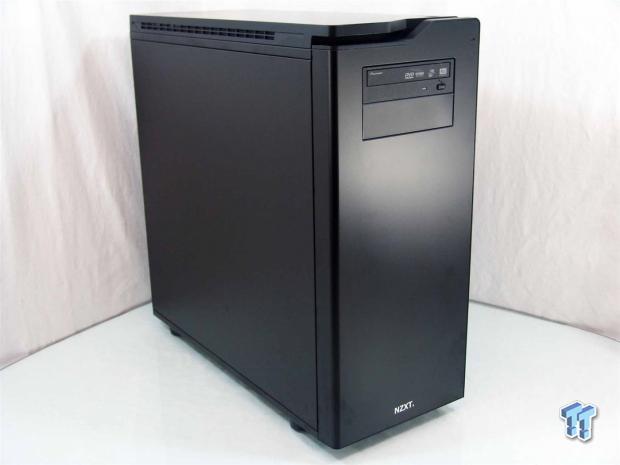
I closed up shop with the build completed. This shows that aside from the exposed DVD drive, which doesn't look that bad, the chassis looks much like it did fresh out of the box. Now all we have to do is plug it in and test it out.
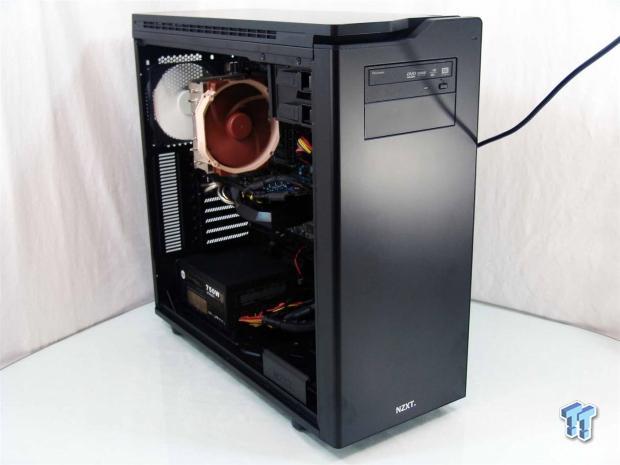
The reason you are seeing the chassis with the panel off was to show that it is in fact running, and when connected to a mouse, keyboard and screen, the LED on the front did not light with HDD access either. Along with the dysfunctional LED on the front, the power switch is also broken. I had to use a screwdriver to boot my system to get the audio and thermal testing done. While I could have asked for a panel replacement, and they would have sent one I'm sure, I just wanted to explain why the last image was like it is. Again, this was an early sample from NZXT, and your case is very unlikely to show up to you like this.
Final Thoughts
Power button and LED issues behind me. This is a huge chassis that looks amazing, is designed with silence in mind and has ventilation to redirect noises, and sound absorbing materials applied, and is a chassis that cools really well on air, but also offers water cooling enthusiasts a case with placements for up to four radiators, and still have room for a loaded system and all the rest of the water cooling gear. NZXT really left no stone unturned with the H630 chassis.
The matte finish on this chassis is like no other case I have seen, and makes the plastic front bezel blend into the steel components of the exterior with a perfect match. The design is simple, yet elegant, and offers just a touch of angles and panel lines to give it a bit of character. On the inside it is a whole different ball game. The sheer amount of fan options inside the chassis, amount of places to store up to ten storage drives, an over abundance of wiring options, the list just goes on and on. Even if the aesthetics are something too plain for you, I can see that this chassis is going to be a perfect candidate for chassis modification. It has everything a modder wants on the inside, and the outside is a virtual blank canvas waiting for you to make the H630 your own.
Depending on where you are located in respect to the chassis, the noise levels will vary. In the front of the chassis things are dead silent. At the left of the chassis you can hear 33dB of noise level, as the sound works its way from inside of the case and out the venting at the top. The back of the chassis is where I got the highest reading of 39dB. Seriously though, who has the back of the case facing them? The right side also is where the chassis gets its intake of airflow, and while somewhat silent, I got a reading of 34dB here. Since the normal range of hearing stops at 25 to 30dB, the chassis does keep in line with the "silent" design that NZXT were looking for from the start. One thing I will add is that with just a single 200mm fan in the front and the 140mm stuck in the back, temperatures inside of this chassis are very cool as it is shipped. I can only imagine how good it will be with more fans, even water cooling with some high pressure, but low noise fans.
Now I really hope you can see why I was so blunt at the start where I said you were getting quite a bit of case for the money. Every way you look at it, any way you try to listen to it, the H630 is the largest, most silent, feature rich solution I can think of for this price point. When the H630 Ultra tower does finally make it to the shelves with a price tag of $149.99, I see an issue with anyone being able to keep stock long. This chassis is just that good. NZXT shows once again why they are getting so much respect in the chassis game - because they aren't afraid to load up a very nice looking chassis, and offer it with an appealing price point.
If you want a silent chassis that can grow with your ideas of water cooling and much more, I definitely suggest that you take a long hard look at the H630 Ultra-Tower chassis from NZXT.


