Introduction
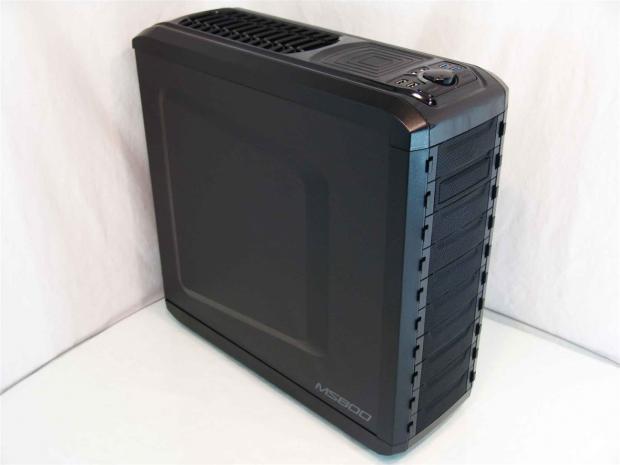
Of course I have been aware of the fact that Zalman made more than just coolers, even though that is what seems to drive most of their business. There have been a few cases I have seen in news blasts and for sale when shopping prices for other cases, but up until now, Zalman hadn't sent me any.
This year at CES I had a meeting with Zalman, and of course we discussed the large group of new CPU coolers that are in the works, there was also a section with quite a few new cases that Zalman is to offer at various points this year. I also saw the chassis we are going to be looking at today, and at that time I believe I was told this case was planned to retail in the $100 to $150 price point.
Making a bold leap into today's chassis market, specifically in the $100 to $150 range, is almost suicide with what is currently offered. As I look over at Newegg, cases like the Define R4, the Storm Scout 2, the C70, the 500R, the 550D and the TJ04 to name most of the top offerings in this segment. With the bar set so high by these cases in design, aesthetics, feature sets, most of these cases are at or near the price point of this new case, and are the direct competition as I see it. This is why I say it's almost suicide to enter this segment, but Zalman feels they have a strong enough design and final product to deserve you money over the other somewhat aging designs.
Since I have yet to actually hold a Zalman chassis in my hands, I have no real expectations. I was able to look at this chassis at CES, but it was more in passing as I tried to absorb all the information on this chassis as well as around six others, all in the short amount of time we had set aside to discuss things. That in mind, I don't have anything that sticks out from CES about the mid-tower chassis we are looking at today, the MS800. So with no shadows or silver linings over their heads, let's dive into the new MS800 and see just where it falls in the already flooded market of mid-tower chassis offerings.
Specifications, Availability and Pricing
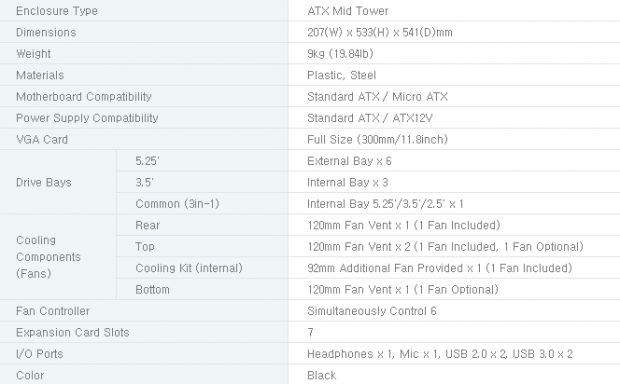
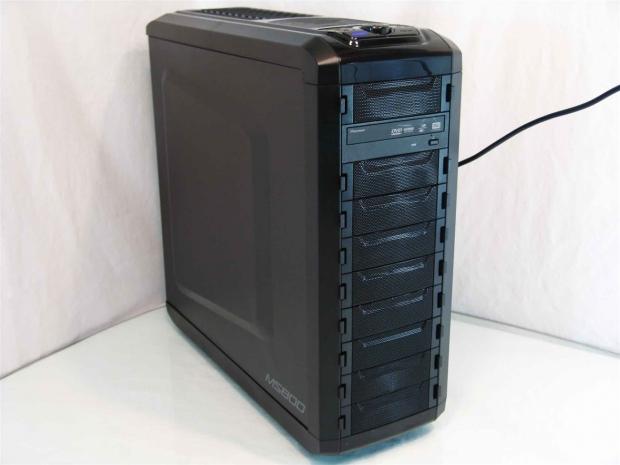
The outside of this ATX mid-tower chassis is covered on three sides with black plastic, either shiny or textured, and there are three sides that are made from steel and painted with a textured black finish to match the plastic wrapping the other sides. The front of the chassis offers a bezel with thick side pieces, and the entire front of the chassis in between is made up of ten removable mesh panels. The plastic then gently curves at the top and bottom as it mates up with other plastic covers. The bottom cover is shiny, and offers a built in dust filter to keep the chassis clean inside. As it wraps to the top of the chassis you run right into the front I/O panel offering USB 3.0, USB 2.0, 3.5mm audio jacks, the power and reset buttons and a dial fan controller.
As you move back on the top of the chassis, you find a utility tray and then a bunch of louvers above where fans can blow out of the top of the chassis. As for the side panels, both offer a bump in the panel. The left is to allow taller CPU coolers, and the right is to allow a bit more wiring behind the motherboard tray. In the back of the chassis you have a pair of holes with grommets for water cooling, seven expansion slots with a protective cover and the PSU mounts at the bottom.
Cooling this chassis are three fans installed by Zalman with three additional places to add one. The front of the chassis is essentially all 5.25" drive bays with 3.5"/2.5" adapters in four of them for the HDDs and SSDs along with a card reader or floppy drive. There are no options for fan mounting in the front unless you rig something up. The top of the chassis will hold a pair of 120mm fans, but only one of them is included. The back of the case has a 120mm fan as an exhaust, and the floor of the chassis offers room for another optional 120mm fan. Zalman does include a 92mm fan in the hardware, and this fan is meant to me mounted to the GPU support system inside of the case to add air flow to the CPU, GPU's or anything else you can contort the fan to point at. One of the best things about this, is even with all of the holes filled, that is five fans total, and the fan controller on the front can control up to six, so you can even add the CPU cooler to this if you would like for complete control at the spin of a dial.
Something that is going to save this Zalman chassis is that I must have heard things slightly wrong, because as I look around to buy the MS800, I am finding only two locations currently stocking these in the US, and that is Newegg.com and Fry's Electronics. Both locations are showing stock with a price of $89.99, which is a really good price. I do however recommend that you go to Newegg for this deal, as you can save yourself about $10 in shipping cost.
With this new price in mind, it still has the same competition I mentioned earlier within $50 of it, but now we bring in cases like the 400R, Phantom 410, H2, Raider and the Level 10 GTS. If I didn't make the point earlier, you can plainly see the market has a lot of strong contenders, Zalman better have brought their "A-game".
Packaging
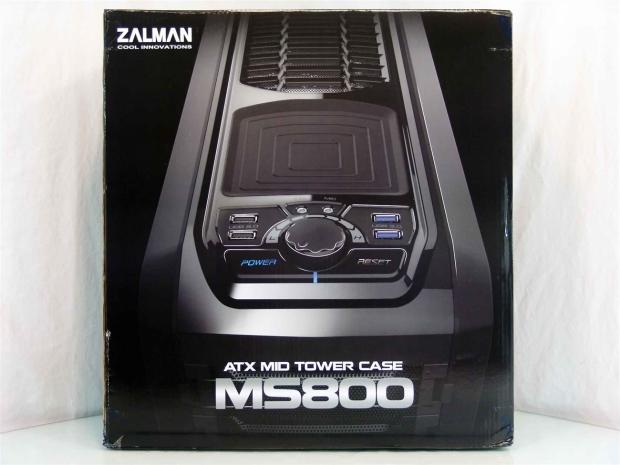
The Zalman name sits in the top left corner of this shiny black cardboard panel. Taking up most of this panel is a very up close look at the MS800, showing the louvers on top, the utility tray, the control panel, and even a bit of the mesh that runs down the front.
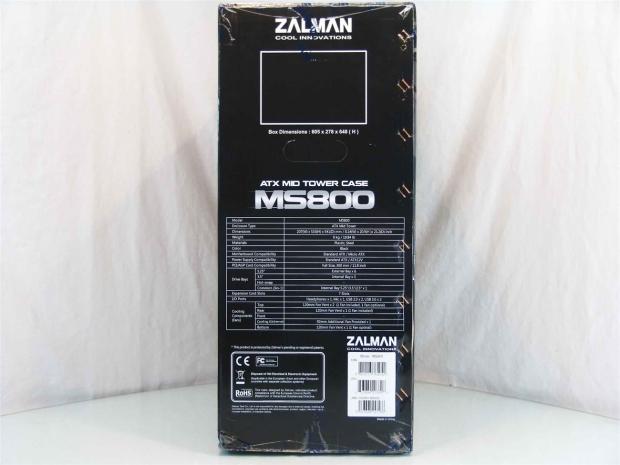
I assume there is some form of a sticker missing from the white outlined box at the top above the packages dimensions. As you move down beneath the handles, you run into the specification chart for this chassis.
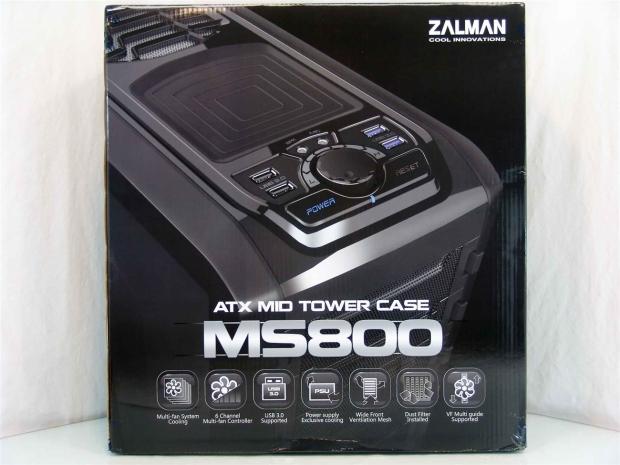
Around back there is another look at the same general area of the MS800, just this time you get to see a bit of the side panel, too. Under the chassis name are features like the cooling system, fan controller, USB 3.0, PSU cooling, the front mesh, dust filters and the GPU support are covered.
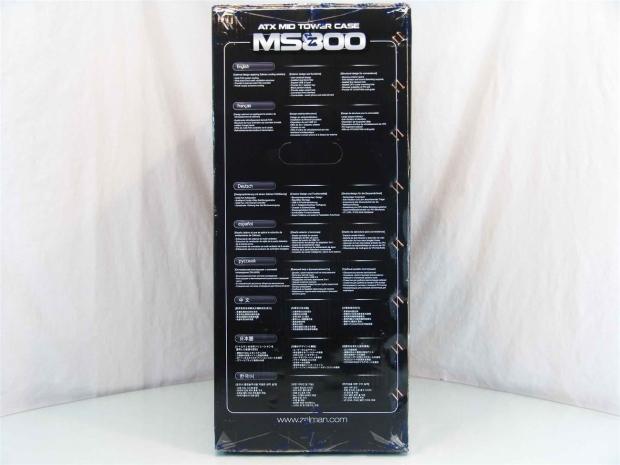
In plain text on this side you can find the features on the outside and on the inside listed here, and under the English rendition, it is repeated in seven other languages.
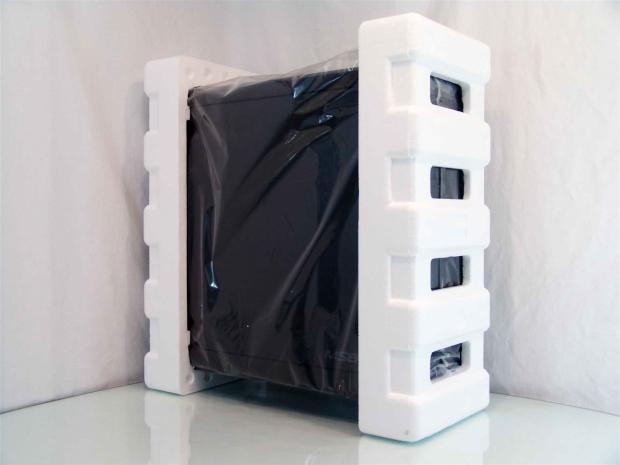
Inside of the box the MS800 is protected first by a plastic liner, and a few static clung pieces under it to cove the shiny bits of plastic. Once covered in plastic, the front and rear of the chassis are what gets covered with the Styrofoam caps. While different from the typical setup, it allowed the MS800 to arrive in top notch condition.
Zalman MS800 ATX Mid-Tower Chassis
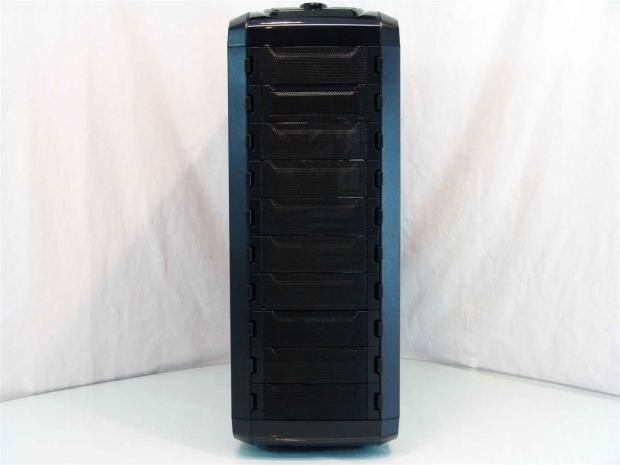
Looking at the front of the MS800 you can see the angles used at the top and bottom as the textured sides of the bezel support the ten removable mesh panels between them. To add a bit of strength to the mesh as well as adding a bit of design detail, each of the mesh covers is shaped with a notch at the top.
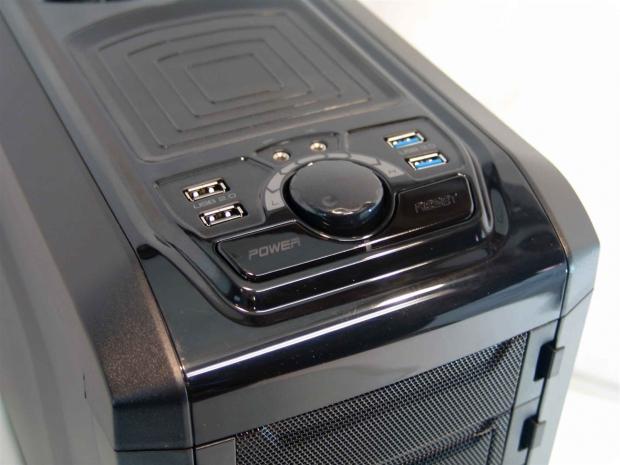
As soon as the bezel curves from the front and starts to level off with the top you run into the front I/O panel. Here you have USB 2.0 and USB 3.0 ports, a pair of 3.5mm jacks between them, the power and reset buttons with the HDD activity light between them, and lastly is the large dial fan control knob.
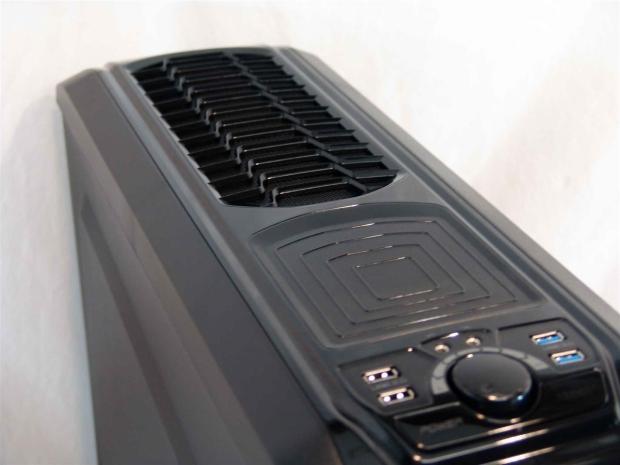
Just behind the I/O is a tray to hold your phone, keys and USB drives - whatever you like. Behind that there is a louvered section that brings the air forward from the 120mm fan hanging below it.
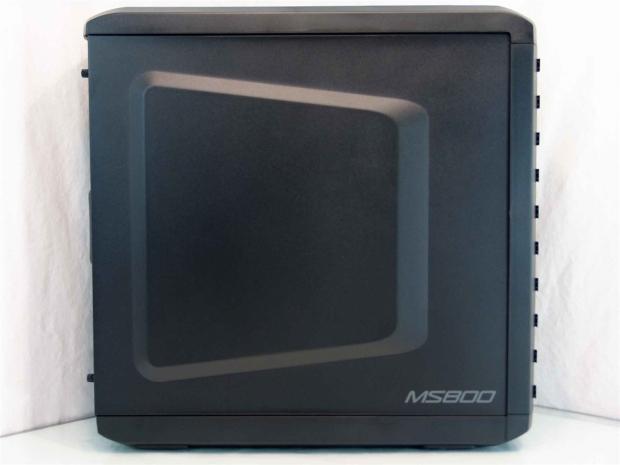
The left side of the case is thicker around the top, front and bottom, as the side panel is a bit inset. There is a large bump out to allow for taller CPU coolers and custom GPU coolers, and the name of the case is even painted on the panel at the bottom.
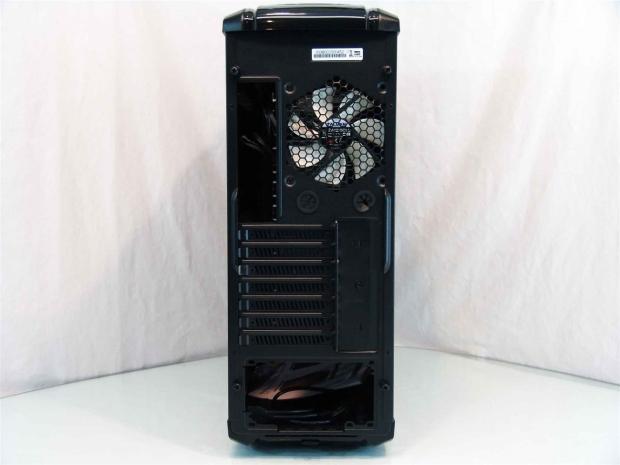
Out back, the top of the chassis is pretty tall and should allow most AIO units to install at the top. Then you have the rear I/O next to the 120mm exhaust fan, just above a pair of holes for water cooling. Since the PSU is at the bottom, it only left room for seven expansion slots. To allow for 300mm cards to go inside, the slots got moved to the back wall of the case, and then it needs the metal slot cover on the right to keep people from just removing cards from your case.
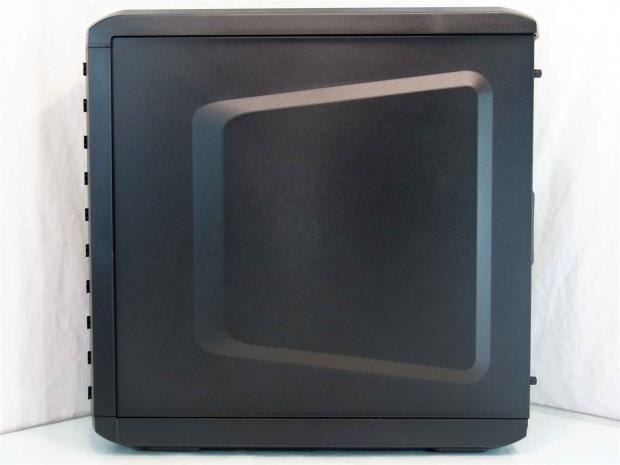
The right side panel is a match to the left, sans the MS800 naming. This bump is specifically to allow wiring a bit of room because the tray is right even with the frame in this chassis.
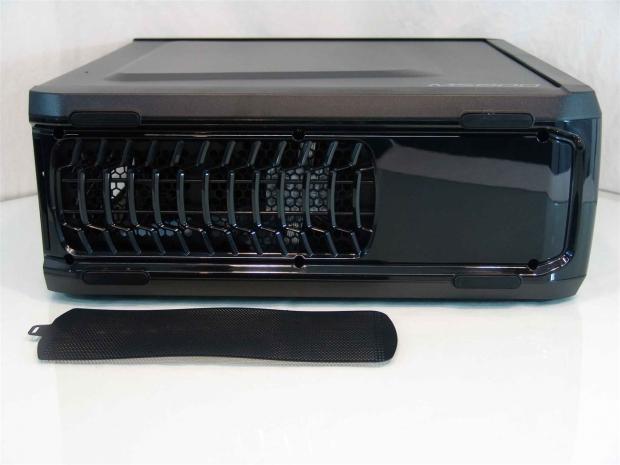
Under the chassis you have matching plastic to the top of the chassis, just a shame you won't see this most times. To keep the PSU and the optional fan from blowing dust into the chassis, there is a removable plastic filter that you can pull out the back of the chassis and clean regularly.
Inside the MS800
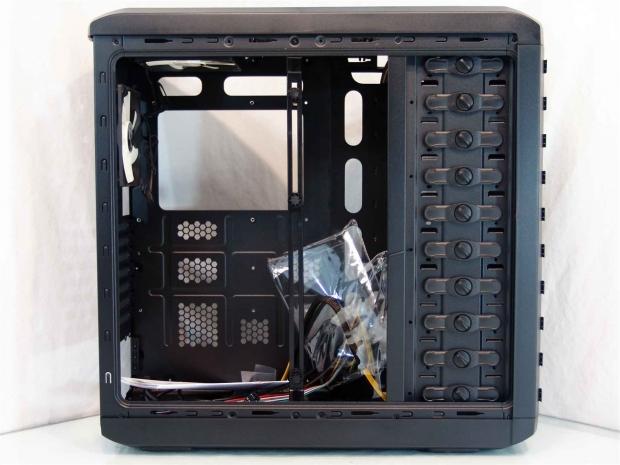
When I first removed the doors, I found that the plastic bag that was tied to the drive bays had broken and the instructions, the hardware, as well as an extra fan were just floating about inside the chassis when it arrived.
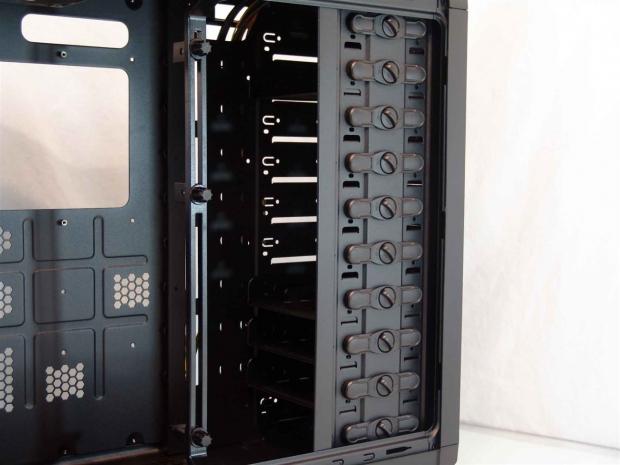
Off to the left you can see the GPU support system that will also support a fan to aid airflow mid chassis. To the right you see all of the ten 5.25" drive bays. All of the bays use a tool-free clip on this side, but only the four that have adapter trays are screwed in on the other side currently.
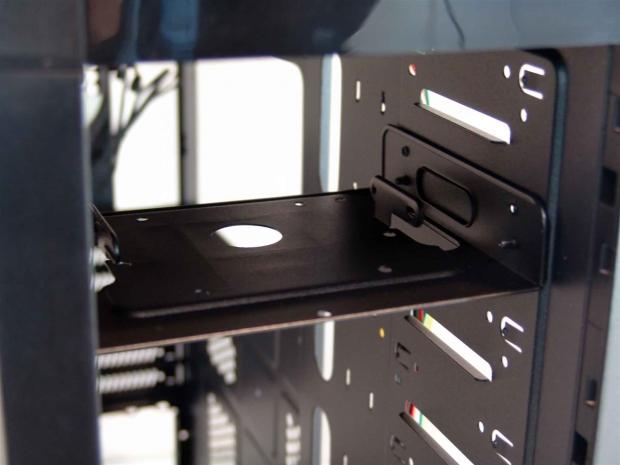
Removing all of the bay covers on the front bezel helps to show these trays off. Behind the cover with the option for a floppy drive or card reader, there is an adapter tray. If you don't have plans for these options, this can also be used as a storage tray.
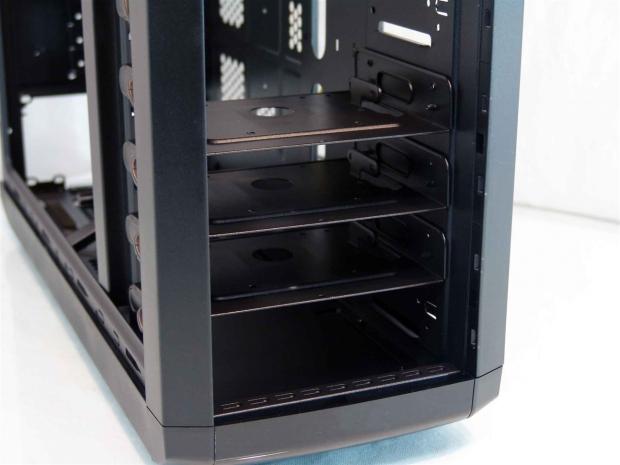
Down at the bottom are three more identical adapters. While at the top it is intended for certain devices, they are all equipped to take on 3.5" and 2.5" storage drives with the holes in the bottom of each of the trays.
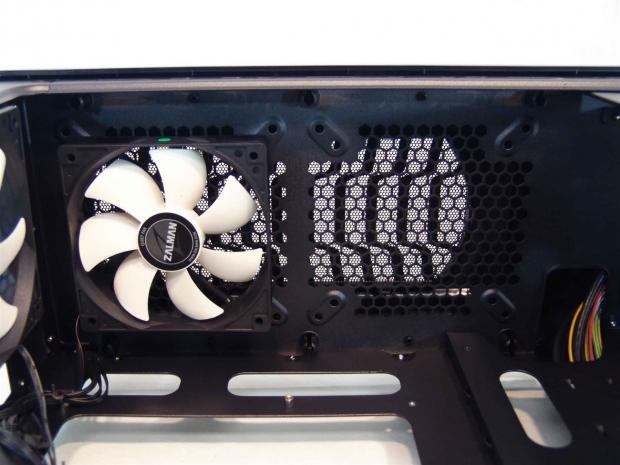
The manual and the specifications both say there is room for 120mm fans at the top of the chassis, but they neglected to mention that there is also room for 140mm fans as well. Also you can see quite a distance to the top stand-offs, and you should easily fit a dual radiator AIO up here.
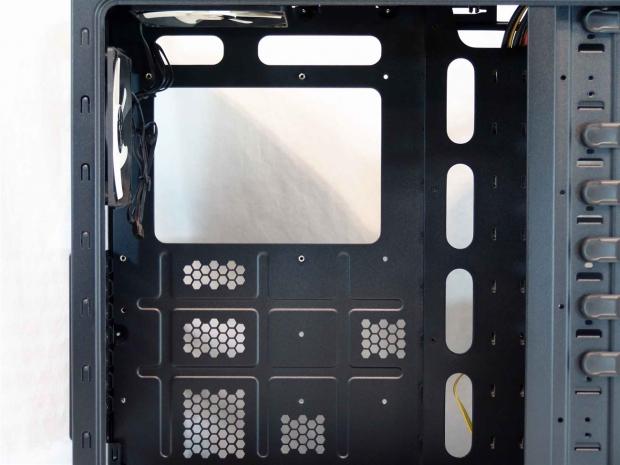
The motherboard tray offers a large CPU access hole that will allow motherboards a chance to cool the sockets and the back of the SIMM slots. Around the tray there are seven wire management holes, but they lack grommets.
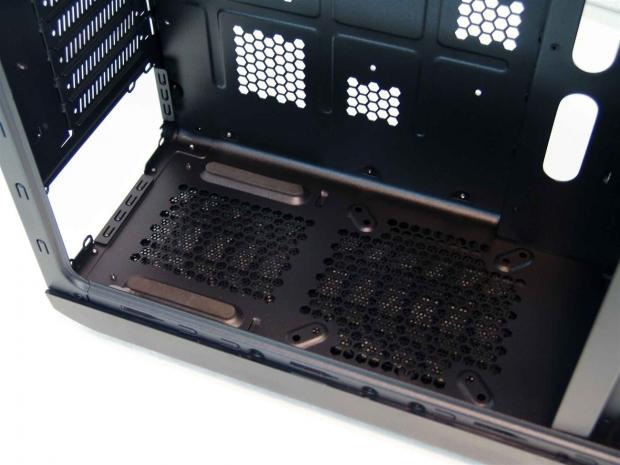
The floor of the chassis has rubber support rails for the PSU to sit on and a well-ventilated area between them to allow the PSU to draw in a lot of fresh air. In front of that you again have the option to install a 120mm or 140mm fan.
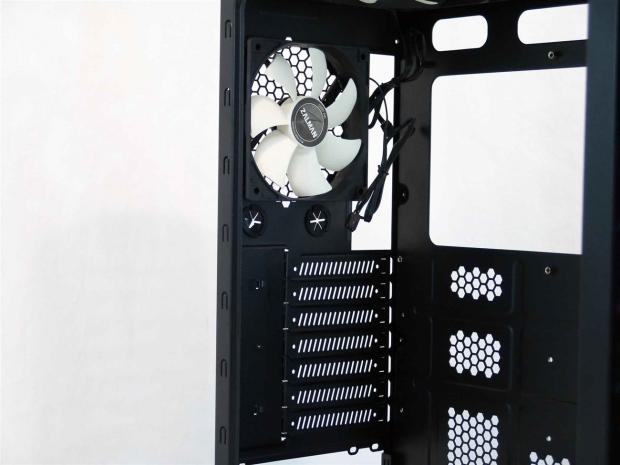
Inside of the rear of the MS800 you see the 120mm exhaust fan somewhat mounted on the back. It was at this point that I noticed it only has two screws in it, and both are stripped. As for the slots, since they are all the way back to allow for longer cards, you have to access those screws from the outside.
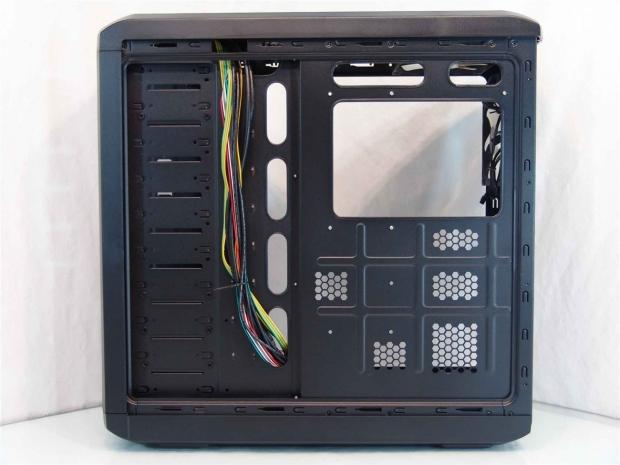
Behind the motherboard tray there is maybe 2mm of room to run any wiring. There is very little inset to the whole right side. This is why they run all the wiring to the left to give you a hint that the sixteen wire tie points under the wiring is where it needs to run.
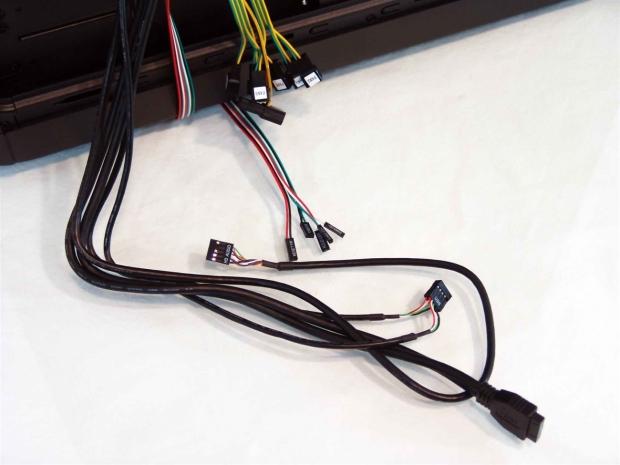
The wiring for the most part is black; those being the native USB 3.0, USB 2.0 and HD Audio. The front panel connectors for power and such are on a ribbon of rainbow colors, and at the top you can see the yellow and green wires of the six fan leads and the Molex connection to power the fan controller.
Accessories and Documentation
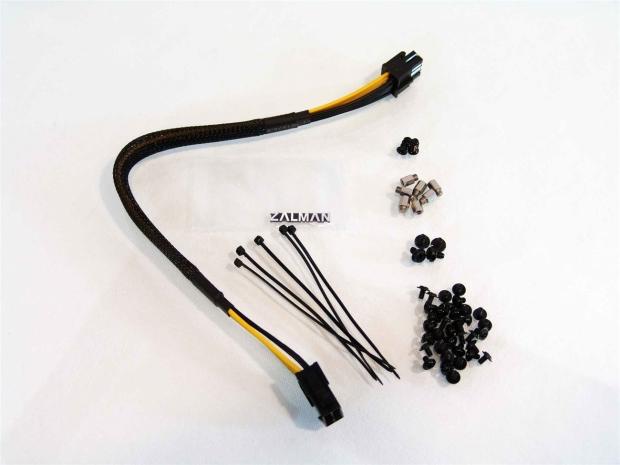
I had to dig around a bit, but I was able to locate all of the hardware. There is an 8-pin extension cable, a Zalman case badge and five wire ties. On the right is a pair of fan screws, seven standoffs, four PSU screws, and a handful of screws for the motherboard, optical drives and storage drives mounting.
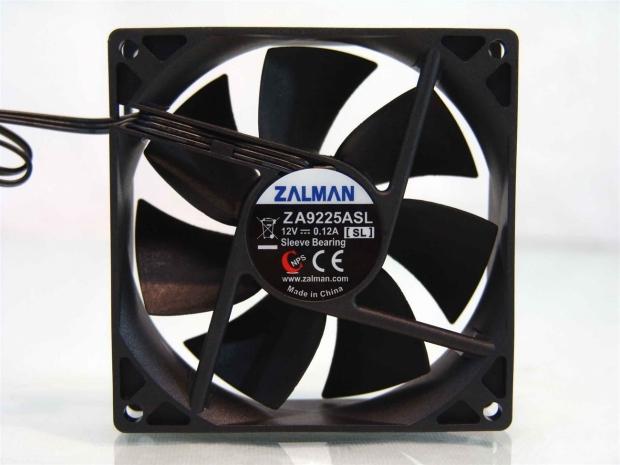
Also laying in the bottom of the case was this ZA9225ASL fan that is sent to be added onto the GPU support system. With the way it mounts, you can set this fan at almost any angle to allow users to put air where it is needed the most.
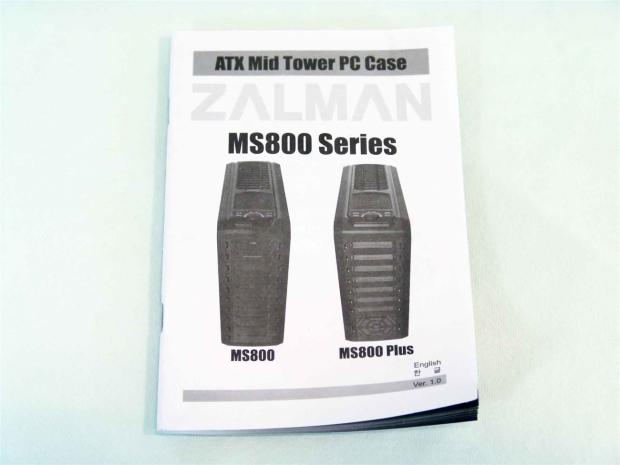
The manual for the MS800 is also the manual that works on its sister case, the MS800 Plus. The manual is printed in black on plain white paper, and is a cost cutting measure that is well employed on something we use once and it sits in the box for ever after.
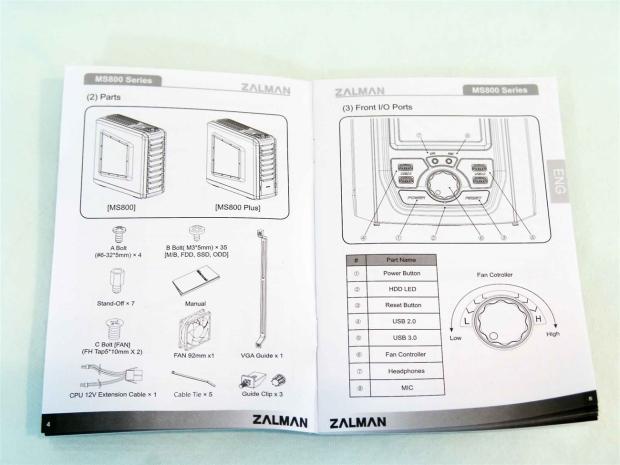
After a preamble and a specs chart, the manual jumps right into covering all of the included hardware on the left, but on the right it gets right into the control panel and below shows what each button, connection, or switch does, and even covers how the fan control dial works.
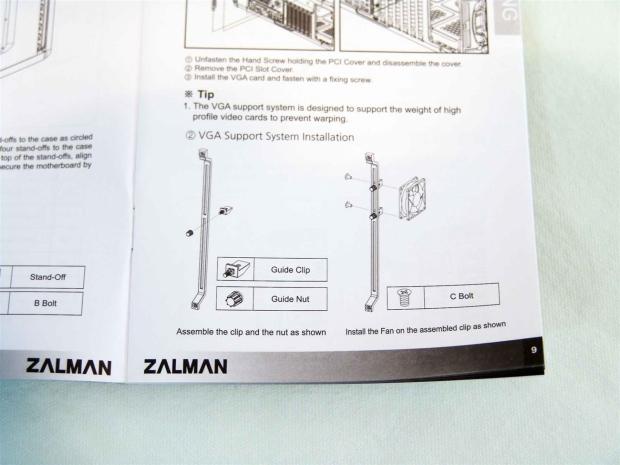
After showing me where the standoffs go, and showing me how to remove the expansion slot covers, the manual covers how to use the GPU support system. You can see they show the installation of the fan at the top half, leaving the bottom half to support three cards in the bottom half.
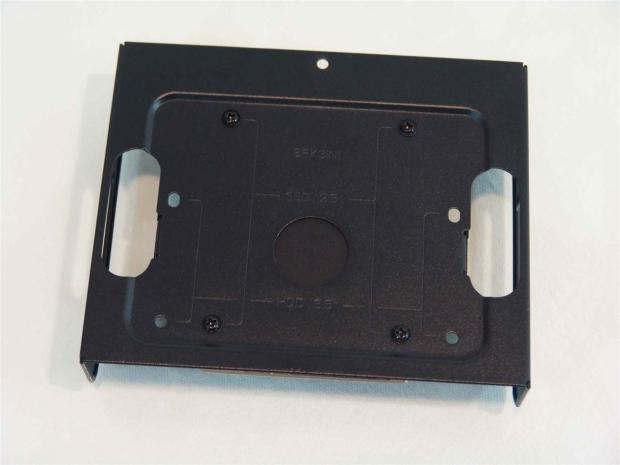
I went ahead and mounted my SSD into one of the tray, but I flipped it over so you can see what it going on. While the top has taps on the sides for a floppy drive or card reader, under the tray you have eight holes drilled and marked for 2.5" and 3.5" drive installations.
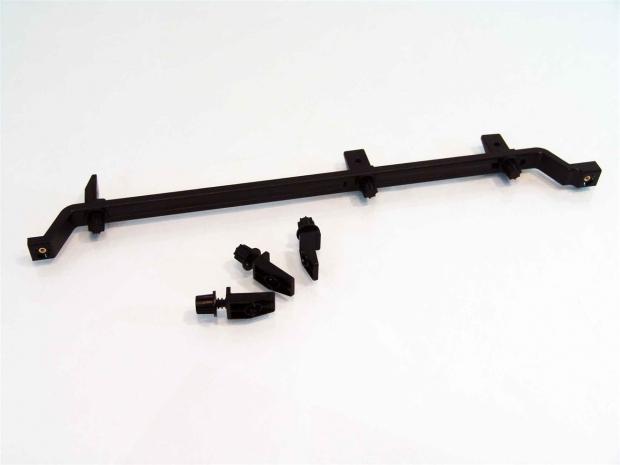
The support system comes with three of the support tabs installed on it already. The two at the right will be used to mount the 92mm fan in a moment, leaving four extra clips. In reality you can only run three heavy video cards in here, so essentially you have an extra clip if one should break. To use them, just unscrew the cap, put the stem into the gap in the long bar, and then screw the cap back on when the tab is where you want it to do its job.
The Build and Finished Product
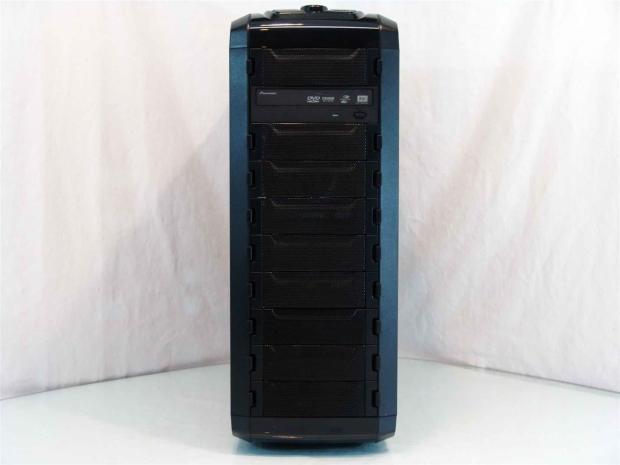
Since you can pretty much do whatever you want in the front of this chassis, I removed the cover with the adapter in it for 3.5" devices and slid in the DVD drive. Right below it, behind the cover, is the SSD just to help clean up the wiring inside, and allow the lower two-thirds of the panel to passively allow cool air into the chassis.
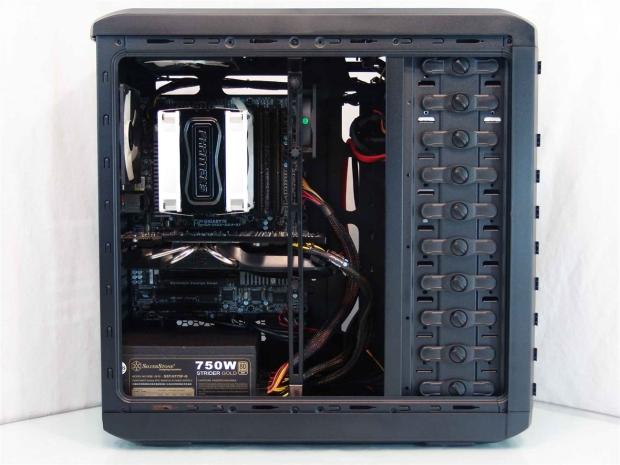
Inside the case, the Phanteks cooler looked a bit too tall, but then I remembered about the panel so I carried on. It was a bit rough with the specific cooler on my GPU, but I was able to get the bar in and support this card with it. I also now have the 92mm fan blowing over the RAM and trying to blow above the CPU cooler on the motherboard.
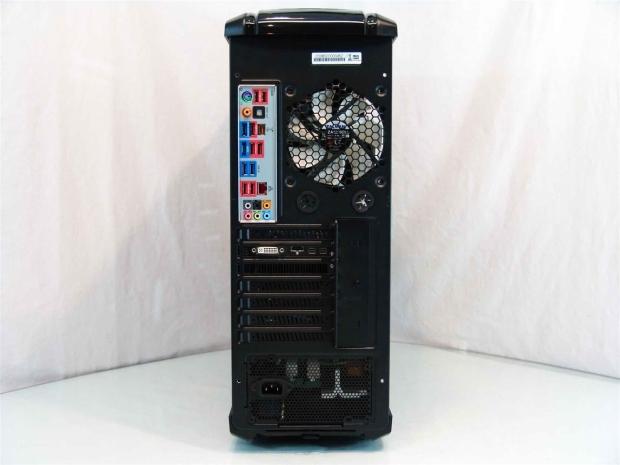
Look closely at the fan, the right two holes have no screws. Besides that, the rear I/O cover snapped in easily, and the expansion slot cover isn't that much of a paint to deal with to get the card mounted inside. Come to think of it, everything back here went rather well.
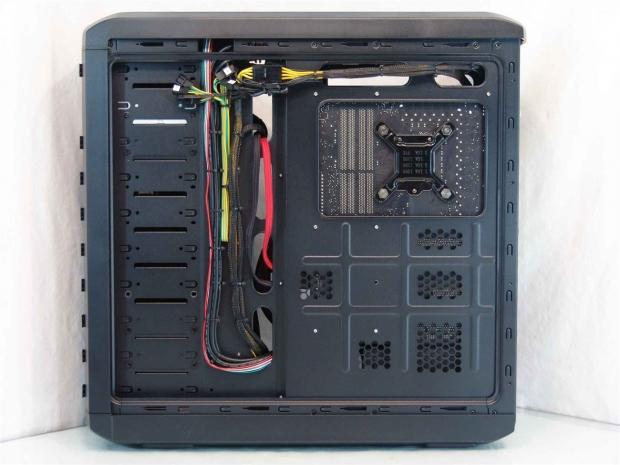
With all the places to tie wiring, and seeing that Zalman sort of hinted at the way it needs to be, I followed their advice. With a bit of time and some planning, you can get a really tidy result like this, you just need about 50 wire ties to make it happen.
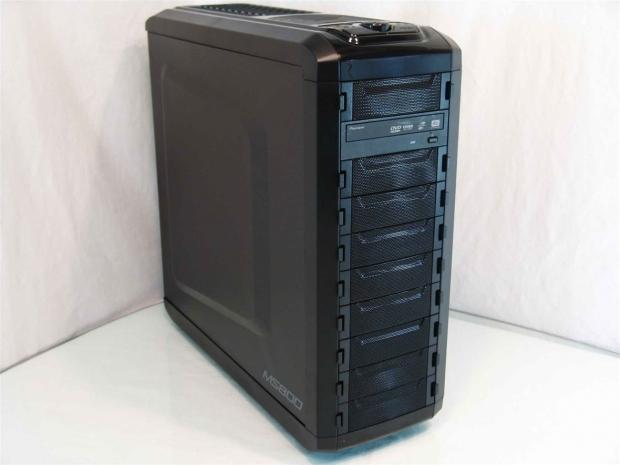
The door panels went back on much easier than they came off, as I literally had to pry them off with a screwdriver to get the first image inside of the MS800. As far as the looks go, had I not used the optical drive, there would be no difference in looks from its out of the box state.
Once powered on, with the fan controller on low, you only have the light of the power button, and the occasional flicker of the HDD activity light letting you know the PC is running from this distance. Even with it at full blast, from this distance there is just a slight hum that is audible from the MS800.
Final Thoughts
Taking into account everything we just saw with the Zalman MS800, some things impressed me, while other things bother me a bit, but I understand why it was done the way it was. Starting off with the good I like the styling, the shiny plastic is a bit much for me, but I like the design and layout. On the inside I really like the bay drive setup, it allows users to do whatever they want, and with some creativity, you could get fans in there, too. The motherboard tray is well ventilated, has a large access hole for the CPU, and offers plenty of holes and tie points to manage the wiring. Another thing I like is that they have a GPU support system that will work on standard video cards as well as video cards like mine with unusual coolers or ones with no access to the edge of the PCB to get its grip. Adding a fan to the top is a cool feature, but with no option to point the fan at anything, it's more or less just blowing air at the CPU cooler, it can't blow at anything on the board.
Then there were the things that sort of turned me off from this design. I understand the need to push the slots back to make room for 300mm video cards, but I don't like having the cover and needing to go outside the case to remove a cover or install a card. The motherboard tray could have been set in a bit further, but if that was done, even the bump is the door wouldn't be big enough to allow the usual suspects in tower coolers to even fit. I am glad there was just the 8-pin and two fan leads that needed to go to the right side, there isn't much room for more. Even on the left side of the tray it takes quite a bit of planning, running the wires, taking your time, and tucking the extra length back into the top of the chassis to keep things clean inside. I realize there isn't a way to see inside without the door panels being off, and since I had to pry at these to release them, you likely won't be showing your friends as you don't want to look like a tool fighting the door before they even get to see what's inside.
On the whole, the MS800 did pretty well. The cooling, its feature set, and the design and aesthetics are all something that will draw in the buyers. With a price before shipping of $89.99, I think the chassis would have been priced right on point. My real issue, and the reason I gave another case a low score, was for this very reason. If you fight to get in the chassis as the first encounter with it once it is out of the box, it is a real disappointment for one, and sort of brings that cloud over the case, making you look for other things that may have not received the attention is deserved.
To me the most functional thing on a chassis should have to deal with access to install my components, and without being able to offer that, I really can't get behind the MS800 with my recommendation. If you don't mind fighting the case every time you need access, by all means consider this chassis, it does have a lot of other cool things that can help sway your vote.


