


Introduction
Quite a long time ago I was introduced to Enermax cases when I was asked to have a look at Staray, in its red form. This is still when cases shipped with primer guts and no real wire management options, or even the thought of USB 3.0. Back then less was expected of cases, and for its time, it was a reasonable choice for a mid-tower chassis. Then I was asked to review the Fulmo GT, and this was one large chassis that took advantage of the newer trends. The insides were painted, it offered USB 3.0, had a fan controller, as well as many other options that made me fully recommend that chassis when I saw it, even today it is still a solid competitor for your dollar.
With this newest of cases only being my third to look at, I had yet to get a real grip on the overall quality of the Enermax lineup. Their coolers are always top end, but with the cases I had seen, I had one that by today's standards, likely wouldn't sell, and the other was a complete flip of the coin offering everything users would want in a full tower chassis. That being said, all it would really take to please me to get behind them fully as a manufacturer would be to deliver me a solid chassis that offers a full feature set and proves to me that Enermax can stand the test of time and continue to stay on the edge of designs and keep the fine eye to detail that sold me on the Fulmo GT.
Today we are going to be having a look at the Enermax Hoplite ST. Now there was already a Hoplite from Enermax, but I wasn't asked to look at that chassis, but from what I can tell by the images on site, the Hoplite ST is a definite move in a better direction for this chassis name. While the original was bold and took advantage of the Vegas LED fans that were new at the time, it wasn't a chassis that you would immediately like, but even by today's standards it has a very well appointed feature set. Stripping the chassis of some things, swapping it out for other ideas, and a complete redesign of the exterior is what Enermax is bringing forth in the latest Hoplite to carry this name.
Stick with me, this will be interesting at the very least as I take you through, in fine detail, what the Enermax Hoplite ST has to offer.
Specifications, Availability and Pricing
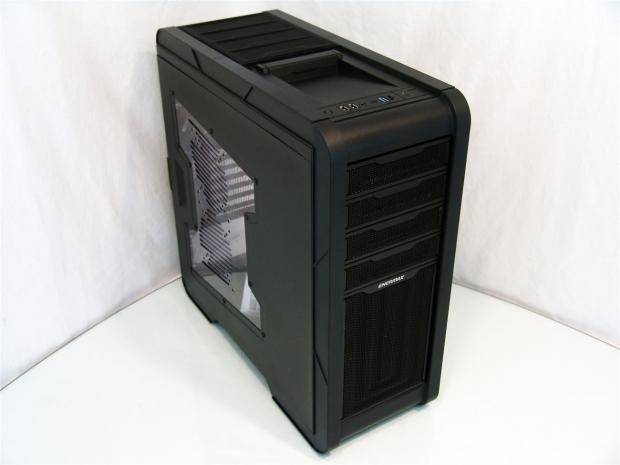
On the outside of the Hoplite ST, the design reminds me more of the Fulmo GT than the original Hoplite chassis. The front of the chassis is blacked out with steel mash that that has raised sections in it for strength as well as style. As the front makes its way to the top and bottom the chassis there are rounded corners to gently wrap around to those panels. On the top the Hoplite ST features a front I/O panel followed behind it by a drive dock that has a door over it to act as a dust cover. Moving back a bit further, you have more of the same stylized mesh inserts that the front sports, over an opening that allows for either a 140mm or a 120mm fan to be installed. Under the chassis you will find a dust filter under the PSU, and that the chassis is supported with some large chunky feet. Around the back you will find four water cooling holes, seven expansion slots, and a large plastic handle to aid you in opening the side panel.
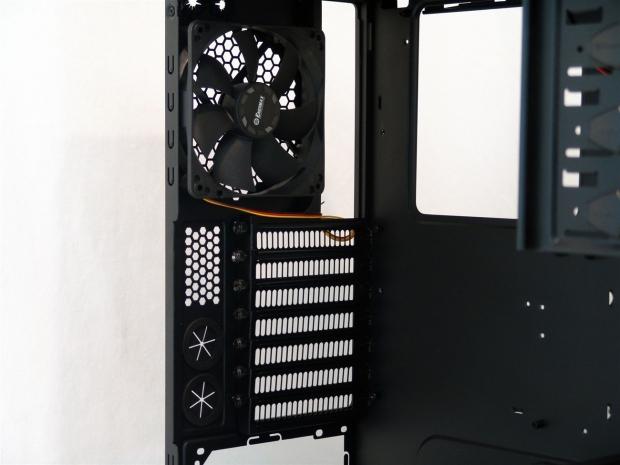
Inside of the Hoplite, it is painted with the same textured black paint that covers the exterior. Behind the front bezel you will find a 120mm fan installed just in front of the six drive bays for both 3.5 and 2.5" storage drives. These are in two racks of three drives each, and the top rack is removable from the chassis. Above those bays you will also find four 5.25" drive bays. Just behind all of the bays you will find the motherboard tray. Not only can you house an ATX and M-ATX motherboard, you get four wire management holes, three of which have grommets, and seven places to tie up wiring in the 20mm of room behind the motherboard tray. You will also find all of the wiring from the HD Audio, USB connections, and the Molex power plugs you need to power for the fan controller which powers three fans, and the dock on the top of the chassis.
Locating the Hoplite ST in the States is a tough challenge at the moment, and I am not quite sure they have made landfall yet. I am aware of the MSRP already set on the chassis though, and that is $69.99. As of now all I can find is listings over the pond, and with VAT included, the deal isn't as sweet over there as you are paying more than just a one to one conversion rate on this chassis.
Our Latest Mid-Tower Cases Review Coverage
While I will say this is a really good price for what you get on paper, it is in reality that I am dealing with, so how about we get right to it and see exactly what it is you do get in, on and around your Hoplite ST from Enermax.
Packaging
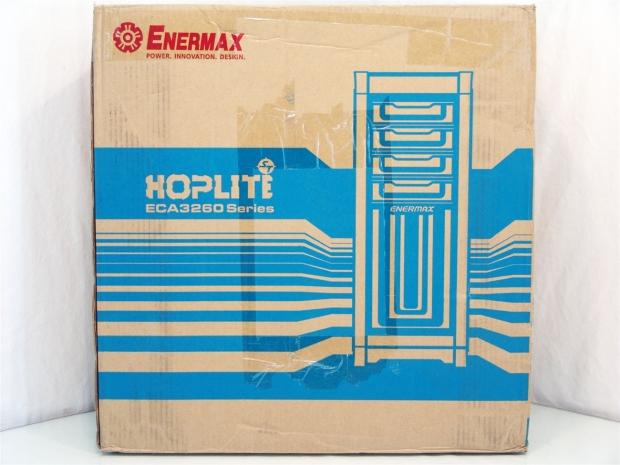
The packaging is basic to keep costs down, even as far as to show that this is for the Hoplite series of cases. It shows that there is an ECA3260 Series chassis inside, but you have to look a little farther to see which of the two variations you are holding.
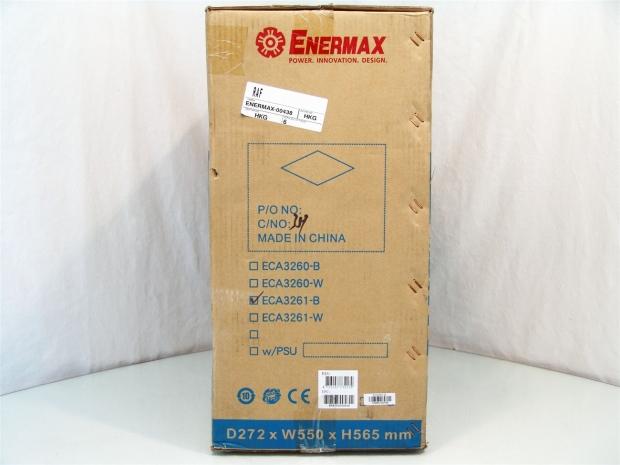
On the right of the packaging it shows that there are four versions of this chassis. I believe the first two on the list are solid door models, while the ECA3261-B I received is the black version with a window.
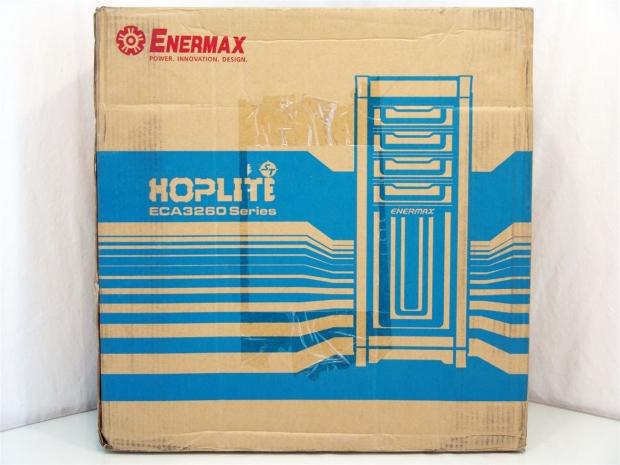
On the back they show the same exact thing we found on the front. You are going to need to search the web in the store or ask someone to open the box if you want a look at what is inside besides the light blue rendition of the front of the Hoplite ST.
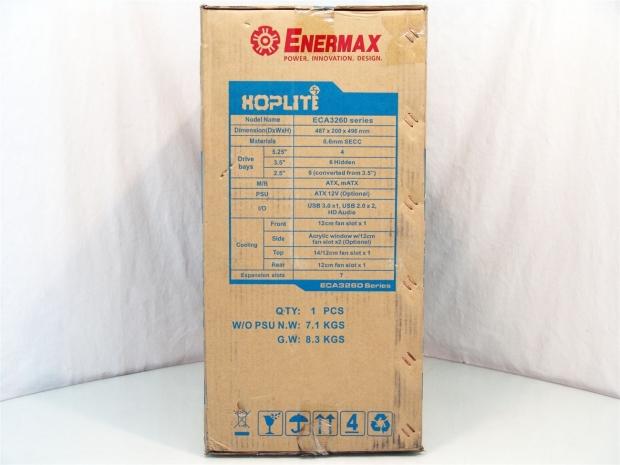
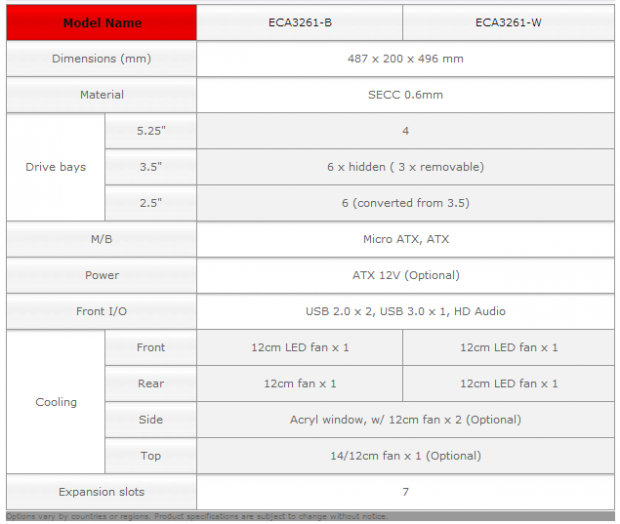
Enermax at least allows you to read about what is contained in the box. This list of specifications should give buyers a good idea if this chassis will at least accommodate your hardware requirements.
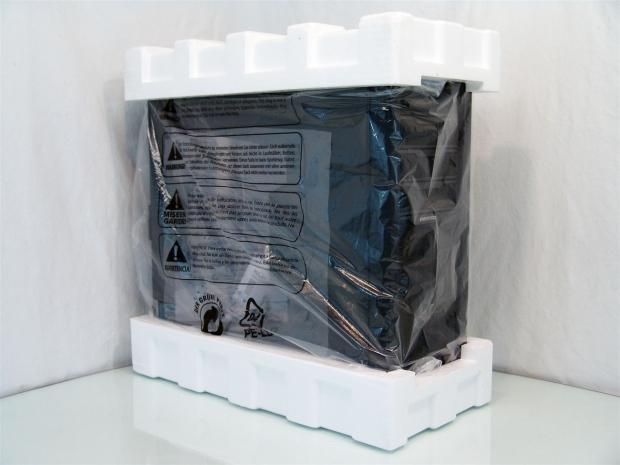
To protect the chassis, Enermax puts static cling plastic on the window, and then wraps the entire chassis sin a plastic liner. Once that is all bundled up, the use Styrofoam on the top and bottom to protect the chassis from transit damage.
Enermax Hoplite ST Mid-Tower Chassis
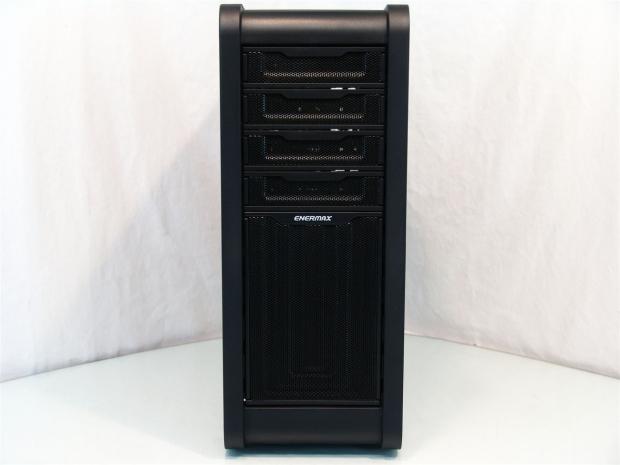
Down the face of the Hoplite ST you find a thick band of plastic at the top, bottom, and both of the sides. Then, in the mesh of the four bay covers and the large mesh panel over the intake you can see the "U" shaped design pressed into the mesh. This leaves the little space in the middle for the Enermax name in chromed lettering.
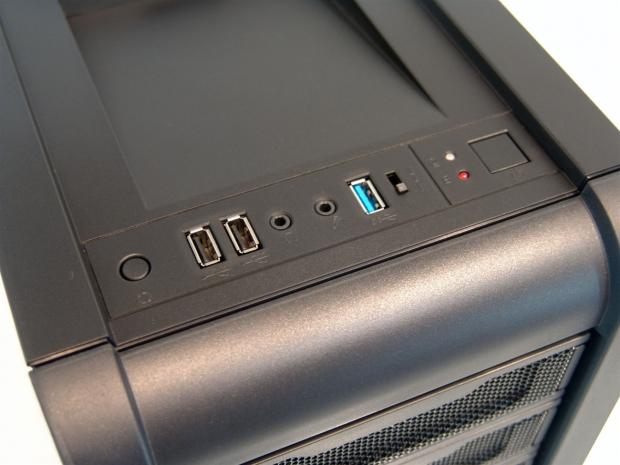
As the front rolls over the edge and meets the top of the chassis you run right into the front I/O panel. Here you have a reset button, two USB 2.0 ports, the HD Audio jacks, a USB 3.0 port, three speed fan controller, activity LEDs and the power button.
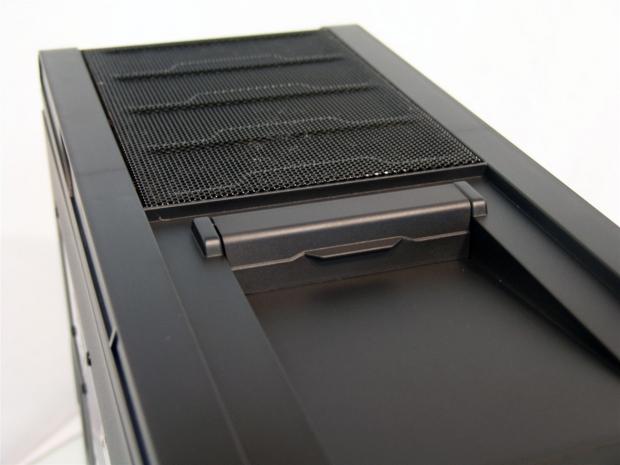
Behind the I/O panel there is a slanted section on top that has a door covering the access to the connections under it now protected from dirt when not in use. The mesh behind it that allows an optional fan to blow through mimics the design of the bay covers design.
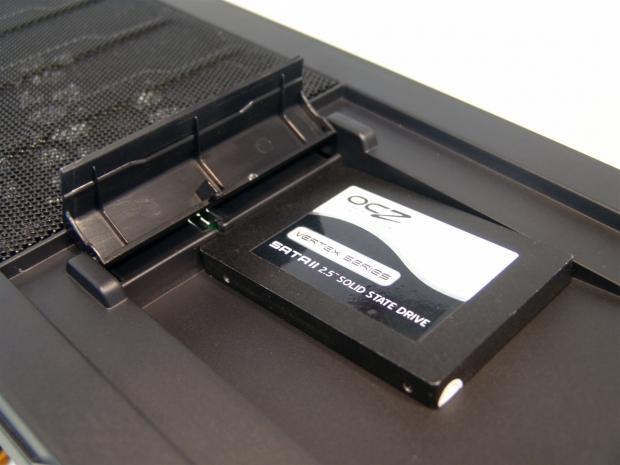
If you lift the front of the door up, it swings open to allow you to easily set in a storage drive as I did with this SSD and have hot swap capabilities. This will not only fit this 2.5" drive, but any SATA 3.5" hard drive as well.
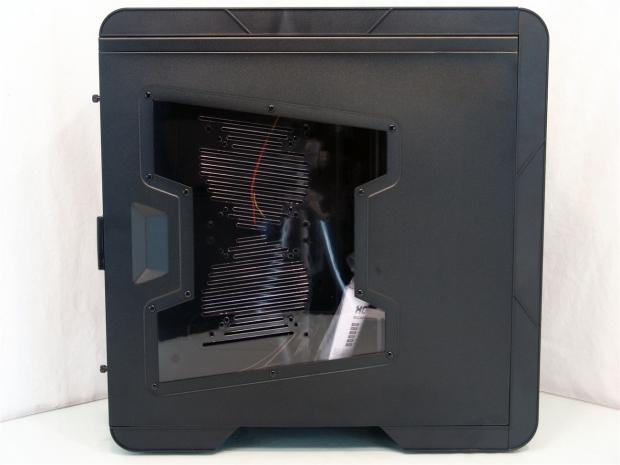
Now looking in at the left side of the chassis you can see the thick plastic wraps three sides of the Hoplite as the feet continue with the parts on top and on the front. The "I" shaped window is something I haven't seen, and I like the incorporated finger grip and angled fan mounting holes.
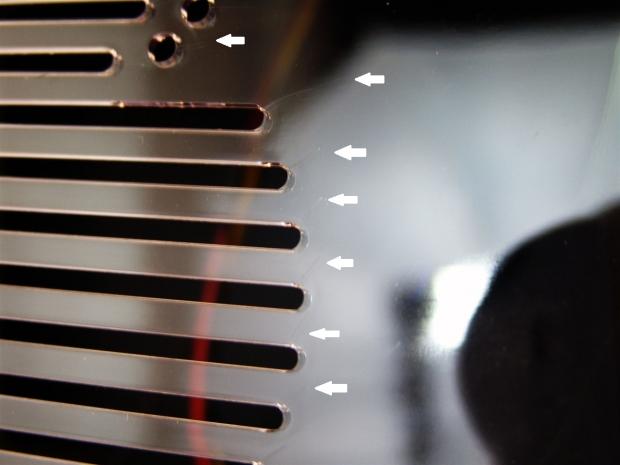
Looking much closer at the fan holes and the slits cut from the window shows that on both sides of the slits and coming off in one direction from every fan screw hole are these stress cracks I am pointing out with the white arrows. This is not something I want to see when staring in at my expensive hardware.
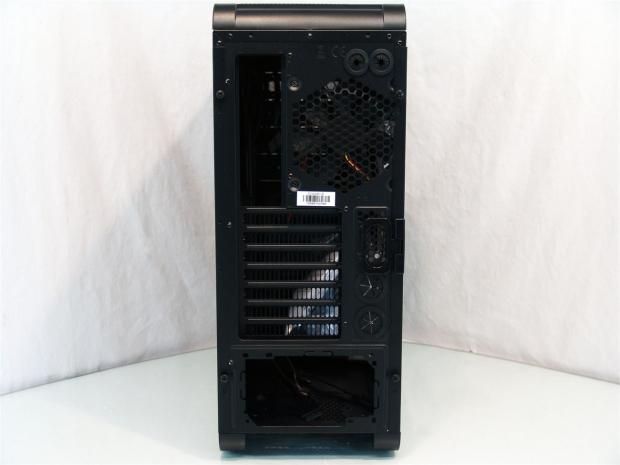
Behind the Hoplite ST you get four holes to pass water cooling tubing through, two at the top and two in the middle. The rest of the chassis is well ventilated including the seven expansion slots and the section next to them.
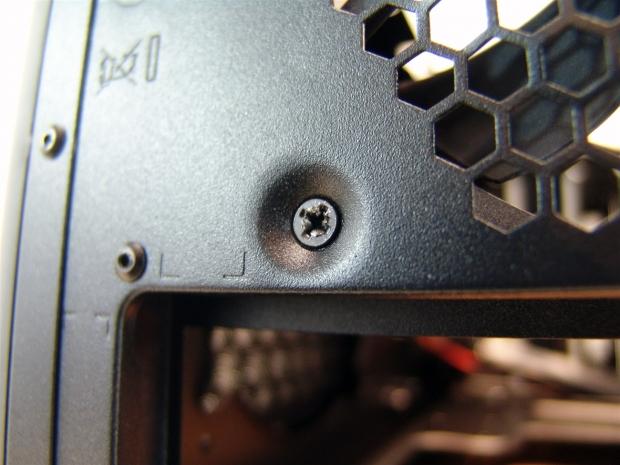
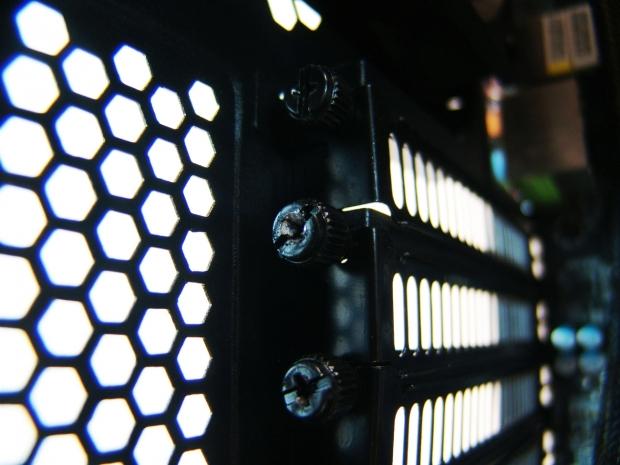
As I was checking things out, I noticed that two of the fan screws were stripped. The other one is not quite as bad as this, but again not something you would want in a brand new chassis.
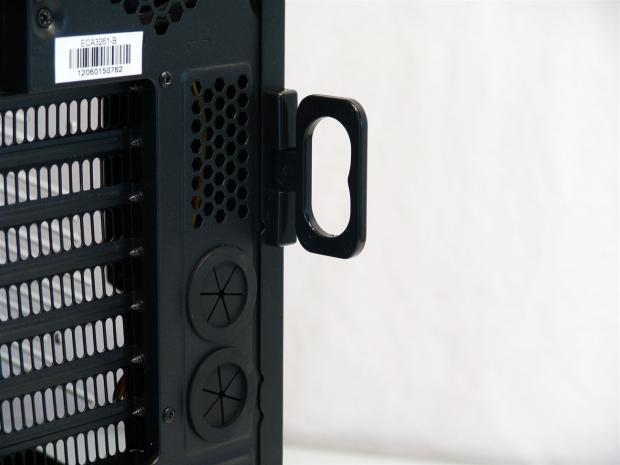
Over on the right side when looking at the back of the chassis, you will find a handle that is folded flat against the chassis. Unfold it and it allows you to remove this really tight side panel.
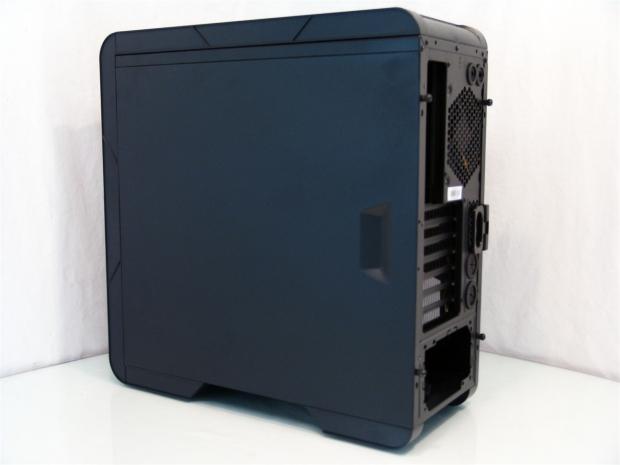
The right side panel is just a large expanse of black textured paint on a steel panel that only offers the small finger hold to try to remove this super tight fitting panel.

Under the chassis you have long wide feet with much smaller rubber pads attached to them to keep the chassis from sliding around. Near the back, under where the PSU will install, there is a small removable dust filter to make cleaning a little easier.
Inside the Enermax Hoplite ST
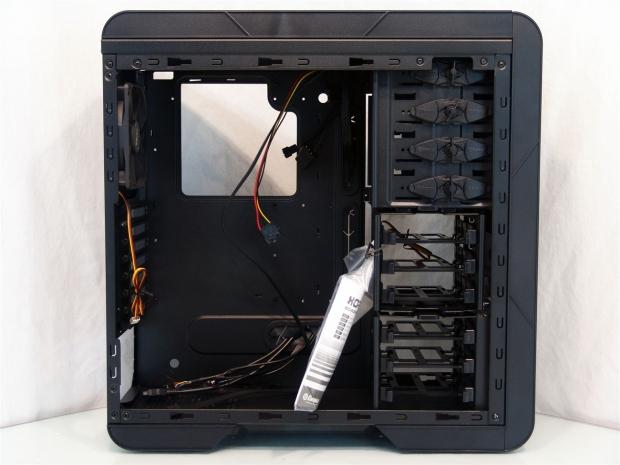
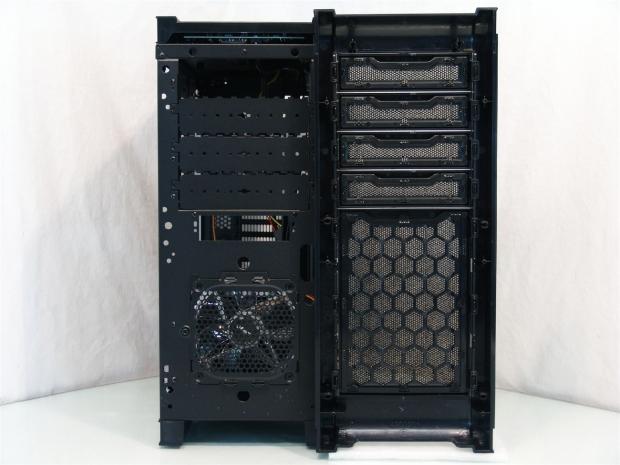
With the side panels off now it is much easier to get a view of the inside of the Hoplite ST. Near the top you will find a pair of Molex power leads, and behind the black one are the fan headers for the controller on the front. You will also find the hardware and paperwork tied to the drive bays.
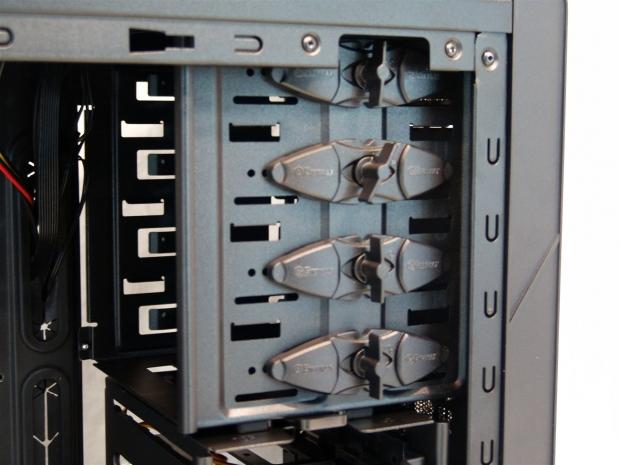
The four 5.25" bays use these twist to lock, twist back to unlock, tool-less clips to secure the devices here. The other side uses dimples pressed into tabs that will sit in the holes on the other side with no holes for adding screws.
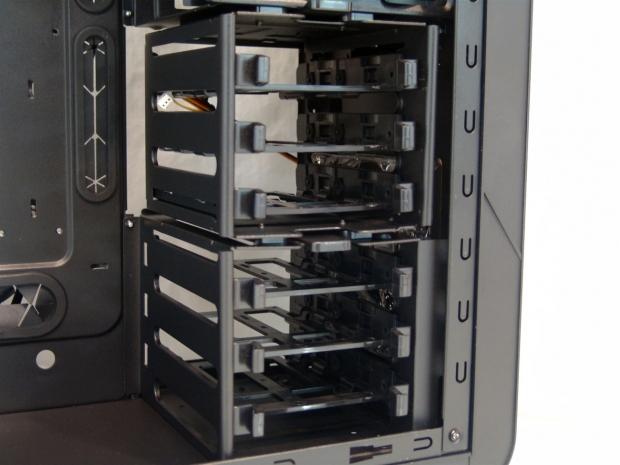
Behind the clear 120mm fan working as the intake you see there are two hard drive bays that hold three drives each with slide in trays. The trays also are able to hold both 3.5" as well as 2.5" drives. The top section has a tab at the top and bottom of it that when squeezed together allows for that section to come out.
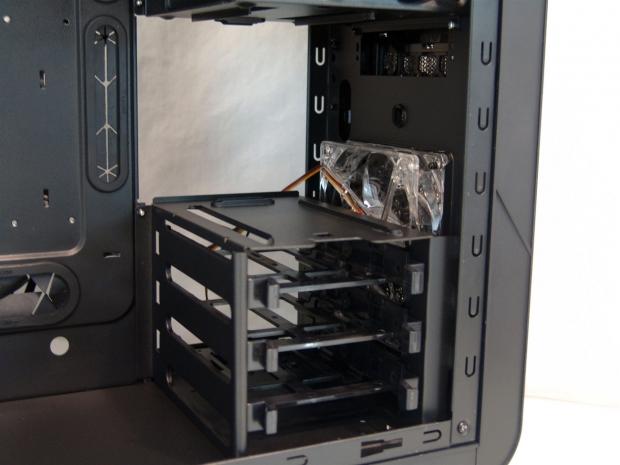
Removing the top section is very easy, and does expose a bit of the front fan. I wish the bottom would come out as well, but alas it is riveted into the chassis.
In the roof of the chassis you have the option to install either a single 140mm fan or a 120mm fan in here. To gain access to mount the fans, you have to remove the top that is held in with round plastic clips, I didn't find any screws holding it, but be aware it will take the SATA dock wiring along with it.
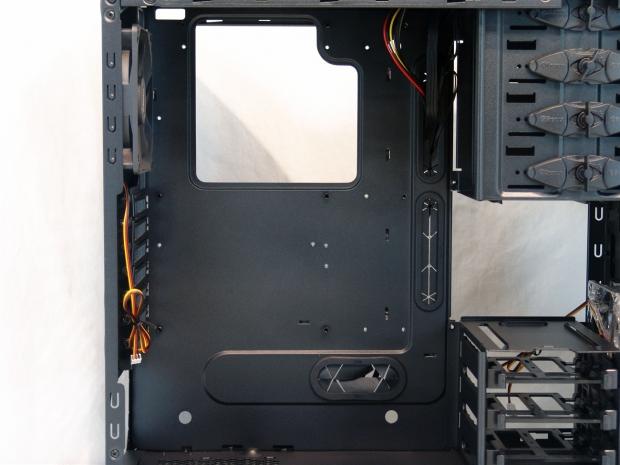
The motherboard tray offers a large CPU cooler access hole, and 8-pin EPS cable hole at the top, and three wire management holes with grommets to surround either an ATX or M-ATX motherboard.
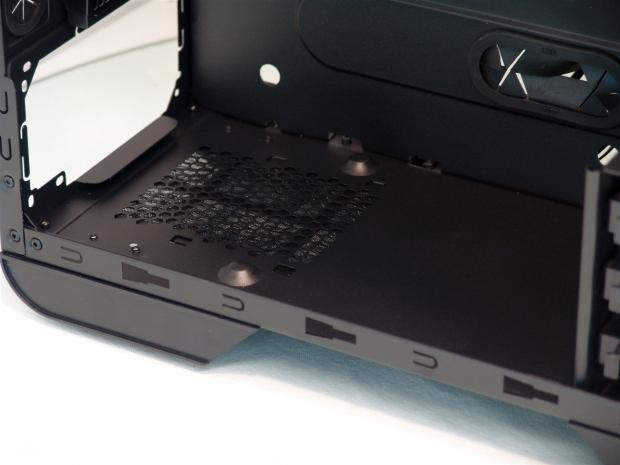
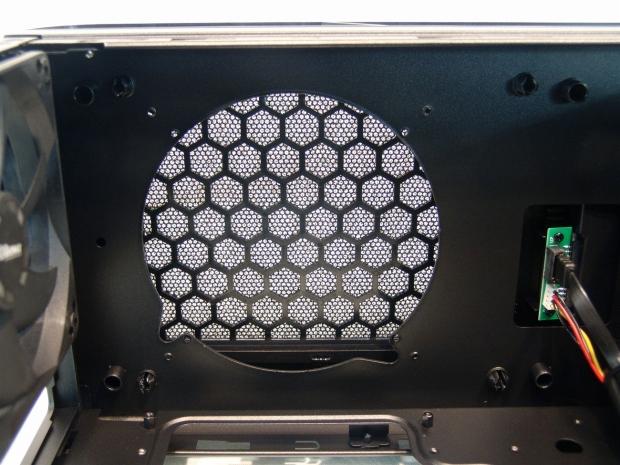
In the floor there is a pair of pressed steel bumps that come up from the floor to support the front of the PSU to carry some of the weight. The mesh and dust cover look to be well placed to allow any PSU to breathe freely.
Inside the rear of the chassis you can see the second 120mm fan that is installed in this Hoplite ST. You can also see that the expansion slot covers, and cards will be secured with thumbscrews.
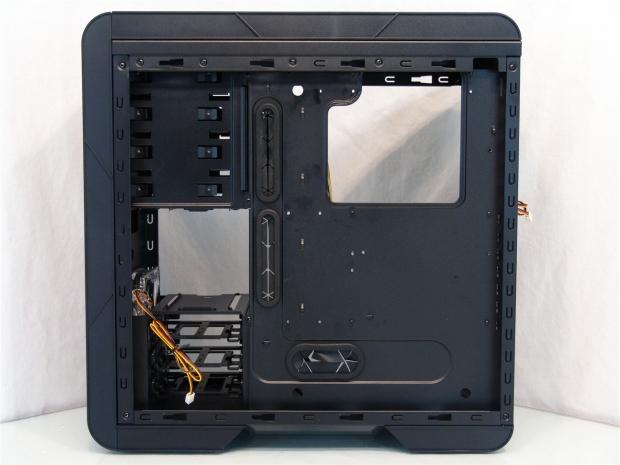
Behind the motherboard tray, since it is relatively flat, you get 20mm of room here for wiring across most of the expanse. Near the edge of the motherboard tray on the left, and up near the optical drive, space is slightly more limited, but there is enough to get buy I think.
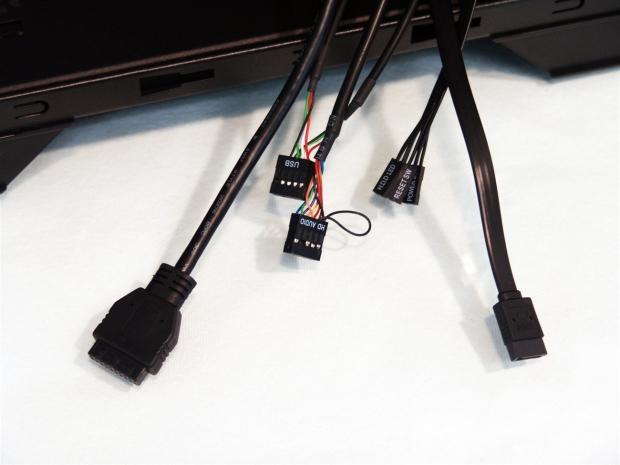
As for the wiring that can actually make it out of the chassis for an image you have the USB 3.0, USB 2.0, HD Audio, and F_Panel connections along with the SATA lead from the dock. You can't see the three 3-pin fan leads or the Molex power plugs that I mentioned when we first looked in the chassis.
Accessories and Documentation
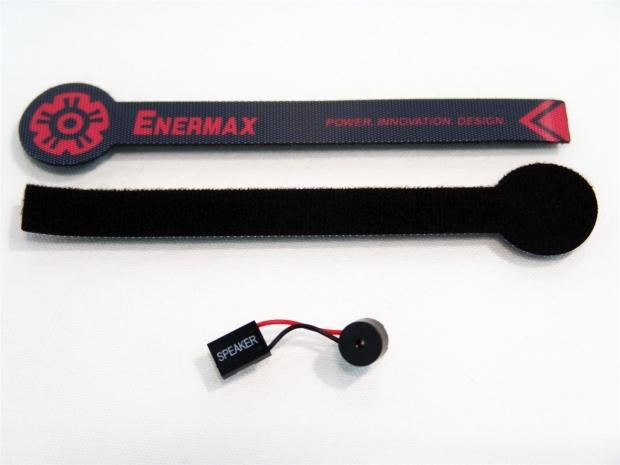
In the hardware bag there aren't a whole lot of things to see, so I broke it up so we can get a closer look at it all. Here you have wire management strips that have the hooks on the "Enermax" side of it and the loops on the black side so they easily wind as it attaches to itself. You also get a motherboard speaker in the bag.
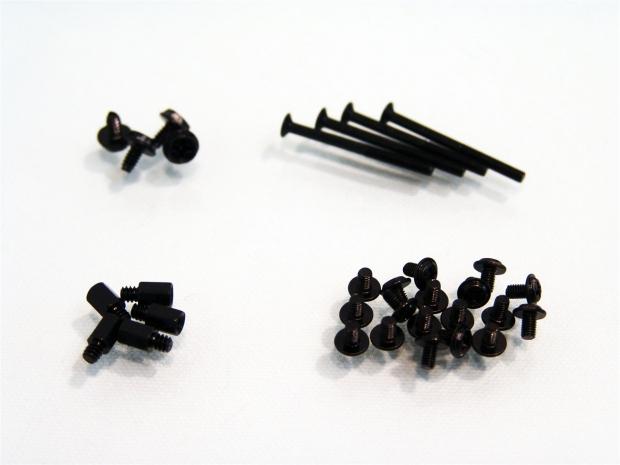
The rest of the hardware included with the Hoplite ST is what you see here. Four PSU screws, four long fan screws, five stand-offs, and 18 screws to use with storage drives in those plastic trays of the HDD racks.
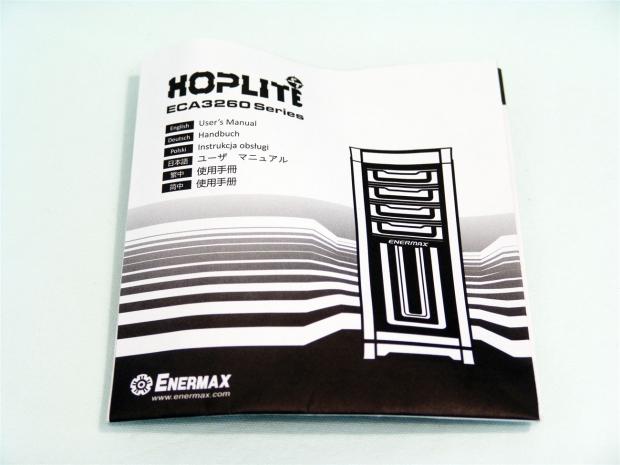
The manual included covers the ECA3260 Series and not specifically each individual version of the Hoplite ST. The manual also covers five languages other than English.
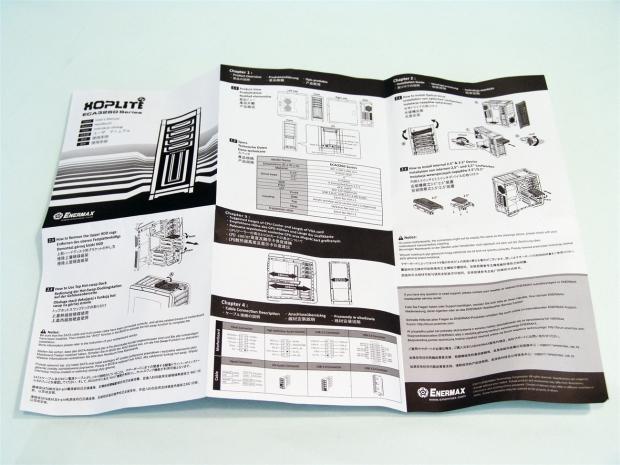
Fully unfolded you can see everything the manual has to offer as it is not printed on the other side. They don't cover step by step, but there is enough information to figure out the drive dock in the top, the removable cage, and even reference a wiring guide if you need to.
The Test System and Thermal Results
Removing the front bezel is pretty easy; in fact if you pick up the chassis with your hand under the front it will come off for you. There is access to the 120mm fan in the front with the removal of a single screw. Then the metal plate will allow the fan to come out to be cleaned.
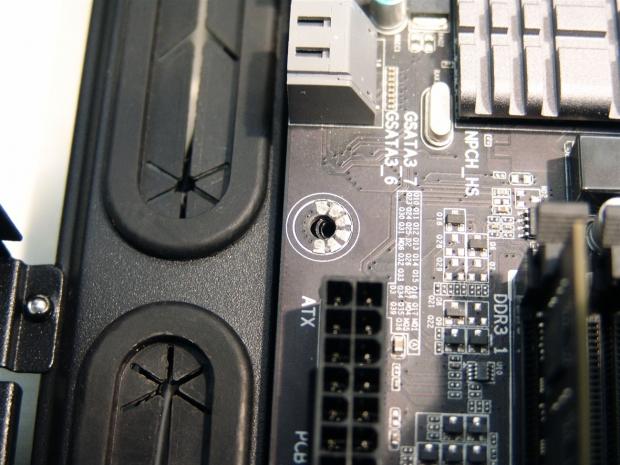
I was also a bit disappointed to see that the middle stand-off, nearest the bays, is just off the mark and no way I could use it. All of the rest of the screws were lined up and tightly in place when I took this image.
If a misaligned riser didn't have you a bit steamed already, as I went to add my video card, I really could not believe that this sort of work gets past QC in any factory. The amount of stripped screws in this chassis is just getting unforgivable.
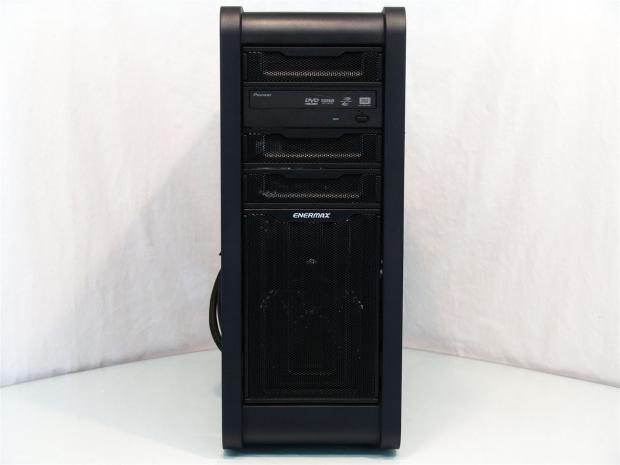
Back outside with the build complete, we look again at the front of the Hoplite ST. With the optical drive installed, and the SSD stealth installed above it, I like the look you get, and I don't think the ODD looks bad or breaks up the design all that much.

Since I was able to get the SSD and the ODD in the top, you can see why I would like the drive bays completely gone below; I had no use for them as they block the fan. As for the rest of the build, I can't say it went without issue, but I was able to muscle my way through the build.
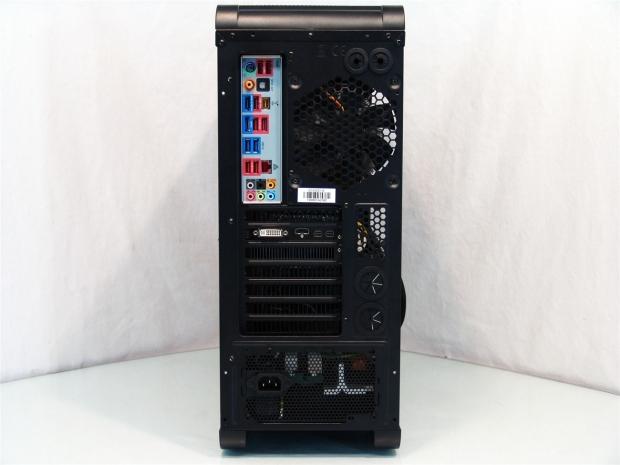
Nothing really to mention in the back, the I/O shield went in fine, and the PSU and video card lined up and were snug once the screws were tightened up.
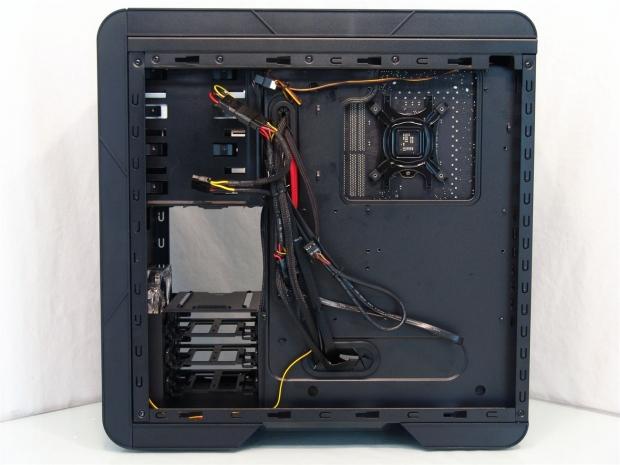
Without many other options you are left testing the limits of what 20mm of space can hold for wire management. With only one way to get all of the wiring back here at the top you are left with little option but to run a thick trunk as I did. Getting the panel back on required the full force of both arms as I slid it over the wires and back into place.

Both panels are extremely tight to get on or off, but I managed to get them both on. Here is a look at the hardware through the window once I managed to squeeze the panel back onto the Hoplite ST. The fan holes do line up really well to aid both the CPU and video card cooling though.
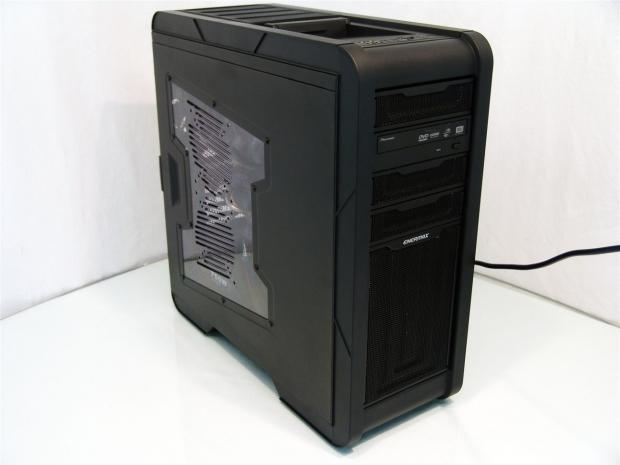
Here is one last look at the Hoplite ST before I push the power button. Aside from the view of the hardware through the window and the ODD no poking through the front, you are left with all the same styling you were given in the beginning.
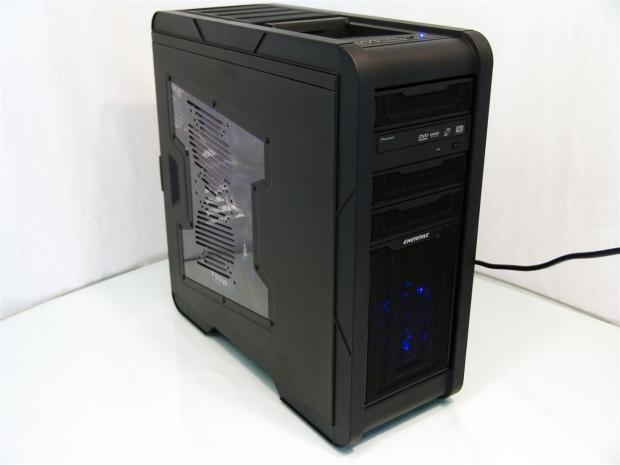
Pushing the power button illuminates the front fan with a flood of blue LED lighting, and there is a blue LED on the top denoting power with the occasional flash of a red LED for the storage drive activity. Other than that, unless you add fans with them, that is all the Hoplite ST has to offer out of the box.
Final Thoughts
First off I would like to address the plus side of the Enermax Hoplite ST. This chassis looks really good, has a pretty full feature set, and will sell at a really reasonable price once they do hit the US shores. A hot-swap drive dock for storage devices is always a handy feature, and with the dust cover door on it, you aren't left with an ugly hole to stare at. The window on the side is interesting, and the optional fan placement there is strategically placed. I even liked the removable hard drive section to allow for much longer video cards. I really liked that there is a three speed fan control, and the two equipped fans were able to keep things cool inside and not deliver more than a light hum as they work to rid the chassis of heated air. I even dug the handle that makes removing that super tight side panel much easier on the hands. As far as the basics go, on paper, I really like what the Hoplite St is all about.
The reality is though that I think the list of cons way outweighs the pros list for this case. The first issue I ran into was the small cracks or fractures in the clear plastic used on the side panel. Not only will these fractures grow into much larger cracks, but I noticed it right away and it would drive me nuts knowing that was there. Then I ran into the rear fan screws being stripped, and I can see how it happens, but how hard is it to try again? Sending it out like that is just rude. Then when I got inside and found that the stand-off wouldn't line up with the motherboard, and the horrendous looking thumbscrew in the expansion slots that were stripped, all I can say is someone in the factory must have been having a bad day and didn't care.
Add in the fact that the door panels are near impossible to get on or off with one person, and while there is room for some management of the wires, it isn't very well thought out at all. Also once the panels are off the chassis loses most of its rigidity. Not only that, this made it through Quality Control, and on to a reviewers desk to show the world that Enermax will give me something like this, what are they selling to their customers that don't have the soap box that I have?
Even with a realistic price tag, for a chassis that is in perfect condition, the $69.99 MSRP is reasonable, but not for what I got. I am really disappointed in the product I received, in this instance the poop rolled uphill and I bet some people are going to be pulled in the office over this one. I really do wish I had gotten a better sample, because the pricing and feature set makes me want to get behind this design, but the lack of attention to detail in this chassis, I wouldn't pay $20 for this chassis if I knew the damages it has and that I would have to fight at almost every turn and battle anger as I kept finding disappointments, almost to the point of making me toss the idea of doing this review at all.
I thought in the end I would deliver the chassis for what it is and expose the fact that Enermax may need to look at their OEM or their in house workers to see why cases like this are on shelves and for sale. We expect much, much better next time.

 Lian Li B4-mATX Review: a compact mATX SFF case with excellent airflow and premium features
 Ocypus Sigma F36 BK ARGB Cooling Fan Review: high airflow and unified design in one frame
 PCCooler CPS RZ820 Display Review: a flagship-level CPU air cooler with an LCD screen
 MOAIPLAY ORA PRO G1 850W ATX 3.1 PSU Review: high efficiency and 10-year warranty for $119.99
 NZXT H6 RGB+ Compact Dual-Chamber Chassis Review
 Rockstar co-founder doesn't care about the physical vs digital debate, says companies should give players what they want
 God of War Laufey gets a release date and Kratos is making a return
 GTA 6 trailer 3 expected to arrive within two weeks, according to insider
 Thieves stole 16 RAM sticks from Chinese eSports hotels, arrested
 Lisuan LX7G100 GPU achieves playable FPS in system with no Intel AMD or NVIDIA hardware inside
 Elder Scrolls 6 roadmap not affected by layoffs, Bethesda says
 Intel and AMD are locking Chinese customers into long-term CPU deals as server chip prices climb more than 40%
 Ubisoft CEO says Sony's PlayStation disc shutdown will not disturb the industry too much
 Vibe coding is flooding the App Store with new apps - on track for record submissions in 2026
 Geekbench 7 is out with CUDA support, smarter multi-core scoring, and new AI workloads across all major platforms
 Thrustmaster T.Flight HOTAS 5 MSFS Edition Review
 SteelSeries Arctis Nova Pro Omni Wireless Headset Review - One Headset to Rule Them All
 SteelSeries Arctis Nova 7 Wireless Gen 2 Headset Review - New and Improved, But Is It Enough?
 AMD Ryzen 7 7700X3D Review - Days of Future Past
 Samsung 990 2TB SSD Review - Ninth Gen QLC at PCIe Gen4 Speeds
 ASUS ExpertBook Ultra (Panther Lake) 14" Business Laptop Review
 ASUS ROG Raikiri II Xbox Wireless Controller Review - Ready to Take Control
 MOZA FMP18 Panel Bundle Review: authentic F/A-18 Hornet cockpit controls for flight sims
 Micron 6600 ION 245.76TB Enterprise SSD Review - Best in Class Programming Speeds
 MOZA MA3F EFCM Flight Control Module Review: authentic Airbus A320 autopilot panel for simulators
 The Ultimate Guide to Personalizing Your Windows 11 Taskbar
 How to Turn Your Windows Laptop Into a Second Monitor with Miracast and Wireless Display in Minutes
 6 Mistakes to Avoid When Buying a Windows Laptop
 I capped Windows Update's bandwidth with Delivery Optimization, and my downloads stopped choking
 I use this decade-old free tool that finds files faster than Windows Search does
 I install and update most of my apps with this Windows command now, and I stopped downloading sketchy installers
 Hisense U6SF 65-inch MiniLED TV: High Performance Meets Leisurely Convenience
 I stopped digging through Windows menus after I set up this one folder
 Don't sell your Windows laptop until you do these things
 6 PC cleaning mistakes to avoid for safer hardware maintenance