


Introduction
It has been quite some time since I have seen a new mid-tower design from Cooler Master and to be honest, this may be the best mid-tower design of them all. Cooler Master dug back into their history of chassis designs, stuck with a top selling chassis series and rolled it all together into a package that shows they really stepped up their game with the release of this chassis.
Don't get me wrong, it isn't like this is a completely new build from the ground up. If you look around this latest release both inside and out, you will see traces of the full-tower HAF 932 and HAF-X, as well as even hints of the CM 690 II in this design. Just to elaborate a bit, this new chassis offers things like an 8+1 expansion card configuration, just like the 690 II. You get a PSU wiring cover like that found in the HAF-X and of course the original HAF 932 is what started the line-up. Even this newest version has hints in the exterior design that lends to the original concept yet are changed enough not to look like a WWII gas can.
The HAF XM from Cooler Master definitely has its roots deep in the history of Cooler Master's designs, but they still managed to make this a design that can stand on its own in an already very crowded market place. Something else most of us have come to know from Cooler Master and that is that the pricing of most if not all of their mid-tower pricing is super competitive. With tons of decisions on the plate for mid-tower purchases, hopefully when I am done, you can see where the HAF XM ranks on your list of pro's and con's; my guess is that this chassis will be right up at the top of your list.
That being said, let's go over the specifications so we can see what this new case is going to cost you to own the latest mid-tower from Cooler Master.
Specifications, Availability and Pricing
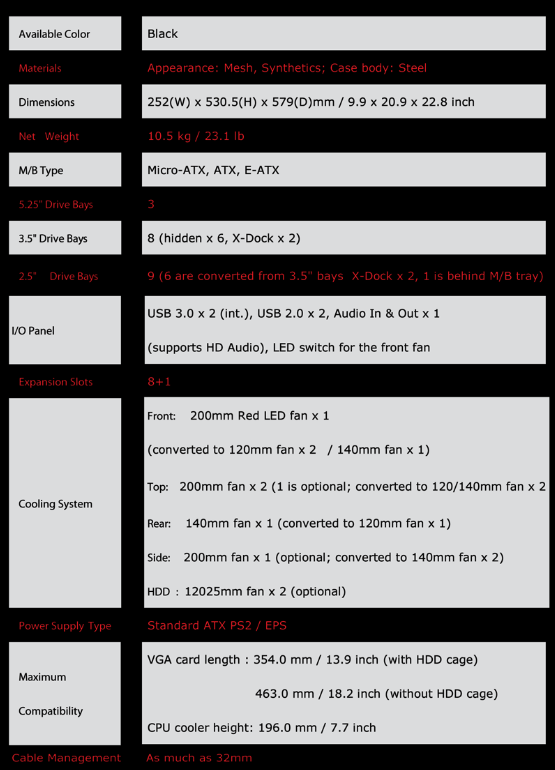
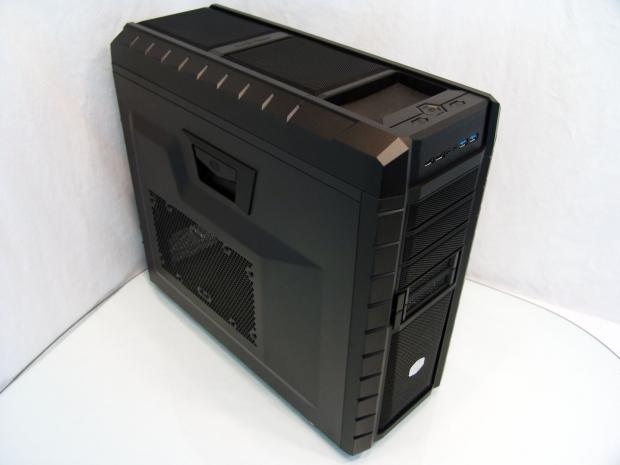
Just like other HAF cases, the XM is built from steel and uses a combination of ABS plastic and mesh inserts to give this chassis its shape and style. Down the face there are large chunky plastic sides with both the 5.25" bay and the two X-Dock bays having mesh covers. At the bottom there is a large mesh insert backed with a 200mm fan with a Cooler Master badge at the very bottom. The top of this chassis is also mostly plastic and stands a couple inches taller that the steel of the chassis.
Besides the front I/O with USB 3.0 and other connectivity and a storage tray just behind it, the back two thirds of the mesh covered top is removable for access to change the fan arrangement from the 200mm fan already installed here. Both sides of the chassis offer the bump-out that the HAF 922 had, just shaped slightly different and the left panel offers an area for fans and a large plastic handle to release this panel. The back of the chassis offers a 140 mm exhaust fan with an 8+1 expansion slot configuration and a bottom mounted PSU with a dust filter.
On the inside, at the front, there are racks for the three tool-free 5.25" bays with the X-dock just below it. Moving down a bit more you find the HDD rack that can hold six 2.5" drives or 3.5" drives in the slide out trays. Also the top of this rack is removable to allow room for longer video cards inside this chassis. The motherboard tray inside of the chassis is laid out well offering plenty of wire management options; it can hold a 2.5" drive behind the motherboard and is compatible with Micro-ATX, ATX and E-ATX boards. Another cool feature on the inside is that Cooler Master adds the PSU wire cover found in the HAF-X to keep it all very clean and professional looking when the build is completed.
Our Latest Mid-Tower Cases Review Coverage
As I said before, Cooler Master has always been very competitive with not only their designs, but most importantly, in pricing. As I looked for this chassis Google came up a bit lame with only one hit. So I dug a little deeper and specifically searched for this chassis at a few locations. I found all of them are selling the HAF XM for $129.99. Both Fry's and Newegg are listing it for that currently, the only difference is whether you are paying tax for a local pickup or the shipping that differs between the two, with Fry's having the slight edge in total pricing.
I realized a long time ago that to get an averagely equipped mid-tower it is going to cost you $99.99 and with the options incorporated into the HAF XM, it all comes down to looks with this chassis as I already know the price is spot on without even opening the box.
Packaging

Just as I would expect from Cooler Master packaging, they went with the black background to display the product over and the use of purple to accent the packaging is just what they do now. Along with the first look at the front of the chassis CM makes sure you know this is a mid-tower with a new door latch and offers 3-way SLI or CrossFireX support.
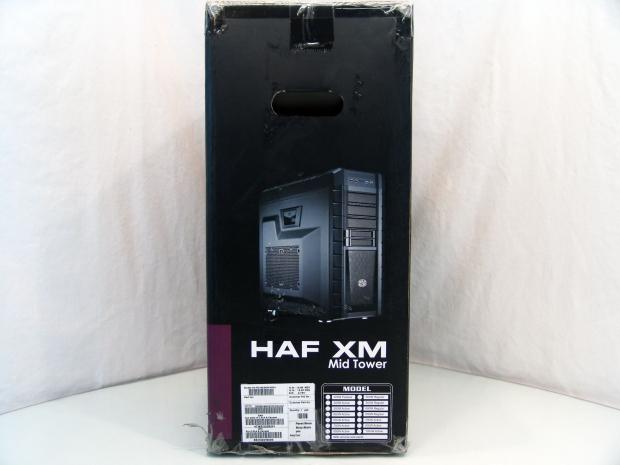
On this great expanse of black we get to see the HAF XM from the front, but also we get to see the left panel with the mesh and plastic handle for access. At the bottom there is a check box list for what is included inside the box as in model of chassis on PSU options.
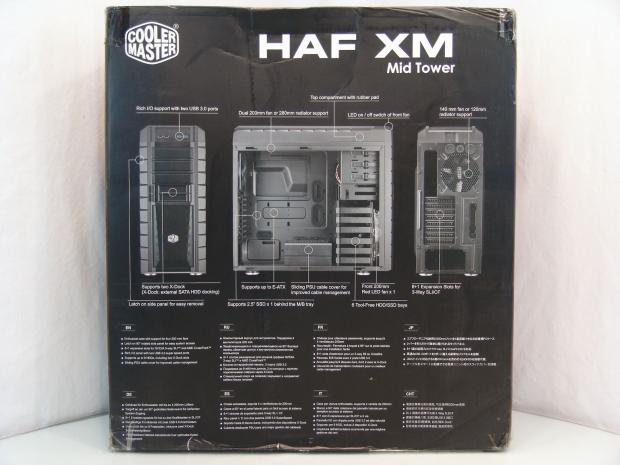
The back of the box is where you can read up on all the features in finer detail. Along with the three images denoting the features there are multilingual descriptions of what is being pointed out here.
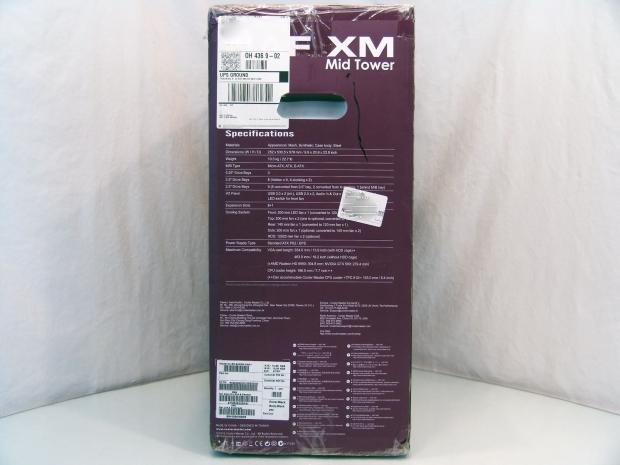
As with most boxes from CM we see, there has to be a full purple panel. Here they apply the specifications chart, the Cooler Master office information and the tiny writing that says this is a mid-tower case and for assistance and information you should go to www.coolermaster.com.
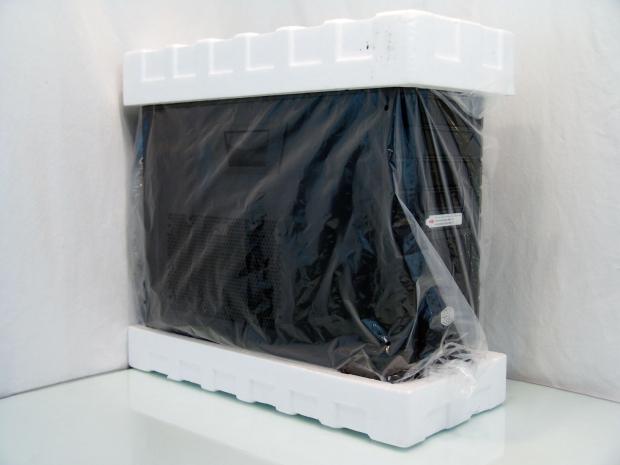
This chassis is pretty light for its size and the use of Styrofoam end caps were enough to safely deliver the HAF XM to me even with the abuse the box took. To keep scratches at bay the plastic liner is wrapped around the chassis prior to adding the caps.
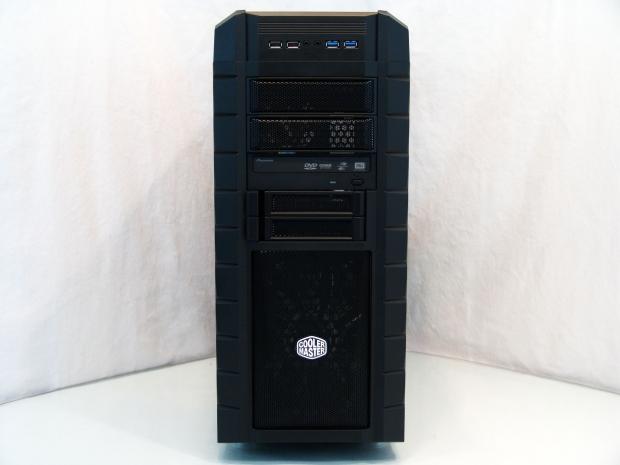
Cooler Master HAF XM Mid-Tower Chassis
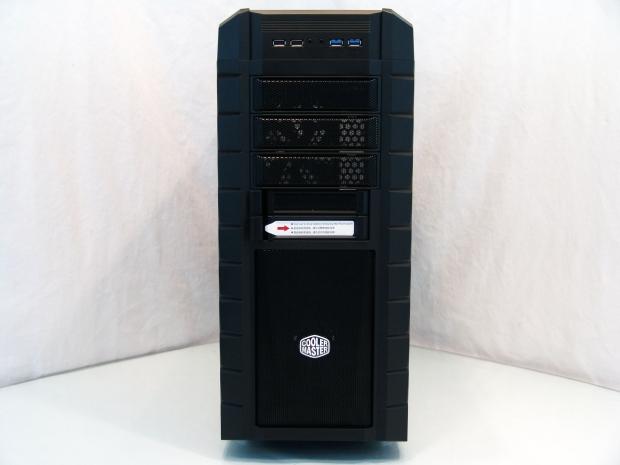
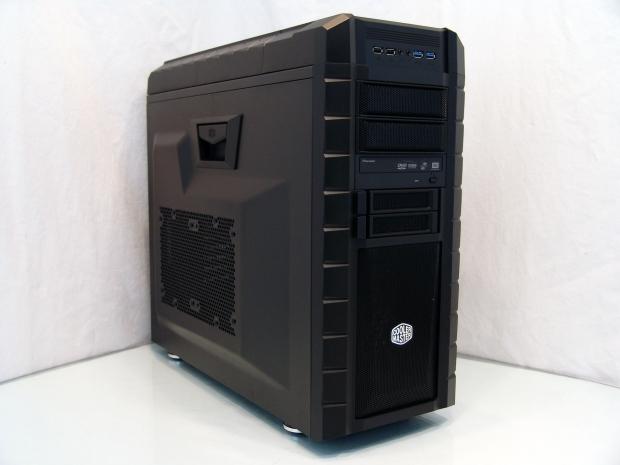
The front of the HAF XM has block-like, chunky, plastic sides that flank the front I/O panel, the mesh covers for the ODD bays and X-Dock bays and the large intake area also covered with mesh.
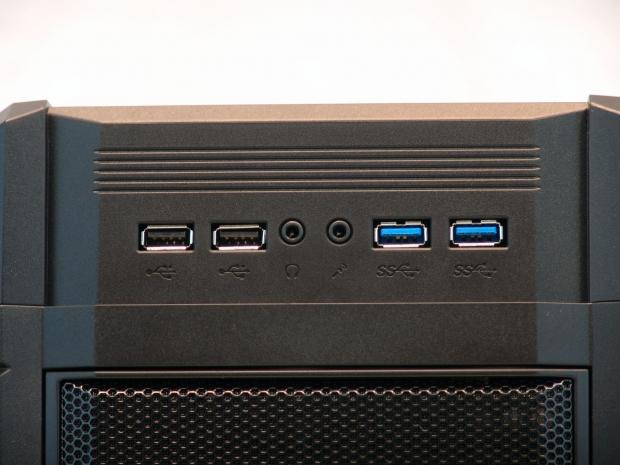
The front I/O panel offers USB 2.0, a headphone and microphone 3.5mm jack and USB 3.0 connectivity on the right.
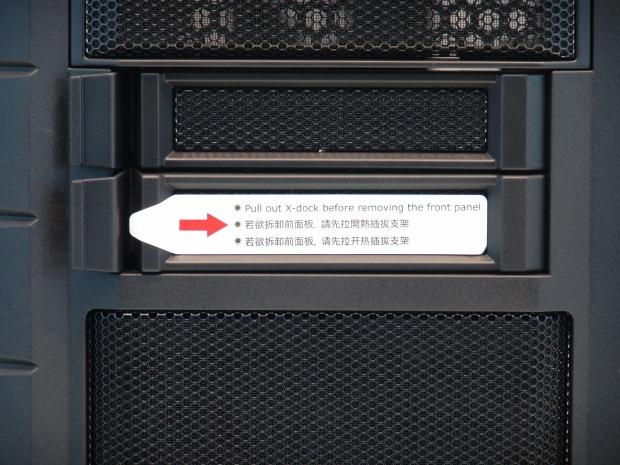
The sticker on the X-Dock bays reminds you to remove this pair of trays before trying to remove the front bezel. If you don't, you will pull out the drive trays as the panel is pulled and if you have a disc in there, it could end badly.
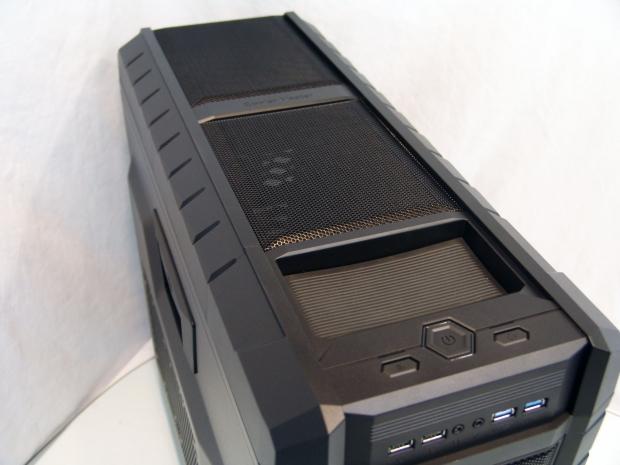
The top of the chassis starts with a light switch, power and reset buttons with a storage bin right behind it. As for the two mesh areas at the back of the top...
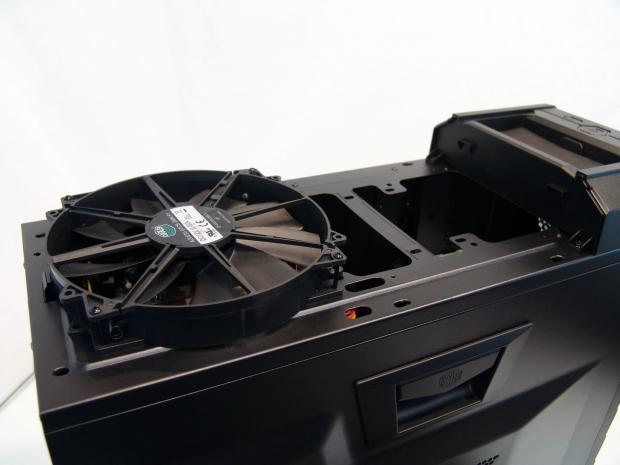
... It is removable with the removal of a thumbscrew in the back. CM sends a 200mm fan in here from the factory, but they do spec this area to allow for a dual 140mm radiator as the largest you can run in this area with the provided mounting holes.
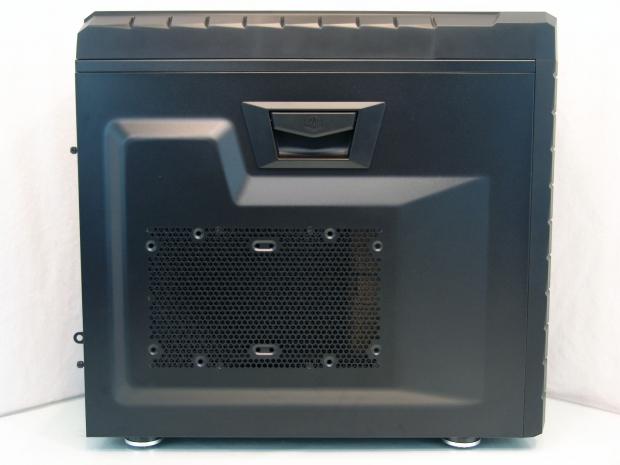
The left side has a large bump-out to allow room for both the fans that can optionally be installed here and not have them rubbing on the sides of you triple video card setups. There is also a handle that releases this panel, but you have to take out a pair of thumbscrews in the back first to make this handle useful.
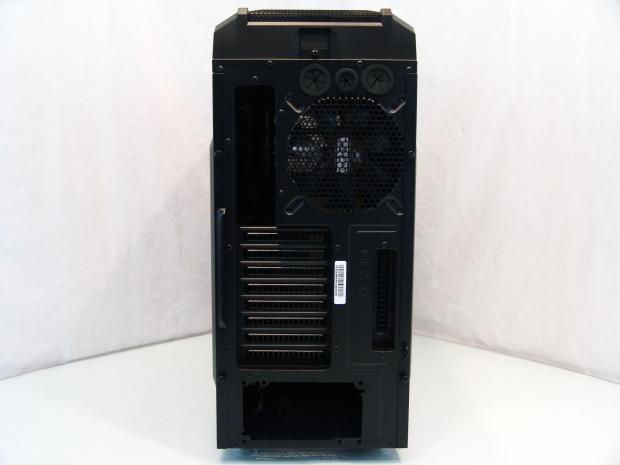
At the very top you can see the screw that allows you to remove the top, just above the tubing and wiring pass-through holes. Below the 140mm fan is an 8+1 configuration of the slots to give you options along with multi card configurations.
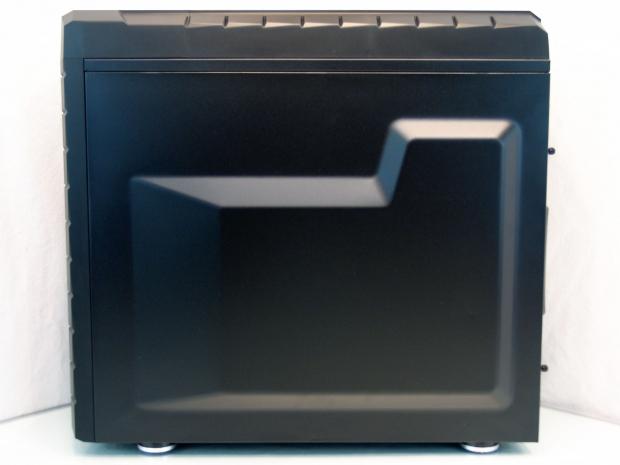
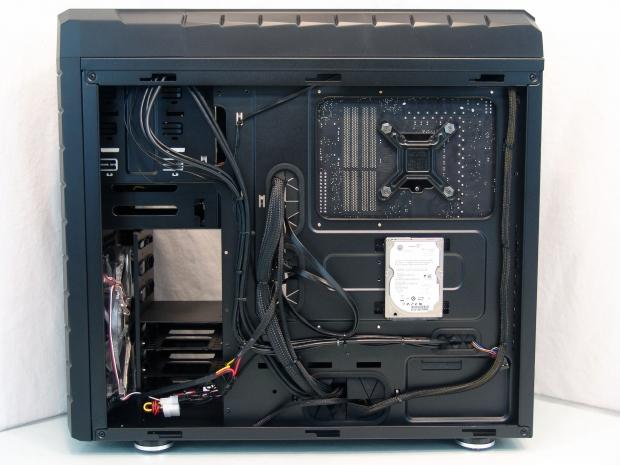
The right side of the chassis has the same bump out, so that you can really stack up the wiring and the panel will just swallow up just about anything you can want to run behind the motherboard tray.
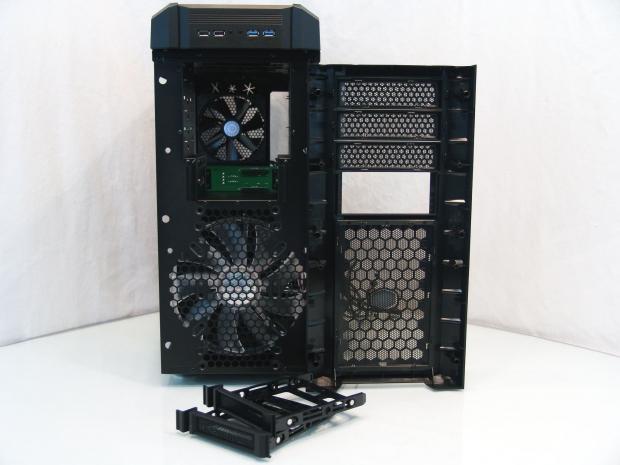
Inside the Cooler Master HAF XM
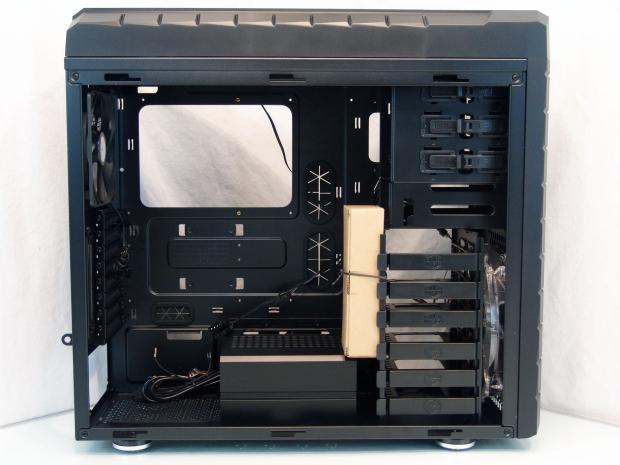
Our first look inside shows the hardware is securely mounted to the HDD assembly and a few wires sticking out of the left side of the PSU wire cover that made it into this design.
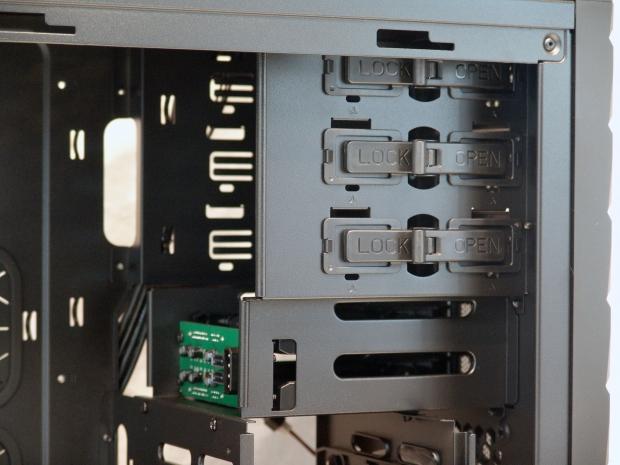
The trio of ODD bays have tool-less latches that are an automatically locked once the drive slides in. To unlock them, push the tab forward and slide out the device. The PCB you see is to connect a pair of SATA cables and a 4-pin Molex to make the two X-Dock bays functional.
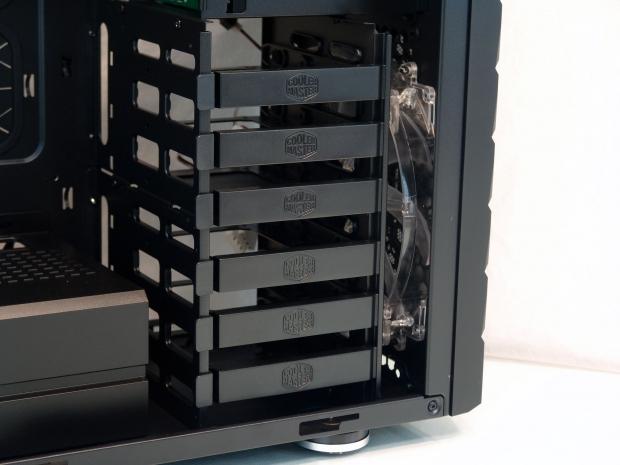
Behind the 200mm intake fan there are six trays that use pins on the sides for 3.5" drives and screws through the bottom of them for 2.5" drives. This assembly is a two piece design allowing the top section of three drive bays to be removable for over eighteen inches of clearance for cards.
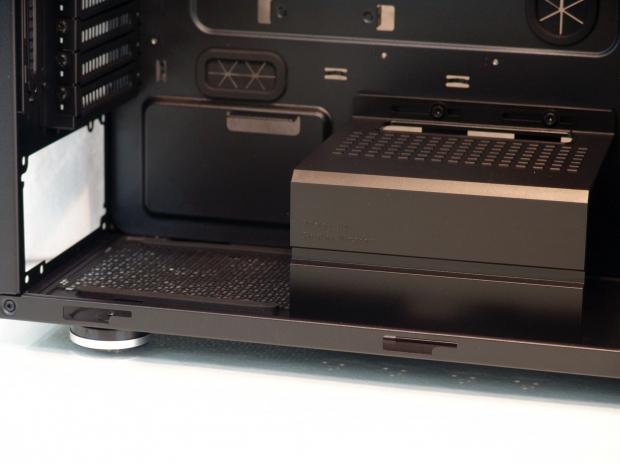
On the floor there isn't any ventilation besides under the PSU since the PSU wire cover included would just block that air flow. There is also a removable dust filter (removable from the inside) between the raised rubber pads that support the unit.
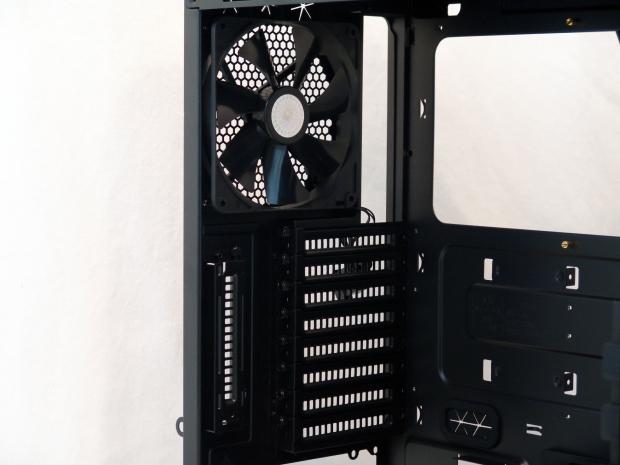
Inside the rear of the chassis each of the nine expansion slots use thumbscrews to mount devices and this chassis has replaceable ventilated covers. I know it is hanging out the rear I/O, but the 140mm fan concluded here has a 3-pin connection and a 4-pin Molex adapter connected to it for options on how to power it.
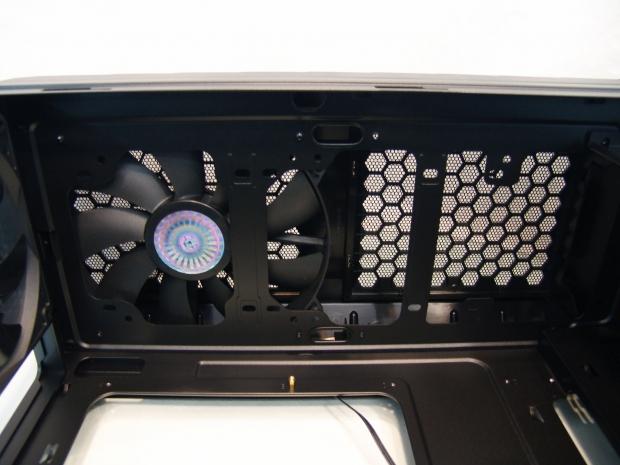
I wanted to get an image of the roof from the inside to show that even if you went with a thicker radiator in the top, there is room at the top and on the inside to add a pair of fans to cool that radiator since room is limited with thick radiators above the steel panel.
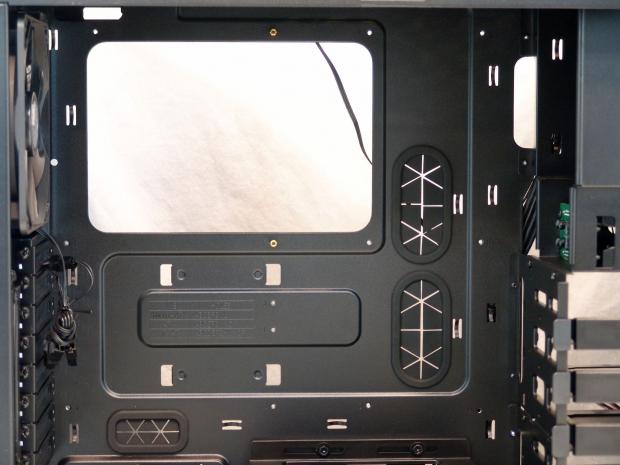
The motherboard tray will accept Micro-ATX, ATX, even Extended-ATX and offers four large holes around the tray with thirteen tie points to keep wiring under control. There is also a 2.5" drive mount that is stamped into the center of the try around where CM lists where risers go for each board.
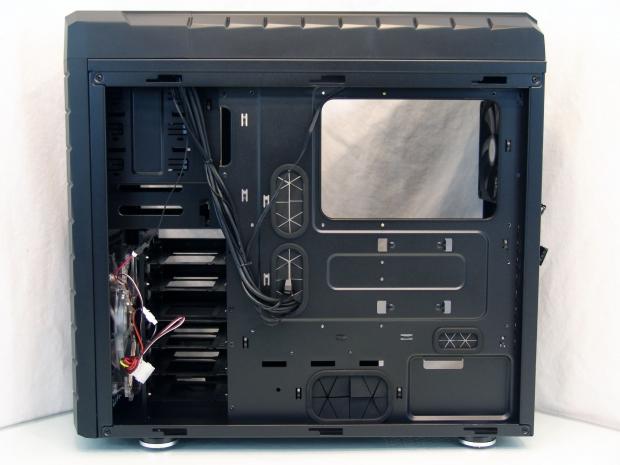
Behind the motherboard tray you only get 20mm of spacing in most areas. Don't worry though; the large bump in the door adds plenty of room for what you have to accomplish back here. Also you can now see the very large hole near the PSU that was covered with the plastic wiring cover when we viewed it from the other side.

The wiring is long enough to get where it needs to go and still have slack to deal with at the other end. As far as the connectivity, you get native USB 3.0, USB 2.0, HD and AC'97 Audio and the four connections for the control and lighting wires, even though two of mine are marked power switch.
Accessories and Documentation
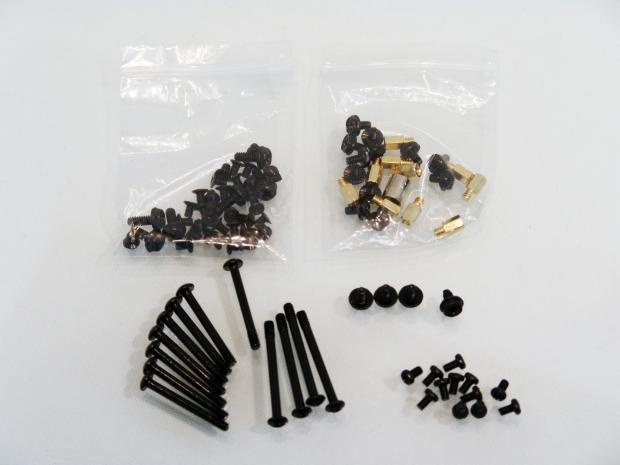
In the hardware box you will find a motherboard speaker and about twenty wire ties (not pictured) and this full assortment of screws. In the bag at the left there are all the HDD screws and the bag on the right contains the risers and motherboard screws. The bottom left has eight shorter and four longer fan screws for the front and top of the chassis, while the right has the PSU screws and the ODD screws.
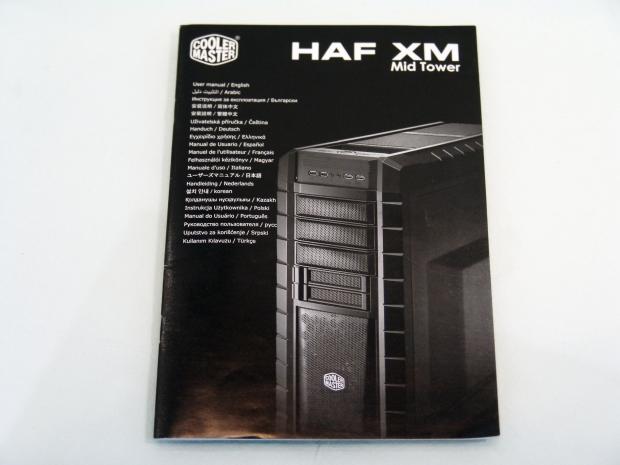
The manual is well written and has images along the way to help guide you through every step and the dismantling of this chassis to get all your goods into it. To be honest, the only reason I had during the whole process to reference this manual was to verify that I had all my goodies as I checked it against the list on page three.
The chassis design is just that easy to work with and figure out that you don't really need the manual if you are an experienced builder, but it definitely will hold the hands of the inexperienced.
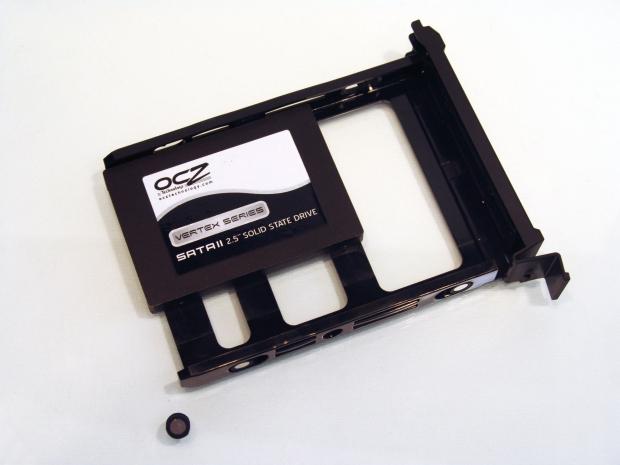
If you are using 3.5" drives you simply bend this plastic frame around the drive until all of the pins align with the drive and then you just slide it back into the rack. For 2.5" drives, you do have to remove a pin to allow the drive to sit correctly and then screw it in from the back.
The Build and Final Product
As it was suggested, I removed the X-Dock trays and removed the front bezel to gain access to the bay covers and I noticed the intake has a dust filter mounted inside the bezel. You can also see the PCB and the SATA power planes.
With my SSD in the X-Dock and the DVD drive installed it doesn't take too much from the overall design of the front of the chassis. However, I must say, the use of a paper sticker on the X-Dock cover was a pain to remove as it doesn't come off very nicely at all.

With an ATX motherboard in this chassis it looks like this should be a full tower case with the amount of room left over inside. I removed the top half of the hard drive cage just to show you the enormous potential to fit extremely long video cards in here with no issues at all.
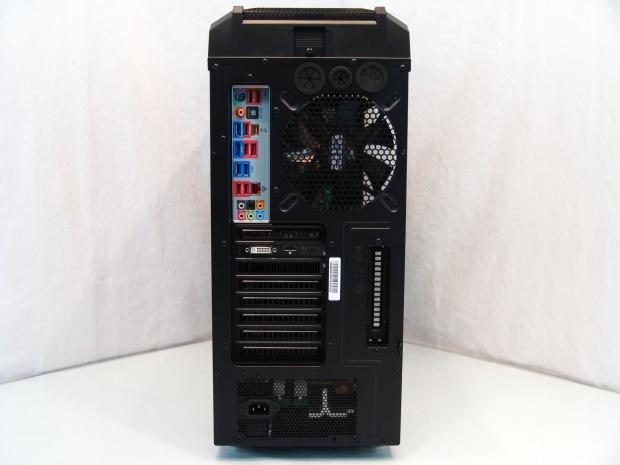
Since looking at the rear of the case is pretty self-explanatory, I will take this time to say that CM also states that you can hang a 120mm radiator where the 140mm fan currently resides.
The wire management was really easy to get under control with thirteen places to tie to and six total holes to pass wires through, four with grommets and the large area behind the HDD assembly to run your wiring. I did also add the 2.5" drive, just for show though as it is not connected.

How this works is the tabs on the other side of this drive have pins in them to set into the mounting holes of the drive. Once that is done, lay the drive flat and add a screw or two to the tabs on this side to secure it into place.
The HAF XM is all back together and besides the DVD showing through the bezel now, the chassis looks the same as it does out of the box. Now we just need to add some power and see and hear what happens.

The light on the power button denotes the PC activity, while the light above the fan switch denotes their on or off state. The light above the reset button is for HDD activity, but booting an SSD you have to be fast to get that light in an image.
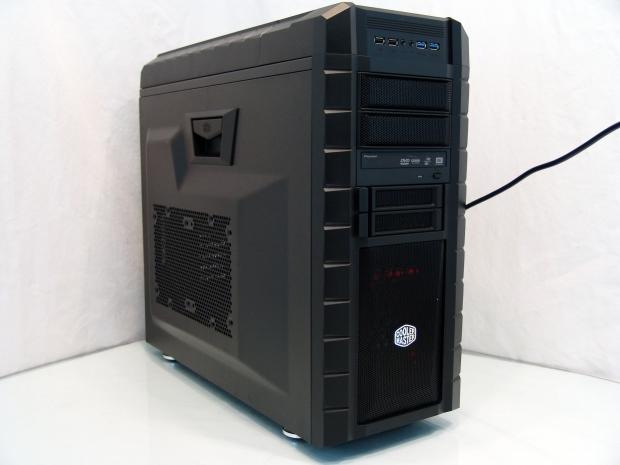
From the front of the chassis the only light you will see is the subtle glow of red LEDs from the intakes fan. With the lights having a switch, even this can be turned off and the chassis will just have the power button lit and the occasional flicker of the HDD LED to be seen at all.
Final Thoughts
To me Cooler Master took the finer points of what makes them such a success over the history of case designs that they have developed over the years and stuck in enough new "flavoring" to the exterior to make it a standalone contender.
The pricing for what is included with this chassis design is so right on the money, it's going to be hard to pass this chassis up when making a selection of mid-tower - even some full-towers with the room the HAF XM offers. I like the PSU cover as it tidies things up inside so well. I also like the 8+1 configuration of the expansion slots, as it gives options for fan controllers or lighting controllers to those who plan to be filling those slots with up to three graphics cards. Since we are on the topic, the removable cage allowing for larger than eighteen inch video cards is just a bit insane for a mid-tower design, in a good way of course.
Even as it ships direct from the factory, the dual 200mm fans and the 140mm attached to the rear of the HAF XM are very efficient at not only keeping temperatures down, but even at full speed, noise levels are kept to a minimal hum. For those that want to pack as much as possible into this chassis, there are plenty of cooling options to keep you and you components content there as well. The removable top allowing for thicker radiators and room inside for the fans, the dual 120 or dual 140mm radiators should take care of most builds cooling needs. Even if you planned on having a triple stack of cards in here with the stock coolers, the left panel offers plenty of cooling options to be stuck to the door to force cool those cards.
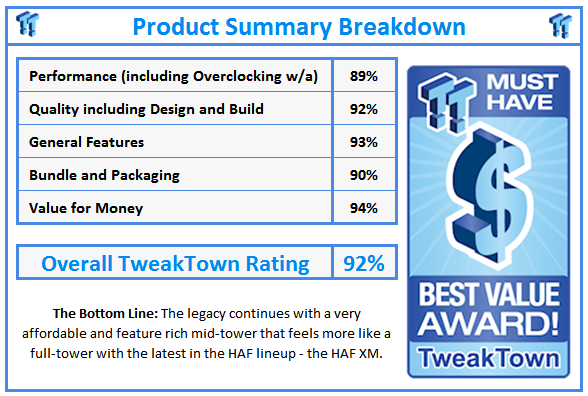
It seems I am leaving so much out, but the build and assembly went so smooth there just isn't anything bad I can really point out about this chassis. While keeping within the HAF pedigree in designs on the exterior, the HAF XM is the best HAF mid-tower I have seen and is only bested by the HAF-X in my opinion from this lineup.
Considering the cost of the HAF-X and its age, the HAF XM is going to be a hot seller at the $129.99, which I am seeing it listed at. The real question is do you have enough money in your wallet right now, because I know a lot of you are going to be building inside of the Cooler Master HAF XM.
 MOAIPLAY ORA PRO G1 850W ATX 3.1 PSU Review: high efficiency and 10-year warranty for $119.99
 NZXT H6 RGB+ Compact Dual-Chamber Chassis Review
 Lian Li HYDROSHIFT II 360P OLED Curved Liquid CPU Cooler Review
 ID-Cooling FROZN A620 SLK CPU Cooler Review
 GAMDIAS Atlas P6 CG Dual Chamber Mid-Tower Chassis Review
 NVIDIA launches ACE Game Agent SDK Beta for in-game AI companions that run on RTX GPUs
 PUBG's new Ally Duo game mode pairs you with an AI teammate powered by NVIDIA ACE
 Nintendo finally fixed the Switch eShop after nearly a decade by replacing its sluggish web wrapper with a native app
 AMD, Google, Tesla, and Groq turn to Samsung Foundry as TSMC runs out of capacity
 Destiny 2's future still bleak despite huge 100K player counts on Steam
 AMD confirms Ryzen Threadripper TR6 'Mustang Peak' with Zen 6 cores, 2nm process, and PCIe 6.0 support
 Sony has patented a PlayStation controller with buttons that change hardness during gameplay
 Hackers are using Steam's Wallpaper Engine to distribute malware that can steal your logins
 Report: Bethesda layoffs may be happening as Xbox Game Studios breaks up
 Intel's 18A-P process node is now in risk production, will power next-gen Xeon 'Diamond Rapids' processors
 Speed Racer (2008) 4K Ultra HD Blu-ray Review: a stunning remaster of the cult classic
 Navman MiVue Smart True 4K Surround Dashcam Review - Seeing In All Directions At Once
 IQUNIX Magi96 Pro Aluminum Low Profile Mechanical Keyboard Review - Premium Build, Satisfying Sound
 Asetek Forte S-Series Racing Simulator Bundle Review
 Razer Pro Type Ergo Wireless Split Ergonomic Keyboard Review - Built for Comfort and Support
 ASUS ROG Strix Morph 96 Wireless Gaming Keyboard Review - Great Performance, More Affordable
 SAPPHIRE Radeon RX 9070 GRE PULSE OC Review - A New 1440p Challenger Has Arrived
 ASRock Radeon RX 9070 GRE Steel Legend Review - The RDNA 4 Mid-Range Reshuffle
 I read the Windows Backup app screen carefully, and it does not back up what most people think
 Low Sound Volume on Windows 11? How to fix audio issues and restore normal volume
 8 Critical Warning Signs You Should Never Ignore in Windows 11
 This Windows security feature protects Documents from ransomware, but it is off by default
 Windows 11 already has a voice typing tool, and it is the one most people are not using
 Quick Assist is the only remote-support tool I open when a relative calls about their PC
 The PowerToys utilities I keep enabled on every Windows 11 PC, and the ones I turned off within a week
 TweakTown's Best of Computex 2026 Awards - The Best Hardware, Gaming Gear, and AI
 Phison E37T SSD Controller Exclusive Preview - The Fastest DRAMless SSD Platform Yet
 USB Ports Not Working in Windows 11? Try These Fixes