The Bottom Line
Introduction, Specifications, and Pricing
Looking back at our review history, it seems we missed some of the better Antec cases from years past. We had always heard users raving about the older P280 and much older P180. What we always heard was that the cases looked stunning, they were quiet, and always tended to have a great feature set that was slightly ahead of the curve. These cases were also rock solid, and spawned a lot of mods back in the early days of cutting your wire management, and adding in water cooling before it was the cool thing to do.
That being said, even without personal experience, its reputation has preceded it. This does raise the bar as to what we expect to see in a chassis with a proven heritage, but at the same time, we are excited to see what all this new version has to offer. From what we can tell, only the basic idea of the original cases is kept, as Antec redresses the exterior with some cool new and hidden features. With high expectations, we still plan to be fair and scour this design just like any other, and hopefully, we don't find anything obnoxious that may go against what we have heard all these years.
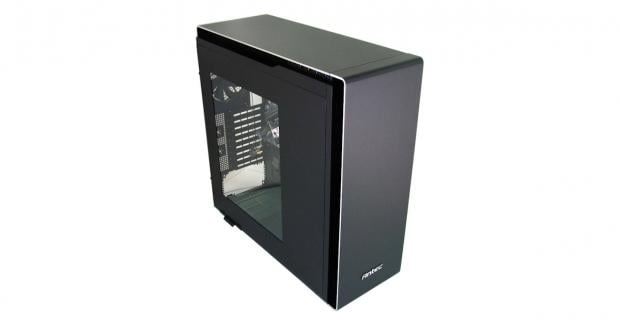
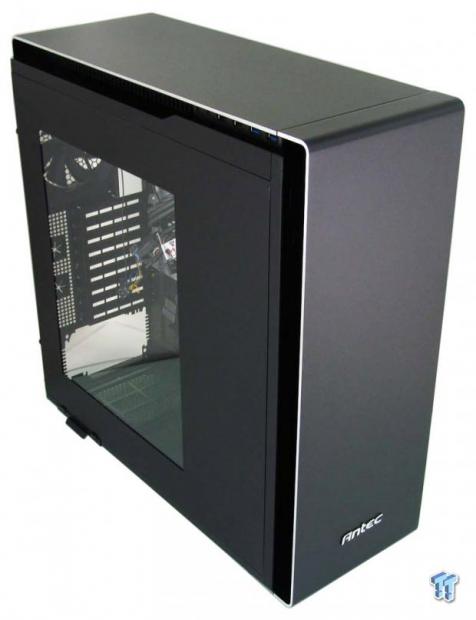
Today we bring you the Antec P380 from their Performance One series of cases. While the original designs had thin add-on panels of aluminum to dress them up, this time, aluminum is a major component in the design, as it sits center stage. The interior has been completely reworked and has very little resemblance to cases gone by. This full-tower chassis from Antec is not exactly revolutionary, that would not be exactly right to say, but we do know that this chassis design changes everything we knew before, and has features that would keep even the pickiest customer sublimely happy to own one.
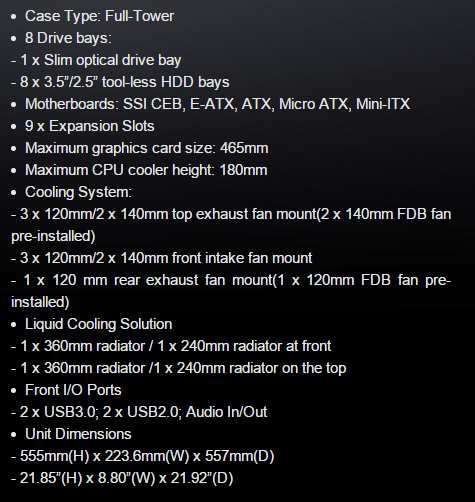
First of all, we see that this is a full-tower chassis, in which you could install an SSI-CEB, E-ATX, ATX, Micro-ATX, or even a Mini-ITX motherboard. What is not said is that this chassis is mainly made of a steel frame, painted black inside and out. There are bits like the top panel and the underlying structure of the front bezel that is made of black ABS plastic as well. What sets this chassis off, though, is that a 5mm thick section of aluminum curves from the top of the chassis, continues to run flat down the face, and then gently curves back to meet the bottom of the P380. We are not given an exact weight, but it is heavy. We are, however, offered up the sizes, where we find that the P380 is 21.85" tall, 8.8" wide, and 21.92" deep.
Inside of the chassis there are eight drive bays for either 3.5" or 2.5" drives, but no 5.25" bay access through the bezel at all. To remedy this, there is an optional location inside of the top panel where you can install a slim optical drive via a tray shipped with this chassis. The front I/O panel offers two USB 3.0 ports, two USB 2.0 ports, and a set of HD Audio jacks, which resides at the top, on the left side of the case. The power and reset buttons are completely hidden, but still accessible. At the back of this case, we find nine expansion slots, with a maximum video card length of 465mm supported here. We may as well also cover that Antec does make mention of the CPU cooler height, where it is "limited" to 180mm, if that is even a limit.
Options for cooling are as follows. The top of the chassis supports three 120mm fans or two 140mm fans, and for now, Antec supplies it with a single 120mm FDB fan installed there. There is a rear exhaust fan location, which can take only a 120mm fan, and Antec includes an FDB 120mm fan there as well. Behind the front bezel, you also have the same options as the top has, just that this time there are no fans installed. As far as liquid cooling goes, you can put a 360mm or 240mm radiator in the front, the same for the top, and you can hang a single 120mm radiator in the rear.
Locating the Performance One P380 is easy enough at this point. Amazon has it selling for $130.21 with shipping included. With what you are about to see, we feel that it won't take long for you to realize how well priced this chassis is.
Chad's Chassis Test System Specifications
- Motherboard: GIGABYTE GA-Z68X-UD4-B3
- CPU: Intel Core i7 2600K (buy from Amazon)
- Cooler: Corsair H80i GT (buy from Amazon)
- Memory: G.Skill Ripjaws F3-12800CL6D-4GBXH
- Video Card: ZOTAC GeForce GTX 970 AMP. Extreme Edition (buy from Amazon)
- Storage: SuperSpeed 128GB SSD
- Power Supply: SilverStone SST-ST85F-G (buy from Amazon)
- OS: Microsoft Windows 7 Ultimate 64-bit (buy from Amazon)
Packaging
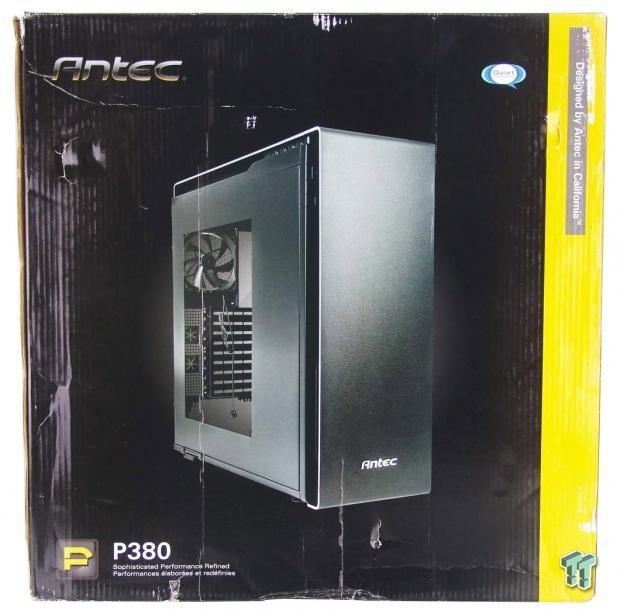
Antec did not hold back on the packaging, almost to denote that if the box looks so shiny, the case must be hot. There is a large image of the chassis in the middle, with the company name, a notation to quiet, the chassis name at the bottom, and a bold yellow stripe down the right.
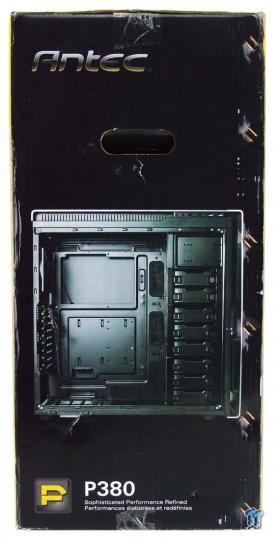
The Antec name tops this panel, but below the handle is an image inside of the chassis to show off the layout.
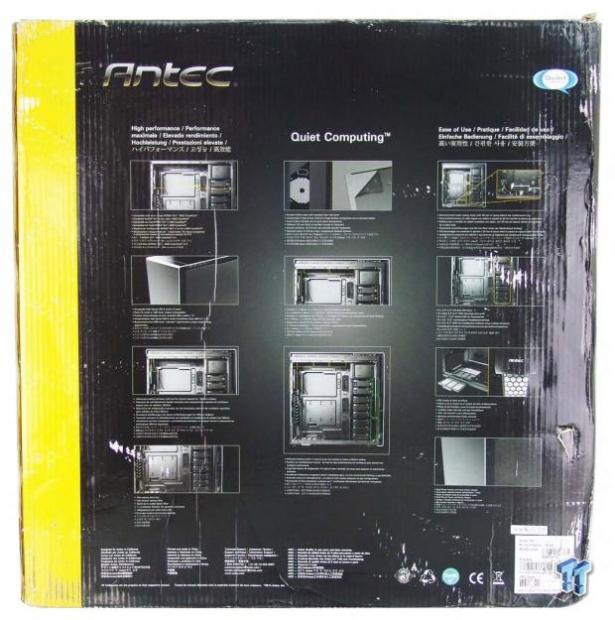
The back keep the bold yellow stripe, but more important are the eleven images. These along with text below them all, explains the main features found in the P380.
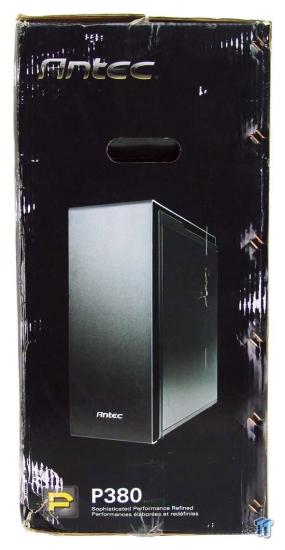
The last of the panels offers a look at the front of the P380, but this time from the right side. This is also a prelude to the fact that they designed this chassis to fit well on either side of the desk.
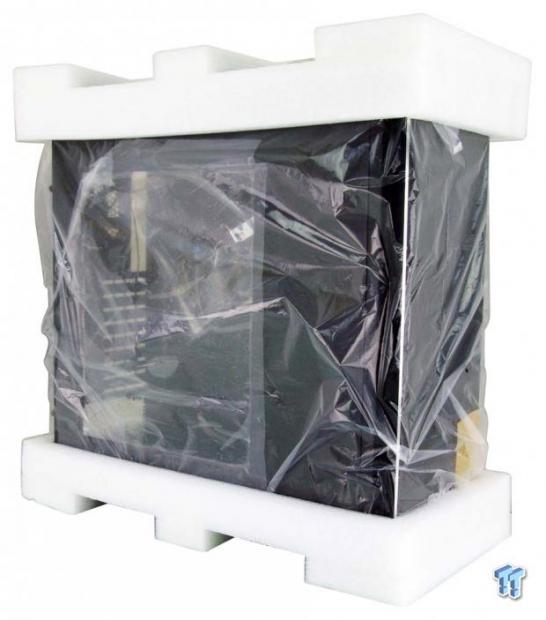
Inside of the box, we found the P380 surrounded and well protected. Considering how bad the box was attacked in transit, the dense foam caps, plastic liner, and cling plastic on the window allowed this sample to arrive in perfect condition inside of it.
Antec P380 Full-Tower Chassis
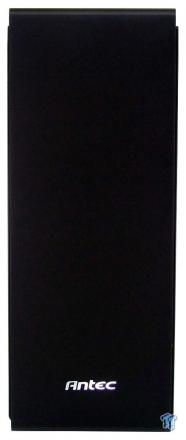
The front of the chassis is simply a textured black expanse of thick aluminum. The only thing to break it up in any way is that Antec placed their name at the bottom.
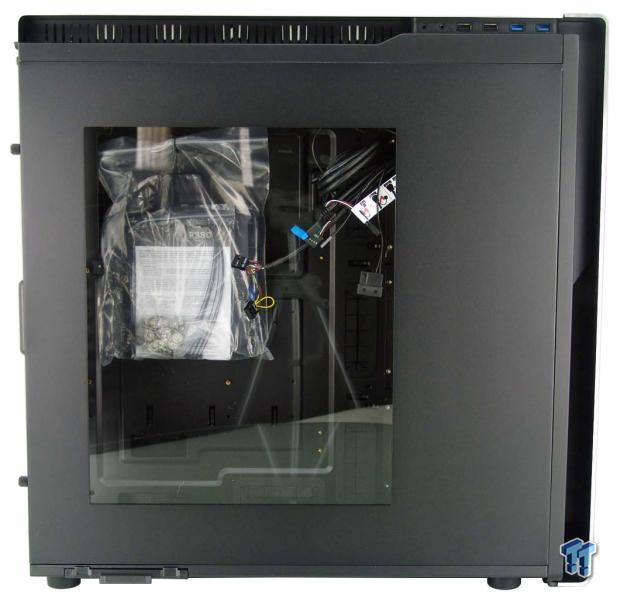
Along the top and front edges, we see the bright line of the exposed aluminum with room for the chassis to breathe under them. On the left side panel, there is a large window, which stops short of the bays, so you only see the sexy bits inside.
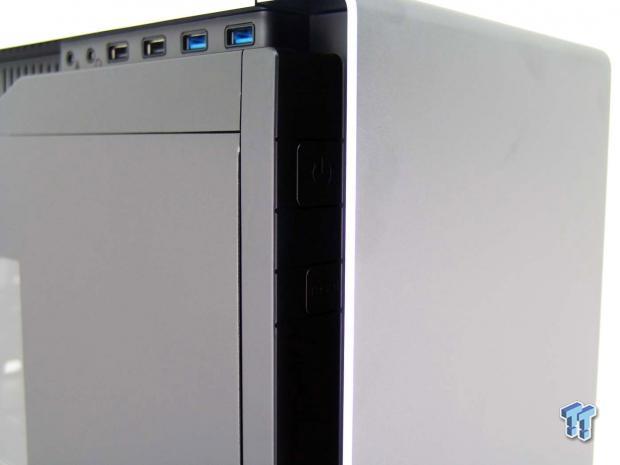
Near the top, in the plastic portion of the front bezel, just behind the aluminum, are the hidden power and reset buttons. They are hard to see, but you can just make them out from the shadows.
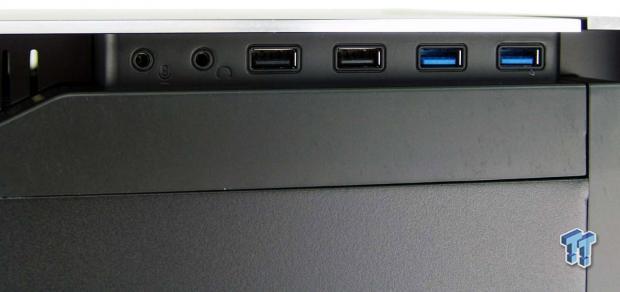
The front I/O panel is at the top right corner of the left side, just under the aluminum top panel. In it, you can find a pair of 3.5mm HD Audio jacks, a pair of USB 2.0 ports, and USB 3.0 ports ending things on the right.
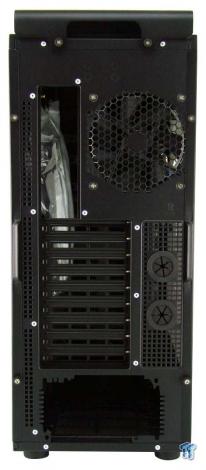
The back of the chassis it topped with thumbscrews to release the top panel of the P380. With a bit of a gap, it is then that we run into the exhaust fan and rear I/O. The nine expansion slots are accompanied by mesh with a pair of grommets in it, to the right. This leaves the hole at the bottom for the PSU.
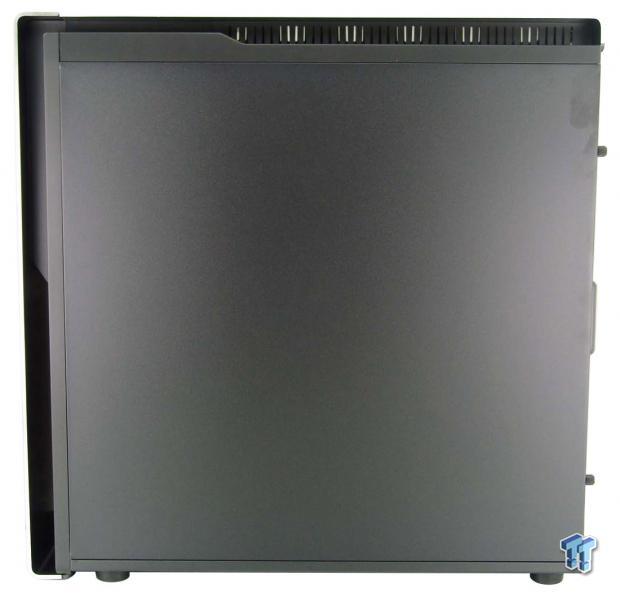
The right side of the chassis offers that same exposed aluminum trim line that runs along the top and down the front, but this time, the panel is solid. There is venting at the top, just like the other side, and we still have one more thing to show you here.
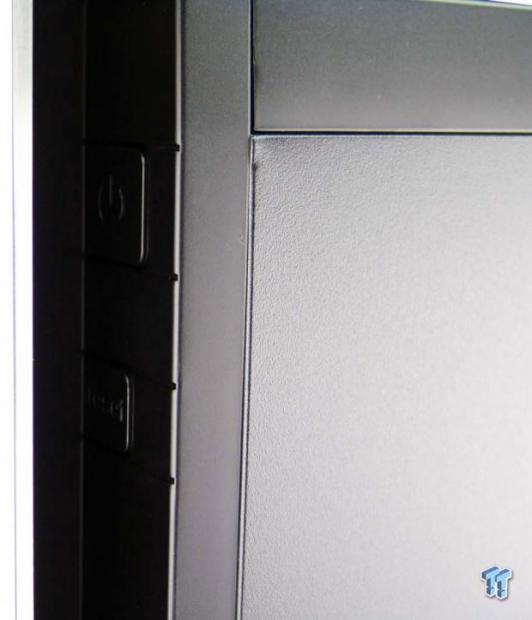
Antec designed this chassis with two sets of power and reset buttons. This means that even while offering a huge window if the case sat to the left, you could still turn it on and off. It is nowhere near as easy to access the front I/O panel, but we do like having a choice.
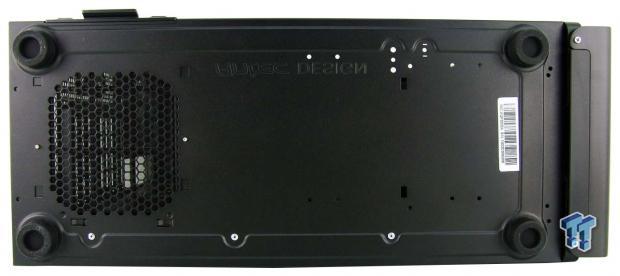
The view under this P380 shows us that it is supported with large round rubber feet near the corners. The PSU area offers steel mesh, but there is also a dust filter here, with the tab sticking out the bottom of the left side for removal and cleaning.
Inside the P380
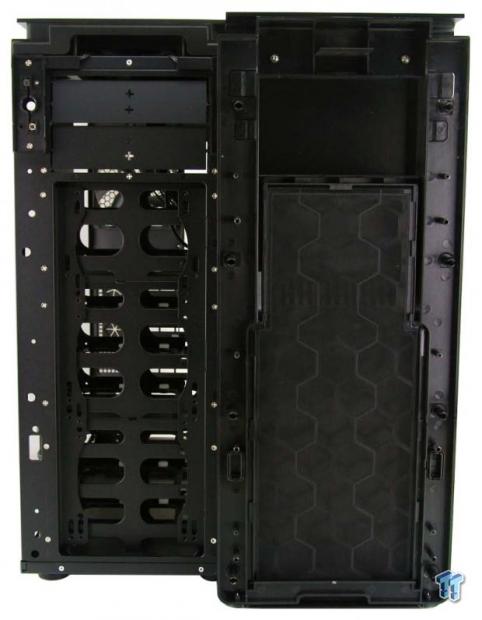
Behind the bezel, we see that the side vents are run through and come to the center, where the removable dust filter is. The front of the chassis is wide open for optional fans and is recessed to make room for them.
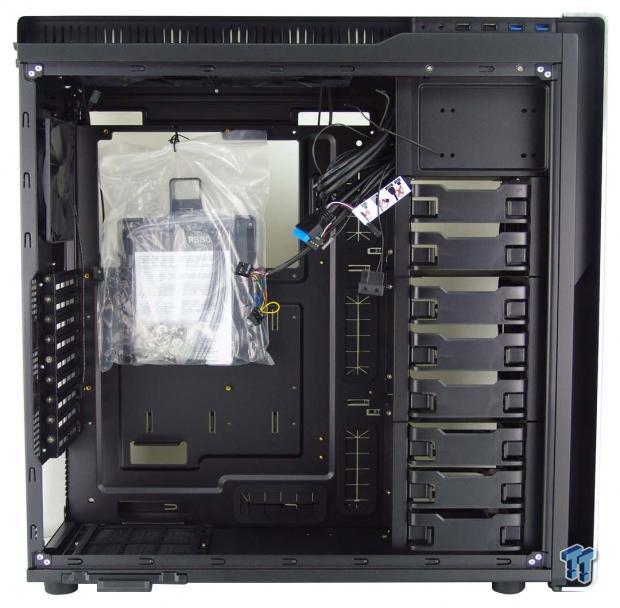
We removed the side panels with sound deadening material on the back of them and found this. The wiring is loosely hung and has gotten loose in shipping. The hardware and literature have stayed tightly tied to the motherboard tray, however.
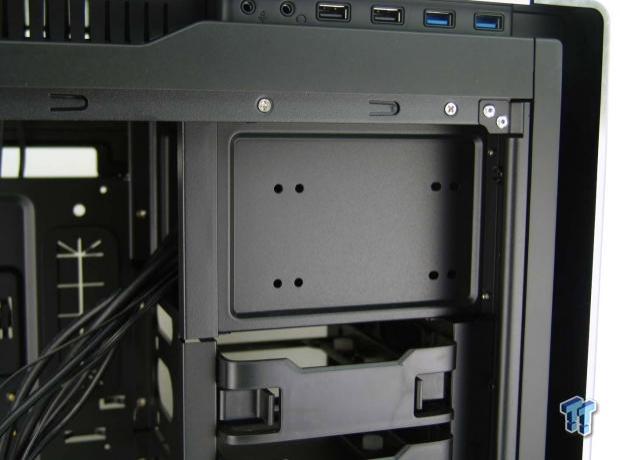
There are two bays at the top of the chassis for 5.25" drives, but with no holes in the bezel, this is just extra space and support for the top of the HDD bays.
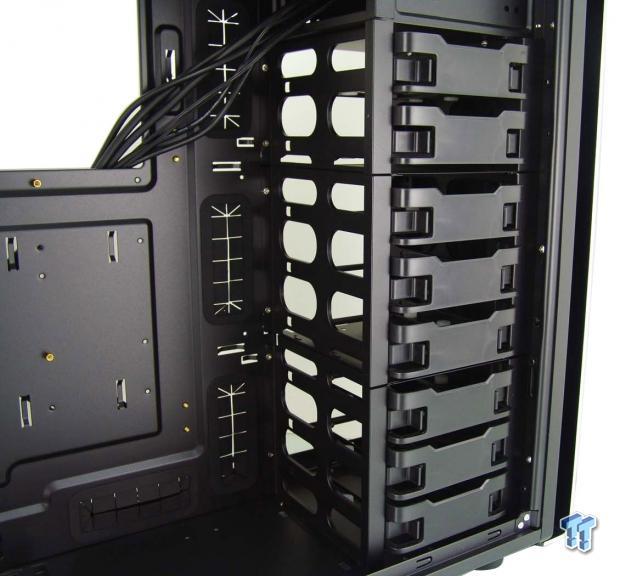
Speaking of the HDD bays, they are broken up into three racks. The top rack can hold a pair of drives while the lower two cages can house three each. The slide out trays are drilled so that you can screw in either a 2.5" drive or a 3.5" drive into each of them.
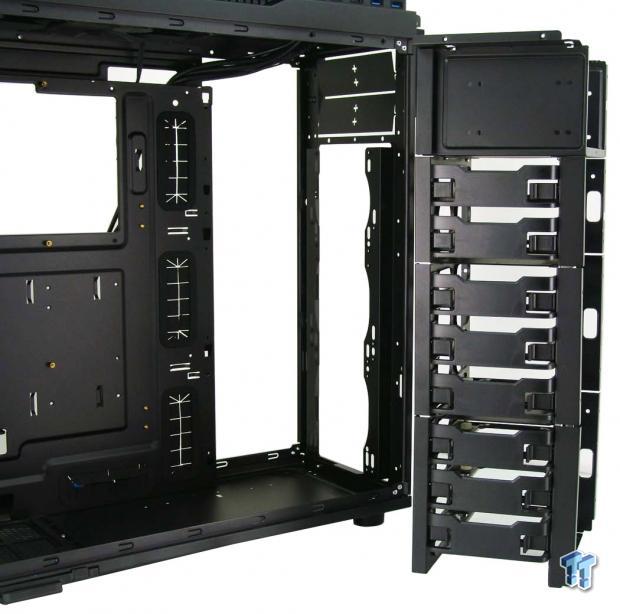
After removing a dozen or so screws, we found that the entire assembly will come out of the case. This can be broken down into components and rearranged inside, or left out altogether to allow for water cooling to be installed.
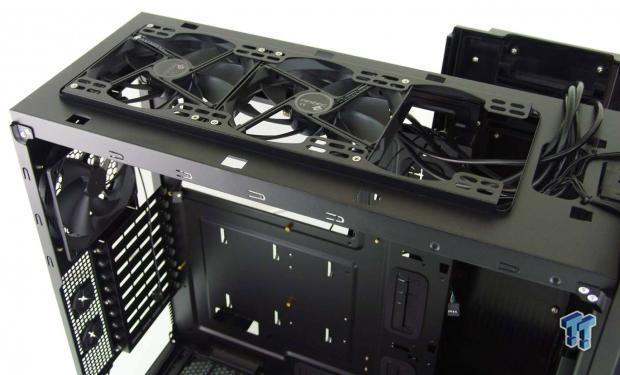
At the top of the chassis, once the top panel has been removed, you can access cooling options here. We see that Antec supplies two 140mm fans, but there is room for a third. There is also room for three 120mm fans and 360mm worth of radiator if you want.
Inside the P380 Continued
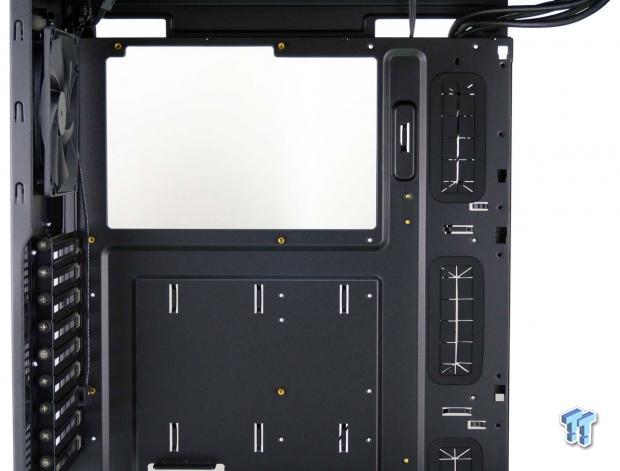
The motherboard tray is well equipped. There is a very large access hole, two wiring holes above it, and the three with grommets down the right side. We also count eleven tie points for wiring, so keeping things clean will not be an issue for wiring.
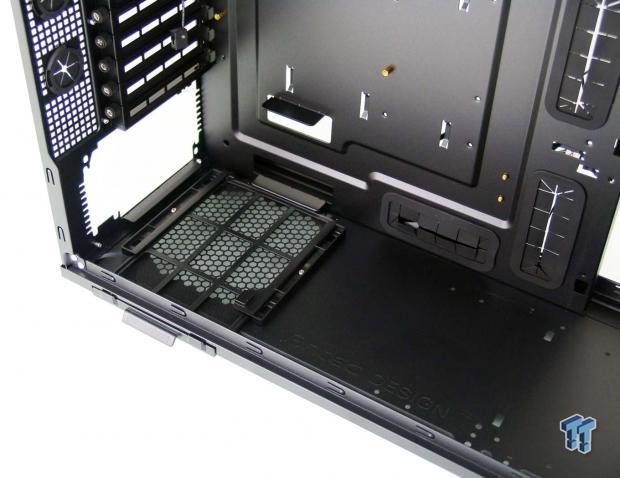
The floor of the chassis shows the dust filter for the PSU, and looking closer, we find a rail at the back and one on the tray to support the PSU over it. We also see another large hole with a grommet, to pass wiring right from the PSU to the back of the tray.
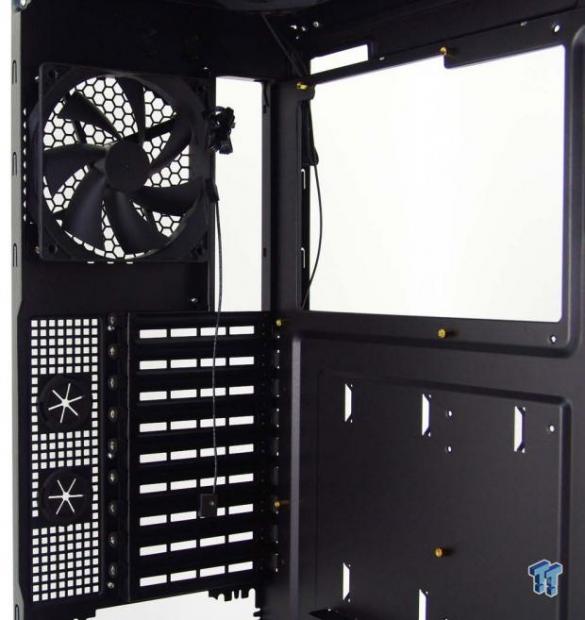
The included fans all sport the same 3-pin connection, and they all have a lead that ends in a 3-way micro-switch for high, medium, and low fans speed operation. As for the expansion slots, the covers, and future cards are secured with plastic covered thumbscrews.
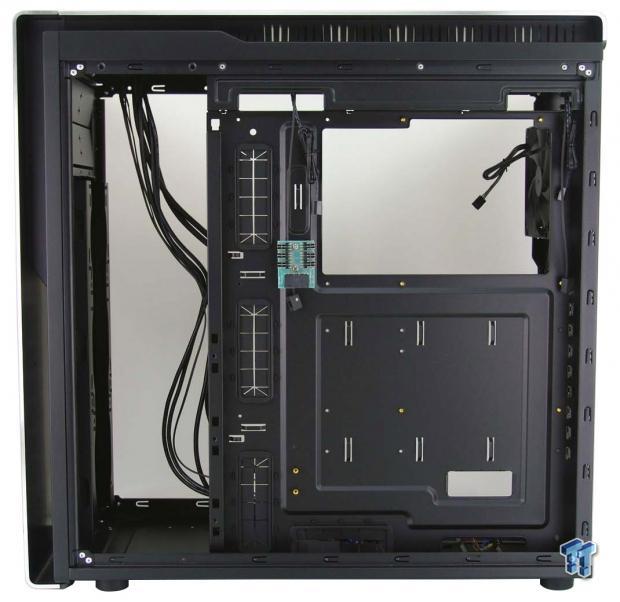
There is more than 20mm of space behind the motherboard tray and a ton of room at the front without the bays in place. There is the edge of the tray to consider, though, as it gets bent, there is only 10mm of space to pass wires from the back to the front.
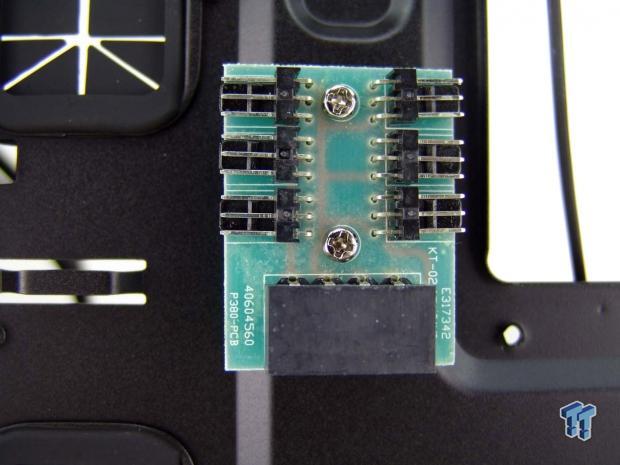
There is also a six-fan hub screwed onto the back of the motherboard tray. This is powered with a 4-pin Molex, and will run any fan connected to it at 12V. The factory fans still have options, though, as you can still set the switches.
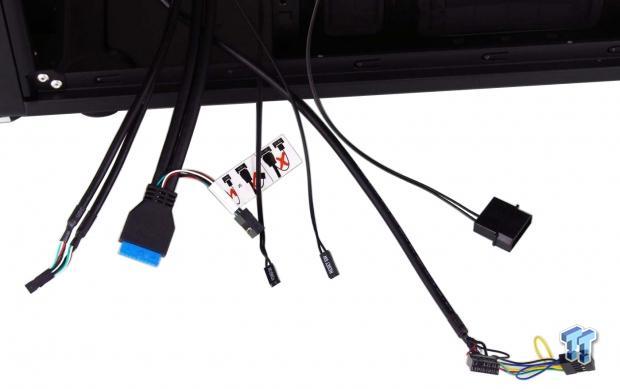
If we have one complaint, this is it. While the wiring is black, and the USB 3.0 connection offers a 2.0 end as well, all of this wiring is very short in its length, and will require more of it to be seen than is needed.
Hardware & Documentation

Inside of that bag we saw hanging inside of the chassis, we found another bag containing this. There is a set to the left to deal with the optional slim optical drive installation, but the rest of the screws they provide are slapped together for you to sort out. Everything you need is in this pile, even a few things like the white grommet, which we have no idea what it is even there for.
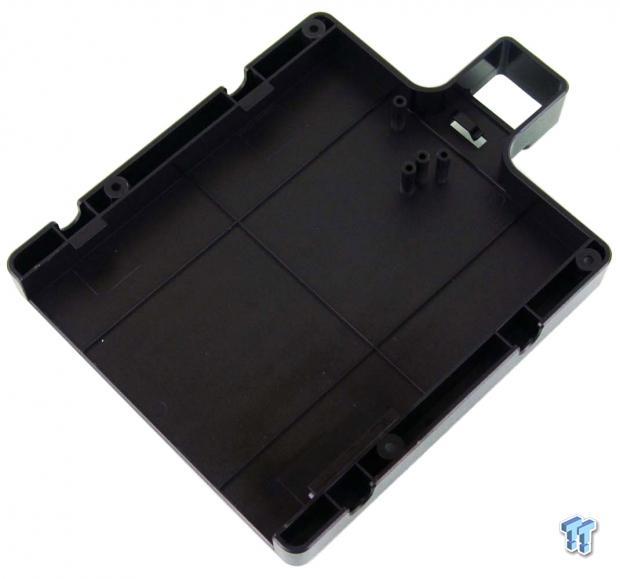
This is an adapter tray for the slim optical drive. This installs on the top of the chassis, and there is a pop-out panel on the right side to allow the tray to go in and out of the chassis. That pack of screws secures the drive in this tray, as well as the screws to secure this to the roof of the P380.
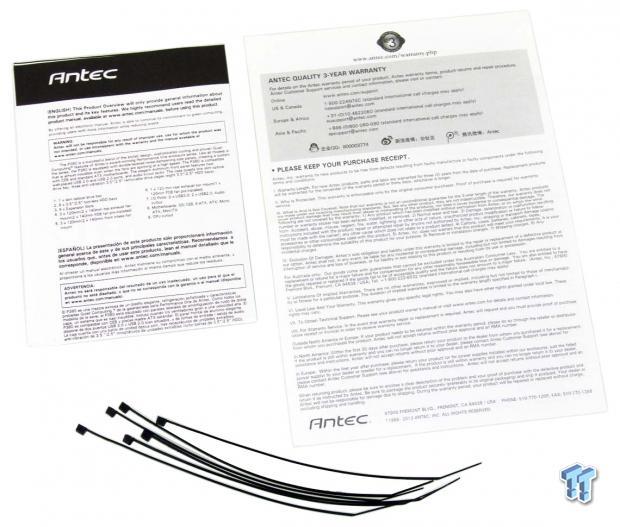
The manual is short and sweet, but will get you by when stumbling through the build process or finding the right hardware for the job. Next to it is the warranty insert for the three-year coverage they offer, and at the bottom is a set of six zip ties to tend to wiring.
Case Build & Finished Product
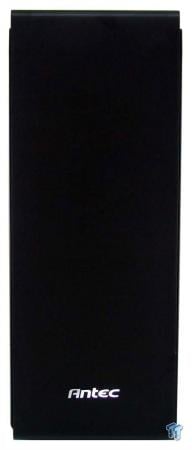
As is the trend in a lot of cases these days, and one we like, the front of the P380 looks the same now as it did when we first laid eyes on it. The design is such that there is no way to break up the aluminum, nor would we have wanted to.
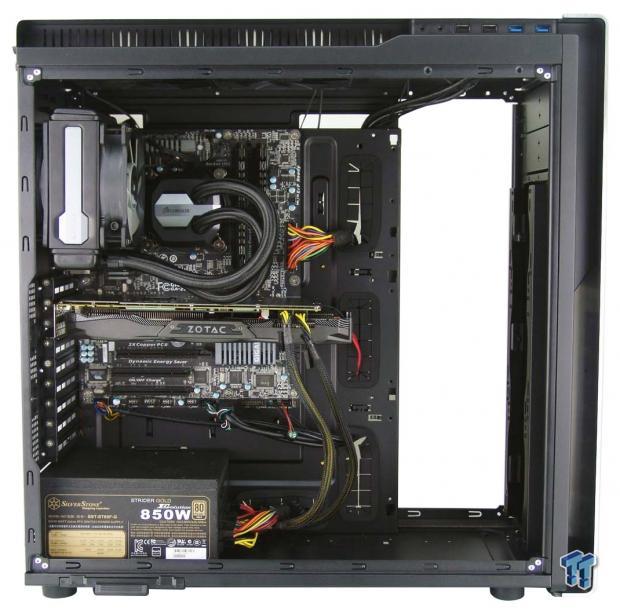
For those who want water cooling, there is a ton of space in the front; even room above the motherboard as well. Everything we installed went in as smooth as silk, but the wiring is very tight on the HD Audio cable and the USB 3.0 connection, so much that it even warps the grommet in the hole they are running through.
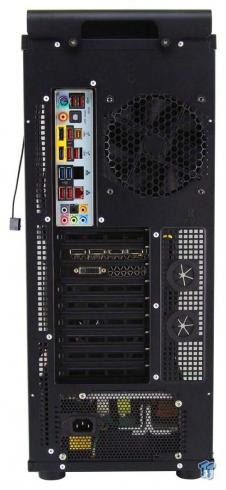
The back of the chassis has not a single issue. The dust cover snapped right in. The card aligns well, and the PSU lines right up to be screwed into place.
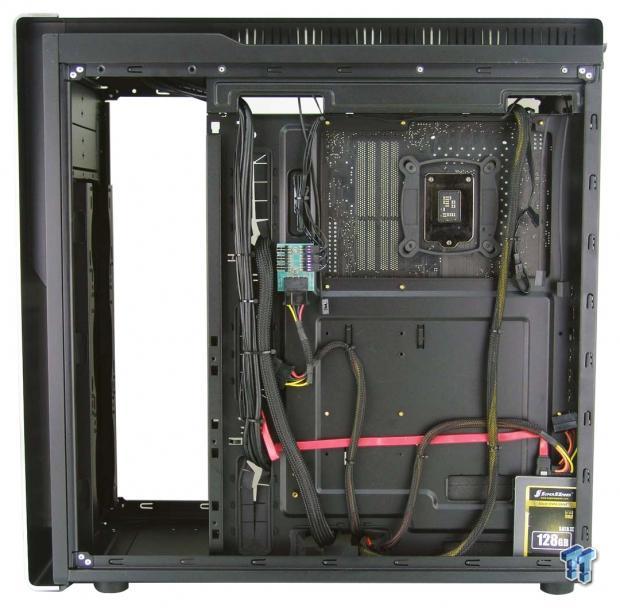
One thing we did miss was options for drives once the bays had been removed. With all of the room left behind the tray, we just stuck an SSD in on the floor and went about the build as usual. Fan leads are long, and makes connecting them to the hub simple, and we even got away with bundling most of the wiring together without having interference with the door panel.
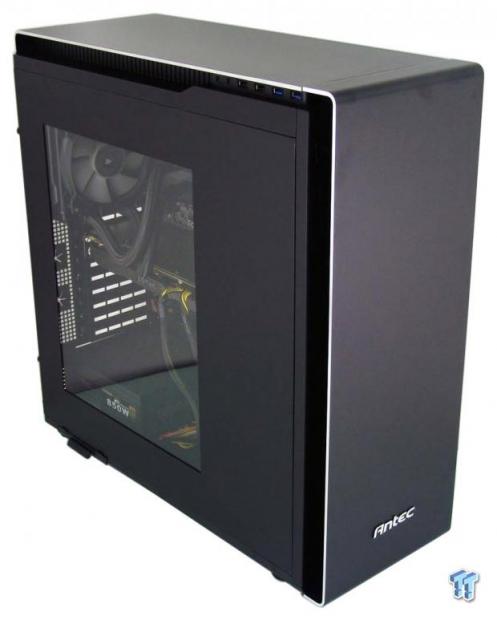
Even mixing steel sides with the aluminum top and front of the P380, we like everything this exterior offers. It is sleek, sophisticated, and even with the large window to view the hardware, we have a hard time finding any fault with the aesthetics of this chassis.
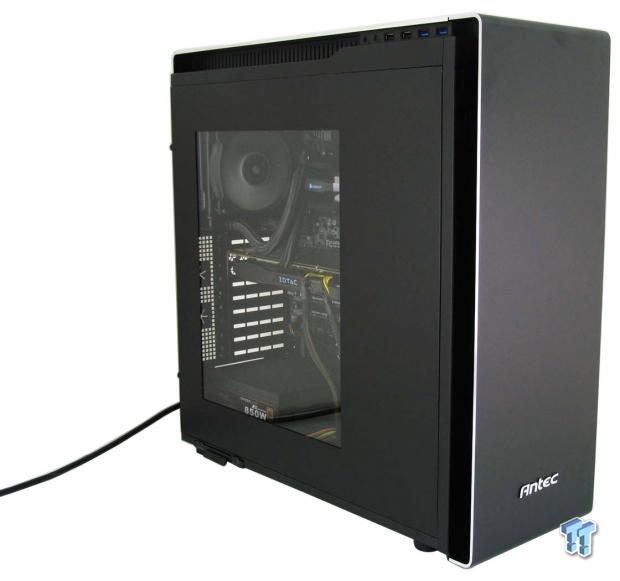
One thing about this chassis that we found out when powering it up, there are no lights to blind you or shine onto the walls. Everything is hidden from view, even the switches to turn it on, and this is why we moved to a lower angle. That way you could see the fan spinning and the Zotac name on the card is lit up, denoting the system is on.
Final Thoughts
Between the sleek and sophisticated looks of this chassis, and the feature set it offers, Antec not only evolved the P380 to a new level from its predecessors, but it also affords customers a lot of bang for buck.
The use of thick aluminum typically drives the price up on a chassis, but in the P380, it only drives up the sexy factor. The chassis is rock solid, even with the bays removed, there was no obvious flex or lack of support. With measures added to achieve some level of sound absorption, the most we heard from this chassis was 30dB with the trio of fans set to run at their highest speed. Running a hand through the chassis and next to the vents, you can easily feel the flow that these three fans provide. Everything is as it should be.
While we did find the cables to be a fair bit short for the layout of the chassis, we were still able to get them plugged in. We could have opted for other routes for them, but who wants wiring running across their motherboard - we certainly don't. We also felt that Antec could have offered a tray or two behind the motherboard tray, as the removal of the HDD cage eliminated all locations for storage. We did like the space afforded by removing it, however. At that point, you have room for a 360mm radiator in the front, a 360mm radiator at the top, and even though they do not specify it, we had no issues putting one in the back for our build. In all reality, Antec has lived up to the hype that we have heard all these years from their Performance One series of cases.
Even with its shortcomings, the Antec P380 has won us over. A nicely refined design, use of thick aluminum at the top and bottom, power and reset switches on both sides, and the option to install a slim optical drive, they are all just icing on the cake. While we will have to detract some points for the storage and wiring issues, this Antec full-tower chassis will still score well. When you factor in that you can have this chassis for $130, it just makes it all that much sweeter of a case.
You will be hard pressed to find an exterior of this caliber along with the feature set provided in this design. With all of this in mind, short wires and potential lack of storage locations, if you just change things around a little bit, you can easily rectify these issues, and have a super slick looking build for all your friends to be jealous of.
Chad's Chassis Test System Specifications
- Motherboard: GIGABYTE GA-Z68X-UD4-B3
- CPU: Intel Core i7 2600K (buy from Amazon)
- Cooler: Corsair H80i GT (buy from Amazon)
- Memory: G.Skill Ripjaws F3-12800CL6D-4GBXH
- Video Card: ZOTAC GeForce GTX 970 AMP. Extreme Edition (buy from Amazon)
- Storage: SuperSpeed 128GB SSD
- Power Supply: SilverStone SST-ST85F-G (buy from Amazon)
- OS: Microsoft Windows 7 Ultimate 64-bit (buy from Amazon)

