Introduction
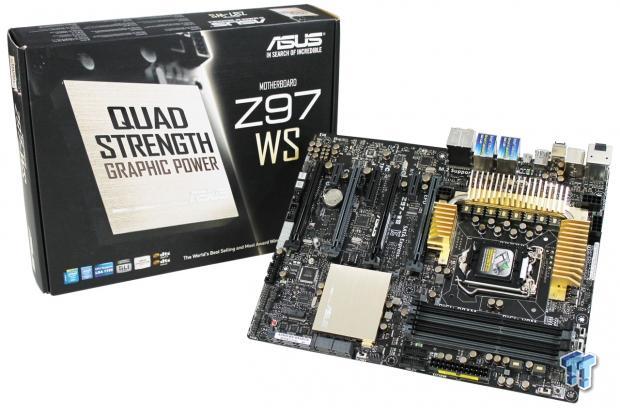
We have reviewed other ASUS workstation motherboards before, but this time around, we have one using the new Intel Z97 chipset and revamped UEFI BIOS and utilities to look at.
The motherboard look simple enough but it has a lot under the hood. Let us look at the feature list for this motherboard.
Key features are native third generation PCI Express x16 that also supports NVIDIA 4-Way SLI and AMD 4-Way CrossFireX. ProCool Power Connector eliminates the hollow areas in traditional power connectors, is much stronger, and has better power efficiency. It also allows for better heat dissipation, which allows the connector to run cooler.
Q-code logger lets you log events right to a USB flash drive. The log includes all ASUS Q-Codes in a handy text file. An improved UEFI BIOS includes enhanced overclocking abilities.
There are also new SATA Express ports, M.2 Socket 3, four Memory DIMM's which support 3300MHz O.C./3200MHz O.C./1600MHz up to 32Gb, and improved ASUS SUITE III utility includes enhanced overclocking abilities and 5-way Optimization.
Let us look at the exclusive features of this motherboard:
- ASUS Dual Intelligent Processors 5 with 5-Way Optimization
- CPU Power with 8-phase power design & ASUS CPU power utility.
- DRAM Power with digital 2-phase DRAM power design.
- ASUS EPU, TPU
- Fan Xpert 3 featuring auto tuning and multiple thermistors.
- ASUS Graphics card tuning featuring ASUS video cards power level and fan functions.
- Network iControl featuring instant network bandwidth for top network programs in use.
- USB 3.0 Boost
- USB Charger+ featuring quick charging function for all smart devices.
- Ai Charger+, Disk Unlocker, AI Suite 3, Anti Surge and MemOK!
Now let's take a close look at the package on the next page.
Packaging & Specifications
Packaging
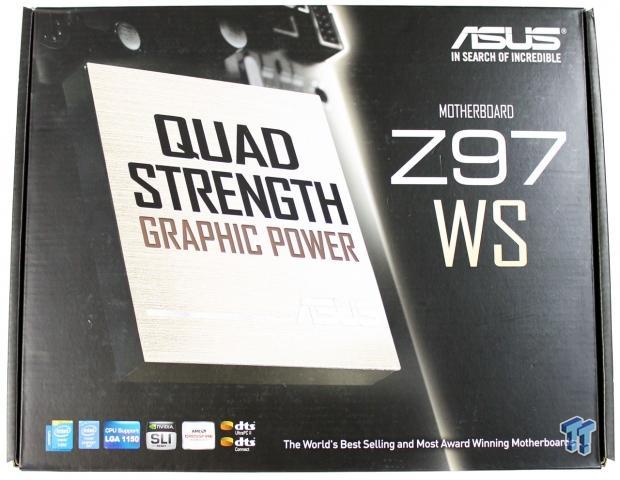
The ASUS Z97-WS comes in a nice box, which is simple enough.
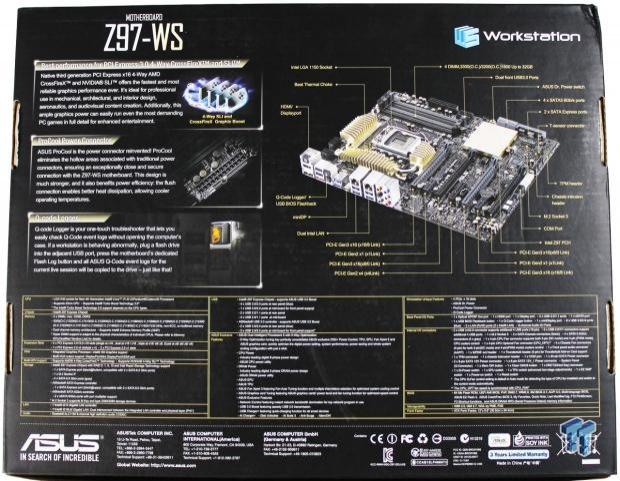
The back of the retail box shows all the main features of the Z97-WS.
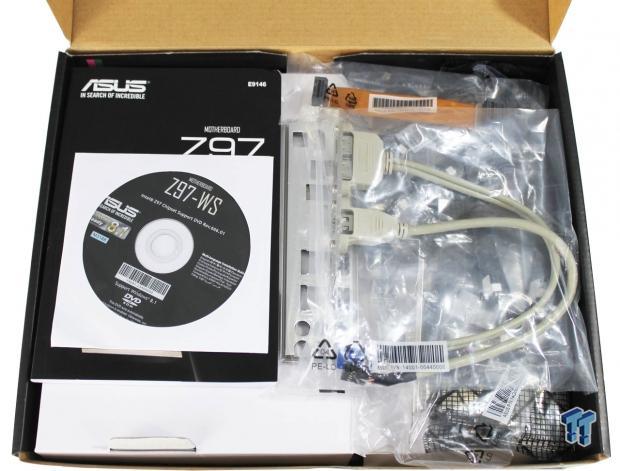
Opening the box, we get out first look at everything that comes with the retail package.
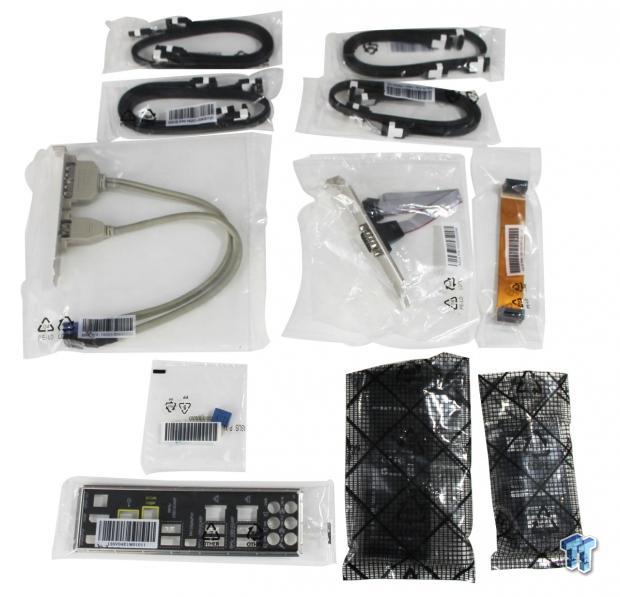
Taking out all the accessories, we can see that the Z97-WS comes with.
- 4x sets of SATA cables
- 1x COM port connector
- 1x USB expander
- 3x SLI bridges, one for SLI, one for Tri-SLI and one for Quad-SLI
- 1x front panel header
- 1x I/O plate
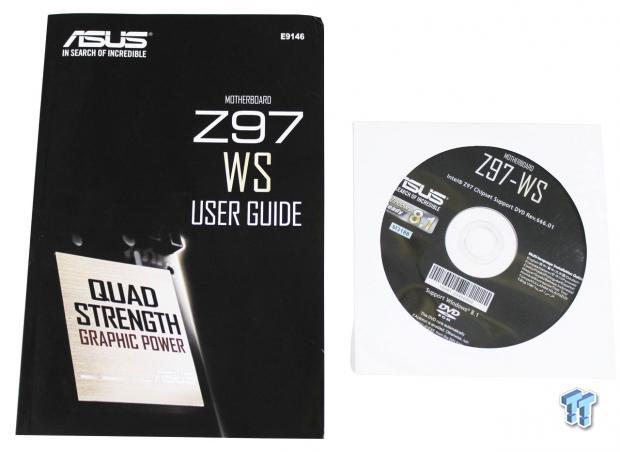
Also included in the retail package is a manual and a driver DVD
Specifications
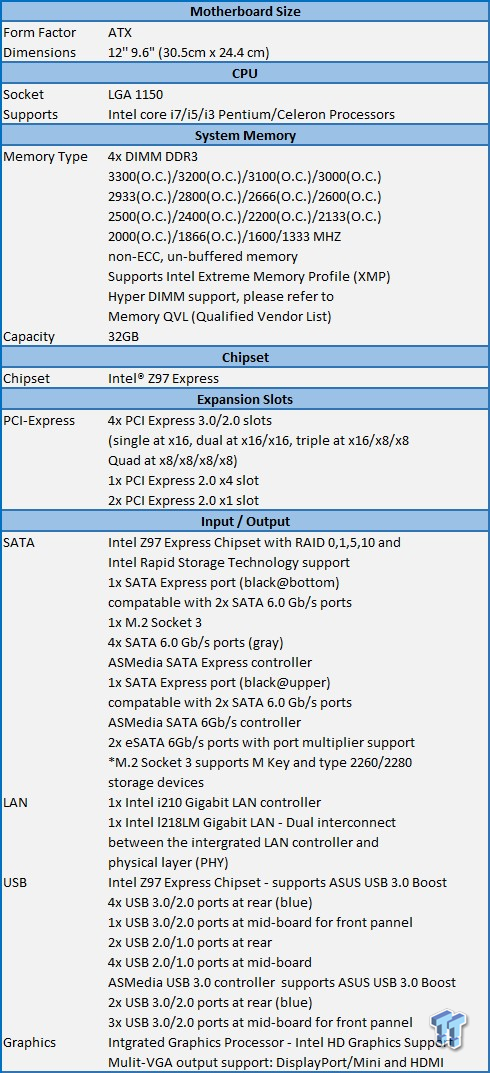
Here we see a full list of specifications for the Z97-WS. The main features are the SATA Express options for storage and we see plenty of USB connectivity included.
This motherboard also has plenty of options for RAM speeds and the ability to overclock those.
Layout Details
Layout
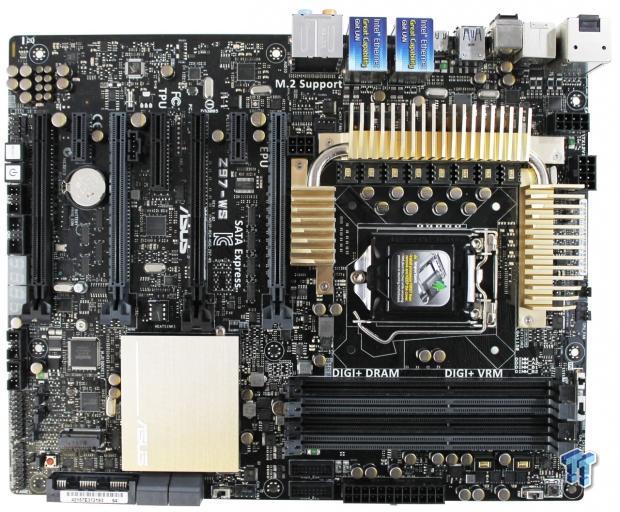
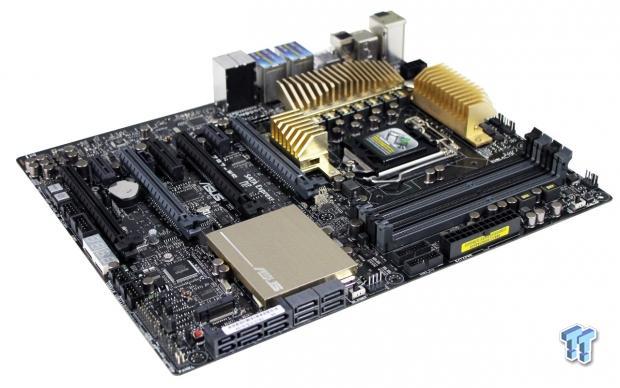
Just like some of the other ASUS workstation motherboards we have tested, this one is nice and clean. It has large heat sinks for the power components so they should run nice and cool. The area around the CPU socket is clean, so it should provide good airflow, which helps to keep it nice and cool.
You can also see two 8 pin and one 6 pin power connectors. The two 8 pin power connectors are for the CPU. The 6 pin power connector off to the left of the heat sinks we assume is for using more than one video card or other PCIe expansion boards that might need extra power.
In our tests, we only used the two 8 pin power connectors. Also off to the left side you can see the two Q-Code LED displays.
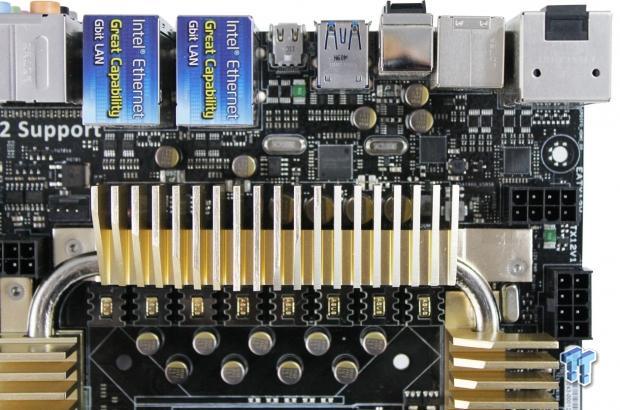
Here we get a close up of the power area on the motherboard. You can also see the three power connectors. As we said above, we only used to the two 8 pin connectors on the right for our testing.
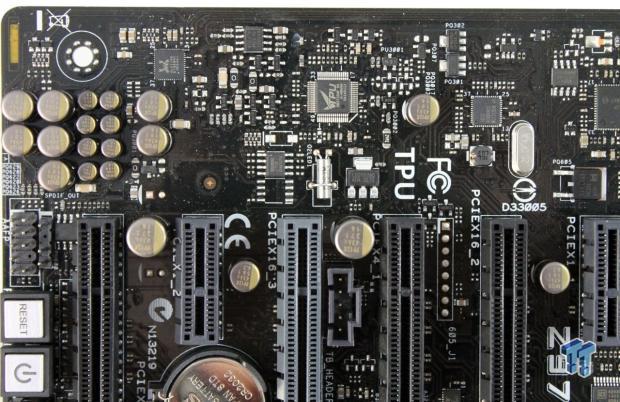
Looking at the top left of the motherboard, we can see the front panel audio header with a SPDIF header next to that. Next, we can see the power and reset buttons.
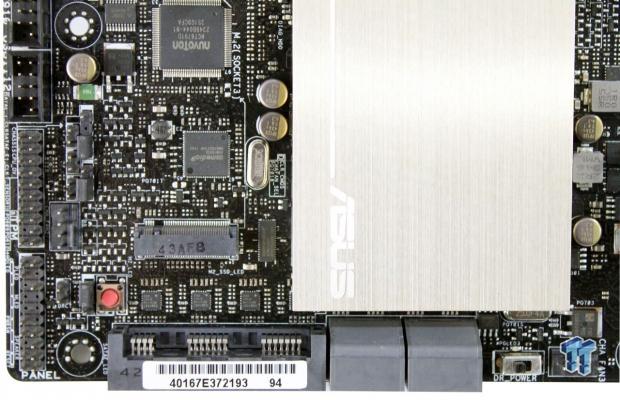
Now looking at the lower left side of the motherboard, we find two USB 2.0 headers at the top, followed below with a TPM header - if you wish to use the feature, you can plug in a TPM module here.
Next to the TPM header we find a T-Sensor connector, chassis intrusion connector, chassis fan control jumper and a CPU over voltage jumper.
The red button is for clearing the CMOS. Here we also see the new SATA Express connectors followed by four more SATA ports. Just above the SATA Express connector, we find the M.2 Socket 3 port. Just after the SATA connectors, we find the Dr. Power switch.
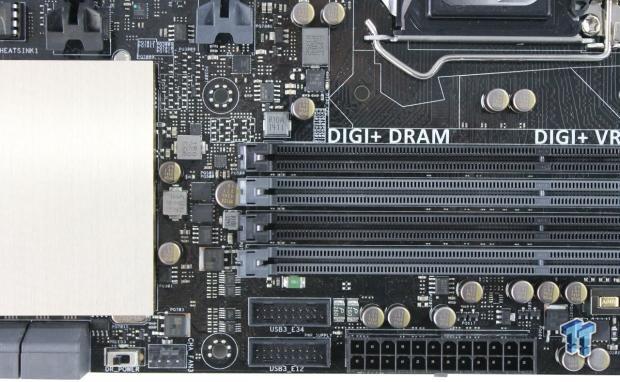
On the bottom of the board, we can see the two USB 3.0 front panel headers and the main 24 pin power connector.
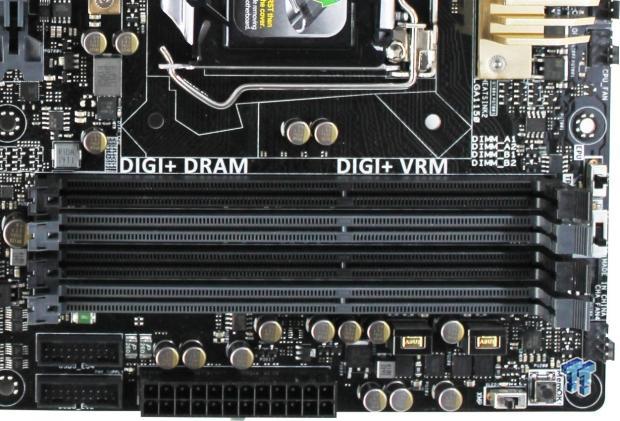
Now looking at the bottom right side of the motherboard, we see the EZ XMP switch and MemOK button.
Following up the right side of the board, we find the TPU switch, which allows you to automatically adjust the CPU ratio and clock speed for optimal system performance. Above that is the EPU switch, which will automatically detect the current PC load and moderate the power consumption.

Here we get a better look at the SATA connections. On the left, we see the two SATA Express ports, and on the right are the four SATA ports.

Looking at the back I/O, left side is Optical S/SPDIF output, HDMI port and DisplayPort outputs. Next is two USB 2.0 ports and an eSATA port, and the next stack is Q-Code logger button and the USB BIOS Flashback button. There are also two USB 3.0 ports, Mini DisplayPort, and the next two stacks are the same with Intel LAN ports with two USB 3.0 ports below. The last stack is the audio outputs.
BIOS & Software Details
BIOS
With the Z97-WS we find a new and improved UEFI BIOS that ASUS has developed. We find that is much simpler to use and offers many new features.
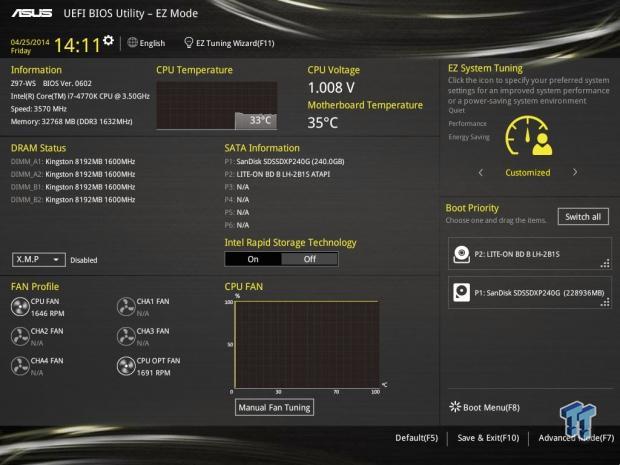
This is the main EZ Mode BIOS screen, which shows basic system information and options you can change without going deeper into the BIOS. It really offers just about anything that you would really need to adjust on this screen. To change the boot order, simply drag the device you want to boot first to the top spot. One of the things I changed first was CPU Fan speed and I simply dragged the line in the bar graph to 100%, as I wanted the fans running at full speed the whole time I was testing.
We also see EZ Tuning here, which we will go into in just a bit in the Overclocking section.
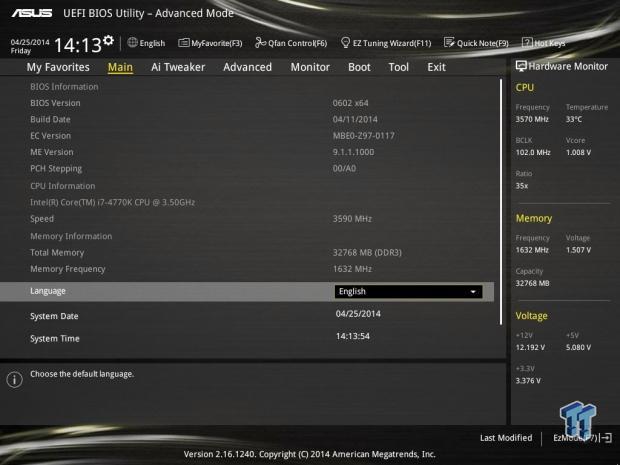
Clicking the Advanced Mode button at the bottom right brings you to this screen. Notice on the right side we can see hardware monitor read outs.
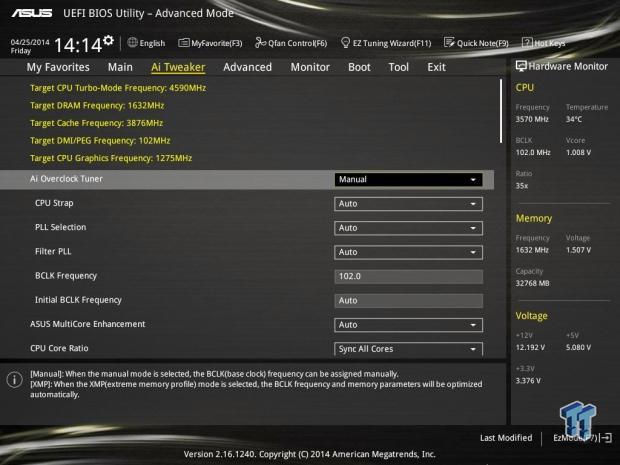
This is the main screen for the AI Tweaker.
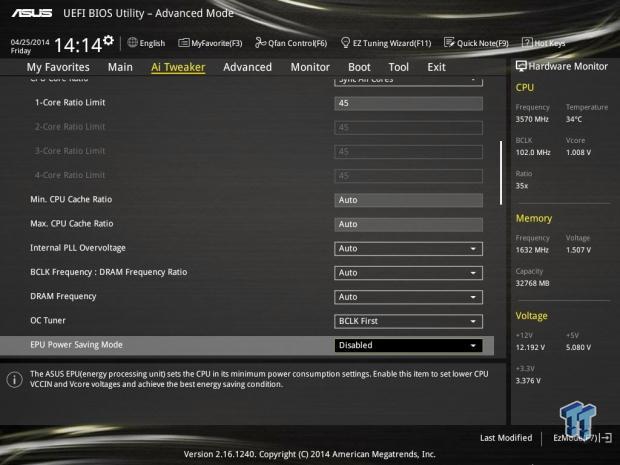
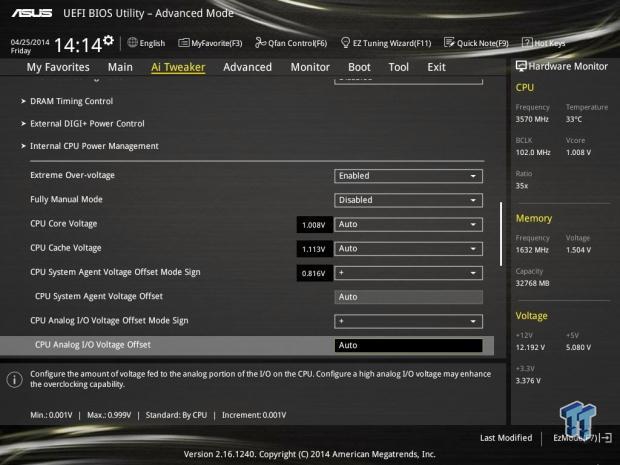
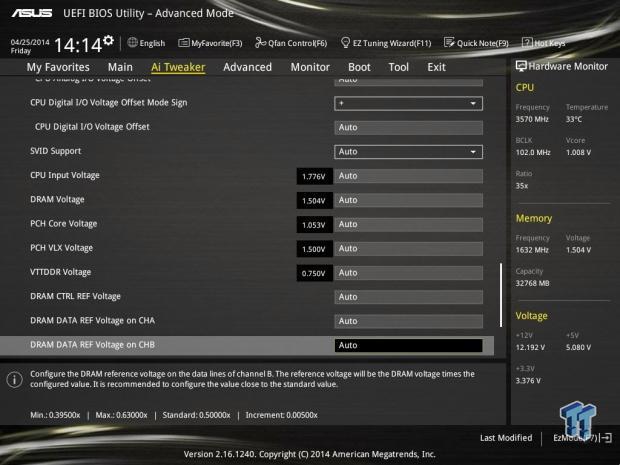
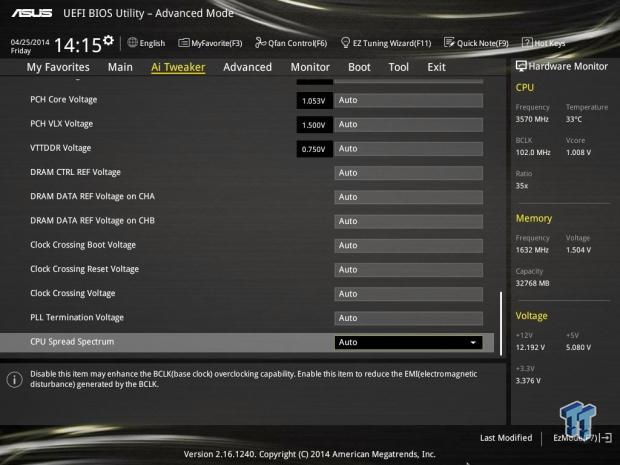
Now we see in the next four screens, additional options for the AI Tweaker tab.
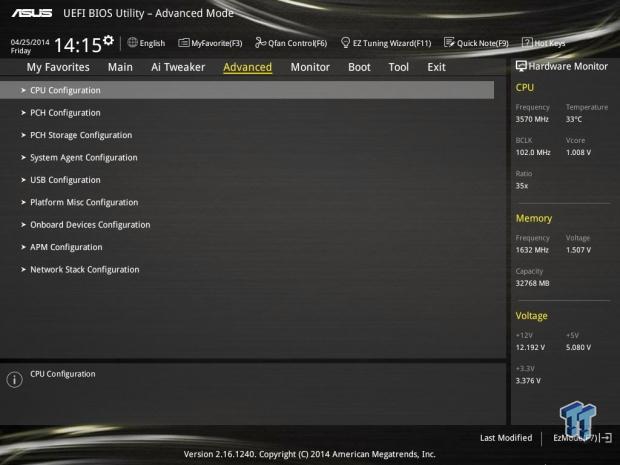
Now we are looking at the Advanced tab and in the next two screens.
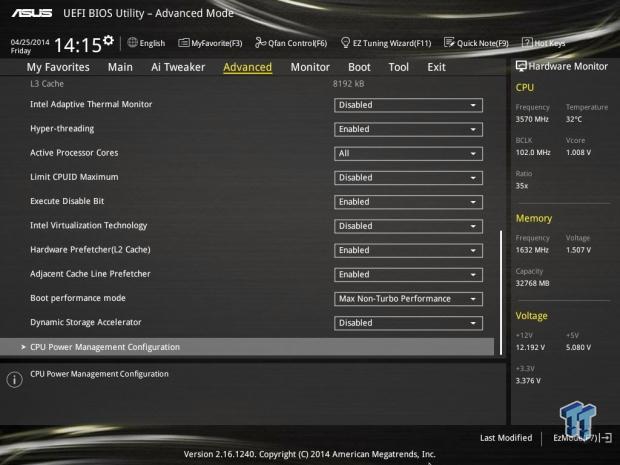
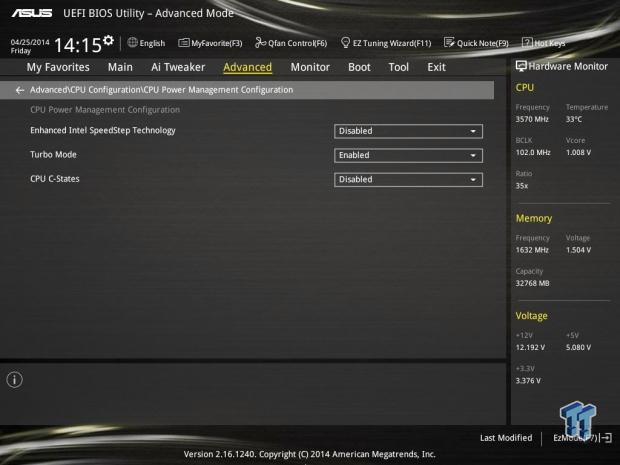
That sums up the new UEFI BIOS screens and as you can see they offer just about anything you might want to adjust and then some.
Software
The supplied driver disk has the basic drivers that you need to get this board up and running.
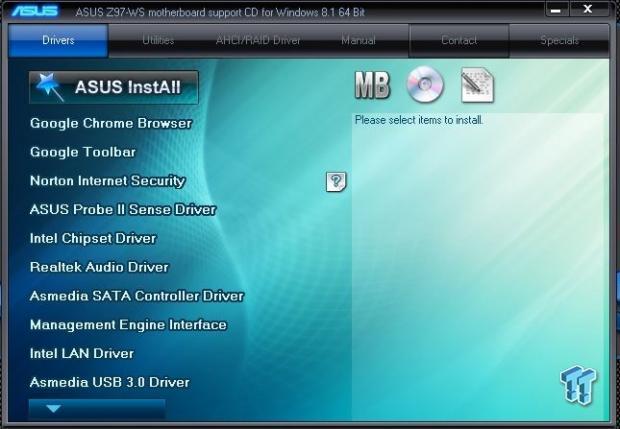
Inserting the driver disk, we come to the first screen, which shows the options available for this disk. Clicking on each of these sections listed will start to install the selected drivers.
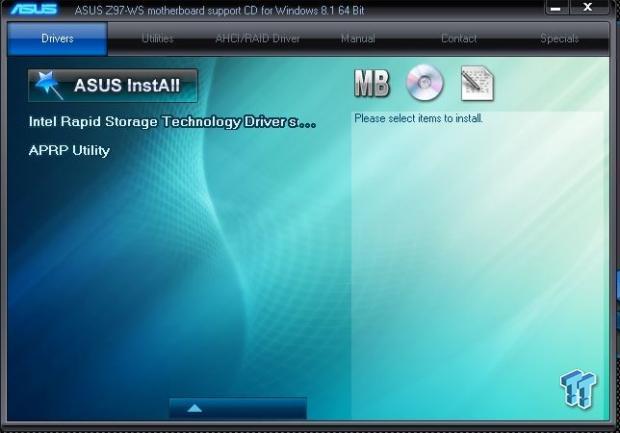
Here are the last two drivers in the list.
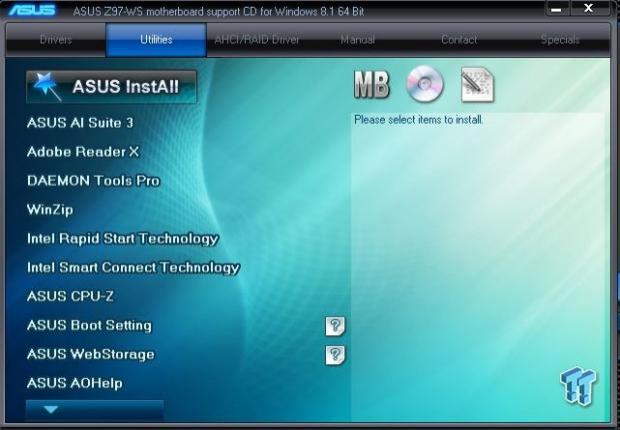
Here is the list of utilities that you can install.
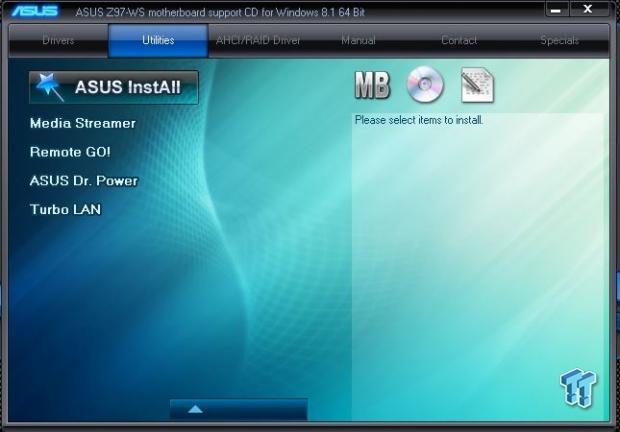
These are the last four utilities.
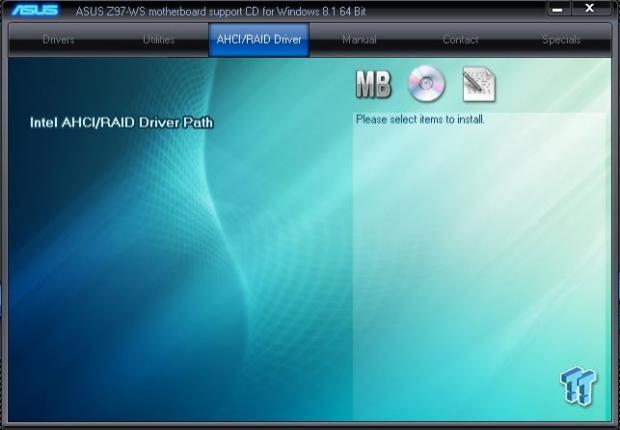
If you need RAID drivers, you can find them here.
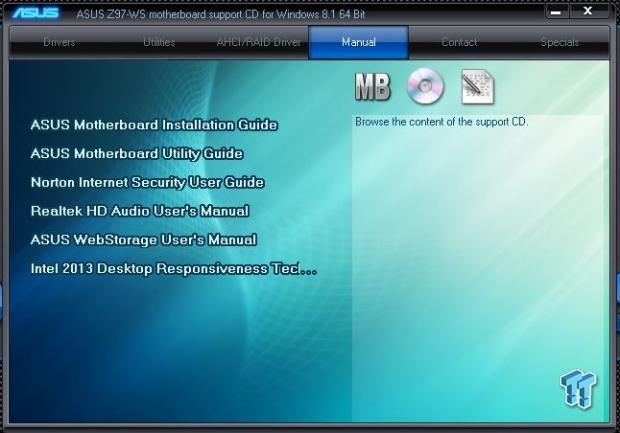
Here are manuals in case you need them.
Should you need to contact ASUS you can find that information here. The last tab has specials for software.
Overclocking
We jumped into the EZ Tuning Wizard right away to see what this could do. With the latest Intel CPU's, overclocking is simple unless you want to fine-tune a system or go to extreme cooling methods.
The ASUS Z97-WS comes with two ways to do this that are both simple to do and provide a quick way to boost performance of your system. The first way to handle this is with the EZ Tuning Wizard. Simply boot into the BIOS and select EZ-Tuning Wizard.
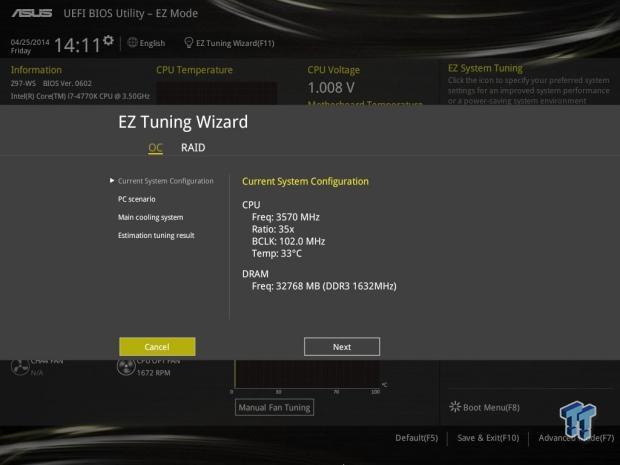
The first screen will tell you what your system is running at now. We are using an Intel 4770K CPU and we see stock settings shown here. Now click next.
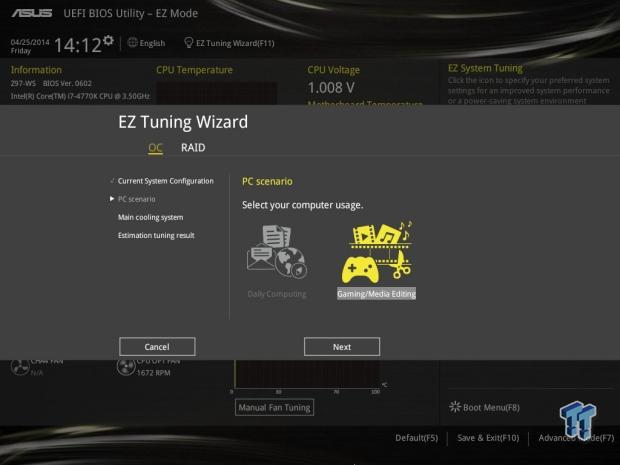
Here you have two choices, Daily Computing or Gaming/Media Encoding. We selected Gaming/Media Encoding. Click next to move to the next screen.
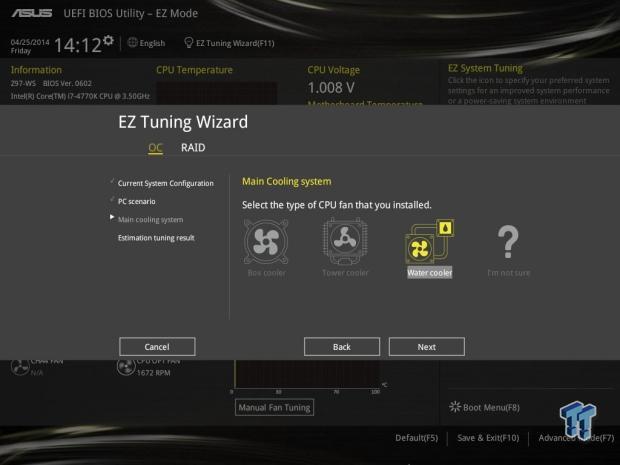
Here we select what type of cooling we are using with the system. We are using a tower air cooler, but we wanted to see what we could come up with for an overclock so we selected water cooler. Click next and it will set the overclock and reboot the system.
This came up with a 4.589GHz overclock for our system. We ran our tests with this and everything worked just fine. We did see temperatures get to 80c on some tests, but the system did not thermal throttle, so all is ok.
We would suggest getting an AIO water cooler or even a water cooling kit to get better temperatures. Note that some CPU's might not be able to run at this setting, so setting the cooler type to tower might give you better results.
We just pushed it to the max and let it rip. After you get the system up and running, install the ASUS AI Suite III and that will bring us to the second way of overclocking the system.
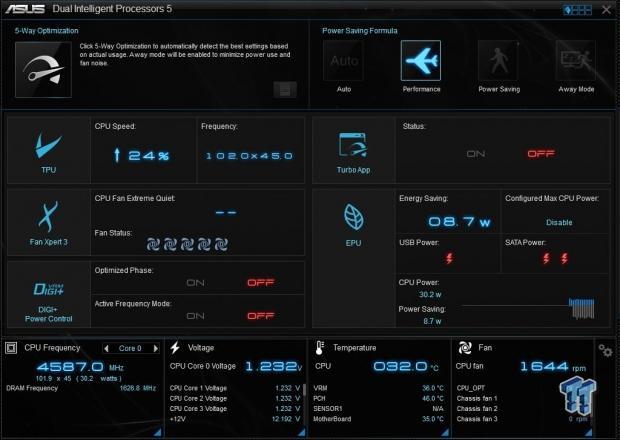
This is the main screen of the AI Suite III.
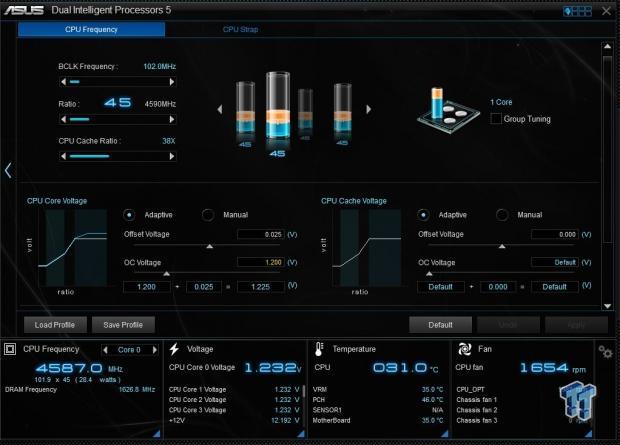
Here we can see various system settings that are currently used. Note that the settings shown are after we used the BIOS EZ Tune Wizard.
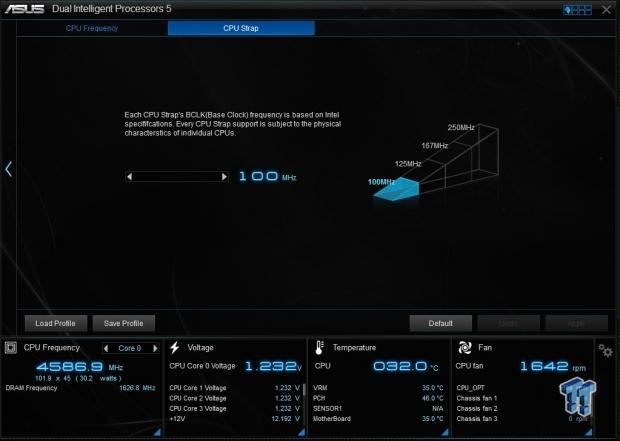
This shows the CPU strap.
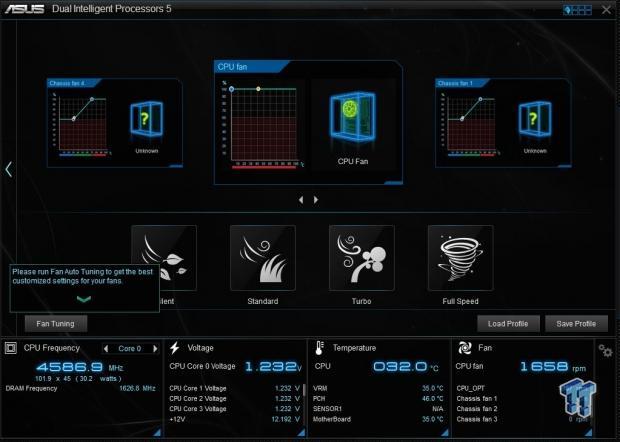
Here we see the possible settings for fan controls.
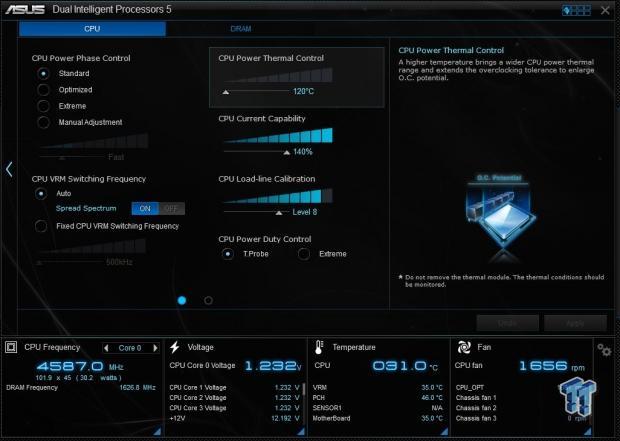
Now we are looking at system voltage settings.
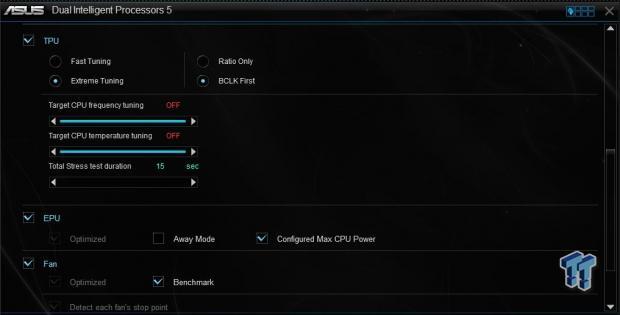
To use AI Suite III for overclocking go back to the main screen and select 5-Way optimization and that will bring you to this screen.
On this screen, you can set TPU settings to how you want to overclock the system. You have several options to select from here. We decided to select extreme tuning and use BCLK first. You can also set the time to run stress tests during this. We just went with the quick method to see what settings it would come up with for a final overclock.
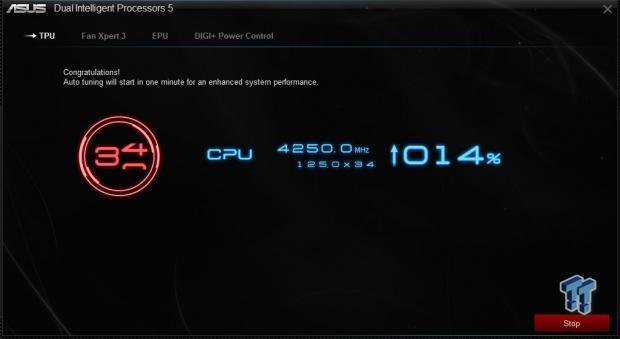
After you click the accept button, you will see several different screens that show what part of the system settings it is working on. The system will reboot several times during this process.
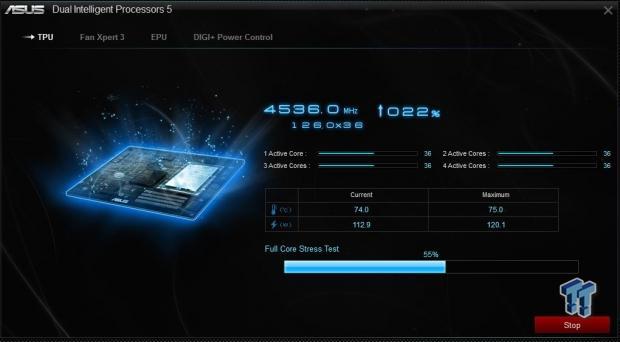
Here is another screen that you will see during the tuning process.
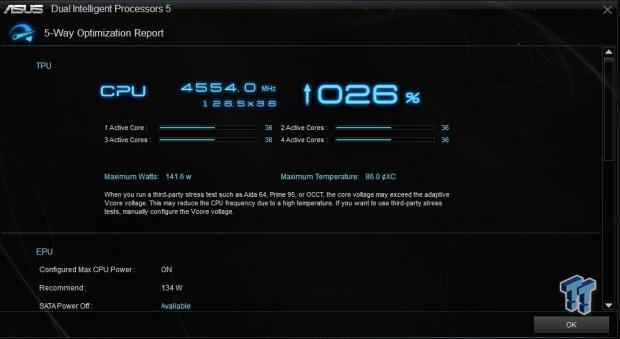
This is the final overclock that it came up with which worked just fine. Using different settings in the TPU screen will yield different results and you can even set a max temperature that you would allow the system to reach for your final overclock.
This is a useful program for fine-tuning how you want the overclock to work and you can set the run for a longer time if you need to. We decided to use the EZ Tuning Wizard in the BIOS to run all our tests. EZ Tune came up with this final overclock.
Test System Setup
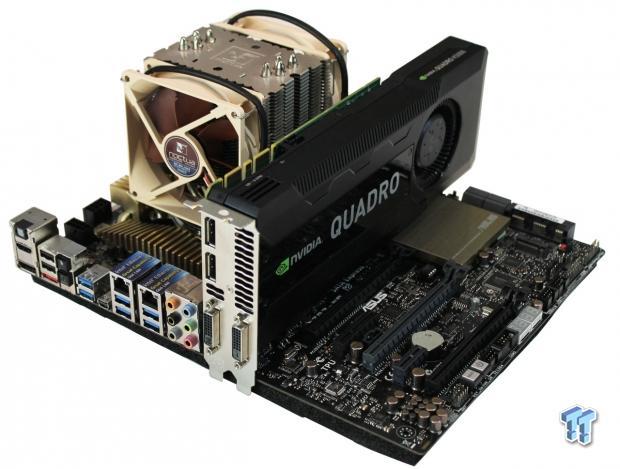
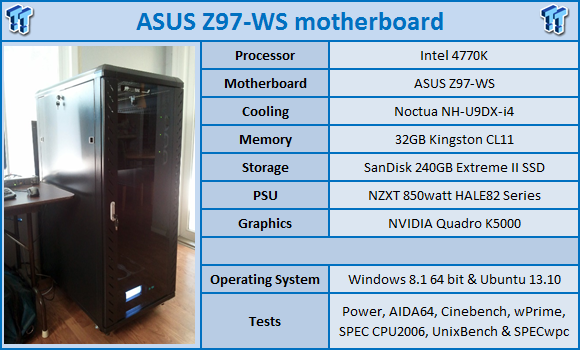
We would like to thank ASUS, NZXT, SanDisk, Noctua, NVIDIA, SPEC and Kingston for their support in providing parts for our test system.
In our tests, we used the same memory and video card that we have used in other tests. The NVIDIA Quadro K5000 is a strong video card for workstations. The Kingston memory kit we used is not an enthusiast type kit, but they perform very well on our workstation tests.
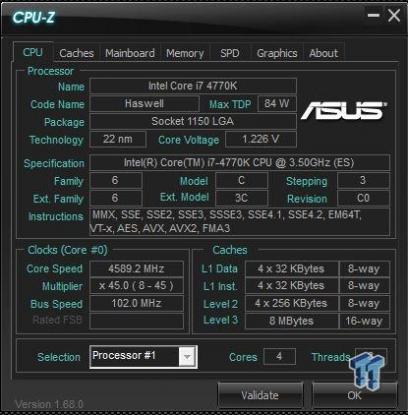
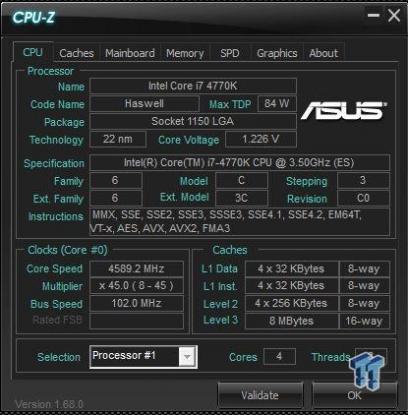
This is the CPUz screen showing the overclock and stats for the Intel 4770K that we will use in our tests.
We will also compare results from the ASUS P9D-WS motherboard with an Intel 4771, locked CPU as they are very close in performance at stock speeds. The results will show the benefits of using unlocked CPU vs. a locked CPU.
We also installed Windows 8.1 for our tests. More and more we are seeing people move to the new windows OS so we will be using this from now on.
Benchmarks - CPU, Memory and SPECwpc Tests
Cinebench 11.5
CINEBENCH is a real-world cross platform test suite that evaluates your computer's performance capabilities. The test scenario uses all of your system's processing power to render a photorealistic 3D scene. This scene makes use of various different algorithms to stress all available processor cores. You can also run this test with a single core mode to give a single core rating.
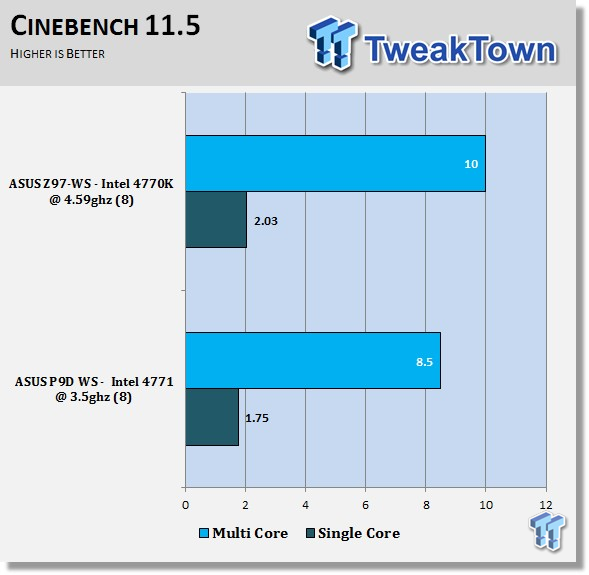
Here we get our first look at the difference between systems. The Z97-WS with an overclocked Intel 4770K shows a big performance increase. We will see this trend in all of our benchmarks results.
Cinebench R15
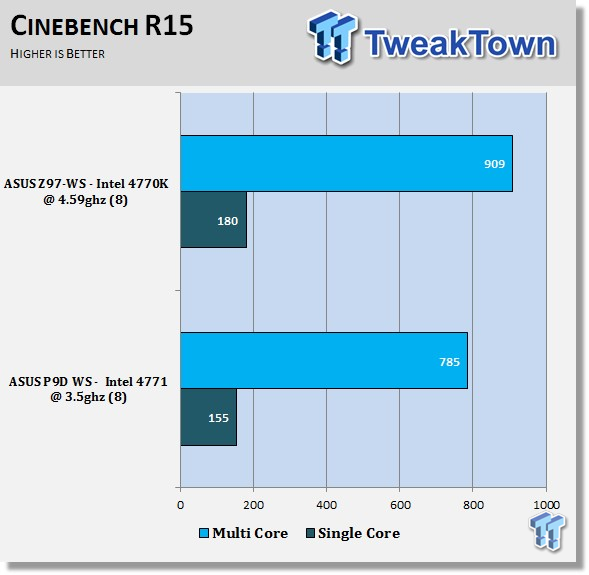
Just like in the Cinebench 11.5 results, we see a much better performance increase.
wPrime
wPrime is a leading multi-threaded benchmark for x86 processors that tests your processor performance. This is a great test to use to rate the system speed; it also works as a stress test to see how well the system cooling is performing.
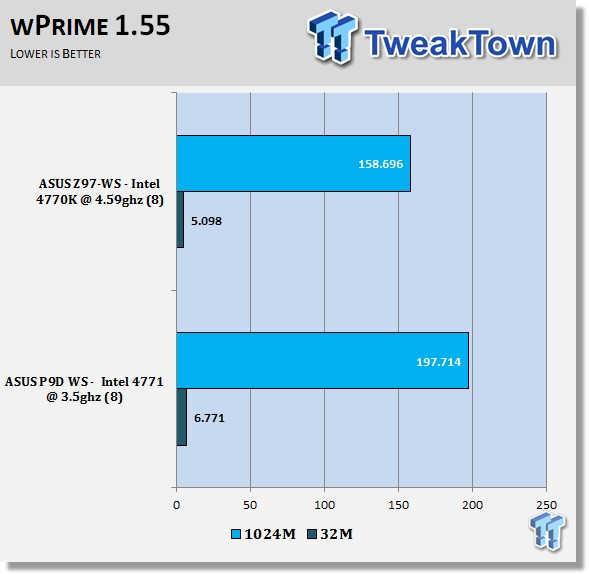
The overclocked 4770K really helps in wPrime whit a big speed increase.
AIDA64
AIDA64 memory bandwidth benchmarks (Memory Read, Memory Write, and Memory Copy) measure the maximum achievable memory data transfer bandwidth.
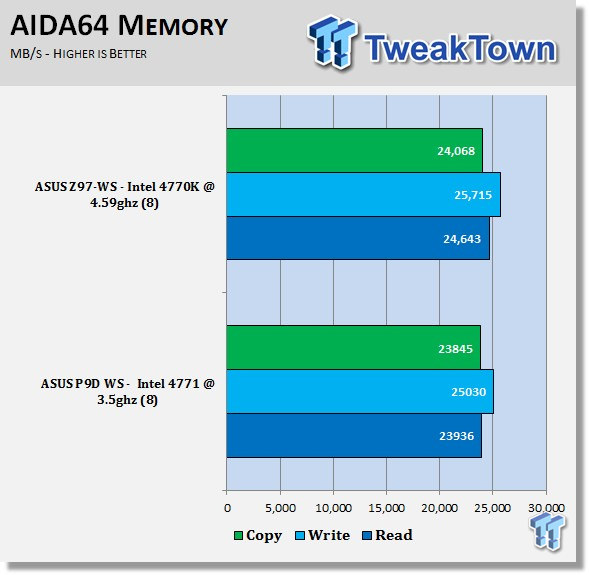
AIDA64 memory tests show the Kingston CL11 1600MHz RAM kits perform very well and we see a small increase on the Z97-WS board.
LinX
LinX 0.6.4 is a CPU benchmark that measures floating-point operations per second and used to compare CPU performance; it is also a very good stress test to run.
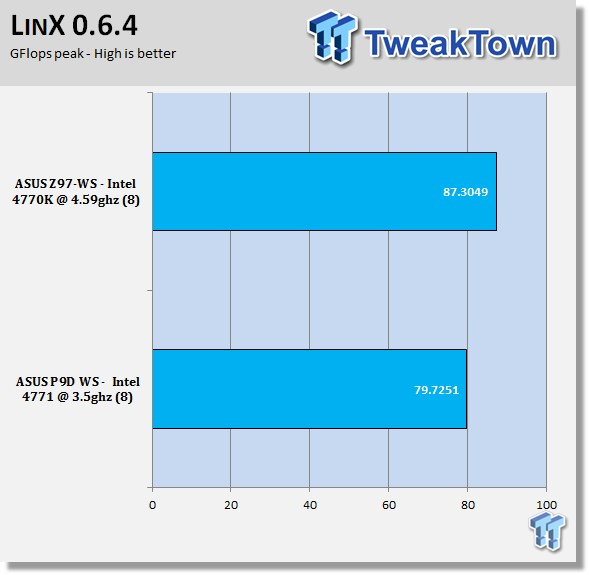
Memory bandwidth increased on the Z79-WS board with help from the overclock.
SPECwpc_v1.0.4
SPECwpc_v1.0.4 is a workstation benchmark that measures key aspects of workstation applications.
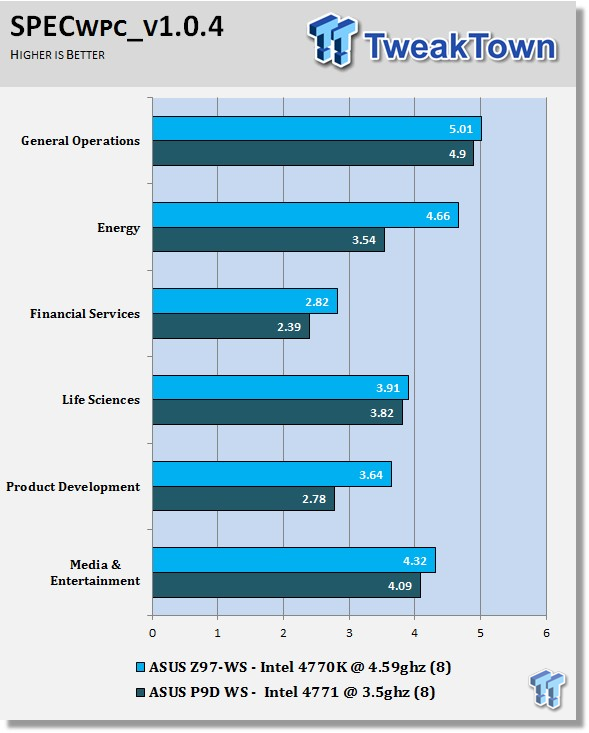
This is a heavy-duty test and even small gains in the results equal a lot of extra performance. In some areas on this test, we see large increases in the results, which shows how well an overclock helps with performance.
Power Consumption & Final Thoughts
Power Consumption
We used the WattsUp? Pro meter in these tests. This allowed us to measure power use directly from the wall. This meter also uses a USB cable to connect to a computer and Logger Pro software to graph the readings while we run our tests.
To test total system power use, we used AIDA64 Stability test to load the CPU, and then recorded the results.
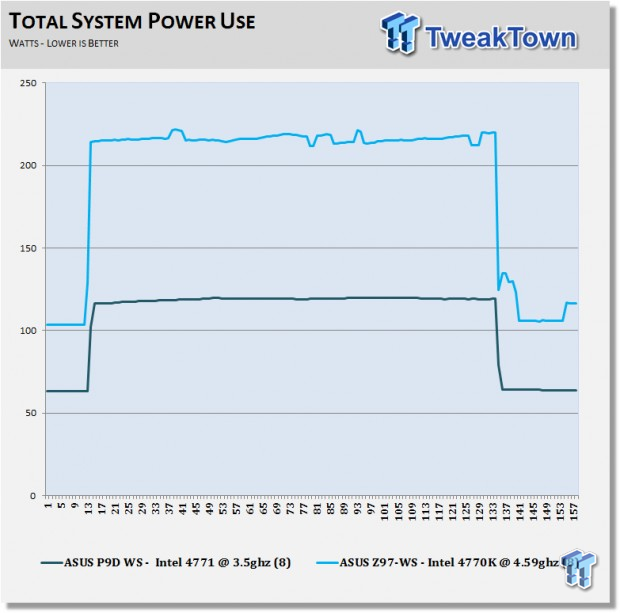
Now we get down to the draw backs of overclocking. Both systems tested are equal except for the Z97-WS, which was overclocked, and the graph shows the extra power needed to do so. Even at 225watts max, the system is still not pulling a super large amount of watts.
Final Thoughts
We did not have enough time to run our full set of tests, but by looking at the results for the tests we did run, we believe that the increase in performance will continue with those tests.
We were very impressed with how the new BIOS really brings it all together when setting a system up. It is much simpler to use and you really have no need to go into the advanced settings anymore.
The ability to simply click EZ Tune in the BIOS, and a few more clicks and you have a fully overclocked system with almost no effort that gives you a great performance increases for next to no effort. If you thought that the latest generation of Intel CPU's were easy to overclock, ASUS has just made it that much simpler. It can boost the performance of this system up into the high-end range with little to no effort.
The package itself has a huge number of features that allow you get a lot out of this system depending on how you want to use it.
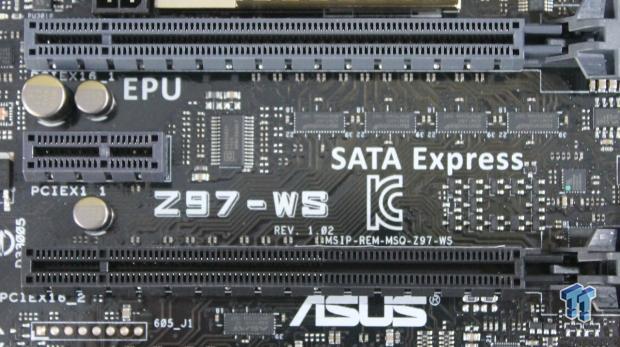
About the only thing we can really nitpick about is we wish it had more SATA ports. Some of us like to use 3-4 hard drives on top of a SSD RAID and a DVD drive, so we have just enough for that, but not much room for expansion. All though when new SATA Express drives come out we could drop our RAID and gain two additional SATA ports, so it's still good.
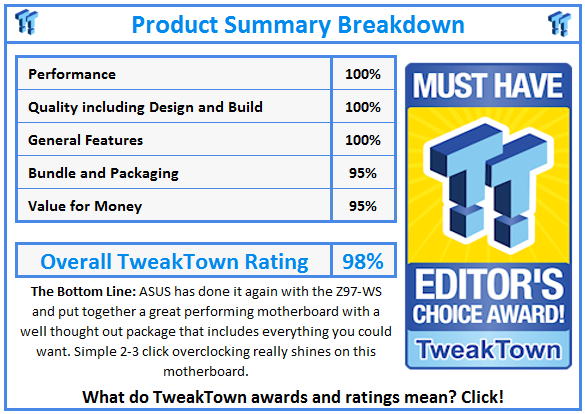
Overall, we think that the Z97-WS is an exceptional platform and ASUS has done a good job with feature load out and updates to the BIOS and ease of overclocking. We also did like the number of USB ports you can run on this motherboard, it seems we never have enough of these anymore. Whether you are a system builder or a DIY kind of person, you really cannot go wrong with this motherboard.
At this time, we do not know what the final cost will be for this motherboard (it should go on sale soon, but we don't have a final date just yet), so we will have to withhold judgment on value. When you compare the package quality of other ASUS motherboards, we have seen this one seems to have cut some corners, even though it is still adequate it does not compare to past motherboards. We hope that this will help to reduce some of the costs for this motherboard.

