


Introduction
All I have seen from Phanteks for a long time is its CPU cooler collection. Granted, copying a top tier cooler design and offering it in all the colors that make customers all warm and fuzzy inside was a stroke of genius, and filled a gap in the market that had been there for quite some time. Sort of going on the same logic, Phanteks is now taking on the chassis market, but this time with a design that is all their own.
As they went about designing this chassis, they have gotten to see what all of the latest and greatest cases from the last year or two have offered, what has been successful, and what were just fads or trends of the era. I see a lot of cases in this design actually, and again I have to say that Phanteks put their own spin on it and has come up with something that has a way to deal with many styles of full-tower cases, and turns them all up a notch to bring something to the market that is truly unique.
I can see bits of Corsair Obsidian designs, I can see NZXT influence, even bits that remind me of the Level 10, but as I said, all done in a unique way, and delivers something that could very well be a mainstream case killer for all of these companies. The level to which Phanteks took this full-tower will make all of the big selling case companies currently selling for enthusiast builds need to stand up and take a look at what Phanteks did, as they have certainly raised the bar a bit here in this design.
With all sorts of modularity to the design, and some super sleek external designs, the new Enthoo Primo from Phanteks is aiming to take on the 900D, Switch 810, the Level 10, and try to slaughter the dreams of all who currently own that chassis or are currently in process of doing an over the top water cooling setup.
This chassis is so slick in fact that I am for the first time in a very long time, pondering actually moving away from my TJ11 for this chassis. For those that don't typically follow my writing won't exactly get that, but by the time you are finished looking at everything that I have seen with the new chassis from Phanteks, you will not only be sold on the chassis and wanting to buy it, but I think you may even go as far as to harass Phanteks to speed up the availability of the Enthoo Primo. It is just that good.
Specifications, Availability and Pricing
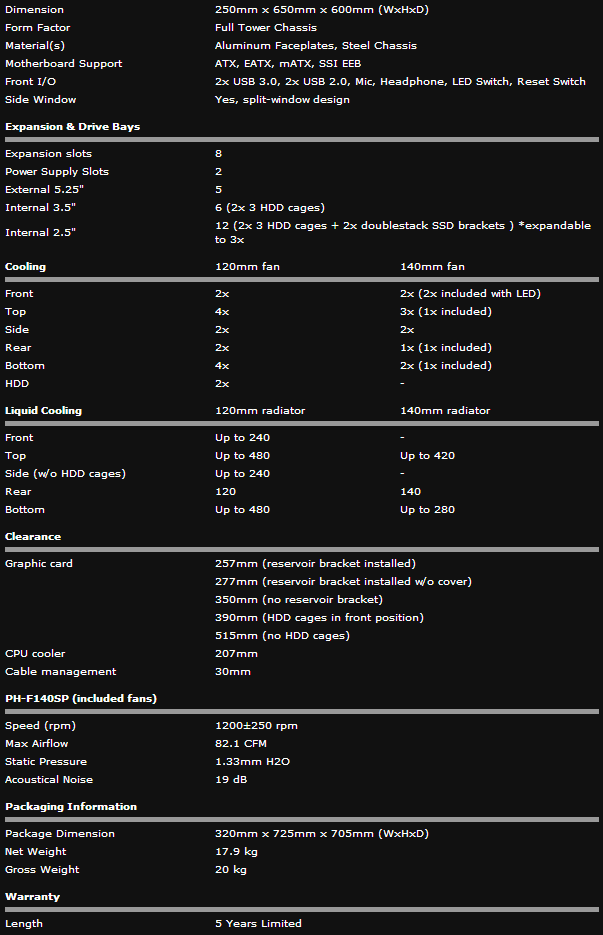
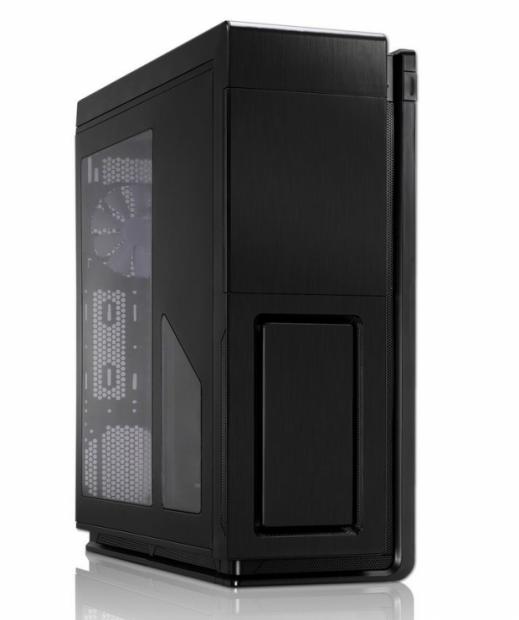
The Enthoo Primo is immense for a full-tower chassis. It stands 650mm tall, it is 600mm deep, and is a portly 250mm wide, and weighs in at a hefty 20kg. For those that never converted to the metric system, that is just over 40 pounds in weight, it's almost a full ten inches wide, is almost 24 inches deep, leaving this chassis standing at 25.5 inches of steel, aluminum plating and plastic awesomeness. The outside of this chassis has so much going on that I will just wait for the images before I even attempt to destroy your mental images with my interpretation. I won't do it the justice it deserves.
Internally there is so much going on; I hope that I can cover it all. The front of the chassis offers five 5.25" drives behind a door that you can use for ODDs or reservoirs. Below that there are six 3.5" bays that are removable from behind the motherboard tray. On top of that this chassis will stack up to 12 2.5" drives in the racks and in the various hidden spots behind the motherboard tray. The motherboard tray will house Micro-ATX, ATX, EATX and SSI EEB motherboards, and again has so much to offer around it that I think the images will do a much better job than I can of showing what is available.
Our Latest Super-Tower Cases Review Coverage
Cooling is handled one of two ways. You can air cool this chassis and load the chassis full of more Phanteks fans. There are five 140mm fan included of the possible ten locations for them. You can also use 120mm fans in this chassis, and all told there, you can house up to 16 of those. The other route to go is with water cooling, and is where this chassis really shines. The front of the chassis will house a dual 120mm radiator, while the top offers room for up to a quad 120mm radiator, or a triple 140mm radiator. There is also an optional rack to go in place of the HDD racks, and this will allow for another dual 120mm radiator to go on the side.
The rear of the chassis will hold either a single 120mm radiator, or a single 140mm one. That leaves the floor of the chassis which follows the top and offers room for a quad in 120mm and a triple in 140mm there. Not only that, but there is even a reservoir mounting plate and support bar that runs to the right side of the motherboard, and in the back, on the floor, there is even a pump bracket included in the design. Oh, and I almost forgot, for those enthusiast trying to run the most you can pack unto a tower chassis, there is also room for dual PSUs to be able to provide sufficient power for all your needs.
What is the best part about the Enthoo Primo? As if all of what we just discussed wasn't enough? Well, this chassis is not yet available as I write this review, but it has been publically noted that Phanteks has already set the MSRP for this chassis. So not only do you get one of the slickest designed cases currently on the planet, and it is loaded inside and out with eye catching details that make you scan this chassis three or four times before you can take it all in, that MSRP is set at an amazing $249.
Now you can see why I said the cases like the 900D, Switch 810, even my TJ11 are now on the chopping block, and I can see all of those potential customers gravitating to this instead, especially for what you get at this price.
Packaging
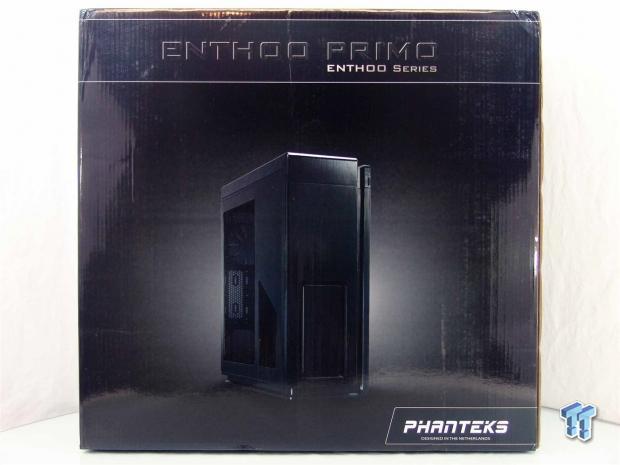
With a high-end product, we would expect some sleek looking packaging, and that is exactly what you get. The top of this panel offers the Enthoo Series and Primo case name at the top. In the middle of all that high gloss cardboard is a front and left side image of the chassis with the Phanteks name at the bottom with the "designed in the Netherlands" line below that.
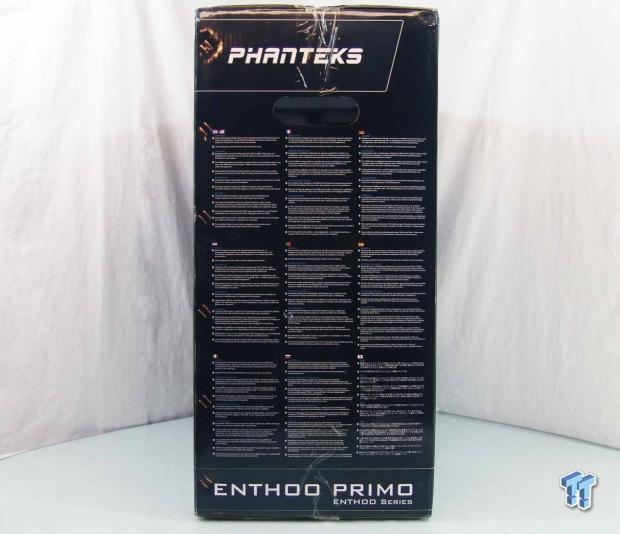
Phanteks places their name at the top of this panel and delivers 12 features of the Primo in eight languages to cover all of their markets.
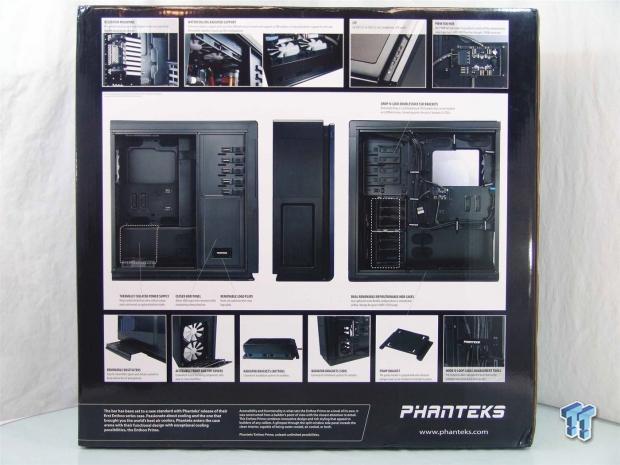
The back has a lot of things to look at. There are five images at the top ranging things from the reservoir mounting to the fan hub. In the middle there are three images of the chassis with five more features being addressed. At the bottom there are five more images covering things like dust filtration and Velcro cable ties.
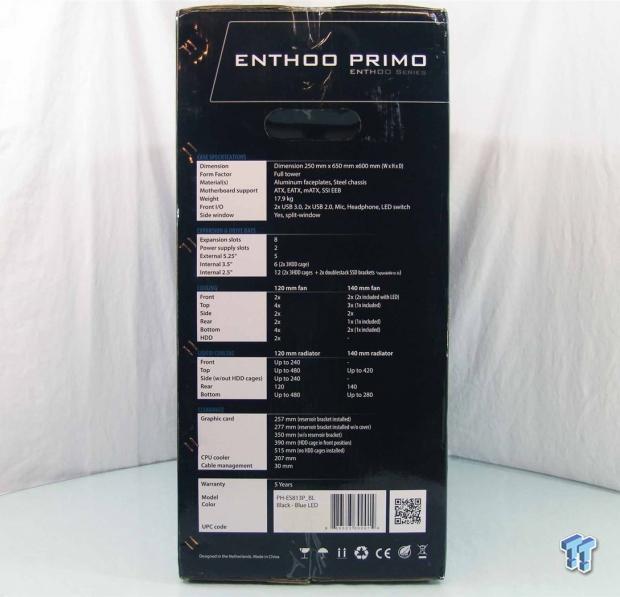
The last panel starts off with the chassis name this time, and delivers the full on specifications chart all the way down to the five year warranty of this chassis. That is right, I said five years.
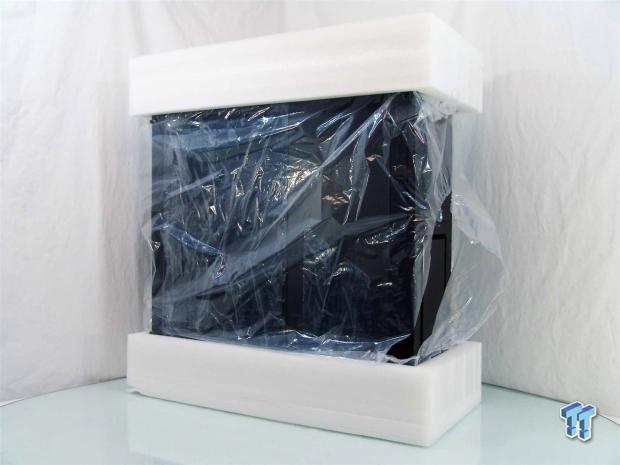
With a larger and heavier chassis, usually Styrofoam breaks just thinking about supporting a chassis like this. I am pleased to see that even though the plastic liner is ripped, the use of thick high density foam allowed this monster of a chassis to arrive in perfect condition.
Phanteks Enthoo Primo Ultimate Chassis
The front of the chassis is made of plastic, but then gets a plate of brushed aluminum applied to the majority of this surface. There is a hidden door at the top, and you can see the ring to allow ventilation for the front fans. You will also see that the right hand of the chassis has what can only be described as a Thermaltake Level 10-like support system.
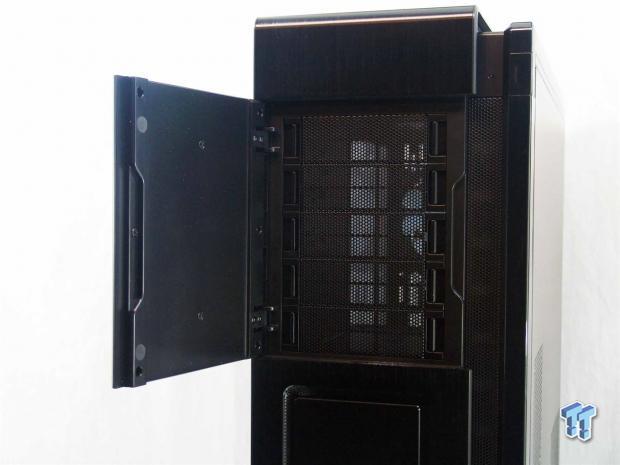
Behind the magnetically closed door, there are five 5.25" removable bay covers. These are easily removed from outside the chassis, making the removal of the bezel for fan removal or radiator placement easy.
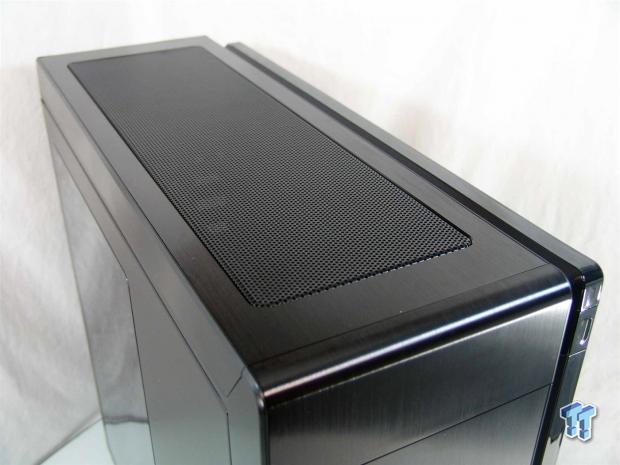
The top of the chassis continues with the brushed aluminum plate mounted on a plastic part, but the bulk of it is then cut away to allow for the removable mesh insert.
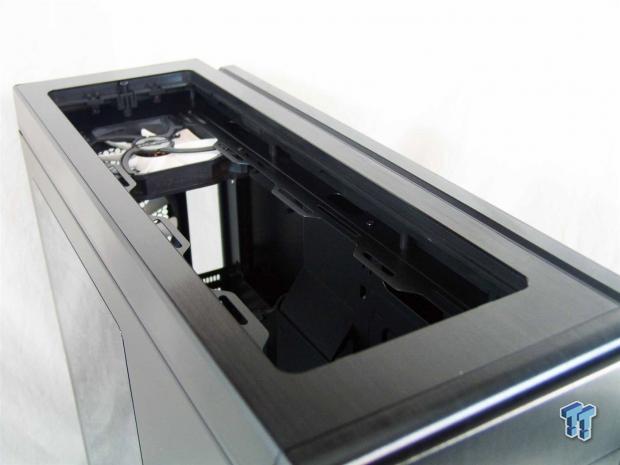
Pushing down on the mesh cover at the rear of the chassis will release a latch allowing you to remove that cover. Under it you will find plenty of room to hang the fans below, and add a regular radiator and more fans on top, or just go with a fat radiator and one set of fans.
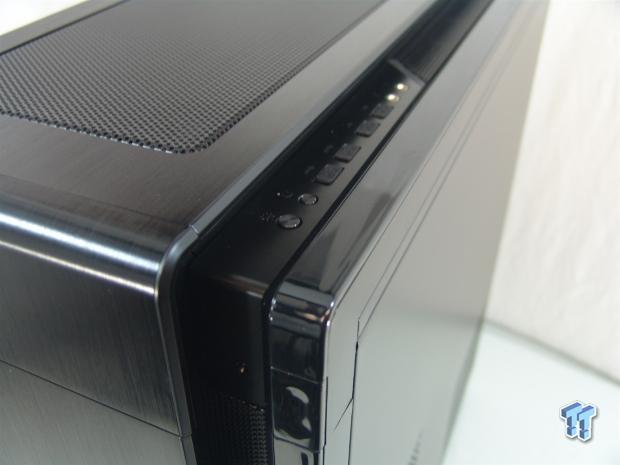
The front I/O is on the front with the power button and HDD activity lighting, while the bulk is at the top. There you have a light on and off switch, a reset button, two USB 2.0 and two USB 3.0 ports with dust inserts and the HD Audio jacks at the back.
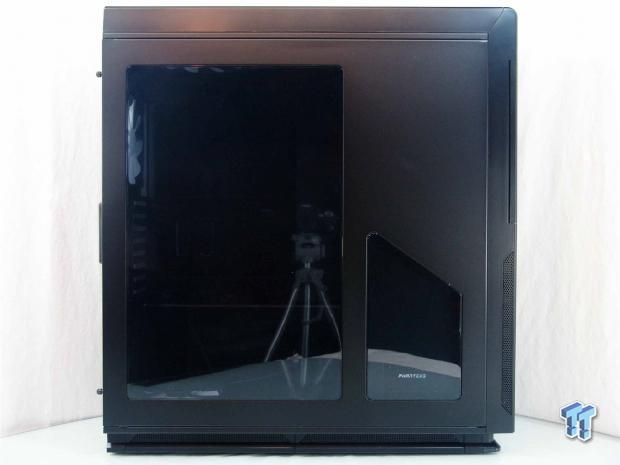
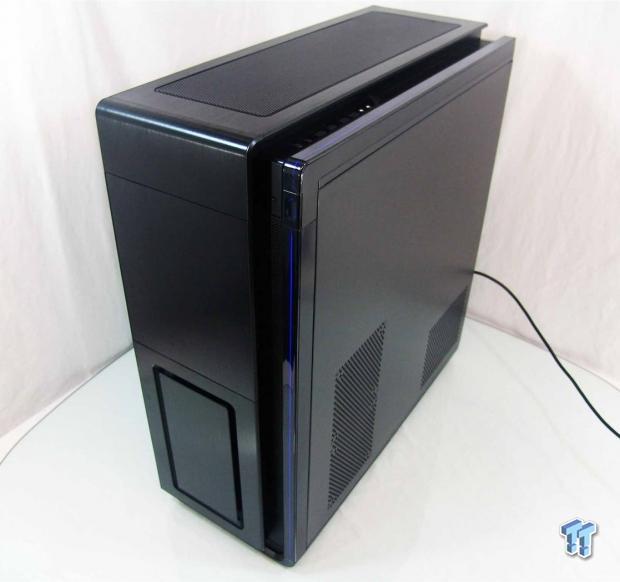
The left of the chassis offers a two window layout. The larger window will give you a full view of the components and the smaller window gives you a look at the Phanteks plate, and whatever you can stick on top of it later.
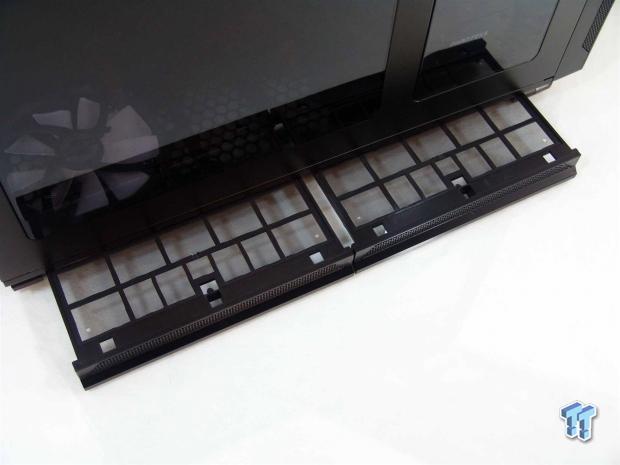
Below the door, if you push in on two trim pieces, you find that they hold the pair of dust filters for the bottom of the chassis. Having them removable from the side is also much easier than out the back, and is showing the sort of thinking that went into this design.
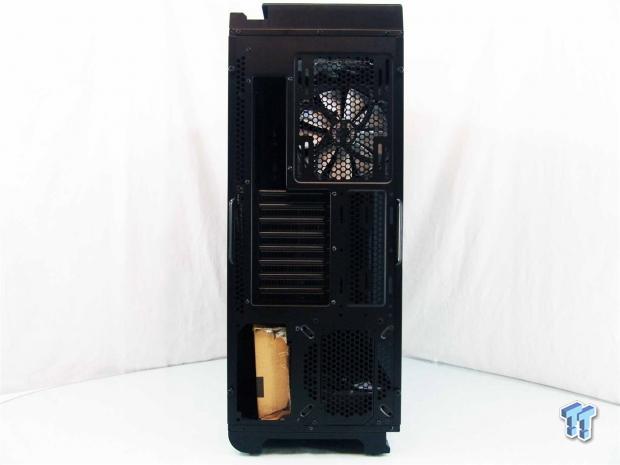
Out back, there is room for a 120mm or 140mm fan next to the rear I/O, followed by seven expansion slots and more ventilation next to them. The bottom of the chassis has the PSU mounted on its side to the left, but the right is an option to either fill it with a fan, or remove part of the plate and add the second PSU.
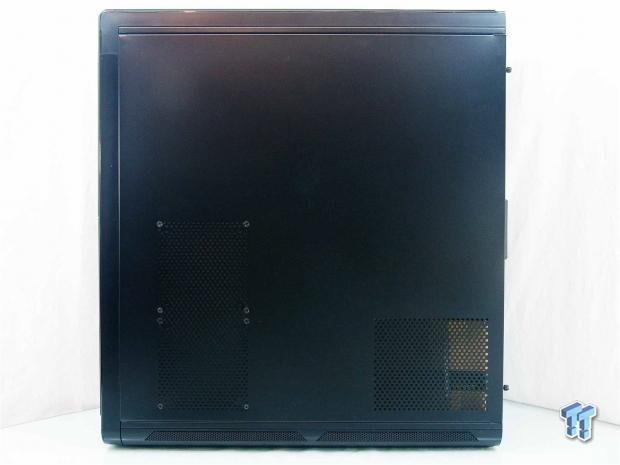
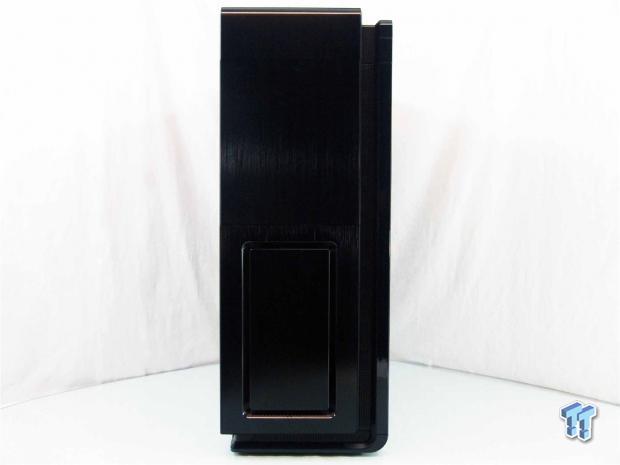
The right side panel looks much larger since it isn't taken up with large windows to offset the size. Here, however, there is ventilation for a couple of 120mm fans at the front of the chassis, and the area at the back edge is to allow a PSU to pull air through it.
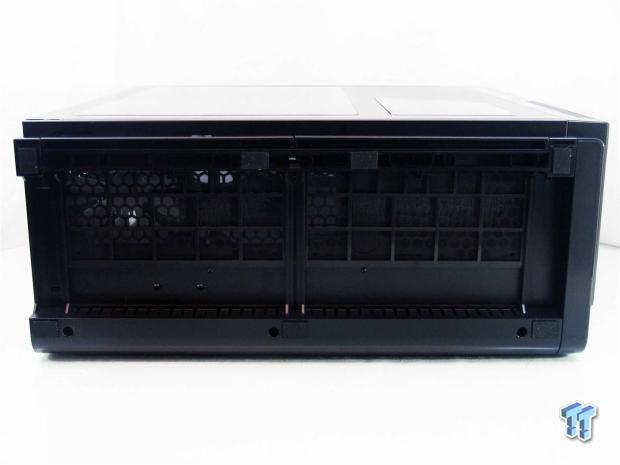
The bottom of the chassis uses a thick plastic frame that takes the stress of the chassis and keeps it stable on a desktop. To keep things from sliding around, Phanteks used seven rubber pads for that need, and the dust filters that I slid out earlier are now covering the entire length of the floor.
Inside the Enthoo Primo
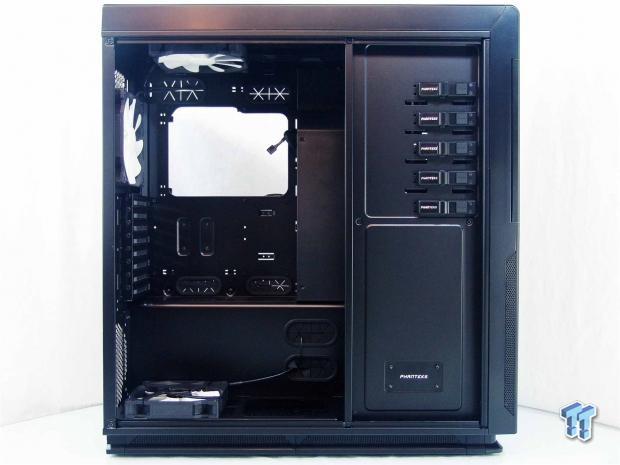
With one glance inside the chassis, it is obvious that it is as unique as the outside is. Take a moment to absorb this compartmentalized design as I take you through and point out all of the offerings and show you just how well thought out this design really is.
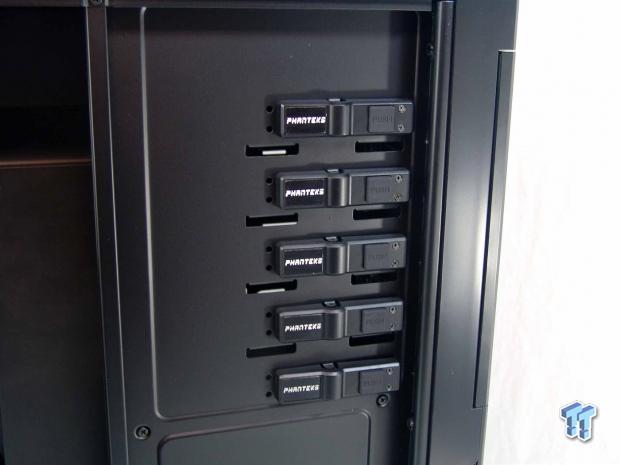
Near the top, but set down far enough to make sure a radiator and fans will fit above them, you have the five tool-free clips that will hold in the 5.25" devices. There is also the option to install heavier things like reservoir pump combination units in with screws for added security.
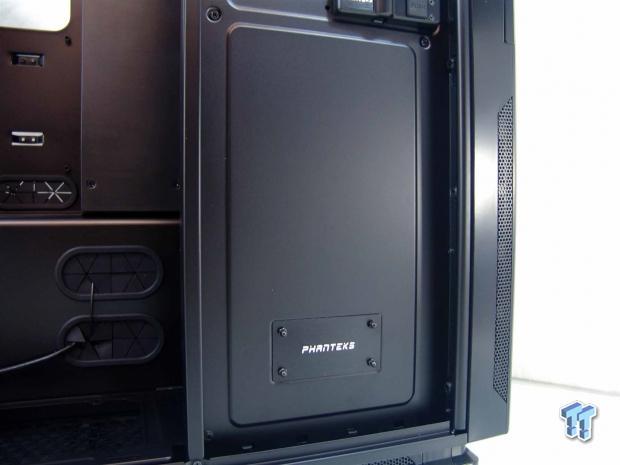
Where I would typically expect to be seeing a stack of hard drive bays, all you see from this side of the chassis is the large steel panel with a Phanteks plate that sort of reminds me of the InWin plates found in the D-Frame.
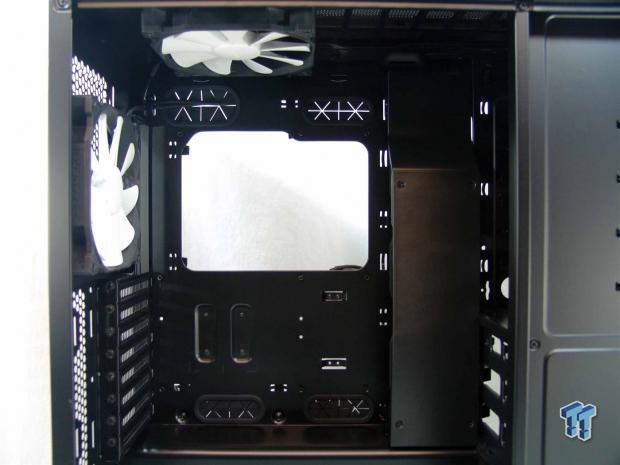
The motherboard tray has plenty of room for anything up to an SSI EEB, offers plenty of wiring options, and additional places to tie the PSU wiring to. On the right there is a reservoir installation piece that covers the motherboard wiring as well. This will conflict with longer air cooled video cards, and is removable to work on, or to leave room for the expansion cards - the choice is yours.
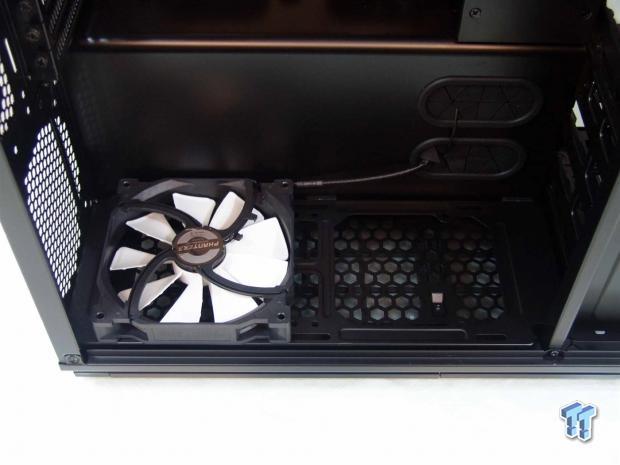
Below the motherboard tray there is a shelf to block the view of the PSU that goes in behind it, a modders dream in my opinion, as everyone covers them anyways. There are two holes to pass wires through and room on the floor for this 140mm fan and two other friends, or if you remove the hard drive section, you can set a quad radiator in here as well.
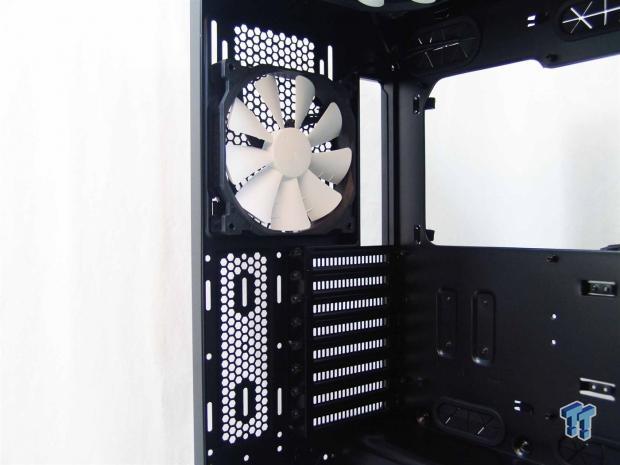
In the back of the chassis you can opt for this 140mm fan or use a 120mm radiator and fan if you want to. Next to the seven expansion slots that use thumbscrews for mounting, that vented area is another place to put a shorter reservoir.
Inside the Enthoo Primo Continued
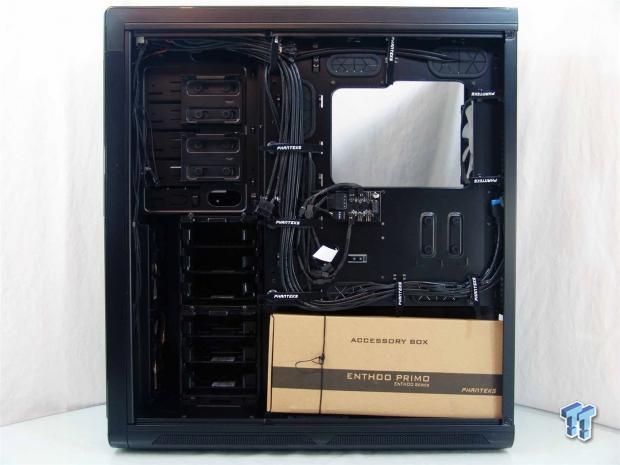
Spinning the Primo around, you can see that all of the chassis wiring has been tended to and tied up to the chassis via the Velcro tie straps found all around the back of the motherboard. Since they are pre-routed, of course they all reach where they need to be. In the middle of all that wiring is a six port fan hub, and a place to store a 2.5" drive if you want to. The hardware and paperwork, along with some goodies all come in the box tied into the bottom.
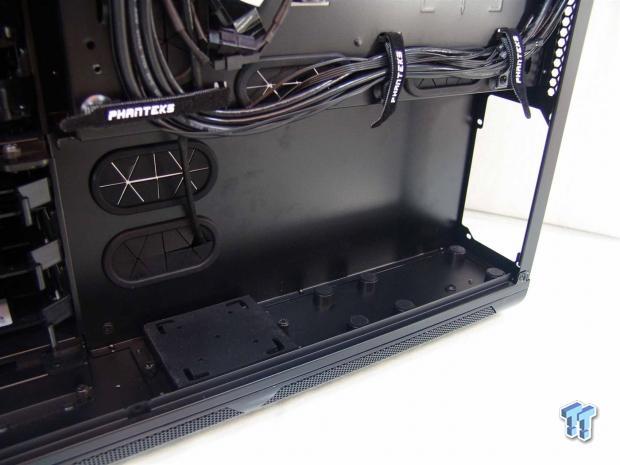
Once the hardware is removed, you can see there are six stands to support even the longest of power supplies. To the left, on the floor, you will find the pump mounting plate, and there is even a hole with a grommet just above it to allow you an easy place to run the tubing from the top of the pump.
On the other side of the ODD bays, Phanteks offers two trays that will support a 2.5" drive. Both of these can be used here, or you can shift one of these to the middle of the motherboard tray.

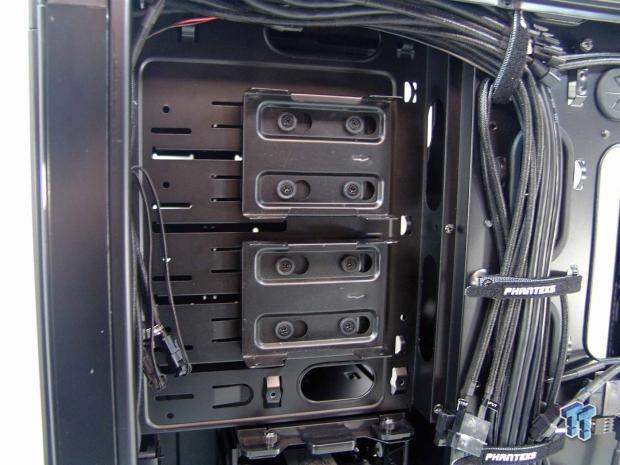
The six 3.5" bays are set into two racks, and both are completely removable. If you would like, there is a plate that will install here to allow a dual radiator or even just a pair of 120mm fans to be placed here instead.
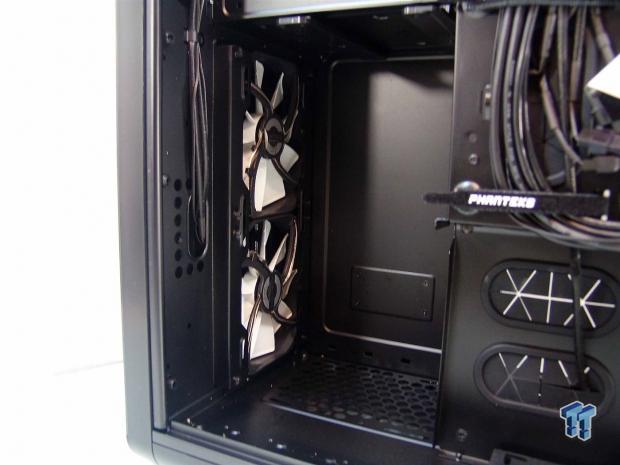
With the drive bays now out of the chassis, you can also see how easy it would be to install a dual 120mm radiator into the front of this chassis. You can also see that the ventilation in the floor comes all the way up to here to support that larger radiator. Keep in mind, the front and bottom radiator will conflict with each other if trying to max out both spots potential.
Accessories and Documentation
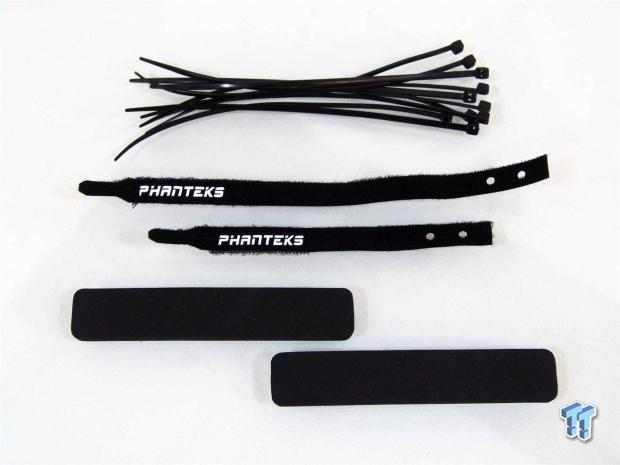
As part of the hardware kit in the box, you get ten wire ties, a long and a short Velcro wire tie to add into the chassis wherever you need them, and you are also given dense foam pads with tape on the back side to support a PSU in the front optional position.
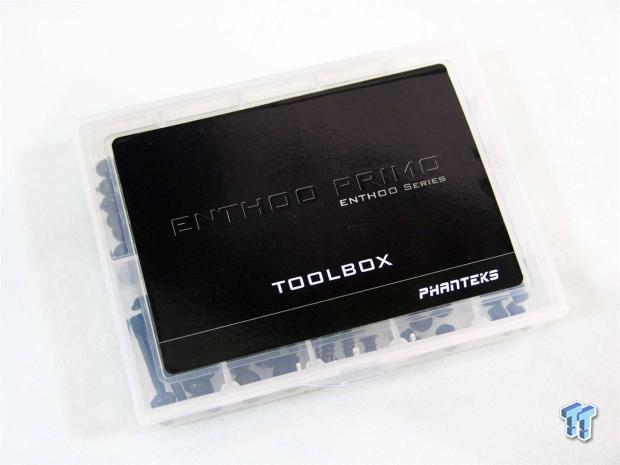
You get all the rest of the hardware and screws in this handy little parts tray. It is just a generic plastic tray like Lian Li would use, but Phanteks takes that additional step to dress things up a bit for their users, even if it is just a tool kit.
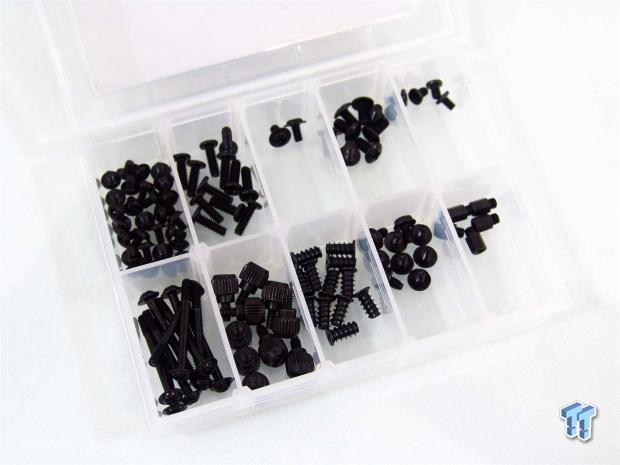
Inside of the parts box, there is a full assortment of screws for everything you want to install. They even give you a full assortment of fan screws, pump mounting screws, and delivers on all of the other categories as well with at least one extra that you will need for all of them.
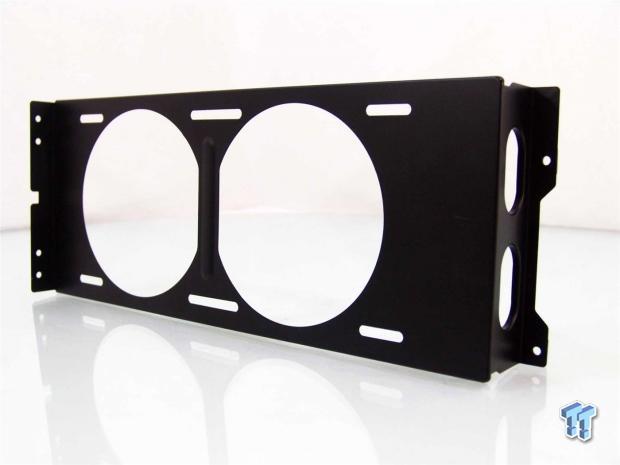
This is that adapter plate I have been talking about for the side of the chassis. With the HDD racks out of the way, this can be screwed to the floor of the chassis and the bottom of the ODD bays to add fans or another radiator to that location.
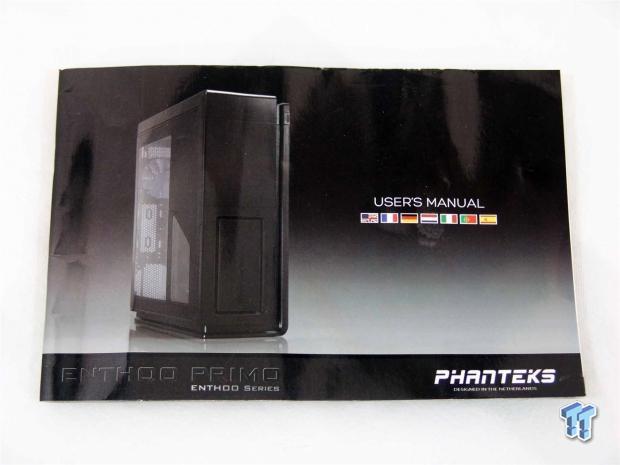
Even the manual is high-end. A glossy covering to the multi-lingual manual is a classy touch, and this user manual should get you though any bit of the chassis that throws you off your game a bit.
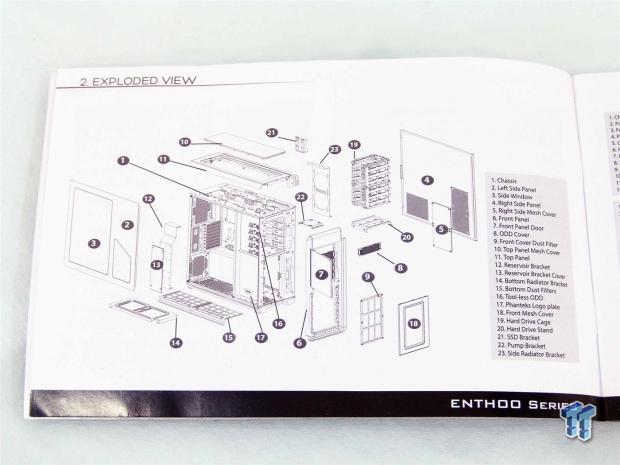
What I think will help everyone to fully understand this chassis is to look at this exploded diagram. It shows all of the main components, where they are located, and gives you a really good idea of what there is to be had in this design.
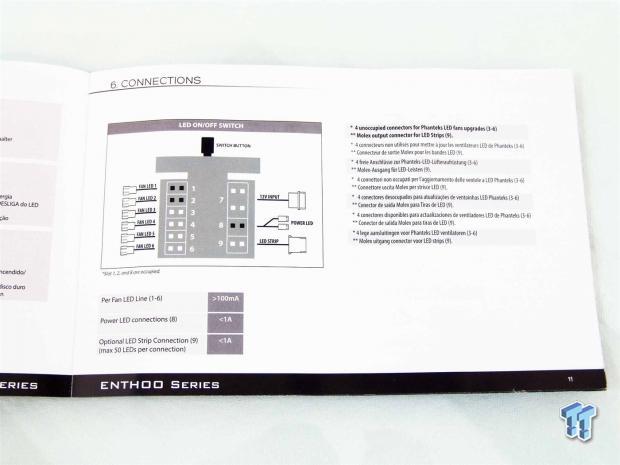
I just picked a random page of the manual to show what sort of information can be found. Not only do they show the chassis with the entire idea of fan and radiator options with drawing to help you figure out your loop, they even cover the small things like the wiring of the six port fan hub that may be a bit confusing for some people at first glance.
The Build and Finished Product
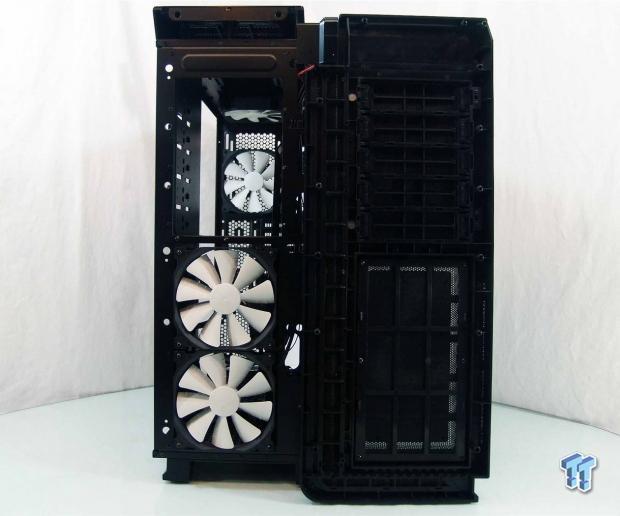
I went ahead and removed the front bezel just to give you a better sense of what is going on back there. When I removed the bezel, I noticed the latch to be able to remove the lower ventilated section of the bezel. This allows you to be able to easily clean the filter along with the pair from the floor of the chassis.
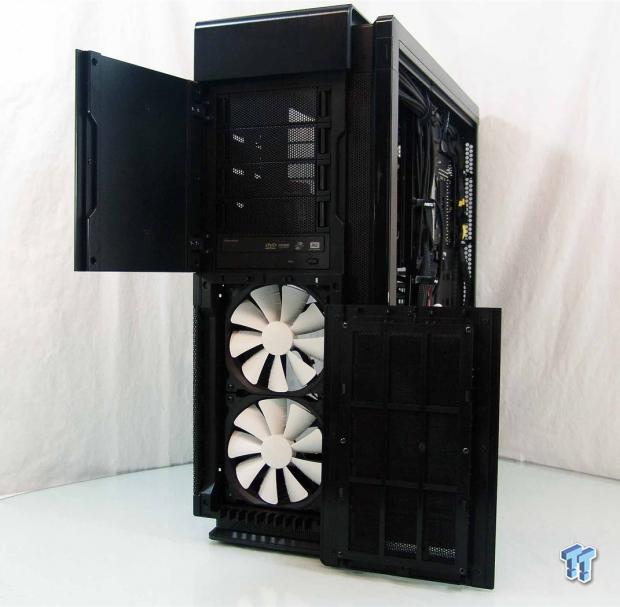
Once I completed the build, I wanted to show off both the drive and the removable section of the dust filter. Technically you do have full access to the fan screws to install a radiator in the front, but I would still pull the bezel to give yourself some working room.
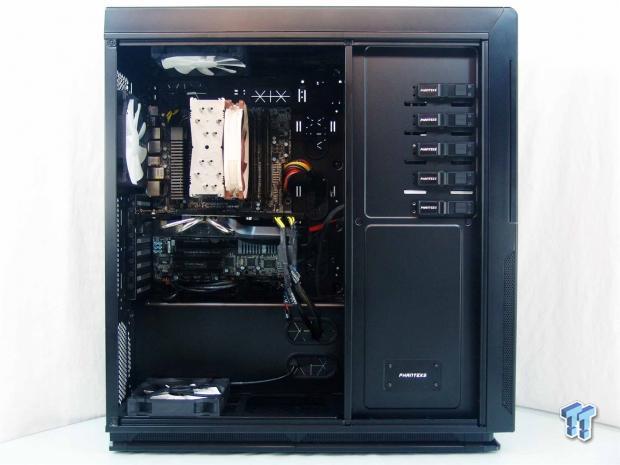
I did opt to install an air cooling based system to see how well the system cools as it is shipped from Phanteks. You may also notice that the HIS video card makes it so I had to remove both the steel plate and the plastic trim piece to allow it to fit correctly. I also really like that all you have to see is the main components, the rest of the system is hidden from view, even without the door on the chassis.
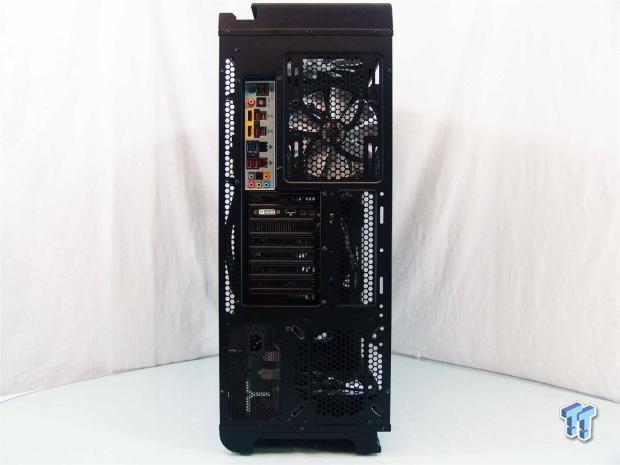
Around the back of the chassis everything fits well, there are no issues with the chassis warping. I tried both PSU mounting positions, and they both have no issues accepting a PSU there.
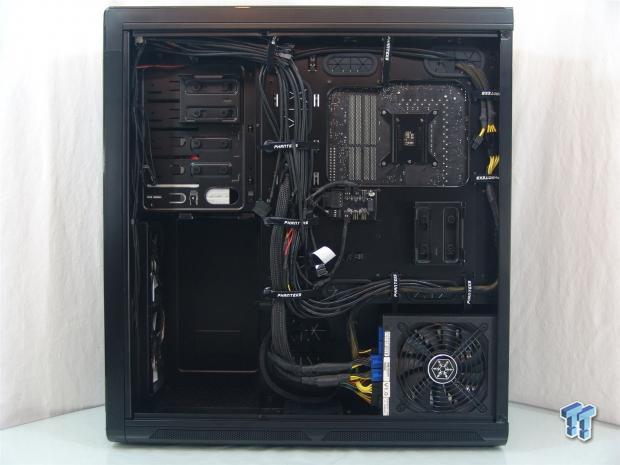
Since Phanteks goes through all the trouble to pre-wire the chassis, who am I to think I can do better? All I did was to loosen the ties and run my PSU wiring aright along with what is already there. There are also no issues with spacing here, as there is at a minimum 35mm of space.
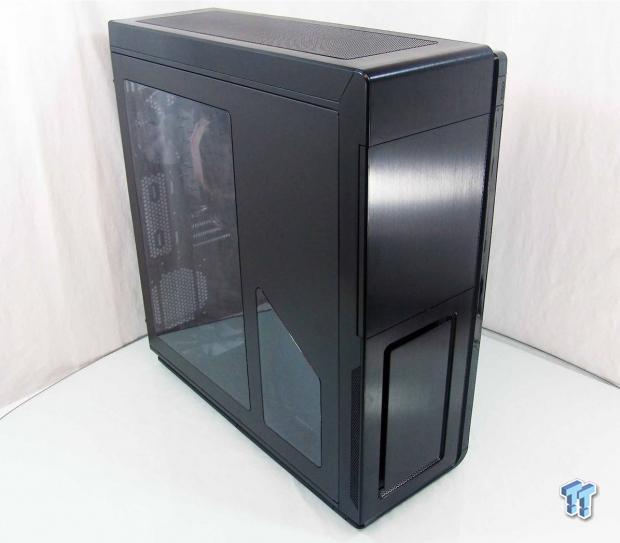
Once the chassis is all back together, nothing has changed externally, well except for the view through the large window on the dies. I like this about cases, where everything is hidden, but I do need to bring up that the door on the front swings the wrong way.
Powering up the Primo there is also a blue trim line of LED that runs down the front and across the top, more of that Level 10-like styling to the design. Also at this point, I cannot hear the chassis running even with the five additional fans included with the chassis on top of my build components.
Final Thoughts
Even while I was pointing out the styling that I find to be very reminiscent of other very successful case designs, I don't think you could put all the parts in a hat and draw any combination of design ideas where it would come together in this manner. By that I mean that even if Phanteks were borrowing ideas, they took all of the best of the best from what is hot and selling in mass amounts, and put it all on one very well thought out, designed, and built chassis you are going to find on the market now, and may even be for some time to come.
The cooling options inside of this chassis are at the top end of what is available as well. An option for 15 120mm fans, or a few less if you want to use more 140mm fans than the five that are included. As the chassis is shipped, it is near silent with a 32dB rating, but I had to have the meter at nine inches from the back and right side to get that level of noise. The rest of the chassis is designed to channel noises away from the user by either placing the venting at the sides, or the way the bottom of the chassis is sealed off by the plastic foot, only allowing air through the back. Even with the stock configuration of the fans, the temperatures were lower than usual, allowing plenty of air to all of the components inside. Then of course you have the water cooling options of a huge radiator in the top and or the bottom, a dual in the front, and a single in the back, it contends like all the rest for the enthusiast to pick this chassis over cases like the 900D.
Everywhere you look, at every corner you turn, and even beyond what your imagination would want the first time around, Phanteks delivers everything any builder out there is looking for in a chassis. Things like the water cooling options, the unique styling, the pre-wiring of the cabling, just everywhere you end up in the Enthoo Primo, you will be amazed at the foresight put into this design. There was only one place where I feel the design slipped up and that was is in the front door. If they would have had it open to the right, I would have been able to say, they covered every angle 100%. With this chassis there were no corners cut, it has everything you can possibly want, and better yet, it is affordable.
Even with a couple of weeks left to wait before these cases end up at your favorite e-tailer's shelves, the $249 MSRP is a very pleasing price in my opinion. For everything that is designed into this chassis, and all the little things that will really make a water cooling build go from "wow, that looks cool" to "I am so building my next computer in this case." If you are one of the first to get the Enthoo Primo, fill it up with all sorts of water cooling sexiness, you are definitely going to be fully satisfied with your choice to purchase the Primo, but you will also be the envy of everyone you know.
I feel like I really can't say enough good things about this chassis, as it hits high marks on features, aesthetics, cooling ability and pricing. There is just no conceivable reason why if you have plans of grandeur with water cooling, that you should pick any other case than Phanteks' Enthoo Primo.

 PCCooler CPS RZ820 Display Review: a flagship-level CPU air cooler with an LCD screen
 MOAIPLAY ORA PRO G1 850W ATX 3.1 PSU Review: high efficiency and 10-year warranty for $119.99
 NZXT H6 RGB+ Compact Dual-Chamber Chassis Review
 Lian Li HYDROSHIFT II 360P OLED Curved Liquid CPU Cooler Review
 ID-Cooling FROZN A620 SLK CPU Cooler Review
 Steam Deck code is bleeding into Steam Machine game functionality
 GIGABYTE launching stylish new RTX 5080 AORUS Infinity Wood graphics card
 Steam Machine buyers will receive different RAM configurations, Valve confirms
 For that 1993 PC look, check out SilverStone's new FLP03 Micro-ATX case
 MONTECH's new TG3 is an entry-level premium ATX case for your next build
 AMD's new FSR 4.1 for RDNA 3 also works on RDNA 3.5 and RDNA 2 GPUs
 Valve confirms AMD FSR 4 support is coming to the Steam Machine
 Xbox has more than a dozen TV shows and films in development
 CD Projekt Red CEO warns that AI-generated games are coming
 The Steam Machine was originally supposed to cost around $750
 Speed Racer (2008) 4K Ultra HD Blu-ray Review: a stunning remaster of the cult classic
 Navman MiVue Smart True 4K Surround Dashcam Review - Seeing In All Directions At Once
 IQUNIX Magi96 Pro Aluminum Low Profile Mechanical Keyboard Review - Premium Build, Satisfying Sound
 Asetek Forte S-Series Racing Simulator Bundle Review
 Razer Pro Type Ergo Wireless Split Ergonomic Keyboard Review - Built for Comfort and Support
 ASUS ROG Strix Morph 96 Wireless Gaming Keyboard Review - Great Performance, More Affordable
 SAPPHIRE Radeon RX 9070 GRE PULSE OC Review - A New 1440p Challenger Has Arrived
 7 Windows settings to change right after installation for better privacy, security, and performance
 I stopped Windows 11 notifications from interrupting me with Do Not Disturb, Focus, and a priority list
 I read the Windows Backup app screen carefully, and it does not back up what most people think
 Low Sound Volume on Windows 11? How to fix audio issues and restore normal volume
 8 Critical Warning Signs You Should Never Ignore in Windows 11
 This Windows security feature protects Documents from ransomware, but it is off by default
 Windows 11 already has a voice typing tool, and it is the one most people are not using
 Quick Assist is the only remote-support tool I open when a relative calls about their PC
 The PowerToys utilities I keep enabled on every Windows 11 PC, and the ones I turned off within a week