


A little hot under the collar
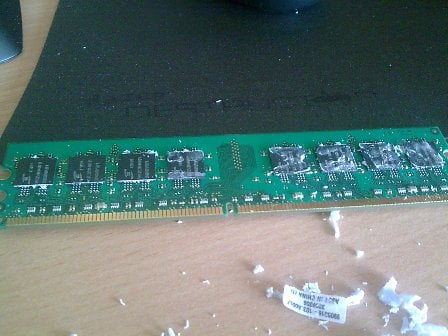
Welcome to another session of void-your-warranty, as today we will look at upgrading the stock heat spreaders on a pair of Kingston DDR2 memory modules.
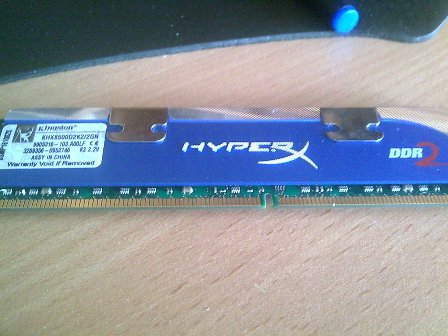
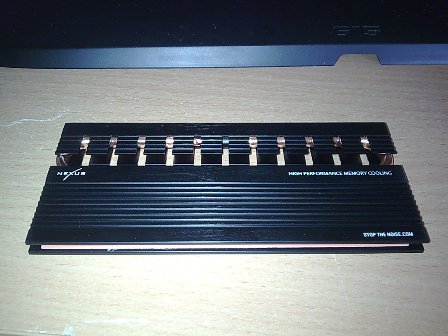
What we will do here is run through a step-by-step of removing the plain flat aluminum spreaders that come with most RAM modules and upgrading them with some Nexus HXR-550B Heat-Pipe memory coolers.
Firstly, a warning before we start:-
- This will void your warranty!
- Do not attempt this mod unless you can afford to replace the RAM if you happen to break it!
- TweakTown and its associates are not responsible for any damage or harm caused in any way!
Now that that is over with, let's look at the various ways of removing the heat spreaders on your RAM sticks.
Method 1
One method is to freeze the RAM, thus causing the thermal adhesive to harden and the bond between it and the chip to become much weaker. This makes it a lot easier to pry apart.
Pros:
- It's relatively safe to put RAM in the freezer; in an anti-static bag!.
- It takes most of the thermal adhesive off the chip, so there's less cleaning up to do.
Cons:
- It can damage the RAM PCB and components when prying open.
- It can potentially rip a RAM chip off if it's really stuck.
Method 2
The next method is the heater method which involves using a hairdryer to heat the RAM heatsinks up; this makes the thermal adhesive more pliable and easier to pry off.
Pros:
- It's quicker to do than freezing.
Cons:
- Heat damages components. If you get it really hot you risk damaging the chips.
- There's potential to burn yourself if you heat it up too much.
- You can still rip a RAM chip off if it's really stuck.
- There's potential for damage to components when prying open.
Method 3
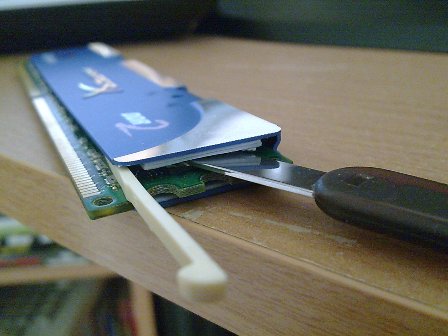
The last method is the slicing method, which works best if the adhesive is a soft pad. Fortunately, most are these days. You insert a small wedge to help lift the RAM sink slightly, then you take a thin bladed sharp knife and slice away at the adhesive on top of the chip.
Pros:
- There are no extreme temperatures to deal with or potential damaging of the chips.
- There's no risk of ripping a chip off if you slice through the material.
- There's less risk of damaging the components or PCB when prying open.
Cons:
- It requires two small wedges (or similar) to lift the heat spreader slightly.
- It requires use of a knife and increased risk of cutting yourself.
- It's time consuming and a bit messy.
Slice and Dice
Having tried both the freezing and heating methods on these Kingston RAM modules, I can say kudos to Kingston; you really have stuck these things on tight!
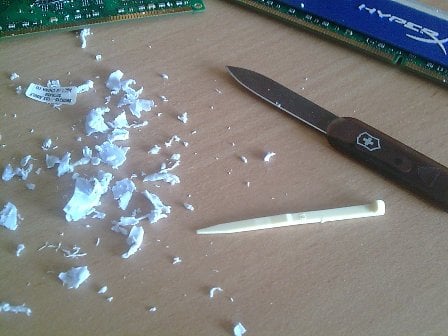
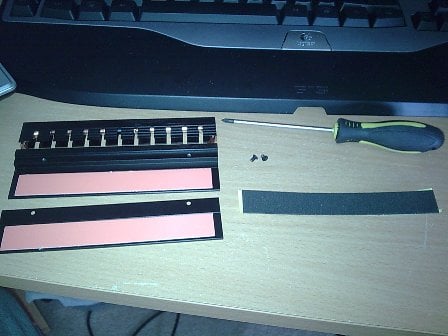
I'm going to resort to the slicing method to remove these heat spreaders. The first thing to do is find some suitable wedging tools. If you have a Swiss Army knife then use the toothpick; this should give you an idea of what you should look for as well. Now, most heat spreaders are different in some subtle ways, so it's up to you to judge what you need to lift up the spreader just slightly.
Once you have your wedge, slide it into an edge to get some lift going, and then carefully use the knife to slice away at the exposed thermal pad. Craft knives and Swiss-card knives are excellent for this as they have thin blades.
Once the first chip is done, insert your wedge a little more and do the next one.
Take care not to damage or chip off any of the tiny surface-mount components on the PCB, because that means INSTANT DEATH for the RAM.
Once you have done one half of the RAM, leave your first wedge in and find a second one, then start again from the other side. Soon you will have an entire face of the heat spreader off!
Repeat the above for the opposite side.
Once you have sliced off the adhesive (or alternately used the heating or freezing method with success), now begins the clean up operation.
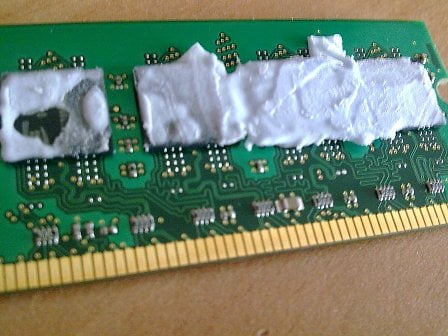
Using your thumb or finger, gently start peeling the gunk off the chips. If you have available some acetone (nail polish remover), then apply liberally to the gunk on the pads to help dissolve the adhesive. This is also good if the thermal gunk was a liquid epoxy; it should help break down the adhesive nature of it.
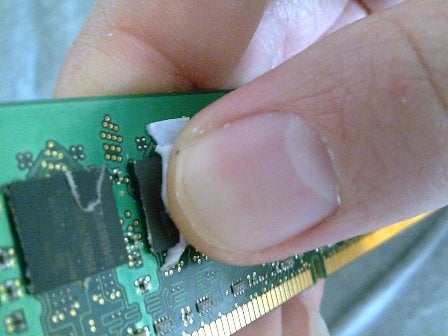
Keep at it for a while until you have removed all of the gunk from the surface of the chips. Don't worry too much about the stuff on the sides, so long as the tops of each chip are clean where your new heat spreaders will stick to, that is fine.
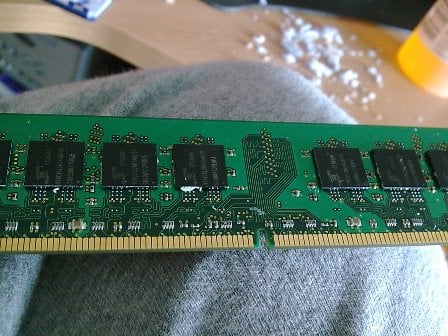
Hey there, hot stuff
With your newly cleaned up sticks in hand, give them a quick inspection to make sure that you haven't accidentally chipped off the smaller surface mount devices.
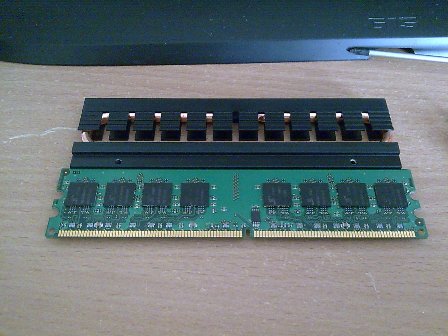
Now for the most exciting part; grab your new RAM-sinks and rip open the packaging! - Here I'm using the Nexus HXR-5500 Black heat spreaders, because they look so deliciously evil, like something Darth Vader would use when building his gaming rig.
Furthermore, they have the copper heat-pipe system to help dissipate more of the heat.
Most third party RAM-sinks will come with a spacer stick-on foam pad too; this is if your memory is one sided, you don't need to put this on if your memory is double sided. That is just asking for trouble.
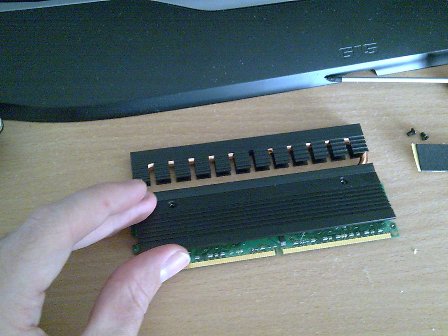
Ready to roll; just peel back the protective on the adhesive, then line up your RAM, making sure the heat spreader part does not cover the notches on the side of the RAM used to lock it to the motherboard.
Note: Look at the orientation of your RAM before sticking it down; some heat-pipe designs add extra length to your RAM, so make sure the side you stick it on has any protrusions pointing away from the graphics card.
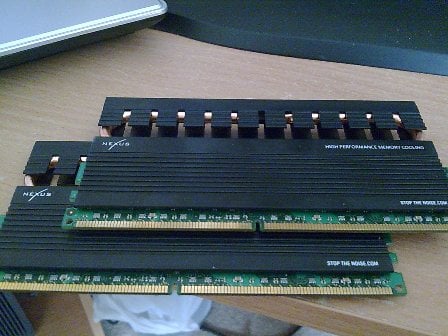
If you are doing this for multiple modules, you will probably want to make sure a pair look matched, so make sure you stick the RAM the right way around in the new RAM-sinks. If you are doing a series of four modules, take extra note of the width and airflow available when all four modules are seated; it can get pretty hot and tight!
The final step of course is to stick the modules back in then turn on your system. If you get a failure on boot-up then you might have damaged one of the modules and you should test each one individually by booting with just one at a time in the system.
Enjoy a cooler computer and better over-clocks!
Our Latest TweakTown Guides
- The PowerToys utilities I keep enabled on every Windows 11 PC, and the ones I turned off within a week
- USB Ports Not Working in Windows 11? Try These Fixes
- Second Monitor Not Detected in Windows 11? Try These Fixes
- Turn Your Old Smartphone Into a Dedicated Webcam for Your Windows PC
- The Send To menu is the right-click feature on Windows 11 that nobody bothers to customize
 The PowerToys utilities I keep enabled on every Windows 11 PC, and the ones I turned off within a week
 USB Ports Not Working in Windows 11? Try These Fixes
 Second Monitor Not Detected in Windows 11? Try These Fixes
 Turn Your Old Smartphone Into a Dedicated Webcam for Your Windows PC
 The Send To menu is the right-click feature on Windows 11 that nobody bothers to customize
 'Radically different' business models coming to Xbox, CEO Asha Sharma says
 GEEKOM's new GeekBook M16 brings a Core Ultra 9 and a 99.9Wh battery to the business laptop market for $899
 AMD warns DDR5 prices won't recover until 2028 as AI demand continues pulling supply away from consumers
 SEGA under fire for using gen AI in new Crazy Taxi game
 Halo Studios quietly establishes innovative new business model for legacy game remakes
 Zelda Ocarina of Time remake confirmed for 2026 launch on Switch 2
 ID Cooling shows off wooden PC cases and matching AIO coolers at Computex 2026
 Formula V Line's Ice Nova Pro 3 air cooler could be perfect for brass-themed PC builds
 SAMA's Computex 2026 lineup includes a curved-glass case and AIO coolers with swappable screens
 Master Chief crashes the Covenant's vacation in new Halo remake prequel missions
 Navman MiVue Smart True 4K Surround Dashcam Review - Seeing In All Directions At Once
 IQUNIX Magi96 Pro Aluminum Low Profile Mechanical Keyboard Review - Premium Build, Satisfying Sound
 Asetek Forte S-Series Racing Simulator Bundle Review
 Razer Pro Type Ergo Wireless Split Ergonomic Keyboard Review - Built for Comfort and Support
 ASUS ROG Strix Morph 96 Wireless Gaming Keyboard Review - Great Performance, More Affordable
 SAPPHIRE Radeon RX 9070 GRE PULSE OC Review - A New 1440p Challenger Has Arrived
 NZXT H6 RGB+ Compact Dual-Chamber Chassis Review
 ASRock Radeon RX 9070 GRE Steel Legend Review - The RDNA 4 Mid-Range Reshuffle
 ASRock Z890 Taichi Aqua Motherboard Review - Flagship features without the flagship price
 GIGABYTE Z890I AORUS Ultra Motherboard Review - Mini-ITX with surprisingly good thermals
 TweakTown's Best of Computex 2026 Awards - The Best Hardware, Gaming Gear, and AI
 Phison E37T SSD Controller Exclusive Preview - The Fastest DRAMless SSD Platform Yet
 ASUS WiFi Routers and Networking Solutions Deliver Long-term Security and Reliability with No Additional Cost
 Windows 11 will not let you pin a folder to the taskbar, but a 30-second workaround does
 ASUS ProArt Displays Unlock Creativity with Professional Monitors for Everyone