


Our Verdict
Introduction, Specifications, and Pricing
Corsair has again stepped into the chassis market with a new release, and while we may be a tad late to the party, there are many reasons why. At this point, we know Corsair would like us to start addressing the features, things like "RapidRoute wire management," its "clean and cool" aesthetic, its high airflow design, yadda, yadda, yadda. However, we are going to be covering this chassis in a slightly different manner!
Things went well until we removed the chassis from the box, and in our attempt to replace the glass side panel, it slid out of the chassis and shattered all over our photo booth. We immediately went to our PR rep. and explained what had happened, and Corsair stepped up to overnight a panel so that we could continue with the process of reviewing the chassis. While this may not be a deal-killer for us, it was the first in a long line of things done in this chassis that makes us scratch our head and ask why Corsair is trying to reinvent the wheel at the cost of the consumer? It is almost as if this chassis was designed to frustrate its users while costing them a considerable amount to be used as lab rats!
The other thing about this chassis and all of the recommendations and gold awards being handed out to it only applies to the very few Corsair had made for reviewers. As far as we can tell, at this point, this is just a paper launch, as the 5000D we are looking at now is not available for purchase on this side of the pond, not even from Corsair. There are not any of these in the wild. We get it is CES season and all that, and companies need to show something. However, what you are about to look at is so overthought that the fine details get lost, and you end up paying way too much for a chassis that while it looks good on the outside, as soon as you get inside, things start to go belly up!
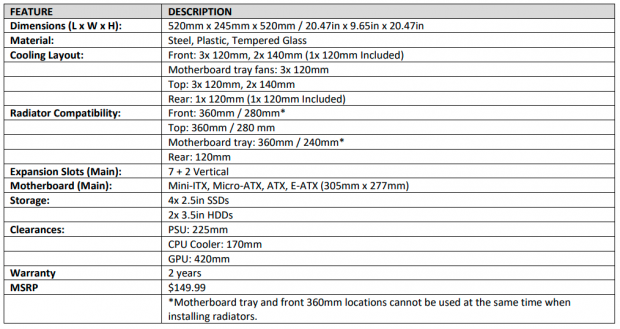
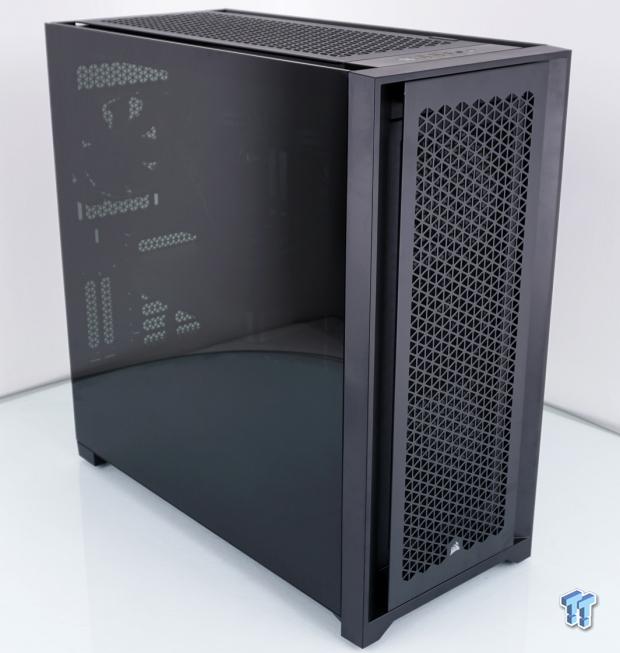
In the chart provided to us in the reviewer's guide, Corsair starts with the 520mm height, the 245mm width, and the 520mm depth, but no mention of the weight. However, the UPS label on the box does state thirty-five pounds, so we would hazard to guess that thirty of those pounds are the case. The chassis is made mostly of steel, with a few bits made of plastic here and there, and the left side of our 5000D AIRFLOW chassis is covered with dark tinted tempered glass.
Best Deals: Corsair 4000D
Cooling inside the 5000D AIRFLOW can be done through a section at the front of the case, with room for three 120mm or two 140mm fans, and one 120mm fan is placed in this area. The second option is the top of the chassis, which is identical to the front, but no fan is placed there from Corsair. There is a third option for fan or radiator placement, which is found to the right of the motherboard tray but is designed to hold only 120mm fans, up to three of them. The back of the chassis is another place for fans, but again is made for 120mm fans, and Corsair places a fan in this location for a total of two included fans in a chassis named AIRFLOW. No irony there at all! Radiator compatibility is self-explanatory, although you cannot use a radiator in the front and to the right of the motherboard tray at the same time.
Expansion slots come in a 7+2 layout, with seven slots being horizontal, with a pair towards the glass that allows for a vertical GPU orientation. Sadly, you have to buy more kit to be able to use this feature properly! Mini-ITX through E_ATX motherboards can fit inside the 5000D, and we also found three trays for 2.5" drives and a pair of trays in a cage for 3.5" drives. The power supply shows that there is 225mm of room, but without the HDD cage in play, that number increases greatly! CPU coolers can be 170mm in height, and video cards can be up to 420mm in length.
The last bits we see are that this 5000D AIRFLOW is covered for two-years with a warranty. While the chart shows a $149.99 price tag, for some random reason, a couple of days before release, we got an email that the price is increased to $164.99 with no explanation as to if it was a mistake, or Corsair thought they could get a few extra dollars per case.
Our Latest Mid-Tower Cases Review Coverage
As you can tell, we are slightly off-kilter with what Corsair is trying to push onto us as new and improved. Still, there is much about this chassis that makes no sense to us, and we plan to go through this chassis as we would any other. Nevertheless, this time pointing out all of the things we feel are not correct for a chassis design from anyone, and more specifically, do not make sense in a chassis that pricing and product placement considers this a high-end chassis. Not some $60 special from a company we have never heard of before!
Packaging
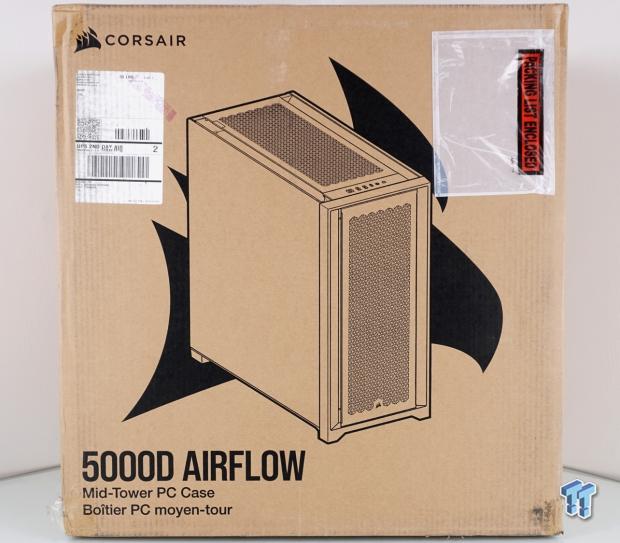
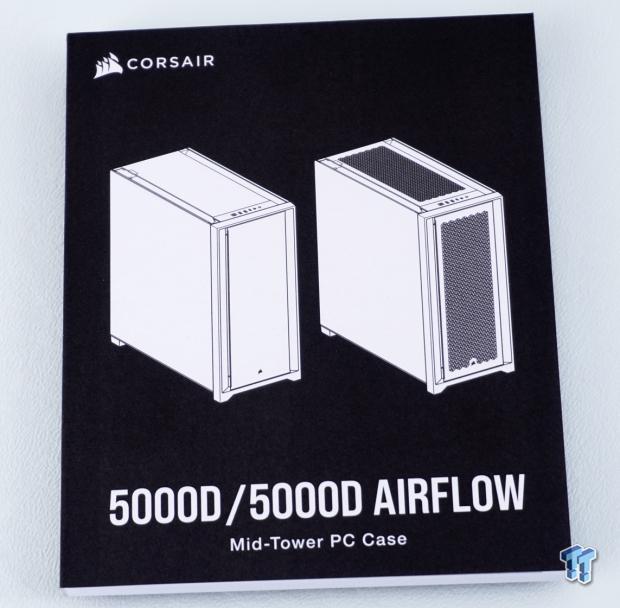
The first glance at the packaging has us hoping that the $165 paid to get this is worth something impressive inside. While the basic cardboard thing does save some coin for something that likely ends up in the trash, I feel this should be relegated to budget cases. If I am spending this sort of money on a box to hold my parts, I want the packaging to wow me from the minute I see it on my porch. There is the Corsair name and logo at the top-left, a sad-looking rendering in the middle of a much larger Corsair logo, and the case's name at the bottom.
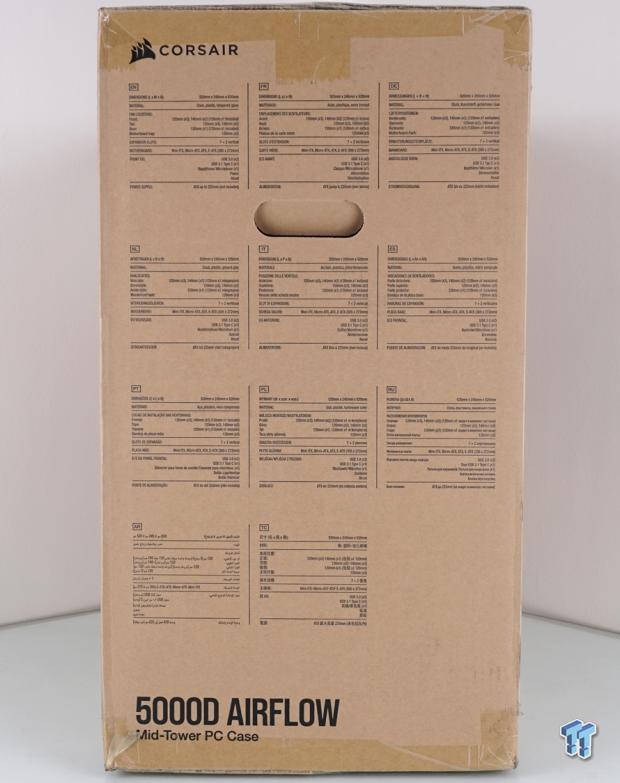
Twelve charts are presented on the right-side panel, all in various languages, delivering most of the chassis specs. Beyond that, there is a handle near the top and the chassis's name to finish things off.
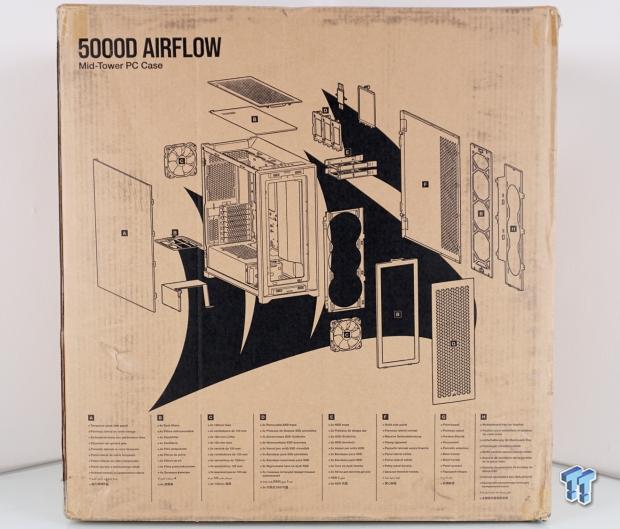
The back of the box shows users an exploded diagram of the 5000D AIRFLOW denoting all of the various components, which they explain at the bottom in many languages. This image is also in the manual, and it the best effort Corsair makes as to how to use or modify this chassis!
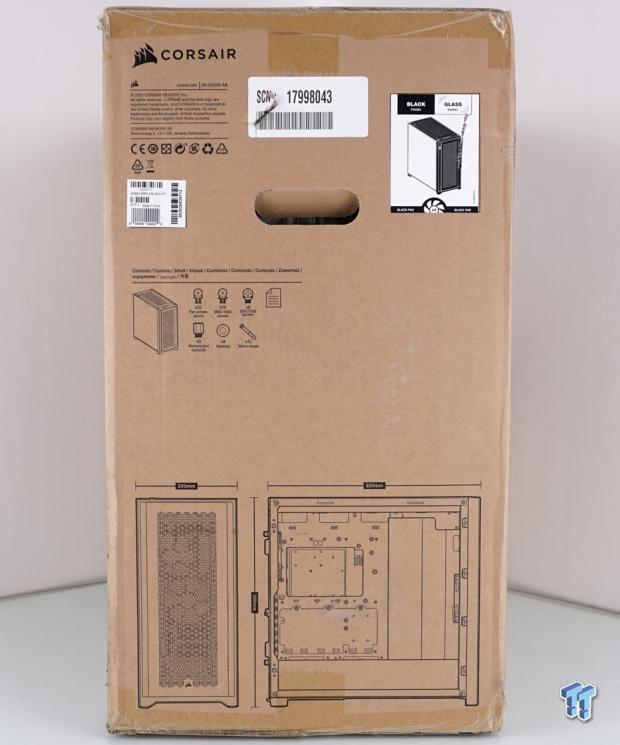
The last panel offers up the Corsair legal information at the top, just above the product sticker with the model and serial numbers, to the left of the other sticker stating this is a black and glass version of the 5000 chassis. There are steel side panels, closed off top and front sections, our version, and RGB model, and then a repeating lineup in white and gray. The middle is a parts list, while the bottom is used for dimensional renderings, both of which would have made for a better presentation than the front panel offered!
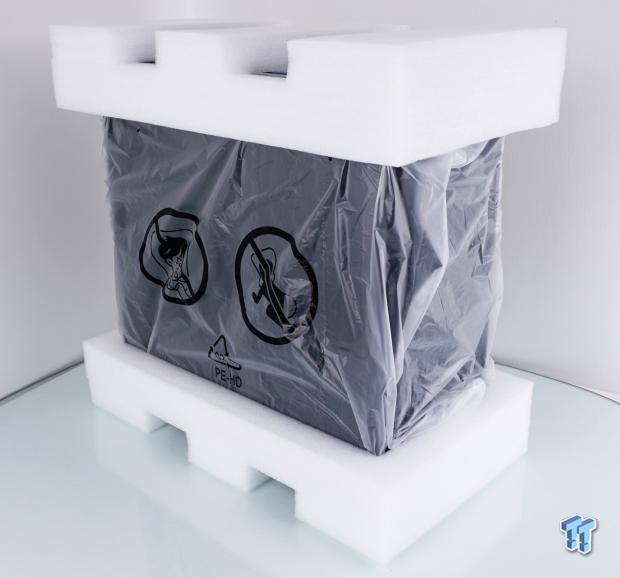
The 5000D AIRFLOW is packed perfectly and took not even the slightest hint of damage in its journey to our door! Using thick open-celled foam at the top and bottom repels larger impacts, and the plastic bag it's contained in protects the paint finishes. There are also sheets of plastic that cling to the glass panel.
After removing them and replacing the TG panel onto the chassis for the next images, we shattered that thing all over this table because Corsair offers no guidance on the matter. The slightest slip in hand allows the tabs on the glass to fall off the tiny tabs used to carry the weight!
Corsair 5000D AIRFLOW Mid-Tower Chassis
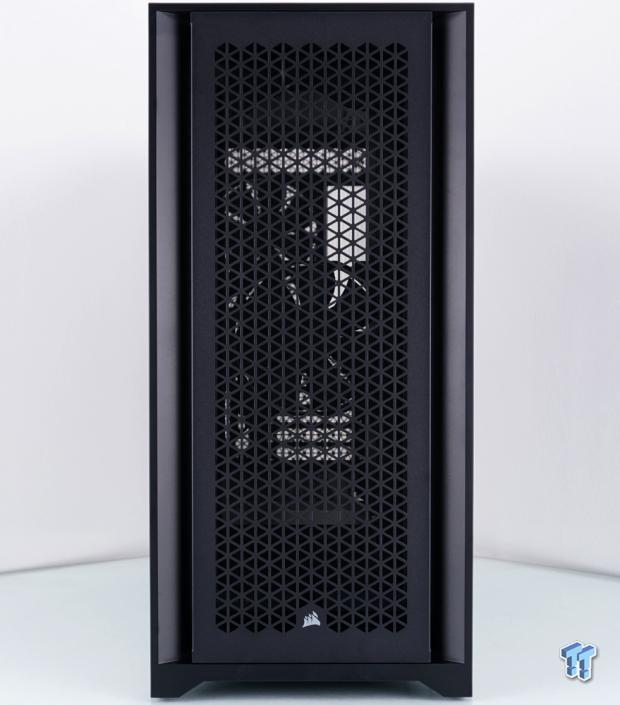
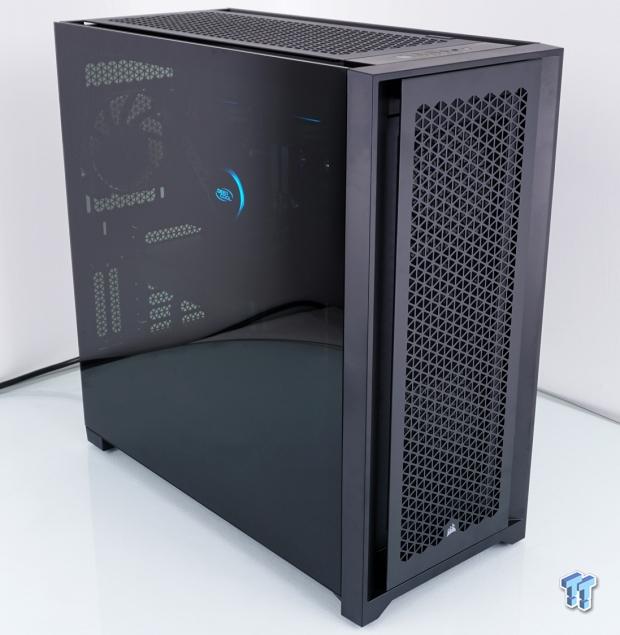
The front of the 5000D is attractive, with a multitude of triangular holes cut from the removable steel faceplate. We also do not mind the chunky overall shape, and the side channels for airflow are nice and all, but we feel it is less for airflow and done more for a better-looking way of allowing the steel panel to pop off the front of the case.
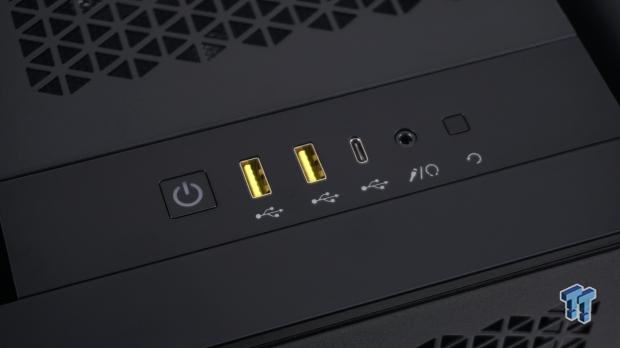
The chassis' front meets the top at a ninety-degree transition from one to the other and is where Corsair installed the front I/O panel. From left to right, we have a small-ish power button, which is backlit white, a pair of USB 3.0 ports, a USB Type-C, a 3.5mm audio jack for headsets, and a very small reset button at the right end.
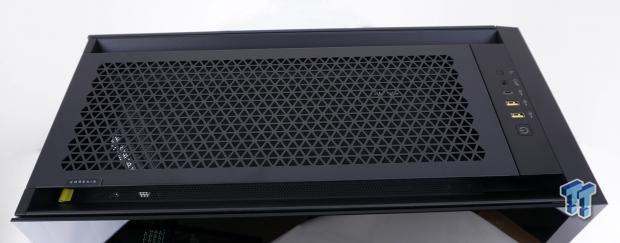
Moving back a bit to allow a view of the entirety of the top of the 5000D, we see that it mimics the chassis's front. Side slots are again present, with a steel panel that snaps over that area for better visual appeal. We also see the Corsair name applied to a rubber tab on this panel, and we also find a yellow tab under it to help remove the mesh dust cover.
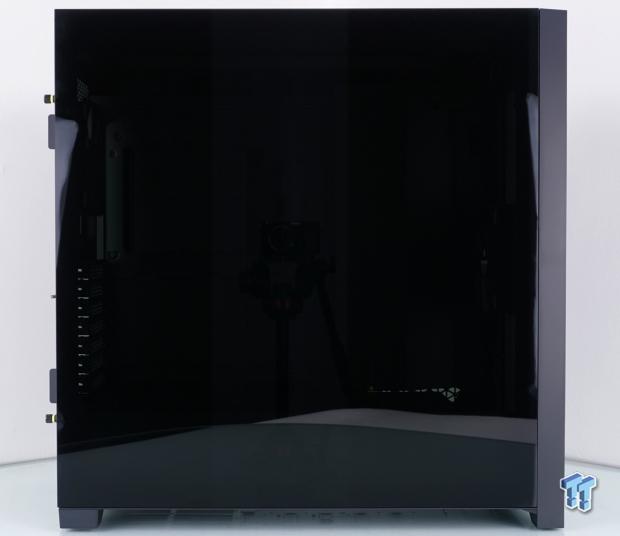
The left side of the 5000D AIRFLOW is a view, mainly filled with dark tempered glass, making it tough to view anything inside of it. The left edge shows the thumbscrews with yellow rubber washers, and the tabs needed to get enough force to pull the back of the panel outward. To the panel's right is the plastic bezel showing around this side, and four tiny tabs connected to that plastic are all that hold this door in place when the left edge is released.
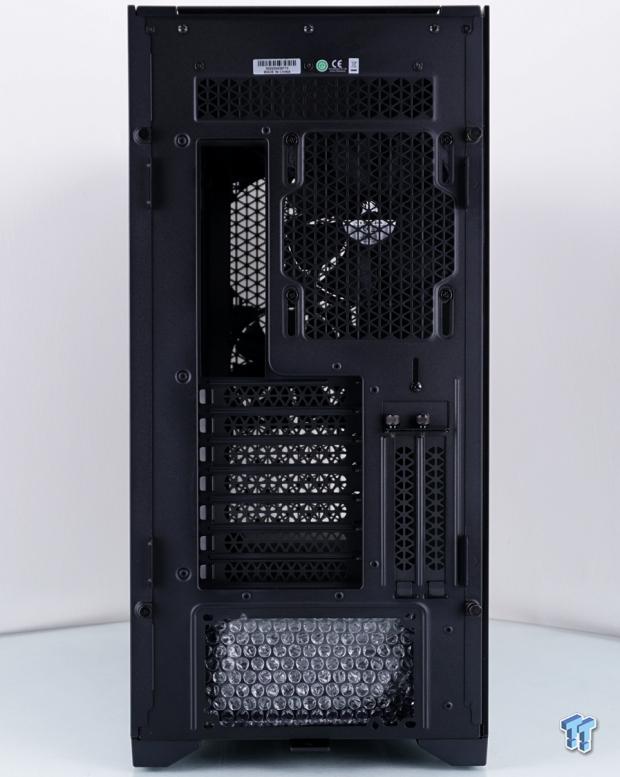
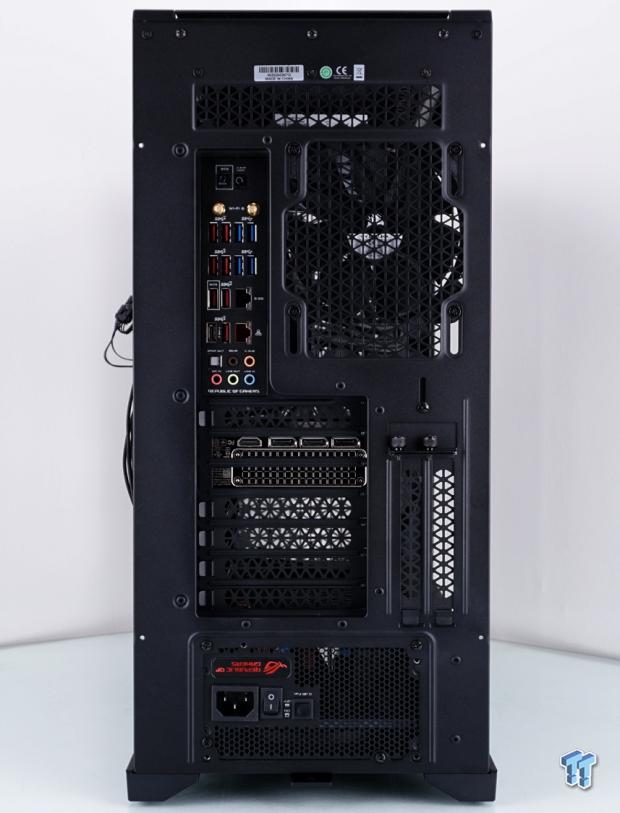
Corsair has a lot of room at the top for radiators and fans with dimensions much closer to what we are used to seeing in full-tower designs before we run into the rear I/O and exhaust fan location. All of the venting around the chassis matches, as we find many triangles here, at the top, behind the fan, and on the 7+2 slot arrangement. Bubble wrap is visible in the PSU area, which has eight screw holes around it, rather than the standard four. We also see a tab at the bottom, which allows the PSU dust filter to come out towards the chassis's back.
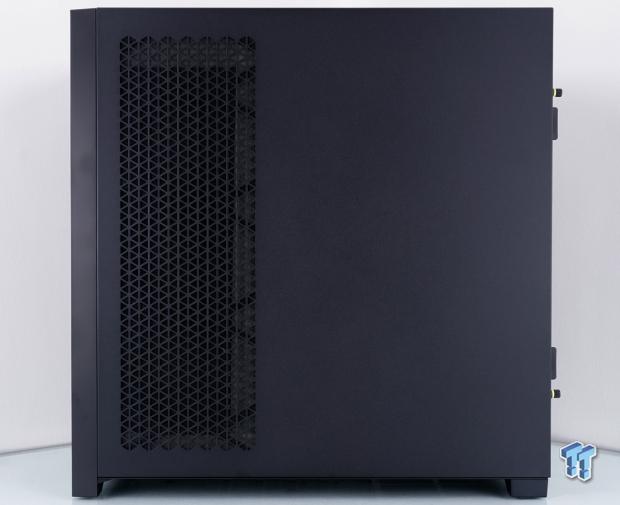
The chassis's right side reminds us a lot of many other cases with front cooling options next to the motherboard tray. We find more matching triangles on the left side, backed with a mesh dust cover. The rest of the panel is steel and solid across the bulk of it, allowing very little view into the chassis from this side. This is a point that becomes relevant a bit later in this review!
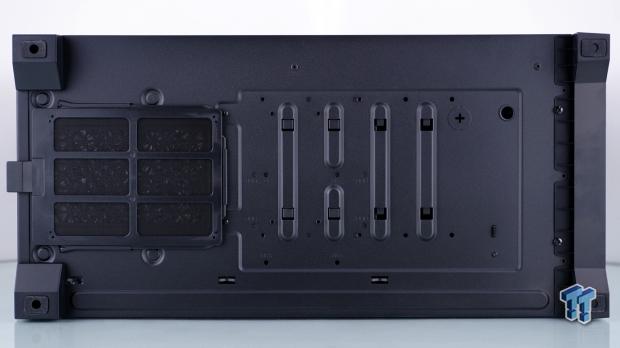
Under our 5000D, starting at the left, we find the PSU dust filter flanked with chunky but visually undersized feet. They do offer rubber pads for grip, however. There are four slots used by the adjustable HDD cage and a couple of wire tie points to the right of that. There is a knockout, we assume for a drain, but then why the other open hole? As to the right edge, or the front of the chassis, the feet are even smaller than the back ones, and we see that the front bezel is screwed onto the chassis!
Inside the 5000D AIRFLOW
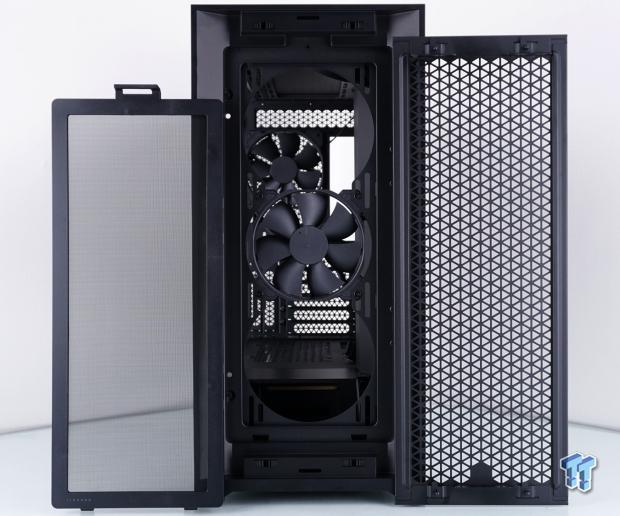
To access the front dust filter (at left), you must first release the steel cover (at right) by popping the four balls from the sockets in the front bezel, at the top and bottom. Once done, grab the tab at the top of the dust filter, pull it toward you, and then lift it out of the frame. The fan/radiator tray is removable from the inside of the chassis and is not removable in this manner.
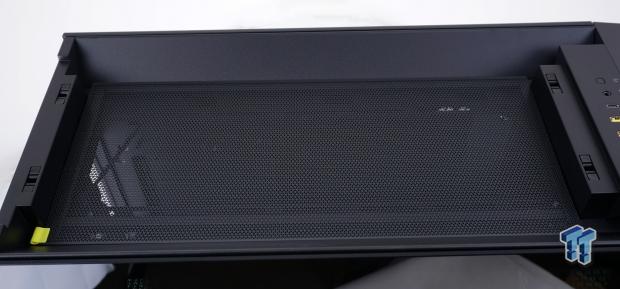
At the top of the chassis, we removed the steel panel already, which exposed the plastic dust cover with its tiny triangular holes making up the mesh. This is magnetically attached, and foam between it to block flow around it allows the cover to fit better and allows for a bit of wire management under it.
Corsair offers a tab to grab the dust cover, but it is small and hard to use, so we slide a finger in from the front of the chassis, in the airflow groove, and lifted the cover out of the way. Under it, we have three wire management holes at the back and seven slots for fan and radiator mounting. The center is wide open, and the near side has seven slots each for 120mm and 140mm fans.
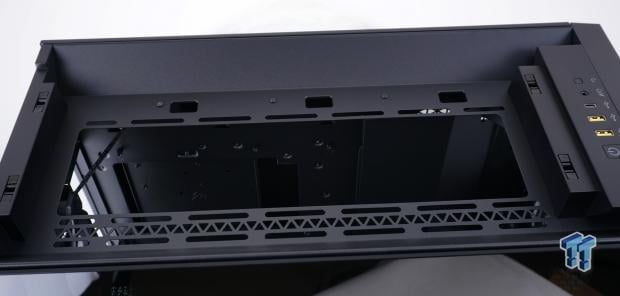
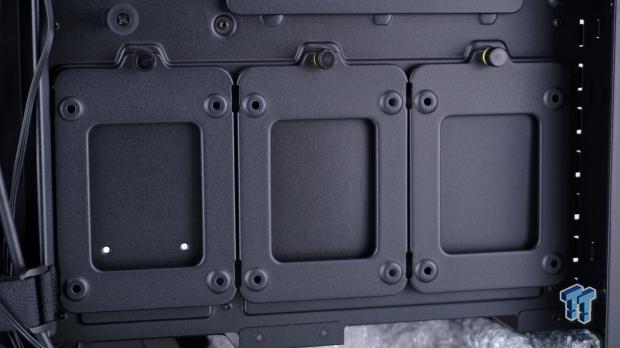
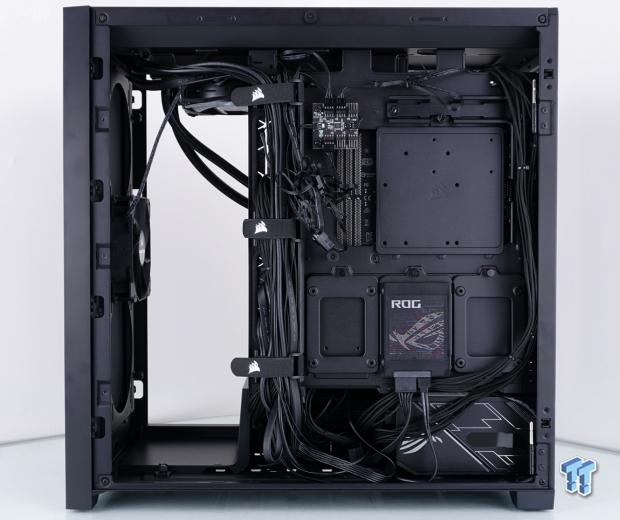
At first glance, we like the wire management options at the top of the motherboard tray and the bottom. The plate hanging on the CPU cooler backplate access hole is a tad strange, and covering all of the wires with a plate at the right side could be good, but we found that it is more of a PITA than it is worth! However, we like the CORSAIR and yellow box painted on it, but that is honestly the best part of this panel.
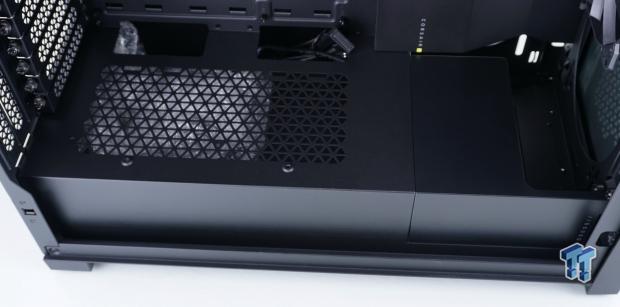
There is a nearly full-length PSU cover inside the 5000D, but most of the steel portion to the left is open at the top, allowing the PSU to be installed fan up or fan down. There are large openings near the motherboard tray and a couple of standoffs, which help 2.5" drives to mount here. The plastic portion of the cover, near the front, has a cutout that will allow for fan installations and even a 27mm radiator and 25mm fan. However, there is another option and is what was wrapped in bubbles inside of the chassis.
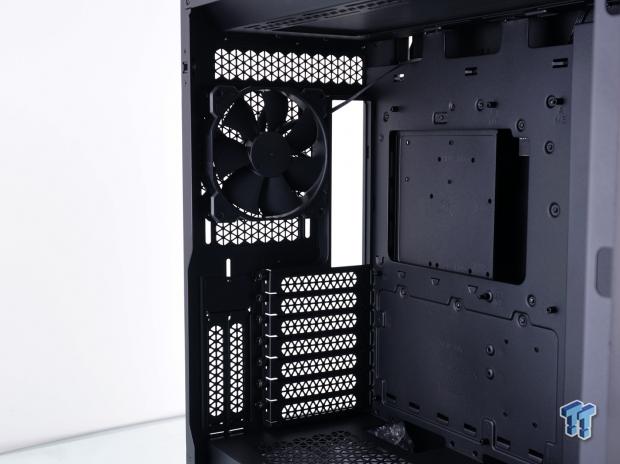
Inside the rear of the 5000D, we see the second of two 120mm fans preinstalled in this chassis, and we can even make out the cover for the +2 slot configuration. We get that the +2 slots do present the GPU in a better light than normal installation, but we feel if you are offering this, you should complete the transaction if you will! Give me the parts to use it, not make me go back for more pieces to allow me to do what the Corsair product imagery portrays is possible, and not until you open the box is it mentioned that you could not use that feature.
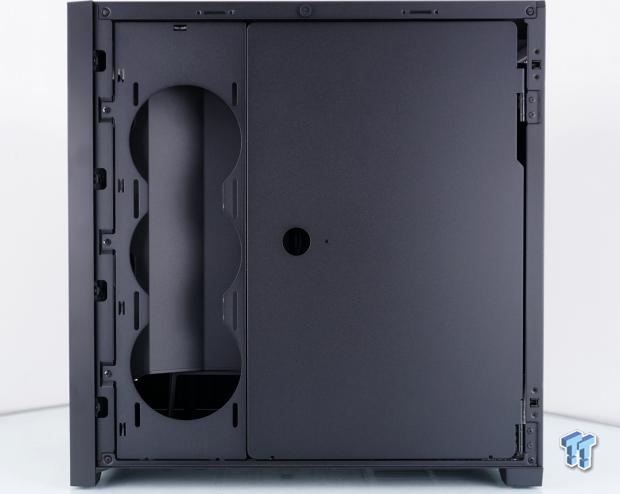
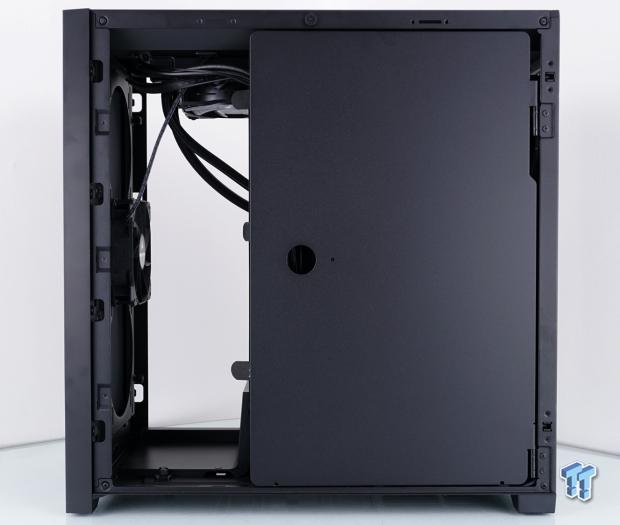
It is about this point that we start to get a one-eyed squint as we ponder what was going through the minds at Corsair. We can appreciate the cooling option at the left, but why need a cover panel inside? I mean, Lian Li and Thermaltake have no issue leaving them to hang out in the wind. Why do we need a cover for this area? Then, we are looking at a door on the right...why? We removed a solid steel door to get here to have to remove yet another door? Corsair also has the RapidRoute feature under this, so what sort of mess are we trying to cover? Why are we paying for a second door? This bit made little sense in our minds!
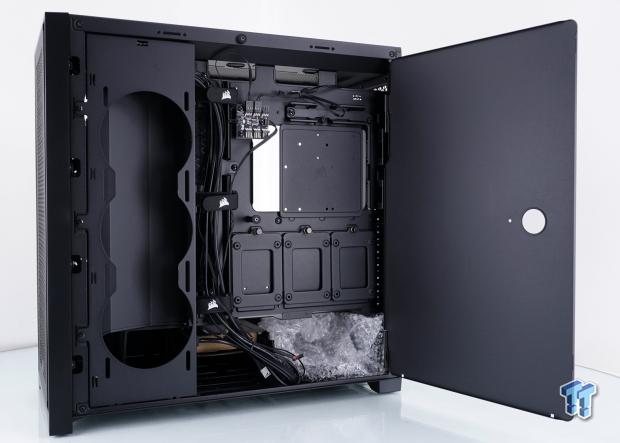
Ok, we move beyond this door having any real use, and we released the magnetic hold the door has to the rest of the chassis and swung it open to expose the back of the motherboard tray. In doing that, swinging the door out on the hinges, we realized it could be lifted and removed. However, unlike any other hinge-using company that makes cases, both hinges are the same length. So you have to feed both hinges at one time, rather than if one is shorter, you can load the hinges one at a time like in a standard chassis!
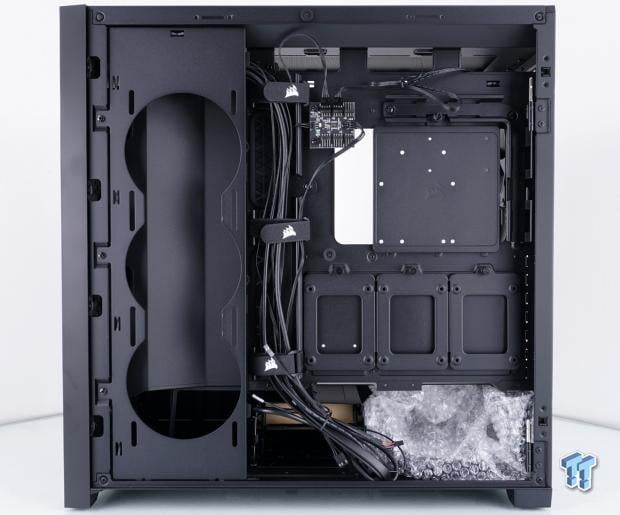
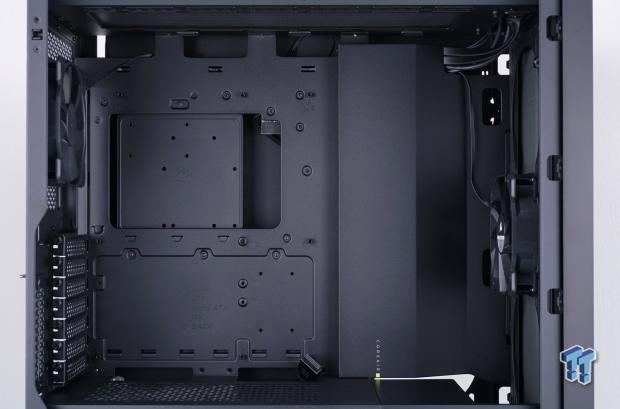
Viewing things from this distance, we will start with the RapidRoute plastic trails. As seen on the left, the chassis wires are routed and already strapped into place. However, that all needs to be removed to access the panels to the left. There is another trail at the top-right of the motherboard tray, and while straps can be easily used at the top portion, the track needs to be removed so that straps can be used on the right side of it. Good idea in our minds, but the implementation could use some tweaking!
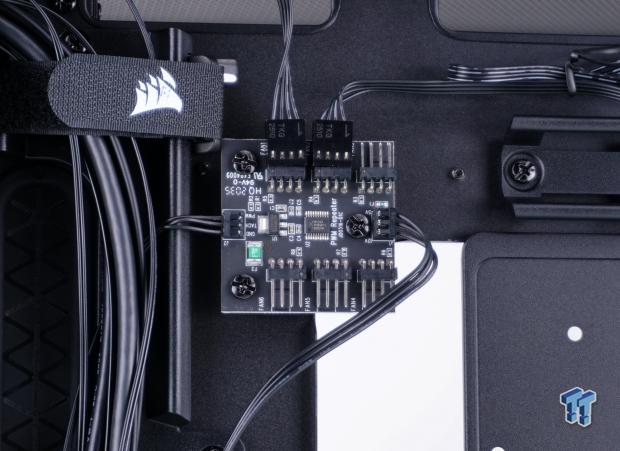
We run into a six-port PWM fan hub at the top-left corner of the access hole in the motherboard tray. On the left edge of the PCB is where the 4-pin PWM fan connector is attached so that the PWM signal can get to the PCB and so that FAN1 can report its RPM to software. The chassis fans are plugged into FAN1 and FAN2, but any 4-pin PWM fan can go on any of the ports. Just be sure that the one you want to read RPM from is on the first port. The three wires on the right edge of the PCB run down the motherboard tray and terminate in a SATA power plug.
Just below the tray hanging in the access hole of the motherboard tray, we run into three 2.5" drive trays, which are locked into place with thumbscrews, and can also be moved from here and mounted on top of the PSU cover. The manual and the specifications state that there four 2.5" drive locations, these three trays and an optional place on the plate above, and the HDD cage also supports room for a pair of 2.5" drives. The plate above these can also house a 3.5" drive, and the cage holds a couple, as the full extent of drive compatibility.
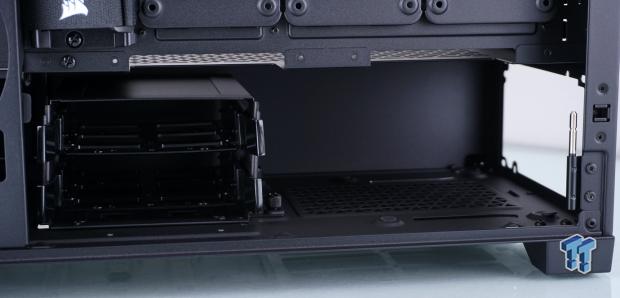
At the bottom of the 5000D, behind the PSU cover, is where the HDD cage is installed, and while we had no issues moving it to the other tracks for more room for a PSU, we could not align the screw that locks the cage to the floor of the chassis, unless we were in the current position! The PSU rests on the four raised bits of steel with foam pads on them, and one of our pads isn't installed properly.
It is roomy enough for our PSU, but you may need to bin the HDD caddy with the optional front cover. Also, as to the hinge business, they are fluted two-thirds of the way up and would be a perfect place to cut one of the two to make panel installation easier. However, we can toss the useless panel and not have to deal with the hinges!
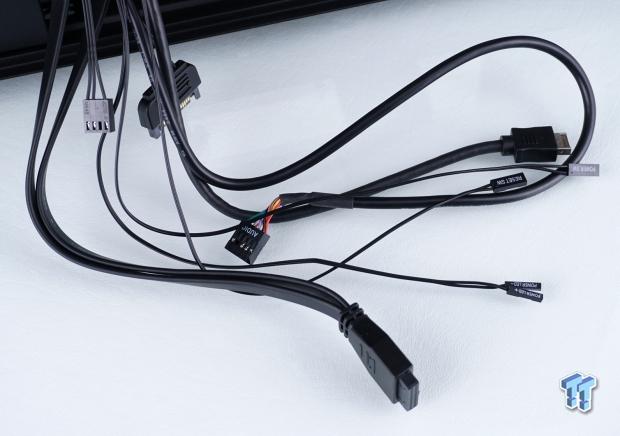
As far as chassis wiring, starting at the left, we have the fan hub wires. A 4-pin PM fan header connects to the motherboard and the SATA power connector to deliver all the power needed for six fans. We then see the HD audio cable, the Native USB 3.0 connector; the power LED leads, the reset switch plug, the power switch plug, and the native USB Type-C connector to round out the cables.
Accessories and Documentation
Installation and Finished Product
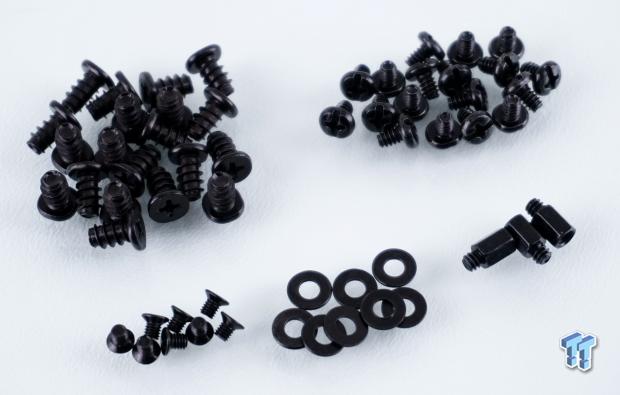
With the 5000D AIRFLOW, we received twenty fan crews, enough to mount five fans, although this chassis has ten locations, two of which are populated, so eight empty spots, and not enough screws to fill them all. We will concede that most aftermarket fans come with screws. We also got eighteen 6/32" screws, nine of which are needed for the motherboard, leaving nine 6/32" to mount three hard drives. At last count, there are six possible locations to mount a 2.5" drive into the 5000D, yet we were provided just enough for two.
There are eight washers, with no real intended purpose, and three extra standoffs. We would also like to mention that with the nine standoffs in the chassis and the additional three here, along with all of the 6/32" screws, we could not come up with enough pairs to mount the motherboard without some of them still being stripped or miss-tapped. We expect more and better in this area!
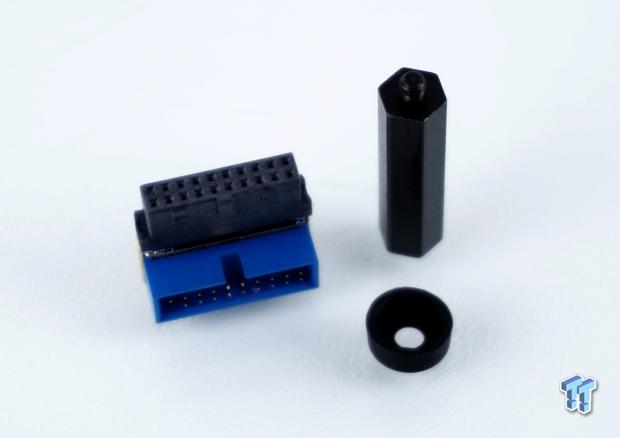
Other bits we found were this ninety-degree native USB 3.0 adapter, which could be handy on some older motherboards. Still, a lot of boards already offer the plug in a parallel orientation to the motherboard. The long standoff is much like the one that holds the back door #2 in place. However, in the 132 pages of the manual, or in any literature we were presented, nowhere on the box was a reason given to use it! It comes with a rubber cap for it too, yet we found a severe lack of need for these "extras."

Including the three already seen behind the motherboard tray, there is a total of twelve hook and loop straps with the Corsair logo on them. While the chassis offers only five more locations in the RapidRoute channels to use them, they can be used under the PSU cover or to route fan leads in the main chamber, whatever you need! A worthwhile addition and a better answer than zip-strips.
This manual has to be one of the thickest, least informative attempts we have seen in over a decade! It opens to a glossary broken up by language. Flip one page, and you are looking at a specs chart and two, dimensional renderings, and on the following page is a list of parts, which includes the screws and washers, but no mention of the adapter or the extra-long standoff. The next page is the same image we saw on the back of the box, and the detailed instructions that follow work you through one-off images and no text as you fumble your way through how it all is supposed to work. In our mind, if you are going to make a chassis complicated to use, you need to spell it all out like Fractal and Phanteks typically did in the past. Better to have too much information than a bunch of renderings that offer very little context.
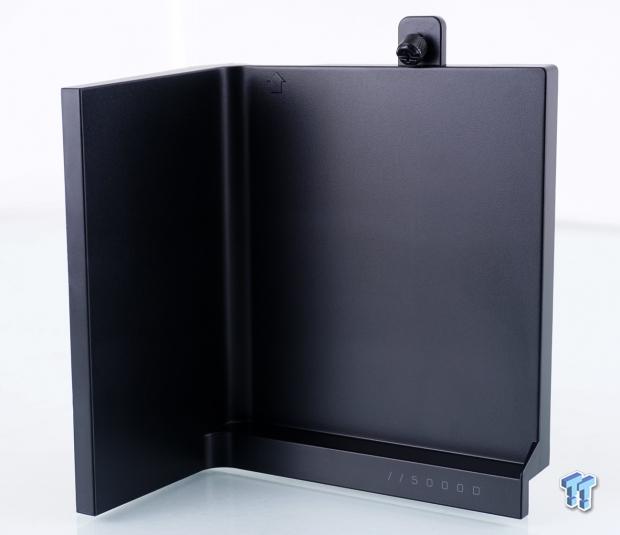
If you recall back to when we first saw the back of the chassis, something was wrapped in bubbles, and this is it. What we are looking at is a 140mm clearance version of the PSU cover. While also eliminating the HDD cage, you can swap the right end of the PSU cover out with this version, which allows a user to install a push/pull with thick radiators. We like the idea behind this, but aligning it with the steel portion of the PSU cover, the plastic guide near the glass panel, and the screw, it took a pretty good whack for ours to snap into place; it is not a gentle swap!
Test System, Installation, and Finished Product
- Motherboard: ASUS ROG DARK HERO (AMD X570) - Buy from Amazon
- CPU: AMD Ryzen 5 3700X - Buy from Amazon
- Memory: Team T-Force XTREEM ARGB 3600MHz 2X8GB
- Graphics Card: NVIDIA GeForce RTX 3070 FE - Buy from Amazon
- Storage: Sandisk Extreme II 120GB SSD
- Case: Hydra Bench Standard
- Power Supply: ASUS ROG Thor 850W - Buy from Amazon
- OS: Microsoft Windows 10 Home 64-bit - Buy from Amazon
- Software: AMD Ryzen Master, AIDA64 Engineer 6.32.5600, and CPU-z 1.94.0 x64
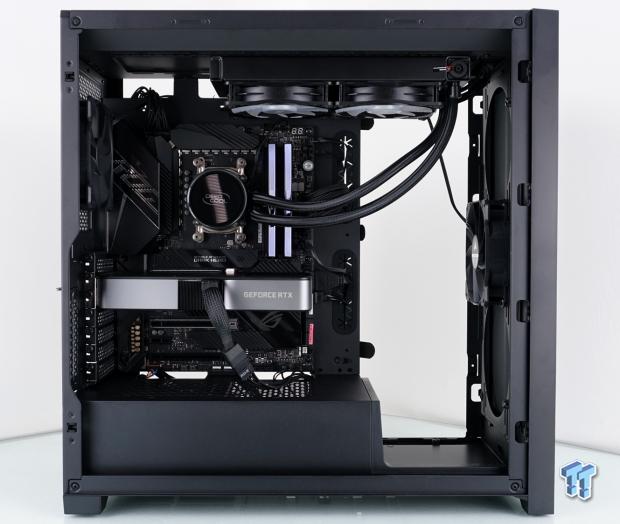
In the stock configuration, we installed the motherboard wired it to the PSU and the chassis, then went to try to install the AIO radiator as we see it, all the way to the right. However, the wire cover panel forced the radiator away from the mounting holes, so we had a choice, shift the radiator left or dive into this front cooling setup. Attempting to remove the panel means we had to remove the RapidRoute system, so we had to unwire everything for something as silly as a millimeter or two of clearance. We were able to screw around and force the SATA data cable, the USB 3.0, and the Type-C cables under the tray, but when it came time for the 24-pin, there is not enough clearance to leave the plate installed and complete the build!
In our frustration, we gutted the right side of the internals, tossed the bits we didn't need on the floor, but we were able to force the optional PSU cover into the chassis. Beyond that, we had to loosen all of the expansion slot covers so that the GPU would align with the rear I/O, but otherwise, we ran out of things to complain about for this image.
The motherboard lined up well with the rear I/O( panel at the top, although we do wish the standoffs and screws were secured at this point, only six screws and standoffs fit together to hold the motherboard in place. The GPU is level, but this is the first case we ever had to remove covers, install the card, then replace all the covers we did not fill slots! The PSU orientation is up to the user. There are holes for both orientations, and with a dust filter below and an open-topped PSU cover, the PSU will draw a sufficient amount of air either way.
Even with the RapidRoute channels and the 25mm of room offered, that distance is from the inner door panel to the motherboard tray's back. The RapidRoute takes up some of that space, and just with the chassis wires and the 24-pin in the left channel, we had to force the door closed to attach magnetically. If you are planning on using the SSD trays, it can cut off some of the paths to use the plate in the access hole, and you can see, if we used the right SSD tray, we would have run into issues getting the 8-pin EPS cable around it.
We feel that an Xibit meme is needed here. Yo dawg, we heard you liked doors. So we put a door over your door, so you can have a door to cover your wires, which we charged you good money in the RapidRoute system to eliminate in the first place! The only other reason this would be needed is for a chassis with clear glass on both sides, and that is something not offered in any of the models!
At this point, we buttoned everything up the way it was and powered it up to see what the 5000D AIRFLOW is all about. Sadly, with the dark tint, all we can see is the AIO lighting and the motherboard power button inside of the case. We also feel a bit letdown that RGB is not a part of this chassis, but why give us something that they can offer in another version and lighten your wallet for more than $200!
Final Thoughts
Along this journey, we kept notes as to what were hits and what were misses, and we may as well start with the misses. We feel that the TG panel needs a better mounting system. We did not mind the sockets at the back, but the tiny tabs at the front of the glass are undersized and almost designed to cause an issue. At least do not round them off so that we can use the entire 3/8" of steel you offered, not just 1/8" to 1/4" of it! There is the cover plate that we complained about for many aspects of how it seemed overthought and convoluted. If it were any other manufacturer, they would let their freak flag fly and have the additional cooling fully exposed to the world, not hidden, and not to the point where it complicates other aspects of the chassis build!
In the extra tray placed in the CPU cooler access hole, we get that it has 2.5" and 3.5" drive holes, but there are also other holes drilled in it, with no notations as to their use, much like the pair of holes in the bottom of the chassis. As much of a fan of wire management as we are, we feel that with a bit more thinking and a couple of different clicks in a CAD program, maybe we could have eliminated the need to completely gut the chassis, where parts could be removed in simple layers, that did not conflict with one another.
On top of that, we got shoddy screws and standoffs, and when it came to M3 screws, we feel shorted. We reported much of this to Corsair before going forward with this, and they state that our complaints are opinions and are in no way consequential to any need to rethink, review, or possibly ponder a V2 of this design. We wholeheartedly feel that this chassis went from a CAD design to the manufacturer due to the global situation, and then to us, with no checks and balances or anyone at Corsair attempting to do what they feel is possible with the 5000D AIRFLOW.
There are things we appreciated along the way but is it enough to win over the masses? We appreciate the look! The monolith design is something Corsair has been doing for years since the release of the 800D many years back. We appreciate that the TG panel does not have exposed hardware or anything goofy breaking up the dark mirrored look, but that is as far as it goes with our love for that panel!
We like the pop-out panels at the front and the top, but it seems there is a more affordable yet still clean approach to doing the same thing with thumbscrews and grooves. Some may appreciate the USB 3.0 adapter. Although we didn't use it, we can see one or two instances where it might be needed. Most likely, the best thing about the 5000D AIRFLOW is that at around thirty pounds empty, it is a sturdy solid box to house your goodies!
We have spent some time testing things out inside the 5000D AIRFLOW and are impressed with what we found here! Thermally, the CPU temperature increased less than two degrees over an open-air run with the same hardware, which we feel is terrific! We also saw a near six-degree drop in the VRM temps, and as to the GPU, our RTX 3070 increased just 1.8-degrees when all of the systems were loaded.
Audibly, we took all of the system component readings during our open-air testing, and we can disconnect the loudest of the noisemakers from our system to obtain what is going on with the chassis. On startup, the fans will turn at 610 RPM controlled with the PWM hub, and at that speed makes 28 dB of noise. Under our loaded conditions, the fans spin at 1366 RPM, delivering 46 dB of noise out into the room. We also took the fans off the hub, provided them with 12V, and saw them spinning at 1522 RPM, and the noise increases to 51 dB at full-go!
Had this been a $100 chassis, we could see overlooking a few of the smaller details, but the reality is that Corsair is asking $165 for the 5000D AIRFLOW, as you saw it here. That is a lot of money to run across as many stumbling points and oddities as we encountered with even the simplest of builds! There is some good behind this design, yet so many newbie/amateurish elements that either do not make any sense or are instances where Corsair is trying to reinvent the wheel just for the sake of saying they did it. It isn't any better. It's just a more complicated wheel! Sadly, we do not recommend this chassis with so many better options available, and cases at this price level will allow you to install the basics without the headaches and frustrations Corsair presented us with their 5000D AIRFLOW.
For those of you out there who do not mind the abuse, you can have an epic looking build, but again, you are paying for parts to go right into the bin! In our opinion, the 5000D is overpriced, full of "what were they thinking" moments. With cases like the 4000 series from Corsair, the Lian Li PC-O11, many of the Thermaltake cases over the past few years, we feel there are better options with less of an investment to consider!
 Lian Li B4-mATX Review: a compact mATX SFF case with excellent airflow and premium features
 Ocypus Sigma F36 BK ARGB Cooling Fan Review: high airflow and unified design in one frame
 PCCooler CPS RZ820 Display Review: a flagship-level CPU air cooler with an LCD screen
 MOAIPLAY ORA PRO G1 850W ATX 3.1 PSU Review: high efficiency and 10-year warranty for $119.99
 NZXT H6 RGB+ Compact Dual-Chamber Chassis Review
 Assassin's Creed Black Flag Resynced sells over 5 times more copies than AC Shadows on Steam
 Obsidian to make a new Fallout game led by New Vegas director
 Even DDR4 RAM is not safe from the RAMpocalypse, prices rose over 50% in Q3 2026
 PlayStation Disc Phaseout Saga: What You Need to Know
 Samsung's first PCIe 6.0 SSD is now in mass production with ridiculous speeds
 Xbox's Elder Scrolls 6 strategy looks shakier after Bethesda layoffs
 The dreaded Steam Machine 'Red Line of Death' was fixed after a simple CMOS reset
 Samsung confirms next-gen Snapdragon power for its new foldable phones
 Apple's foldable iPhone may finally be ready for prime time in 2026
 Earth could escape being swallowed by the dying Sun, scientists say
 MOZA MGX1000 Instrument Panel Review: a realistic Garmin G1000 replica for immersive flight sims
 Simagic Zeus Formula Steering Wheel Review: premium build and advanced inputs for F1 racing
 GIGABYTE X870E Aero X3D Dark Wood Review - A woody goody
 The Super Mario Galaxy Movie (2026) 4K Ultra HD Blu-ray Review
 KTC H49S66 5K2K (5120x1440) 49-inch 180Hz Gaming Monitor Review
 HighPoint Rocket 1604L Gen5 x16 NVMe Software RAID AIC Review: half the price with full 59 GB/s speed
 Next Level Racing ERS3 Haptic Seat Review: immersive sim racing comfort with integrated haptics
 ASUS TUF Gaming X870-Pro WiFi7 W NEO Review - Tuffed up
 GIGABYTE GO27Q24G Gaming Monitor Review: Glossy OLED Gaming at 240Hz
 Don't sell your Windows laptop until you do these things
 6 PC cleaning mistakes to avoid for safer hardware maintenance
 Phison and Intel Take Aim at Local AI's Memory Wall with aiDAPTIV
 How to Remap Keyboard Keys in Windows using Microsoft PowerToys
 7 tips to organize your Windows files for faster, easier access
 Intel Arc G3 Extreme first impressions with MSI's Claw 8 EX AI+ - Incredible power for an extreme price
 How to fix Wi-Fi Adapter Not Working on Windows laptops: troubleshooting tips
 Hisense U7SG 4K TV: Modern Entertainment for the New Age
 6 underrated Microsoft Word features worth using to boost your productivity
 Level Up Your PC Gaming with these Fantastic ASUS Prime Day Deals on GPUs, Motherboards, and More