
The Bottom Line
Introduction, Specifications, and Pricing
iBUYPOWER is a brand that I think anyone who has been part of the PC community is aware of. iBUYPOWER is a system integrator or SI as its commonly referred to. They offer prebuilt systems suitable for gaming and general use, while also offering some exciting customization options and even the occasional unique and exclusive custom designs. One such model is the Snowblind series, which took an NZXT chassis design and integrated an LCD layer. This feature allows the systems GPU to control an image that is displayed on the side panel with the filter enabling internal components to be viewed through the image on the side panel.
The Snowblind series was initially conceptualized and applied to Snowblind based prebuilt systems from iBUYPOWER. However, iBUYPOWER is now offering the chassis in a DIY form for users who want to build their custom system with an active display filter built into the main window panel.
Key features of the Snowblind Element chassis primarily will be the LCD side panel; however, it being an NZXT based chassis, it has similar fitment of components to what we have seen on a chassis such as the H510 Elite.
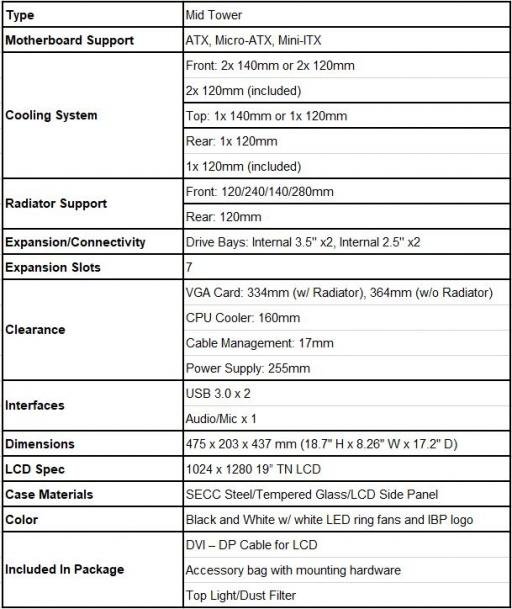
The Snowblind Element measures at 475mm tall and 437mm deep. The width of the chassis is 203mm, which should give reasonable fitment for taller components. The part number for the Snowblind Element is CS-IBP-EMEMENT-SN, and I feel like while the part number looks like Element was misspelled, I assume that is to help designate model differentials.
Motherboard fitment ranges from ITX up to ATX. The 3.5" and 2.5" storage fitment are numbers at two each. Since the HDD cage does not use trays, they cannot be repurposed for 2.5" drives. The 2.5" drive trays are on top of the PSU shroud, which means they will be visible inside your system through the LCD panel window. The PSU fitment is full ATX, and there is reasonable room to fit most at up to 255mm. The PSU is rear entry via a bracket system. The PSU area is covered by a shroud, which helps to give a more reflective white surface to push light back through the side panel along with creating a more agreeable aesthetic than a PSU at the bottom.
The fan fitment is the same as we saw with the H510/H500 Elite chassis. The front takes up to two 120 or 140mm based fans or radiators up to 280mm. The rear mount can fit 120mm radiators or fans. The top can take a single 120 or 140mm fan but no radiator here due to the proximity of the motherboard. The included fans number three, with dual 120mm fans up front, and a single 120mm fan out back. Do note that the included fans are 3-pin DC fans, so control granularity will not be stellar. The two front fans come with a 4-pin PATA adapter, which feeds them full 12V and full speed. The CPU cooler limit is 160mm, which may be a bit short for some of the most massive coolers but should fit most.
The price of the Snowblind element is $299 MSRP, and the newer Snowblind S will cost you $199. Since we are checking out the Element today, we will focus on this price point. The $299 price point is when you start to get to the upper echelon of pricing for a mid-tower, with contenders coming in the form of the Obsidian 500D at twenty dollars cheaper, along with the Phanteks Enthoo Primo being fifty dollars cheaper.
There are also more expensive options, but the one thing the Snowblind series has going for it right out of the box is the LCD panel solution. Any other chassis would require custom work that most may not be comfortable with. With that said, this is going to be exciting as we test the Snowblind Element and asses its performance and features versus the competition in the conclusion.
With all that behind us, let's see what we find as we dig into the Snowblind Element from iBUYPOWER.
Shannon's Chassis Test System Specifications
- Motherboard: ASUS Prime X299 Edition 30 (buy from Amazon)
- CPU: Intel Core i7 8700K (buy from Amazon)
- Cooler: Corsair H100i RGB PLATINUM SE (buy from Amazon)
- Memory: Corsair Vengeance Pro RGB CMW32GX4M4C3000C15 (buy from Amazon)
- Video Card: ASUS ROG Strix RTX 2080 Ti (buy from Amazon)
- Storage: SanDisk M.2 256GB
- Power Supply: SilverStone Strider Platinum 1000W (buy from Amazon)
- OS: Microsoft Windows 10 Home 64-bit (buy from Amazon)
Packaging


The main outer box is a brown cardboard box like you would expect a custom system build form iBUYPOWER would ship within. It does not have any relevant information besides the logo and, of course, a shipping label. There are also notes on fragility and informing shippers that computer components are inside, which I can assume is in the hopes the shipper will be kind to the package knowing the sensitivity of components.
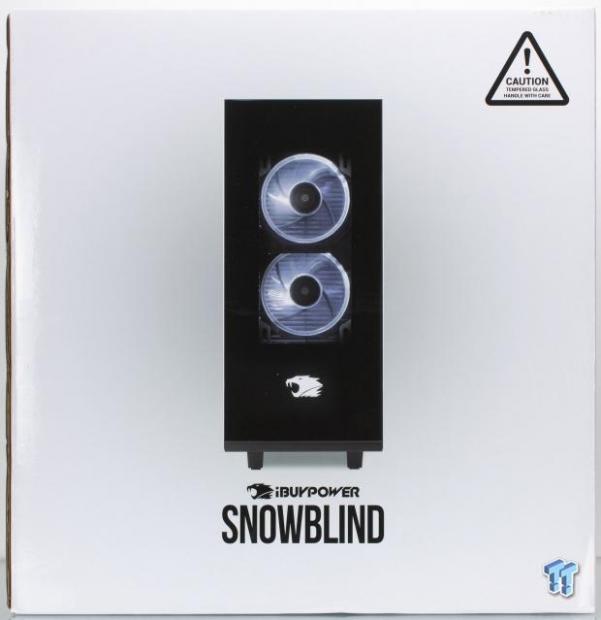
After opening the main cardboard enclosure, we find the actual chassis box inside, which thanks to the outer box is in pristine shape. The package is a crisp white with the front of the chassis in full view. The only other information is a warning about tempered glass, which is breakable and the brand logo and chassis or series name in this case.

The skinny sides of the box have the same design with a note on items included in the package, which is for a fully built system. While a lot of items are listed here, we can state that the only thing in the box is the chassis and its relevant accessories. The serial number sticker is also found here along with an angled shot of the built Snowblind config and the safety and regulatory icons across the lower portion.
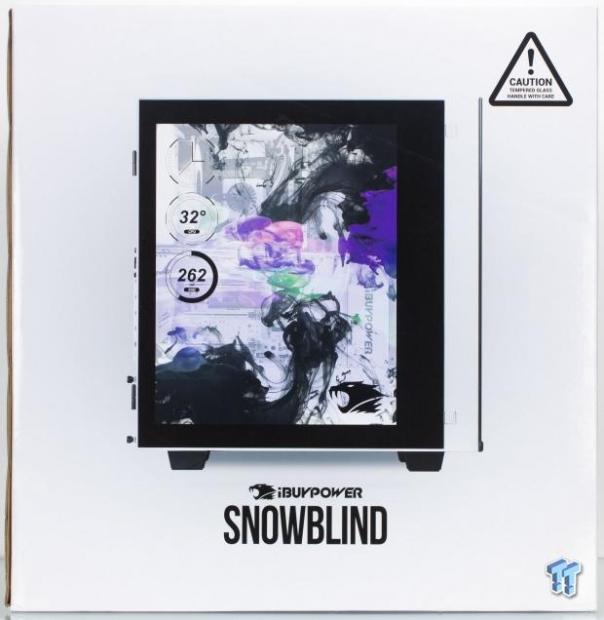
The broad opposing side of the packaging now shows the LCD side panel in full effect. This is, of course, a rendering as the things showing on the LCD are semi-opaque in real-world usage and not as solid or bold as shown here. But they are quite visible depending on the angle and the white level of the internal components. The same warning and logo and series moniker are in place as the large opposite side.

The internal protection for the Snowblind Element is very good with soft type squishy foam taking the impacts. The glass/LCD panels are covered with cling film, and the entire chassis is wrapped in a plastic bag to ensure that abrasion damage is mitigated.
iBUYPOWER Snowblind Element Mid-Tower Chassis
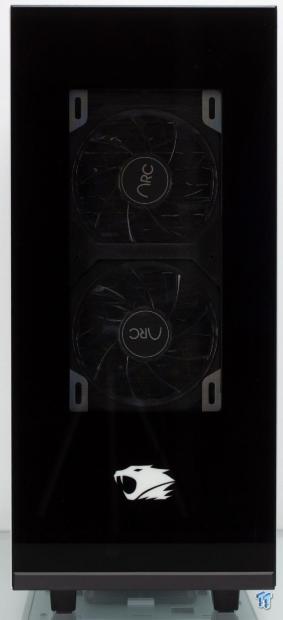
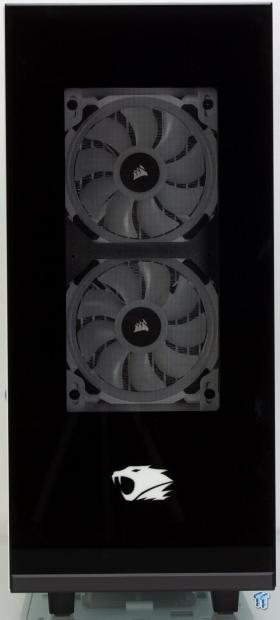
Looking up front, we see that the Snowblind Element has a transparent rectangular portion of the front glass, which highlights the front cooling mounting. This means whether you keep the white lit LED fans up front or opt for RGB fans, you can see them from the front. Below the opening, we have the iBUYPOWER logo, which is lit in white by LEDs inside the panel. The only non-glass portion of the front panel is the bottom strip, which appears to be purely aesthetic.
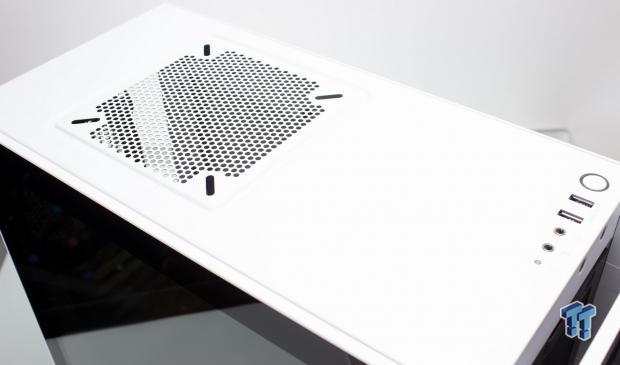
The top of the Snowblind Element is the same as we have seen from several NZXT cases now, with a single fan mount opening. And of course, the I/O up front.
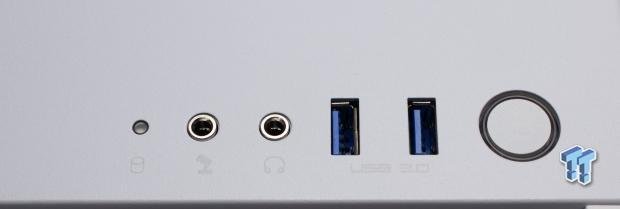
The I/O which is located at the top front of the chassis is simple and features as follows:
- HDD LED
- Microphone 3.5mm jack
- Headphone 3.5mm jack
- 2x USB 3.2 Gen 1 Type-A ports
- Power Button with integrated power LED halo
The I/O is simple and works, although more ports would be welcome at this price point, especially a faster Gen 2 port would be welcome.
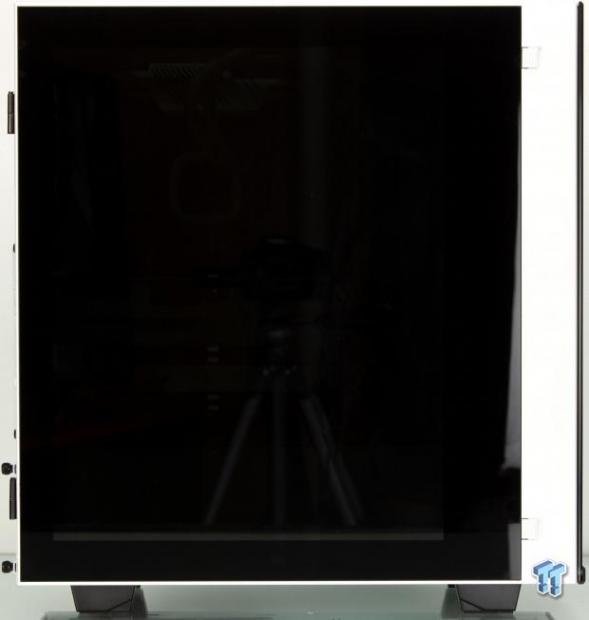
Looking at the main panel, which is the LCD that covers the build chamber is simply blacked out with only a slight hint of what's inside. When powered on, this will become more friendly to viewing as the internal LEDs are super bright and will punch light through the filter. However, with the system off, it will be quite challenging to see anything inside. Do note that the panel has hinges in the rear and allows the panel to swing open. The panel is held closed with two slide latches that almost blend in up front.
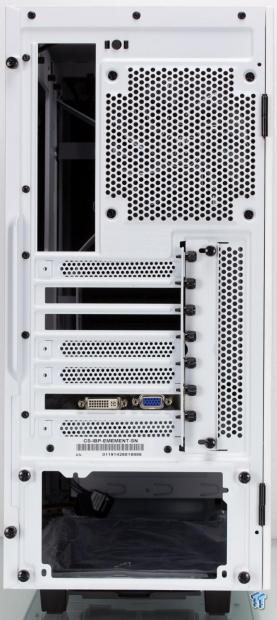
Out back, the Snowblind Element looks like most chassis we have seen with some small differences. Firstly there is a black circle up top; this is a button used to turn on or off the internal LED lighting, which allows you to see the LCD side panel designs being played. You will also notice that the two slots customarily used for a GPU are already cleared of their slot covers since this chassis is designed to be a prebuilt system. There is also a slot with two video ports, which are inputs for the side panel LCD.
The expansion slots are externally accessible, the same as the PSU, which uses a bracket to install the PSU from the rear.
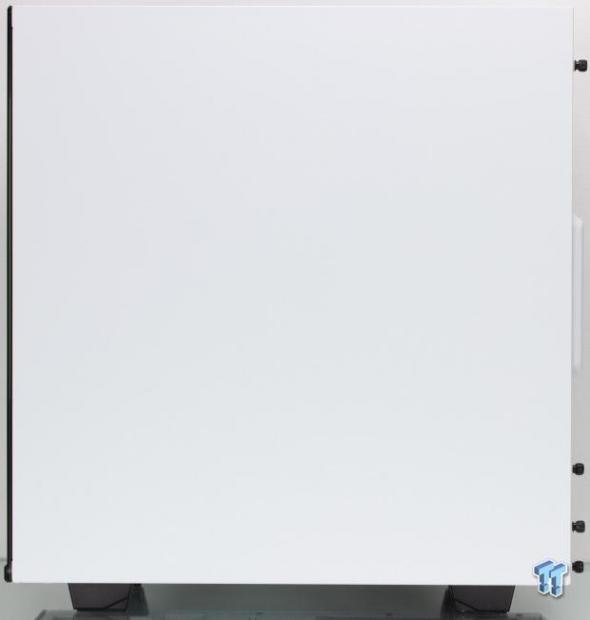
We now peek at the other large panel, which covers the cable management area. The panel found here is solid steel and painted white to match the design of the chassis. Two captured thumbscrews affix the panel to the chassis.
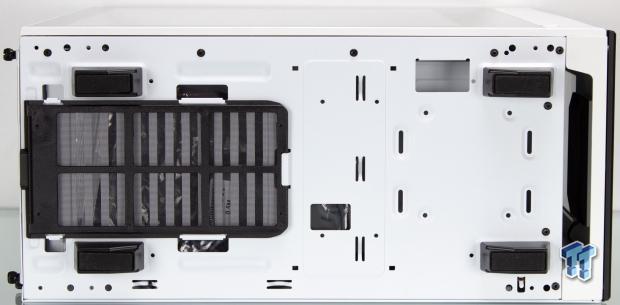
At the bottom of the chassis, we find white painted steel. At the rear, we have a rear removable PSU air inlet filter. Also, here we see several cable management loops, which are punched out of the bottom steel structure. The feet are rectangular plastic, which terminates in rubberized pads to help avoid skidding on surfaces. I do see below the HDD cage area there are various slotted, and static holes that can be used for several potential uses such as a liquid cooling pump or reservoir brackets.
Inside the Snowblind Element
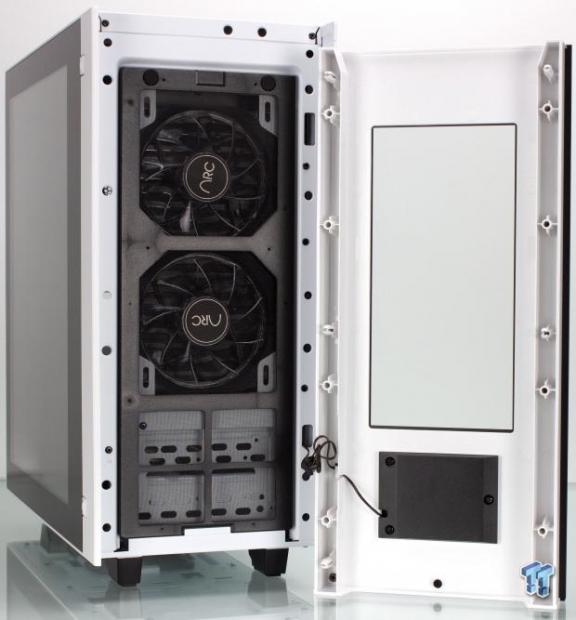

Digging into the Snowblind Element, we find when removing the front glass panel that there is a sizeable magnetic filter spanning most of the front of the chassis. There is also a 2-wire cable connecting the front panel logo to an internal lead supplying power for the logo LED. Puling the filter and you get a clearer look at the fans installed along with their built-in fan holder bracket, which likely is used to speed up the assembly of these systems as prebuilds, which are done by hand. To install our AIO, we will be removing this bracket and these fans in favor of the LL fans that come with our H100i Platinum SE white cooler.
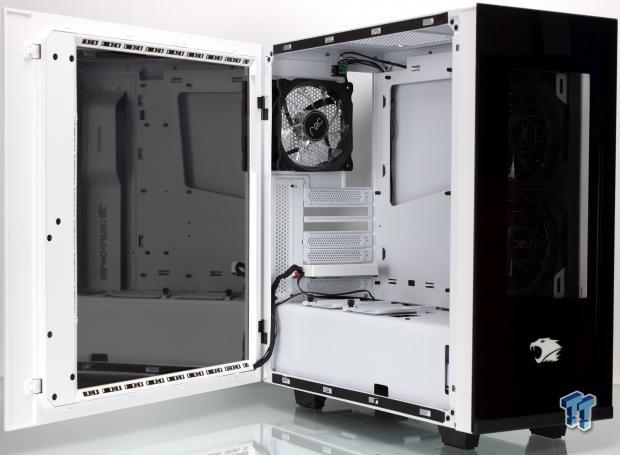
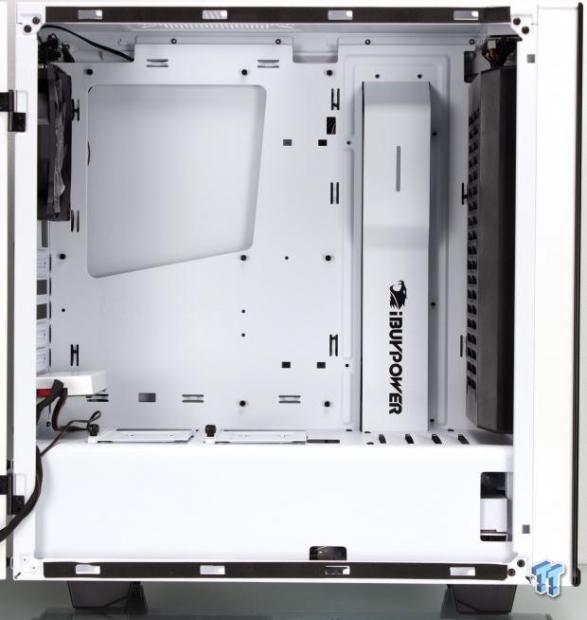
Opening the chassis, and we have a view of the inside of the side panel. The hinge pins are pointed downward, and the panel can be lifted and away if you need to do so. Do note that the wiring for the internal screen interface is well integrated, so I would avoid removing the panel and built-in module if possible. The interior LED array you see surrounding the panel is very bright white to help push visuals through the filter due to the natural way an LCD works. You need a lot of bright light to get light through this panel, so it is also recommended to have as many white-based components in the system for the best functionality of the LCD side panel.
Peeking inside the chassis, we also see the vertical cable management bar, same as we have seen in the NZXT chassis we have reviewed. The CPU cutout is angled and large enough that there should be no issues with any cooler we have seen to date. The top cable management passthrough holes are well placed to allow EPS and fan cables to reach the cable management section in the rear.
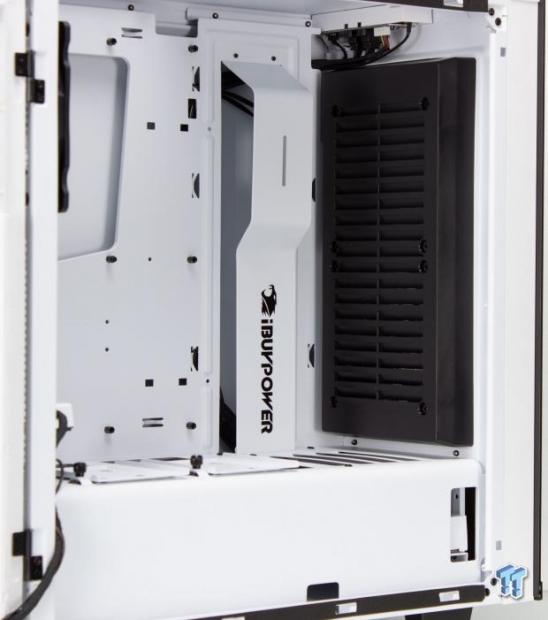
Peeking inside the front fan mounting and we now see the large fan bracket which comes preinstalled. There are louvered vents that direct the airflow from the fans around the chamber. We can see that the fans are directly attached to this bracket, which, as I mentioned previously, will help with expediting the installation process, as the bracket uses four precisely placed holes to mount the pair of fans.
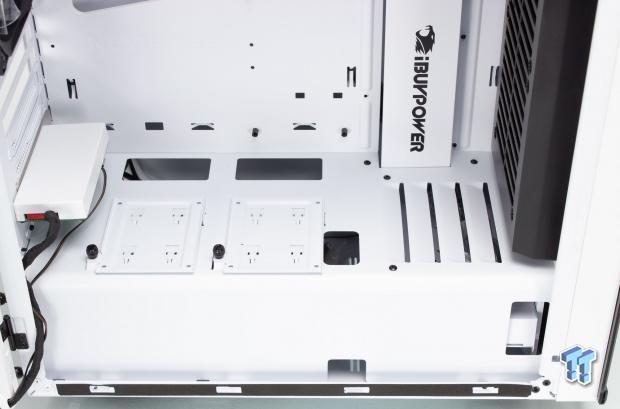
Here we have the PSU shroud for the Snowblind Element. The PSU shroud has well-appointed cable passthrough holes for both the SSD bays along with the front panel cables. Also, here is an opening further outward, which allows for passing cables to the GPU if needed. The front of the PSU shroud has a louvered area, which I am admittedly not sure what its purpose is beyond aesthetic. Lastly, is the dual SSD trays which are retained with slide mounting points, and a thumbscrew to lock it into place.
Inside the Snowblind Element Continued
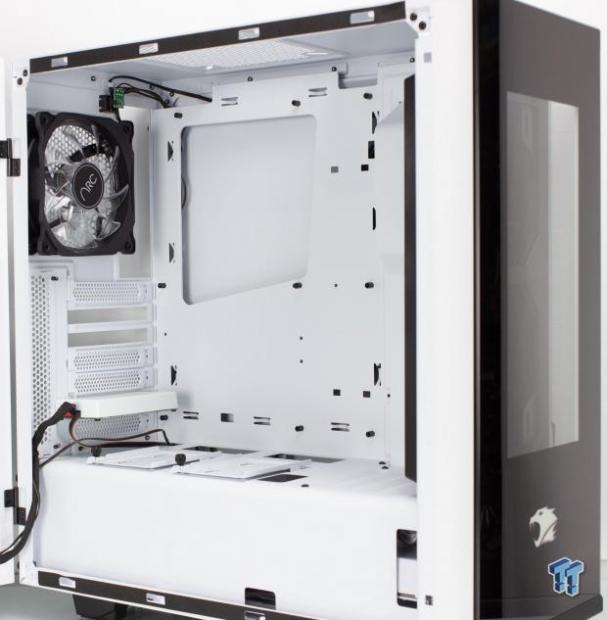
Looking at the rear I/O area from the inside, and we can now see the preinstalled fan. This fan, as mentioned previously, is a 3-pin DC powered 120mm unit. Below this, we have the expansion slots in which the LCD panel module will take one. At the top of the rear, we see the LED control button used to turn off the lighting if so desired.
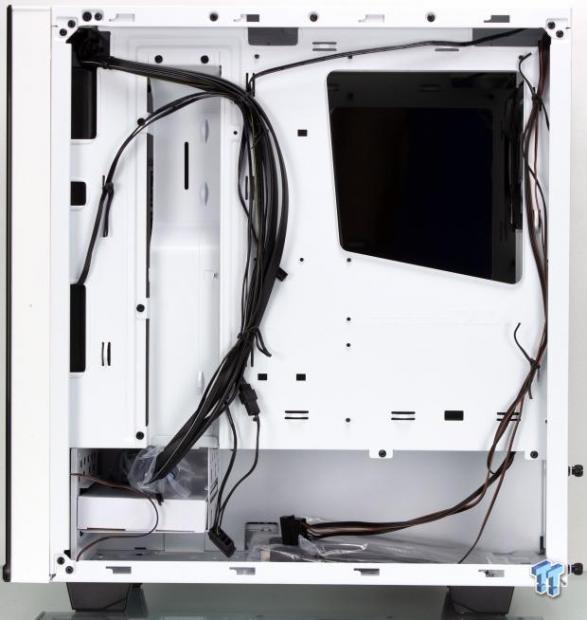
Looking inside the cable management area, we now get to assess the organization capabilities of the Snowblind Element. There are several cable management tie-down loops back here with some even on the vertical bar. Here on the motherboard tray is also where we note the NZXT design logo. The area across the bottom is well appointed with a mostly wide-open space for the PSU and cable hiding.
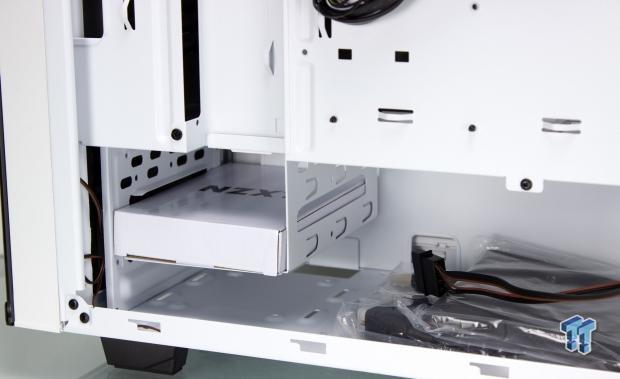
The HDD cage is a two-bay unit that uses fasteners to hard mount the 3.5" storage. There are no trays here which means these locations are only for 3.5" storage and cannot be used for 2.5". This is where we find the accessory box, which we will look at soon.
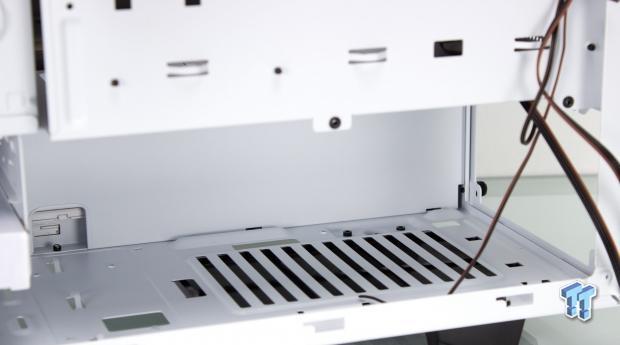
Here we have the PSU area, which has a large opening for air ingress. This longer filtered area means that longer high wattage supplies can be installed without choking the unit. There are raised humps for the PSU to rest on, and they are not padded so that the paint will be the only thing between the PSU and metal to metal contact. This does mean that the mating surfaces can transfer more vibration or harmonics.
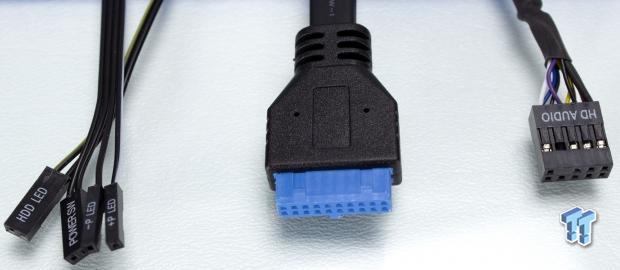
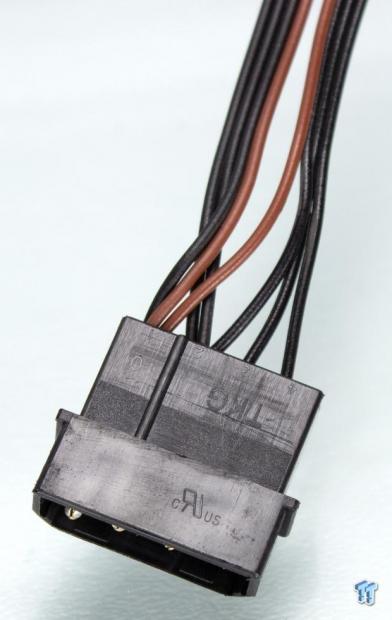
The front panel cable array is as follows:
- Power Switch, Power LED, and HDD LED connectors
- USB 3.2 Gen 1 20-pin connector
- HD Audio header
- 4-pin PATA power connector (Feeds side LCD panel and LEDs)
The cables are as expected, and the PATA power connector used for the LEDs and the LCD panel is a necessity for this whole operation to work.
Hardware & Documentation
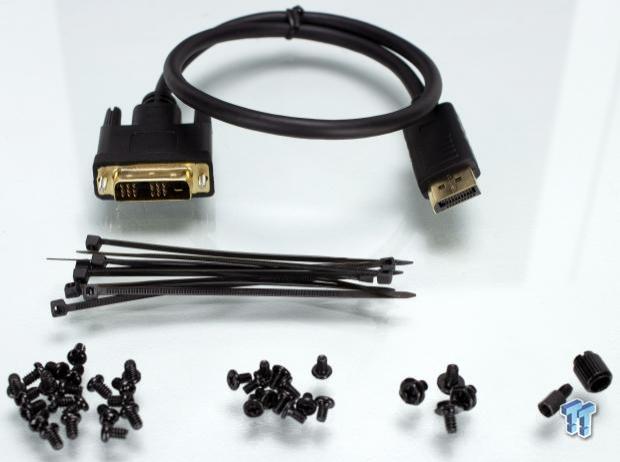
The accessory array is as follows:
- Displayport to DVI cable
- 10x zip ties
- 21x 6-32 motherboard and HDD screws
- 12x M3 screws for mounting 2.5" storage
- 1x standoff and installation tool
Here we see the standard screw set, which would be needed to install a system. The main component here is the DisplayPort to DVI cable, which is used to feed the data to the installed module for the side panel display.
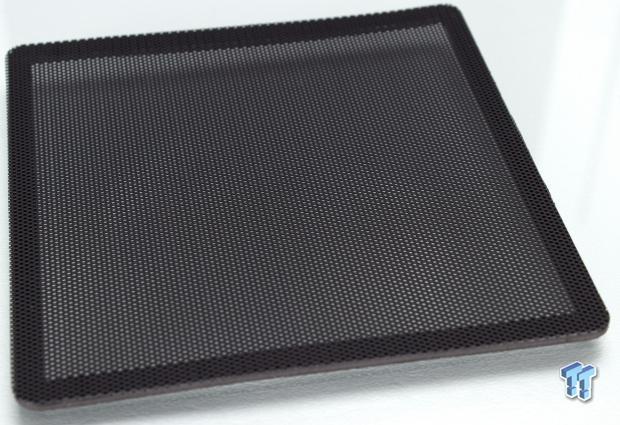
There is another accessory added as well, and it is a magnetic filter for the top of the chassis. This helps shield the top fan mount from dust along with also masking the internal light bleed, which can be substantial without the filter or a fan up top.

The manual for the Snowblind Element is a simple, quick start guide for the side LCD panel. There are no instructions for a user to follow for component installation. If you buy the Snowblind Element, you have to have your wits about you or find some videos online as there are no instructions provided for the build.
Case Build & Finished Product

Now that we have completed the build, we get to check out how it turned out. As you can see, we replaced the fans and their bracket with a front mount 240mm AIO which is themed white to match the white aesthetic of the build and provide a little extra reflectivity for the side panel function.
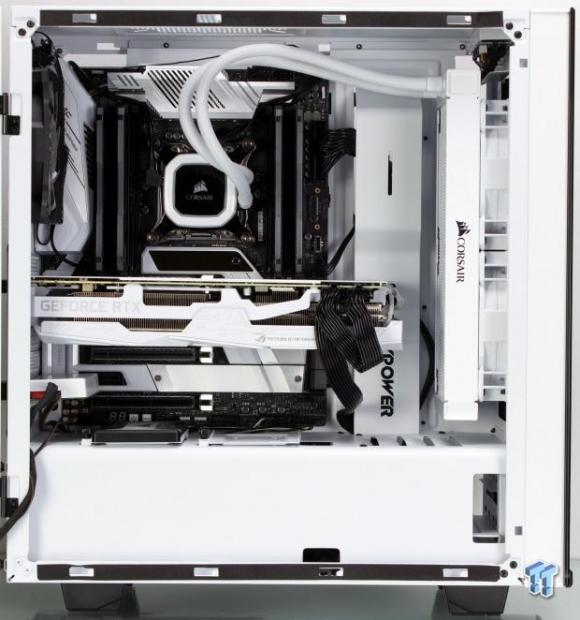
Here you can see that this is not our standard test build, as we opted for white parts to best match how iBUYPOWER builds the rig; this helps ensure as much reflective surface for light to punch through the side panel. We deployed ASUS white components in the Strix RTX 2080 Ti and the ASUS X299 Prime Edition 30 to round out the build, which should load up some heat in this aesthetically focused chassis. As you can see, even with such beefy components, there is plenty of room to get everything in place.
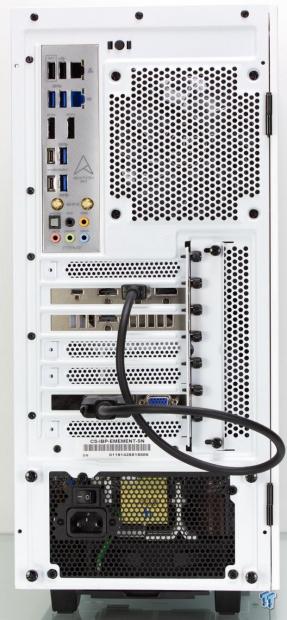
The rear looks as it did before, except all the spots are now filled. The GPU feeds down to the side panel module to give the panel display. This will be set up as an extended display and rotated to portrait mode.
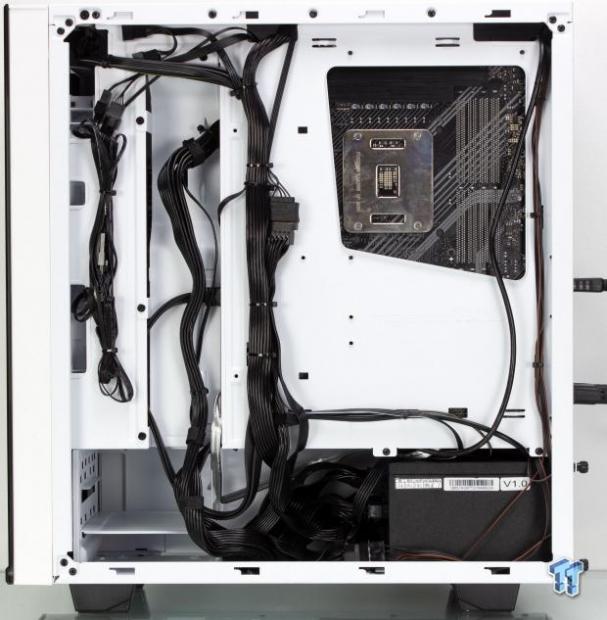
Cable routing in the Snowblind Element is as easy as any other NZXT chassis we have used to date. The vertical bar allows for easy cable routing without the worry of rubber grommets coming loose. The tie-down loops are well-positioned and plentiful for a build. The space in front of our 140mm 1kW supply is more than enough to tuck away unused cables and then some.
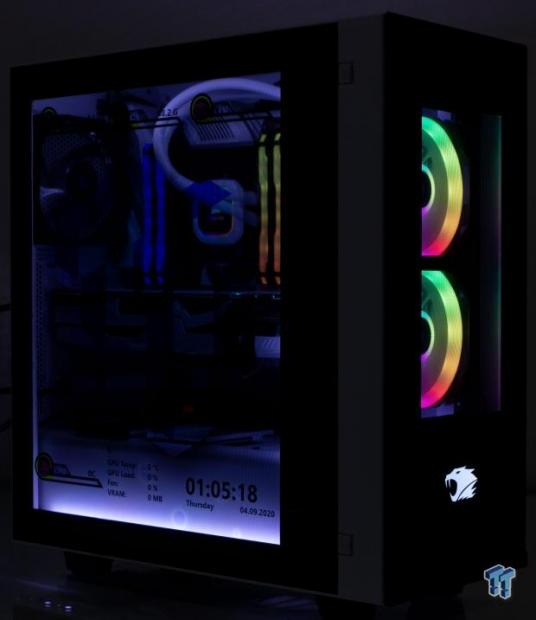
Powering the rig on, we see that with the lights off and a short shutter that the filter for the LCD is strong. The front RGB fans having a transparent window means you can adjust your lighting to match the theme of your build even from the front. You can see some of the data across the bottom of the side LCD panel, but I think we should take a better angle here.
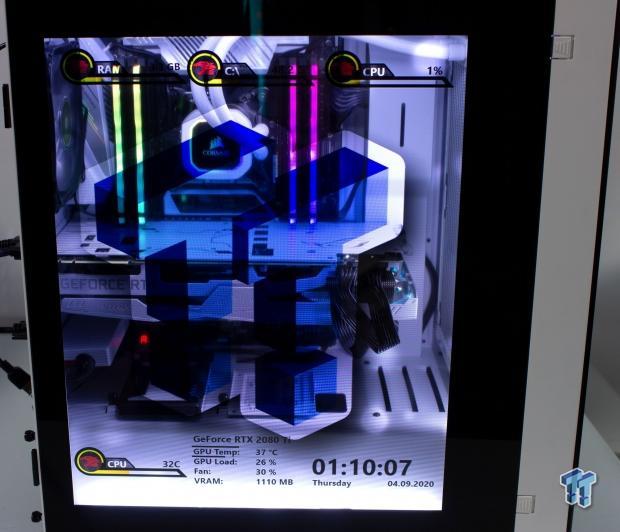
Taking a direct look at the side panel and you can now see the custom layout I created for the LCD, and of course, I had to pimp our logo a bit in the central portion. So note that to get some of these gauges working, you will need ancillary applications such as Coretemp and MSI afterburner so that the Rainmeter app can pull the data required.
What's better than an image of the side panel? How about a video?
Final Thoughts
I saw the Snowblind system when iBUYPOWER first introduced it some years ago. For the longest time, it was only offered as a prebuilt system. Several modders have taken on the task of integrating their panels, and while it is possible, it does not come without risk and some skill required. The Snowblind Element comes with the panel included and done in a neat way that feels like it would be easy.
During testing, the Snowblind Element did well. The measured ambient was 20.8C with an RH of 45%./ The 7900X CPU reached a steady-state average thermal delta over ambient of 39.5C while the RTX 2080 Ti averaged out to a delta of 33.7C. This is more than acceptable, and quite honestly, I am surprised as neither of these parts is low on the thermal output department. I think the Snowblind Element easily earns a passing score here.

What we like
The first thing must be the LCD side panel. With the world now inundated with tempered glass panels, it is nice to see something that can be aesthetically dynamic. The thermal performance comes in next with great overall results here.
The next thing would be the overall aesthetic aside from the LCD panel, which is beautiful and serves the build well. The build quality is not bad, as I did not find any areas where I felt the component quality was lacking. The quality of the finished LCD panel comes up with the quality of materials as the fit and finish are fantastic.
What do we think could be better?
There are some things I think could be better on the Snowblind Element. First would be the HDD cage, which I would like to see use trays so that users with 2.5" storage can use the cage if they choose to omit spinners. The cooling fitment could use some expansion to enable larger liquid-cooled builds with this excellent feature set. Including a manual with a DIY chassis is elementary. Since this is one of iBUYPOWER's first standalone chassis I have had hands-on time with, I hope in the future they include an appropriate manual. I am glad they included the guide for the LCD setup, but a build guide is desirable for new users.
At the asking price of $299, the Snowblind Element may seem steep. However, if you consider the time, risk, and components necessary to make this yourself, I think the picture becomes far more apparent and the price more palatable. While you may be missing the latest high-speed I/O, the Snowblind Element offers something few can, and that is a dynamic user-controllable aesthetic that is hard to compete with. While the value of this specific feature will vary from person to person, if you want this sort of solution in a roughly plug and play fashion, there is no other game in town.
Do note that at the time of writing stock of the Snowblind Element was limited but still available, however its less expensive cousin, the Snowblind S, is still readily available. iBUYPOWER confirmed that presently they are low on chassis only stock and will determine soon if they will add more. If you want this feature as a full system, iBUYPOWER can do this as well, with a Snowblind series prebuilt gaming rig.
Shannon's Chassis Test System Specifications
- Motherboard: ASUS Prime X299 Edition 30 (buy from Amazon)
- CPU: Intel Core i7 8700K (buy from Amazon)
- Cooler: Corsair H100i RGB PLATINUM SE (buy from Amazon)
- Memory: Corsair Vengeance Pro RGB CMW32GX4M4C3000C15 (buy from Amazon)
- Video Card: ASUS ROG Strix RTX 2080 Ti (buy from Amazon)
- Storage: SanDisk M.2 256GB
- Power Supply: SilverStone Strider Platinum 1000W (buy from Amazon)
- OS: Microsoft Windows 10 Home 64-bit (buy from Amazon)
Performance |
96% |
Quality |
98% |
Features |
95% |
Value |
90% |
Overall |
95% |
The Snowblind Element from iBUYPOWER is what you would expect from an NZXT chassis. It is the addition of the LCD side panel that takes it from good to great. If you are looking for the ultimate in dynamic aesthetics, the Snowblind series is hard to beat.

Similar Content
Related Tags

