


Our Verdict
Introduction, Specifications, and Pricing
Corsair is no stranger to the PC game as the now offer virtually everything short of core components such as motherboard, CPU, and GPU. Corsair started as a memory brand back in the inception of DIY PC with cache modules for boards back when the cache was not on the CPU. Now, fast forward a few decades, and we are faced with a tech conglomerate the likes of which are quite rare.
Today we have the newest venture for the Corsair crew with their HydroX series of DIY liquid cooling components. We have seen other manufacturers struggle to engage this segment with varying levels of success in the past. Corsair went the acquisition route picking up a team of relatively recent departures from EK and putting them to work developing what would end up being the HydroX lineup we have today.
Corsair still does not have specific kits set up yet, but we have seen a few for the EU region on Amazon recently, so we believe we will see them sooner rather than later. In the meantime, we looked at their configurator and set up a liquid cooling build roughly off their configuration suggestions.
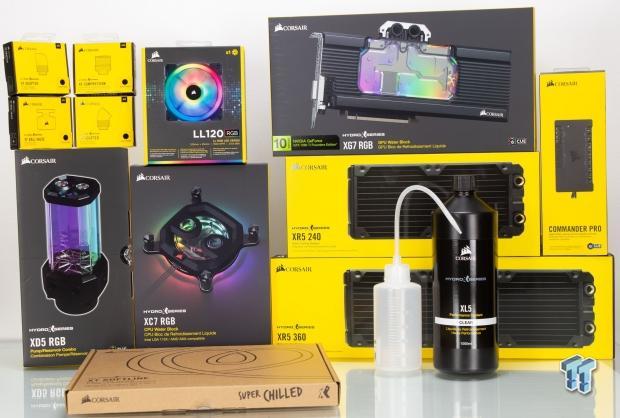
On the following pages, we will assess the website where you select parts and show the parts provided along with the finished build. With that said, let's start this off next with the HydroX configuration page, where I can show the detail that you can set up the HydroX parts.
Best Deals: Corsair HydroX Series XC9 RGB CPU Water Block
Shannon's Chassis Test System Specifications
- Motherboard: ASUS ROG Maximus XI Extreme Z390 (buy from Amazon)
- CPU: Intel Core i9 9900K (buy from Amazon)
- Cooler: Corsair HydroX Series Liquid cooling (buy from Amazon)
- Memory: Corsair Vengeance Pro RGB CMW32GX4M4C3000C15 (buy from Amazon)
- Video Card: NVIDIA RTX 2080 Ti Founders Edition
- Storage: Sandisk M.2 256GB
- Power Supply: SilverStone Strider Platinum 1000W (buy from Amazon)
- OS: Microsoft Windows 10 Home 64-bit (buy from Amazon)
HydroX Configuration webpage
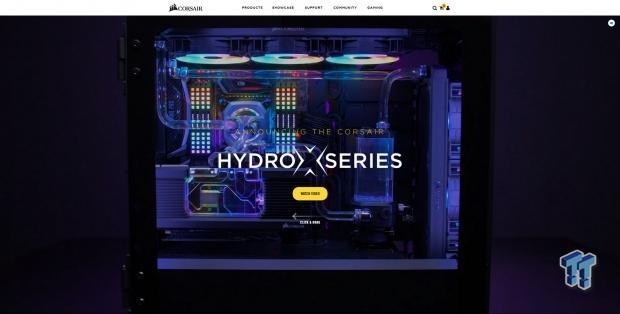
When you navigate to the corsair webpage and select their custom liquid cooling section, it directs you here. This is where you can choose to watch their marketing video covering the HydroX lineup, or you swipe left to get to the thick of things, and you can start selecting parts. I do feel like Corsair's marketing team missed a chance to be cheeky with a swipe right insertion for the moving forward, whereas swiping left could take you back to the main Corsair page.

Swiping left gets you to the selection to view the entire lineup of Corsair HydroX custom liquid cooling parts, or you can select to move to the configurator, which is what we will be doing. There are several selections across the bottom where you can see the marketing pages for the cooling, but we won't bother with that in this review, we are going to jump right into the parts selection.
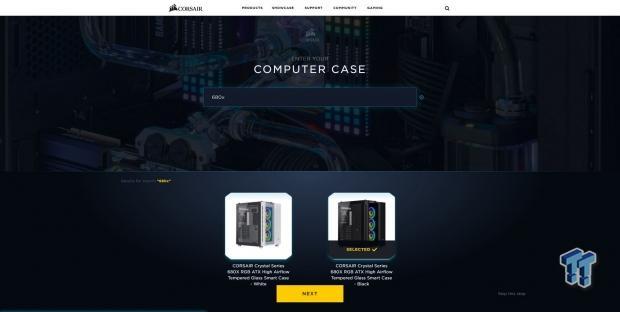
Once in the configurator, we find that the option for pc chassis was initially only Corsair based chassis. However, since then, they have started to expand, adding the PCO11 Dynamic XL, which is an excellent choice as the first non-corsair chassis to add, but I do hope that they add many more as time marches on. We chose the 680X, which we reviewed recently, and felt it was appropriate to use for our HydroX configuration and build.
Our Latest CPU Liquid Coolers Review Coverage
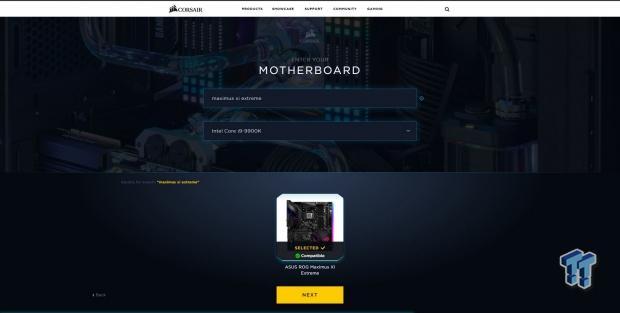
Next up is where you select your core components, starting with motherboards. The motherboard selection is plentiful, and it had every model I tossed through it that I could think of. Overall, this is not hard as it merely needs to know what socket (mainstream vs. HEDT) you may be using. This will impact which CPU block applies to you. The CPU selection is also here, which has not just the 990K but the 9900KF, and 9900KS.
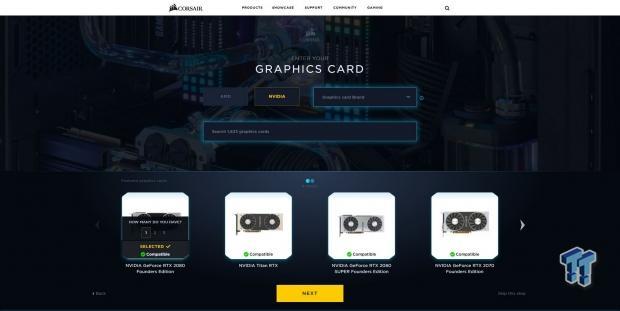
Next up is the GPU selection, which ensures you get the correct water block for your card or cards. As you can see, the selection allows you to select the quantity of my Founders Edition 2080 Ti. Even if NVLink only allows two GPUs in SLI, you can still select up to three.
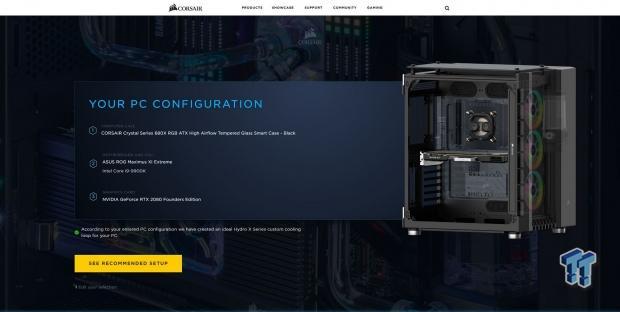
Now we reach the summary screen where you can verify all your parts are correct, and then you can see their recommended setup. Also, if there is a mistake, there is a link below the large yellow button, which allows you to go back and edit your selected components.
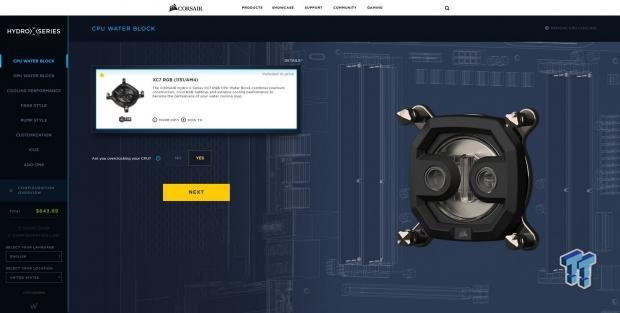
Now we enter the individual component deep dive. Here we have the CPU block Corsair recommends, and they ask if you will be overclocking the CPU. I selected yes because, as you choose yes to these, it will compensate for more cooling via more radiator when available to cover the heat load overhead.
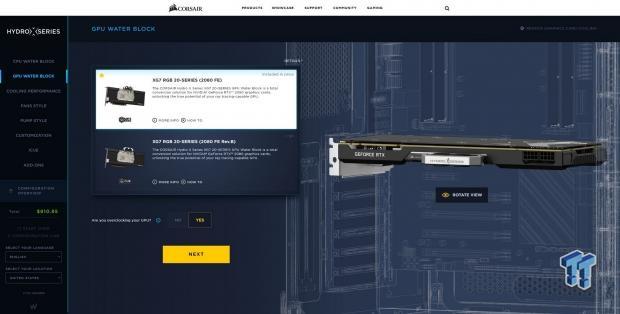
Next up is the GPU, which we elected to use our trusty RTX 2080 Ti for this project. Here we see two options, and one is for a Rev B. The Rev B 2080 series block is designed to fit some of the newer 2080 SUPER model cards as well. Depending on the card you choose in the configurator, you will have either both or the Rev B if the original version will not fit your newer model. Once again, we do find the overclocking query, which tries to consider extra heat with an OC if selected.
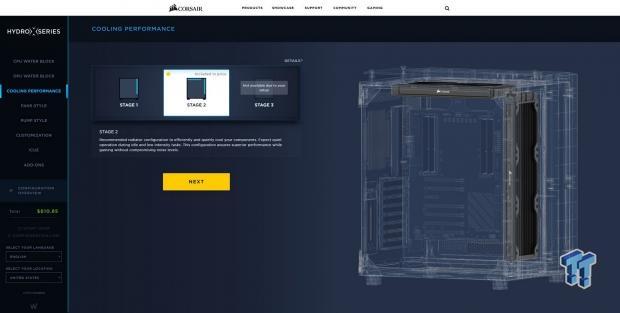
Moving to the next page, we find the "cooling stage" you want to select. With the 680X, we have stage one, which is a single front mount radiator, and with Stage two, there is an additional top mount radiator. Stage three is grayed out as it is not applicable for our setup; however, hang in there because I found a weird bug in the system, so to speak regarding this. We will discuss that in the latter part of this page.

Moving to the fan section, Corsair rightfully identifies that the 680X comes with triple LL fans, and therefore reduces the amount from your total automatically. I do like that Corsair recognizes your preinstalled parts and adjusts things rather than just forcing more fans down your throat unnecessarily. We opted for two more LL120 fans up top and a 140mm at the rear to round out the fan performance and visual aesthetic needs.

Next up is the Pump/Res section. Corsair employs both a D5 pump/res and a flatter smaller DDC version. For this review, we will be building with the D5 version, but we received both from corsair to show, which we will cover on the page looking at both reservoir units. The D5 is included in the overall quote, and the DDC unit is the same cost, which being it's a more compact unit, can be suitable for smaller form factor builds, or possibly mounted in a chassis which cannot usually accommodate a larger reservoir.

The next page is where we decide whether we want to do soft tube or hard tube. We selected soft tube, but Corsair does offer PMMA hard tubing and appropriate fittings, along with soft tube compression fittings to match your cooling system appearance goals. Overall, this selection is not nearly as important for performance as they both move the liquid across the cooling loop; just one is flexible, whereas the other is rigid. Here we also get separate tabs for coolant color and fitting color. We chose black for our build, but the options are chrome (Default), black, gold, and white. The coolant colors are clear (default), red, blue, purple, and green. We chose default clear for our build as it allows the best compatibility with a varying array of RGB lighting colors.

This next part has to do with iCUE components. I do like once again that if you have an applicable Corsair chassis, this configurator will know what it comes with and default to not providing something you do not need. The options you can add here are the RGB fan hub, along with a Corsair Commander Pro. Corsair sent us a Commander Pro so that we can keep our LL fan function, have the RGB cooling components and also have RGB strips in the chassis as well for a fuller ambiance.

The final step in this configurator would be the add-ons section. This section is where you can add ancillary fittings, extra tube, and coolant. Also, under iCUE, they offer the ability to add additional Commander Pro, Lighting Node Pro, and even RGB fan hubs in case your build needs more. The tools tab has a coolant fill bottle, along with TM30 and XTM50 thermal paste tubes, which you can order along with your components. Do note that all blocks come with thermal paste pre-applied, however, if you would like to do your application, or remount, its good to have extras on hand.

One of the last pages in this experience would be the overview where you have a parts breakdown along with their cost. Here, you can choose to go back to any of the other tabs and swap parts as you see necessary. Otherwise, you can download the configuration, which is a part listing you can save for later. Next to that on the bottom, we have the build guide download, which gives you a printout of the recommended configuration based on your parts and how the airflow should run. At the bottom right, we find the build guide reference, which is rfpat9 in case any of you following along at home want to look at our specific build-out.
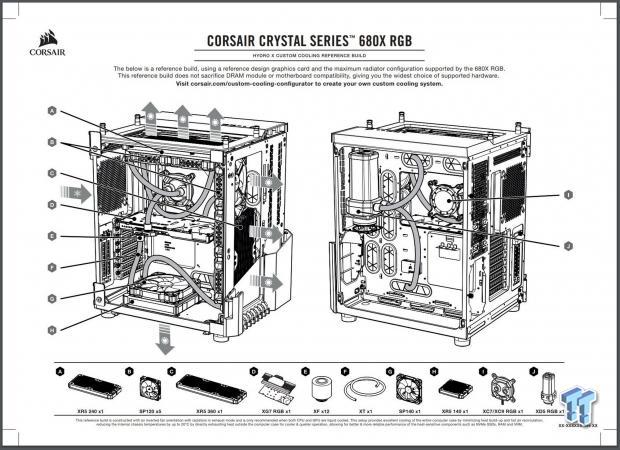
And here we have it, the Corsair build guide for the configuration I built, or sort of. The reason I say sort of is this is the bug I had mentioned previously where you could see there is a 140mm radiator on the bottom of the chassis. The 140mm radiator was never offered during the build and was never specified in the configuration, as you observed in the last image. Basically, for the build, we will mostly follow this guide but omitting the bottom radiator and going form the GPU into the radiator.
Also note that in this configuration, we will have the pump/reservoir hidden away as the build guide recommends placing it in the PSU chamber area. This is ok as it makes for a clean build, but keep that in mind as the 680X does not have much front to rear depth to fit a large cylinder in front of a GPU. One more thing we will be changing is I opted to source my riser cable and will be using the GPU vertically for a better showpiece build, and I will also be hiding the tubing a bit better than we see in the guide.
Ok, now that we have our parts selected, let's check them out!
Corsair XC7 RGB CPU Water Block


The front of the XC7 block packaging is like other Corsair devices we have seen in the past. The front is dominated by the image of the CPU block itself. Other than that, we have the corsair logo up top and the hydro series and naming information along the bottom. Also down here is the iCUE logo along with the Intel 115x and AMD AM4 compatibility note. Yes, Corsair offers two different block options, one with HEDT in mind, all of which have their mounting solution in place.
The rear of the packaging for the XC7 is once again dominated by an image of the lit RGB block. Below this, we find a few key features in six languages. The XC7 has more than 60 high-efficiency micro cooling fins, which form the images, and from my inspection is a cold plate with a skived fin array in the center. I will say up front that the blocks mounting hardware and even their cold plate are very similar to what we have seen from Asetek, which is neither a good nor bad thing, just something I felt worth noting.

Opening the XC7, we find that the block is held in place inside of a plastic clamshell. Atop the clamshell is the warranty guide and manual.

The accessories with the XC7 are simple. First up is the mounting ring for AM4, which, as I mentioned, looks a lot like an Asetek part we have seen to hold their pump heads to the processor. The backplate has a rubber gasket to help with potential shorting concerns. The backplate supports both 115x and AM4. I know AM3 is aging, but I am admittedly surprised Corsair did not include it simply because the holes were very similar. There are washers and the mounting studs which come preloaded with springs to apply appropriate tension to the mating surface. I will say the mounting hardware is well done, so it looks nice once installed.


Now we get to look at the block itself. One thing to note is that the right-hand G1/4 port should be your inlet as it is the one with the integrated water jet area, which pushes coolant into the middle of the fin stack. The ARGB LEDs are surrounding the circular clear center section. The Corsair ship logo across the bottom is transparent to allow it to be lit by the ARGB effects as well. Looking at the cold plate, we are greeted by a hexagonal array of pre-applied thermal paste. This spread should be more than enough to cover both a 115x IHS or a Ryzen one.
XG7 RGB GPU Water Block
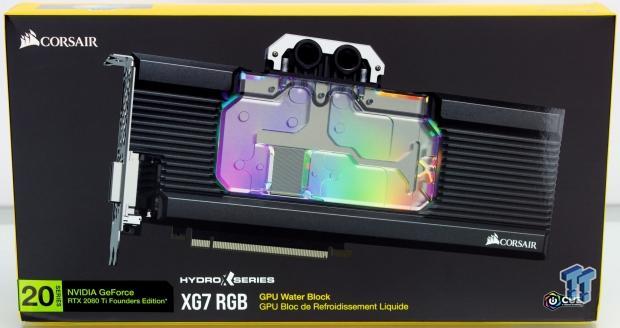
Here we see the theme continues with the XG7 RGB Water Block. The packaging is mostly an image of the block installed on a GPU and lit. The GPU block we wound up using was a 20-series mounted to a 2080 Ti.

Spinning to the rear, and we find that the XG7 packaging carries the same aesthetic with a feature set listing in six languages.

The outer box of the XG7 is a sleeve. The sleeve covers a standard brown cardboard container, which houses soft black foam that cradles the XG7 block.
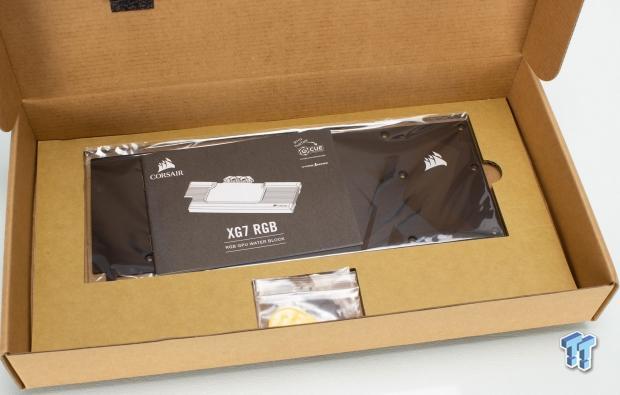
Below the block, we have the accessory pack, the backplate, and the manual.

The XG7 manual is a multi-page booklet that covers the installation of the block in a relatively generic fashion. The instructions are simple enough that I assume anyone with the confidence to re-paste a stock GPU would be fine doing this.
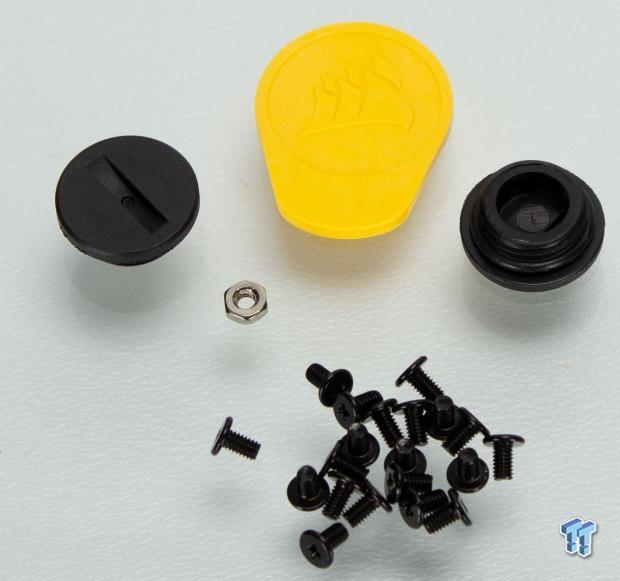
The accessory kit is simple, as it is only for this block. The kit includes two stop plugs that close off the two unused G1/4 ports on the top terminal block of the XG7. There is also a yellow tool that can be used to tighten or remove the stop plugs. Lastly would be the mounting screws, which are used to build the block onto the card. There is also a nut that can be used with one of the mounting screws to affix the bottom I/O bracket mount to the PCB.


Here we have the XG7 backplate. The backplate has some HydroX flare styling, and all the holes used to mount the block are pass-through from here. The inside of the backplate, as you can see, is blank and does not offer any form of thermal transfer from the rear of the PCB to the backplate for cooling.


Here we have the stock backplate remove from our 2080 Ti, and as you can see, it employs thermal pads not only for the rear of the GPU, memory, and VRM but also for a few other IC's it appears. As you can see in the comparison, the Corsair unit does not have any sort of metal areas or fitment for thermal pads to sink heat away to the backplate. I have seen situations like this before, due to liquid cooling, never allowing the components to get warm enough to need this extra passive cooling.


Now we have the XG7 block itself. The XG7 block has an integrated flow meter so that you can visualize the coolant movement, which is nice to ensure you can tell if something is wrong or there is either pump issues or flow impedance if that is static.


The edge of the XG7 block is where the ARGB connectors pass through. The connectors are corsair specific and require a Corsair iCUE compatible controller to connect through. One thing worth noting is that the HydroX components have daisy chain capability with an inlet and outlet ARGB port except for the XC7, which has only the ARGB input. This means that when connecting your components, you can start with GPU or reservoir, but it must terminate with the CPU block.


The top of the XG7 shows several styling and aesthetic cues. The top portion, which has the HydroX series logo, sits above the terminal block and closely resembled the design of the metal top bar from the Dominator memory modules. The Corsair logo more toward the rear I/O section is in the transparent part, which will be RGB lit. The GeForce RTX logo sits adjacent to the NVLink connector. The other image I wanted to show the flow indicator paddle wheel, which is simply a white plastic five paddlewheel that is directly in the flow of the coolant. When the pump pushes the fluid by, it spins. It's not a marvel of engineering as it does not need to be; it just works. I do wish Corsair could have attached a mag signal to the paddle wheel, as then it could have connected to a fan header and provided feedback on the fluid movement and then could have set off an alert if it detected no signal.


And here we have it; our 2080 Ti is now equipped with the XG7. This is the first step in readying the parts for the build, and I will admit, the styling of the block is kind of growing on me. I usually am not a massive fan of the large black heat sink look, but as I have built it, it does start to have a much more appealing aesthetic.
XD5 RGB Cylinder Reservoir with D5 Pump
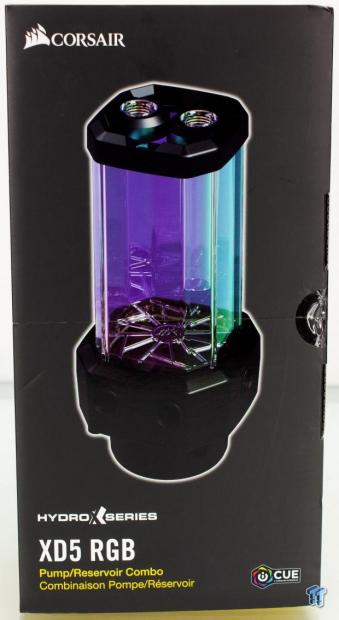
The first reservoir and the one we will be using in the build is the XD5 RGB. This is a cylinder style reservoir, although this one is more squared off with flatter sides creating a unique aesthetic for the finished unit. The packaging, as expected, is taken over by the image of the unit with the descriptor portion across the bottom.
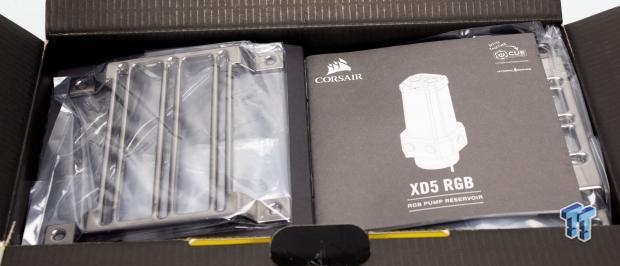
The box, as we saw in the previous image, had a split running horizontally across the middle, which allows it to open like a clamshell. When opened, we see here that the mounting brackets are visible along with the manual and other accessories below it.

Pulling the second covering layer and brackets out of the way reveals the pump/reservoir unit itself. Also, here is another bracket option for mounting, which is the one we will use to mount in the PSU chamber of our 680X.


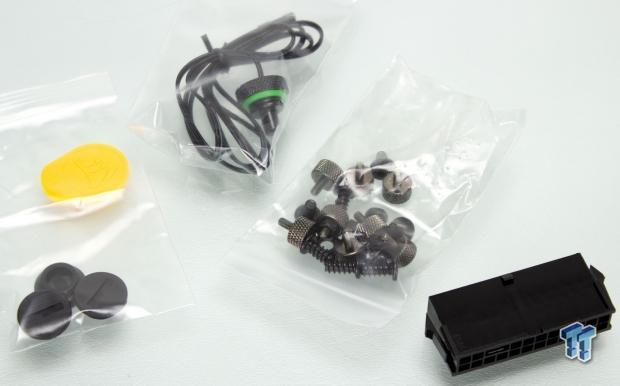
Here we have the first pair of accessory parts. Firstly, it is the fasteners which consist of screws for mounting several different styles, from fan or fan opening mounts. We also have the knurled thumbscrews for mounting directly to the rubber insulated mounts on the pump/reservoir bottom mounts.
Next up is the mounts themselves, which has a 140mm fan mount, a 120mm mount, and the central unit which the pump slides into. This bracket allows you to direct mount to appropriate holes in a chassis or the fan mounts depending upon your needs. There is also a 24-pin jumper included, which will enable you to switch on the PSU without the system operating for leak testing without board and GPU components powered on.


Another addition to the reservoirs for Corsair is a water temperature sensor. This can plug into a motherboard header, such as those on the ROG board we are using, or we can connect to the Corsair Commander Pro, which is what we opted for.
The two paper additions to the kit are the XD5 RGB manual, which is a multi-page booklet, and the warranty pamphlet, which covers the warranty for the component.


Here we take a look at the ports on the XD5 RGB, and there is four total. The XD5 has one outlet for the pump, while the other three can be used for inlets or the thermal probe. I opted to use the two ports side by side for inlet and outlet while the others were plugged with a stop plug in one and the thermal probe in the other.


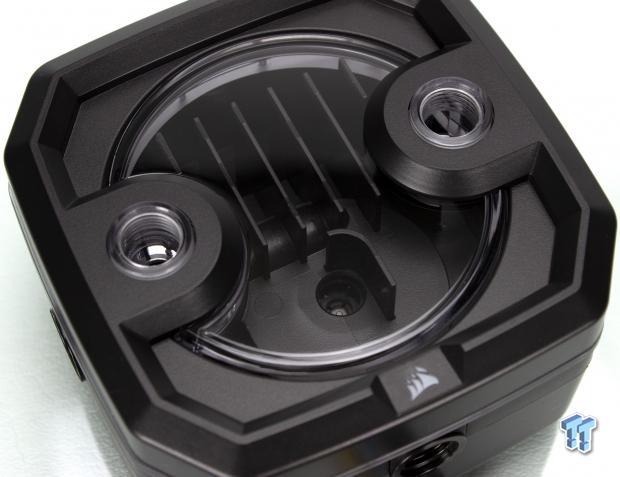
Inside the base, above the pump, we see that there is a form of anti-cavitation grille in place which has a unique angular design. The middle above the pump inlet is the Corsair logo cut out of the plastic grille.
Peeking at the bottom of the pump, we see the label on the D5 model, which shows it with a max of 30W and 10bar pressure. The unit is PWM controlled so that the pump speed will vary based on the PWM/controller input.


Looking at the top of the XD5 RGB, we first have the top ports. The two top G1/4 ports can be used for various things, one has a tube running into the reservoir area and would be best served as an inlet if you opt to have your return line for the loop come in through the top. Both can be used to fill; however, it is better to use the non-tube port as the tube one will stop filling once the liquid level reaches the tube unless you uncap the other port as well.
Looking at the top cap from underneath, you can see the addressable RGB LEDs. These are downward-firing, illuminating the walls of the reservoir along with the liquid within. These are individually addressable and controllable via iCUE.


The connectors for the XD5 RGB are split into two groups. The first being the pump controls, which consist of a PATA connector for power, which has only two pins for +12V and ground. The other is a 4-pin fan header with only two pins inserted. The two pins are for RPM sense and the other for PWM signaling. When combined with a motherboard PWM header or even the Commander Pro, we can control a precise curve for the D5 pump to give the best performance and noise profile.
The top cap is up next, and this is the RGB wiring, which we opted to plug into the Commander Pro. This is a daisy chain style as you see one male, and one female connection. This allows us to connect all the liquid cooling parts in line with each other.
XD3 RGB Pump/Reservoir with DDC Pump


The XD3 is the smaller pancake-style pump/reservoir combo. As you can see, it's a square style shape with the top of the square being the reservoir chamber. Being Corsair, you know this has iCUE control and addressable RGB for those who desire it. The unit employs a DDC pump, which is a popular compact pump design that makes this unit ideal for a small form factor rig where room for a cylinder style reservoir may not be ideal. We did use this pump/res to pre-test blocks for any leaks before the assembly of the full build. However, we opted for the XD5 D5 unit for the final build due to the space availability and the extra liquid volume, which made bleeding the loop far easier.


Opening the packaging of the XD3, we find a clamshell-like our CPU block. On top of the clamshell, we have the accessory mounting options and hardware.
Checking out the brackets, we find the 140mm and 120mm fan mount brackets. Also, here we see the mount used where the pump sits directly in the middle, which would likely be the one, we would use in the PSU chamber if we went with this model in the 680X. Also, here is the multi-page manual and the warranty booklet, like what we saw on the XD5 cylinder style reservoir.
Here we have the other included accessories. Firstly, is the stop plugs used to populate the G1/4 ports, which will not be used, along with the yellow tool for the installation of the plugs. Next will be the temperature probe, which goes into the water tank to measure the liquid temperature. The mounting screw set is quite like the XD5 version and covers the several mounting options. Lastly, for this one, we have the 24-pin ATX jumper used to cycle the PSU and allow the liquid cooling pump to run and leak test the loop once built.


Now we get to the XD3 unit itself. The XD3 has two connectors like the CXD5 with the PATA connection serving power, while the 4-pin fan header provides RPM feedback and PWM control. The RGB connectors are the same as the XD5 with a male and female connector to allow a pass-through or daisy chain of the components. The top ports offer an inlet and outlet for the XD3. The internal baffling appears to make a sort of shoring or walls to help avoid cavitation and bleeding of air in the coolant since the volume is limited.
Flipping to the rear and we see the DDC pump retained with four Torx head fasteners. There are also four rubber-mounted legs which are used to mount the pump to the included brackets for mounting. We also see two cable guides to help manage the pump and RGB daisy chain cabling.


Here we have two of the ports for the XD3. The first being the side port, which can also be used as an outlet the same way the front left-hand port does, so you have options.
The second port shown is your designated fill port at the top of the pump or opposing the down side where the front-facing logo is found.


The other two ports running the surround of the pump are as follows. The right hand G1/4 port is an inlet for a liquid return like the one found of the same right-hand side front-mounted port; you can use either for return or inlet.
Next, up is the bottom-mounted port, which should be used for your temperature probe. This port is recommended as it will ensure the probe is continuously in the liquid so the reading can be considered accurate.
Finishing off the XD3, we wanted to give a more stylized angled look at the pump/res unit. Here you can see the baffling and even the small J shaped wall around the pump inlet to try and eliminate the propagation of air cycling continuously through the loop. While there may be air at first and it may cycle, the internal structures help baffle the air circulation, and eventually, with regular refills for the first bleeding period, they will work out.
XR5 240mm & 360mm Radiators
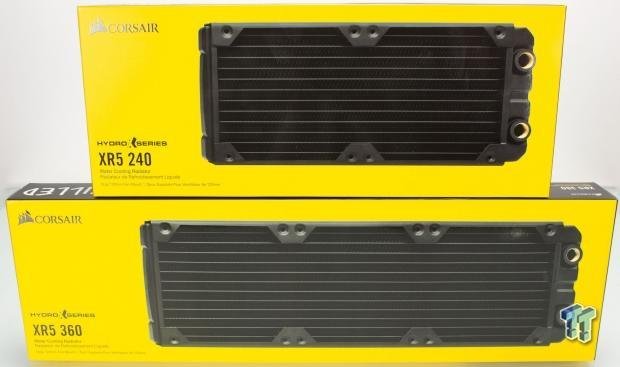
Next up on the bench is the XR5 radiators per the spec build-out we completed at the onset of this project. We have a 240mm for the top and a 360mm up front. The radiators are 120mm fan-based and will be fitted with LL 120 fans. The packaging, like all the parts we have seen, is dominated by the product image. Also, do note there are thicker versions of these radiators available should your build have the room and the need.
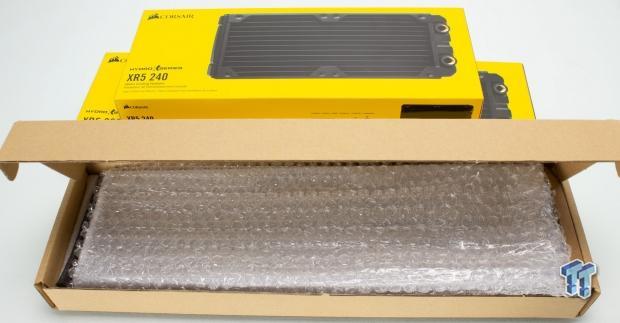
The large box is a sleeve covering the brown cardboard container that holds the radiators. The radiators are wrapped in a bubble wrap bag with the accessories nestled into the cardboard covered area near the end tanks.
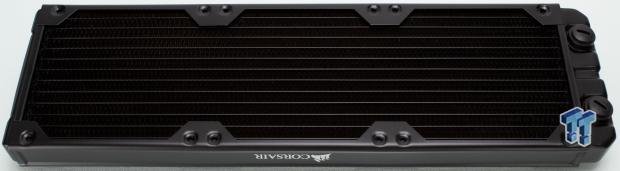
Here we look at the 360mm radiator as all of the XR5 series radiators are the same, except for the size. The fin array is excellent and loose enough that you do not need a very high noise and static pressure fan to cool it. Also, a note should be taken that the QC on the surfaces is top notch as I did not see a single fin out of place or smashed as I have experienced with several other radiators over the years. There are only fittings on a single side, so no need for stop plugs or potentially forgetting them during the build.
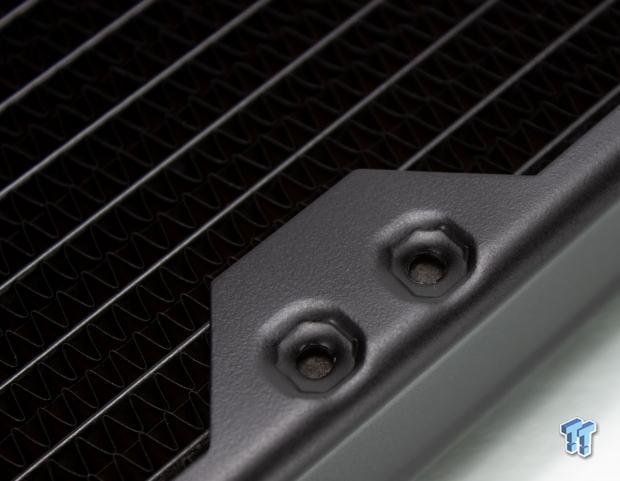
The screw holes are an area I like on the Corsair radiators. These indentations around the holes help quite a lot with threading the screws as the indentations work like a pilot hole guiding your fastener to the threaded mounting hole. As you can see, the mounting holes are backed by a solid metal plate to avoid the screws protruding into the radiator tubes/fins, which could result in a leak.
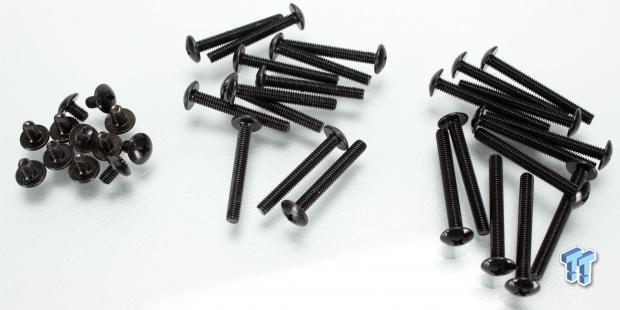
The fastener array is good, and it includes small screws for directly mounting the radiator to a chassis. Then there are two types of fan screws, in two lengths, to accommodate standard 25mm thickness fans along with slightly thicker fans should you choose to go that route. The screws are all M4, but the two fan screws measure in at 30mm and 35mm lengths, while the direct-mount smaller screws are 6mm in length.
XF Softline Fittings, Tubing, Commander Pro, and LL Fans


We have four total fitting types we are deploying during this build. There are firstly the compression fittings themselves, which will retain the hose to the components and ensure no leaks. Next will be the 45-degree fittings, which will be used when a slight bend is necessary and will make for a cleaner run versus trying to bend the tubing. There are also 90-degree fittings, which will be used for things where the tube needs to exit the device parallel to the device it is coming from. Lastly will be a ball valve which will be connected via a 3-way fitting that will allow for easy draining of the loop when refill or maintenance is required. This part will be tucked away in the back chamber, and nobody will ever even know it exists.


Here we see the XT softline tubing fitting on the barbs of the compression fittings. The barbs number three total layers, which you can see with the collar removed, this ensures that the fittings should seal quite well when assembled in the build.
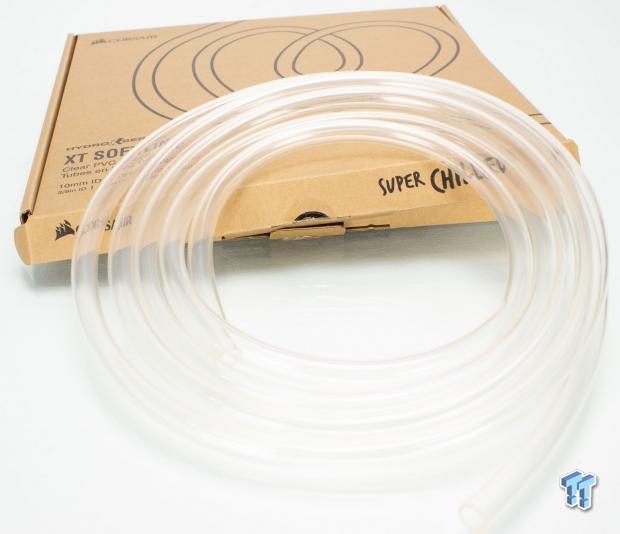
Here we have the 10mm ID softline XT tubing, which came with our build materials. The box of tubing measures 3 meters. The tube is very clear, although my photo lights make it look like it may be a bit foggy, as you will see in the finished build, it is indeed quite transparent.
Corsair Commander Pro


The commander pro is an all-encompassing iCUE powered hub that can be used for fan control, RGB control, Thermal monitoring, and a dual USB 2.0 pin header hub. This unit will add the needed RGB control as Corsair sent over LED strips to help light up our build after we had initially selected the HydroX components. The temp header is also welcome as it will allow us to hook up our thermal probe in the reservoir to log liquid temps alongside the CPU and GPU temperatures. The packaging is like the rest with an image of the device dominating it. Some information is included explaining what it does, but it kept quite simple. Once the center carton is pulled from the sleeve, we see the commander pro unit in a plastic bag covering and its permanently fixed cables in the chamber adjacent.
Below the unit, we find the accessories and documentation. Here we see the warranty guide, the multi-page manual, and an e-waste pamphlet.

Here is the included cabling with the Commander Pro. There are two RGB LED hub cables used for connecting RGB fan hubs. There are also four thermal sensors, which can be applied to any area you want to monitor. Lastly, there are four fan extension cables (4-pin).


Peeking at each side of the Commander Pro, we see the six channels of the fan controller. We also see the dual LED channels which can control up to six fans per channel, six RGB strips, or a full set of liquid cooling components per channel. There are four thermal probe headers and, of course, the USB 2.0 10-pin dual connectors. This is a great advantage as many boards only have a single USB 2.0 pin header, and the Commander pro needs one, but it splits its input into two usable outputs. This sort of expansion is helpful and enables other accessories such as AIO or other devices which may require USB communication with your system.

The connectivity for the Commander pro is a single SATA power lead and a USB 2.0 header. The SATA power lead provides the needed power for the unit and connected LED's, and fans. The USB header allows communication with the main system via Corsair iCUE software. This USB 2.0 port also passes and splits the signal via its internal hub to the two included pin headers to ensure you do not need to sacrifice devices due to a lack of headers.
Corsair LL Fans


One of the last components we will be looking at is the LL fans, which will be used for our build. The LL fans were chosen as they are what came default in the chassis and were recommended by the Corsair configurator. There are likely better model fans, which may provide a better auditory or airflow experience. Still, we wanted to test the system the same was a customer who setup their liquid cooling via the configurator with minimal changes. The LL fans are something most of you are probably familiar with, and they have a beautiful aesthetic with an RGB lit hub and surrounding ring.
Pulling the inner box form the outer sleeve, we see the fan in its cradle, and the cables are hidden in the yellow cardboard chamber you can see below the fan.
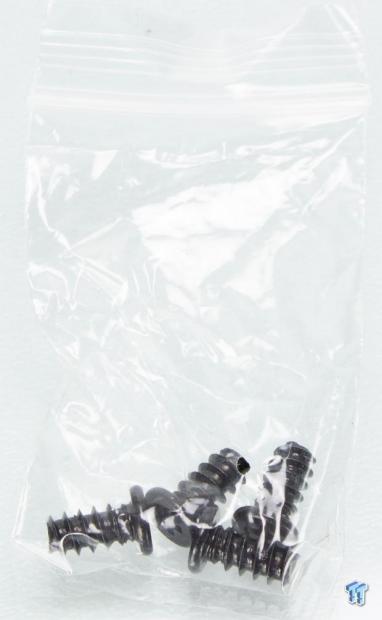
The only accessory of note with the fans is four fan screws, which are expected.


The Fan removed from its packaging; you can see it has rubber bumpers around its periphery. These bumpers or pads help soak up vibration and harmonics form the fan during operation, making them overall more silent than a direct plastic frame mounting.
Two leads are coming from the LL fans, one being 4-pin for PWM fan control and power. The other lead is the iCUE compatible Corsair proprietary connection. This ensures that your ARGB synchronizes correctly with all your other ARGB devices controlled by iCUE.
HydroX Build & Finished Product
Here is a small video clip we put together to show the finished rig in action. While I am not the biggest fan of rainbow RGB, I think Corsair did something special here, and with iCUE, the lighting works cohesively and creates a great overall aesthetic.
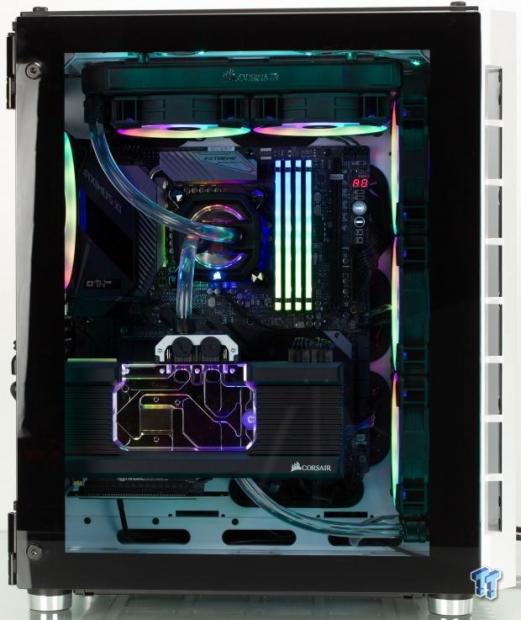
Everything has been built into the 680X chassis, and here it is coming to life. As you can see, everything, including the Corsair memory, falls in line. Now that iCUE supports ASUS motherboards; I can even synchronize things across the board as well.
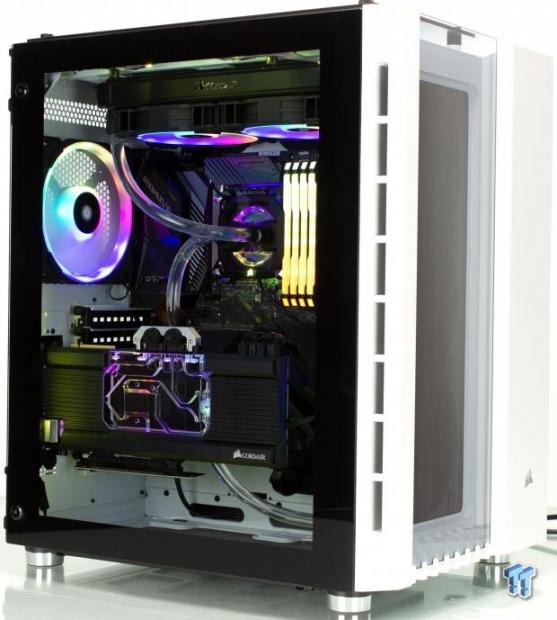
Taking an angular shot, you can see that the RGB is contained to the inside of the 680X as the radiators blackout the front and top portion from the exterior.

I wrestled with installing the GPU in the motherboard directly versus going vertical. I'm sure many of you will agree that with the visuals of this block, vertical was the only way to go.
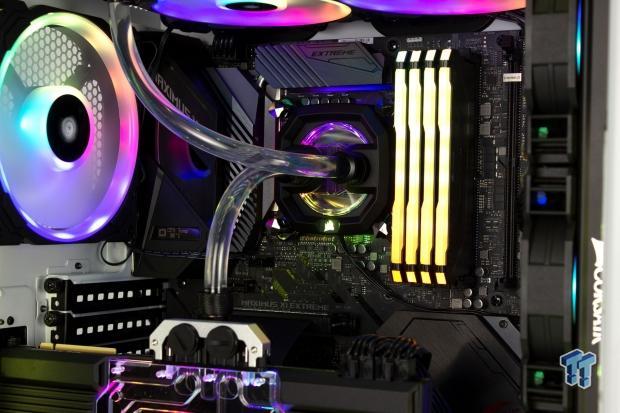
Here is another shot of the CPU and surrounding components all lit and running fully liquid-cooled.
Corsair iCUE

Now we step into iCUE and give you a view of the monitoring dashboard and controls within the iCUE software. If you look at the Commander Pro section, you will see a temp reading; this is the liquid temperature probe in the XD5 reservoir unit.
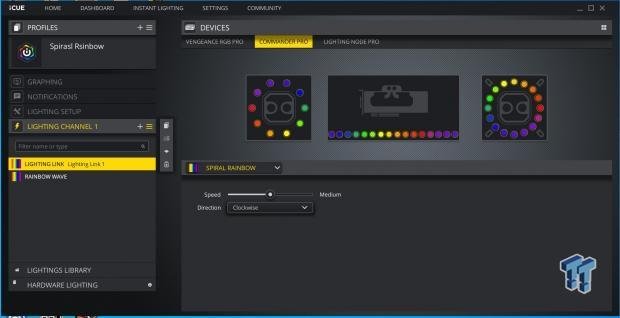
Here we have the lighting setup. Here you can see that the lighting channel with the HydroX components shows them daisy-chained in order, and the effects can flow through them in sequence.
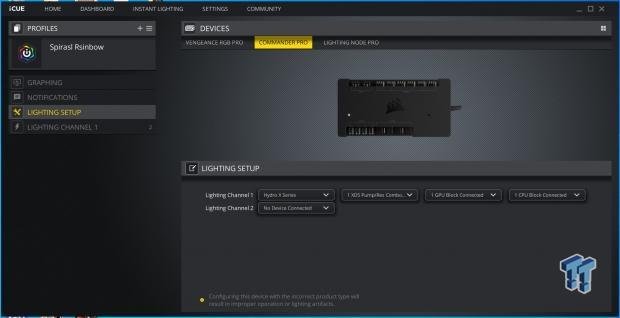
The last part of the iCUE software we will show is the configuration for the LED channel. As you can see, the iCUE software knows how many LEDs each device has so you can set them up in a daisy-chain, as we showed in the previous image. For example, if you have two XD5 reservoirs, there is an option for this, along with several GPU blocks. This allows us to configure the RGB lighting to match precisely our components installed.
I know this has been a long one, so bear with me as we round the bend to the home stretch and the conclusion.
Final Thoughts
When I first was contacted to check out the new HydroX components, I was not sure what to expect. Corsair is a very new player in the custom DIY liquid cooling game. However, Corsair made some decisions that likely sped things along, which is picking up some former EK employees to help support the development and integration capabilities of these cooling components. Corsair is still very new, and I think there will be some teething issues as they discover some of the pitfalls along the way. Every manufacturer that earns its spot as a recommended manufacturer of DIY liquid cooling goes through this learning and constant evolution.
In testing, all I can say is that the HydroX parts performed as I would expect with the 9900K, which is notoriously a hot chip running at full FPU loading up to 66C average with minor peaks in the 71C range. This is quite good and pulled 4C off the Thermaltake Floe Riing 360mm AIO for comparison. The GPU is where a lot of the magic will happen for gamers, and we observed our 2080 Ti hitting a peak of 53C with an average of 51C.
This means full boost all the time, even with the CPU and GPU running 100% for hours as the liquid reached a thermal steady state. This is a great result and right up there with what I have experienced with top-name competitors with the same parts.
What we like
We like the configurator Corsair offers. The configurator takes the potential stress of making sure you have the right parts for your build and recommends stages of configurations to meet your systems loading. As the configurator becomes updated with more chassis and components, this will only add more value to the solution. The ARGB solution and its ability to synchronize across all of their compatible devices are excellent. This capability makes for a great aesthetic without some of the mishmash of colors you may see with solutions that cannot be tuned precisely to be lit in the same mode or capacity.
The reservoir options are great, and I am quite happy to see the XD3 compact reservoir, which I am sure will find its way into small form factor builds. The GPU blocks, including a flow indicator, is a nice touch and adds to the flair of the overall solution, especially when you can see it with the GPU vertically mounted.
What do we think could be better?
There is not a lot that I do not like about the new HydroX series. A lot of the features are all welcome and the designs while, in some cases bucking tradition all feel fresh and well-appointed once put together as a complete loop. If I were to knit pick, I would have to say that the lack of detail on things like the Rev B block difference could confuse some users, especially since you see two block models for a 2080 Ti. There is no descriptor in the configurator to understand the difference.
The other thing would be the fact that if you kill the iCUE process, it will default back to the profile of a rainbow. There is a way around this by creating a new profile for the lighting effects, but for some new users that may be confusing, and this means anytime the iCUE software is terminated, it will revert to rainbow mode. I know that's a stretch, but that's the only knits I can pick here.
When looking at this from a price perspective, the HydroX lineup is competitive with offerings on the market. The radiators sit right next to the black ice counterparts, which it mirrors. The CPU blocks seem relatively cheaper, depending on your comparison. The GPU blocks are right in the middle of the thick of things as far as pricing is concerned. The reservoir is much cheaper than the EK quantum models while being a bit higher than the Xres 250, so once again, right in the thick of things.
The performance, price, scalability, and synchronization will undoubtedly see many users adopting new HydroX solutions. Corsair went all out on this one, and now it just leaves us asking. Where can they go from here? What will they do next to make the HydroX lineup even better?
Shannon's Chassis Test System Specifications
- Motherboard: ASUS ROG Maximus XI Extreme Z390 (buy from Amazon)
- CPU: Intel Core i9 9900K (buy from Amazon)
- Cooler: Corsair HydroX Series Liquid cooling (buy from Amazon)
- Memory: Corsair Vengeance Pro RGB CMW32GX4M4C3000C15 (buy from Amazon)
- Video Card: NVIDIA RTX 2080 Ti Founders Edition
- Storage: Sandisk M.2 256GB
- Power Supply: SilverStone Strider Platinum 1000W (buy from Amazon)
- OS: Microsoft Windows 10 Home 64-bit (buy from Amazon)
 Lian Li B4-mATX Review: a compact mATX SFF case with excellent airflow and premium features
 Ocypus Sigma F36 BK ARGB Cooling Fan Review: high airflow and unified design in one frame
 PCCooler CPS RZ820 Display Review: a flagship-level CPU air cooler with an LCD screen
 MOAIPLAY ORA PRO G1 850W ATX 3.1 PSU Review: high efficiency and 10-year warranty for $119.99
 NZXT H6 RGB+ Compact Dual-Chamber Chassis Review
 ZeniMax's ESO studio is still big enough to deliver new content
 id Software not a support studio after layoffs, reportedly working on new Doom project
 Apple sues OpenAI, accusing it of engaging in a 'strategy to extract Apple's confidential information'
 Another RTX 5090 power connector melted, and even ASRock TempGuard failed to save this one
 Reverse scam: Redditor orders a Ryzen 7 7800X3D but gets blessed with a 9800X3D instead
 Colorful iGame Shadow II DDR5 memory with CXMT ICs hits 8600 MT/s
 ASRock says there are no plans to sell its Taichi 10th anniversary concept components
 Sony CEO sells $4.7 million worth of stock days after PlayStation announces disc phase out
 Black Flag Resynced is a win for Ubisoft, pirate remaster achieves 2 million sales in 24 hours
 Micron 6600 ION 245.76TB Enterprise SSD Review - Best in Class Programming Speeds
 MOZA MA3F EFCM Flight Control Module Review: authentic Airbus A320 autopilot panel for simulators
 Turtle Beach Stealth Pro II Wireless Gaming Headset Review - Premium Sound, Fantastic Features
 MOZA MGX1000 Instrument Panel Review: a realistic Garmin G1000 replica for immersive flight sims
 Simagic Zeus Formula Steering Wheel Review: premium build and advanced inputs for F1 racing
 GIGABYTE X870E Aero X3D Dark Wood Review - A woody goody
 The Super Mario Galaxy Movie (2026) 4K Ultra HD Blu-ray Review
 KTC H49S66 5K2K (5120x1440) 49-inch 180Hz Gaming Monitor Review
 HighPoint Rocket 1604L Gen5 x16 NVMe Software RAID AIC Review: half the price with full 59 GB/s speed
 Next Level Racing ERS3 Haptic Seat Review: immersive sim racing comfort with integrated haptics
 Don't sell your Windows laptop until you do these things
 6 PC cleaning mistakes to avoid for safer hardware maintenance
 Phison and Intel Take Aim at Local AI's Memory Wall with aiDAPTIV
 How to Remap Keyboard Keys in Windows using Microsoft PowerToys
 7 tips to organize your Windows files for faster, easier access
 Intel Arc G3 Extreme first impressions with MSI's Claw 8 EX AI+ - Incredible power for an extreme price
 How to fix Wi-Fi Adapter Not Working on Windows laptops: troubleshooting tips
 Hisense U7SG 4K TV: Modern Entertainment for the New Age
 6 underrated Microsoft Word features worth using to boost your productivity
 Level Up Your PC Gaming with these Fantastic ASUS Prime Day Deals on GPUs, Motherboards, and More