
The Bottom Line
Introduction, Specifications, and Pricing
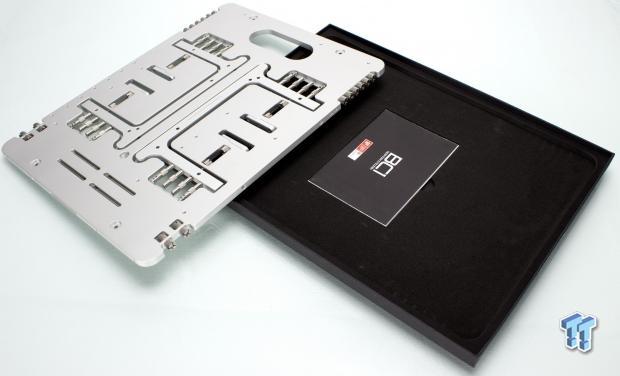
Streacom has made a name for itself by making everything from unique chassis even to test benches with premium materials. The latter of which we are looking at today, we have one of Streacom's BC1 bench chassis or "test bench" models in the lab today.
It needs to be mentioned that the BC1 or openbenchtable concept is a collaboration between overclocking entities HWBot, OverclockingTV, and Streacom. The BC1, like much of the offerings from Streacom, is a massive chunk of Aluminum at its base. The BC1, at its core, is an open-air testbench. Many users prefer tower chassis with filtration and included fans for their builds; however, PC test benches are made for easy swapping of parts. Some users opt to use a testbench for their everyday use rigs, primarily for aesthetics and the ability to show your hardware, while others just like the ability to have optimal temps due to the open-air design.
Key features in my opinion are as follows:
- 8mm thickness 5052 Aluminum alloy
- Fully modular construction
- Compact portable design
- Dual-edge fan/radiator mounting
- Quick-release push-pin motherboard standoffs
As previously mentioned, Streacom made a name for itself with high-quality components, and the BC1 is no different. One of my favorite parts of this must be the quick-release style standoffs.
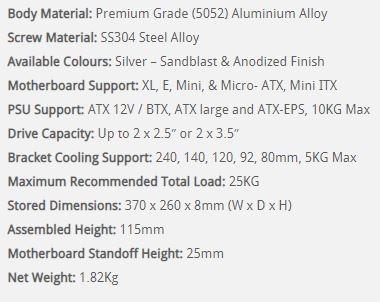
The Streacom BC1 is what we are looking at today, and it comes with a part number of ST-BC1. 1S for the model we have. Our unit is silver, and this is the only color available from Streacom, the final product is sandblasted and then anodized. The entire unit, when in its portable disassembled mode measures in at 370mm tall, 260mm wide and only 8mm thick.
The BC1 fits form ITX to EATX and XLATX form factors to support all but the massive dual socket boards. This means no matter what level enthusiasts or open-air build you choose, it should fit here. HDD and SSD fitment are up to two total drives. You can mix and match up to two 3.5" or two 2.5" drives as they slot with mounting thumbscrews directly through the base chassis tray. PSU fitment is standard ATX style PSU's, and if you have an ATX to SFX bracket, you can fit that as well, but the mounting is for ATX/BTX model supplies. Streacom recommends a maximum component loading of 25KG for the BC1.
Cooling fitment on the BC1 is unique as two small brackets attached to the top and bottom edge of the main tray. They can support up to a 240mm radiator, which Streacom recommends not exceeding 5KG. This limit is likely to avoid leverage forces of a larger radiator from putting a torsional load on the small brackets, which will mount up to the fan holes on a radiator or fan. Fans can also be installed in these brackets, and the brackets can reach down to 80mm to fit some of the smallest available fans you would be likely to use.
The current selling price of the BC1 is $169 at Newegg at the time of writing. There are not many other test bench style cases that match the level of quality or capability that the Streacom BC1 offers. The only ones I could find available at the time of writing is the Praxis WetBench, which is the older model they will be refreshing soon. The WetBench is $199 and offers some neat fitment and features as we use one in our PSU testing reviews for our real-world testbench.
With that said, let's dig into the BC1 and see what it has to offer for those of you looking for an open-air experience.
Shannon's Chassis Test System Specifications
- Motherboard: ASUS ROG Maximus XI Hero (Wi-Fi) Z390 (buy from Amazon)
- CPU: Intel Core i7 8700K (buy from Amazon)
- Cooler: Corsair Hydro Series H60 (buy from Amazon)
- Memory: Corsair Vengeance Pro RGB CMW32GX4M4C3000C15 (buy from Amazon)
- Video Card: MSI GeForce RTX 2060 Gaming Z (buy from Amazon)
- Storage: SanDisk M.2 256GB
- Power Supply: SilverStone Strider Platinum 1000W (buy from Amazon)
- OS: Microsoft Windows 10 Home 64-bit (buy from Amazon)
Packaging
The box is large but flat like a book, measuring in at only 21mm thick. This tells you exactly how compact the BC1 is when it is broken down. The front of the box is super clean, with only the BC1 and "openbenchtable" on the front in foil printing.
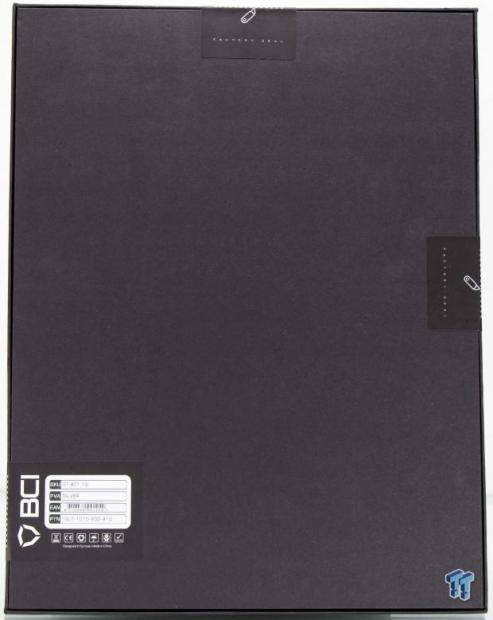
Flipping to the rear of the packaging, and we have three stickers that must be cut to break the seal on the box. The bottom left-hand edge has the inventory control label integrated into one of the sealing stickers used to hold the box closed.


Opening the packaging, we find that the BC1 is nestled into a custom cut dense foam inset for the packaging. The lid of the package has the same foam lining it to ensure your testbench arrives safely.


Puling the BC1 from the package and we see that below the testbench itself, we have the manual recessed into the foam of the packaging. The manual is a multi-fold sheet that shows what the few fastener types are meant for and how to install your components.
Streacom BC1 Open Air Chassis
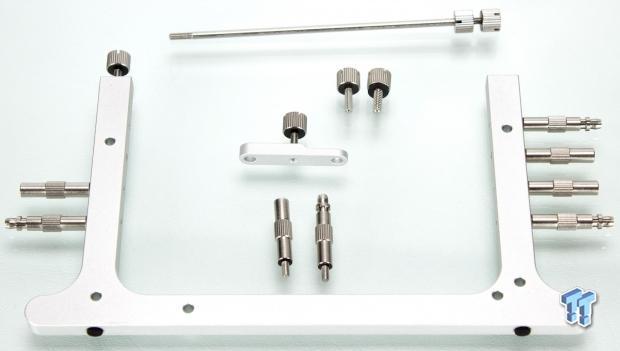
The BC1 is made to be toolless and straightforward, and as you see here, there are only a few fastener options that make finding the right one for your needs will be as simple as threading it in place. This significant Aluminum component is one of the legs of the BC1. The leg helps to hold several of the standoffs while being transported and even while in use. The thumbscrews come in two flavors, one being coarse (6#32), while the other is fine threaded (M3).
The two more protracted standoff looking pegs are taller standoffs with one being a push pin style allowing easy installation and removal of motherboards while the other will use M3 thumbscrews to more firmly attach or lock the motherboard to the bench. Those same threaded standoffs also are used to install the PCIe card supports you see up top, as they will simply not reach the card if they are installed directly into the bench table. Lastly, in the very center, we have the cooling bracket piece, which will use one end to screw to the bench, while the other hole will line up with cooling parts to hold them in place on your testbench.
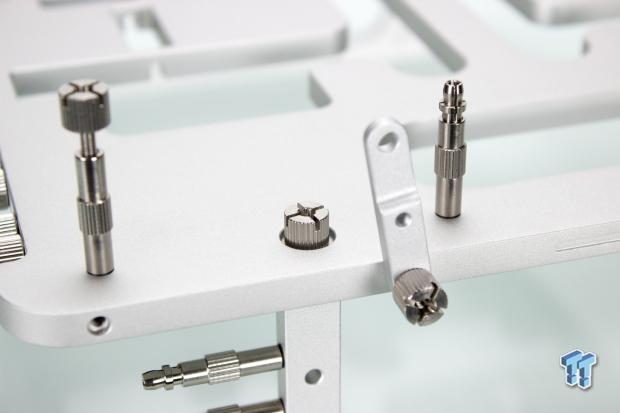
Here we installed one of each fastener to show how they can be installed. Most users will likely use the rightmost pushpin style standoff as it allows quick swapping of boards as the occasion calls for it. The standoff to the left is the threaded unit, which can be used to lock the motherboard into place, or it can also support the GPU support rods/brackets. The center screws secured into the recess in the base plate is used to fasten the feet to the main tray. Lastly, we see the cooling bracket arm in place, there are four of these, and they support spacing from 80mm to 140mm, supporting up to 5KG or 240mm, according to Streacom's spec sheet.
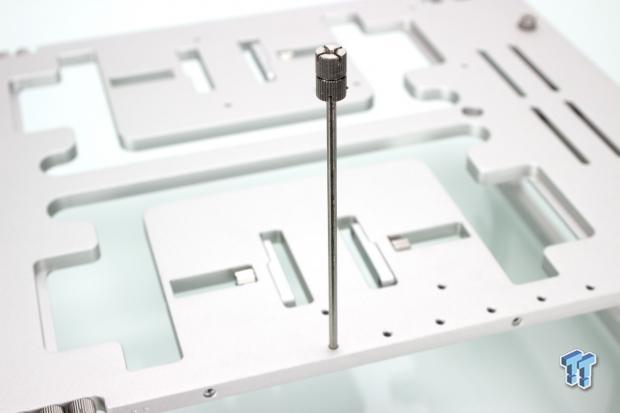
Without reading the instructions, as I usually do, I found that installing the GPU mounting rods into the base of the BC1 works great in theory until you need to use it. Then you quickly realize its about one standoff length too short to fasten to the GPU I/O. This is one of those moments where even if you have done this for a long time, and it pays off to view the manual.
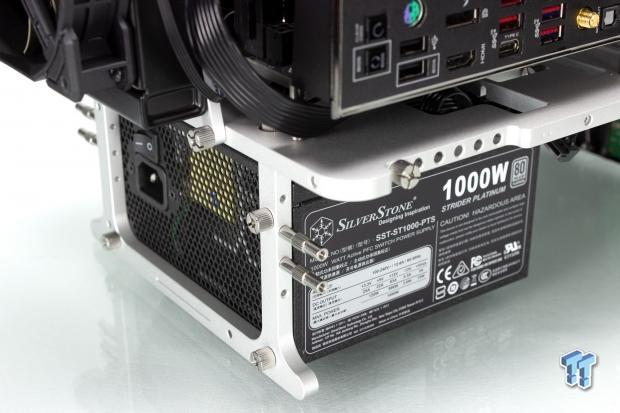
The PSU uses the coarse threaded thumbscrews to fasten the PSU to one of the bench legs, and it becomes part of the build at this point.
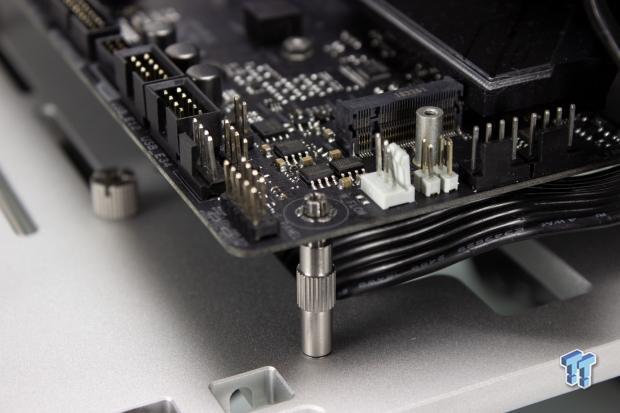
Here we see the quick release or "pushpin" standoffs as Streacom calls them. While I do not think these are appropriate for many chassis-based builds, I do wish that more test bench options came with these or even offered them. I am betting several people would adopt these for their case-based builds as well.
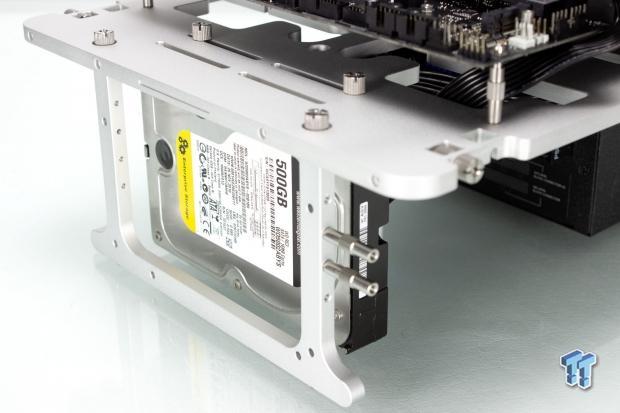
Here we get a peek at how you mount storage to the BC1, and as I mentioned previously, you can see that the two thumbscrews insert through the slotted holes through the main plate. Once there, you can fasten the 2.5" or 3.5" drives in place so they will be part of the bench and, therefore, no pieces scattered about during operation. Do keep in mind that storage space is at a premium, and two total drives can be mounted here, except for M.2, of course.
Case Build & Finished Product


Now that our build is complete, we will do a rotation around the bench to show each angle, and how accessible or usable the system is while on the BC1. First up at the end, with the controls in place, we find that everything is easily accessible, and cabling can be well managed out of sight. One thing to note is that the BC1 does not have any sort of front panel connectivity or controls. Should your motherboard not haver integrated power/reset button, you will need to buy switches separately or go old school and short the pins when you need to power the rig.


Here we see the lower edge and the fact that we could install a fan on the lower-end to help with cooling should the bench need it. When reviewing components, it is easy to see why a setup like this would be favorable as I could individually plug and validate each connection on the board far more comfortable than being inside of a chassis. Here again, we see that even in such a compact bench, we were able to tuck the cabling between the main plate and PSU eliminating a rat's nest of cables and making for a clean easy to work on bench.
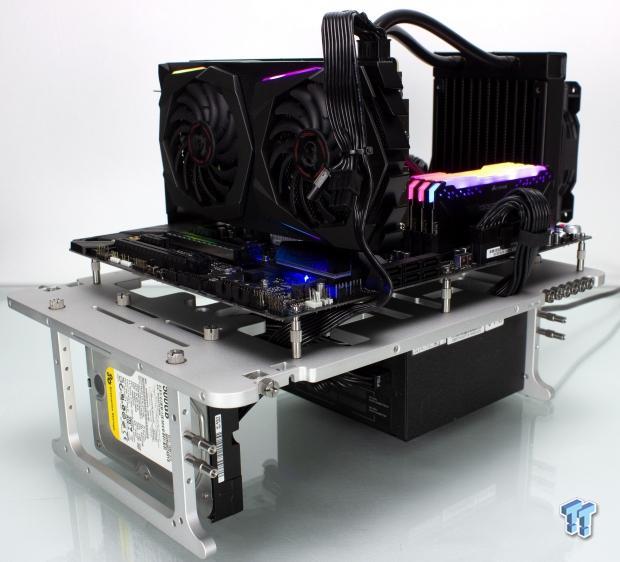

With everything built, the next test was to get the BC1 rig fired up and see how everything works. Of course, as always, we have a bit of RGB, and if your rig has RGB, well, the BC1 has no smoked glass so that you will see all of it, of course. Overall, if I had my LN2 pot on this, I think this would work just as well as my DimasTech, although admittedly much smaller, the BC1 can also be tossed in my backpack if I need to hit the road.
Now all that's left is to wrap this one up and take a look at what we think of the new BC1 openbenchtable design.
Final Thoughts
Test benches are something that used to be far more common, but they have sort of headed toward an even further niche than they used to be. When looking at the one form Streacom, HWBot and OverclockingTV, I was admittedly excited as I have been involved in the OC community for a long time, and I know some of the people involved in the teams who worked on this.
So, I knew that they would be pushing this to be something special, and I think they pulled it off as the BC1 takes virtually no space when broken down. All of the parts and fasteners mount into the bench when transporting, so you never need any tools or separate accessory packs.
Even though it is open-air, I still tested the bench for thermals, and as expected, it was within .3C delta of my initial baseline measurements for this testbench. The ambient was measured at 20.5C, with an RH of 41%. The CPU showed an average delta over ambient of 47.9C with the GPU checking in at a delta of 38.6C.
The CPU pulled a great result as it had fresh air on tap at every moment, but the GPU since its fans do not kick on until 60C is a unique challenge and goes to show how case fans can help keep the card passive for longer and help push air through the GPU cooling solution. The GPU temps were in no way terrible, but there are a few cases that have done better, and that is thanks to their installed chassis fans.

What we like
The BC1, while it is simple and just an open-air test bench, has a lot going for it. First up is portability, which allows the BC1 to go flat occupying only 8mm of thickness and can be tossed in luggage or a backpack should you need it to go with you to an event. The overall quality and stability of the materials used is excellent and offers a solution that doesn't provide even the smallest amount of flex. The pushpin style standoffs are fantastic, and I wish all my test benches had them since it makes swapping platforms so much easier. The fact that all the mounting hardware and accessories mount to the bench is incredible as it means that all the toolless fasteners are on hand wherever your bench travels with you.
What do we think could be better?
This is a rare occasion where I cannot think of anything that could be better. The only thing would be to have power/reset buttons integrated into the chassis to avoid the issue where some boards do not have onboard switches. This can be done while maintaining a similar slim profile, although it would take some creativity.
Considering everything we have observed int this review, I do think that the Streacom BC1 bench table merits the asking price. The quality of materials, portability, modularity, and all-around ease of build and use make the BC1 a tough act to beat. There are larger test benches out there that can fit various needs, but the capabilities and well-engineered simplicity are a hard thing to come by these days, and Streacom pulled it off very well.
It's a test bench and works as one; for those of us who use test benches or love open-air solutions, the BC1 should be on your shortlist.
Shannon's Chassis Test System Specifications
- Motherboard: ASUS ROG Maximus XI Hero (Wi-Fi) Z390 (buy from Amazon)
- CPU: Intel Core i7 8700K (buy from Amazon)
- Cooler: Corsair Hydro Series H60 (buy from Amazon)
- Memory: Corsair Vengeance Pro RGB CMW32GX4M4C3000C15 (buy from Amazon)
- Video Card: MSI GeForce RTX 2060 Gaming Z (buy from Amazon)
- Storage: SanDisk M.2 256GB
- Power Supply: SilverStone Strider Platinum 1000W (buy from Amazon)
- OS: Microsoft Windows 10 Home 64-bit (buy from Amazon)

Performance |
97% |
Quality |
100% |
Features |
90% |
Value |
95% |
Overall |
96% |
Streacom and its BC1 have definitely impressed with its ease of use , portability, and its premium feel and materials. Anyone looking for an open-air testbench should have the BC1 on their list.

Related Tags

