
The Bottom Line
Introduction, Specifications, and Pricing
Anyone who has been around the custom PC scene likely knows the name MAINGEAR. MAINGEAR for the uninitiated is a custom or boutique PC builder who makes showcase level systems that can ship to your door. Now, obviously, me being the guy that tests cases, PSUs, and Custom cooling, you can bet we are not testing a fully built MAINGEAR system today. We are, however, testing a MAINGEAR chassis with their Apex ICS.
MAINGEAR makes a system called Vybe, which is the chassis we are going to be testing today. It is a relatively standard smooth front panel chassis with a flexible and functional design for both air and liquid cooling based builds. MAINGEAR over the past few years have stepped up their liquid cooling game beyond off the shelf parts, to working with companies like Bitspower to outfit select chassis such as the Vybe and F131 with a custom liquid cooling manifold/distribution plate which MAINGEAR calls Apex cooling.
MAINGEAR is not like a typical case company and, therefore, does not have a features list for me to dig into. MAINGEAR's page for the Vybe chassis is quite simple and to the point with the only real description being as follows.
"As a master sculptor starts from a fine piece of clay, a master PC must start with fine case. With a built-in RBG and fan controller, you never have to worry about motherboard pins again. Prepared to be super cool with support for two radiators with no modifications."
So with that, we can say that the apparent target is build and system design flexibility, which I am sure is a welcome thing for both the MAINGEAR system building team who use this chassis daily. This may also be of great benefit to DIY users as MAINGEAR has made the Vybe available as just a chassis for enthusiast builders. We will see on the upcoming pages what MAINGEAR did with the Vybe and any tangible value it adds compared to a conventional chassis.
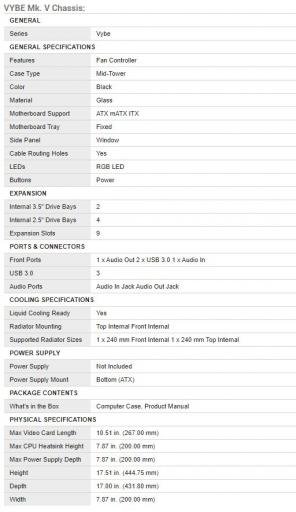
The name of the chassis, as mentioned before, is the Vybe, although this one is technically labeled the Vybe Mk. V. The Vybe measures in at 444.75mm high, 431.80mm deep, and 200mm wide. The width could be a bit of a concern here as being a bit wider will allow for more clearance between the motherboard components such as RAM to fit without the top-mounted AIO or LCS to interfere.
Motherboard fitment is ITX up to ATX, although from my view internally, there should be enough room to fit EATX here as well; we will test that when we build in it. HDD and SSD fitment number up to two 3.5" drives in a cage below the PSU shroud, while 2.5" can fit up to four. The SSD fitment is behind the motherboard tray and the adjacent front section via removable trays. However, the chassis we received only had two trays, so while you may be able to fit up to four SSD, you may need to get extra trays from MAINGEAR.
PSU space is up to 200mm, which should cover all but the most astronomical 1600W units, which are not necessarily realistic in this mid-tower chassis. The PSU shroud is built-in and covers the entirety of the PSU from view through the tempered glass panel. The front-most section of the shroud had a pass-through opening for a radiator or fans to fit through the shroud itself into the lower chamber. The PSU shroud is also ventilated so that heat cannot be trapped, and air can flow into or out of the lower chamber.
Cooling fitment for the Vybe is up to two larger 240mm radiators, one in front and one up top. The front from initial looking appears to fit up to a 360mm radiator, but we will explore that as we dig into the chassis. Fan fitment looks to be right around triple 120 upfront and triple up top or even 140mm dual front and top. The rear is adjustable mounting for a 120mm fan with up to 20mm vertical adjustment in 4mm steps. CPU cooler height is limited to 200mm, or let's just say, not so limited. Preinstalled fans number three, which are all 120mm standard black fans and are 3-wire DC controlled.
The price of the black Vybe chassis is $119.99 form MAINGEAR direct. The Apex ICS is $149 from MAINGEAR, and the two in one package as we received today would be $269. We will be testing the Vybe chassis as a chassis aloe before adding liquid cooling, so let's focus on that $119.99 price point. In this range, as always, it can be quite competitive. Competitors at this price point will be the MasterCase H500, MB530P, and MC500 from Cooler Master. Also, the 220T from Corsair and DG-77 from EVGA. For around $10 more, we enter the territory of the Define R6 from Fractal. So, in a nutshell, MAINGEAR and their Vybe will have to show some engineering prowess to excel among these entries.
Shannon's Chassis Test System Specifications
- Motherboard: ASUS ROG Maximus XI Extreme (Wi-Fi) Z390 (buy from Amazon)
- CPU: Intel Core i9 9900K (buy from Amazon)
- Cooler: Corsair H100i Pro RGB (buy from Amazon)
- Memory: Corsair Vengeance Pro RGB CMW32GX4M4C3000C15 (buy from Amazon)
- Video Card: MSI GeForce RTX 2060 Gaming Z (buy from Amazon)
- Storage: SanDisk M.2 256GB
- Power Supply: SilverStone Strider Platinum 1000W (buy from Amazon)
- OS: Microsoft Windows 10 Home 64-bit (buy from Amazon)
Packaging

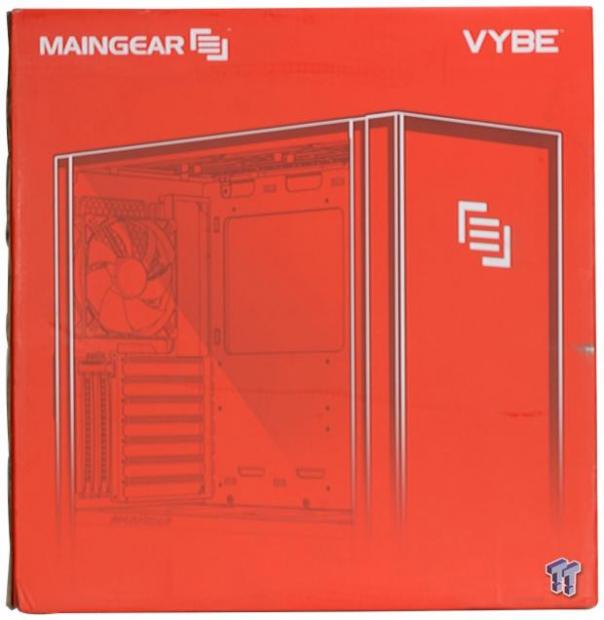
The front of the Vybe packaging shows the MAINGEAR logo prominently along with a fading away depiction of the Vybe chassis. It is very bright red, which is MAINGEAR's color.
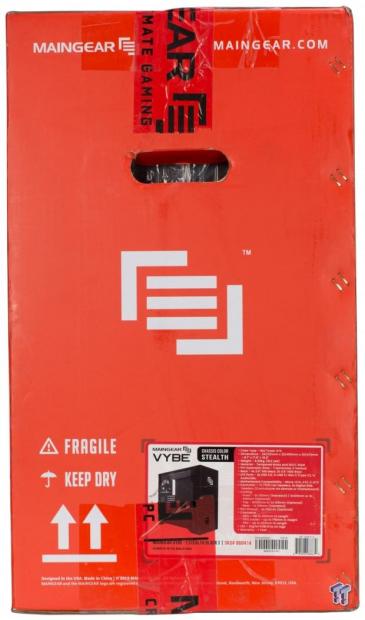
The first of the skinnier sides of the packaging shows a large MAINGEAR logo center, MAINGEAR, being founded by Wallace, an automotive enthusiast, of course, represents what I consider a gated shifter pattern. The top is adorned with the brand name and webpage while the bottom lists the shipping and inventory labels. For shipping, we have the fragile and "this side up" warning. Lastly, we have the lower logo with the description of what's in the package along with the applicable UPC/SKY barcodes. The SKU barcode is for Microcenter stores as MAINGEAR has partnered with them a short while ago for the distribution of their hardware and systems.
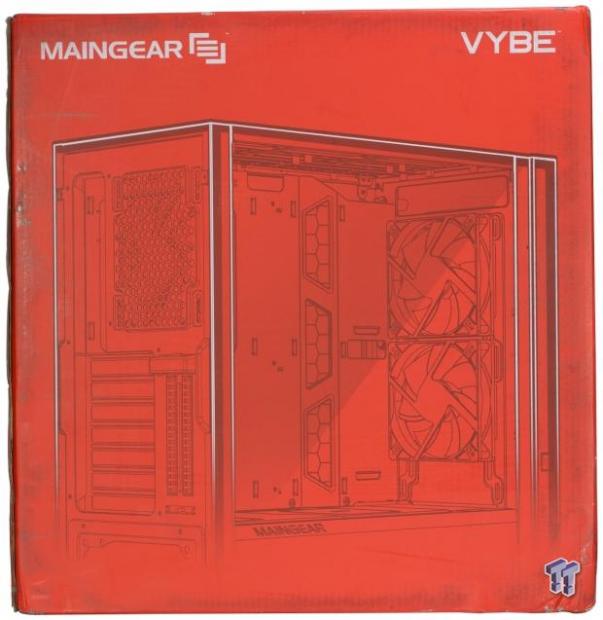
The rear of the packaging shows an inward look at the front fan mounting and inside the chassis from a rear angle. The top is flanked once again by the brand name and logo along with the Vybe chassis name.

The opposing skinnier side of the box is almost exactly like the opposite edge. The same SKU label is present; the only addition is an inventory control sticker next to the large logo. This looks to be from the OEM factory, which makes the chassis.
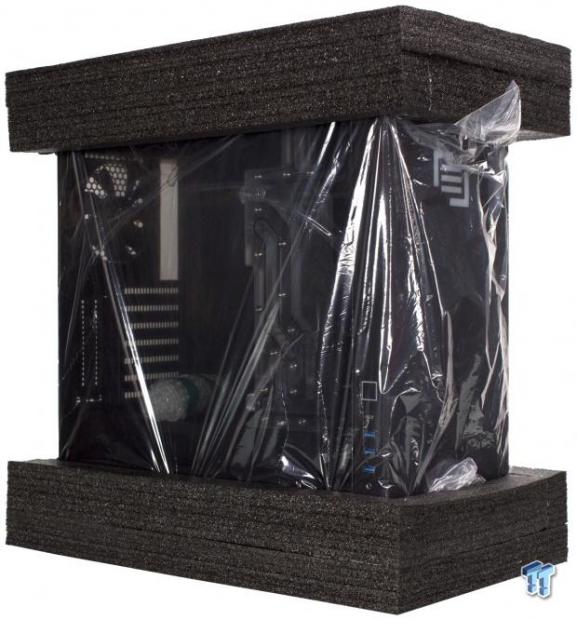
The Vybe chassis pulled from the box we see has a plastic bag to help with abrasion during shipping. The top and bottom ends are enveloped in soft polystyrene style end caps, which is our preferred packing material to see as it does not crack like standard Styrofoam and also tends to avoid rubbing abrasions along with better impact absorption. The glass panel has a cling film that you remove once you get the chassis unwrapped.
MAINGEAR Vybe Mid-Tower Chassis

The front of the Vybe is a blank slate in black with only a MAINGEAR logo in the middle top portion of the front panel. This logo is RGB lit and will either work with an included remote or sync to your motherboard, depending upon your preference.
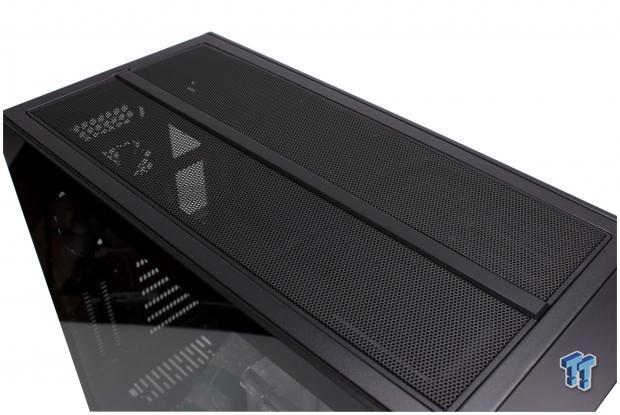
The top of the Vybe has a magnetically affixed split metal grate filter covering the top mounting of the chassis. The lip at the rear edge is where you can get leverage to pull it up and off of the chassis. This specific top filter design we have seen before, most recently on the Lancool One Digital from Lian Li. As we dig further in this chassis, you will see the similarities to the Lancool One Digital we covered recently.
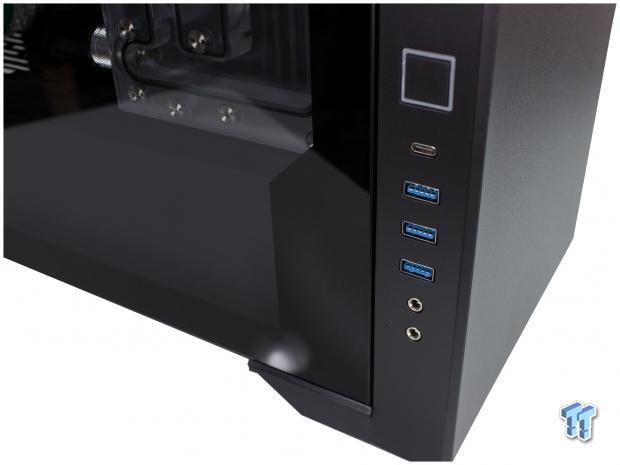
The front panel I/O is on the front panel, but instead of being up top, it is on the lower front panel on the main chassis panel side. This will be great for systems on a desk next to your display. But can become a real pain for those who place their system on the floor or below their desks. The front I/O consists of the following:
- Power button with integrated LED power ring
- USB 3.2 Gen 2 Type-C
- 3x USB 3.2 Gen 1 Type-A
- Separate microphone and headphone 3.5mm jacks
I do like this I/O array although I do wish that the chassis did not waste a USB 3.2 Gen 1 interface as one of the Type-A's still uses a full 20-pin motherboard header. Overall this is still a very stout I/O and offers respectable connectivity compared with many chassis at this price point.
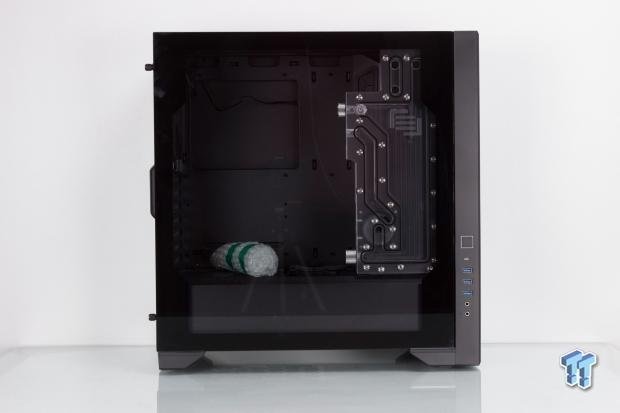
The main chassis panel is tempered glass, which slides on and off and uses thumbscrews to affix to the rear of the chassis. Inside we spy the Apex ICS in place along with a roll of bubble wrap, which holds the drain line fitting. There are not any airflow openings on this side, which are visible as of yet.

On the rear of the Vybe, we get another look at the similarities to the Lancool One Digital, and while I am not sure if MAINGEAR used Lian Li directly, they potentially used the same OEM that Lina Li uses. Here we see a pretty standard layout with seven standard expansion slots and two verticals. The vertical bracket for GPU is sold separately and sells for around $45.
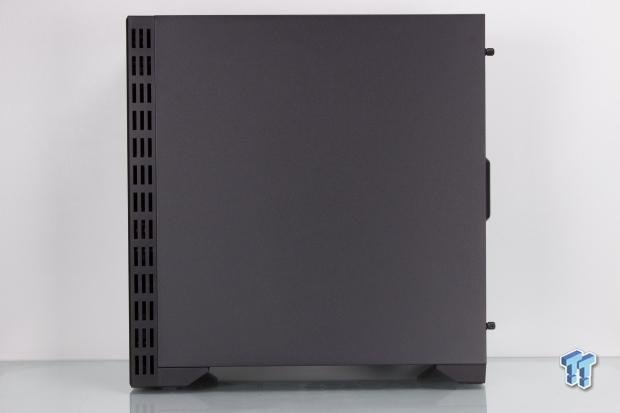
The cable management side of the Vybe we see is a substantial steel panel, which also affixes to the rear of the chassis with thumbscrews. The front panel is ventilated from top to bottom on this side, which feeds air into the front fan area.

At the bottom of the Vybe, we see four plastic feet with square rubber pads. The feet butt up against the front panel, which hangs just a few mm above the rubber pads, so the chassis from the front appears to flow right to the desk or floor surface it sits upon. The internal 3.5" HDD cage is adjustable via the stepped line of screw openings you see here so you can adjust the cage forwards or backward to fit either longer PSU or radiator and fans below the shroud. The HDD cage can also be removed if you prefer. Lastly, we see the removable and cleanable dust filter over the PSU area.

Here we have the filter removed, and you can see the elongated fan area to fit various PSU sized while offering clean, cooling airflow from below.
Inside the Vybe
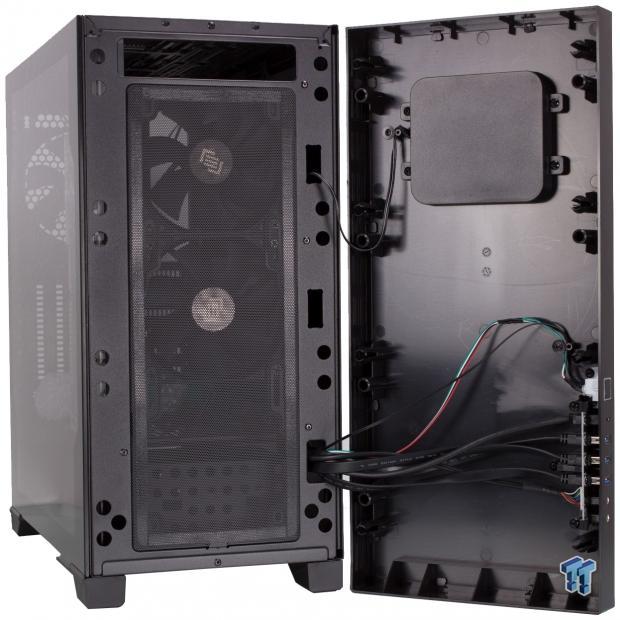
The front panel of the Vybe pulls off with a bit of resistance from the plastic pegs which retain it to the front of the steel chassis. When removed, we expose the magnetic fan filter placed in front of the fan mounting locations. The rear of the front panel is plastic, and we find the square cover behind the MAINGEAR logo, which is where the RGB is held to illuminate the logo. Here we also have the front I/O permanently affixed, which can be a real pain when working on the chassis as you have to remove the entire cable array to remove the panel.
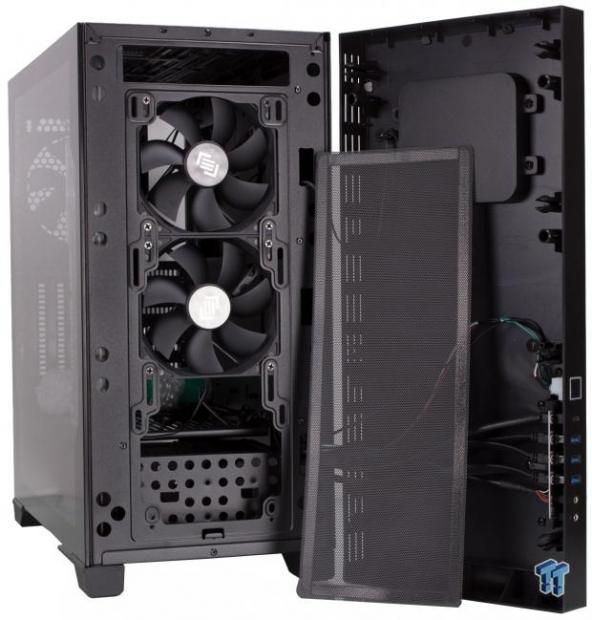
Here we have the front with the magnetic filter moved to the side so we can see the fan mounting on the inside. As you can see, the fan mounting can quite easily fit three 120mm fans here, which means a 360mm radiator is possible. However, due to the inlet top port for the Apex ICS location, a 360mm radiator would be out of the question as it would block the top port of the Apex ICS unit.
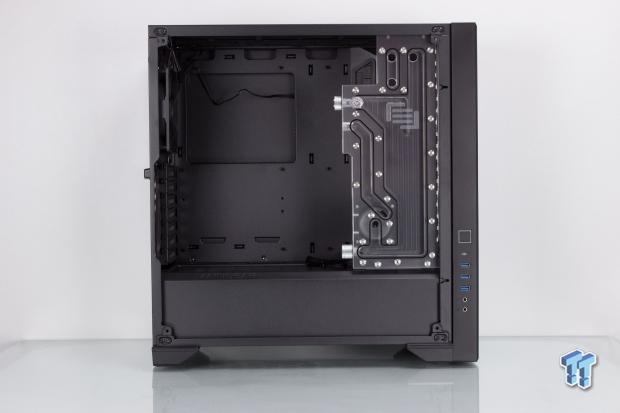
First, look into the chassis; we get a clear look into the main chamber of the Vybe with the Apex ICS in place. When test fitting radiators, I found that the top port toward the front panel, which is for radiator return, would be blocked by a radiator if a 360mm were used, which is why MAINGEAR specific fitment of 240mm. If you opted for liquid cooling without the Apex ICS, however, you could likely fit a 360mm in here, but you lose the aesthetic and performance offered by the Apex ICS unit.
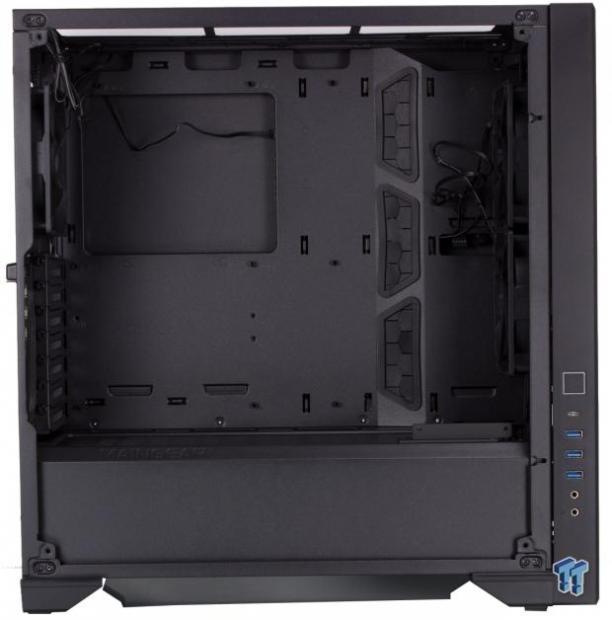
For the remainder of the review of the chassis alone, we have removed the Apex ICS unit, and now we will look at the rest of the Vybe as the base chassis. Do not fret, though, as we will be performing a dual build here with liquid cooling after our standard testing. The CPU backplate cutout is sizeable and will fit any cooler we have tested to date. The cable management holes with grommets rise upward at the motherboard edge, and as you can see, they are a fair bit past the furthest right standoffs, which is why I believe our EATX board for this project will fit.
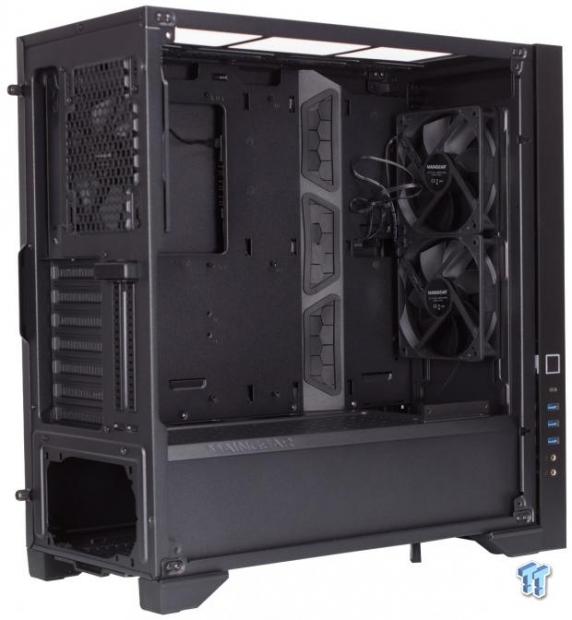
Here we see the two fans who come equipped for intake in the front. They are standard black case fans with 3-pin DC control and are 120mm. This mounting is fine for fans alone, but when installing custom liquid cooling with the Apex ICS, they will have to mount lower to clear the fittings.
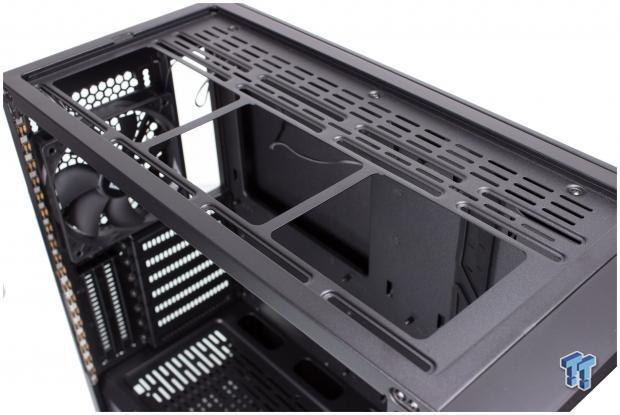
Here we have the top mounting for the cooling as mentioned previously. We removed the magnetic top filter/grill, and we now can see the slotted mounting stamped into the top. This metal is not the strongest here, so don't lift the chassis by this or press very hard on it as it can deform. This is normal for a chassis of this price and works fine when mounting radiators here. One thing to note is the 200mm width of the chassis as my measurements tell me we may have some RAM clearance issues here with our taller Corsair Vengeance Pro RGB DIMMs. 10-20mm more thickness for the chassis would make a world of difference as a mounted radiator in the top will not have issues fitting with any DIMM at that point unless they are insanely tall. This is a similar limitation to what we observed on the Lancool One Digital.
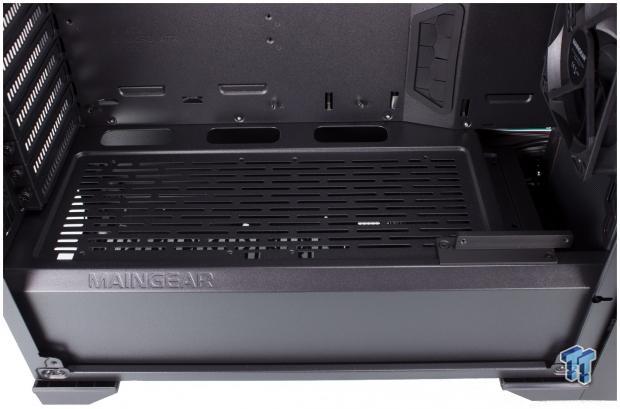
The PSU shroud has three angles, the vertical portion which runs parallel to the side panel. We also have a flat plane which runs parallel to the top panel. The edge of the PSU shroud rounds off with a 45-degree angle where MAINGEAR placed their name. The top of the PSU shroud shows the ventilated slots in the cover to allow air or heat to escape. There are three openings at the board edge, which will enable passing through of front panel cables along with potentially the GPU power cables. The bracket toward the front of the PSU shroud is for mounting the Apex ICS, so if you get just the case, this will not be present, so don't worry, it will be smooth PSU shroud.
Inside the Vybe Continued
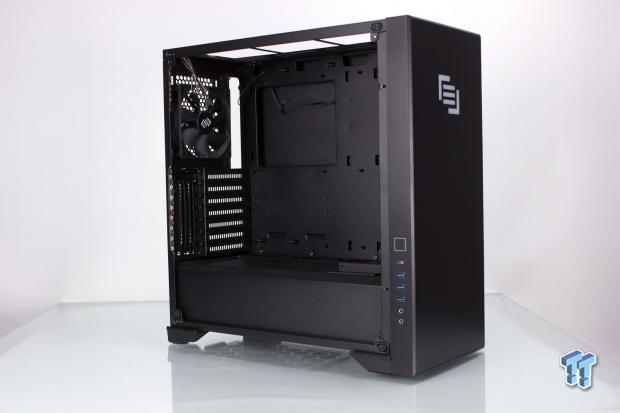
Here in the rear, we see the same 120mm case fan fitted in the back for exhaust. This one is DC as well and connected to the PWM hub in the cable management area along with the other two fans. Here you can also see the addressable LED strip running vertically in the main chamber. The PWM fan hub in the rear also supports splitting the ARGB signal to up to three devices, which covers the Apex ICS, the vertical strip, and the front MAINGEAR logo.
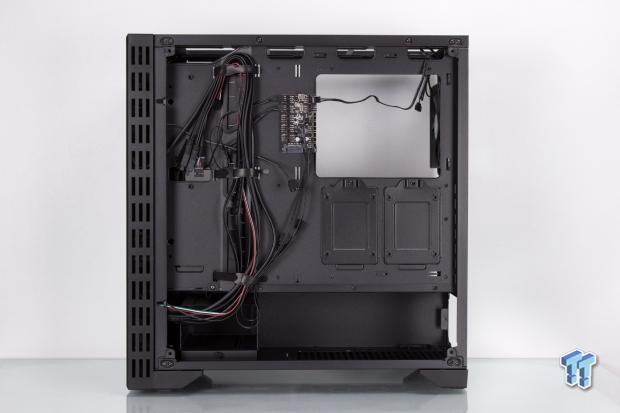
Here we get a look where you hide the less savory bits such as bundles of cables and storage. We see two SSD trays below the CPU cutout along with the previously mentioned PWM/RGB controller. There is a bit of space behind the motherboard tray to hide cables. Still, I think the best way to run them is the same way you see it run out of the box, with the bulk of the cables running up the area to the left of the cable management grommets as this area rises more into the main compartment giving more room to hide cables behind the panel.
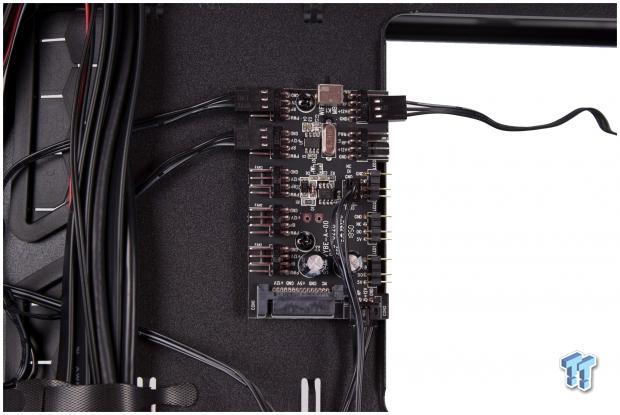
Here we take a closer look at the PWM/ARGB hub. The hub has seven total 4-pin headers, which is more than enough to handle a full liquid-cooled build and then some. DC fans can be used here as well, but harnessing it's PWM capabilities would be preferable. There are also three ARGB headers you see here on the right hand side. If you do not get the Apex ICS, you can use this header for another ARGB device, but I would exercise caution as too many LED's attached to an ARGB header can cause strange behavior. The toggle at the top of the controller manually switches the RGB controller between using the IR remote vs. the motherboard input for ARGB control. The controller uses a single SATA power lead to feed everything.
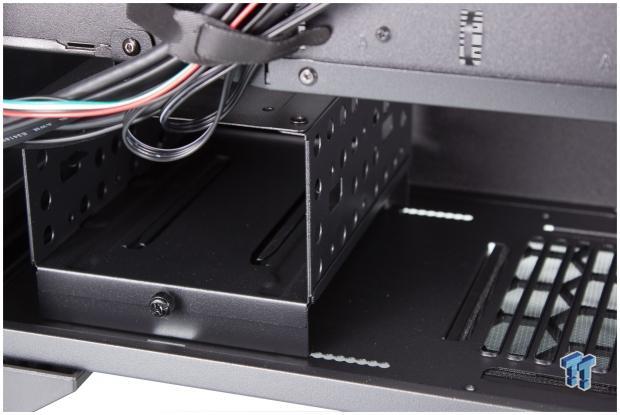
The HDD cage is the same as we saw in the Lancool One Digital and it uses fasteners to secure HDD's in place. The cage is removable should you not need or want the cage taking up space.

The PSU area is in the standard location below the PSU shroud in the rear of the chassis. Here we get an inside view of the elongated ventilation to support larger PSU models. There are four rectangular rubberized foam feet which the PSU can rest upon when installed, eliminating potential vibration and damage from metal to metal contact as it sits in the chassis.
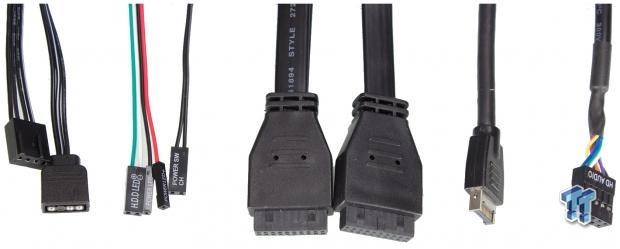
The cable array is what we look at next, and most of the cables are all black. The front panel cables being multi-color is a bit of a surprise as the fit and finish of this chassis has been quite good thus far, but having bright white, green, and red cables going to your motherboard seems like an odd decision in an all-black chassis. This is likely a small oversight, and I hope in the future as MAINGEAR offers different chassis models, this tiny detail is looked after.
The cable array is as follows:
- 4-pin fan connector (feeds PWM signal to the hub)
- 3-pin ARGB connector (feeds the triple ARG hub headers)
- Power, Reset, and Power LED connectors
- 2x USB 3.2 Gen 1 20-pin headers (feeds front panel Type-A ports)
- USB 3.2 Gen 2 connector (feeds front panel Type-C port)
- HD Audio connector
Hardware & Documentation

Here is the main accessory fastener pack:
- 10x zip ties
- 8x long fan screws (to fasten fans on the PSU shroud)
- 28x motherboard and SSD screws
- 8x HDD screws
- 6x PSU screws
- 3x motherboard standoffs
- 1x standoff tool

Here we have the controller included with the Vybe, which can be used to adjust the RGB colors if you do not have an ARGB header on your motherboard, or you simply prefer this method.
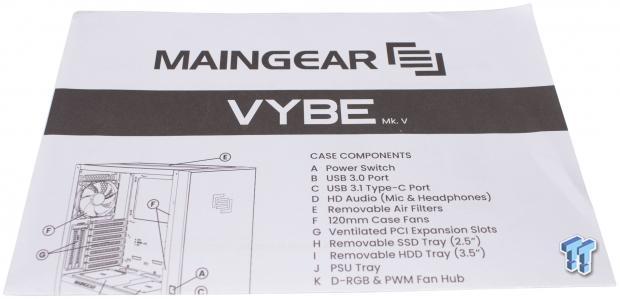
The manual for the Vybe is four full-size pages and includes some fundamental instruction for the chassis, but no information in regards to the Apex ICS unit.


Here we have the Apex ICS unit. While it is not technically an accessory, it is available separately, so I thought it was appropriate to take a look at it here. The integrated pump is a DDC S1 pump with PWM support, which allows for a quiet pump with a ramping speed based on loading.
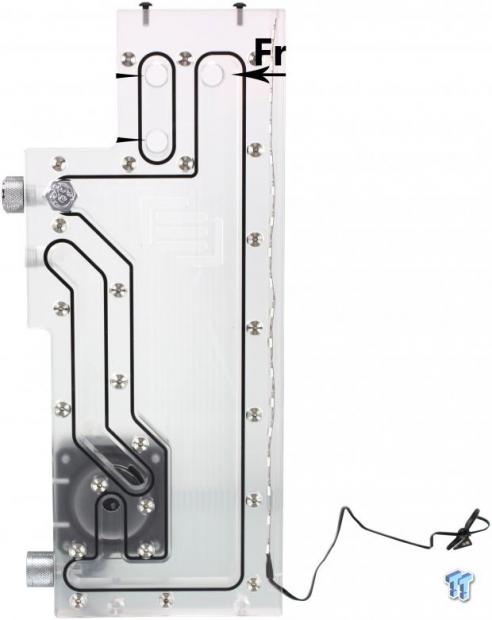
Here we highlighted the ports and their function of the Apex ICS unit so that you can see how the loop should be connected. One thing to note is that the top left port labeled as "to radiator" if using two radiators should go to the top radiator first, then to the front mount unit, and back to the right-hand top port.
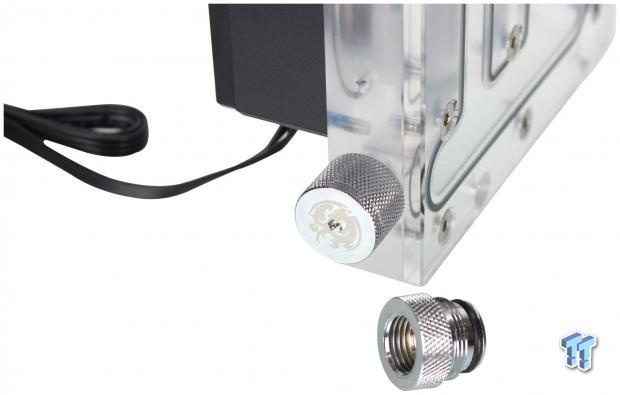
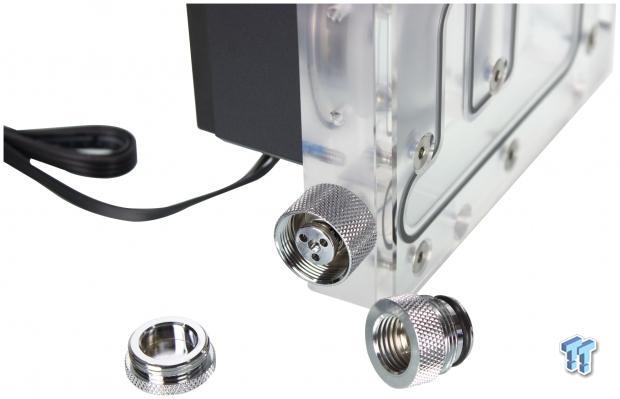
Here we have the lower drain port fitting as you can see MAINGEAR included an accessory fitting which threads into this covered port, which is spring-loaded. This allows you to fit a piece of tubing to this fitting and, when needed, simply remove the cap and thread on the fitting with a tube attached to drain fluid away into a container to offer a drain capability, which is virtually spill-proof while being integrated into the Apex ICS.
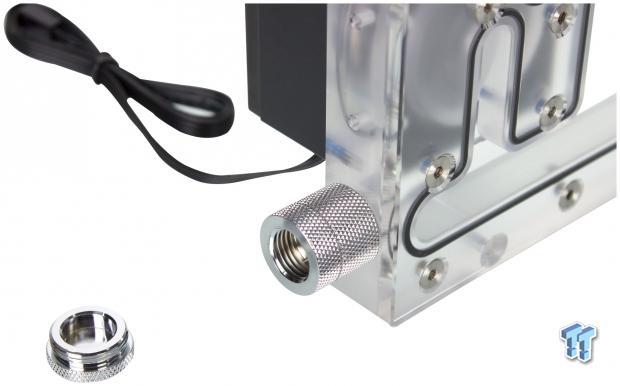
Here we have fit the drain portion of the fitting to show that the G1/4 thread can be used to install a fitting and tubing to this before being installed for efficient draining.

The fill port for the Apex ICS is capped off with this pressure valve, which you can press and bleed the loop as pressure builds and air escapes. Otherwise, it seals and can be removed by threading it out of the Apex ICS.
Case Build & Finished Product
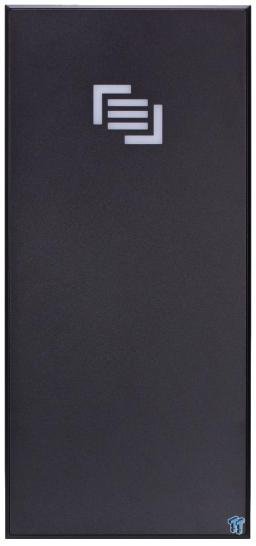
The front of the Vybe looks unchanged when assembled as the system is not powered up, so the logo is not illuminated. The front of the chassis seems quite subdued, simple, and clean. But, the glass panel lets you know this is a gaming/showcase build, and not a business rig.
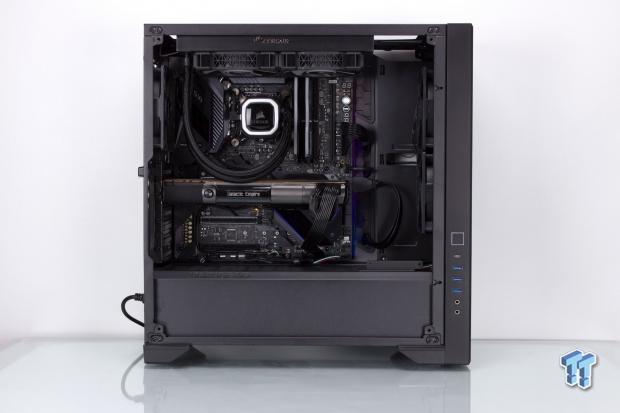
Here is the built standard rig, but you may notice some parts have changed here to accommodate the liquid cooling planned for this build. We chose a higher-end build for this review due to we wanted to be able to put the fire to this liquid cooling. We decided to go with the Maximus XI Extreme, which is EATX, and slotted into the chassis just fine, and seated in the board is a 9900K, and the GPU is an NVIDIA TITAN Xp Collectors Edition. The 9900K is notoriously toasty, so it should be a good representation of the difference between an AIO cooled rig and custom liquid cooling. The RAM, you will notice we did indeed run into issues as we could not run our Corsair Vengeance Pro RGB DIMMS due to not enough clearance. We opted for our backup RGB DIMMs Geil Super Luce, which are about 8mm shorter, and even they were pressed by the radiator, but it was light enough pressure that I was comfortable doing it.
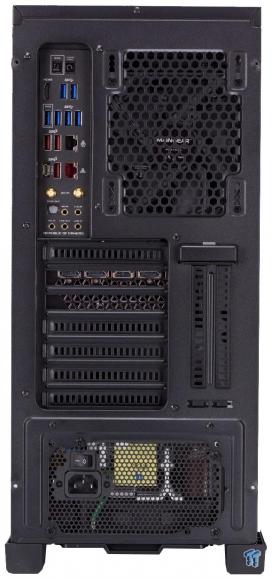
The rear of the build looks relatively standard, with all of the significant gaps now filled in with the I/O for GPU, motherboard, and PSU. We did not have the riser unit for the MAINGEAR vertical GPU mounting, so we had to opt for standard mounting for both the standard build along with the liquid-cooled build.
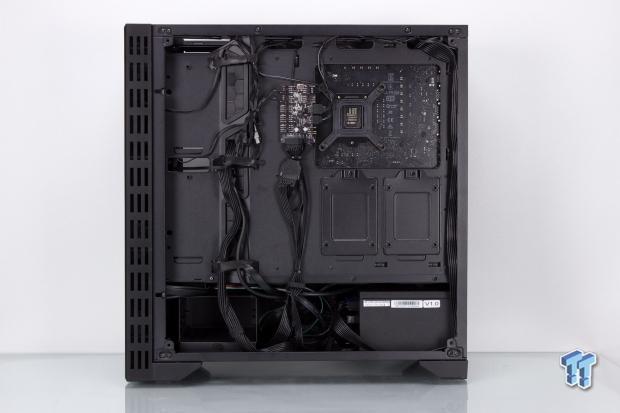
Here you can see that the Vybe offers plenty of places to route cables. I did opt to use the preinstalled Velcro straps, which held the wires just fine, had I used zip ties, however, it would have been a bit tighter but overall using the Velcro does the job.
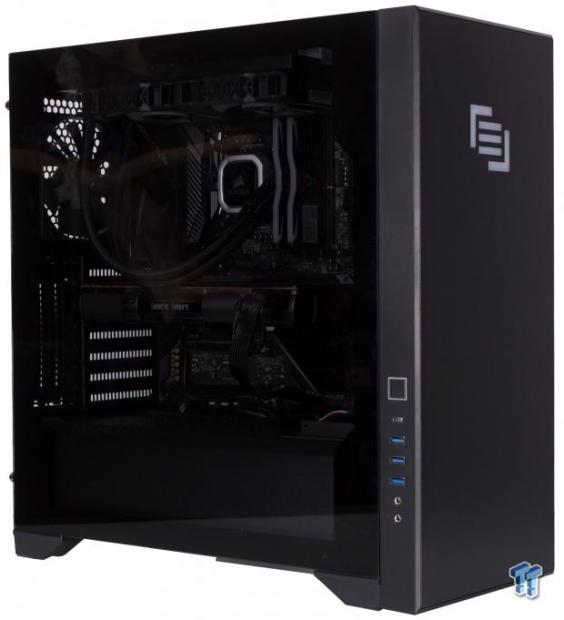
Here we have the stealth blacked out build in its finished state. Not powered on, you can see the outline of components due to the lightly smoked glass.
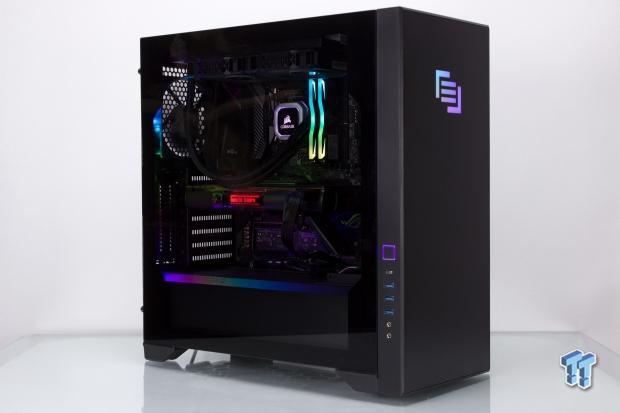
Switching the system on and everything comes to life. The power button seems to stick to purple color while the front panel logo and internal RGB strip have a fully addressable aesthetic, which helps the system come to life.
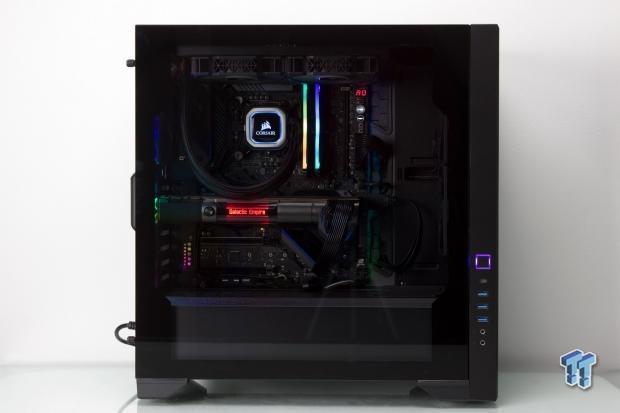
Here we have a side view so you can see the inside directly and the illumination.
Liquid cooling parts for the build
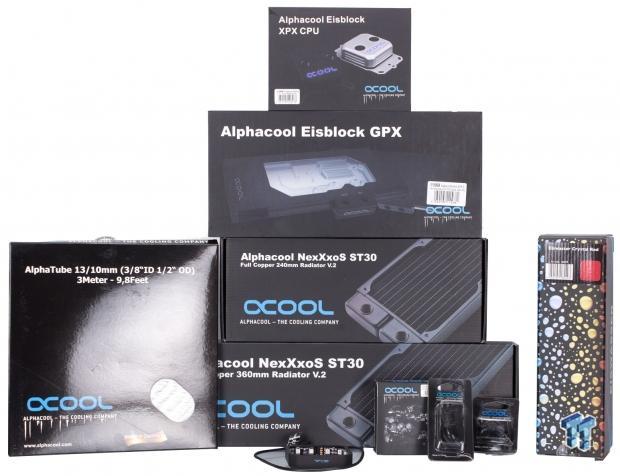
When we received this case some time ago, I knew we would need some serious gear to build out this Vybe to its full potential. We worked with Alphacool to assist with the necessary components to build the loop we need. Also, we opted for a few RGB touches to further the aesthetic for the Vybe. Being MAINGEAR's color is red; we also chose crystal red, clear coolant for the final build.

The CPU block we chose was a satin finish block, which we wanted to illuminate, so Alphacool sent this along, which surrounds the block with RGB LEDs.

Here is the block with the RGB surround, so now you can see what will be cooling the CPU. I'm sure you have noticed this is only a mock-up, so no mounting hardware is on the block.

We chose an Alphacool Iceblock for our TITAN Xp which has an acrylic front so you can see the fluid moving through your loop, and would be a fresh aesthetic if you have a vertically mounted GPU. The beautiful thing about this block is it uses several pads to contact critical components to passively sink heat and put the backplate to work, helping to cool the card.

The radiators we used are ST30 models, which are standard thickness. Alphacool offers 60mm thick radiators, but for the confines of the Vybe, we chose something a bit more on the level with what users would install.

We chose black fittings for this build to go with the mostly blacked-out theme. These are soft tube compression fittings as we opted for the soft tube to allow for easy parts swapping and maintenance vs. hard tube builds. We may do a hard tube build on this platform at a later date if there is interest, but the time and skill associated with hard tube builds can be tough to justify for most users.
Liquid cooled finished build

Here's the front of the Vybe after building it with liquid cooling. This time we lit it up and chose a purple color for the RGB as it offered one of the best looks, in my opinion.
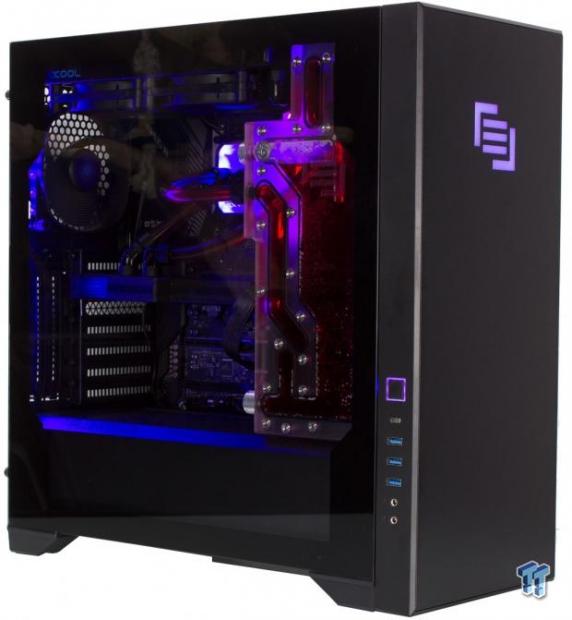
Here is the same angular shot we had before with the standard build but fully liquid-cooled. The RGB, when moved from rainbow to a static color with the rear LED strip, and from Apex ICS LED strip all synchronized, the color can help the parts stand out and create a very cool finished build.
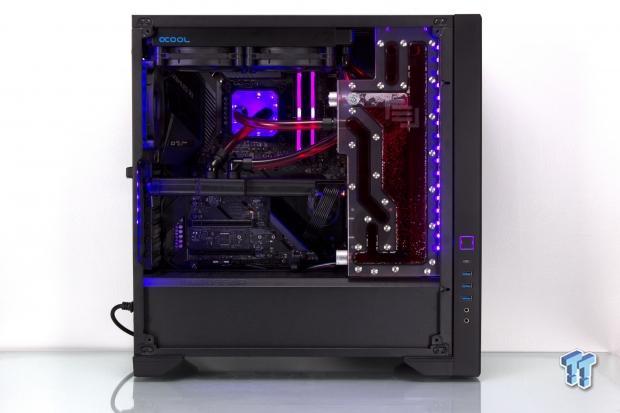
Looking straight in the side with no panel, we get an excellent unobscured look at the finished build. The purple, while it may not be everyone's cup of tea, helped highlight the build in photos. The RAM, if it matched the rest of the components illumination, I feel would be the finishing touch to make this is a genuinely cohesive build.
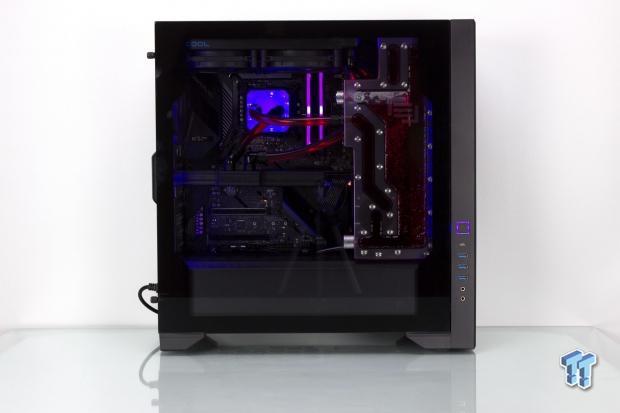
Here we have the Vybe build now complete and buttoned up. The black surround on the glass panel helps to hide the LED hotspots form the two LED strips, and now we have a glow throughout the build. The most welcome part would be the fact that the liquid cooling dropped the audibility of the system in a significant way.
I would say it's time to steer this one to the finish line and wrap this up.
Final Thoughts
When I first was asked to take a look at the Vybe, I was interested simply based on the fact that the chassis had a familiarity to me, along with the fact that this was an excellent chance to build an awesome liquid-cooled machine as well. As I dug into the chassis, I realized that there were many things to like about the Vybe, which we will list below, but overall it was a case that came across as very easy to build in for the most part.
The thermal performance for the Vybe is as follows. First up is our standard build, which we measure an ambient of 24.1C with an RH of 45%. The standard AIO CPU and air-cooled GPU build showed a delta over ambient of 67.1C on the CPU. The GPU showed a delta over ambient of 57.9C.
Moving to the custom liquid cooling and the first thing we noticed was how much quieter the Vybe became. The Measured ambient was 24.0C with an RH of 44%, and the CPU showed a delta of 57.4C while the GPU showed a delta of just 19C. The ability to liquid cool the GPU net us a drop in GPU temp of almost 40C, which meant rock stable boost clocks only limited by the arbitrary power limit. The thing worth noting is that the 9900K CPU on the H100i would throttle under prolonged stress, but under custom liquid cooling, it held its ground at top clocks and did not budge even under heavy sustained loading.

Now it's time to talk about what we like about the Vybe. There's a lot to like about the Vybe, as it's either based on a very competent case or from the same OEM. The EATX fitment and substantial cooling fitment capabilities are all significant positive marks. The integrated fan and ARGB hub along with preinstalled ARGB strip and front logo are welcome; they allow you to tune your system aesthetics to match whatever theme you are looking for.
Next, we will look at what we like about the Apex ICS. First up, like any liquid cooling manifold or distro plate, it allows for more natural planning of liquid cooling tube routing and even less overall tube mess. It also adds to the aesthetic of the final build as I don't think many would sneer at the appearance of a unit like this. The inclusion of the secure and spill-proof drain port is very cool. Using a PWM DDC pump is also great, and the addition of an addressable strip into the unit adds to the ability to tune the aesthetic.
Now we have to address some things I feel could be better with the Vybe. First up is the width of the chassis, which, if it were enhanced by up to 20mm, would offer much more fitment capabilities for top-mounted radiators while opening up DIMM support. The fact that a single Type-A port uses a full 20-pin header is something I have knocked points off for in the past, and even with the solid I/O of the Vybe, it's going to lose some points here as well. The ARGB aesthetic is terrific, but I do wish you could adjust the power switch RGB as it will not match many themes, and since it faces the same side as the main components, you will notice it.
Now to the Apex ICS again, and what we find an issue with. There's not a ton I can say here as the unit is quite well built. One thing is the position of the return (inlet or from radiator) port. Some creative reshuffling of the Apex ICS could open up 360mm compatibility for the Vybe, but as it stands, you block the inlet port.
The price point for the chassis at $119.99 is not bad for what it offers. When comparing it to the comparable offerings, it holds its own in both performance and subtle yet strong aesthetic appeal. When purchasing the Apex ICS specifically built for the Vybe, it becomes an even better deal. When you look around, we find that most liquid cooling manifolds or distro plates can run over $200, where the Apex ICS comes in at $149 or 269.99 for the case with the Apex ICS preinstalled.
MAINGEAR chose an excellent starting point for the Vybe platform and added features to make it both a more comfortable build and a robust aesthetic contender.
Shannon's Chassis Test System Specifications
- Motherboard: ASUS ROG Maximus XI Extreme (Wi-Fi) Z390 (buy from Amazon)
- CPU: Intel Core i9 9900K (buy from Amazon)
- Cooler: Corsair H100i Pro RGB (buy from Amazon)
- Memory: Corsair Vengeance Pro RGB CMW32GX4M4C3000C15 (buy from Amazon)
- Video Card: MSI GeForce RTX 2060 Gaming Z (buy from Amazon)
- Storage: SanDisk M.2 256GB
- Power Supply: SilverStone Strider Platinum 1000W (buy from Amazon)
- OS: Microsoft Windows 10 Home 64-bit (buy from Amazon)

Performance |
95% |
Quality |
96% |
Features |
95% |
Value |
92% |
Overall |
95% |
MAINGEAR may not be a chassis manufacturer, but they took a design and added some cool aesthetic options along with features to ease builds, which warrant recognition.

Similar Content
Related Tags

