
The Bottom Line
Introduction, Specifications, and Pricing
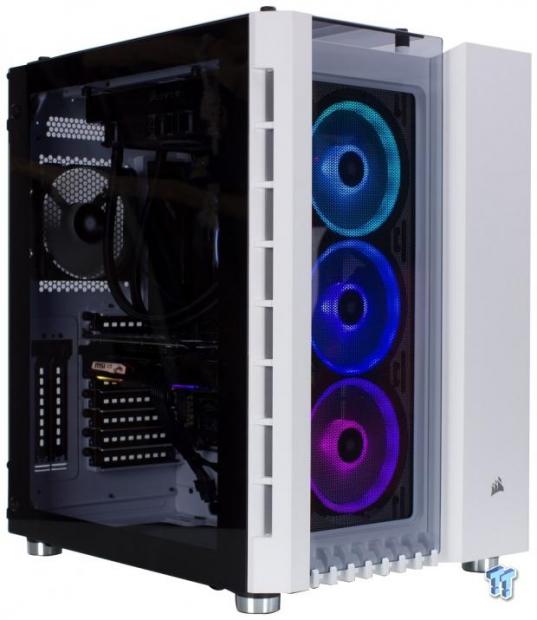
Corsair is no stranger to our case reviews, and they have had some that were good and some that were less than we expected them to be. Today we have one of the cube style iterations of a mid-tower chassis in the Crystal Series 680X. The 680X shares some defined previous chassis options Corsair offered, such as the air 540, 240, and associated cube style cases.
The Crystal 680X changes things up a bit for their cube style offerings, like the smoked tempered glass flanks the airflow openings for a unique aesthetic. With Corsairs' RGB options, it is only natural they would want to offer options where you can view RGB components such as fans. Corsair is attempting to embrace cooling focused users looking for a boutique-style chassis with cable management and component hiding capabilities that will attract those looking at showcasing specifically core components and liquid cooling.
Key features as listed by Corsair are as follows:
- High airflow design
- 3x included LL series RGB fans
- iCUE control software compatibility
- Dual chamber layout
- Triple tempered glass panels
- Massive cooling potential (8x 120mm or 7x 140mm mounting)
- Front panel Type-C
- Flexible storage options (up to 3x 3.5" & 4x 2.5")
- Vertical GPU compatible
This feature set is quite good, and the inclusion of a surround tempered glass around the central chamber makes for an interesting dichotomy between plastic and glass surfaces. The ability to it multiple radiators internally will appeal to many liquid cooling enthusiasts, and having the high speed I/O ensures Corsairs' design does not feel dated.
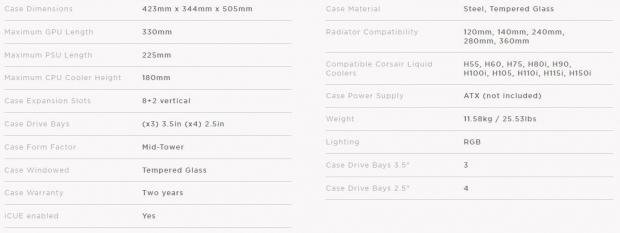
The Corsair Crystal 680X came to market with a part number of CC-9011169-WW, which is not as simple to be able to remember as some we have reviewed previously. The dimensions of the cube style mid-tower come in at 505mm tall, 423mm deep, and 344mm wide. As you can see, the width is quite higher than a normal mid-tower, and this is due to the dual chamber design, which houses the storage and PSU behind the motherboard tray.
Motherboard fitment for the 680 is from ITX up to EATX. HDD and SSD are as previously mentioned with larger 3.5" coming in at three available trays, and a plastic quick-release cage for 2.5" drives carries up to four. PSU fitment is virtually unlimited with a spec of 225mm, and consumer PSU's don't stretch that far with one of the largest we have seen reaching 200mm for the Corsair AX1600i or even the EVGA SuperNOVA 1600W T2 at 220mm. Most users will likely employ a much more modest PSU in the 140 - 180mm range. There is technically not a PSU shroud as the entire rear cable management chamber is where the PSU resides along with storage, which all are found behind or adjacent to the motherboard tray.
Fan fitment has already been mentioned with up to 8x 120mm (3x front, 2x top, 1x rear, and 2x bottom) or 7x 140 (2x front, 2x top, 1x rear, and 2x bottom). Radiator fitment is the same fitment for radiators as its associated fans. If opting to air cool your CPU, the limit to height will be 180mm, which is not much of a ceiling and will allow pretty much any CPU cooler we have seen. The included fans are a point of interest for the 680X as it comes with triple 120mm LL RGB PWM fans in the front and a standard chassis fan on the rear as exhaust.
The 680X comes to the market at $249.99 and comes head to head with the Lian Li PC011 Dynamic XL. Corsair is going to have to show some excellent performance to fight against the PC011D XL model as that performed well in both performance and aesthetics.
Shannon's Chassis Test System Specifications
- Motherboard: ASUS ROG Maximus XI Hero (Wi-Fi) Z390 (buy from Amazon)
- CPU: Intel Core i7 8700K (buy from Amazon)
- Cooler: Corsair H100i Pro RGB (buy from Amazon)
- Memory: Corsair Vengeance Pro RGB CMW32GX4M4C3000C15 (buy from Amazon)
- Video Card: MSI GeForce RTX 2060 Gaming Z (buy from Amazon)
- Storage: SanDisk M.2 256GB
- Power Supply: SilverStone Strider Platinum 1000W (buy from Amazon)
- OS: Microsoft Windows 10 Home 64-bit (buy from Amazon)

Packaging
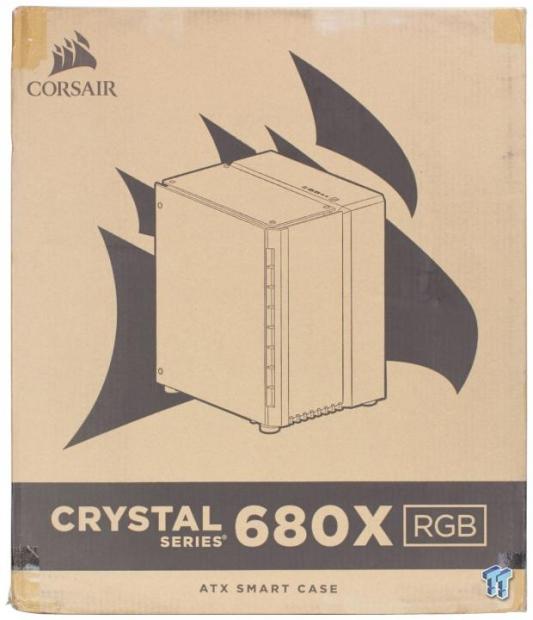
The front of the 680X package is mostly covered by a blacked out sails logo of Corsair. It is flanked by an open line drawing of the chassis and across the bottom lists the series and model.
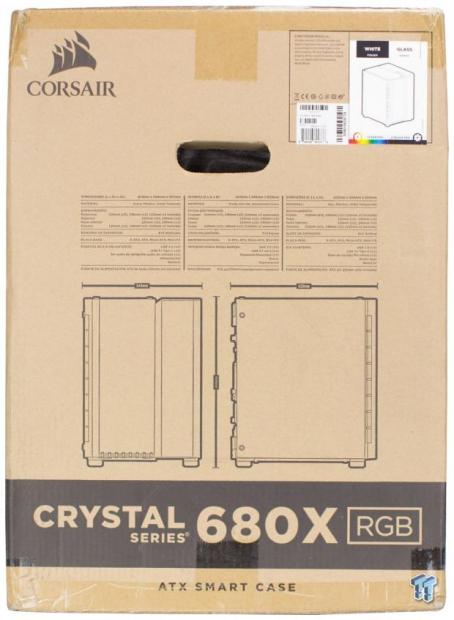
The first of the slimmer side of the package shows a dimension layout of the 680X along with the spec table in three languages. At the top RH corner, they have the label showing what color the chassis is, the glass panels or not, and the fans which are fitted, RGB or not. Adjacent to this label is several barcodes for inventory management.
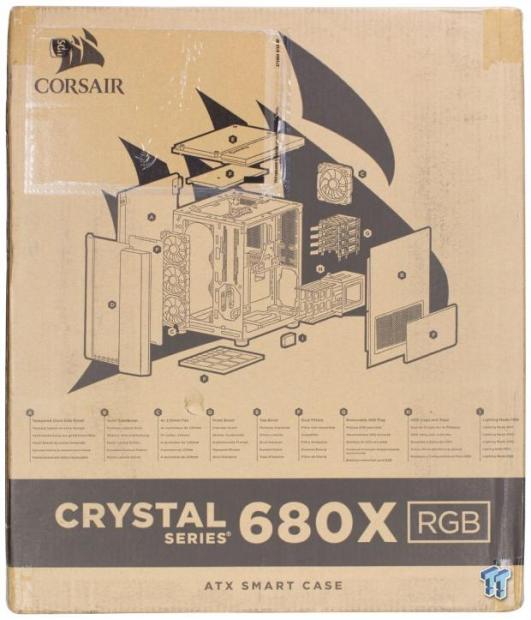
The rear of the packaging, we now see the same sail of the Corsair logo, but this time the chassis is an exploded view. At the bottom, we see a stripe of part notations listed in six different languages.
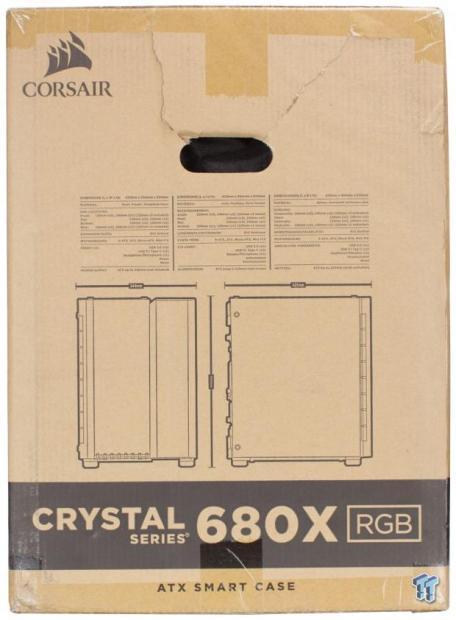
The opposing slimmer side of the packaging has the same dimensions layout along with the spec table in the other three languages.
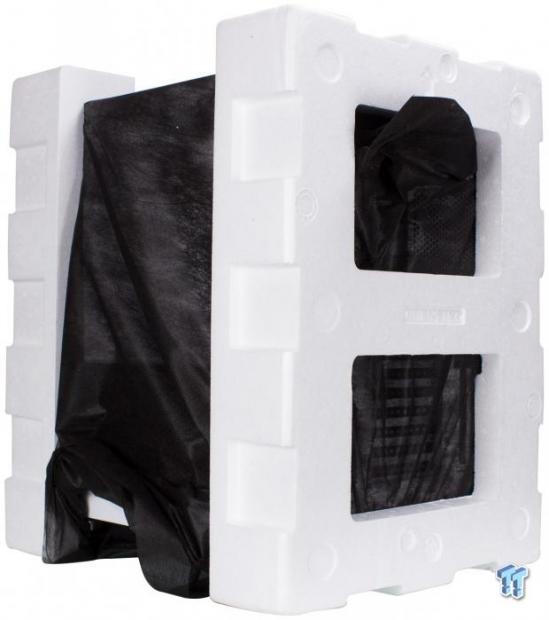
The 680x comes out of the box with hard Styrofoam end caps protecting it around the edges. The case is found in a fabric bag that helps protect against abrasion. All of the glass panels have plastic cling film in place to help avoid any transit damage.
Corsair Crystal 680X Mid-Tower Chassis
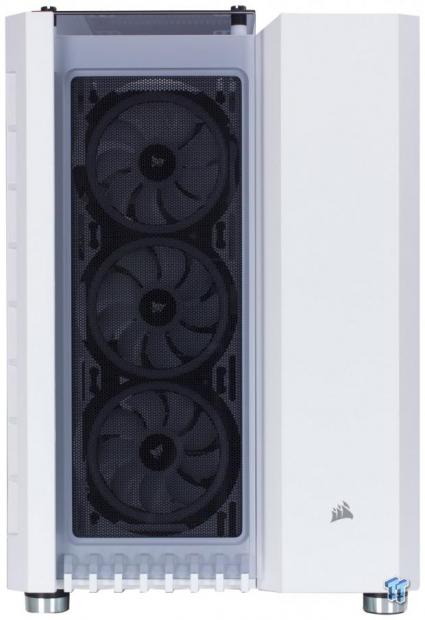
The front of the 680x is a bit unique as you see the glass and fans behind are offset to the left. The 680X being dual-chamber means the main components and the cooling chamber is to the left closest to the main glass panel while the PSU, cable management, and storage are hidden behind within a solid panel. The glass panel sits on support posts giving the panel several millimeters of rising above the main panel for airflow. This should help with having a stylish glass aesthetic while still maintaining airflow.
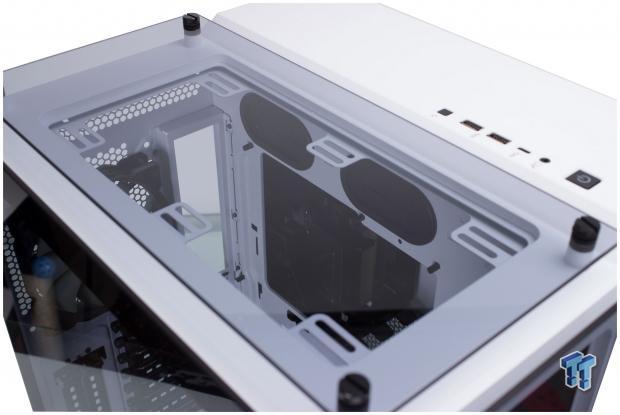
The top has a similar glass panel that sits above the fan mounts, allowing a gap for airflow. You will notice that the top mounting does not have a filter as this magnetic filter comes separate from this top fan mounting. I love that Corsair does not require removal of the glass as it appears, but the fan mounting both front and top are removable trays form the internal to allow mounting without having to smudge the glass trying to remove and reinstall it.
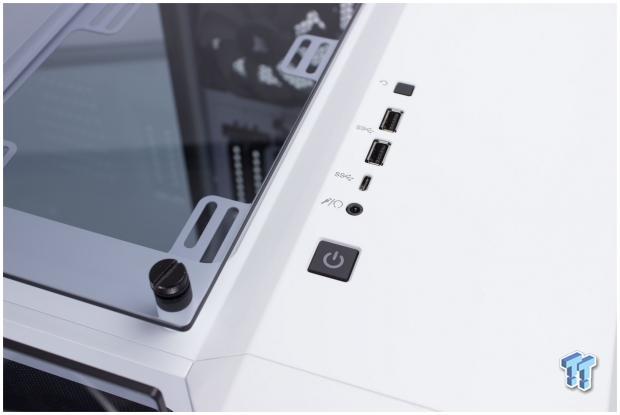
The chassis I/O is found up top toward the front and directly aside from the top glass panel and main chamber airflow we were discussing. The I/O is outfitted as follows:
- Power button with integrated power LED
- Combination headphone and microphone 2.5mm jack
- USB 3.2 Gen 2 Type-C port
- 2x USB 3.2 Gen 1 Type-A ports
- Reset button
The I/O is what we would expect and offers plenty of high-speed connectivity. The Type-C port uses the 3.2 Gen 2 (3.1 Gen 2) connector for full high-speed operation. One thing missing is an HDD LED, which there does not appear to be one.
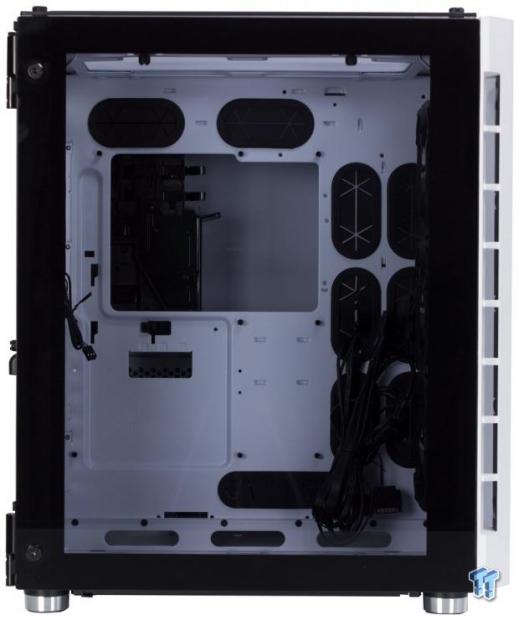
The left-hand side of the chassis with the main glass panel is now visible. The glass is smoked, not blacked out, but darker than completely clear. The front panel we can see some of the ventilation ports which feed air behind the glass panel for the fans. The main glass panel is held closed with magnets, and it is attached to the chassis with two large metal hinges. The panel can be removed, but first, a screw must be removed from the top hinge, which keeps the panel from coming off inadvertently.
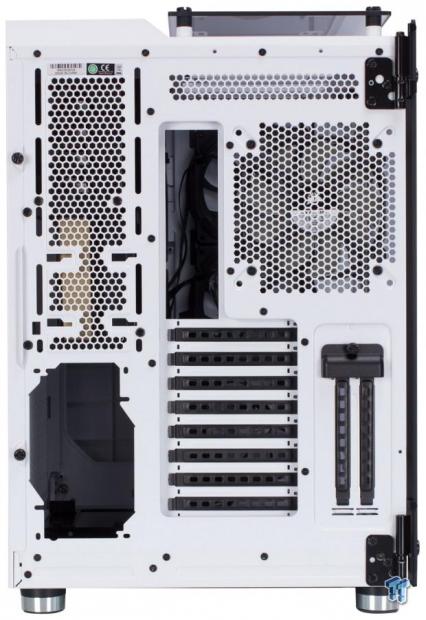
The main chamber of the rear looks like a standard chassis, and it seems like you just pulled a PSU from the bottom and rotated it to be behind the motherboard tray. The expansion slots are a plus one numbering eight. The 680X also offers a vertical GPU mount, but you have to purchase the ribbon separately. The rear exhaust fan is a 120mm preinstalled, but you can swap to a 140mm unit if you decide to. All of the expansion slots are internally accessed except for the vertical GPU slot, which has an external cover and mounting.
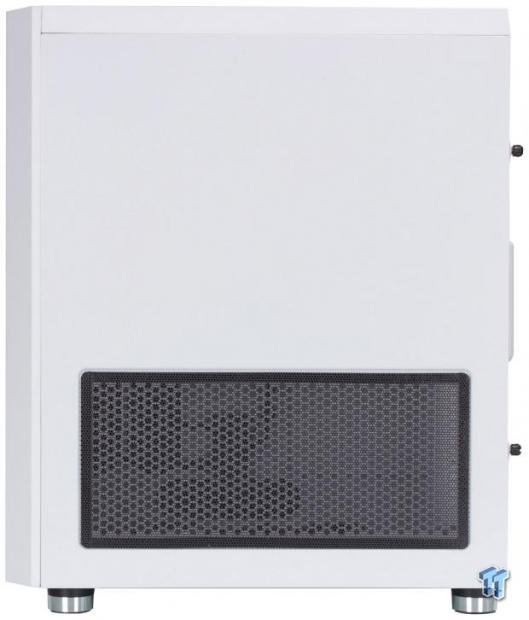
A solid steel panel covers the cable management side of the chassis, with the only opening being a large airflow mesh with a removable magnetic filter. This is made to help the PSU breathe as it sits upright with the fan facing this panel. To the right, you can see the thumbscrews that retain the panel to the chassis.
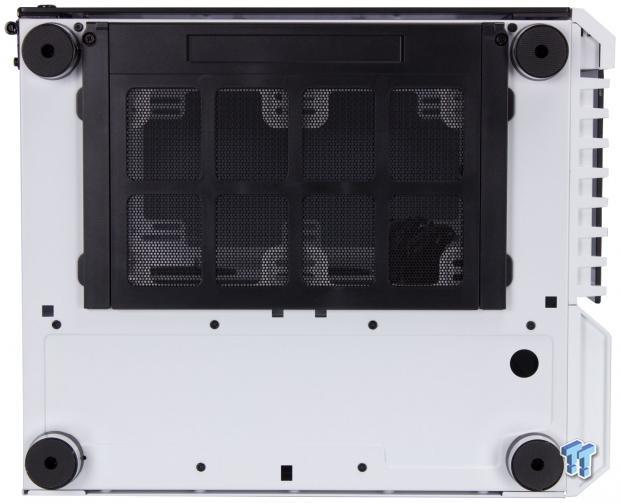
The bottom of the 680X is significant, being a dual-chamber design. The top area with the large filter is the main chamber, and the filter covers the lower fan/radiator mounting. The feet number four and have a metallic finish, along with rubber pads on its end, to avoid skidding.
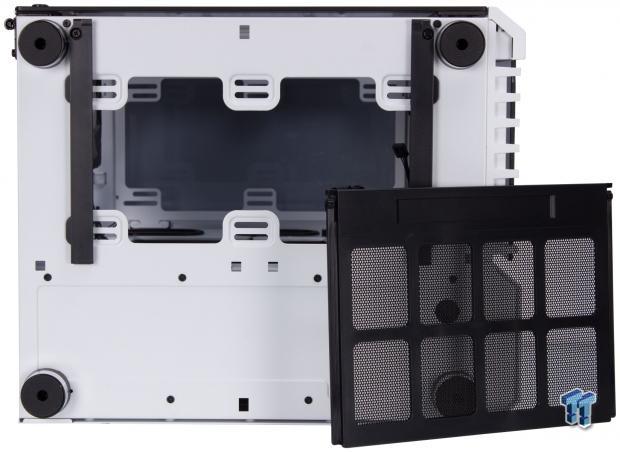
Here you can see the filter removed and the massive dual opening, which supports 120mm and 140mm based mounting. The filter slides out from the sides and requires the door to be open for the filter to be removed.
Inside the 680X
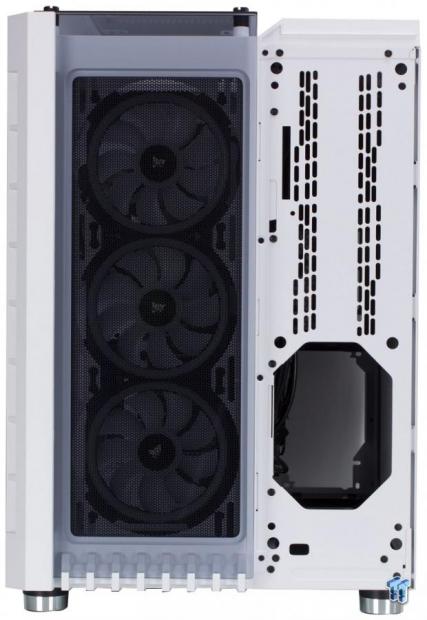
The front, for the most part, will not need to be removed, and you have to remove several screws internally to remove the left-hand side. The right-hand side of the front, as you see, can be pulled off, but there's not much most will use here. If you wanted to remove the plastic from the front entirely, it would require more work than would likely be beneficial as the removable trays allow you to install radiators or cooling as needed without ever removing any external panel.
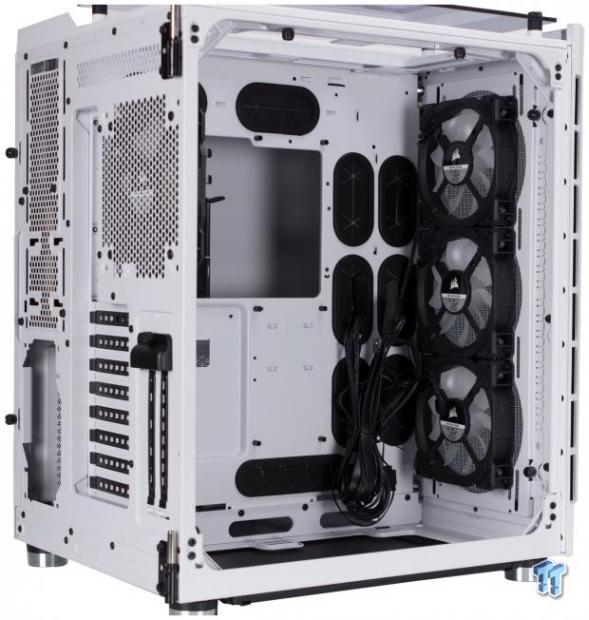
The interior of the 680X is wide open and has tons of space to sort out your liquid cooling endeavors should you choose to install a massive cooling system. You can see two separate vertical rows of cable management pockets with grommets. On the front, we see the tray which can be removed with the removal of two thumbscrews. Here you can also see the three preinstalled 120mm LL fans.
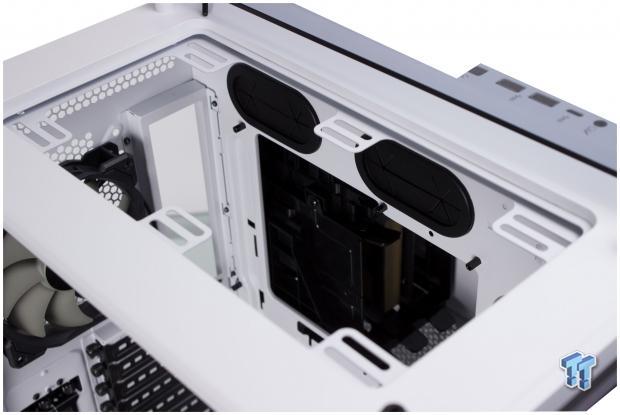
Much like the front, there is no real reason to remove the glass panel, but I did so here to show that they can indeed be removed. In reality, if you want to install cooling here, you can do this by pulling the cooling bracket from inside with two thumbscrews. When you do this, you would also want to install the magnetic filter here, which will sandwich between the bracket and the chassis. Here we have mounting for dual 120mm or dual 140mm with slotted mounting.
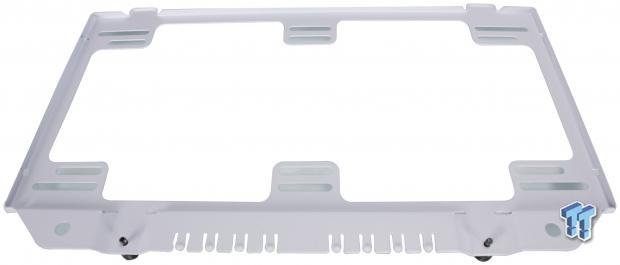
Here is the bracket removed from the top form the interior as you can see the bracket mounts with two tabs on the motherboard tray side, while the two thumbscrews fasten the bracket securely at the top.
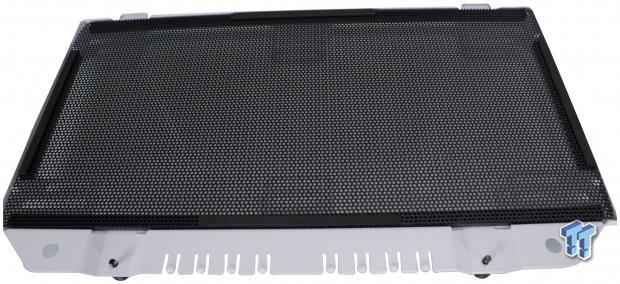
Here we installed the included magnetic filter, and you can see that the filter fits well and has foam pads to ensure the filter assembly seals against the top of the chassis.
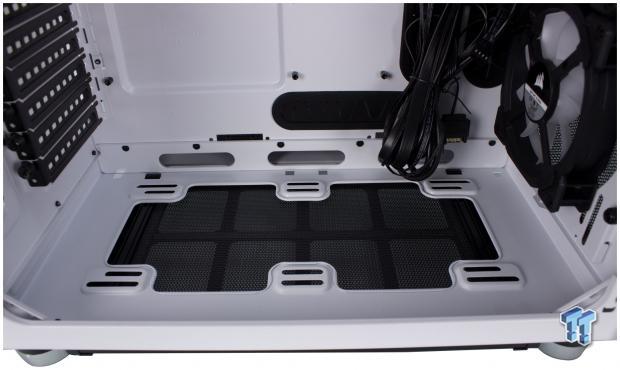
At the bottom of the 680X, we see the interior of the bottom chassis mounting for cooling. The slotted mounting once again for dual 120mm or 140mm. Depending on expansion card installation, radiator mounting and thickness may be limited here to avoid motherboard interference.
Inside the 680X Continued
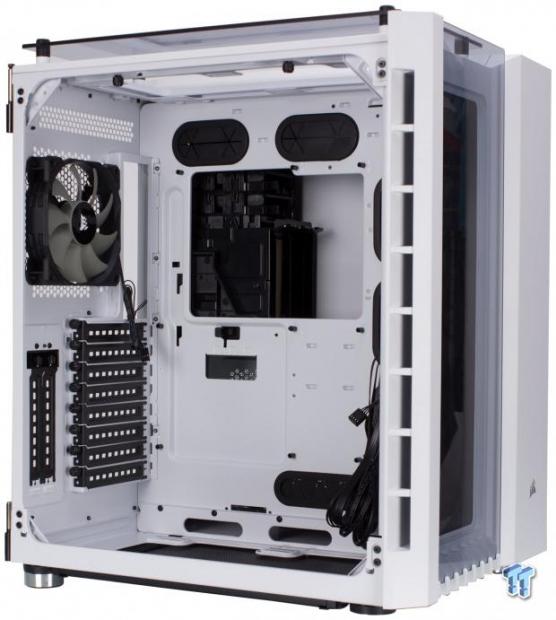
Here we see the massive CPU cutout; it is sizeable enough to accommodate any CPU cooler we have seen to date comfortably. Here we can also see that the motherboard mounting is well below the top, which means there is a sizeable space for thicker top-mounted radiators. This is welcome as it helps to avoid interference between cooling and motherboard components or installed RGB memory should you choose such an application. Also, note that the motherboard is surrounded by a broad array of pass-through cable holes, which help accomplish tidy cable management.
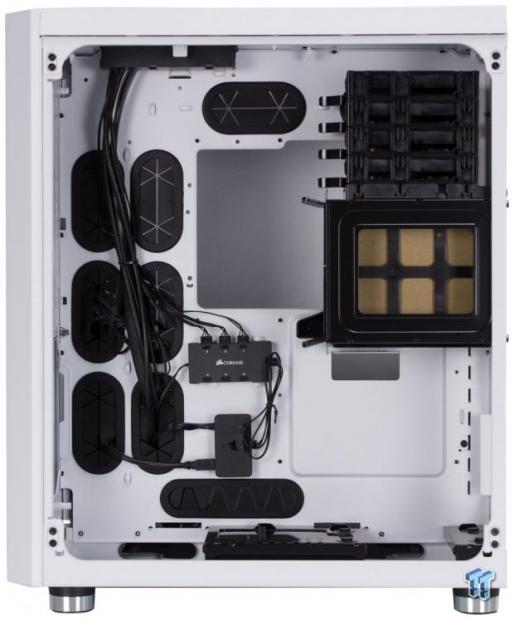
Here in the rear cable management area, we see the business end of the 680X. Here is where all cables will be routed, PSU installed and storage managed. To the top right, we see the 3.5" and 2.5" drive cages. Lower middle, we see the preinstalled lighting node and hub to feed the included LL fans RGB control. The bottom bracketry is in place to support PSU installation.
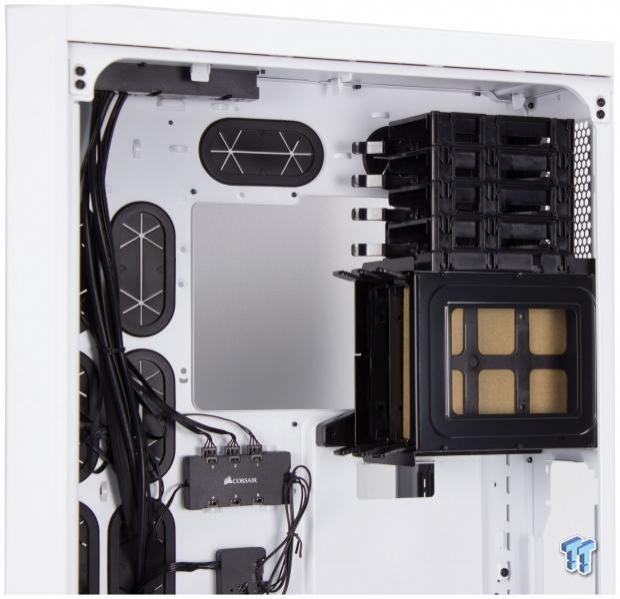
Here we have the drive cages; the 3.5" drive trays are tool-less with pegs in each tray to retain the HDD. The 2.5" plastic cages have a lever style retention where you can slide the notch on the side, which allows the SSD to pop out.
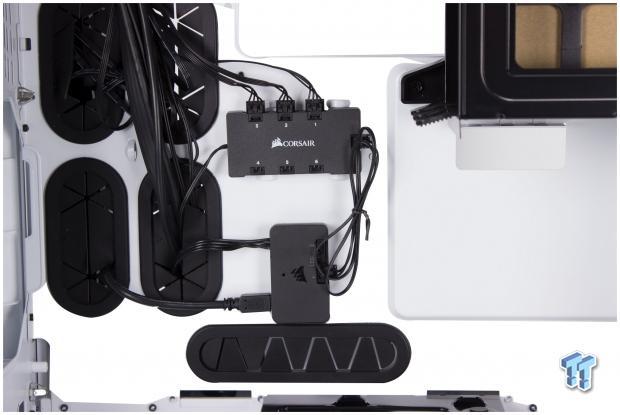
Here we have the RGB control, which comes preinstalled in the 680X. This is where you can connect any extra LL fans as you add them, and the Node below also has a second channel that can support RGB LED strips for internal case lighting. This unit is controllable via Corsairs' iCUE software.
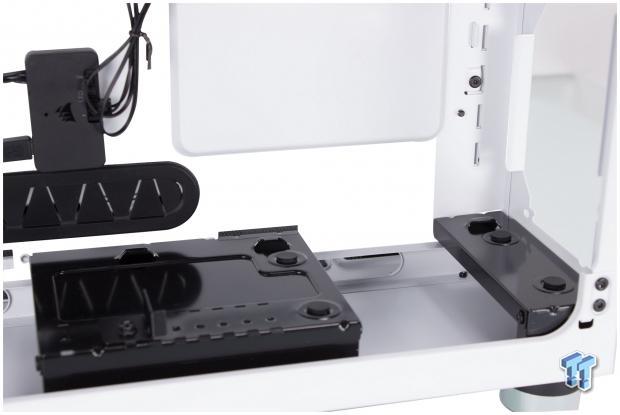
Here we have the PSU bracket, which supports the PSU standing on its side rotated ninety degrees. The bracket has front support to hold it tightly to the rear mounting area. The braces also have foam rubber circle pads for the PSU to rest upon.
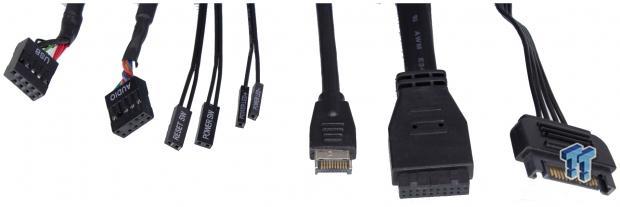
The front panel cables are as follows: (Note: one SATA power connector was not long enough to photo)
- USB 2.0 10-pin header (For Lighting Node)
- HD Audio Header
- Power, Reset, and Power LED headers
- USB 3.2 Gen 2 header
- USB 3.2 Gen 1 header
- 2x SATA power connectors (one for Lighting Node, one for the RGB Hub)
The front panel connectivity covers all of the connectivity and the additional RGB amenities. The I/O offers both dual Type-A and a Type-C connector for the newest high speed I/O available for chassis.
Hardware & Documentation
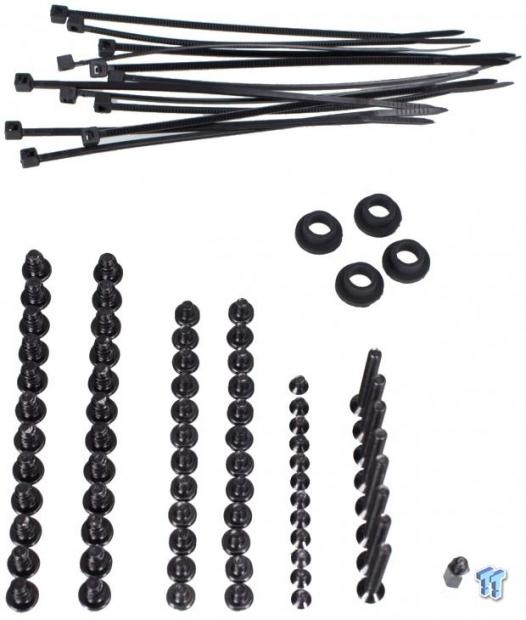
The accessory package is sizeable and is as follows.
- 12x zip ties for cable management
- 24x short fan screws
- 24x motherboard and HDD mounting screws
- 12x ODD and SSD mounting screws
- 8x long fan screws
- 4x short rubber spacers
- 1x extra motherboard standoff
The included screws are more than enough for most systems, which will be used in the 680X. The motherboard/HDD screws also work for PSU if your PSU is second hand or did not have screws included.
The manual is a booklet style with 52 pages split between six languages ending on page 48. The final few pages are for conformity and safety regulatory information.
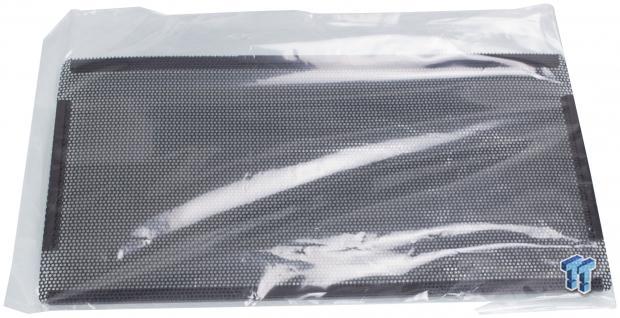
The final accessory worth mentioning would be the top-mounted fan filter, which comes separately. This is the same filter we showed on the top fan bracket we installed.
Case Build & Finished Product
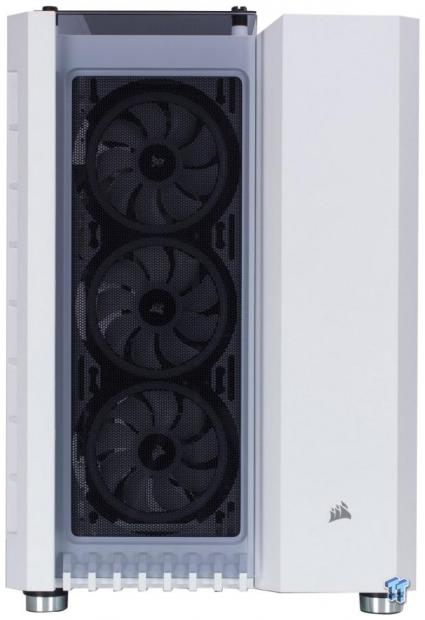
Taking a look at the front, it does not look any different after being built as the LL fans obscure the view of the components now installed within.
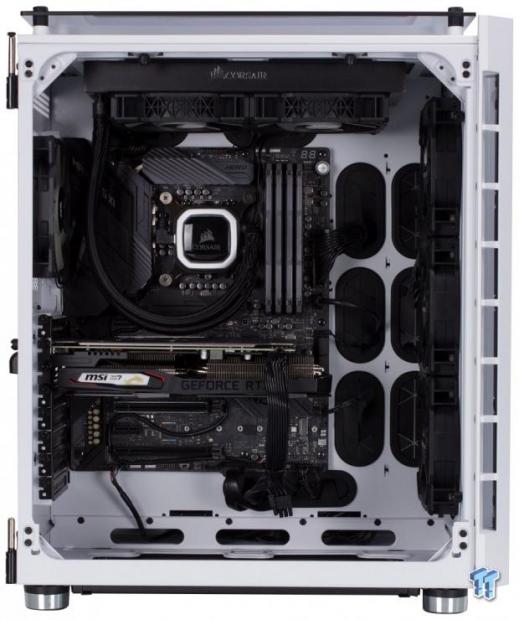
The build is now complete, and everything went in very quickly. The board and GPU went in with ease, but the part that helped a lot was the removable trays. This allowed me to install the H100i radiator to be installed without having to hold it in place up top while fidgeting with screws. Once the radiator was affixed to the bracket, it was as easy as putting the tabs of the bracket in place, then just threading the captured thumbscrew into the chassis.
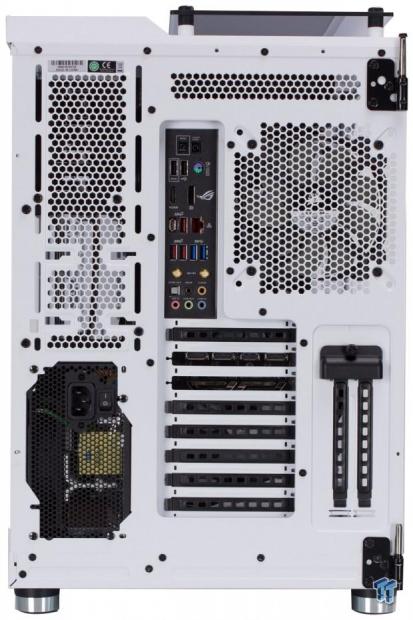
The rear I/O is a mirror image of the previous empty image but with the necessary ports now filled. All of the devices lined up, and everything is accessible with ease, and no significant issues were observed.
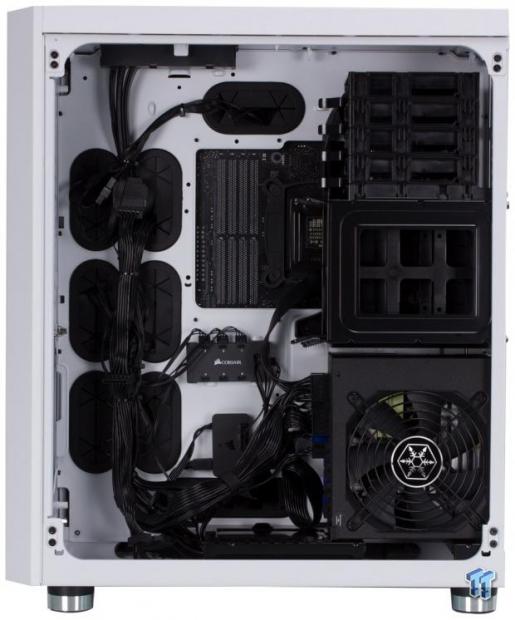
Cable management, as I have said many times in the past, is my least favorite part of a build. With that being said, the addition of RGB fans adds a multitude of wires to the bundle. These cables need to be managed; this now makes this rear chamber even more of a welcome addition. The multitude of cable tie-down points came in handy and ensured that everything went together with relative ease with minimal need for cutting zip ties to adjust a cable.
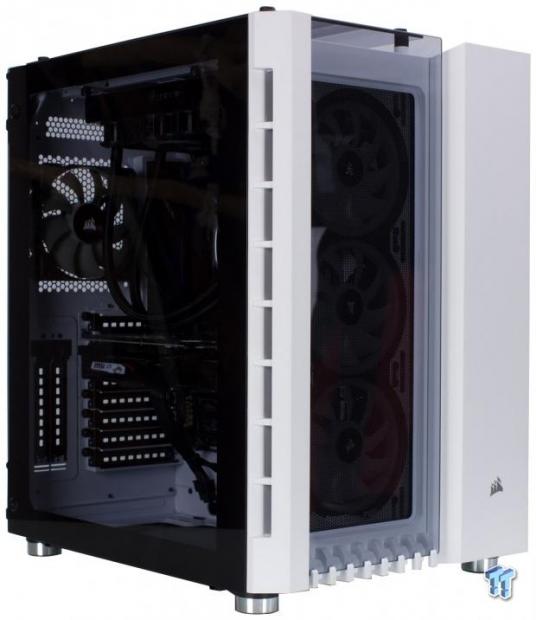
With the panels attached, we now have a finished build. The opaque nature of the 680Xs glass panels makes for a smoky blacked-out appearance while still being able to see the components inside. This is mostly thanks to the white painted interior. White reflects the light coming in to make the parts inside a bit more visible.

With everything powered up, we can see that the system comes to life, and the LL fans shine brilliantly in its default rainbow setting. The fans have a myriad of options for RGB settings to bets match user taste, but the rainbow one worked well enough for photos. One thing of note is the fact that with our Corsair AIO and RAM, we can sync all of them to the same lighting profile for a more cohesive illumination of your build, especially if you get the additional RGB strips for the chamber.
Final Thoughts
When I first took a look at the 680X, I will admit, I liked it because it is a dual-chamber design, which means that fitting cable management behind a tight panel is less of an issue. When I got into building it, I found several things that helped to make the 680X a reliable option for most any system builders looking for a case with this sort of feature set.
For our testing, we set up our standard testbed, and the ambient was measured at 22.1C with an RH of 44%. The CPU reached a delta of 42.4C, which is one of the better results we have seen in a while. The stock included fans to help make sure this temperature is possible and makes the 680X stand out in the crowd both aesthetically and performance-wise.
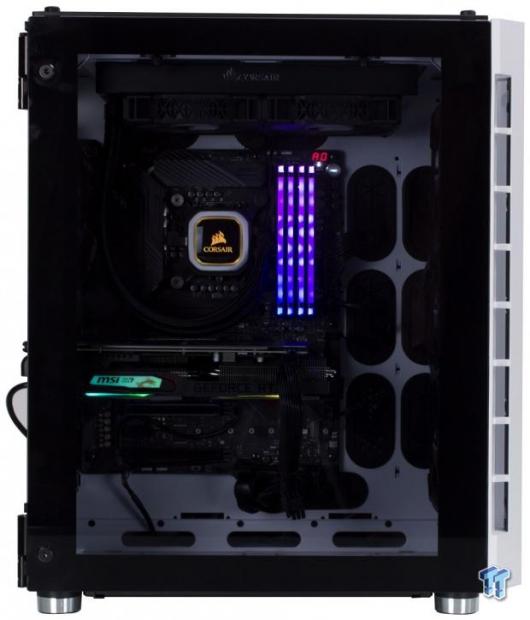
Now we get to what we like and don't like; what we like coming first. The 680X is a sizeable case, allowing fitment of pretty much anything you would need. The removable trays while not an entirely new idea help make this case from a capable addition to one that is much easier to build in. The ample cable management space afforded by its more substantial form factor means that you are not hoping all of your panels will still close nicely after managing cables. Also, while RGB is not always my favorite addition to a case, I do feel that the LL fans work well with the open glass panels on the 680X.
Next up is what we don't care for or wish to be improved in the 680X. This one is tough as the 680X does a lot of things right. While the three front LL fans are PWM, the rear exhaust is DC, and I think it would be helpful for all of the fans to be PWM so that they can be controlled on the same curve. Also, on that note, a PWM splitter would be a welcome addition here as while I would love to believe that all boards will work with no issues controlling all of the PWM fans you want, many do not have enough fan headers to service a vast array. I think a small PWM hub numbering 6-8 ports would be a great feature and add to the overall ease of building in the 680X.
The price coming in at $250 is a tough area, as there are many regular cases in this area. However, with the 680X's unique form factor, I do think that the only real contender would be the PC011 Dynamic series, both the standard and the XL, or maybe even the Lian Li PC08RGB. The PC08RGB is a great option, but overall the Corsair unit has it beat in a few ways one, being the ease of mounting of cooling. Other being iCUE control of the fans, which come preinstalled. Overall while I never like to recommend a case based on RGB, it has to be factored in, and Corsair made the 680X a robust package.
Corsair made a solid case with the 680X, and with the addition of the preinstalled fans. It is ready to drop your system in and get it running, along with so much more. Much like Alice, it is really up to how far the rabbit hole you want to go. With Corsair recently launching their HydroX gear, you can bet that the 680X will be the platform where I will be testing the new custom liquid cooling gear.
Shannon's Chassis Test System Specifications
- Motherboard: ASUS ROG Maximus XI Hero (Wi-Fi) Z390 (buy from Amazon)
- CPU: Intel Core i7 8700K (buy from Amazon)
- Cooler: Corsair H100i Pro RGB (buy from Amazon)
- Memory: Corsair Vengeance Pro RGB CMW32GX4M4C3000C15 (buy from Amazon)
- Video Card: MSI GeForce RTX 2060 Gaming Z (buy from Amazon)
- Storage: SanDisk M.2 256GB
- Power Supply: SilverStone Strider Platinum 1000W (buy from Amazon)
- OS: Microsoft Windows 10 Home 64-bit (buy from Amazon)

Performance |
98% |
Quality |
95% |
Features |
99% |
Value |
96% |
Overall |
97% |
Corsair took the cubic design of the Air 240 and 540 to new levels with the Crystal 680X. A chassis with the aesthetics, fitment and performance to receive top marks. Oh, and let us not forget iCUE RGB, if that's your thing.

Similar Content
Related Tags

