
The Bottom Line
Introduction, Specifications, and Pricing
Corsair is no stranger to our test bench, whether it be RAM, coolers, or the plethora of other devices they make these days. While Corsair started life as a memory company, the past several years, they have upped their game in the chassis department. Corsair has not only had some of the current trends integrated into their chassis rather quickly, but Corsair has also helped foster adoption for various chassis trends and even led the market in several instances.
Today we are looking at one of their recent chassis releases with the Carbide 678C. The Carbide series has hosted some impressive new chassis throughout history from the cubic AIR 240 and 540 to even the 740. They also have included more mainstream models such as the current SPEC series and 400Q and C. The Carbide series has always been a mix of steel with some plastic trimmings for aesthetic.
With all of the previously mentioned inclusions, the 678C is looking to make a mark on the market with a reliable mid-tower option with sound deadening and tempered glass much to the likes of something you may see from Be Quiet or Fractal Design. The 678C is designed for enthusiasts looking for versatile cooling fitment, modularity, and an overall robust build platform. The 678C much to my surprise is sans RGB, which is counter to typical Corsair style as they have focused on their new iCue management suite and their ability to RGB all the things.
The key features according to Corsairs page for this chassis are as follows:
- Optimized for quiet operation
- Modular design to allow versatile cooling placement
- Extensive sound deadening
- Multitude of cooling options
- Integrated PWM fan Repeater (PWM Signal Hub) Supporting six fans
- USB 3.2 gen 2 Type-C port
- Versatile storage options via modular trays
- Easy accessibility via Hinged door style front and main side panel
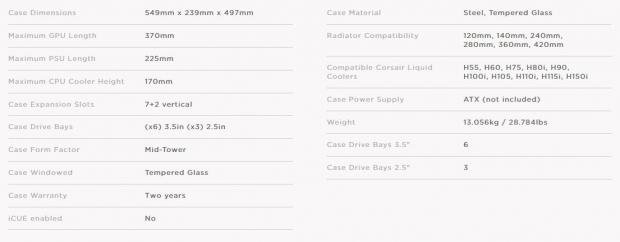
The chassis, as mentioned previously, is the Carbide 678C, part of the Carbide series with the part number of CC-9011170-WW. This is the White version of the chassis, as the Black version would be part number CC-9011167-WW with all other parts remaining the same. The chassis measures in at 549mm tall and 497mm deep, and a width of 239mm. This fits well within the commonly accepted Mid-Tower designation. The width of the chassis will help a bit with the ability to install components, and I hope this means clearance for a proper RAM set this time while having a top-mounted AIO.
Motherboard fitment for the 678C is from ITX up to EATX. The extra width is nice since the motherboard tray is a bit recessed, as you will see in the pictures on the following pages. This means that most high-end enthusiasts boards will fit without issue. HDD fitment is up to six for 3.5" drives, but if you can get extra trays, there are two additional spots left open, which could raise this limit to eight. There is a small plastic SSD caddy running across the rear of the motherboard tray that allows tool-less SSD installation or removal from the caddy.
One addition I have not seen in quite a while is a 5.25" opening in the front of the chassis once you open the front door. The 5.25" mounting is removable to expose more top-mounted cooling fitment, but it is there in case you need it. The PSU is limited to 225mm if you want to consider that a limit, so we know you can fit most any PSU in the space at the lower chassis. Speaking of the PSU area, there is a PSU shroud in place to make for a cleaner overall build. The PSU shroud has an elongated cutout upfront to support thick radiator mounting at the front of the chassis.
Cooling fitment is quite versatile as Corsair states with up to eight 140mm based fans and nine 120mm depending on your preference. The top can support triple 140mm or triple 120mm, while the front can support dual 140mm or triple 120mm. The rear can support either a 120mm fan or 140mm. The bottom can support up to dual 120mm or dual 140mm fans, respectively. Radiator fitment is quite similar; just keep in mind that 360 or 420mm based top-mounted radiators will require removal of the 5.25" mounting. Preinstalled fans are totaling three, all of them 140mm based and mounted with single units in the front, the top, and the rear. CPU air cooling height is limited to 170mm, which is plenty for most high-end air cooling solutions.
The price for the 678C at the time we started writing was $179.99, but as of completing testing, it is now $149.99, which is a great new value proposition coming down like this as the 678C now has an entirely different batch of competitors to contend with. Had we left the price at $179.99, the 678C would have been head to head against cases such as the Vector RS from Fractal and the Define S2 vision, which is both powerful and troubling competitors. Now, we find that the 678C with its new price being placed against The H510 Elite from NZXT, the Define R6 and Meshify S2 form Fractal and the Silent base 801.
Shannon's Chassis Test System Specifications
- Motherboard: ASUS ROG Maximus XI Hero (Wi-Fi) Z390 (buy from Amazon)
- CPU: Intel Core i7 8700K (buy from Amazon)
- Cooler: Corsair H100i Pro RGB (buy from Amazon)
- Memory: Corsair Vengeance Pro RGB CMW32GX4M4C3000C15 (buy from Amazon)
- Video Card: MSI GeForce RTX 2060 Gaming Z (buy from Amazon)
- Storage: SanDisk M.2 256GB
- Power Supply: SilverStone Strider Platinum 1000W (buy from Amazon)
- OS: Microsoft Windows 10 Home 64-bit (buy from Amazon)
Packaging
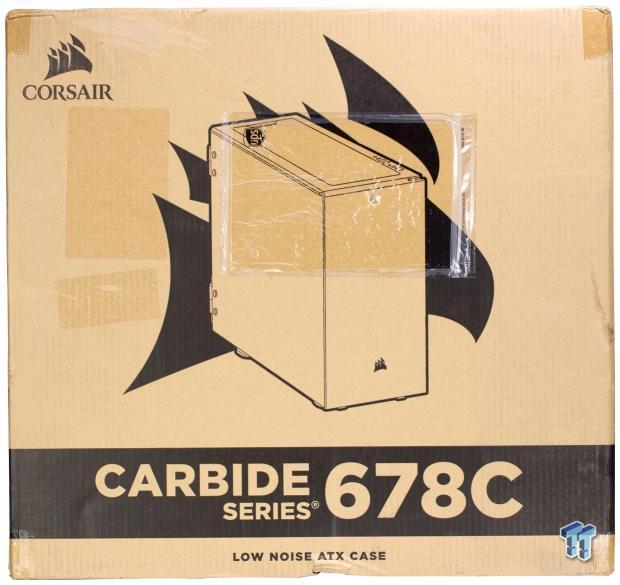
The front of the box, which luckily I was able to salvage as the shipping company had applied labels and whatnot all over the place. It shows a line drawing of the 678C with large Corsair sails flanking it. The Corsair logo sits up top with the name and designation below.
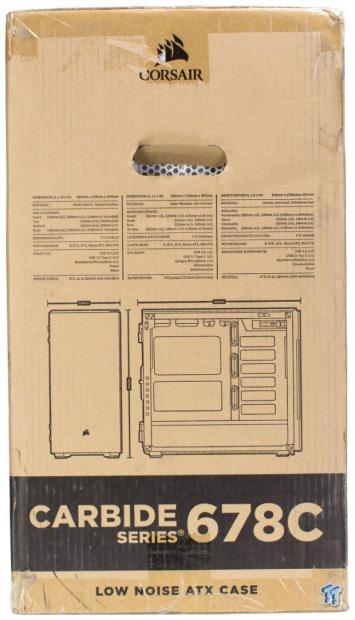
The first of the two smaller sides have more depiction of the chassis and its measurements along with a more open view of the interior. There is also a rough spec listing in three languages adorning this edge.
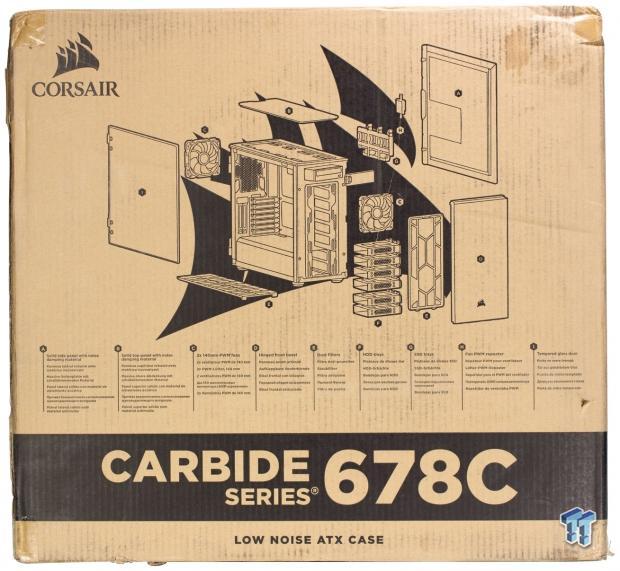
Now we get to the rear of the 678C box, and in standard Corsair fashion, we have an exploded view of the chassis. This view shows pretty much any removable part outside of the chassis. The reason I say pretty much is that it does not show the removable 5.25" brackets, but I think that's more because most users likely won't venture into removing those. Plus, it would get quite messy as well. Each item has a letter and a corresponding listing of what the item is in six languages, including English.
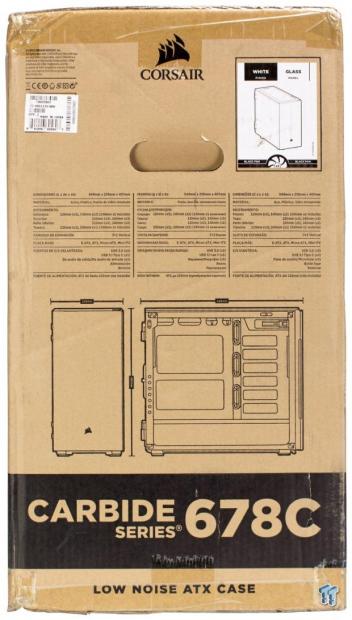
Here we have the small opposing side, and again we see a very similar layout. This time the spec table is in three more languages, much like the previous side we had just viewed, which also broke down each part into six languages. This side also has a larger white label, which quickly shows what color the chassis is along with fan type and quantity. To the left, we have a white sticker with several bar codes for inventory control.
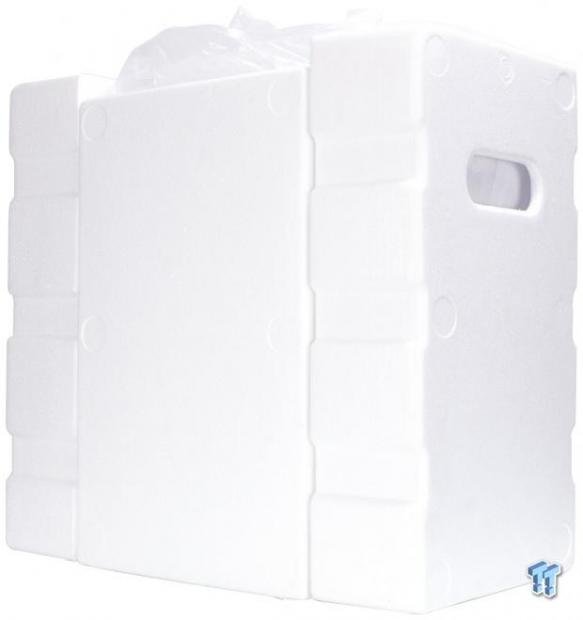
Pulling the 678C from the box, we find that it is guarded by hard Styrofoam end caps, along with a sizeable hard Styrofoam panel to help protect the tempered glass panel.
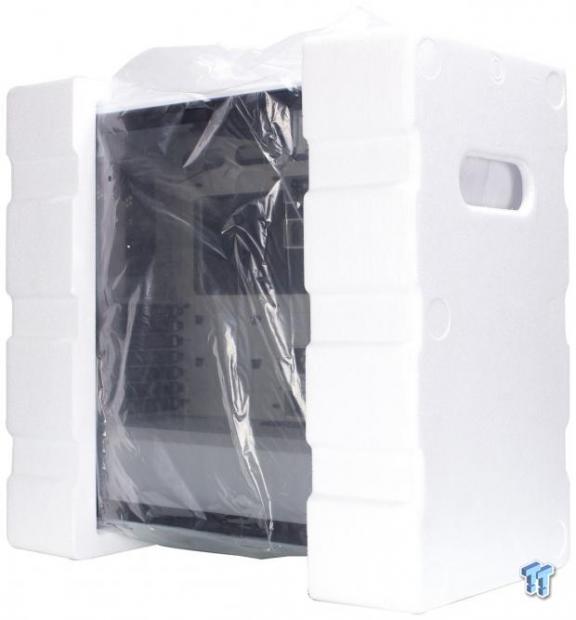
Now that we removed the side panel Styrofoam, we can see the chassis, which is also in a plastic bag to help avoid abrasions from vibration during transit. As yet another layer of protection corsair also adorns the exterior glass panel with a plastic protective film which can be removed after unboxing.
Carbide 678C Mid-Tower Chassis

The front of the chassis is substantial as it has a hinged door that opens from the left. The lower portion has a gray corsair logo but otherwise not much to see. You barely see the silver feet for the chassis poking out and reflecting on the photo bench surface. In the topmost area, we can scarcely see the gap between the top and front panel, which exposes the black inner plastic. The front door is held closed via magnets embedded into the panel itself.
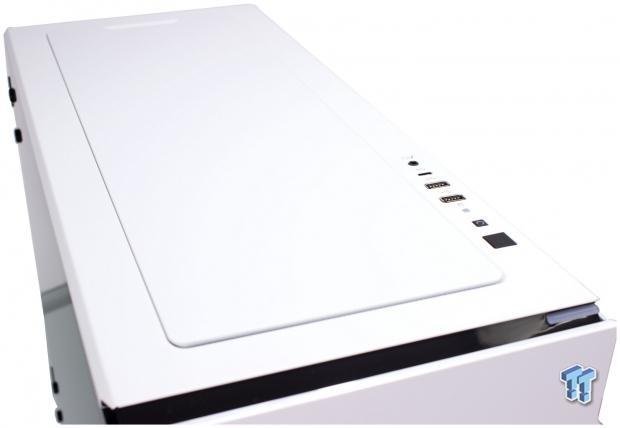
The top of the 678C has a large ventilation area, but by default, it also is adorned with a large solid plate with sound deadening material to reduce acoustics of the chassis. If using top-mounted cooling, I would recommend removing this. Corsair preinstalls a fan here, and I cannot imagine how it would breathe very well with this panel in place. The I/O is found to the right-hand side top adjacent to this ventilation area, which we will check out now.
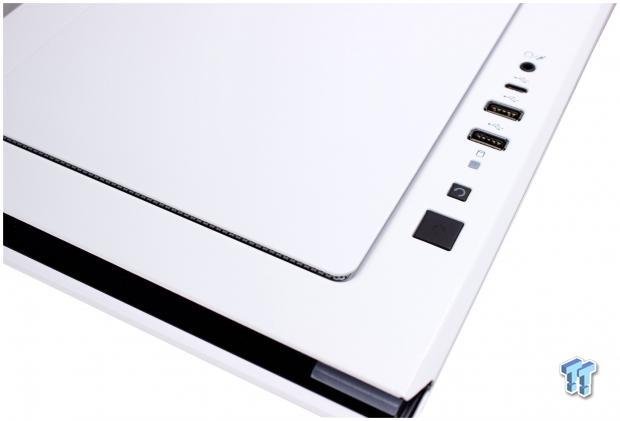
The front panel I/O is stuffed quite well and even has redundant power LEDs. To the front, you will see the wide rectangular semi-opaque plastic. This piece is used to light up blue when the system is powered on. The power button itself also illuminates when powered.
The I/O loadout is as follows:
- Power button with integrated power LED
- Reset button
- HDD LED
- 2x USB 3.0 (USB 3.2 Gen 1) Type-A ports
- USB 3.2 Gen 2 Type-C port
- Combination microphone and headphone 3.5mm jack
The I/O is more than competent for the chassis and quite common for chassis of this level. The combo mic/headphone jack, however, will require an adapter if you plan to use it for a two-wire headset.
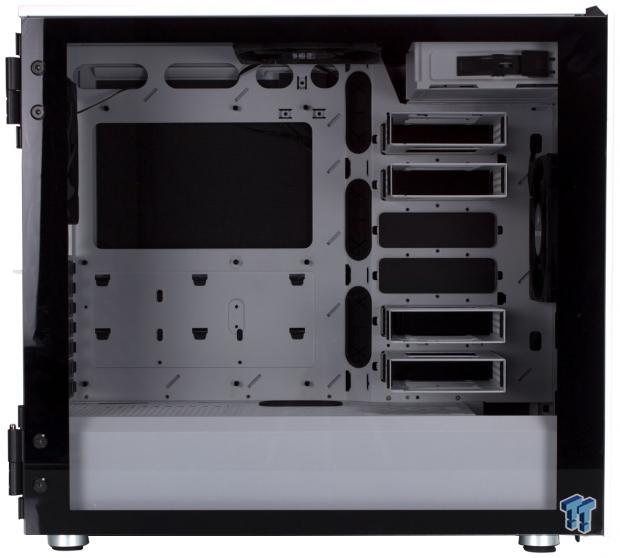
A tempered glass door covers the left side of the chassis. The tempered glass door uses magnets to stay shut, which is nice as it somewhat eliminates the ordinary fasteners at each corner used to affix a panel. However, there are still four fasteners on the rear edge which fix the hinge to the glass. The glass has a slight tint to it, not overly dark but more smoked. You can also see inside with many of the cases features visible, but we will get to those shortly when we dig inside.
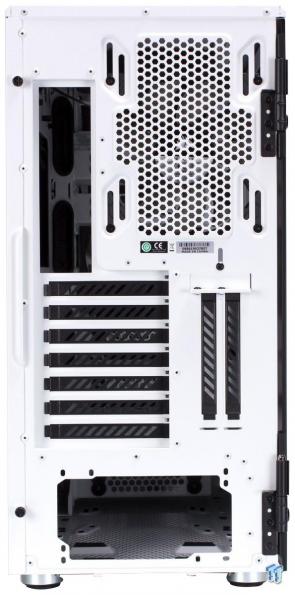
The rear of the chassis is reasonably standard, with all of the parts being where you would expect them. The chassis has slotted 120mm and 140mm fan mounting, but come preinstalled with a 140mm PWM fan. The 678C also has the standard seven expansion slots with the additional two for vertical mounting. If vertical mounting, you would need to purchase the PCIe riser separately as the chassis does not come with it, but that is relatively standard as most cases do not. The gap between the IO Shield cutout and the cable management panel side is not huge and telling that there may not be a large amount of room back there. Let's take a look at the cable management side now.
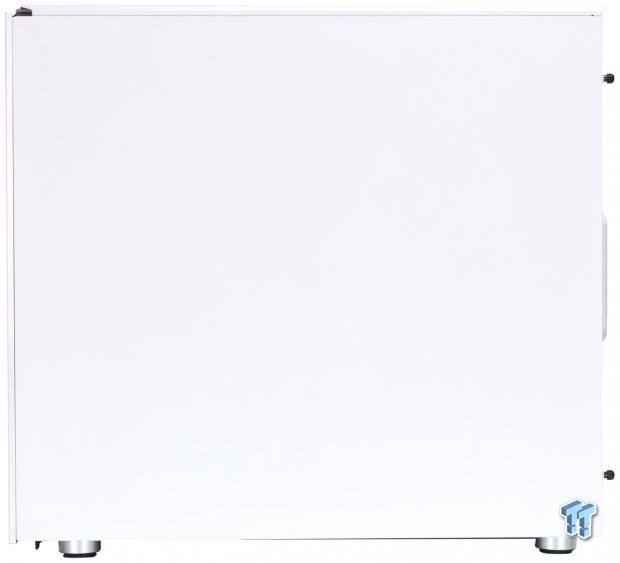
The cable management side panel is solid steel and painted chassis color white. This panel has no ventilation or any special features here. The panel shows a minimal gap to the front door panel when closed and creates a solid white aesthetic.
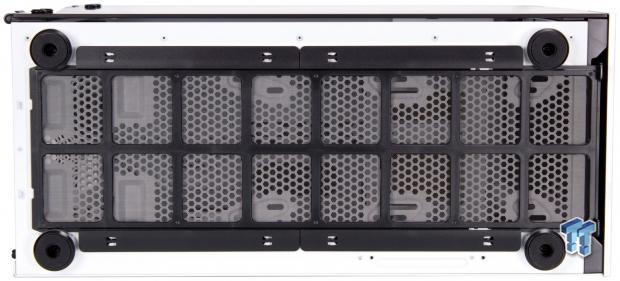
The bottom of the 678C has a full-length dust filter in place. The dust filter removes from the front and requires the front door to be opened for it to be removed. The opening is massive to allow for large PSUs along with bottom mounted cooling to breathe as expected. The corners are where you will find the four circular pillar style feet, each having its round rubber pad to avoid skidding.
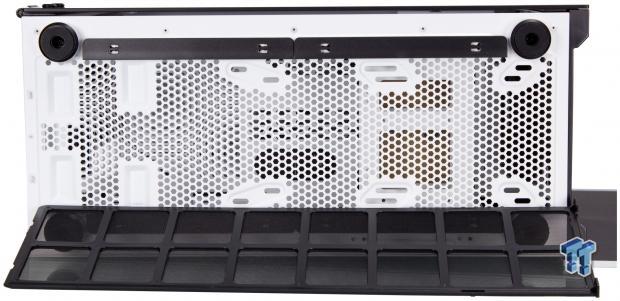
Removing the filter, you can see the massive ventilation opening at the bottom. I am quite sure we are close to more open space than metal in this chassis as its almost entirely free for airflow. One area that's not fully open for airflow is the front panel door, which now you can see the cutout across the bottom, which is the front intake fans only way to ingest air. This opening is quite limited and requires the air to move up and into the fan, which is not ideal, and with the door closed, the 678C will suffer a bit from a lack of incoming airflow.
Inside the Carbide 678C
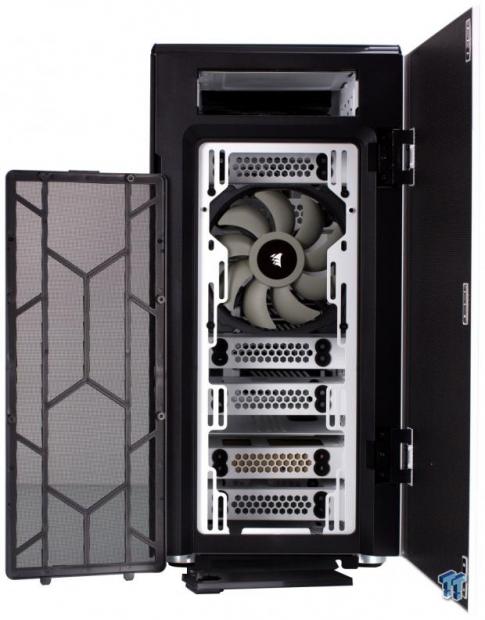
Opening the front door of the 678C and you are greeted by a massive dust filter which is held in place magnetically with two bottom tabs to ensure it can swivel away from the top. The front fan is installed in the top location here, but one thing to take note of is, as I mentioned previously, you can now see that the only gap for aspiration in the front of the 678C is the bottom of the front panel. While this may make for a pretty aesthetic, we had seen situations before where thermal performance was less than stellar due to lacking airflow. Also of note is we took out the cover for the 5.25" drive bay, which is indeed in place and ready to install should you still use something like an optical media.
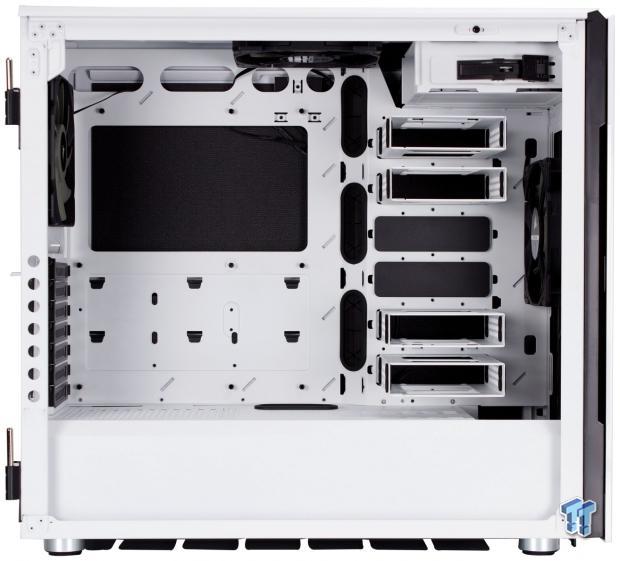
Here we have the inside of the chassis now without the glass panel. As you can see, you did not miss much by looking through the panel as everything is pretty wide open. The drive trays to the right are removable for an even more wide-open area, and there are two hidden 3.5" trays below the PSU shroud you can use. If using the opening in the front of the PSU shroud for a very thick radiator, removal of the drive trays may be necessary.
The CPU cutout on the motherboard tray is massive and should be fine for any cooler I have ever had hands-on time with. While you may not be able to tell from this shot quickly, the motherboard tray is recessed, and where you see the vertical cable grommets is where it protrudes upwards as you move toward the front. This is why the grommets are so far right from the standoffs to allow for EATX board fitment.
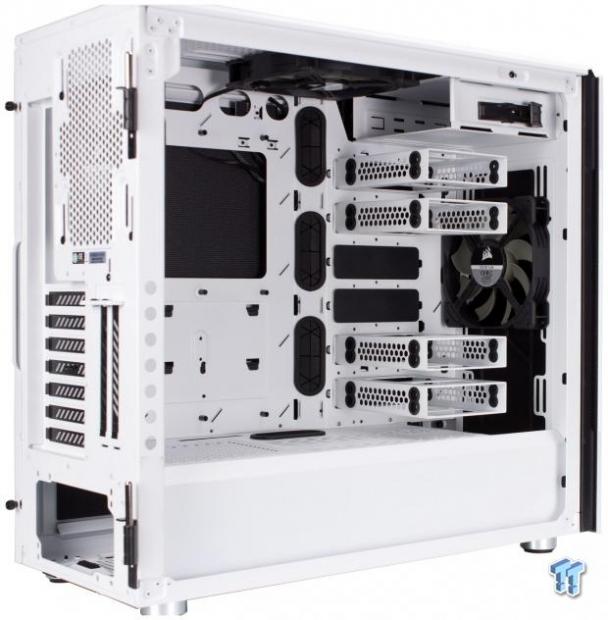
Here we see the fan mounting form the backside and the single installed fan in place. You will notice that the HDD trays are in front of the fan mounting, but they are vented to allow air through, so their restriction should be minimal. To fit the H100i, we use for our standard testbench; we will install the top fan below the front fan and have both as intake into the front.
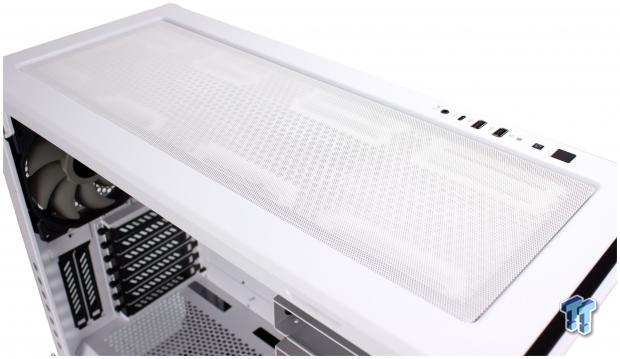
The top solid panel we saw before had sound deadening material on the bottom of it, helping keep the interior noise from coming out. Under the solid panel, you will notice that there is also a magnetic dust filter in place for you to use if you install ventilation up top. Funny enough Corsair fits one of the 140mm fans up top, and for new builders, they may not notice that their fan is blowing onto a solid panel.
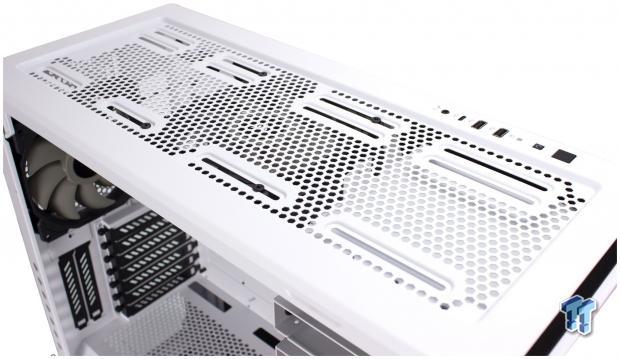
Removing the magnetic filter allows us to see the preinstalled fan along with the slotted mounting for both 140mm and 120mm fans. I do like that Corsair moved the motherboard down a bit from the top, making interference by top-mounted cooling a little less of an issue.
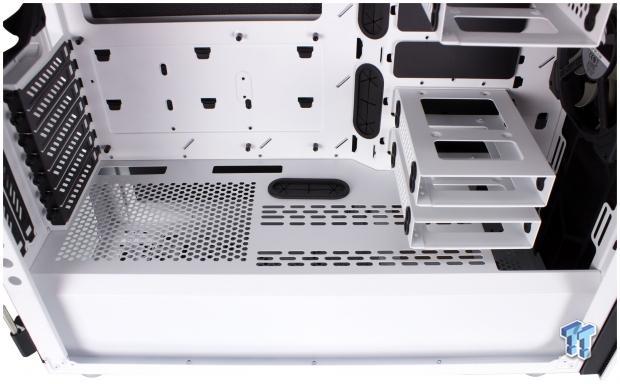
The PSU shroud is long and well ventilated. Here you can see, as mentioned previously, that the front-most area is cut out to allow for thicker radiators to pass through. The HDD cages are in the way for maximum thickness and would have to be removed if going that extreme. The PSU shroud has a few close to motherboard cable pass-through holes which do not use grommets and one a bit more outboard, which does. This will likely be used for GPU power cables.
Inside the Carbide 678C Continued
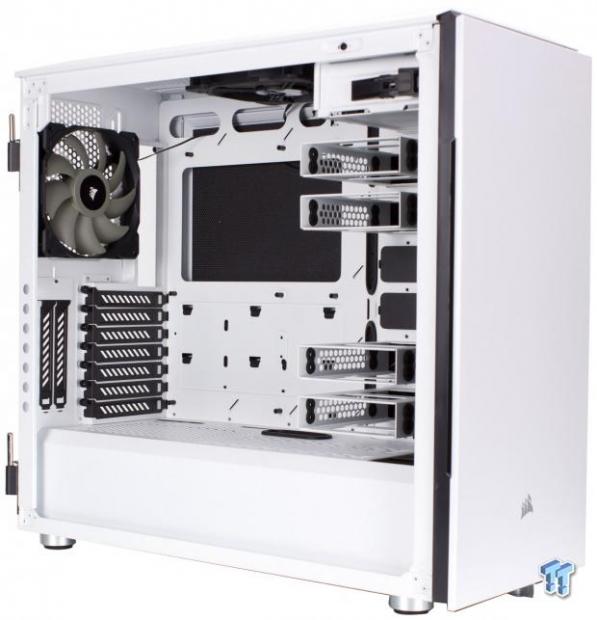
Here we get an internal shot of the 678C's rear I/O area. Same as we saw when looking form the exterior applies here. One thing I like is the fact that Corsair stuck with the broader frame rail on the rear and drilled access holes for the expansion slot fasteners, so you still have more metal in place to keep everything rigid. The single exhaust fan we see here is also PWM, like the rest, and is connected to the PWM repeater (hub) in the rear cable management area.
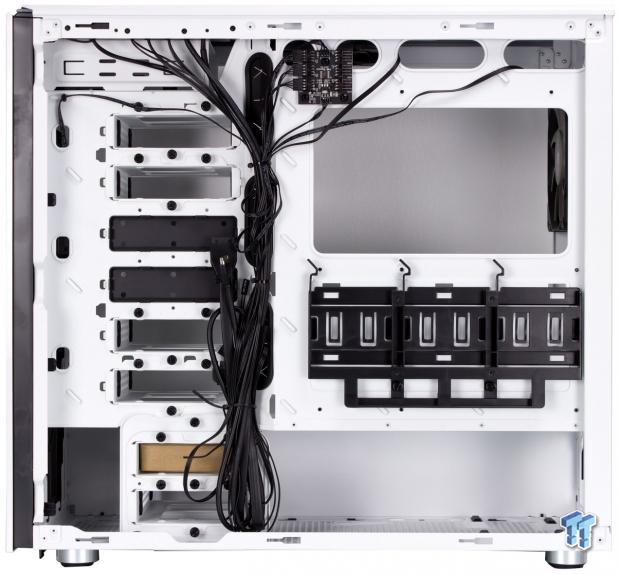
Here we have the cable management area of the 678C. This area, while seeming significant, is unfortunately mostly lacking in cable management directly behind the motherboard tray. The motherboard tray area is a mere 17mm from the side panel, whereas the non-recessed potion where the HDD trays reside is a far more large 40mm of cable management room. Add to this the fact that the SSD tray portion protrudes basically to the panel surface, and you have a veritable wall separating the rear cable management area across the motherboard tray.
Had Corsair left the motherboard tray at 40mm from the panel, there would be far more room for cabling, but that would have the add-on effect of also limiting interior space, which at the minimum would hurt vertical GPU placement for air-cooled cards.
The area back here, especially on the front-most area behind the HDD trays, is where you will have most of your cabling based on this design. It is not necessarily a horrible thing but can be somewhat limiting if going for super clean runs. The triple 2.5" tray is a cool idea as it has embedded springs to help eject the SSD when removing it. The large SSD tray assembly is also removable should you opt to have the 17mm of space usable for cabling runs, so I will give Corsair credit for at least having removable components so you can choose your limits.
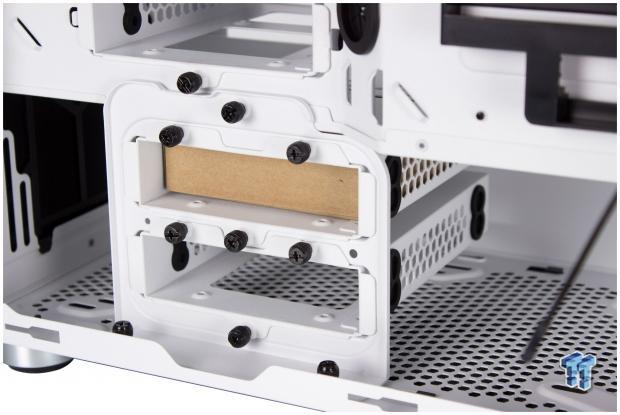
Here we have the main cage for the 3.5" HDD trays. Each 3.5" tray or caddy is its metal unit, which mounts through the chassis with three offset thumbscrews. The main cage below the PSU shroud can be removed with just a few thumbscrews to clear the area for cooling components thoroughly should you choose such a layout.
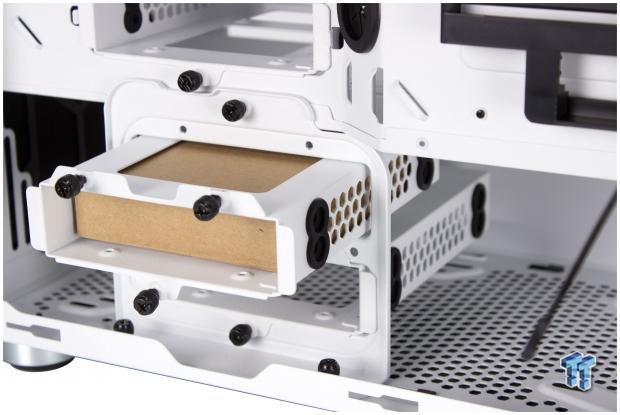
We pulled one of the cages so you can better see how they are attached. Also, note that the rubber grommets on the side are for vibration mitigation and requires screws to hard mount the HDD's in the trays.
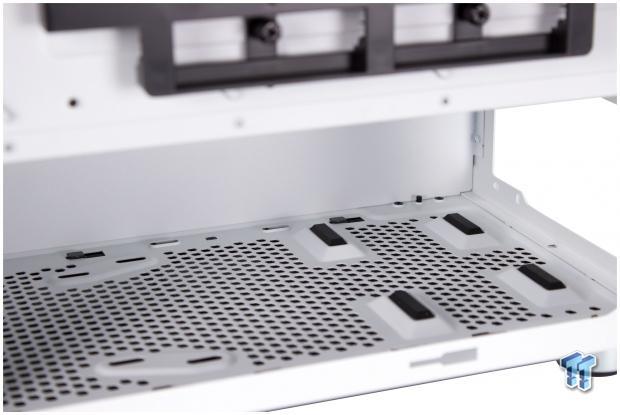
Here we see the massively ventilated PSU area. As I said before, this area borders on having more open space than actual metal, which, based on the design, is an excellent choice to allow pretty much any PSU in this chamber to be more than sufficiently cooled. There are rubberized foam pads for the PSU to rest on and potentially avoid the transfer of harmonics during operation. This is a silent chassis, after all.
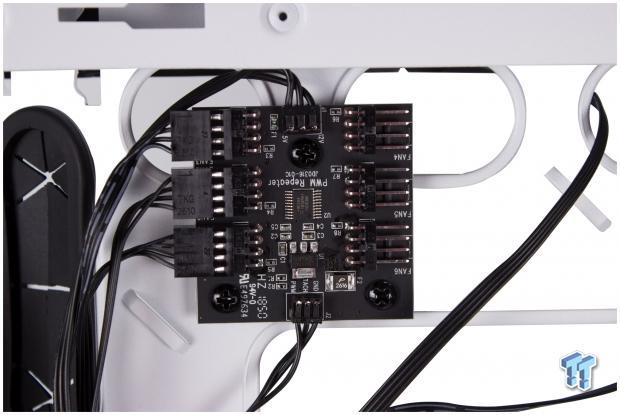
One of the last parts we will cover for the cable management area will be the PWM repeater or PWM fan hub. As you can see here, it has two soldered connections top and bottom, which serve power to the unit through the top via a SATA power connection. The PWM reference comes from your motherboard or other PWM capable controller via a 4-pin fan cable connection, which connects to the bottom of the PCB. Then we have four total fans connected to the PCB with space for three more or possibly more if you are ok with using splitters.
I do like solutions like this as it can help manage a bunch of fans from a single reference, which is helpful for things you want to be synchronized, such as case fans or even radiator fans. This could also help if your motherboard happens to be a bit scant in the PWM fan header department.

The front panel cable array is as follows:
- Power, Reset, HDD LED and Power LED headers
- 4-pin fan header for PWM repeater/hub
- SATA power connector for PWM repeater/hub
- HD Audio header for front panel combination 3.5mm jack
- USB 3.2 Gen 2 internal connector for front panel type-C port
- 20-pin USB 3.2 Gen 1 connector for front panel type-A ports
This is a substantial connector array and offers current high speed along with top-end USB 3.2 Gen 2 connectivity, which is an excellent addition as many platforms now offer it.
Hardware & Documentation
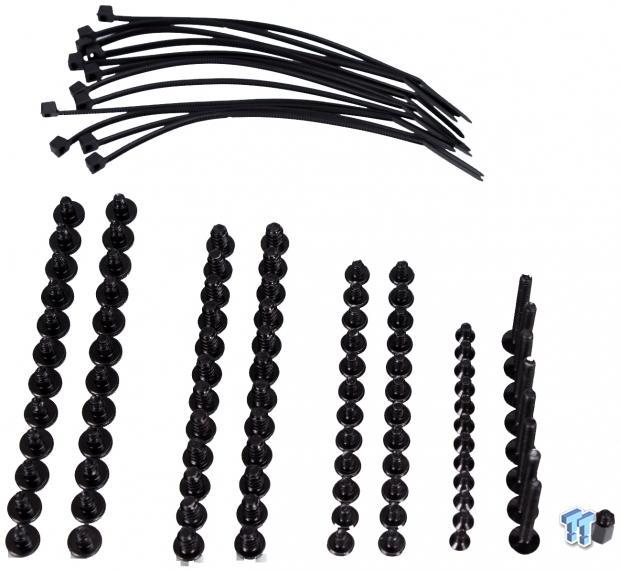
Corsair includes a quite substantial array of fasteners to complete a build within the 678C.
Here is the run down of everything in the accessory pack:
- 24x HDD screws
- 24x short fan screws
- 24x screws labeled as use for motherboard but also work for PSU and likely other mounting
- 12x screws for SSD and ODD mounting
- 8x long fan screws
- 1x extra motherboard standoff
- 12x zip ties for cable management
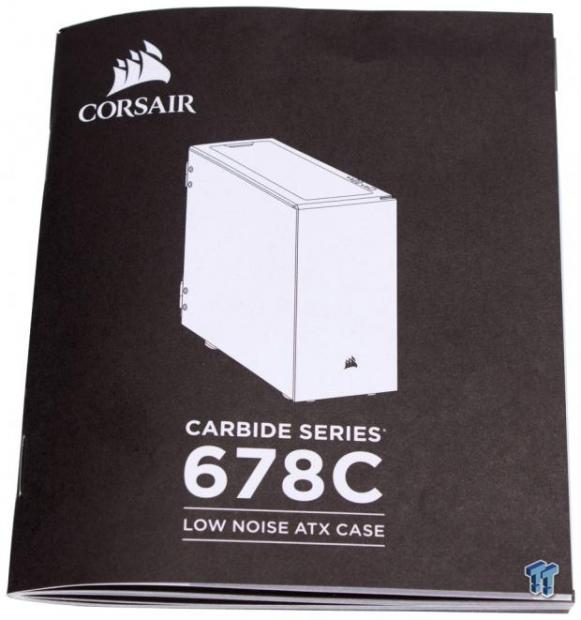
The manual for the 678C is a multi-page booklet style. In totality, the manual reaches 52 pages, but that is several languages, and in reality, each individual language gets about eight pages. The final pages offer some regulatory information along with compliances.
Case Build & Finished Product

The front of the chassis remains the same post build as the front panel is opaque, so you cannot see the changes or addition of components.
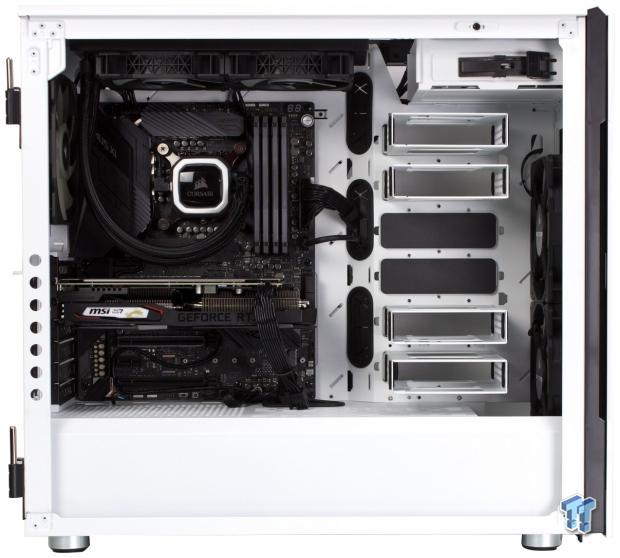
As we see here, the motherboard went in smoothly and had room to spare to the right-hand edge since this is not an EATX board. The GPU also slotted in, and the access holes in the chassis made quick work of installing the GPU without needing to try to thread screws in at an angle with my driver as some chassis require you do. You will notice that the cables by and large are absent as the multitude of cable management holes means most things can be tucked out of sight quickly.
The addition of the extra height of the chassis above the motherboard means there is no threat of fitment issues with the RAM since space is large enough to swallow up the radiator and fans with room to spare. The 678C is shaping up to be a potentially viable candidate for a full custom liquid cooling loop. Do note that we did relocate the top-mounted fan to the front so that the AIO could be placed without issue.
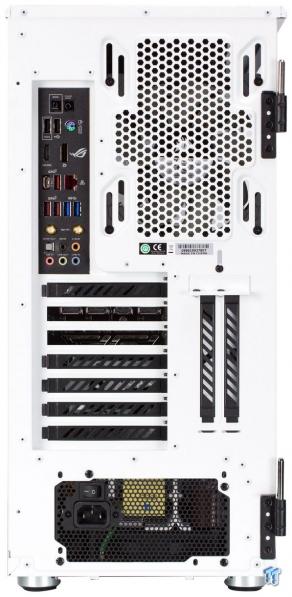
The rear I/O is filled as expected, while we could have moved the rear fan in its slotted hole, the default position was already excellent for the application. We did not have a Corsair riser, so the vertical GPU mount will remain untested.
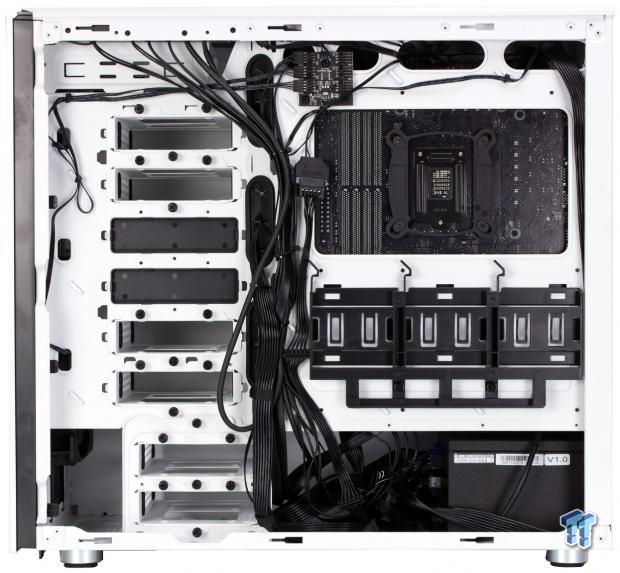
Here we have the cable management for the 678C with our build installed. As you can see, we opted to run almost all of the cables to the front area where there was more space to work with for cabling runs. The exception being the EPS 8-pin lead, which was routed alongside the rear frame rail, but the SSD caddy was removed to accommodate the wire run, then reinstalled.
Corsair put an immense amount of cable tie points in the 678C, and many of them came to good use. For those who get anxiety, just thinking about cable management need only remember that the rear panel is opaque, so you will never see your cables once the build is complete.
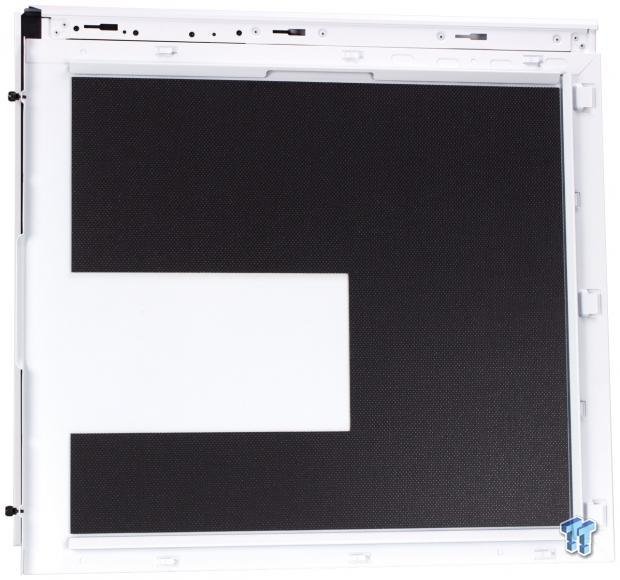
One area I wanted to show before we button this rig up is the inclusion of the sound deadening to the rear panel. This helps keep noise inside the chassis along with making the rear panel feel far heavier than you would expect. Also, this panel shows another exciting thing as you will notice the sound deadening is removed for a large rectangle, which coincides with the SSD tray on the rear. This should show you just how close the tray is to the panel that they had to shave away the sound isolation material on the panel to clear it.
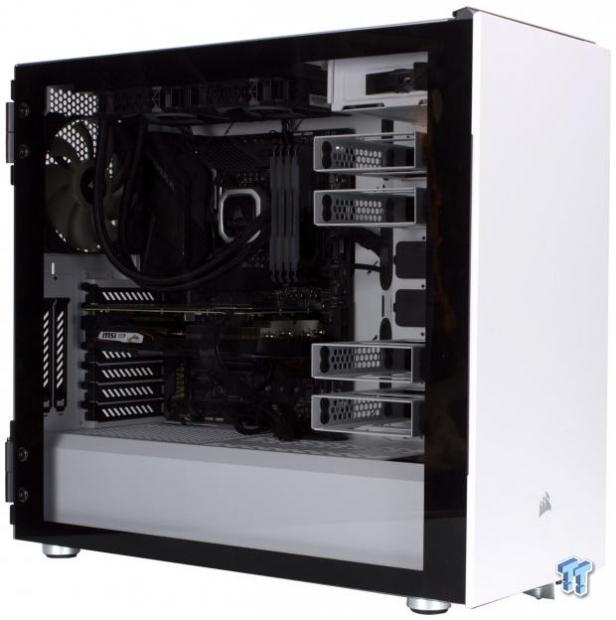
With all of the parts installed but not powered, the system looks subdued, but due to the light smoke of the glass, the components are still readily visible. The white chassis interior keeps the panel looking brighter than it is as white reflects far more light, and therefore you get more visibility form the panel.
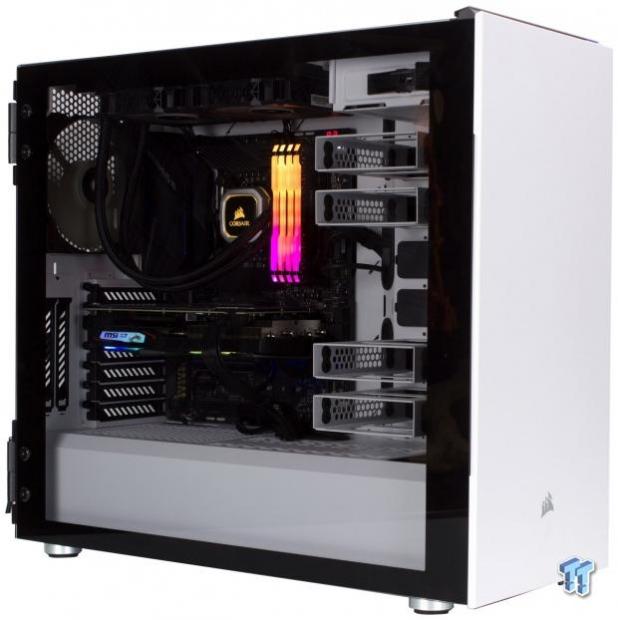
Kicking the system to life, and we see that the rainbow unicorn test build is alive and well. I will say that the 140mm preinstalled fans in the 678C are rather quiet as I could not hear them over any other noise from the system.
Final Thoughts
When first looking at the 678C, it looked like just another smooth front chassis. It was not until I got it out of the box that I understood everything going on with it. I do think the 678C is a quite capable chassis with some strange decisions such as the idea to put a fan up against the flat sound-deadening panel made zero sense. Also, why did they not just put the fan up front where it would have made far more sense for anyone opting to use the sound deadening panel? We will talk more about this in the final thoughts below, but first, let's check out how it performed.
When testing the Carbide 678C, our measured ambient was 23.3C, with an RH of 42%. The CPU when testing showed an average delta over ambient of 44.1C while the GPU showed an average of 37.1C. The GPU was sitting just above the 60C mark, which is where the fans start moving, and even though we saw peaks into the 63C range, it hovered around 61C. The CPU we saw respectable results. Still, I do feel like it could be better if the front panel had more potential to ingest air, that bottom opening on the front door hurts front airflow ingress and also shows a couple of degrees delta over the mean for our best cases on the chart.
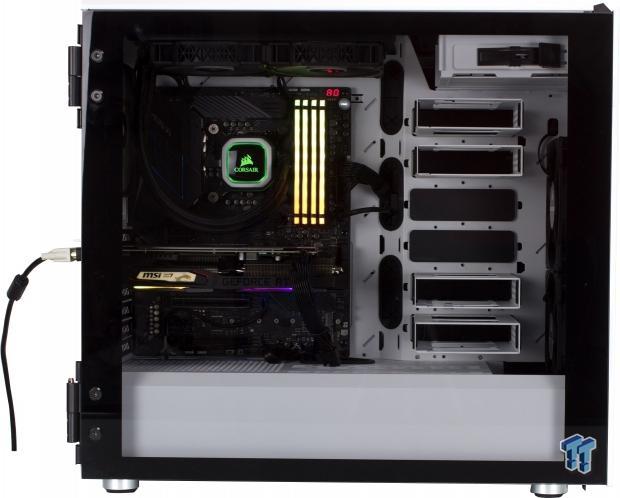
What did I like about the 678C? I would have to start with the overall open space available to play with. The fact that Corsair left space up top to allow for liquid cooling while not interfering with motherboard components or memory is a great move compared to the issues I observed on the 465X and 220T recently. The inclusion of four 140mm PWM fans is a very welcome addition. The inclusion of a top fan filter along with a noise reduction solid plate is excellent for those who prefer that, as it gives the 678C a shot in the arm in regards to trying to combat entries form Be Quiet or Fractal. The magnetic closing of the glass and front door is excellent as it has no latches to break. The hinged removable tempered glass door works well here and gives an excellent presentation aspect while also being easy to remove when building or maintenance is required.
Now we get to the detriments, and there are some things I think could be better. I do wish that Corsair would include extra HDD bay covers so that if you opt to remove them, there would not be large open rectangles in your case. This is something companies like Be Quiet do and are welcome additions as it helps significantly with managing appearance when removing components. The fact that Corsair put a fan default in the top, which also comes default with a flat solid sound dampening panel, seems like a significant lack in judgment, and for builders who may not know better can harm the chassis ability to properly cool.
At the new price point of $149.99, the Carbide 678C is a quite competent case which by default, is sans RGB but with Corsair and many others offering massive suites of RGB components at the ready. You can easily outfit this chassis with whatever your heart desires. With the competition well within view, I think the only detractor to the 678C is the aging inclusion of a 5.25" drive opening in the front, which is at least hidden by the door. The other consideration is the lackluster airflow capabilities with the front door closed. The 678C will still cool well enough, but if the panel had more breathing room, it would be all the better for it.
Corsair made some interesting choices with the 678C, and some are as easy as moving a fan while others are a bit harder to cope with. While the front panel is a bit damning here, I think overall; the 678C is a solid case. Just be mindful that your front airflow is suboptimal, and you will likely gain a few degrees if you opt for the 678C for your next custom build.
Shannon's Chassis Test System Specifications
- Motherboard: ASUS ROG Maximus XI Hero (Wi-Fi) Z390 (buy from Amazon)
- CPU: Intel Core i7 8700K (buy from Amazon)
- Cooler: Corsair H100i Pro RGB (buy from Amazon)
- Memory: Corsair Vengeance Pro RGB CMW32GX4M4C3000C15 (buy from Amazon)
- Video Card: MSI GeForce RTX 2060 Gaming Z (buy from Amazon)
- Storage: SanDisk M.2 256GB
- Power Supply: SilverStone Strider Platinum 1000W (buy from Amazon)
- OS: Microsoft Windows 10 Home 64-bit (buy from Amazon)
Performance |
85% |
Quality |
95% |
Features |
90% |
Value |
90% |
Overall |
90% |
The Corsair 678C is a quite competent chassis with some great features. The door and its ability to impede airflow keeps the 678C from topping the charts. However, if you build it well, the 678C can still make for an amazing new rig.

Similar Content
Related Tags

