
The Bottom Line
Introduction, Specifications, and Pricing

Not too long ago, we took a look at a chassis in the Lancool series by Lian Li. That unit was the Lancool One Digital, and it did quite well with an appealing RGB illumination aesthetic along with overall reliable build quality. Today, we have the next iteration in the Lancool family with the Lancool II. This chassis looks to improve on build compatibility and of course, RGB to ensure aesthetics are on point for what users would expect.
The Lancool series has always been for the gamer who wants a capable chassis along with some unique gamer-centric aesthetics. This does mean that in many cases, a Lancool chassis may be a bit more on the aggressive side and not always well suited for a business or HTPC environment, but at the end of the day, their target audience is in the name. Lancool is targeted for those who want a pretty and functional PC case.
Some of the key features of the new Lancool II are as follows:
- Flip panels and shrouds
- ARGB front panel illumination
- Cable management covers
- Flexible cable management bar
- Versatile cooling fitment
- Optional accessories
The case is just now launching, so Lian Li did not have a real marketing list of talking points for the Lancool II so, I improvised my own set of highlight features I see for the chassis. The flip panels and shrouds are cool, as you will see in the review. The glass panels flip open and pivot on hinges while being removable. The front panel ARGB implementation gives a beautiful aesthetic while being easy to work with using a cable-less front panel connection. The rear cable management covers will likely garner some praise from all levels of builders as you can hide and cable mess from view.
The cable management vertical bar is similar to the one the PC011D XL had, which allows it to be flipped to fit wider EATX motherboards. The versatile cooling fitment is about the variations of fan and radiator placements enabled by the Lancool II design, which can make builds more straightforward and more flexible for component fitment. The optional accessories, we received most of them and will take a look at them before equipping them within the chassis.
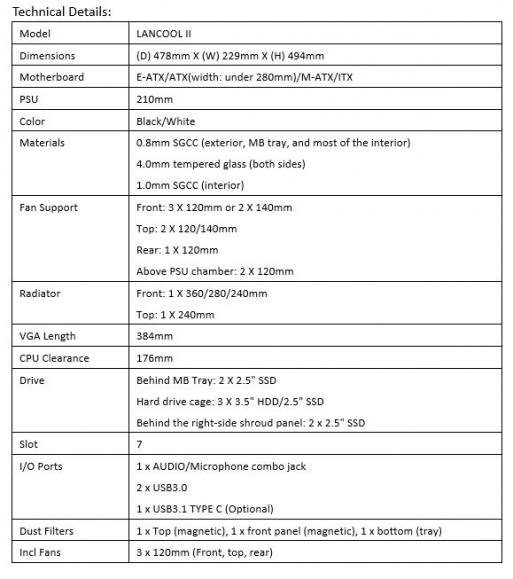
The Lancool II measures in at 494mm tall, 478mm deep, and 229mm wide. The Lancool II is a mid-tower by common understanding, but it is not the smallest mid-tower.
Motherboard fitment is from EATX down to ITX. In standard configuration, full ATX boards will fit just fine. Still, the cable management vertical bar can be rotated to fit even wider EATX boards if needed to ensure cables can still be tucked away while running a larger enthusiast board. The Lancool II can fit ATX power supplies with a maximum length of 210mm. This does mean that the Lancool II can fit virtually any PSU in the lower chamber, keep in mind that an extensively long PSU can tighten up clearance for front mount radiators and HDD cages. The PSU is housed under a PSU shroud to hide away the PSU and excess cabling within. HDD and SSD fitment are as follows. 3.5" drives can fit up to three; those same 3.5" trays can fit 2.5" drives as well. 2.5" fitment is four, while if you choose to use the 3.5" trays, you can go for up to seven 2.5" drives.
Cooling fitment is something interesting for the Lancool II. For CPU air coolers, you can fit up to a 176mm cooler in place. This will fit many of the great top-end coolers on the market so that the width of the chassis is paying off here. For liquid cooling we can fit radiators in the front and top, the top fits up to a 240mm radiator. The front can fit up to a 3360mm radiator or 280mm for 140mm based cooling. The pre-installed fans are all 3-pin type, with one being in the front for intake and one at the top and rear for exhaust. The top radiator mounting is optional between the center mount and offsets outward mounting to allow component clearance. This will likely be an excellent choice to ensure even tall RGB RAM sticks can fit with top-mounted cooling. The total fan fitment is up to eight pcs as you can fit dual fans on top of the PSU shroud as well should you find the need for such things.
The Lancool II should be showing up shortly after the time of this review. The MSRP for the Lancool II is $89.99 for the black version and five dollars more for white at $94.99. This places the Lancool II in an aggressive part of the market as mid towers with tempered glass and RGB at the $90 - $100 price point is tight. Similar competitors in the space would be the Meshify C from Fractal Design at $89.99, The Enthoo Pro M SE from Phanteks at $97.99, and the Eclipse P400A from Phanteks as well. There are several others, but these share some features that the Lancool II has at a similar price point.
The feature set on the Lancool II on paper is robust, but Lian Li better pull off some excellent build quality and useful features if they want to earn a recommendation for your hard-earned buck.
Shannon's Chassis Test System Specifications
- Motherboard: ASUS ROG Maximus XI Hero (Wi-Fi) Z390 (buy from Amazon)
- CPU: Intel Core i7 8700K (buy from Amazon)
- Cooler: Corsair H100i Pro RGB (buy from Amazon)
- Memory: Corsair Vengeance Pro RGB CMW32GX4M4C3000C15 (buy from Amazon)
- Video Card: MSI GeForce RTX 2060 Gaming Z (buy from Amazon)
- Storage: SanDisk M.2 256GB
- Power Supply: SilverStone Strider Platinum 1000W (buy from Amazon)
- OS: Microsoft Windows 10 Home 64-bit (buy from Amazon)

Packaging
We received the Lancool II very early, and they did not have final packaging yet, which means we get a brown box, which was wrapped in an insane amount of plastic pallet wrap. Needless to say, as you can see the pristine condition of the box, the wrap did its job, although there's nothing of real note.
This side of the box is blank as well, and the same goes for the other two sides. I think with the lack of official packaging, we step into checking out what's inside.
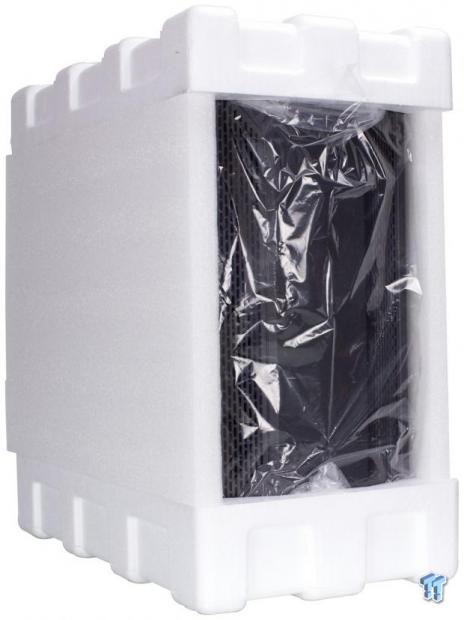
The Lancool II came in a plastic bag to help with avoiding abrasions. The side panels were also flanked by foam squares, which fit between the two hard Styrofoam end caps to form a quite capable protective barrier for the chassis. The two main glass panels also have a cling film on them to help avoid any scratching or damage which may occur during shipping.
While the inclusion of a detailed box is always helpful to see how the company is representing the product to prospective retail buyers, the omission is understandable as we received the chassis with a reasonable lead time before the launch, which is today.
Lancool II Mid-Tower Chassis
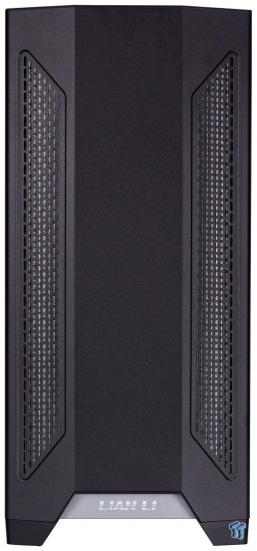
The front of the Lancool II is a metal-clad to a plastic lower plate, which snaps into the chassis. The panel has a lower applique, which is adorned with the Lian Li name. The two vents running up each of the angled sides are ARG backlit and filtered inlets for the front fan locations.
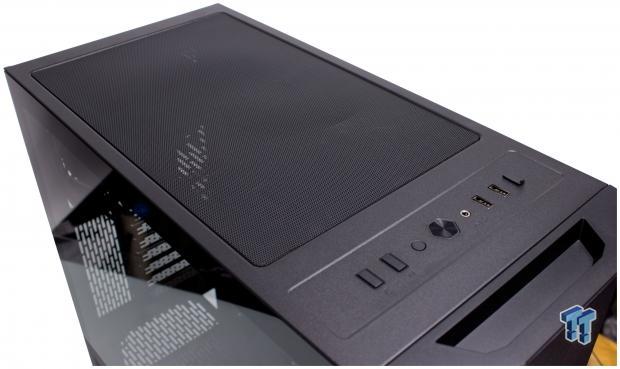
Moving up top, we find a magnetic filter for the top cooling mounting. This filter is a harder material, which, as you can see, can get slightly bent while handling as this one arrived with the dip in the mid-section. This is typically repaired easily by just flattening it out with your finger from the opposing side. Upfront, we have the I/O in the standard position, which we will look at next.
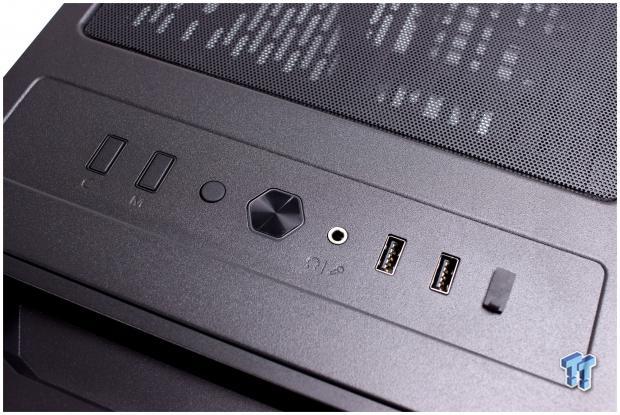
The I/O is up front running across the top of the Lancool II. The I/O is comprised of the following:
- C buttom for changing static color of LEDs
- M button for changing mode on LEDs
- Reset button (flush mounted)
- Power button with integrated power LED surround
- Microphone and headphone combination 3.5mm jack
- 2x USB 3.0 (USB 3.2 Gen 1) Type-A ports
- Rubber plug (Blocking Type-C oval cutout)
The I/O is pretty solid, but I do wish that Lian li had omitted the rubber plug in favor of a plastic filler coming through from the bottom. The issue here is that the rubber plug will come out easily and likely be lost, leaving a Type-C port shaped hole in your front panel. There are better ways to do this in 2019. The front panel controls are helpful for the integrated lighting as well, but I think most will sync this to their board and not change it much. The 3.5mm combo jack assumes you have a single plug for your gaming headset; otherwise, you will be buying an adapter separately or plugging into the motherboard I/O.
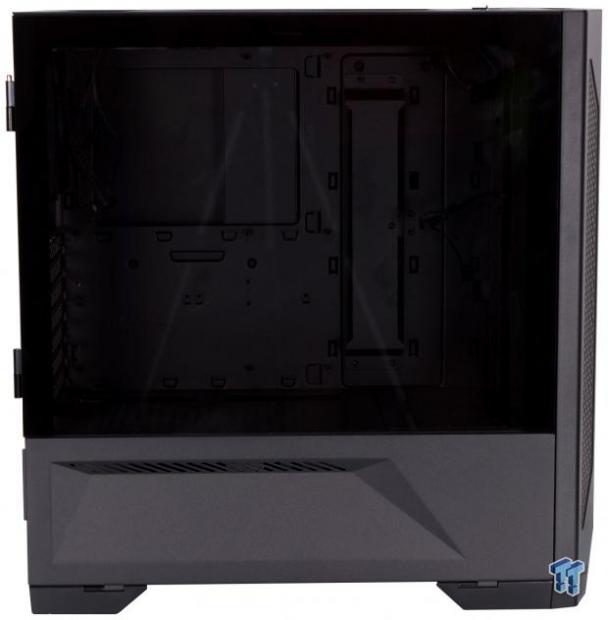
Here we get our first clear look at the primary side panel. One thing you will notice right away is it's about a 70/30 split, with the main glass panel being the major part. The main panel swings open from the front and most easily opens by first flipping down the lower panel. Once the lower panel is flipped downward, you can pull from the bottom front of the glass, and it will swing toward the rear. The main panel glass is tempered and dark smoked, but we can still somewhat make out the internal cable management pass-through and the CPU cutout. The lower panel is metal and has a long angular shallow indentation. The indent has ventilation across the top, which may passively help eliminate heat but overall should be considered decorative.
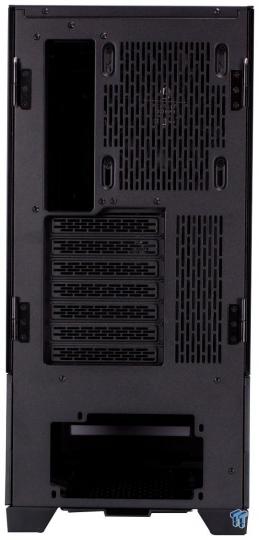
The rear of the Lancool II is all metal and a fairly standard layout. One thing you may notice is that the gap between the rear cable management panel and the start of the I/O shield cutout seems a bit large, and it is. The gap means there is some serious room for cable management, which is always a good sign. The layout is all standard with the rear fan, which is occupied by a pre-installed 120mm fan is slotted to allow vertical adjustment of the position of the fan should you need a slight move. There are seven total expansion slots, all with ventilated covers. Adjacent to the slots is the slotted ventilation screen, which allows air to escape out of the rear of the chassis in a positive pressure airflow scenario.
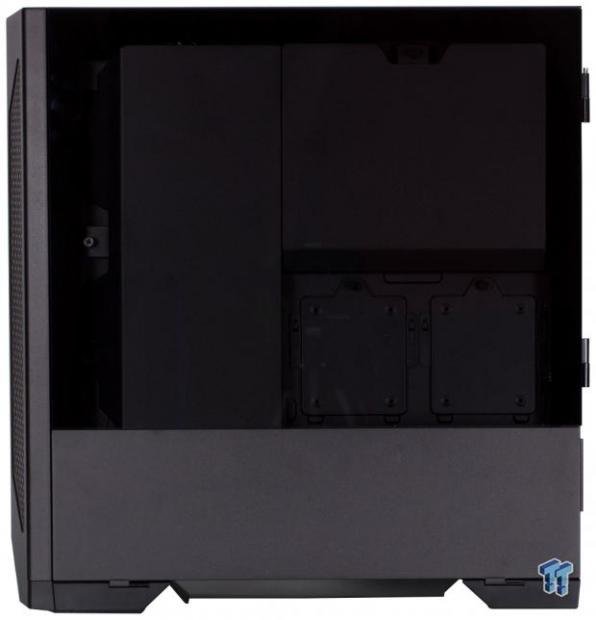
The cable management side of the Lancool II has the same split with the top main panel being dark tempered glass while the bottom is a fold-down tray hiding the lower PSU and HDD chamber. The Lancool II has cable management covers, which we will look at during the teardown, but keep those in mind as they will be essential, and you can see them here somewhat through the glass.
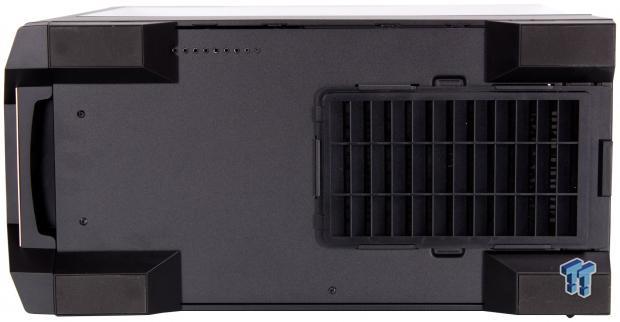
The bottom of the Lancool II is all metal, except for the four rectangular, angular pedestals that are the feet. The feet are capped off with rubber pads on all four corners to minimize the skidding of the chassis on a smooth surface. The front panel bottom we see that there is a cutout almost like a grab area to help with pulling the front panel off. There are several tapped holes visible from the bottom at the top left edge; these are for moving the HDD cage along its adjustment range. Lastly, towards the rear, we have a large removable and cleanable dust filter. This filter helps minimize dust ingestion by your PSU.
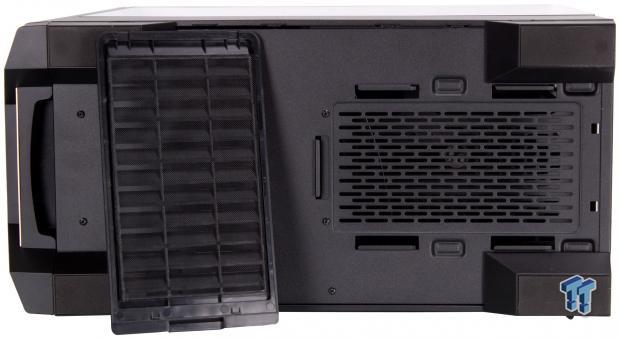
Pulling the PSU filter, we find the PSU air inlet opening to be sizeable and easily able to feed the fan on pretty much and consumer-available power supply we have seen. The filter removes from the rear and can be brushed and even washed clean as needed.
Inside the Lancool II
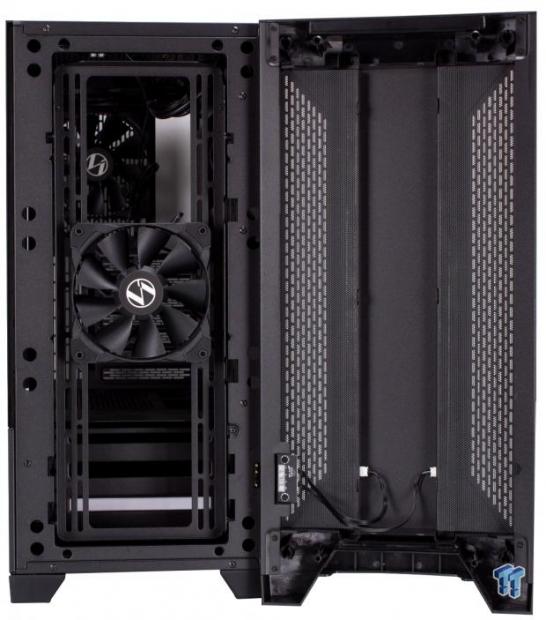
The front panel pulls off quickly enough, but I will note that it came free easier pulling from the dip in the top front rather than the bottom. The nice part of the Lancool II is the usage of the spring pins for connecting the front panel lighting. This means the panel can be removed from the case without having to unplug anything at all. Here you can also see the two separate dust filters in the front panel cutouts. The one thing I can say is not perfect here is there are gaps at the top and bottom where the filter does not completely seal off the inlet and, therefore, can be bypassed. But overall, as the filter is in the fans' direct airflow path, it should do a decent enough job, until the filter clogs if you don't stay on top of it.
The fan, which we see pre-installed, is actually on a removable and adjustable tray, which we will look at shortly.
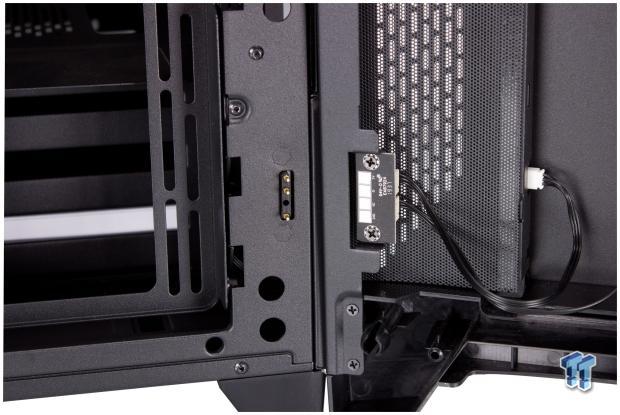
Here we grabbed a close up snap of how the front panel ARGB strips connect to the main chassis. These are spring-loaded pins that contact the pads on the front panel PCB. This allows full removal of the front panel with no wires to disconnect or tether the panel to the chassis. As you can see, the plug could support a four-pin RGB 5050 style connection if needed, but I'm glad they went with ARGB as it provides a smooth color flow.
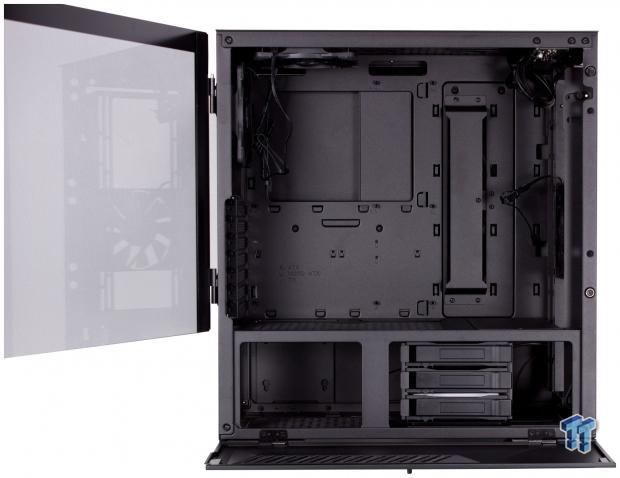
Opening up the main side panel of the Lancool II is a multi-step process. First, you must flip down the lower metal cover, which then gives you a lip to pull open the main glass panel as it rests flush with both panels closed. The panels are secured with powerful magnets, and that's why you need the lip to open the glass; otherwise, that thing is on pretty solid. You can see the round magnets on the front of the chassis frame. The glass panel can be lifted off of the hinge pins to ease the build while the glass panel is moved out of the way. In the main chamber, we get a look at the vast open expanse and the motherboard tray with the massive CPU cutout. The adjustable cable management vertical bar is to the right of the motherboard tray area. This bar allows the cables to pass through without having to worry about a specific pass-through location with grommets.
For the underside, we can see the triple tray HDD cage, which can support up to three 3.5" drives or 2.5" drives depending on your needs. There is also a viewable area of where the PSU will reside, although it will not be visible at all when the panels are closed.
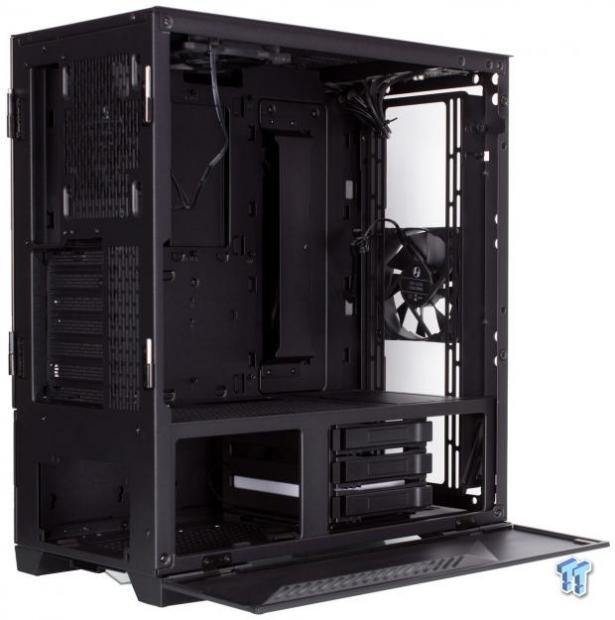
Here we get a backside look at the interior of the mounting tray for the front cooling fans and potential radiators. There are several small pass-through holes next to this front area, which you can use to pass the fan cables through for a cleaner cable-free build.
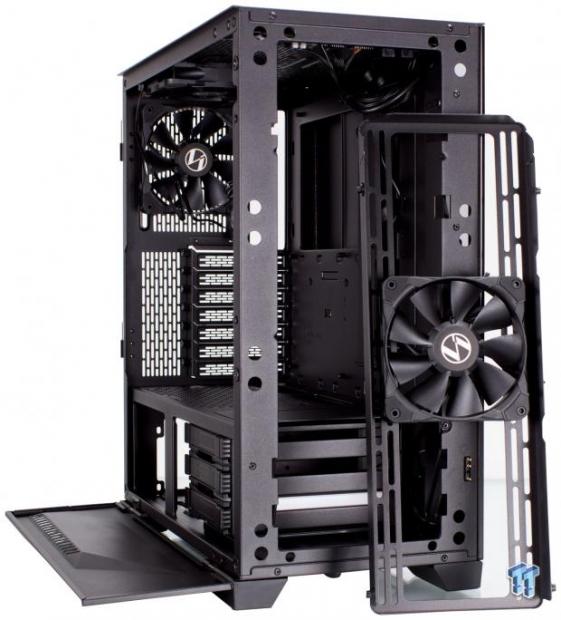
Here we removed the front tray to show you how the adjustable mounting bracket works. The front mounting bracket is secured along the upper edge with one screw on each side. The tray can then pivot out of the chassis with the bottom being secured by a peg sliding into a groove in the chassis. This peg is very important as it is how we can adjust the mounting depth of the bracket.
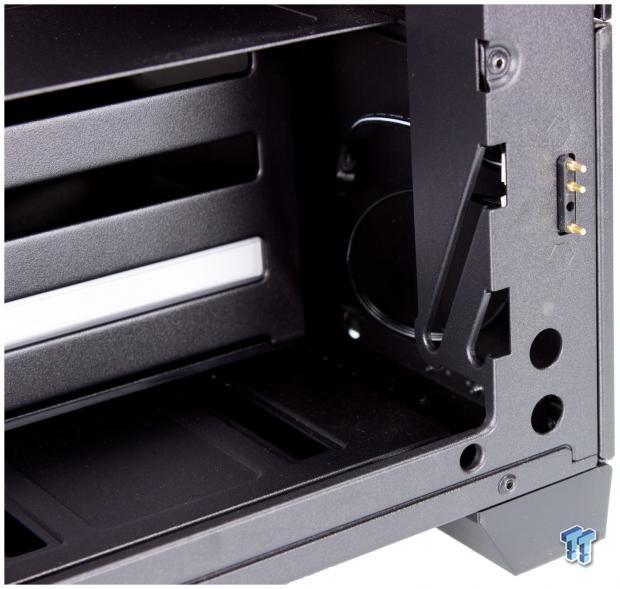
Here are the slots we mentioned previously. The slot which the bracket is placed in by default is the shorter forward-mounted slot. If you opt to move the fans or radiators more inboard to the chassis chamber, you can remove the bracket and insert the peg into the deeper slots. This will move the bracket back and allow for more space on the area between the tray and the front panel so that you can secure a radiator outside of the chassis bracket without hitting the front panel. One thing to note is that there is a removable plate on the PSU shroud, which will need to be removed to allow the bracket to install in the further inboard location. This plate will also allow more room for thicker radiators, keep in mind that you may need to adjust the lower HDD cages to accommodate.
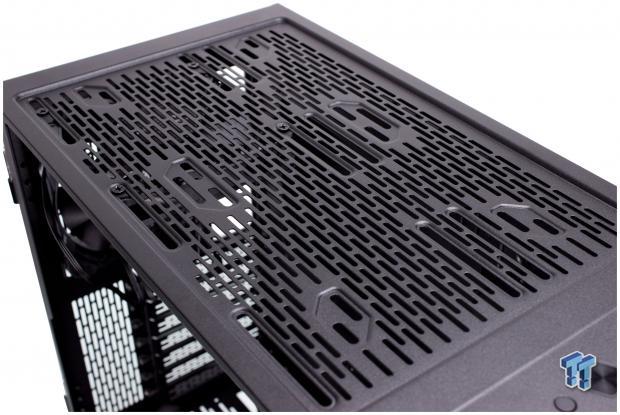
Here we have the top of the Lancool II, and the mounting we discussed previously is uncovered. With the magnetic filter removed, we find that the Lancool II has several mounting points for fans and/or radiators. There is central mounting, which allows a 120mm radiator to attach at the center of the chassis, or you can offset toward the main panel. Offsetting the radiator away from the motherboard and toward the glass panel gives more room for motherboard components and RAM clearance. We have seen several cases in the recent past where I lambasted the manufacturer for their lack of care in regards to RAM fitment while claiming to fit a top mount radiator. The Lancool II, with the outboard mounting, runs no risk of my harsh critique in this regard.
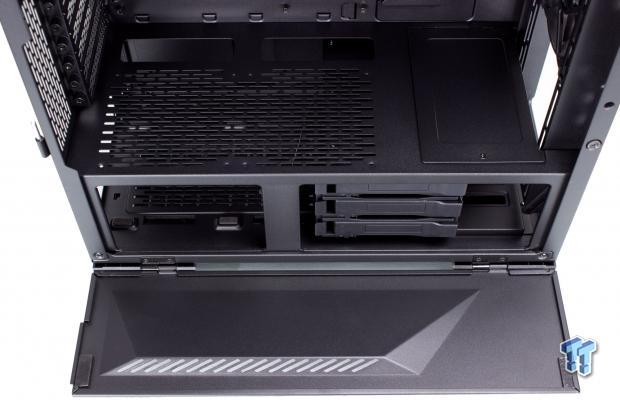
The PSU shroud or mid-plate, as some may consider it runs the length from front to rear. The majority of the plate is slotted with ventilation, as you can install fans here as well. Towards the front edge, you will see a plate that can be removed to give more clearance for thicker radiators, which you may opt to place inside the chassis. Moving toward the motherboard tray area, we find two large openings for cable pass-through and likely the ideal place for GPU cables as well.
Inside the Lancool II Continued
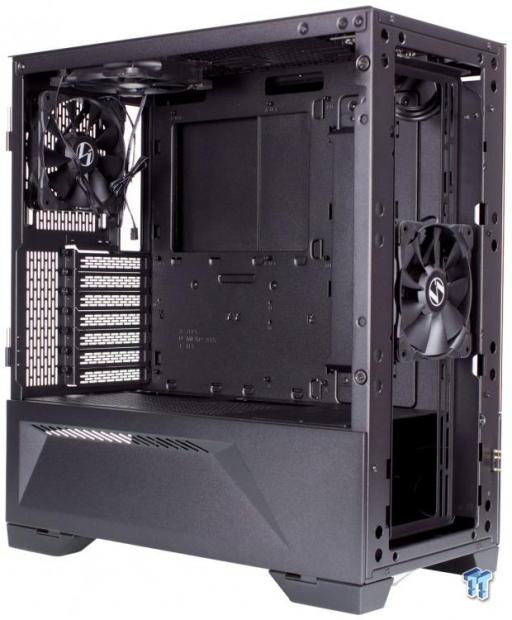
Looking at the rear interior surface, we see the pre-installed fan in place. This fan is like the others a 120mm case fan, which is 3-pin DC controlled. We also see the internally accessible slot covers used to cover unused expansion slots when not occupied. Also of note is the quite substantial length of the slotted mounting holes for the fan as you can see the slots go well below the mounting, allowing for a decent amount of vertical adjustment.
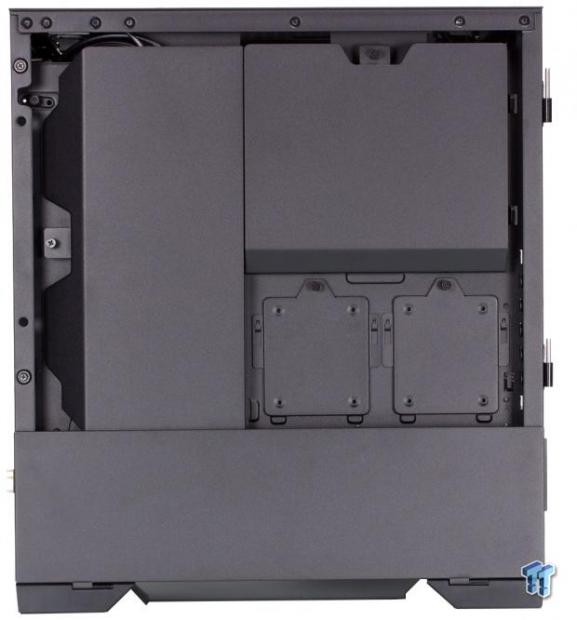
Here we have the rear cable management side panel removed, and what we see is well nothing. Lian Li chose to opt-in for cable management covers on the Lancool II, and from a builder perspective, this is a great choice. For those who want to show off their cable management prowess, the covers can be removed, but for gamers who want to build their rig and game, you can shove everything behind the panels and get to playing. One area not covered here is the two SSD bays as many users like to show off their SSDs, so Lian Li left this open so that whether it be an RGB part or even just a cool looking SSD, it won't be hidden like the cables.
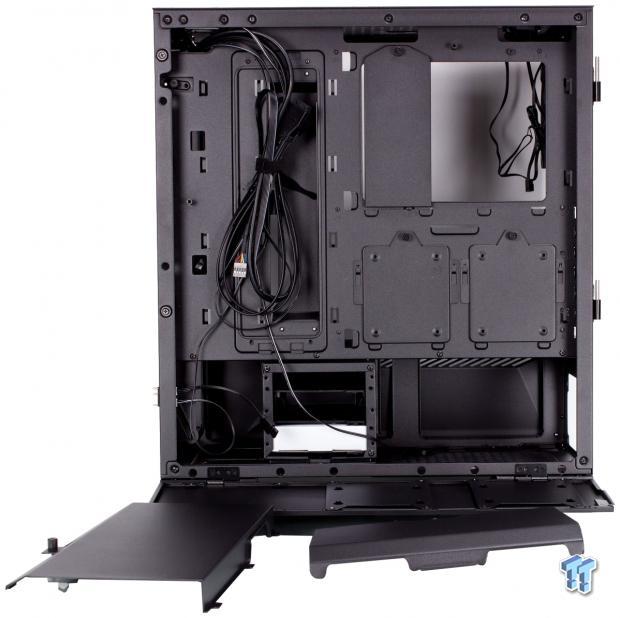
Now we did it; we pulled all of the covers. Here you can see the full cable management section of the Lancool II with no significant obstructions. One part worthy of noting is that Lian Li opted to include a plate which we left mounted over part of the CPU cutout. This is a tray Lian Li installs for users to affix RGB or Fan hubs to the chassis where they can be hidden rather than dealing with a heap of RGB wiring and management. This I give Lian Li credit for as typically users have to improvise their mounting location for ancillary components such as a Corsair Commander Pro, which is a quite common accessory for many RGB enthusiasts builds. Also, note the large loop of cables to the left, they were just this way with the covers in place, and nobody was the wiser, which is the beauty of these covers should you not want to deal with the cable management aspect of the build.
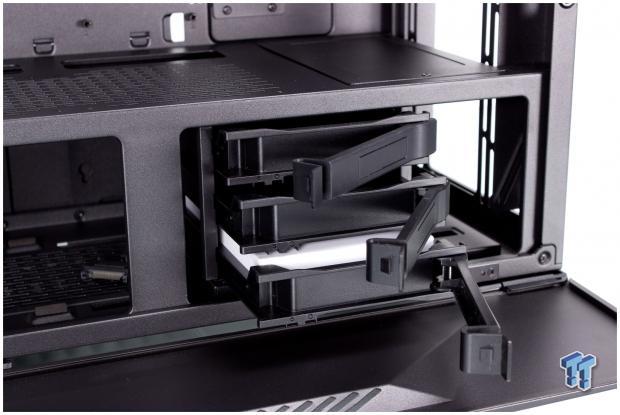
We flip back around the front to show the trays, and their cage mounted in the lower section. This is where the accessory box is found as well, which is familiar with many chassis we have seen. The three trays, as mentioned previously, support 3.5" HDDs or 2.5" drives depending upon your needs. They also have an optional hot-swap PCB accessory, which we will look into later.
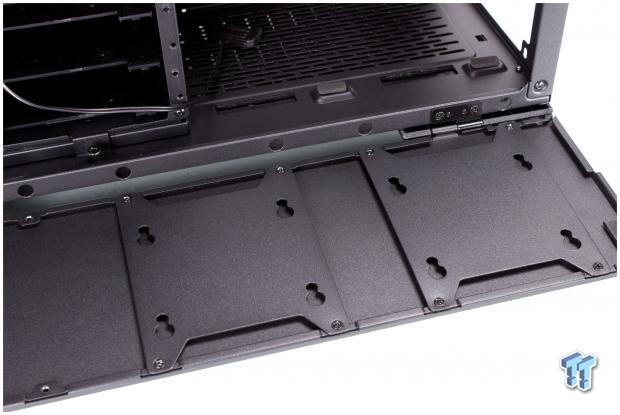
Back at the cable management side again and we see that the flip-down shroud plate is also home to two of the 2.5" drive mounts. Lian Li tried to make use of any space available to place something.
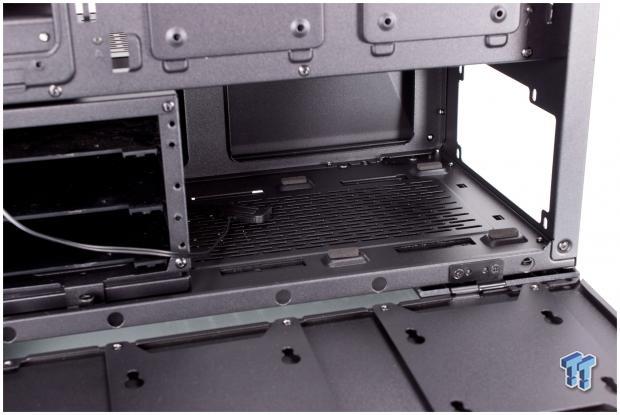
Here we finally get a look at the PSU mounting, which has thick rubberized foam pads for the PSU to rest upon. As you can see, the HDD cage is at its furthest back location, which should be excellent for clearance with our PSU as it is a 140mm SilverStone unit and one of the most compact Kilowatt units we have used.
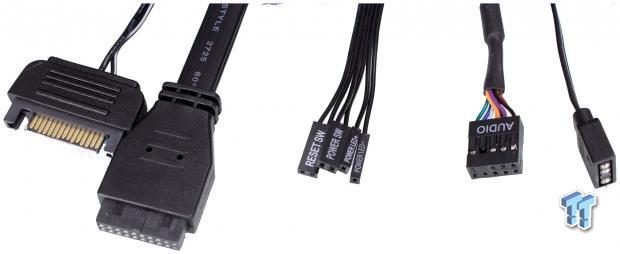
The front panel cables are as follows:
- SATA power for RGB controller
- 20-Pin USB 3.0 (USB 3.2 Gen 1) cable feeds front panel Type-A ports
- Power, Reset, and Power LED headers
- HD Audio header
- 3-pin ARGB cable to sync the internal RGB controller to motherboard or other RGB controller
This is a reasonably stout I/O, and if you opt for the accessory USB Type-C port, then you can install it, and you would have the USB 3.2 Gen 2 connector as well. For the price, if you were going to add anything to this case, I would pay the 12 bucks for that one, which we will check out soon.
Hardware & Documentation
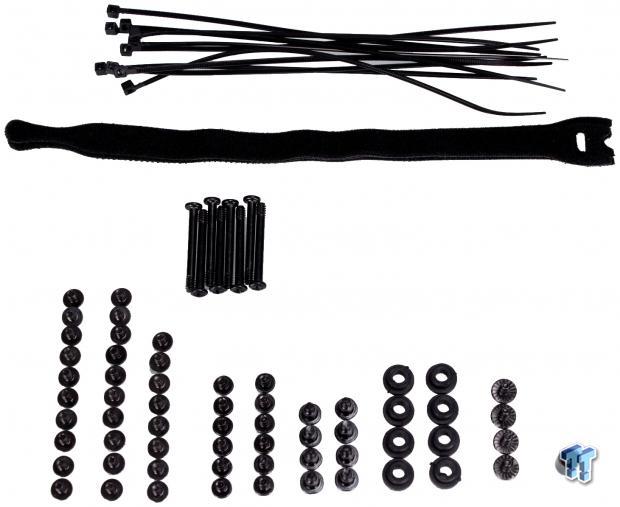
The included accessories are as follows:
- 10x zip ties for cable management
- 3x Velcro straps (one preinstalled in case)
- 8x screws for mounting fan to PSU shroud top plate
- 29x screws for motherboard and 2.5" drive mounting
- 12x screws for 3.5" mounting
- 8x ant vibration screws and rubber mounts for 2.5" mounting to the side plate
- 4x PSU mounting screws
- Standoff installation socket tool
This accessory pack has pretty much everything I would want it to come with. The one thing I would love to see is a multi-pole adapter for the 2.5mm jack to split them to separate ports. I also know that this is a case with ARGB and tempered glass panels at an $89 price point, so I think the adapter omission is forgivable.
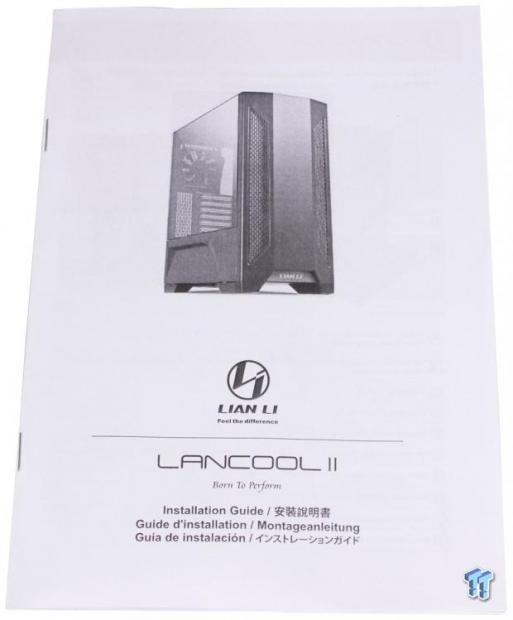
The manual is a 15-page booklet with each critical item in six languages, including English. The manual is detailed enough to get a rough idea of any build needs for a beginner.
Optional Accessories

One way that Lian Li was able to achieve the aggressive price point with the quality of material and fit and finish we have seen thus far is to offer some less common features as ala carte options. Lian Li provides the Lancool and everything you have seen up to this point for the $89.99 price point, but some additional items can further enhance your build while adding to the cost.
Here are the prices for each Optional item:
- Lancool II 1X (Vertical GPU Kit) $49.99
- Lancool II 2X (Side Diffused LED Strip) $11.99
- Lancool II 3X (Hot-swappable Back Plate) $14.99
- Lancool II 4X (3.1 Type-C Cable) $11.99
- GB-001 (Anti-sag Bracket) $7.99
The vertical GPU bracket we did not receive but the others we did and will image them below.
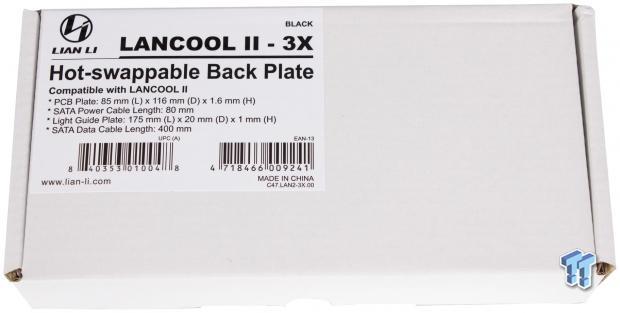
First up is the hot-swappable backplane PCB. This is made to attach to the bottom HDD cage and gives you hot-swap drive capabilities without the need to unplug or replug cables to swap one of the three drives. Another cool part of this solution is that it includes plastic plates that transfer LED lighting to the front of the tray, allowing it to light up when a drive is powered and even flicker with activity.
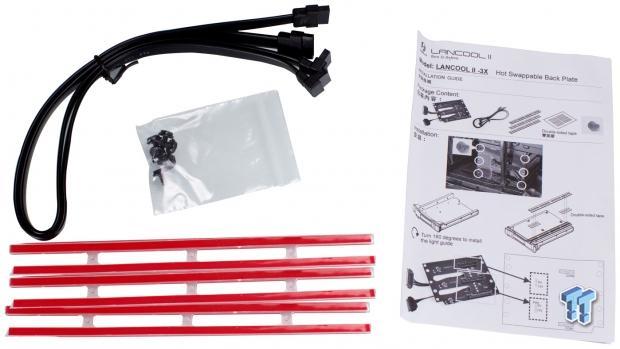
Here we have most of the parts sans PCB that would be used to install the backplane. The backplane, while it serves up to three HDD's Lian Li, only includes two SATA data cables, which means you will need to use one from your motherboard for the third port. That I will admit is a bit weird when the PCB is an accessory item made to service three ports. The three plastic pieces with red strips are the plastic which transfers the LED light form the PCB to the front of the HDD tray. The red strips on the plastic are the cover for the adhesive.

Here we have the HDD/SSD connector side of the PCB. These are merely pass-through ports and do not contain any logic, which could cause issues with drive recognition or performance, which is a good thing. To the other side adjacent to the connector, there are SMD LEDs that will fire when a drive is installed and another, which will fire when the drive is accessed.

Here we have the rear side of the PCB, which houses two SATA power connectors, which is more than enough for three drives. And then, there are three termination points for SATA cables to connect. Now you see why we were understandably confused to see only two SATA cables in the kit.
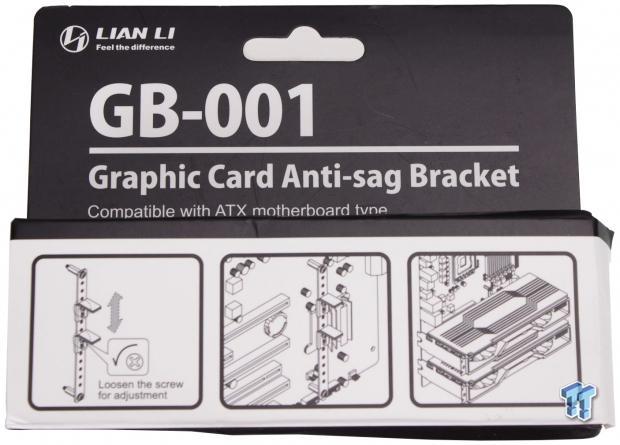
Next up is the GB-001, which is a very crude but effective way to offset GPU sag. Many manufacturers have taken to large brackets and even poles that span from top to bottom of the chassis, with a finger to support the GPU. Lian Li went with a much more subtle and hidden approach by attaching metal strapping to two of the motherboard standoffs and using metal ninety-degree brackets to support GPU's while remaining out of sight.
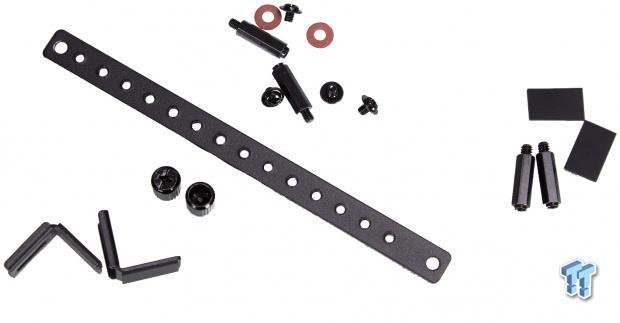
This is everything in the package. Yes, you might be able to make this yourself out of parts from a hardware store, but for exacting fitment, I think it's worth the eight bucks for this. The great part is, this is not case-specific, so you could buy this for most cases as long as threads match and apply it to your rig.
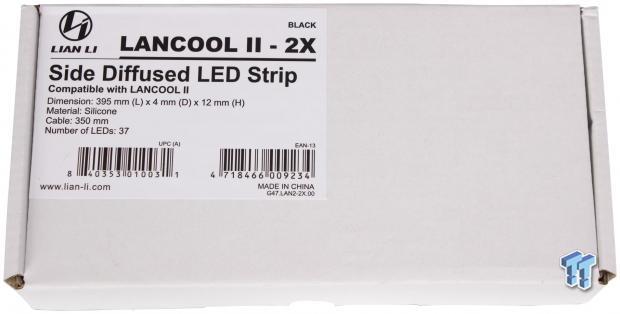
Now we have something purely for aesthetic, and it's the side lighting strip. This strip can be applied to light the gap below the glass panel between the side flip-down plate and the PSU top tray.
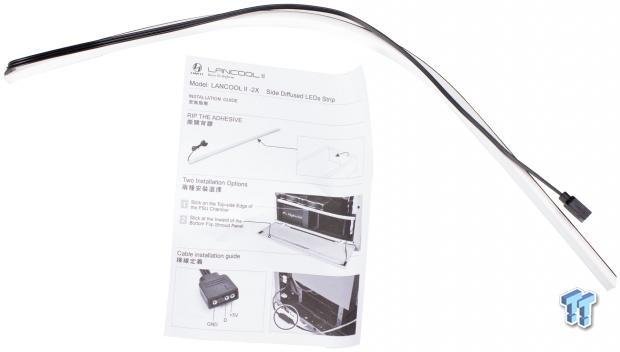
This one is straightforward, as it only has the LED strip and the instructions. The LED strip is a 3-pin ARGB header and can plug into a spare port on the Lian Li chassis, which is left open to expand upon the existing controller or can run directly to the motherboard. If you have the port on the motherboard, it is best to have the internal RGB controller connected to the motherboard then connect this side strip to the internal controller to ensure the front and side are synchronized.
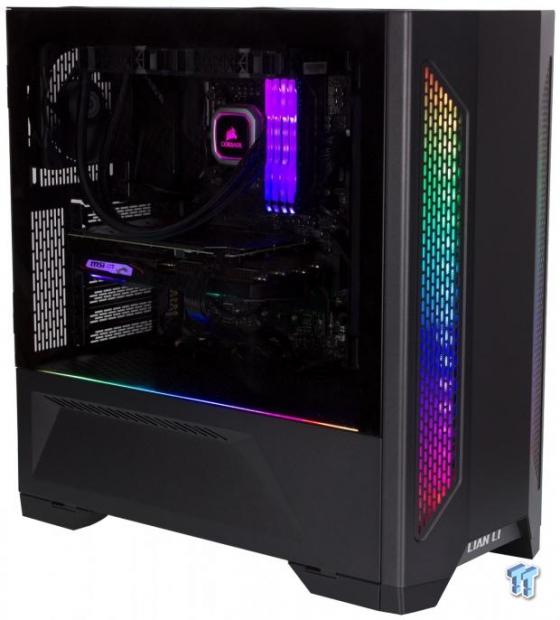
Here you can see a sneak peek of the accessory strip illuminated in our final build.
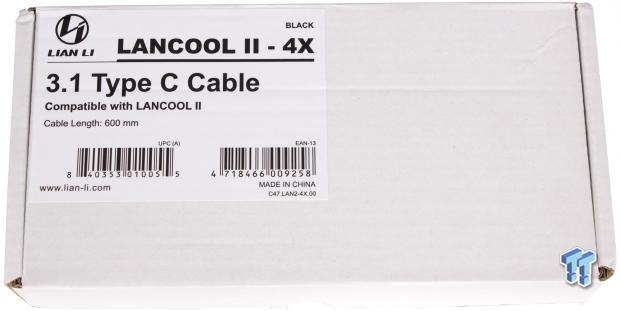
If you were going to get one accessory, this is likely the one I would recommend, especially if you have a newer motherboard with the internal USB 3.2 Gen 2 header. This fills the hole in the front panel and adds a fully capable Type-C port to the Lancool II.

The installation is minimally invasive with the top I/O needing to come out, which is four screws. Then there are six more screws to remove the I/O PCB so that the Type-C can be added and fixed to the PCB with the included screw. Then it's merely a matter of routing the cable with the rest of the front I/O cables.
Case Build & Finished Product
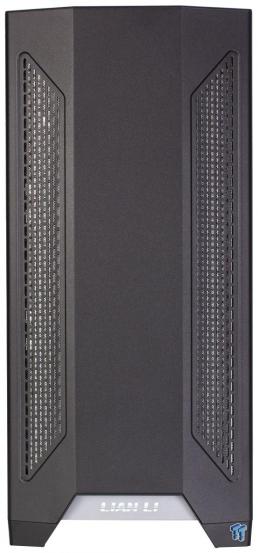
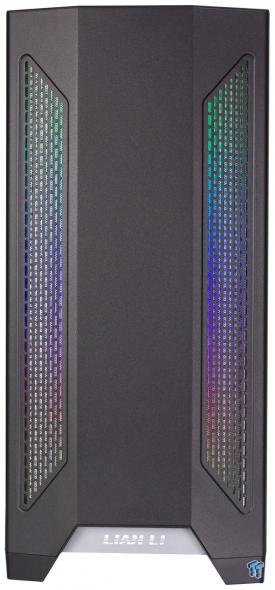
Here we have the built rig, and as you can expect, the front looks the same as when we first unboxed it. The front is a mostly opaque metal sheet, which means you cannot see the innards. It is not until you power the rig on that the front comes to life.
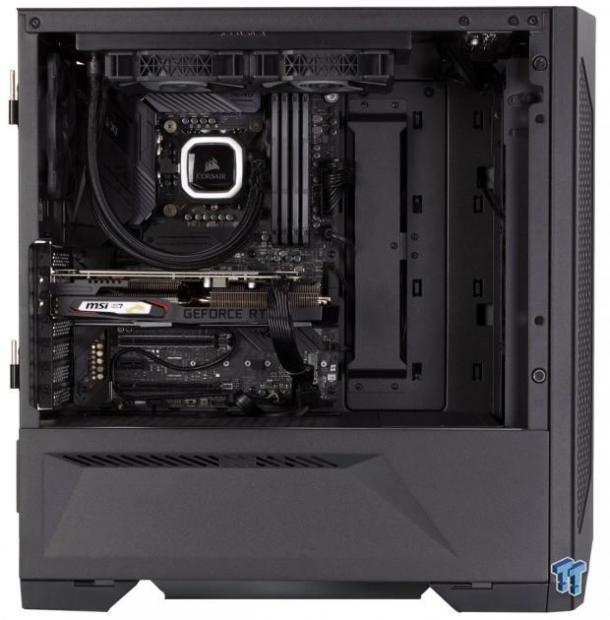
Here we see the test rig installed inside the Lancool II. The motherboard and all components went in with ease and no major hiccups to report. As you can see, the vertical cable management bar helps cabling disappear with ease without the need for visible rubber grommets. The plate the bar is mounted on can be rotated 180 degrees allowing for a wider board to fit and still hide cables well.
As you can see, upfront, the Lancool II is not left wanting for space in any way as a sizeable liquid cooling setup could go up front and still have room for a beefy GPU. Lastly, notice the radiator mounted close to the outer panel and how it allows easy fitment of the tall Corsair Vengeance Pro RGB DIMMS we have installed.
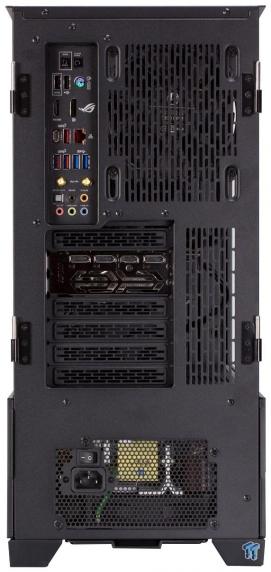
Here we see the rear I/O area, and the only thing that has changed is the inclusion of our test parts. I do like that the spaces between expansion slots are empty and utterly open once the covers are removed. This allows for GPUs with slightly offset ports to be accessible without potential blockages. This, of course, also provides for the various vertical GPU accessories which take up this space to be applied, avoiding the trap of placing the GPU close to the glass door, which can cause issues with GPU cooling.
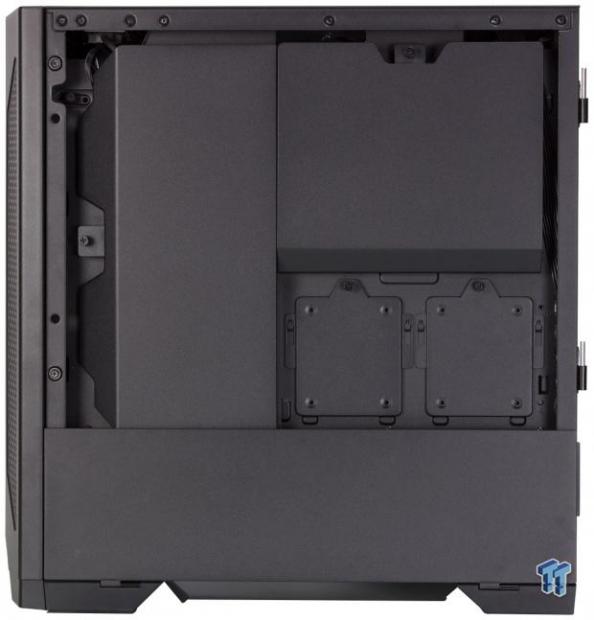
If you did not know any better, you would think nothing was installed in the Lancool II at all. These covers will be a blessing to many, I assume, as you would never know if I managed them or just balled them up and closed the cover. Of course, like every case, I did manage them, but it's fantastic that for those who hold great disdain for having to manage cabling, this is now an option. I know Lian Li did not invent this idea as it has been done already, but they did a great job integrating it.
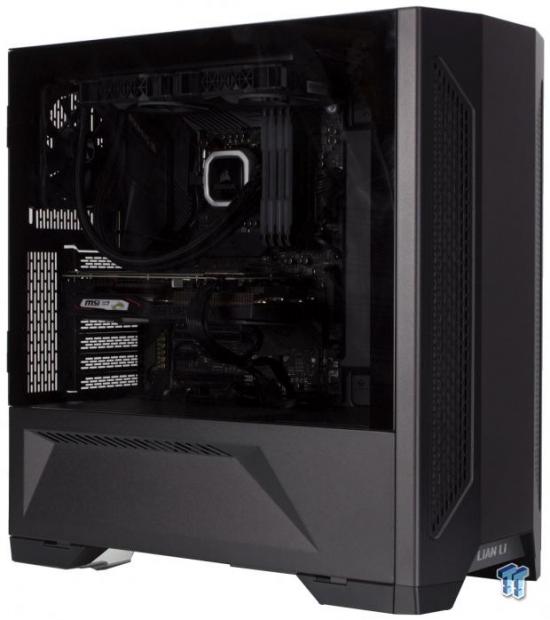
Here we have the system all buttoned up and ready to run. Now that we have more components and surfaces to reflect my studio lighting, you can start to make out parts, but the window tinting still keeps the entire thing quite stealthy.
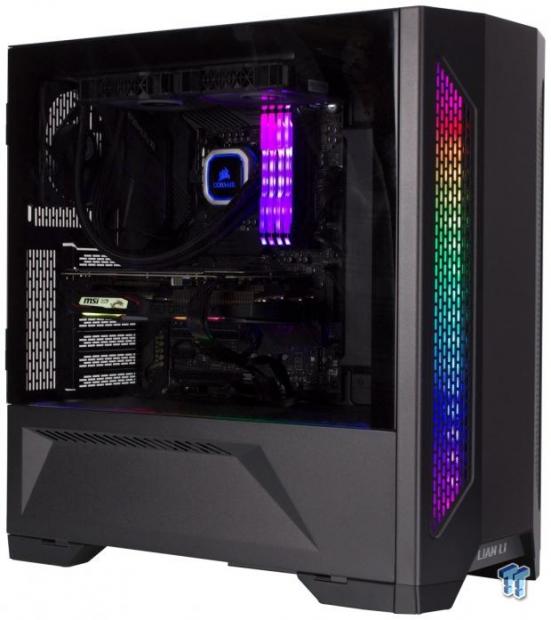
When powering on the test rig, we are greeted by the unicorn rainbow disco as I had the standard rainbow flow profile on the motherboard, and the case was synchronized to follow suit. The front lighting diffusion is excellent and makes for a perfect aesthetic for the Lancool II. If you wanted something more discreet, you can shut the LEDs off or even change it to a single color, depending on your desired appearance.
Final Thoughts
When I first saw the Lancool II announced and shown at Computex 2019, I was interested as the RGB looked good, and the overall design was robust. However, hearing a price point below $100 had me apprehensive that when it came to market, it would either be more expensive or lose quality somewhere. I am happy to say that not much has changed, and the Lancool II is indeed a beefy case on a budget.
Thermal testing was also a question to me as cheaper cases once again tend to sacrifice something. Being the Lancool II has ARGB, dual side tempered glass, wire management covers, and a multitude of cooling and drive fitment options, I figured performance was where it would take a hit. I am happy to report that the Lancool II performed equivalent if not slightly beating the deltas we have seen from other chassis.
The measured ambient during testing was 24C, with an RH of 46%. The CPU measured in at an average delta over ambient of 40.4C, which is 1.1C cooler than the previous leader, the Vector RS with vertical GPU. The GPU thermals were an average delta of 38.2C, which is only bested by the Corsair 465X and 220T and the Enermax Equilence, both of which had their issues.
Now let's assess what we liked about the Lancool II.
First would be the approach Lina Li took to achieving an excellent performing mid-tower while offering accessory items ala carte. This allows the most popular features to be integrated at a lower cost, and any extras a user may want are user-serviceable, and none of them required any special tools or work to be added. Do keep in mind that if you added every accessory, this case could head toward the $200 range, but for the most part, users would be just fine with what comes out of the box. The ARGB flows nicely and creates a unique look for the Lancool II. The split side with both a swing open door and flip open side plate help break up the styling. Overall the Lancool II is a solid build, and the quality of materials is not anything I could complain about.
Now we get to my gripes, and for an $89.99 case, there is only a small knit to pick. I already mentioned this but I think while it is cheap and easy, I would have liked to have seen the USB C port hole be blocked off internally with a molded plastic that could have an upward block off that smooths out the front panel I/O for users who opt to not upgrade to the Type-C. The issue is that the rubber plug can come out easily and can be lost, this is not ideal as then you have a small elongated oval hole in your I/O. The only other thing I wish Lian Li could do was to include a sight window or mesh so that users could see the lit indicators on the drive trays should users opt for the hot-swap PCB upgrade. The whole idea of equipping the trays with active LED pass through via the plastic parts is wasted by the fact that you would need to keep the flip-down panel open to see the LEDs in action.
At the price point, the Lancool II is a great option, and I think many users will adopt this chassis. Lian Li quality is present, tempered glass all around, and the inclusion of excellent cable management hiding makes this an absolute dream for many builders. Add to this the ARGB, which can be synced to the controller of your choice or motherboard, and you have a robust platform for a beautiful looking and solid rig while not breaking the bank.
Lian Li knocks it out of the park with the Lancool II. Anyone looking for a sub $100 chassis for their next build needs to give it a sharp look.
Shannon's Chassis Test System Specifications
- Motherboard: ASUS ROG Maximus XI Hero (Wi-Fi) Z390 (buy from Amazon)
- CPU: Intel Core i7 8700K (buy from Amazon)
- Cooler: Corsair H100i Pro RGB (buy from Amazon)
- Memory: Corsair Vengeance Pro RGB CMW32GX4M4C3000C15 (buy from Amazon)
- Video Card: MSI GeForce RTX 2060 Gaming Z (buy from Amazon)
- Storage: SanDisk M.2 256GB
- Power Supply: SilverStone Strider Platinum 1000W (buy from Amazon)
- OS: Microsoft Windows 10 Home 64-bit (buy from Amazon)
Performance |
98% |
Quality |
97% |
Features |
90% |
Value |
97% |
Overall |
96% |
The Lancool II form Lain Li is a solid starting point for a robust and feature rich build with some great aesthetic to match. Want more? Lian Li probably has an accessory to upgrade it.

Similar Content
Related Tags

