
The Bottom Line
Introduction, Specifications, and Pricing
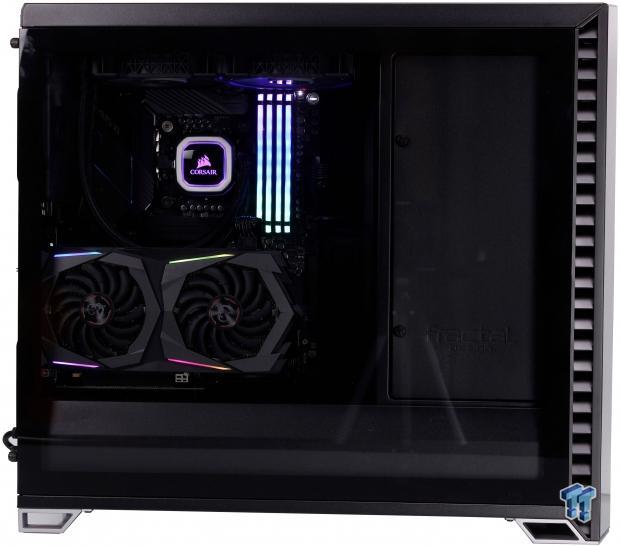
I don't think at this point; most users would need an introduction to Fractal Design. Fractal has been around making some very iconic cases for quite some time now. Fractal showed up on the radar of many enthusiasts with the introduction of minimalists or simple, sleek cases with a quality and silence appeal. Not only that but the hijinks or marketing stunts Fractal has employed to help gain notoriety such as subjecting one of their chassis side panels to a shotgun blast to show its strength. While some of this I'm sure was simply for the fun of the marketing rep, the antics have proven to get some defined attention (pun intended) on the Fractal brand and chassis lines.
The chassis we have today is technically a brand new offering for Fractal, the Vector RS Series. The Vector RS for all intents and purposes is a Define R6 base chassis for the most part with some new exterior panels and some unique modularity to match what you want it to be. The Vector RS is designed for those who want the structural rigidity and overall robust and capable internal skeleton of the R6 but with some style added to the mix, and of course RGB. Fractal has been one of the few holdouts in the RGB game. With the S2 Vision recently coming onto the scene, which was the sign Fractal had finally embraced the new trend and the more flash nature that some users demand.
Some of the key features of the Vector RS series starts with its modularity. The Vector RS can swap between a tempered glass top half panel to an airflow focused panel with a filter allowing fitment of top mount radiators. The case comes default with glass, and in an accessory pack, the parts come to convert the Vector RS into 'airflow mode' should you need the extra mounting locations. Another nice feature is the ability to remove the drive tray panel and relocate it back with the motherboard tray. This will give a more open area for liquid cooling should you find the need. The latter is, of course, a default feature carried over from the R6 and is a very welcome feature to ensure the Vector RS meets as many users' needs as possible.
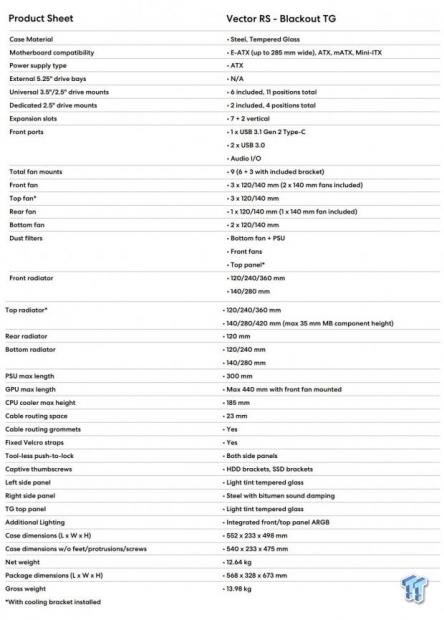
The Vector RS we have today is labeled the 'Vector RS Blackout (Light TG)' this, of course, denotes the full black chassis with a clear tempered glass side panel. There will also be one with 'Dark TG' which has a tinted window, so users have the choice as to which aesthetic they prefer as the start to their build. One thing to note is that while Fractal is known for producing white versions of most of their cases, the Vector RS as of the time of writing will not have a white version. The Vector RS measures in at 498mm high, 552mm deep and 233mm wide. This falls within the customarily accepted measurements of a mid-tower.
The Vector RS is roughly the same as the R6 as mentioned previously, which means motherboard fitment will be vast with up to E-ATX being supported and everything down to ITX. By default, the Vector RS includes six 3.5" drive mounting trays with space for up to eleven total. 2.5" drives have two trays included with two additional mounting locations available for a total of four. The PSU clearance is up to 300mm and has a built-in PSU shroud to help hide the PSU and any applicable cable mess for a clean build.
Cooling fitment for the Vector RS is interesting as previously mentioned the top panel could be swapped for more airflow and mounting locations. As it arrives, the Vector RS supports up to triple 120 or 140mm fans or 360 radiator or 280mm max depending on fan size preference. Default Fractal includes dual 140mm fans in the front panel. The top by default contains no mounting but when swapped can fit up to 360mm or 420mm radiators respectively. The rear fits a single 120 or 140mm with radiator up to 120mm, but 140mm would be a no go due to clearance issues. The bottom even supports dual fans up to 140mm and even 240 or 280mm radiators. CPU air cooler heights are limited to 185mm if you can even call that a limit as I don't know of many coolers coming close to that height.
The Vector RS comes to market at $179.99, which is getting up there in terms of chassis. This sort of price point means any missteps will be caught. At this price point, users are expecting something that is well thought out and has features and fitment to ensure a premium feel and final products. Looking at the price point of $169 - $189 we get a rough cross-section of chassis the Vector RS would be up against which brings the likes of the Corsair 570x which is iconic in its own right along with the PM01 from SilverStone and another from Corsair in the 500D. All of these are potent chassis which do many things right, so it will be interesting to see how the Vector RS stacks up.
Shannon's Chassis Test System Specifications
- Motherboard: ASUS ROG Maximus XI Hero (Wi-Fi) Z390 (buy from Amazon)
- CPU: Intel Core i7 8700K (buy from Amazon)
- Cooler: Corsair H100i Pro RGB (buy from Amazon)
- Memory: Corsair Vengeance Pro RGB CMW32GX4M4C3000C15 (buy from Amazon)
- Video Card: MSI GeForce RTX 2060 Gaming Z (buy from Amazon)
- Storage: SanDisk M.2 256GB
- Power Supply: SilverStone Strider Platinum 1000W (buy from Amazon)
- OS: Microsoft Windows 10 Home 64-bit (buy from Amazon)
Packaging
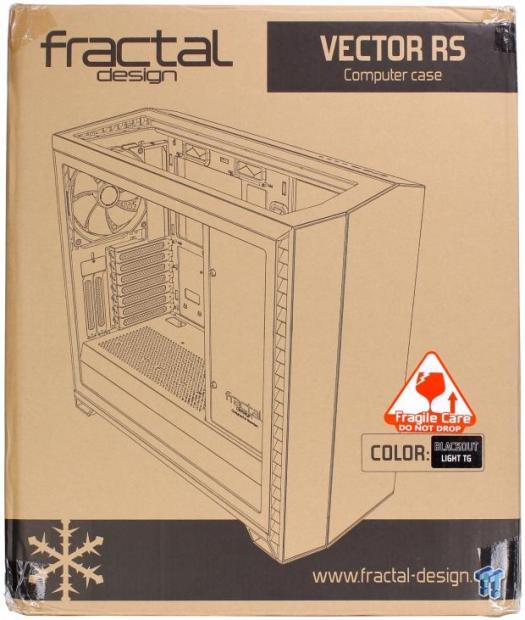
The main side of the box shows the majority of the box covered with a line drawing of the Vector RS chassis with a clear view through the tempered glass side and top. They also have a fragile sticker advising not to drop the package as it has tempered glass inside which as we found can go wrong in a big hurry. There is also a sticker in place showing that the chassis color is designated as blackout and light TG.
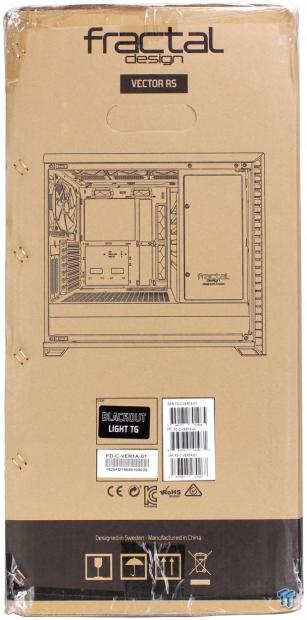
The first of the thinner sides of the box shows a direct side shot of the Vector RS and its interior. Also shown here is the fractal logo and name along with another color label. Also here we have all of the UPC/EAN/etc. Labels for inventory management. Lastly, we have several warning and regulatory and safety compliance marks.
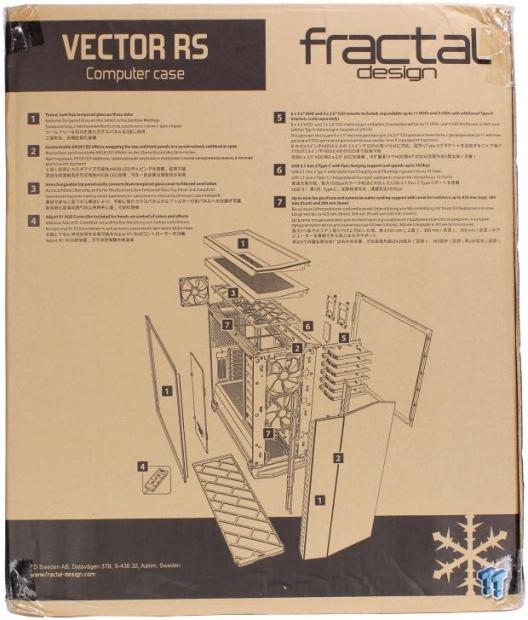
On the rear of the box, we see an exploded view of the Vector RS, and it shows all of the parts for the chassis along with the alternate top airflow panel, filter and cooling mounting tray. There are seven numerically listed features of the parts, and they are translated into four other languages besides English. The languages are German, Russian, Chinese, and Japanese.
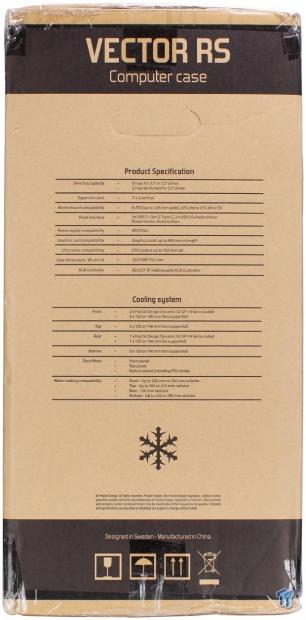
The final thinner side of the box shows a spec sheet along with cooling fitment specs as well to help off the shelf users who may be looking for their next chassis at a local retail store.
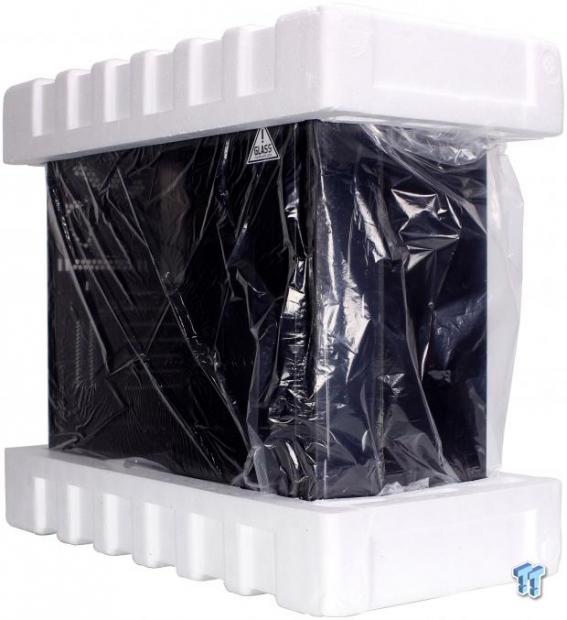
The vector RS comes wrapped in a plastic bag to help avoid vibration abrasion damage to the chassis. Exterior to the bag the chassis is enveloped between two hard Styrofoam end caps, designed to absorb shock during travel and reduce the chance of damage to the chassis during transit. The tempered glass panels also have a plastic exterior film to help protect the glass from abrasions or scratches during shipping.
Vector RS Mid-Tower Chassis
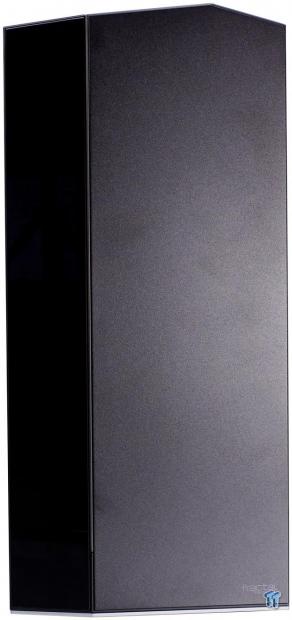
When looking at the front of the Vector RS, it has a flat slate design mostly with a shiny lefthand side panel. At first glance, I thought it was glossy black plastic, but as it turned out, it is a small tempered glass piece along the left-hand edge. The bottom right of the front panel carried the Fractal namesake. The split between the tempered glass and the flat slate is where the front RGB LED lighting is diffused into creating a defined separation in the aesthetic.
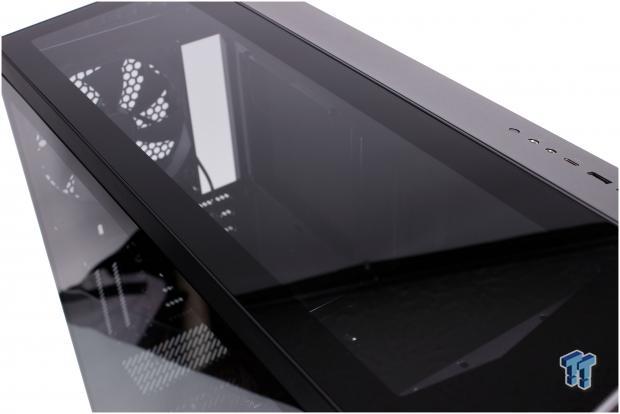
Out of the box, the Vector RS comes with this tempered glass half panel as you see here. By default, the top of the Vector RS chassis favors form over function as there are no cooling, mounting provisions in place and purely a clear aesthetic panel is in place. However, as mentioned before, there are airflow focused panels in the accessory pack, which we will investigate later in the review, so see how the Vector RS can flex to meet your build needs.
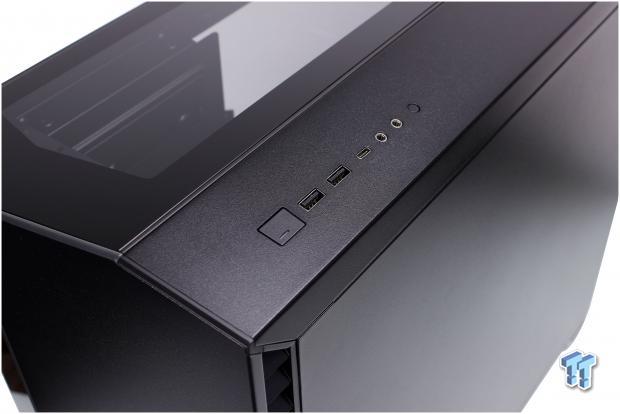
The I/O on the Vector RS is along the right-hand edge of the front top section. This small piece is separate from the top tempered glass panel we can see adjacent to the I/O. This allows swapping of the aesthetic panel for an airflow fixture without needing to tamper with the embedded ARGB stripe or the I/O panel. This, in turn, means that the I/O stays fixed no matter the build without even needing to fuss with removing the I/O.
The I/O is outfitted as follows Left to right):
- Power button with integrated power LED
- 2x USB 3.2 Gen 1 Type-A ports
- USB 3.2 Gen 2 Type-C port
- Headphone and Microphone 3.5mm jacks
- Reset button
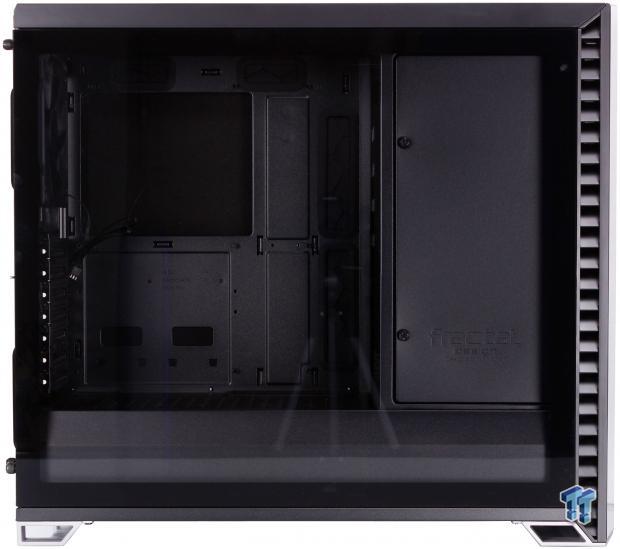
Here we have the main panel which is clear tempered glass and this photo was taken just mere minutes before it was set aside to assess the interior and it decided it had enough and popped. More on that later in the review, but for now, we see the glass panel is clear and allows full view of the interior od the Vector RS chassis. Looking toward the front panel, we see louvered ventilation running up the side, which is internally filtered each side to make maintenance easy.
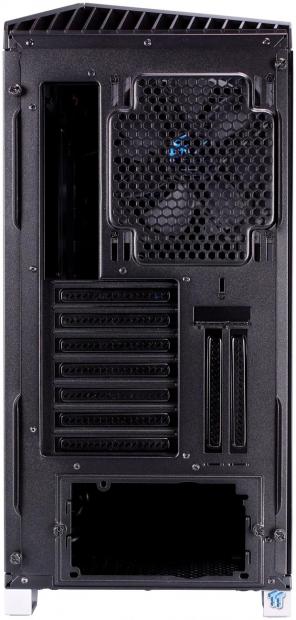
The rear I/O section is fairly standard with everything how you would expect it. The fan fitment here is 120mm or 140mm but comes with a 140mm fan preinstalled. There is also vertical dual-slot mounting for a GPU near the tempered glass window to show off your GPU should you prefer this layout. Keep in mind, if you do plan to install the GPU vertically that you must purchase the Vertical Mounting bracket separately. The PSU slides in from the rear which is why you see two thumbscrews on each side of the PSU mounting bracket. The bracket comes away from the chassis and mounts to the PSU before being inserted.
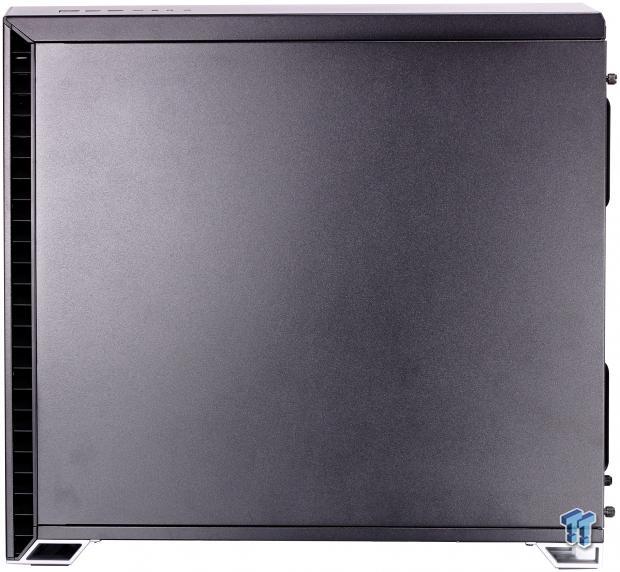
Here we have the cable management side of the Vector RS and as you can see it's a solid steel panel. The front once again, we see the louvered vents leading to the front air inlet. Meeting the front panel at the angular bottom vent, we see the silver plastic feet on each corner. Looking towards the rear we see the dual thumbscrews used to mount the panels as even the glass panel uses a frame and lip over the rear to allow fastening to the chassis without fasteners showing on the glass surface.
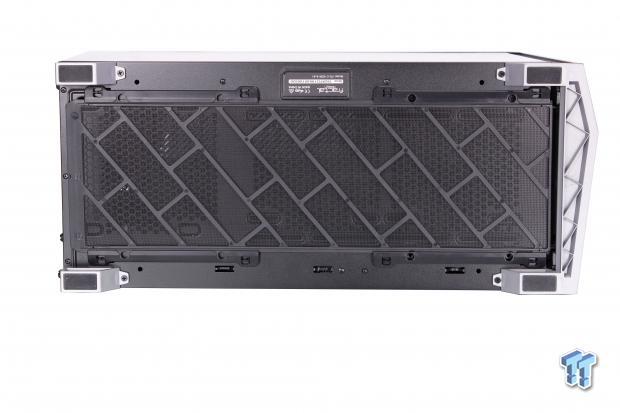
Here we have the bottom of the Vector RS, and the large full-length filter mostly covers it. The filter is removable for cleaning by sliding out from the rear. The reason for a full cover filter is simple, as the Vector RS allows for huge PSUs or also bottom mount fans or radiators. As you can see in front of the PSU ventilation, we also can see slotted mounting for 120mm or 140mm based cooling and Fractal made sure it would be well filtered no matter where you stick your fans.
Inside the Vector RS
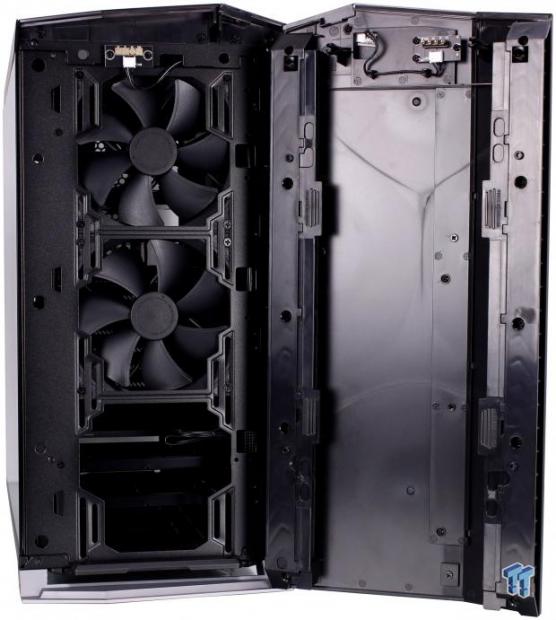
The front panel of the Vector RS is easy enough to remove, but you will need to take note as many panels pull off from the bottom and that's not the case with the Vector RS. To remove the front panel, you should pull on the side louvered area near the top, and it will come loose. The bottom is slotted into the feet area so that the top of the panel pulls away then lifts out. The two 140mm preinstalled fans you can see in place here. The fans are DC (3-pin) which is not inherently bad, but they tend not to have as granular of ramping as a PWM model.
The panels ARGB signal is carried via four spring-loaded pins on the panel side and a PCB with four contact pads which you can see directly above and slightly left of the center of the top intake fan. The front fan mounting as previously mentioned supports 120mm or 140mm based cooling and it is slotted to allow flexibility to mounting locations for your cooling. Behind the panel, you can see that the fans do not have any filter over them as Fractal opted to integrate the filtration into both points of ingress on the front panel which we will look at now.
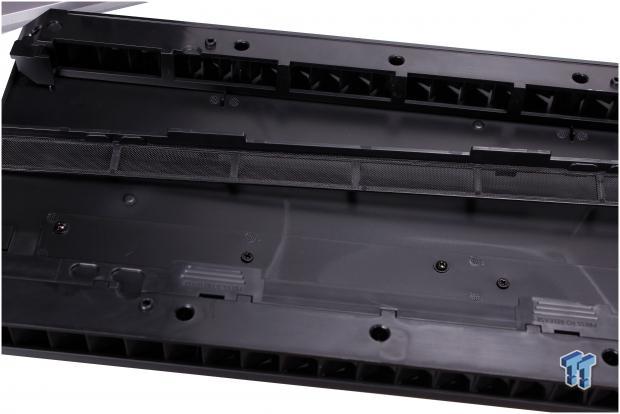
Looking at the filtration on the front panel. As you can see, the louvered areas have long mini filters along their entire length internally and can be quickly snapped out for cleaning. This is an interesting take on filtration as it keeps the filters from being directly in front of the fan, which in some cases can cause airflow degradation. Here the fan can pull air across the entire louvered side openings which can help extend the time between the airflow reducing from filter maintenance being necessary.
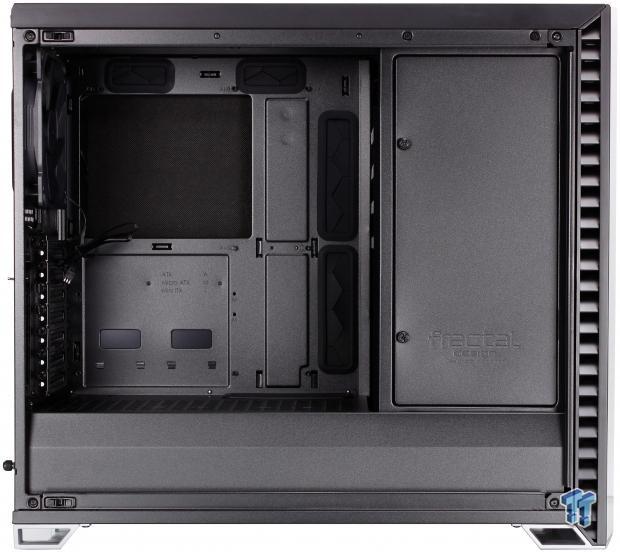
When looking into the side of the Vector RS much like the R6, you can quickly assume the case is cramped due to the large front, drive tray panel. Don't let your eyes deceive you as the drive trays can be removed. The panel can be recessed back to be nearly level with the motherboard tray. Allowing for a wide-open expanse to support an intricate liquid cooling build or whatever your dream build may entail. The CPU backplate cutout is enormous and can almost swallow an ITX board so I imagine there's not much for CPU coolers that this would not work for. The large grommet filled cable pass-through should easily fit anything you may need to pass through to your mainboard from the cable management chamber.
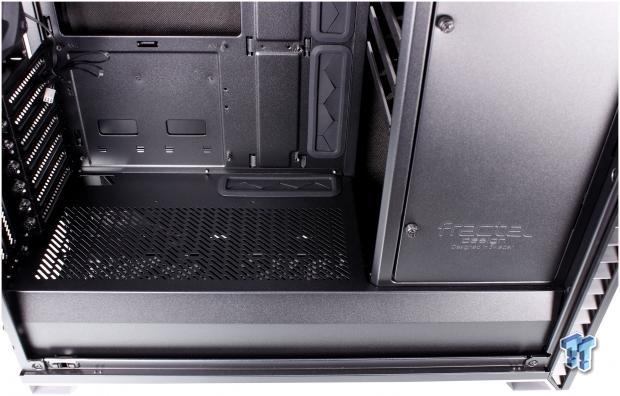
The PSU shroud for the Vector RS is ventilated like the shrouds we have seen on previous Fractal chassis. There are small slits where SSD trays can mount; also, there are threaded holes for the vertical GPU riser to install and secure the GPU. There is a large grommet covered hole here as well. This is capable of handling most anything you would need to pass through, along with a single smaller hole sans grommet for passing anything on the extreme left-hand side. Most users will use this smaller hole for the HD audio pass-through and possibly the ARGB connector.
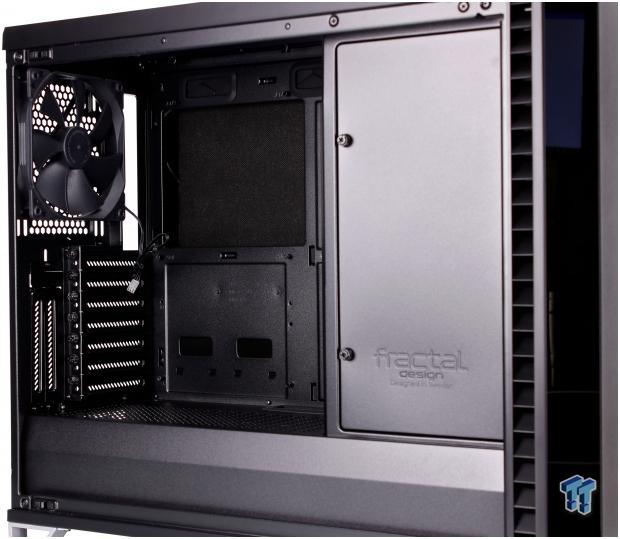
The rear I/O area from the inside is where we can now see the preinstalled 140mm fan from Fractal. This fan is also a DC unit, and below it, we see the seven expansion slot covers. There are also the previously mentioned dual expansion brackets in a vertical orientation for vertically placed GPUs. The main standard expansion slots are internally accessible, while the vertical expansion slot mounting is externally accessible. The vertical slots have a sliding thin metal bracket to cover the opening above the mounting once the card is seated.
Inside the Vector RS Continued
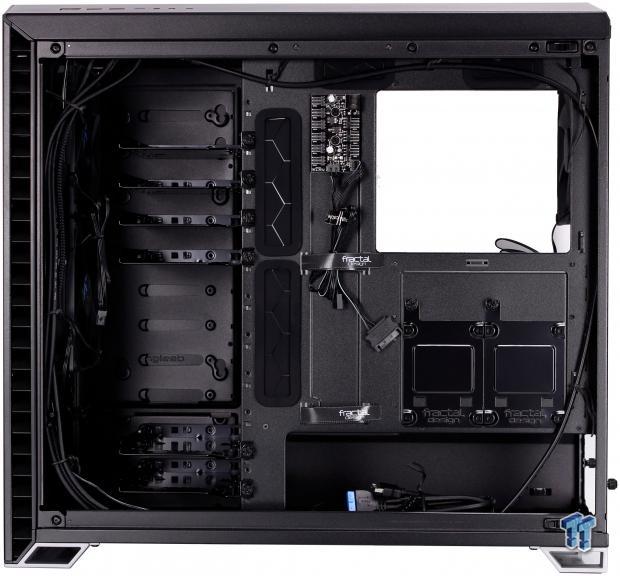
Here we have the cable management area. First up you can see to the left all of the open space which is where six of the eleven possible HDD tray locations in the area shrouded by the movable panel. If you remove the trays, you can move that vertical panel as we mentioned previously to be in line with the motherboard tray. Moving the vertical panel will allow for more open space from the front side for a large open-loop liquid cooling setup. Do keep in mind that with the plate moved, the HDD fitment of trays you see here is removed so you have to plan ahead as to what the system will be. I do like that Fractal enables you to build the Vector RS into a large storage server if you wanted. With up to 11 HDD's, I think most will not need that much space with most users having 1-2 mechanical drives at most in their main rig.
One thing Fractal always seems to do well is cable management, and the Vector RS is no different. The cables when opening the chassis were already well managed with twist-ties holding the cables in place around the perimeter. There are two SSD trays as we mentioned before and next to these we see two Velcro ties used for maintaining cables down the main rig of grommet filled pass-through holes. Above this, we see the fan hub, which comes pre-installed and supports up to three PWM devices along with six DC fans. The area down near the PSU looks to have more than enough room to tuck excess cabling.
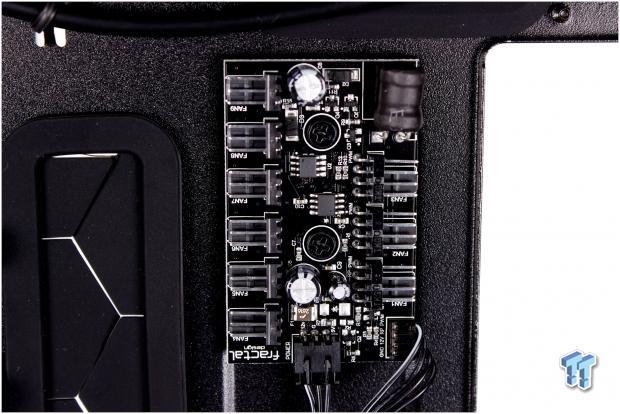
Here we get a close-up shot of the fan hub integrated into the Vector RS. As you can see, it has two leads coming from it. One lead is a SATA power lead while the other is a 4 Pin PWM header which attaches to your motherboards CPU fan header. Other fan headers can be used depending upon what you want your attached fans to reference for the correct PWM signal for fan speed control.
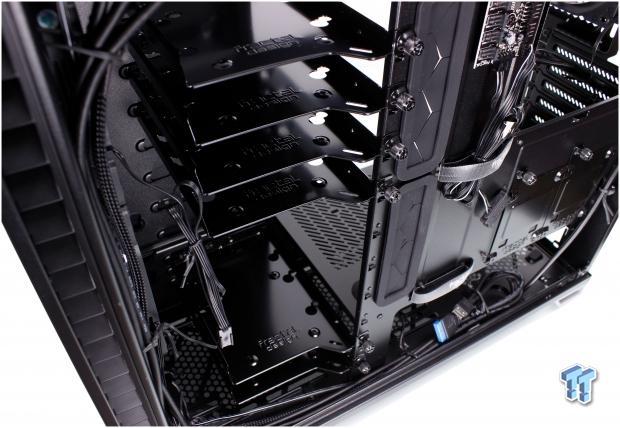
Here we get a quick top-down shot of the HDD trays which come installed. You can purchase more trays as needed to populate this area up to eleven 3.5" drives fully. Also, as mentioned before these can be removed entirely and the panel moved to open this area up as an extension to the main chamber for a vast open space to build within.
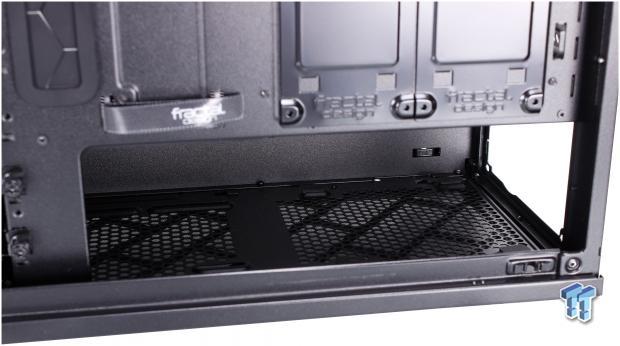
Here we have the PSU area, and as previously mentioned, it supports up to 300mm, or any PSU you could ever want to fit here. The PSU location has rubberized foam pads to allow the PSU to have somewhere to sit that is not metal to metal and relieves possible strain from the mounting position as you would not want to hang the PSU from the back of the chassis. We can also see the large ventilation opening here which is covered by the removable filter at the bottom.

The front panel cables are as follows (left to right):
- USB 3.2 Gen 1 20-pin connector (feeds dual Type-A ports)
- USB 3.2 Gen 2 connector (feeds front panel Type-C port)
- 3-pin ARGB connector (sync ARGB stripe to the motherboard or other RGB controllers)
- SATA power lead (fan hub)
- 4 Pin fan header (fan hub PWM reference)
- HD Audio connector
- Front panel power/reset/power LED connectors
Hardware & Documentation
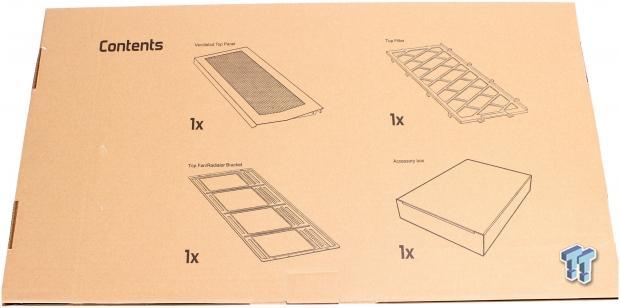
Here as you can see we have a huge box, which includes the alternate airflow edition top panel, cooling mounting bracket and dust filter. Also included in the large box is the small accessory box you would get in most cases.
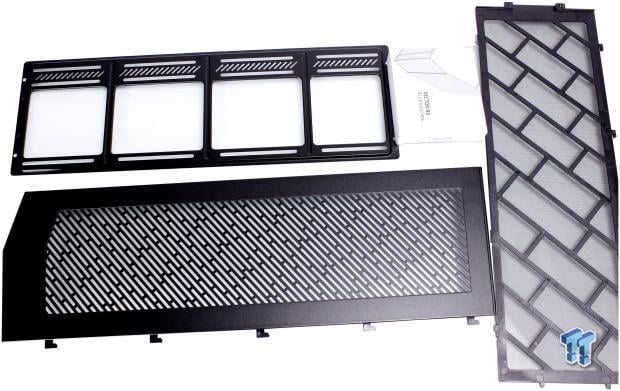
Unpacking the box, we now see all the pieces. The top panel parts we will dig into installing shortly. The part we will look at next is the accessory box and what it contains.
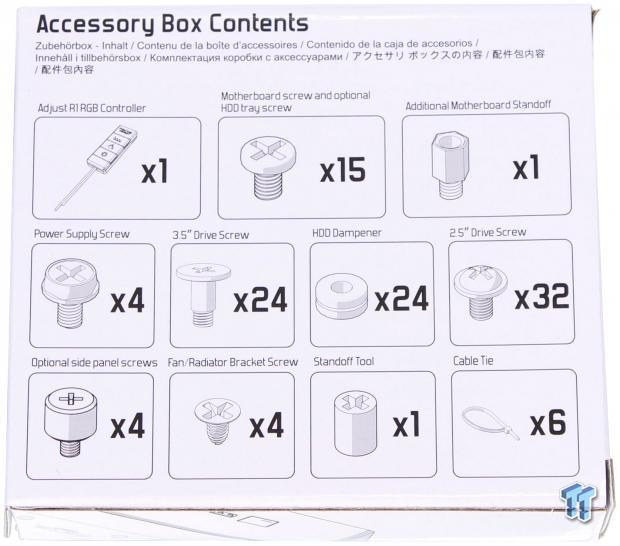
The accessory box has a handy screw guide should you need it to ensure you have all the parts you need but also for a quick reference as the Vector RS has many different screw types.
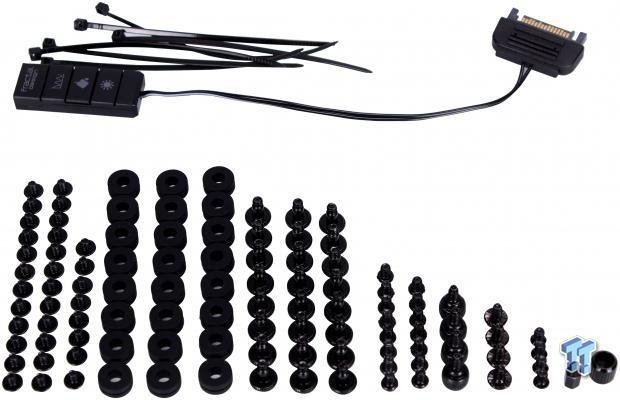
Pulling everything from the box we now can see all of the small bits Fractal includes with the Vector RS.
Here is everything included in the accessory pack:
- 6x cable ties
- 1x manual RGB controller
- 32x 2.5" drive screws
- 24x rubber 3.5" HDD dampeners
- 24x 3.5" drive screws
- 15x motherboard and optional HDD tray screws
- 4x side panel thumb screws
- 4x PSU screws
- 4x top radiator/fan bracket screws
- 1x standoff
- 1x standoff tool
The accessory pack is quite complete, and the inclusion of the LED controller is nice as it avoids having the control on the front panel. The front panel option is one many chassis manufacturers choose and can be rendered obsolete quickly if users hook the ARG directly to the motherboard to sync.
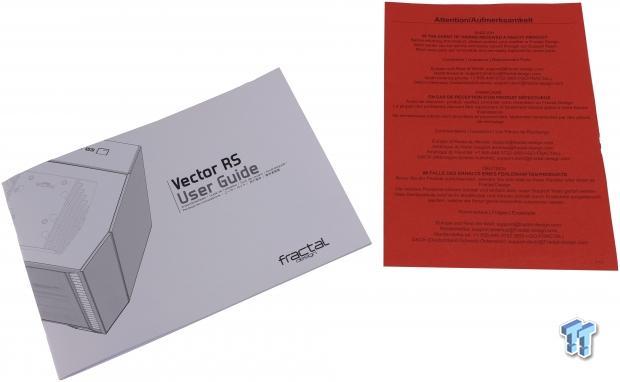
The manual for the Vector RS is a roughly 40-page booklet covering multiple build aspects of the Vector RS with several helpful images to show what the chassis can do and build options. There is also a bright red leaflet which covers what you should do if you receive a faulty case out of the box.
Converting the Vector RS for Airflow Mode
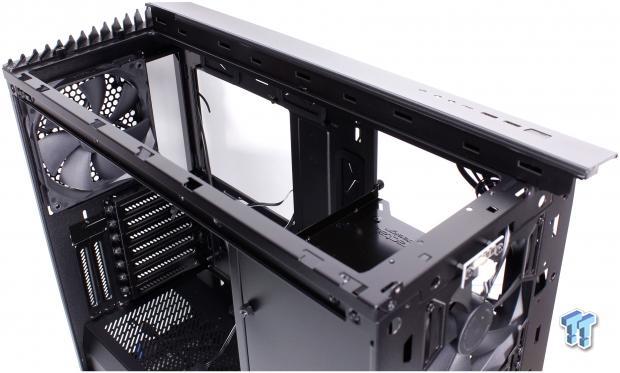
The first step in converting from the top glass panel to the top airflow model is to remove the top tempered glass laden panel. This is accomplished by first removing the front panel. After the front panel is removed, we can then remove the two screws from the front area which affixes the top panel in place. With two screws removed the panel slides forward and can lift up and off of the chassis. As you can see here, we have already removed the panel, and now we have a wide-open top waiting to be converted for cooling fitment. One thing worth noting is how far away this hole is from the motherboard tray. This means even with thicker radiators up top it should not cause any interference issues with memory, it just may visually cover them up a bit if the radiator and fan combo are thick enough.
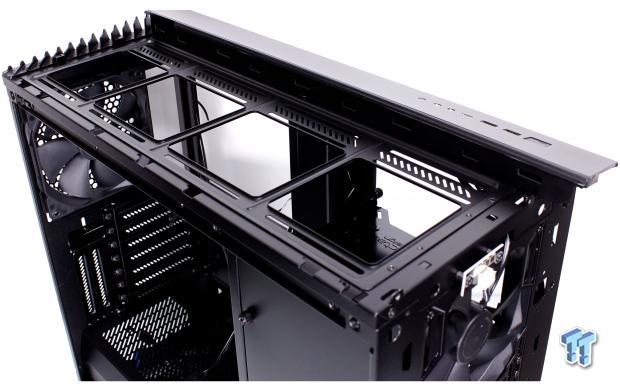
Here we have now applied the radiator/fan bracket. We used the four screws mentioned previously to mount the tray in place on the chassis as you can see the bracket run full-length of the chassis and can support massive top mount radiators. If going big, you will also want to move the vertical plate covering the 3.5" tray mounting back to the motherboard tray to open up the space if your application requires it. Our usage will be with our standard H100i from corsair, so we did not need the vertical plate to be removed.
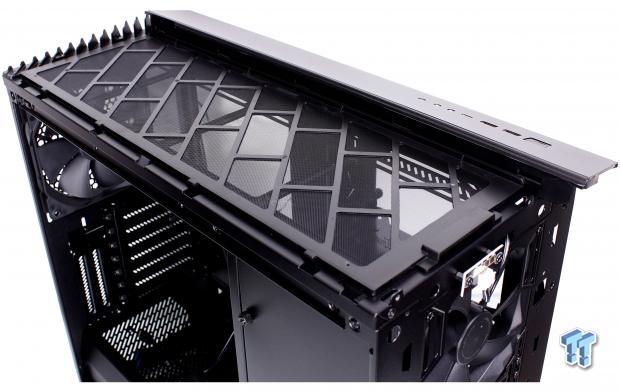
Next up, we slotted in the removable dust filter which will ensure that with the airflow top in place all of the more significant dust bits can be caught by this filter rather than ending up in your system. To install the filter, you will need to feed the tabs into the I/O side top panel piece then lay it down and slide it back to lock into place.
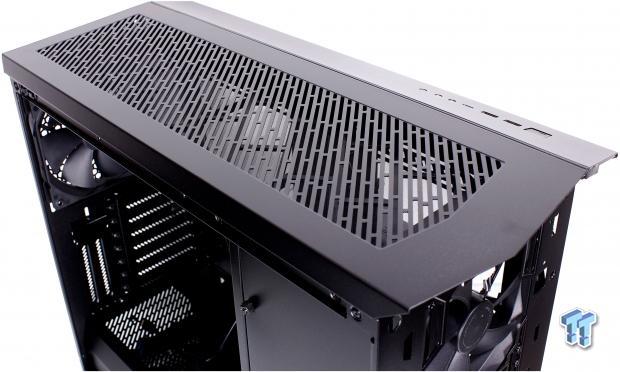
The last step is to install the top airflow panel. As you can see here, this will breathe far better than the stock glass panel. This is now where we will be installing our H100i, and as I mentioned previously, we will not be moving the HDD vertical panel as it is not needed to fit the cooling solution we are using.
Tempered Glass, A Cautionary Tale
I feel like I need to add some foreword here. When we were first disassembling the Vector RS for analysis, we came across something we had only heard as a form of lore in the industry and from some users. Our tempered glass main panel exploded or popped as I call it while it was sitting stationary on the table. When disassembling the Vector RS, we pulled the main tempered glass panel to peer around the innards. The panel was laid flat on the same glass table we use to shoot photos, and the panel was placed sitting on the panels surround bracket/retention balls which the panel snaps into the chassis to hold the panel in place. A few minutes into moving about in the chassis I heard a loud crack or pop as the panel exploded next to me and ejected small bits of glass all over our lab/office. This is something we have only heard stories of happening, but with the countless cases we have reviewed, have never seen it happen on its own.
The reason we are bringing this up is that while tempered glass is cool, it is still glass and as you will see below, it can shatter and even eject shards into your house or on you without warning. Be mindful of this and exercise extreme caution when working on your system with a tempered glass panel as it may be rare but it's worth knowing what can happen.
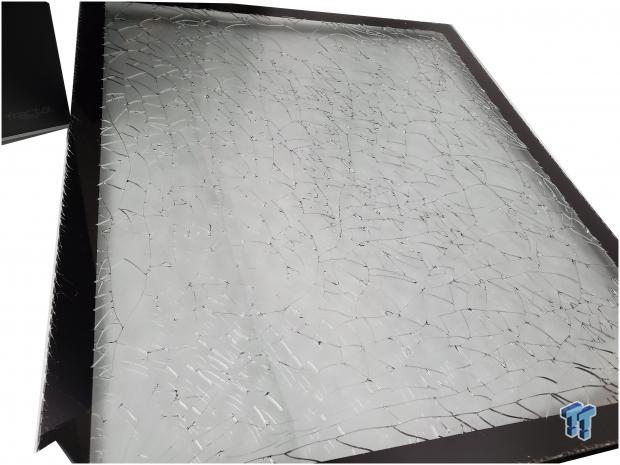
Here you can see the panel. As you can see, the entire panel is shattered with no sign as to where the damage originated or how it came to pass.
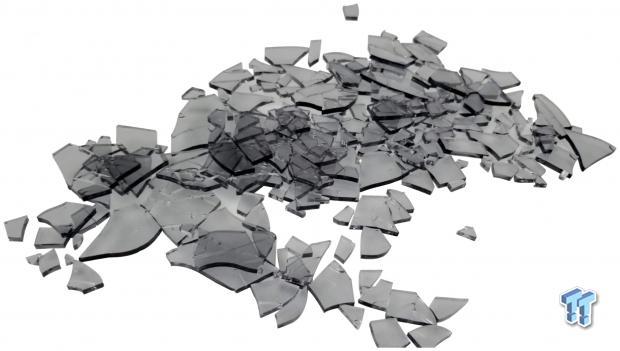
Here we have the pile of glass once the panel stopped crackling and ejecting small bits of glass everywhere. As you can see tempered glass while it may be 'safer' than just plain glass panes, it is still sharp and made for some sizeable pieces which had to be cleaned up. The concern is not with these large pieces though but the tiny slivers and shards that were ejected everywhere.
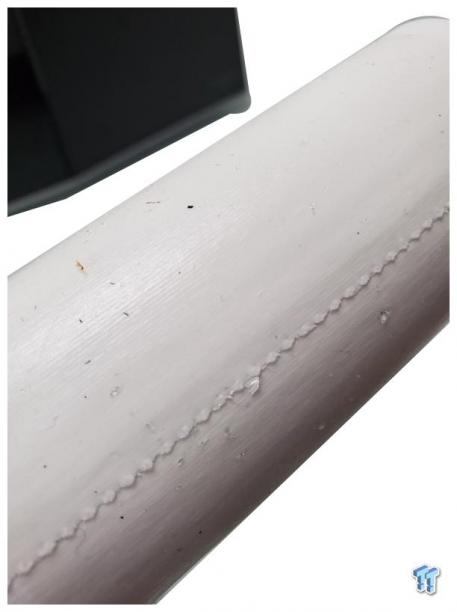
During the cleanup, I kept finding pieces of glass, so I resorted to a lint roller or a roll of sticky tape to collect the glass bits. As you can see here, this is after several attempts to clean up the area. These tiny pieces are a significant risk to not only myself and my feet (trust me stepping on these suck) but more so children or pets which may come across the glass shards if they are in the area.
Here is the moment after it happened, and I can say that it was a bit jarring. I recorded this to send to Fractal as I was a bit alarmed by this. I understand that tempered glass can shatter for unexpected reasons, and it's rare. I was working within a foot of this when it happened and had I been looking closely at the panel when it happened, the small pieces you can hear breaking off in the video as it crackles could have gotten into my eyes and caused damage or even blindness. This is why I am writing this today. Many manufacturers use tempered glass, but this is the first one we have had such an extreme result from on its own. But this should serve as a cautionary note that even tempered glass is still glass and things can happen, so be safe.
Case Build & Finished Product
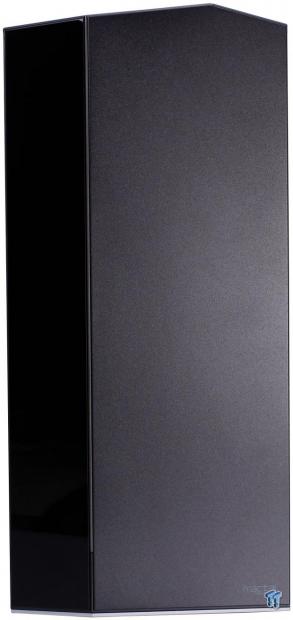
The front of the Vector RS looks the same as when we unboxed it. The Vector RS could realistically pass for an office PC if you chose to disconnect the RGB so that it just had this clean aesthetic with no twinkly lights will blend in as a clean enough PC case. This could also mesh well even with the RGB into a home theatre setup, but if the components internally are lit, it could be distracting so, YMMV.
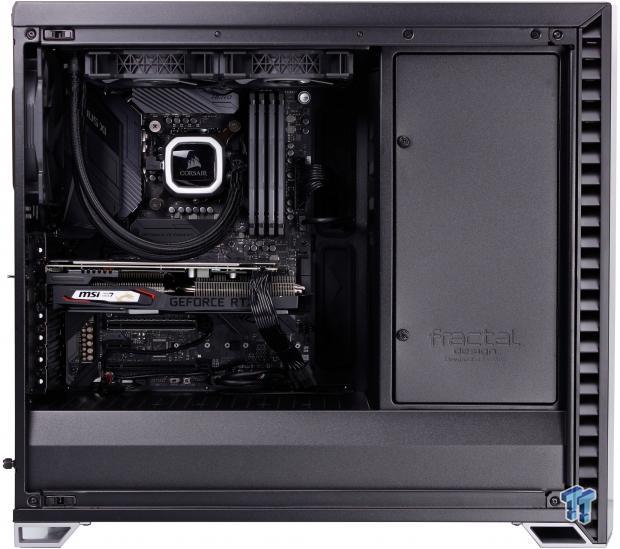
Even with the vertical panel in place, everything went in smoothly with plenty of room for all of our components. The AIO is not even visible with only the fans showing. If we wanted a monster loop, we could, however, pull the drive trays and drop that vertical panel back to offer more main chassis space available for components you want to see.
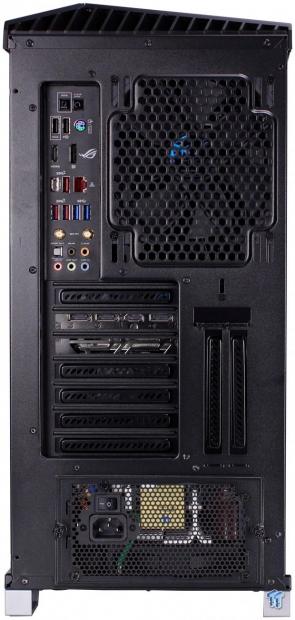
The rear of the Vector RS is now filled, and as you can see, we installed the GPU in the standard orientation for the initial installation.
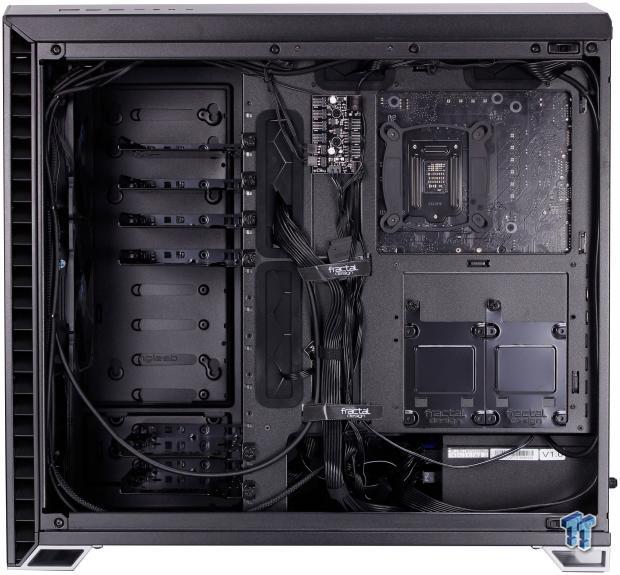
In standard Fractal fashion, I was not disappointed in cable routing. The cabling for the Vector RS was painless with an immense number of cable tie points to lash the internal wiring to the cable tie loops. The Velcro ties worked their magic covering most of the larger cables, while the perimeter handled much of the wires for the chassis itself. That's another kudos I have to give Fractal here is the fact that they ensured the I/O cabling was long enough to be well managed without issue no matter your board layout.
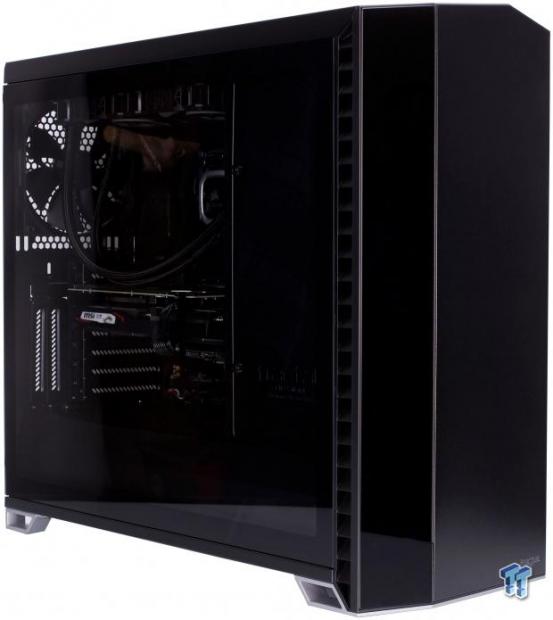
With the panel in place and the system built, I cannot help but feel like the blackout interior aesthetic lends to making the panel feel darker than it is. The parts fade away in the sea of darkness when the system is powered off.

Here we have the Vector RS powered up with the GPU in standard orientation. As you can see, the front and top stripe works well to accent the system and add some unicorn flair to a sleek chassis. With the drive trays in place, you cannot see the Vengeance Pro RGB memory, but it is illuminating the AIO sleeved hoses and fans, which I'm sure some of the more eagle-eyed among you have already noticed.
Vertical GPU Bracket Installation
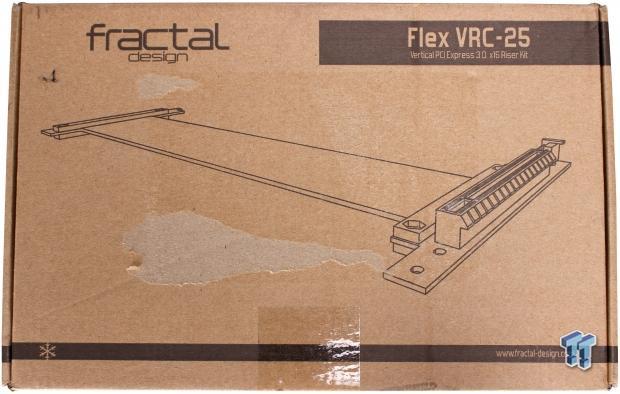
The Vertical Mounting bracket is offered separately and will allow mounting of the GPU vertically next to the tempered glass panel. This is a showcase kind of orientation offering a view of your GPU whereas otherwise if you only have a single GPU, you could be forced to look at the empty slots on your board.
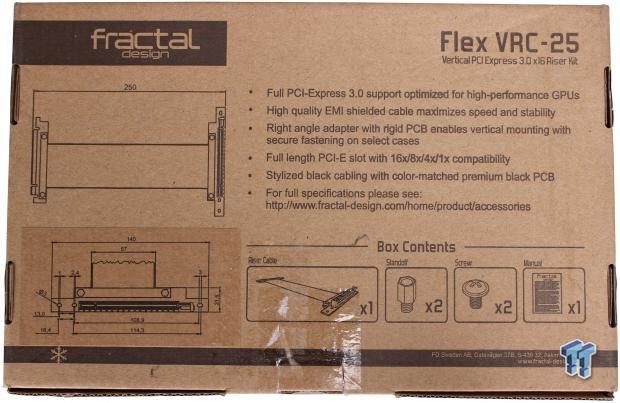
Here we have the back of the packaging where the specs and information are listed. One thing worth noting is that as of the time of writing, there are no PCIe 4.0 risers, so keep that in mind if you plan on running this riser in an X570 based motherboard with a PCIe 4.0 GPU. The signal integrity requirements for Gen 4 PCIe is quite stringent and while some risers 'may work' I would not count on it and assume that you will want to set the slot to PCIe 3.0 manually, but I cannot even guarantee that will work. If using PCIe 4.0, it's likely best to use standard GPU mounting and connectivity until a revised PCIe 4.0 supported riser is available.
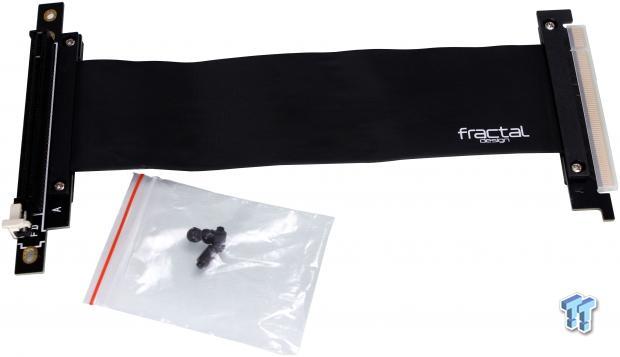
Here we have it, and while it looks simple, that is because it is. Fractal built the support for this into their PSU shroud to ensure it would take very little to get a vertical GPU up and running. The kit includes the riser, two standoffs, and two screws.
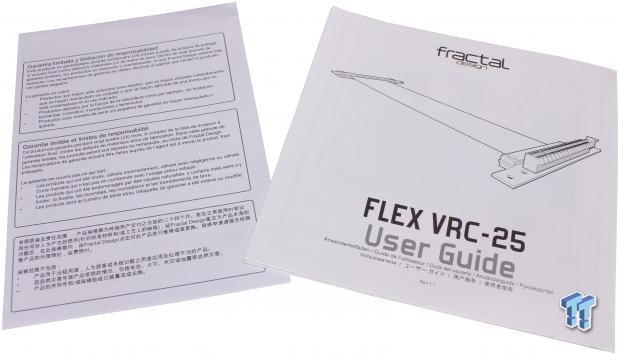
Along with the bracket comes a user guide and a warranty pamphlet. The directions are simple enough; I didn't even need to reference them as it's as simple as:
- Install standoffs into PSU shroud
- Secure riser PCB to standoffs with the included screws
- Plug riser into the motherboard
- Plug card into the riser
I know it almost seems too easy, but Fractal made this a rather painless installation process.
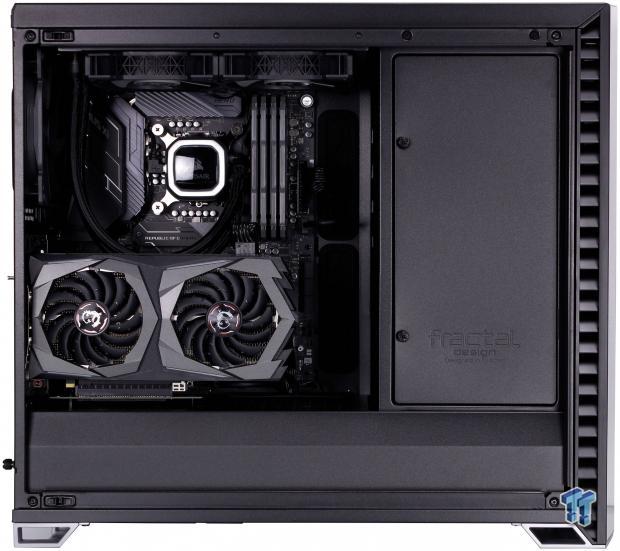
Now with that done, we have the vertical GPU installed. As you can see, the vertical GPU adds a nice aesthetic, and the best part is the other slots are still usable with this solution. This is a great solution in comparison to the vertical GPU mount we recently tested out on Phanteks P360X. The Phanteks solution replaces all of the slots for a single GPU making the rest of them useless. However, one thing Phanteks did well was GPU positioning more inboard, which ensured thermals were not impacted. We will find out shortly how the Fractal solution in the Vector RS fared.
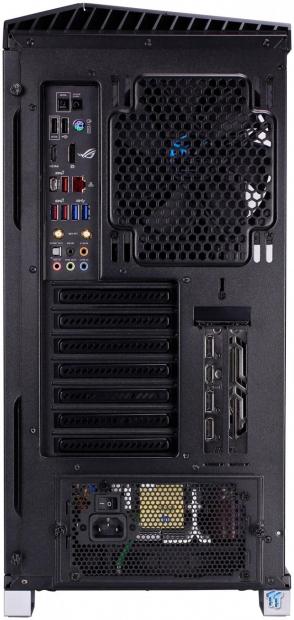
Here we show what we were referring to. With the vertical GPU in place, the other slots are still open to take AIC SSD's or other devices as needed as long as they do not interfere with the riser getting to the GPU.
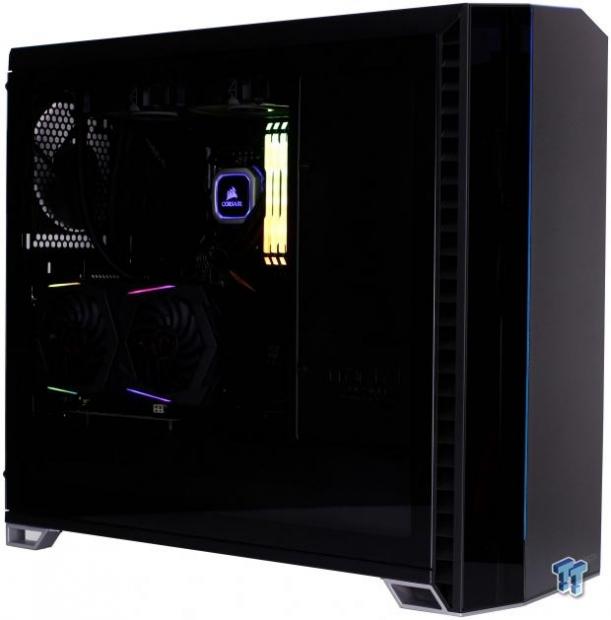
Here is the system fully powered with the vertical GPU, and I think the vertical aesthetic does make for a unique and fresh look for our build.
I feel like this has gone on for long enough, I think it's about due time we pull this ship into port and wrap this one up. Let's see some testing and final thoughts.
Final Thoughts
When I came into this review, I had received the chassis and was interested as the R6 is a pretty solid chassis. First, look at the Vector RS, and I knew I recognized the base chassis with the R6 features or very close to for the most part. I have had my main rig in an R6 for a while and recently transitioned to the Meshify S2 to ensure I fit my liquid cooling components. Now with the Vector RS, I feel like Fractal opened the doors for users to select the chassis they want to build and enable changing things mid-stream should you upgrade to liquid cooling.
Thermal testing is what got us excited as we wanted to see how close to Fractal expectations they came with the Vector RS. Our measured ambient for standard and vertical GPU testing had a measured ambient of 23.1C and an RH of 45%. First, we tested with standard GPU mounting. The Vector RS showed a CPU ΔT over ambient of 43.7 while the GPU saw a delta of 38.3. Moving to vertical GPU testing we saw a CPU ΔT of 41.5 while the GPU rose to 39.4 which may not seem like much, but we also saw spikes of up to 3 degrees C over the standard GPU mounting.
The GPU does sit quite close to the tempered glass panel, and that shows its impact on the GPU. The fact we are running a robust MSI Gaming Z model RTX 2060 is likely why we did not see major thermal issues, but a more powerful card will likely suffer far more from being so close to the panel where it cannot get adequate airflow. This is not all doom and gloom, keep it in mind as it will cause your card to throttle sooner in this orientation or at least can do so. Overall the chassis passes thermal tests but with the above note on a vertical orientation. One last note on the vertical GPU, which is if you are liquid cooling the GPU, then this is a non-issue.
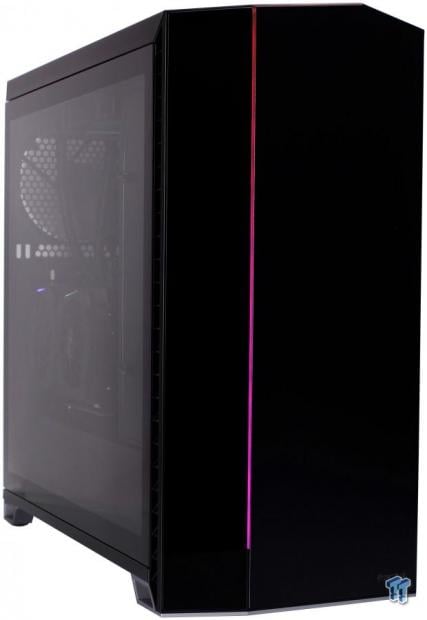
There a lot to like about the new Vector RS from Fractal Design. Firstly is that Fractal chose the right base chassis which gives so many options it's almost dizzying to think of. Fractal offers modularity to make the Vector RS just how you want it whether it be in the default aesthetic mode. Next, you can swap it to airflow mode, which is more of a function over form approach, but even that does not at all take away from the aesthetic in my opinion. Fractal also found a way to push the line just a little further into RGB adoption with the integrated top/front stripe lit by ARGB. Overall if you like the Define R6, you will love the Vector RS, or at least the base chassis, the exterior is entirely up to your style preference.
There's very little not to like about the Vector RS. Fractal did a great job with chassis choice and ensuring that a lot of the right boxes are checked. The only thing I could think of that would be better would be if the pre-installed fans were PWM as such a premium case at a premium price you expect that. Other than that, I'm a bit hard-pressed to find more knits to pick. I could go on about my disdain for what happened with the panel, but let's face it, that can happen with pretty much any tempered glass panel, and we simply were unlucky.
The $179.99 price point is always rough, and you have to offer features to justify this. The base chassis being similar to the Define R6 gives it some significant credibility, and when you start building in it that credibility only increases. The Vector RS offers more modularity a little bit of flair with the ARGB stripe and a robust platform to build your dream PC. If you had an aversion to trying out a Fractal Design case, rest assured the Vector RS is probably one of the most competent cases I have seen in a while.
Fractal Design made the Vector RS into a mid-tower chassis that will be very tough to beat.
Shannon's Chassis Test System Specifications
- Motherboard: ASUS ROG Maximus XI Hero (Wi-Fi) Z390 (buy from Amazon)
- CPU: Intel Core i7 8700K (buy from Amazon)
- Cooler: Corsair H100i Pro RGB (buy from Amazon)
- Memory: Corsair Vengeance Pro RGB CMW32GX4M4C3000C15 (buy from Amazon)
- Video Card: MSI GeForce RTX 2060 Gaming Z (buy from Amazon)
- Storage: SanDisk M.2 256GB
- Power Supply: SilverStone Strider Platinum 1000W (buy from Amazon)
- OS: Microsoft Windows 10 Home 64-bit (buy from Amazon)
Performance |
98% |
Quality |
100% |
Features |
100% |
Value |
96% |
Overall |
99% |
Fractal Design made a good design even better. The Vector RS is a solid performer with tons of features and a laundry list of fitment capabilities that any enthusiasts is sure to love.

Similar Content
Related Tags

